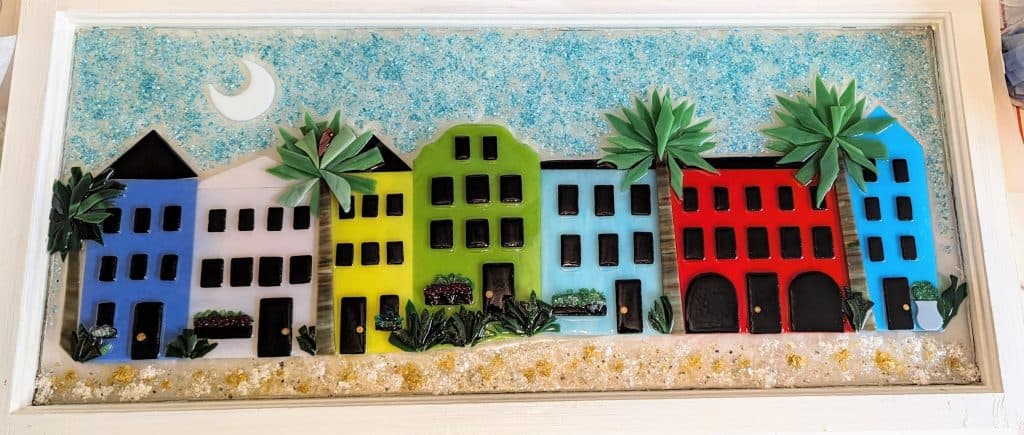
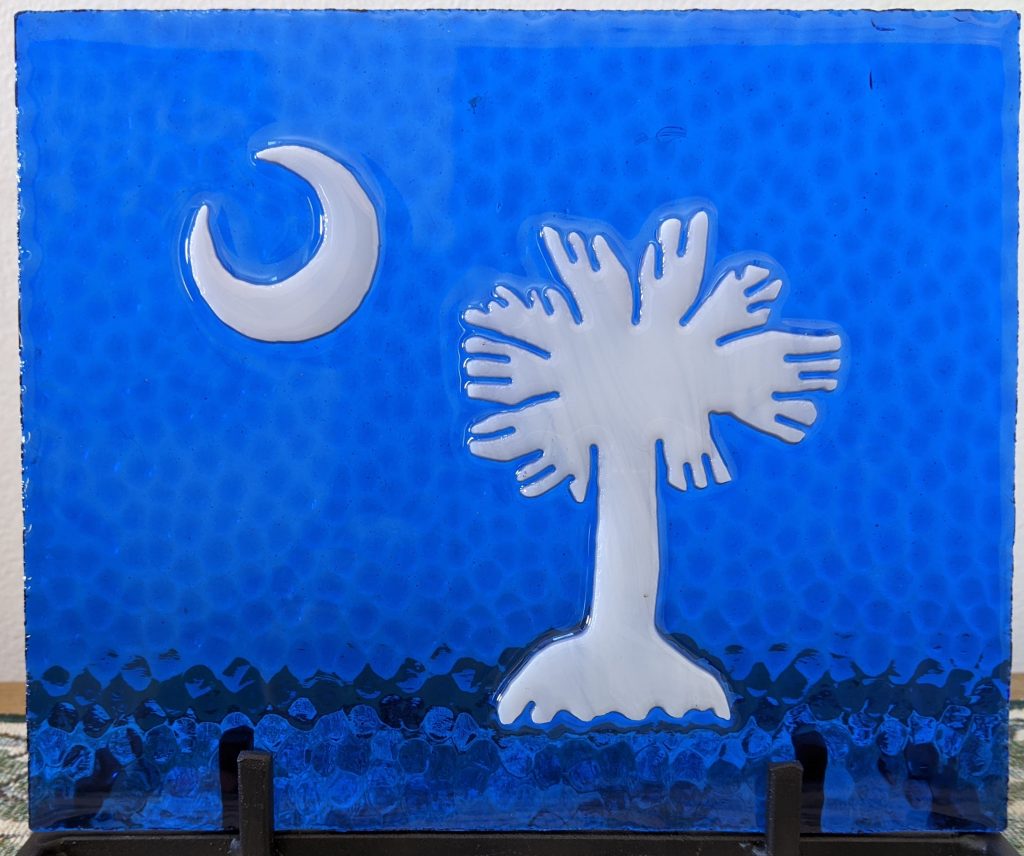
This window needed an extra coat of resin (likely could use a little more, but sometimes I go overboard). Now it’s ready to go to the SC Artisan Center, where it will be available for sale.
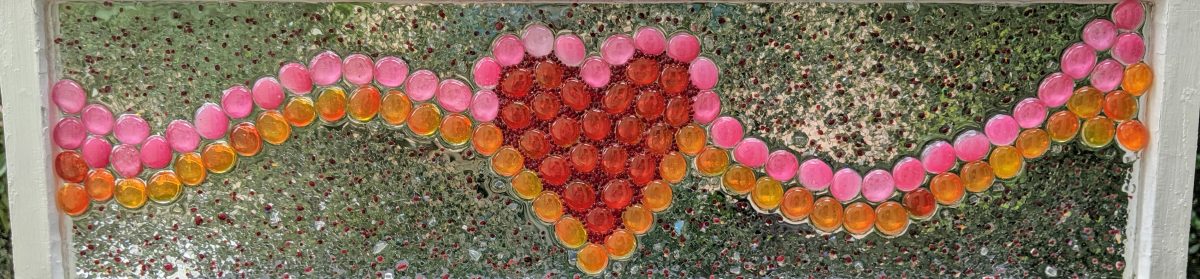
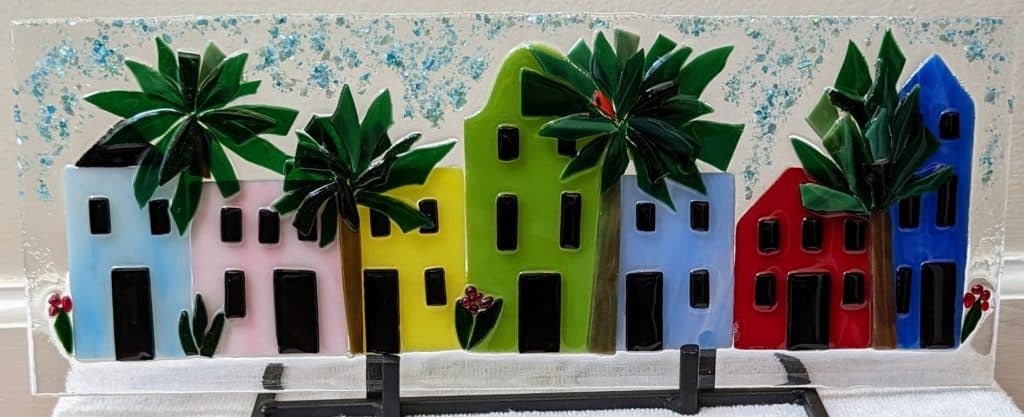
This is the largest Rainbow Row piece I’ve made to date at 30″ wide by 13.5″ tall.
Today I poured and embellished the first resin layer on the Rainbow Row window. I used 8 ounces of resin and might need to make a second layer as this piece has a lot of depth to the details such as trees / bushes.
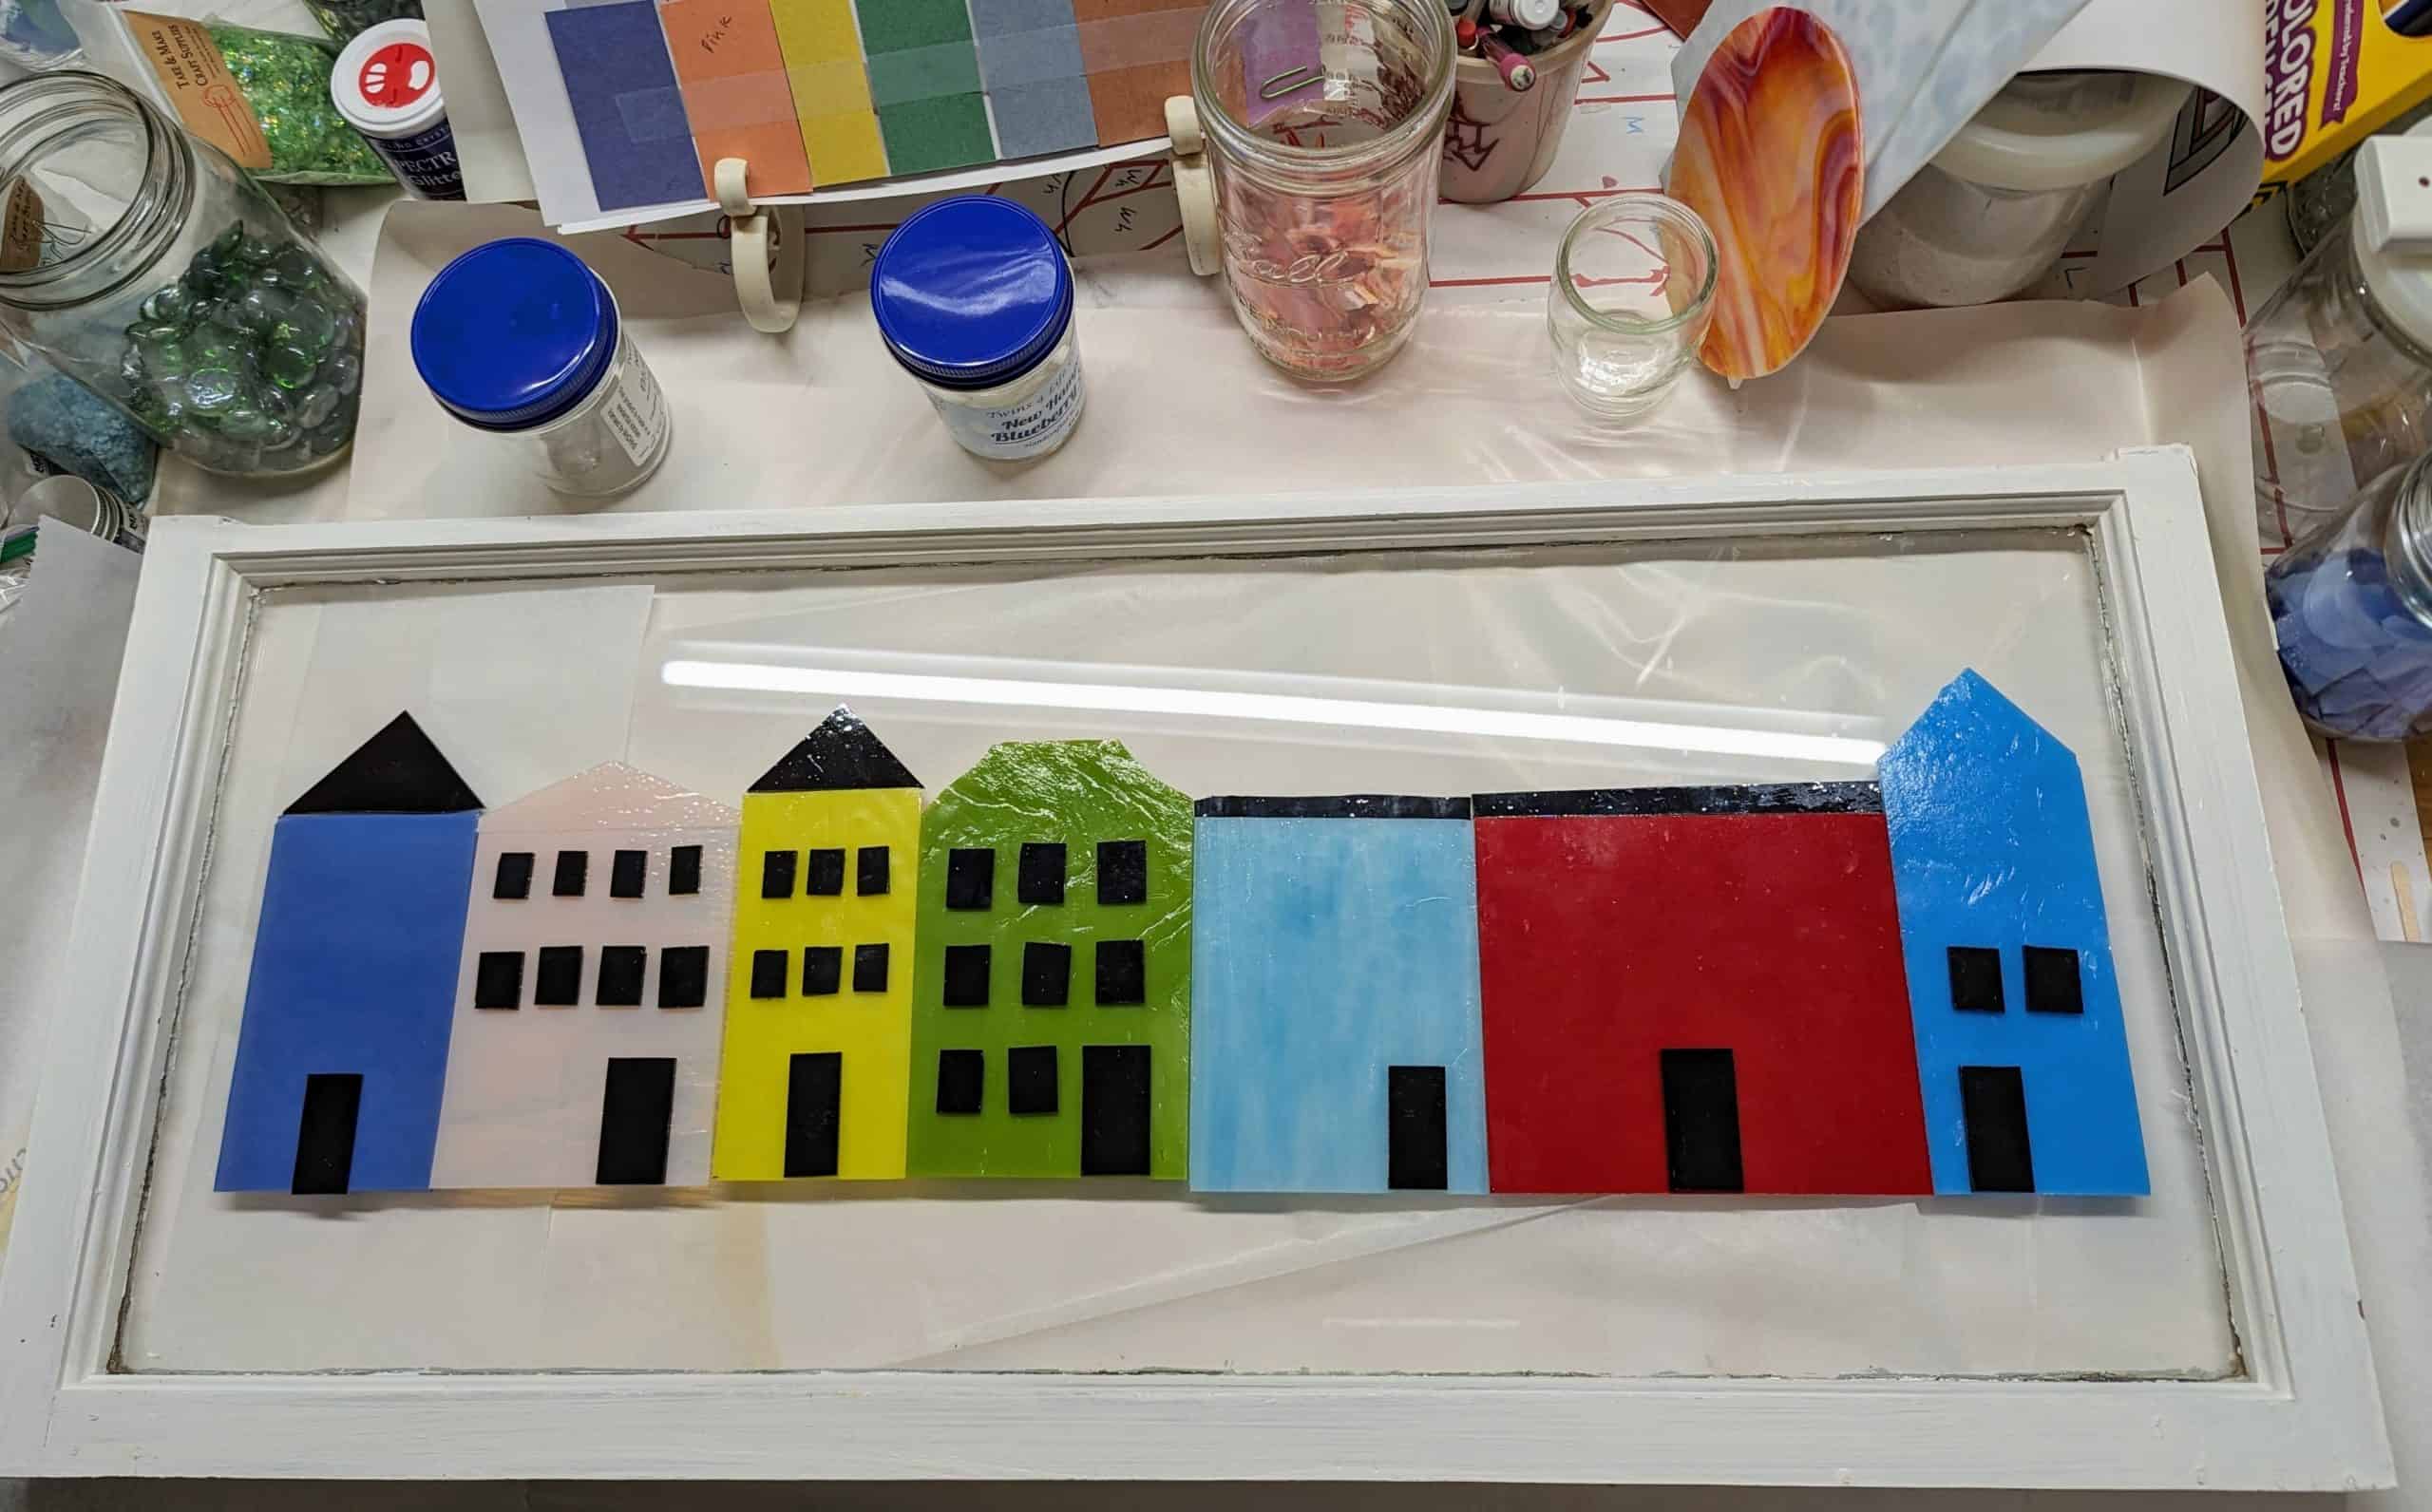
I have been procrastinating on my next window project for several months. Initially I had planned on doing a larger version of Charleston’s Rainbow Row, but I wasn’t sure if it would look as good in a larger format than the other panels I’ve made with it in the past. I bought the glass I needed and then started thinking that maybe I should make another sun, or maybe a moon because I have great moon glass and great spooky sky glass.
But this morning I was asked to donate a window to an upcoming charity event and I decided to just go for it with the Rainbow Row. I won’t know how it will look until I do it, so I might as well do it and stop wondering about it. Hopefully having more room will allow me to do more decorating – trees, birds, flowers, bushes, etc. What I have so far is just rough cuts – I still need to finish the first cuts and then use the grinder to smooth / shape everything before I start with the mosaic adhesive on the first layer. I’m not sure if this will end up in the charity event auction or if another window will, but at least my procrastination is over for the time being!
I am excited to announce that Glass of Sherry pieces are now available at the South Carolina Artisans Center in Walterboro, SC. I’m looking forward to participating in events at the Center and am honored to be associated with this amazing organization! Since 1994, this non-profit center utilizes a retail shop, interpretive displays of Southern folk-life, live demonstrations, and educational and information programs as venues to communicate South Carolina’s culture to the public. By promoting the indigenous fine crafts produced exclusively by South Carolina artists, the Center works to create a better understanding of our rich and diverse cultural heritage.
Housed in a restored eight-room Victorian cottage, the center showcases over 300 of the finest Carolina artists, emphasizing traditional and indigenous folk art and contemporary crafts.
Address: 318 Wichman St Walterboro, SC 29488 Hours: Monday-Saturday 9 am – 5 pm Phone: (843) 549-0011
The works above can be viewed and purchased by visiting the SC Artisan Center retail shop during it’s regular hours. I will also be participating in some of the upcoming events at the Center, held every month on the third Saturday from 10am – 2pm.
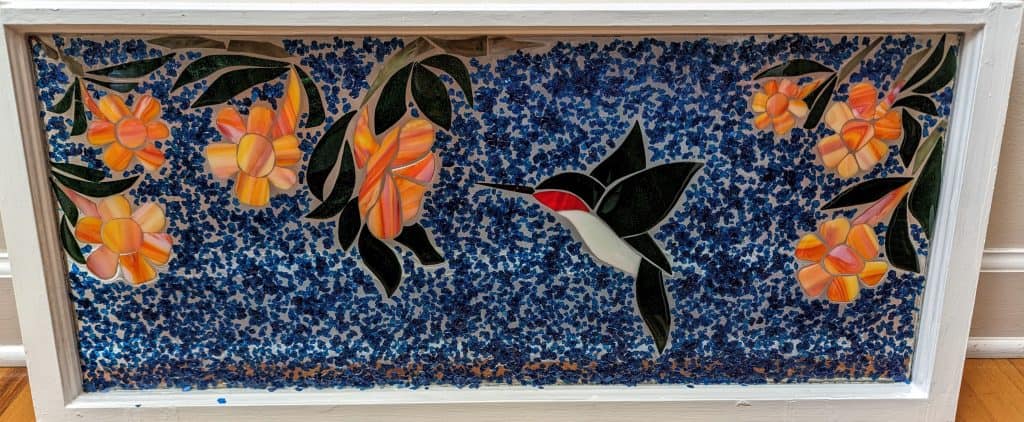
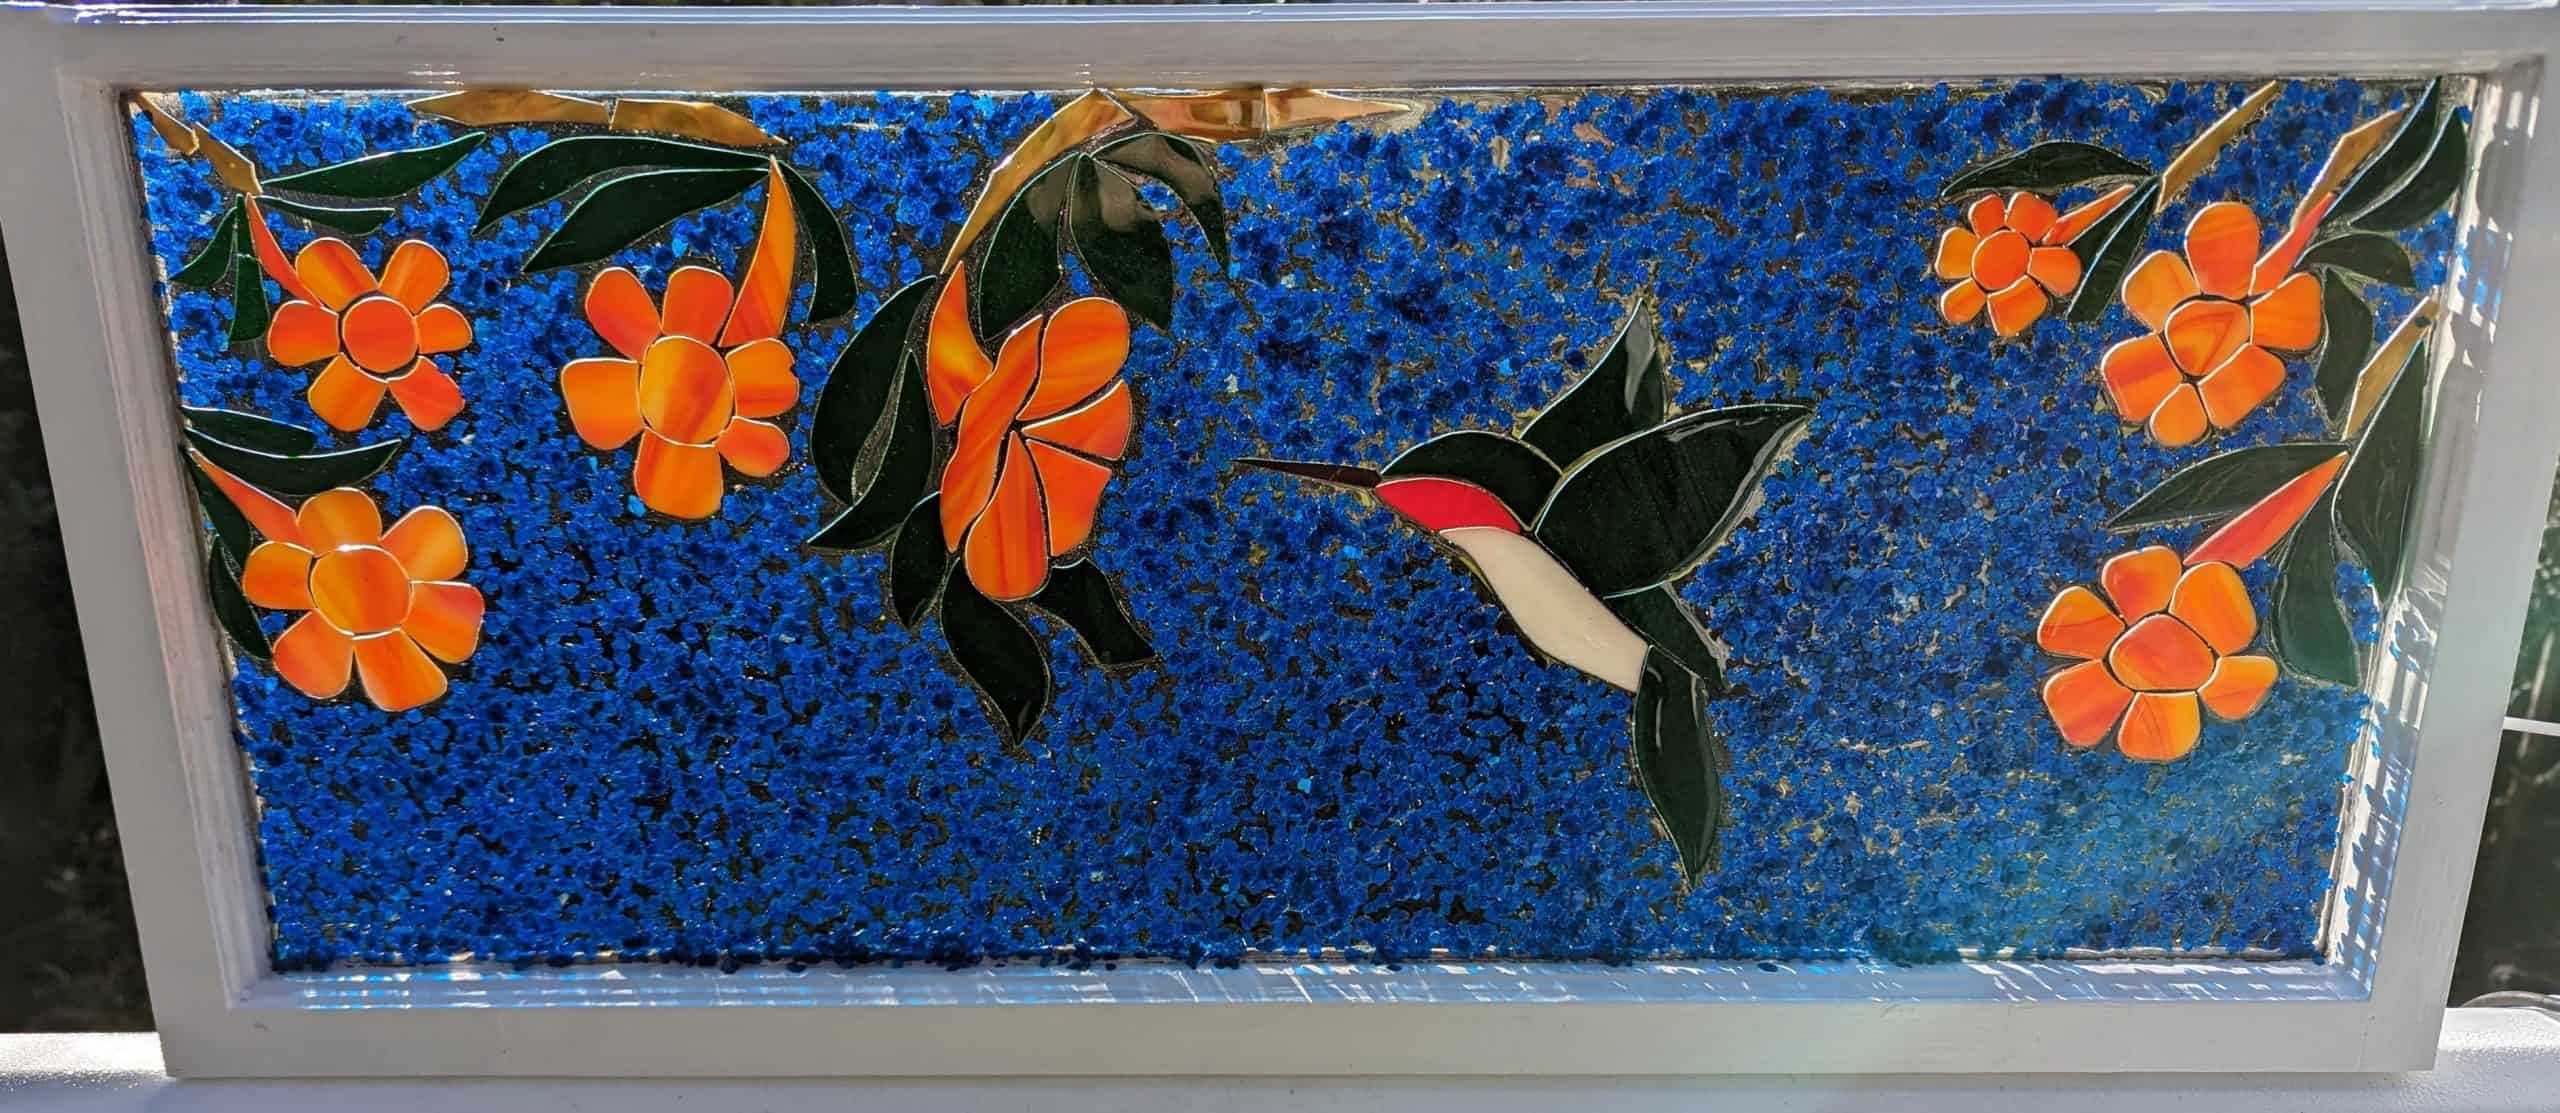
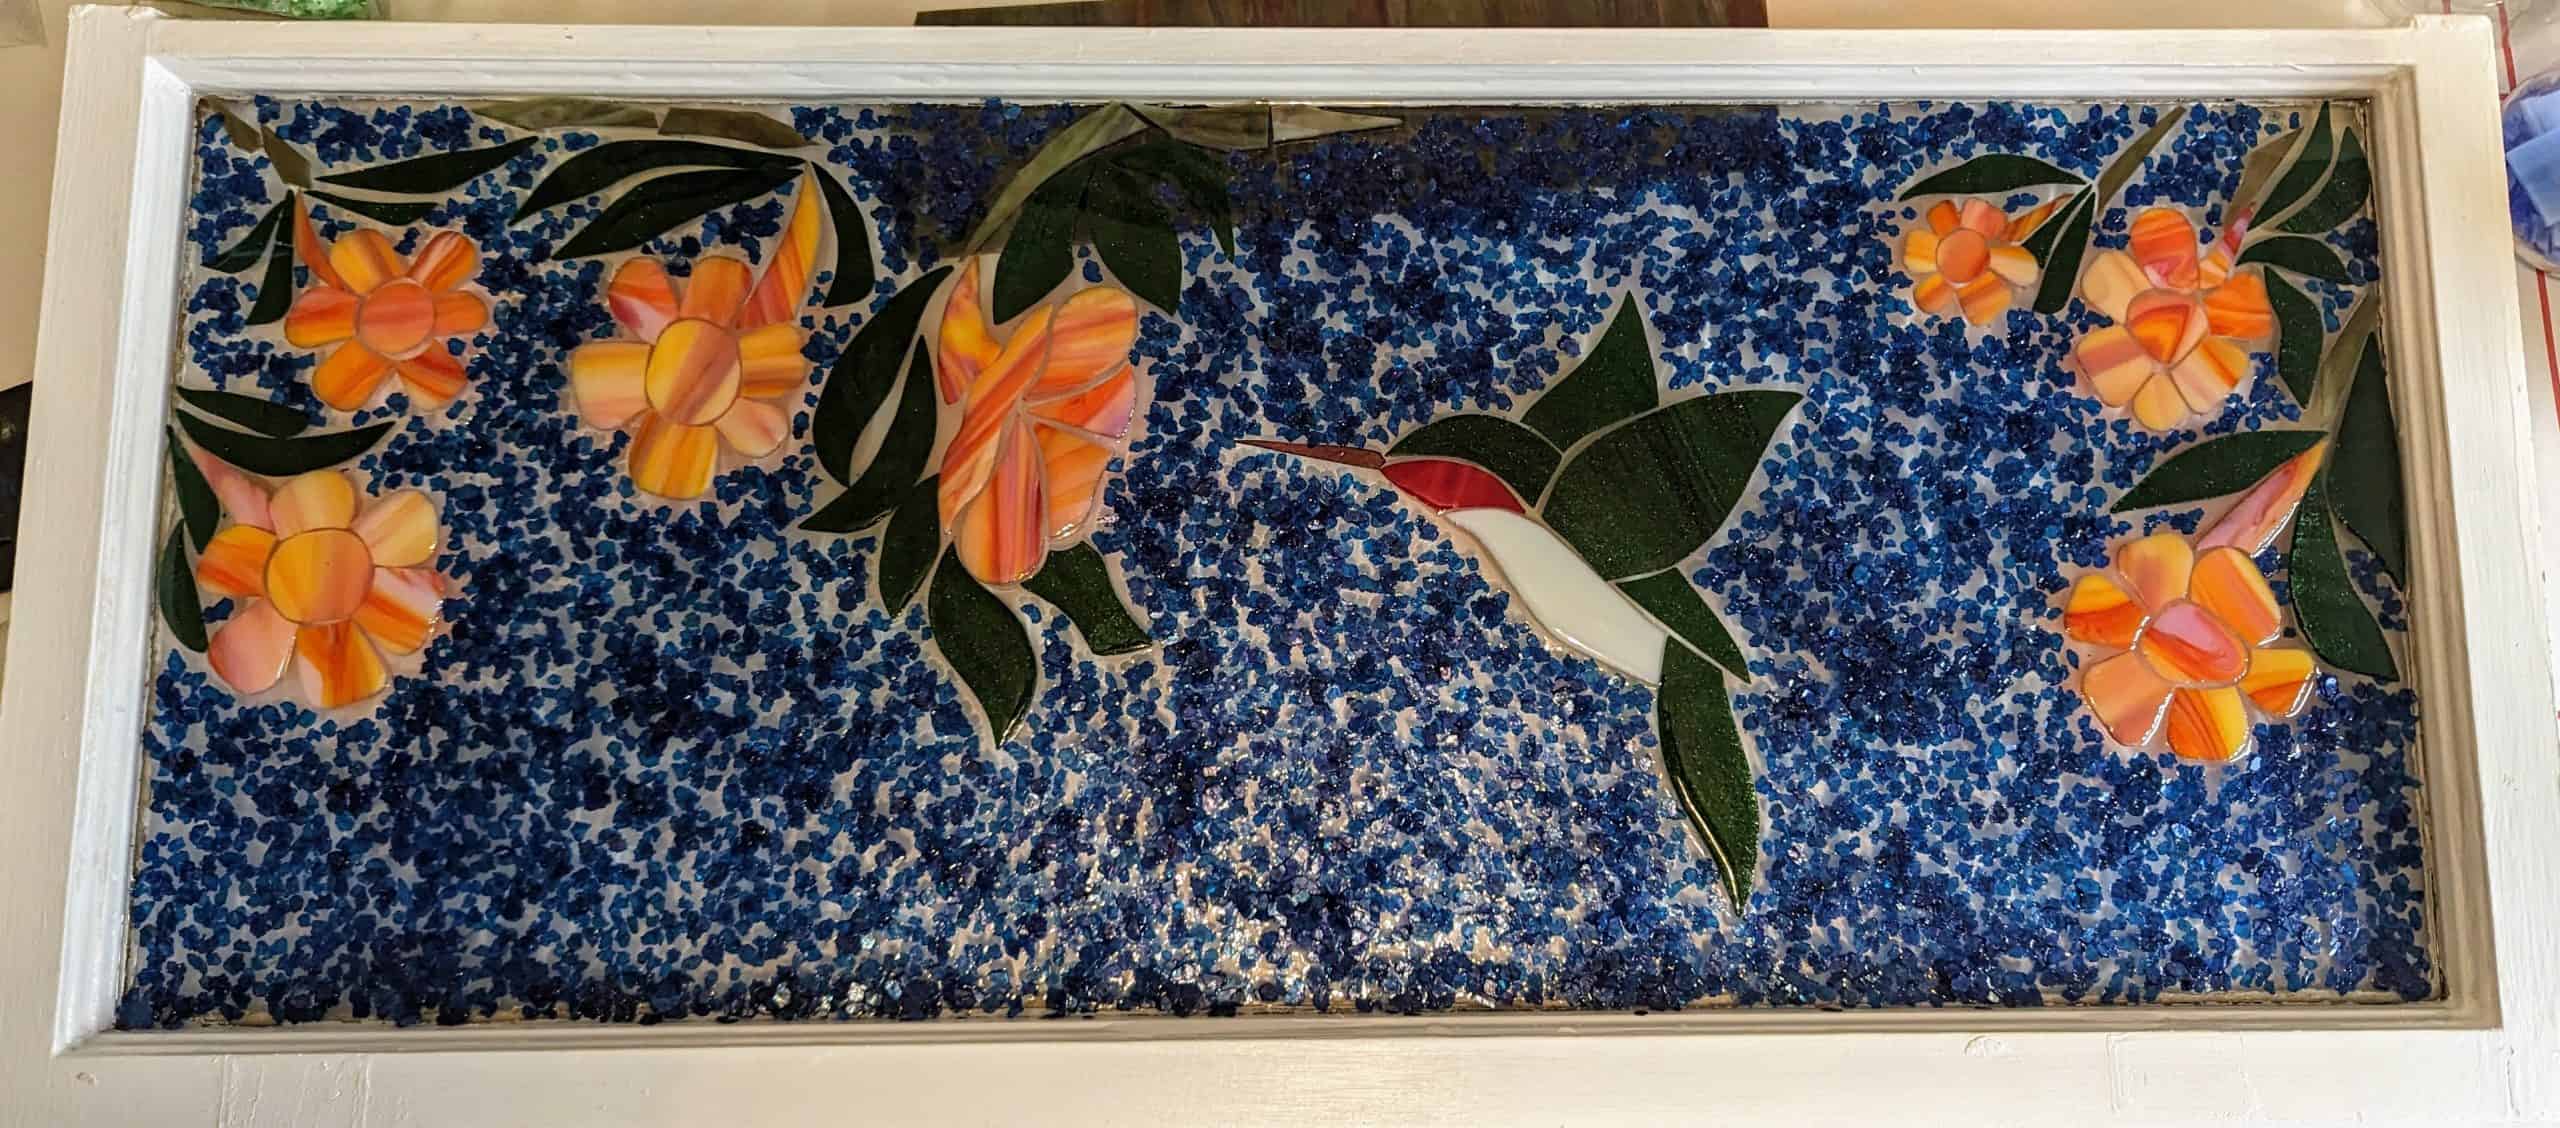
Here is how the Hummingbird with Flowers window turned out with the sapphire blue mica sky – photos outside in the sun. I will have this and other glass items at my booth at the West Ashley Artisans and Crafters Fair tomorrow (11/19) at the Citadel Mall.
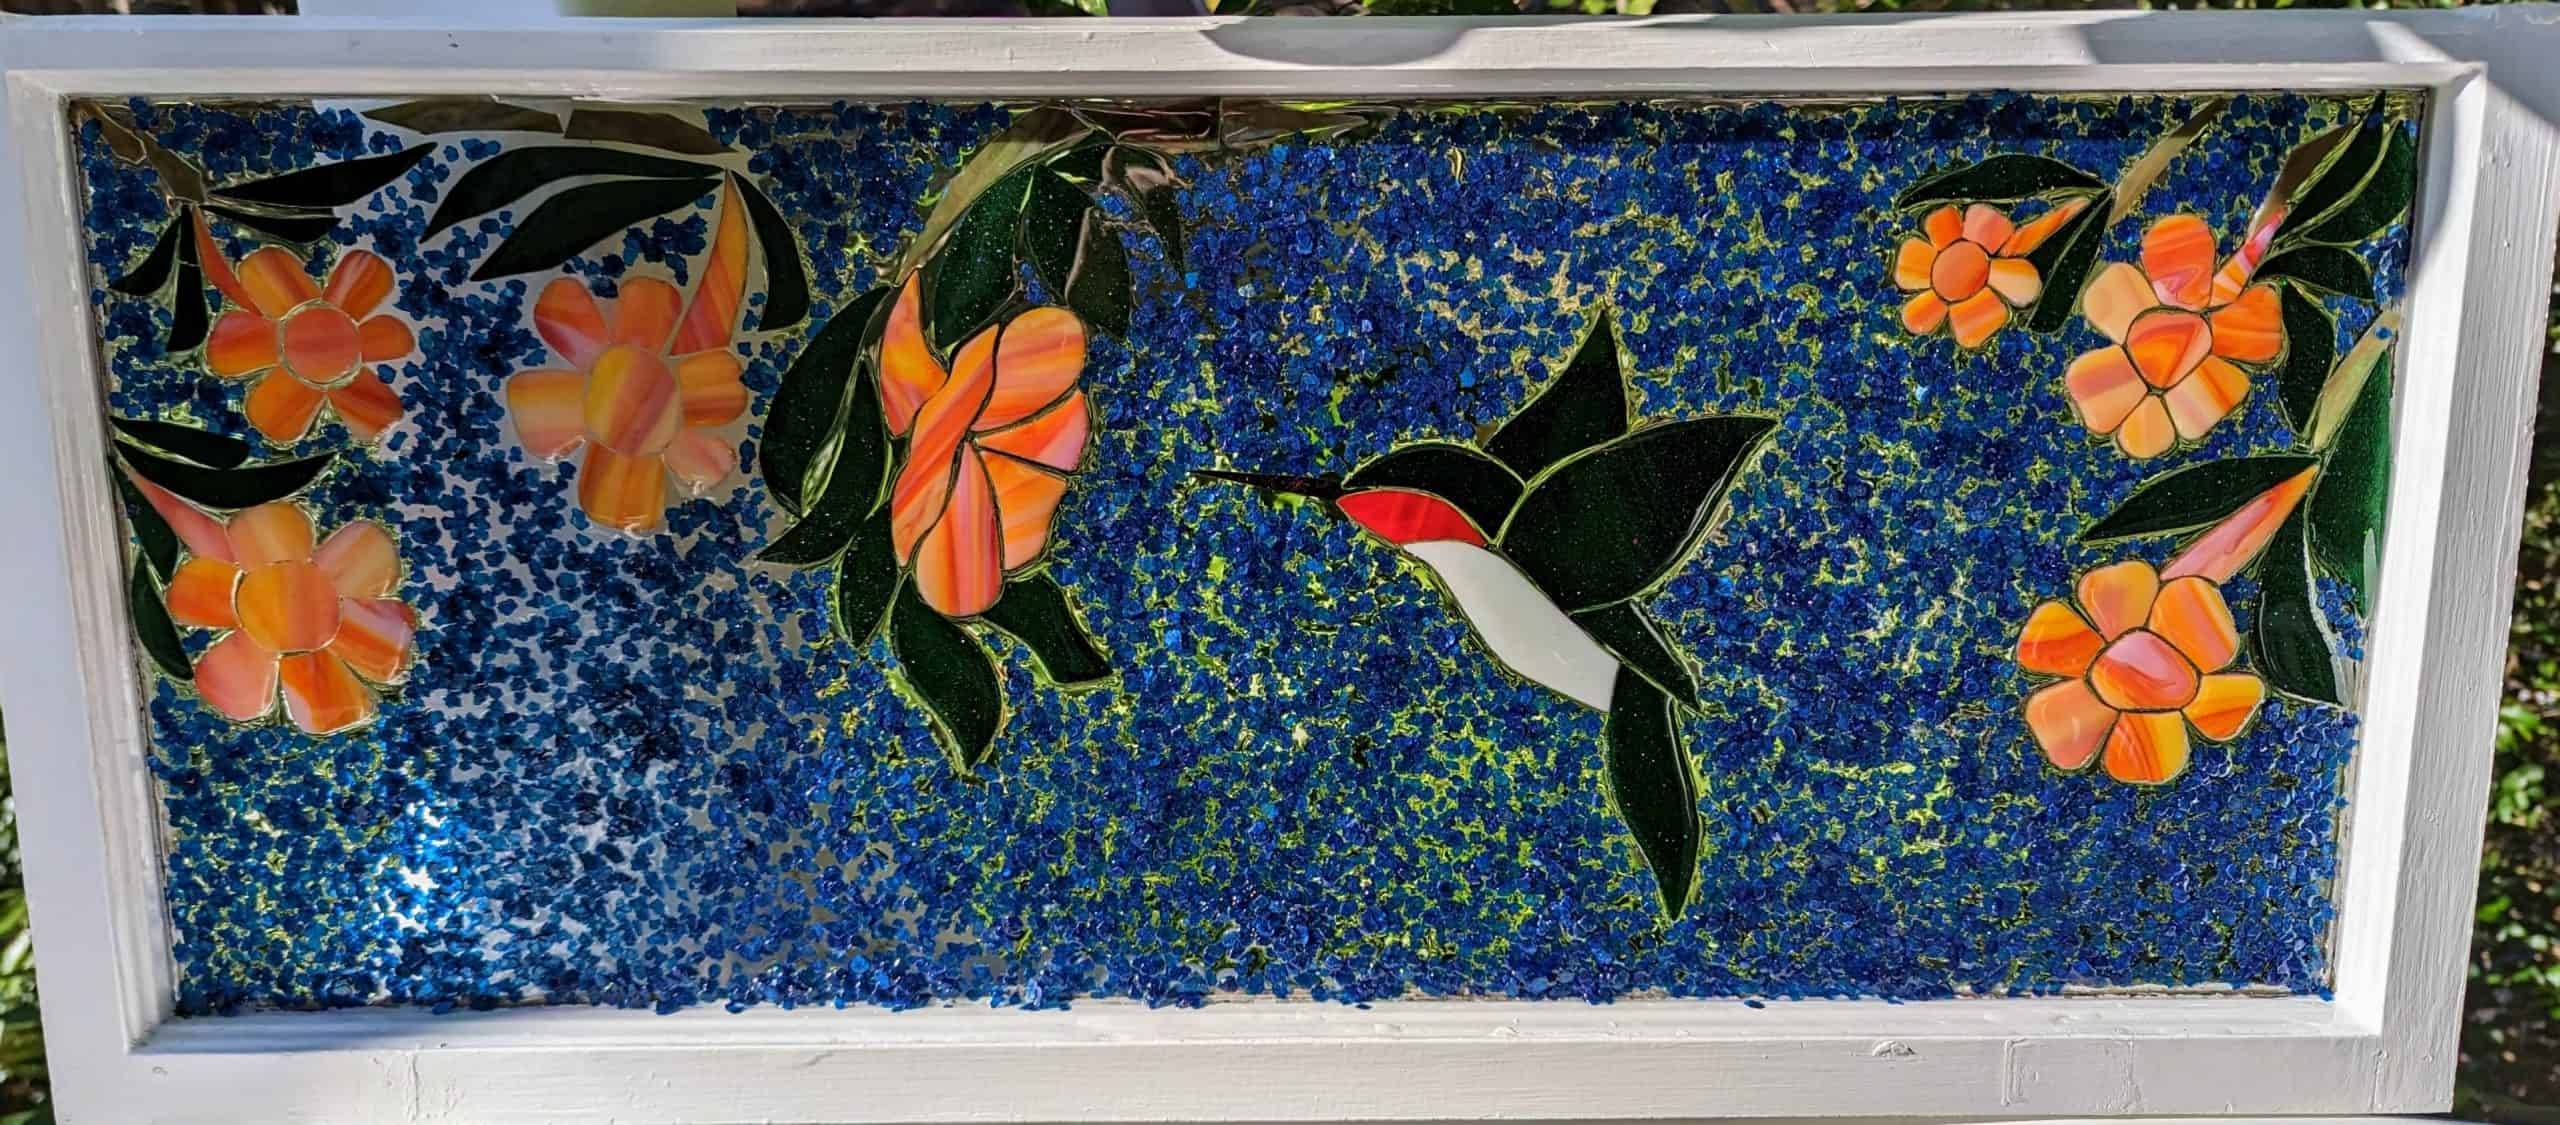
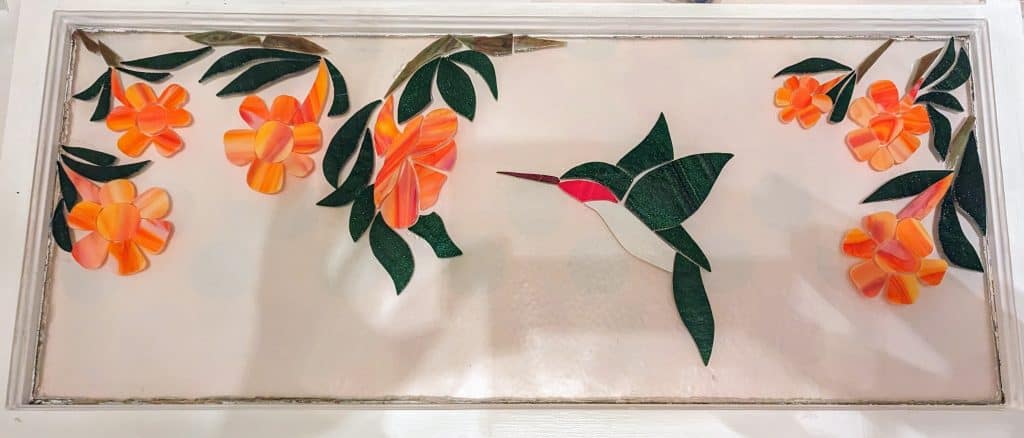
Hummingbird with FlowersHummingbird with Flowers, approx. 30″ x 13.5″View with indoor lighting
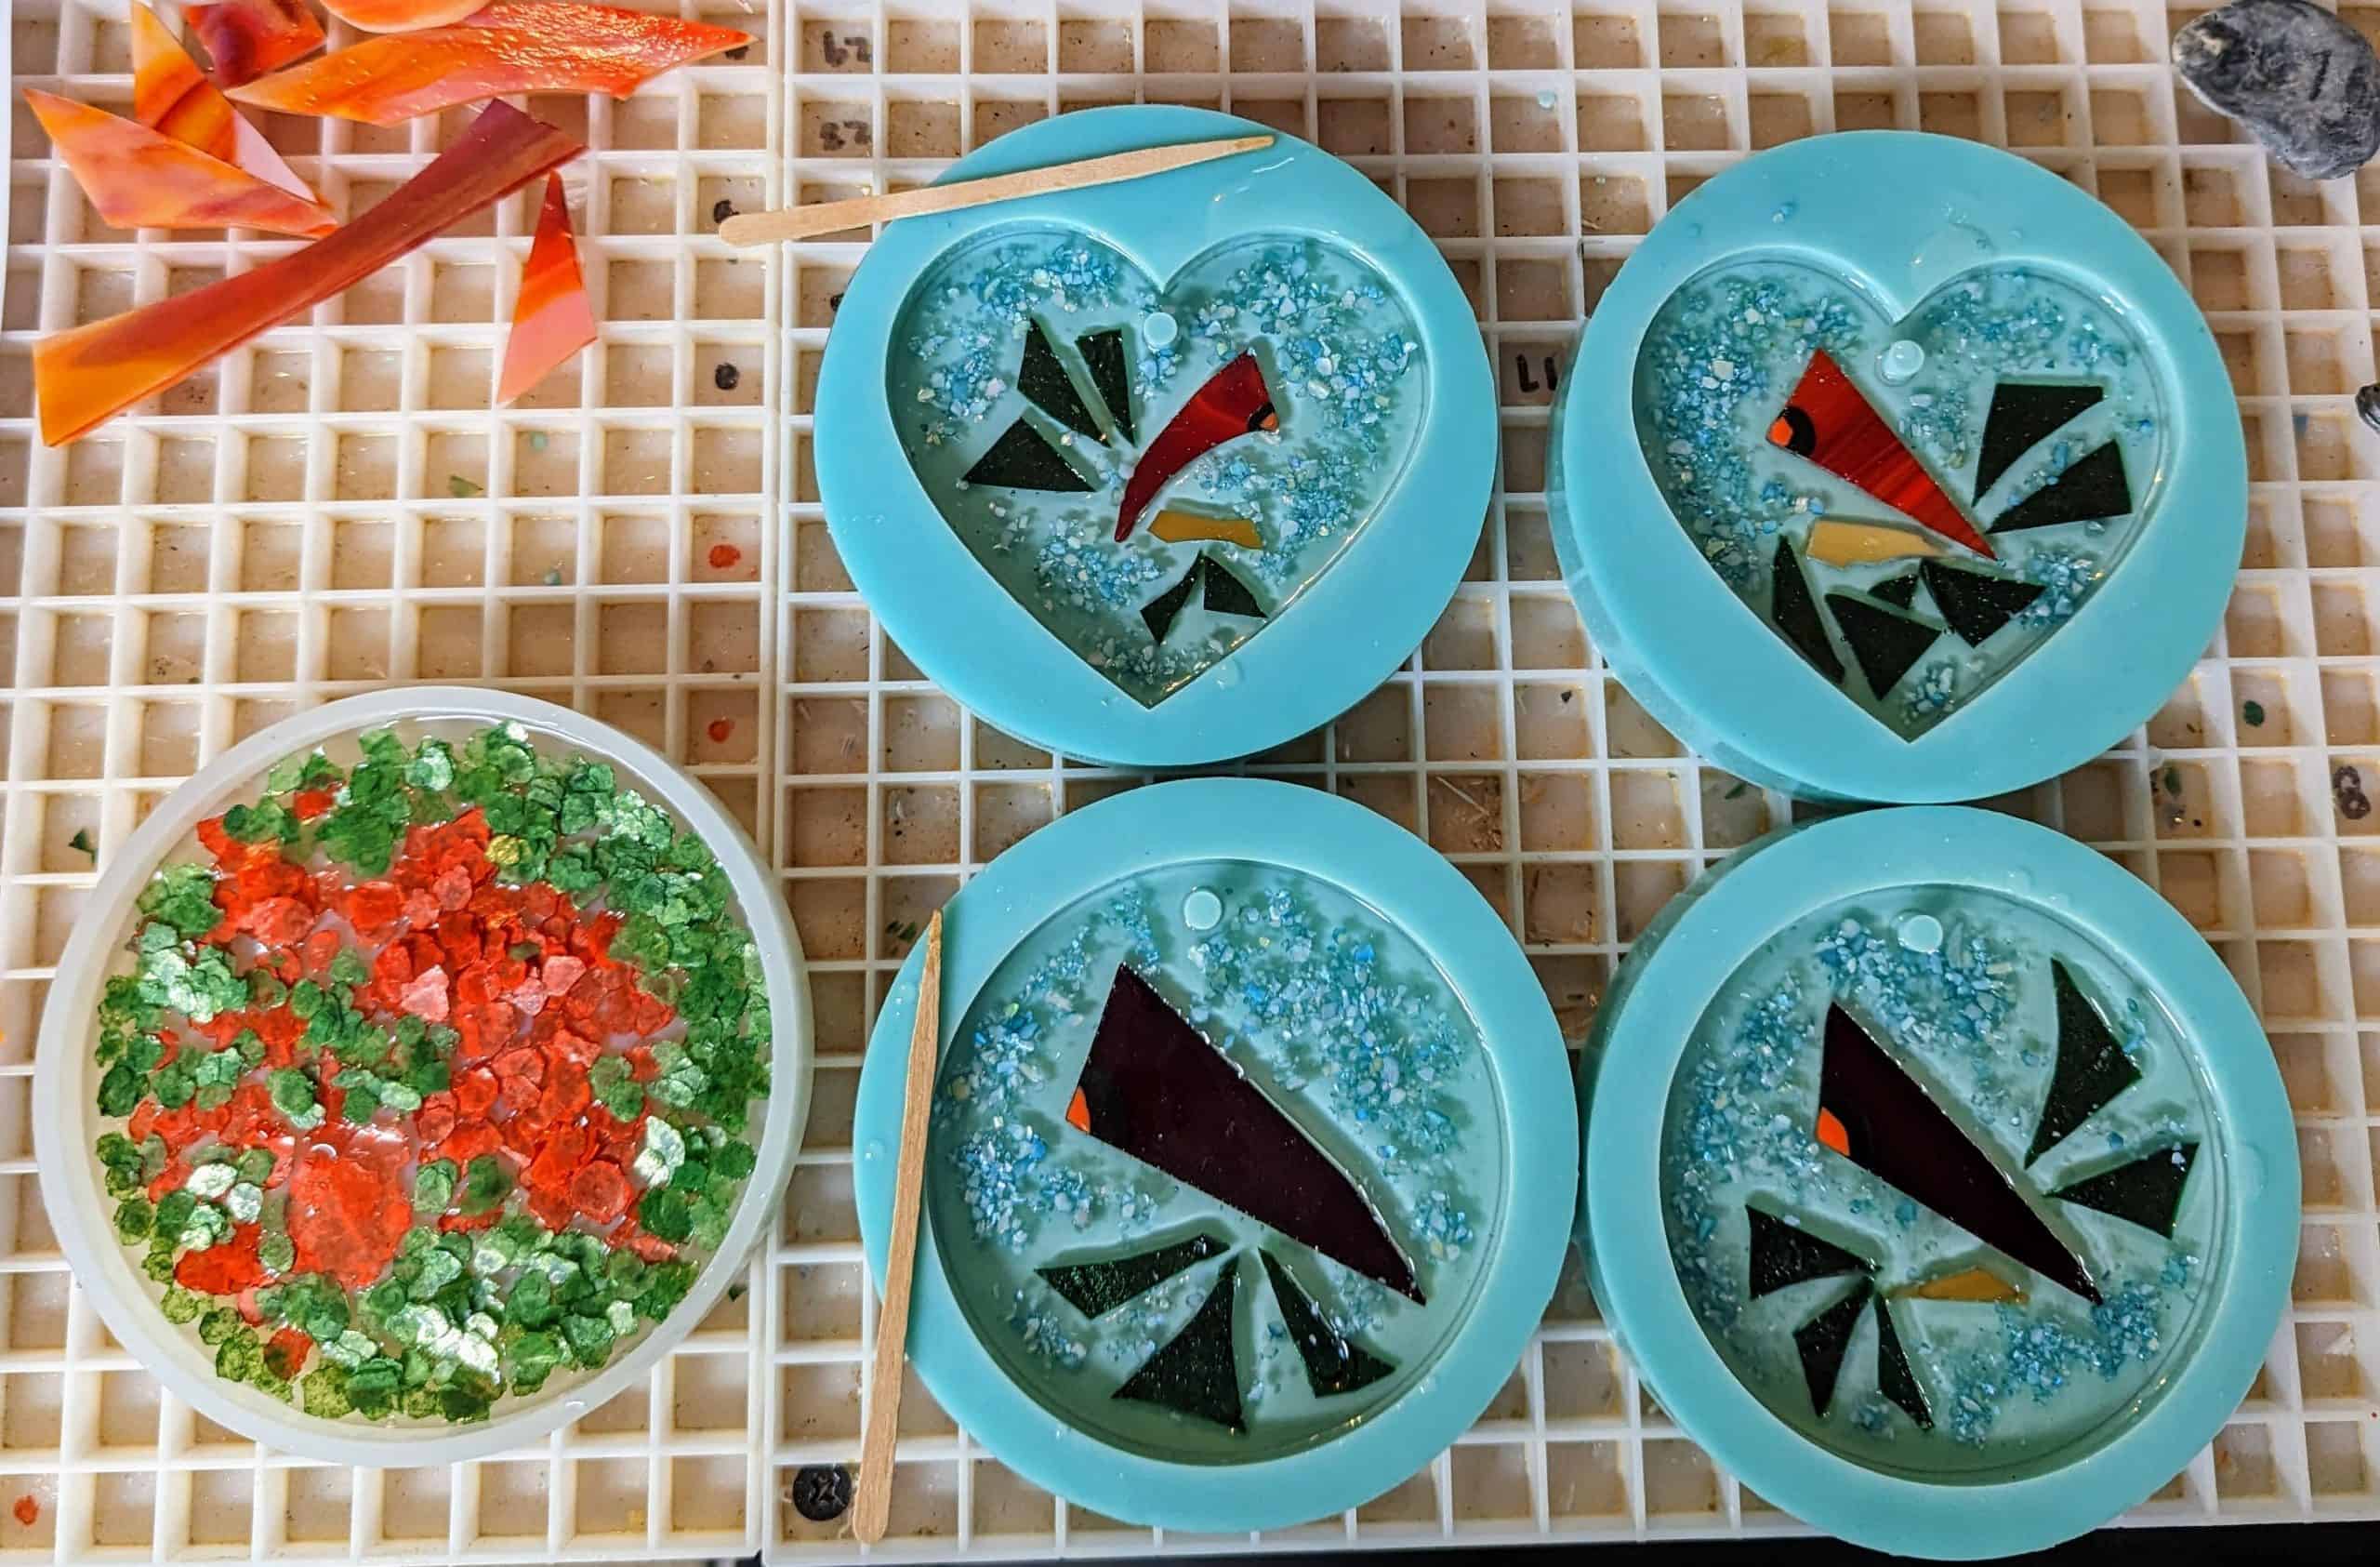
I went to pour the resin on this window a few days ago and didn’t like the look of my hardener (it looked too yellow / old). So I waited until I could buy some new resin at a local store. However, when I got it home, the new resin didn’t look much better than the resin I already had on hand, so I decided to try what I already had open on some small projects before pouring it over my whole hummingbird window.
Resin poured in molds
After a few hours, they looked fine, so I decided to decorate them (four ornaments and a festive red and green coaster). Then I felt better about using the resin I had on hand to do my large hummingbird window. I mixed 12 oz of resin and took the plunge.
Resin PouredResin spread out
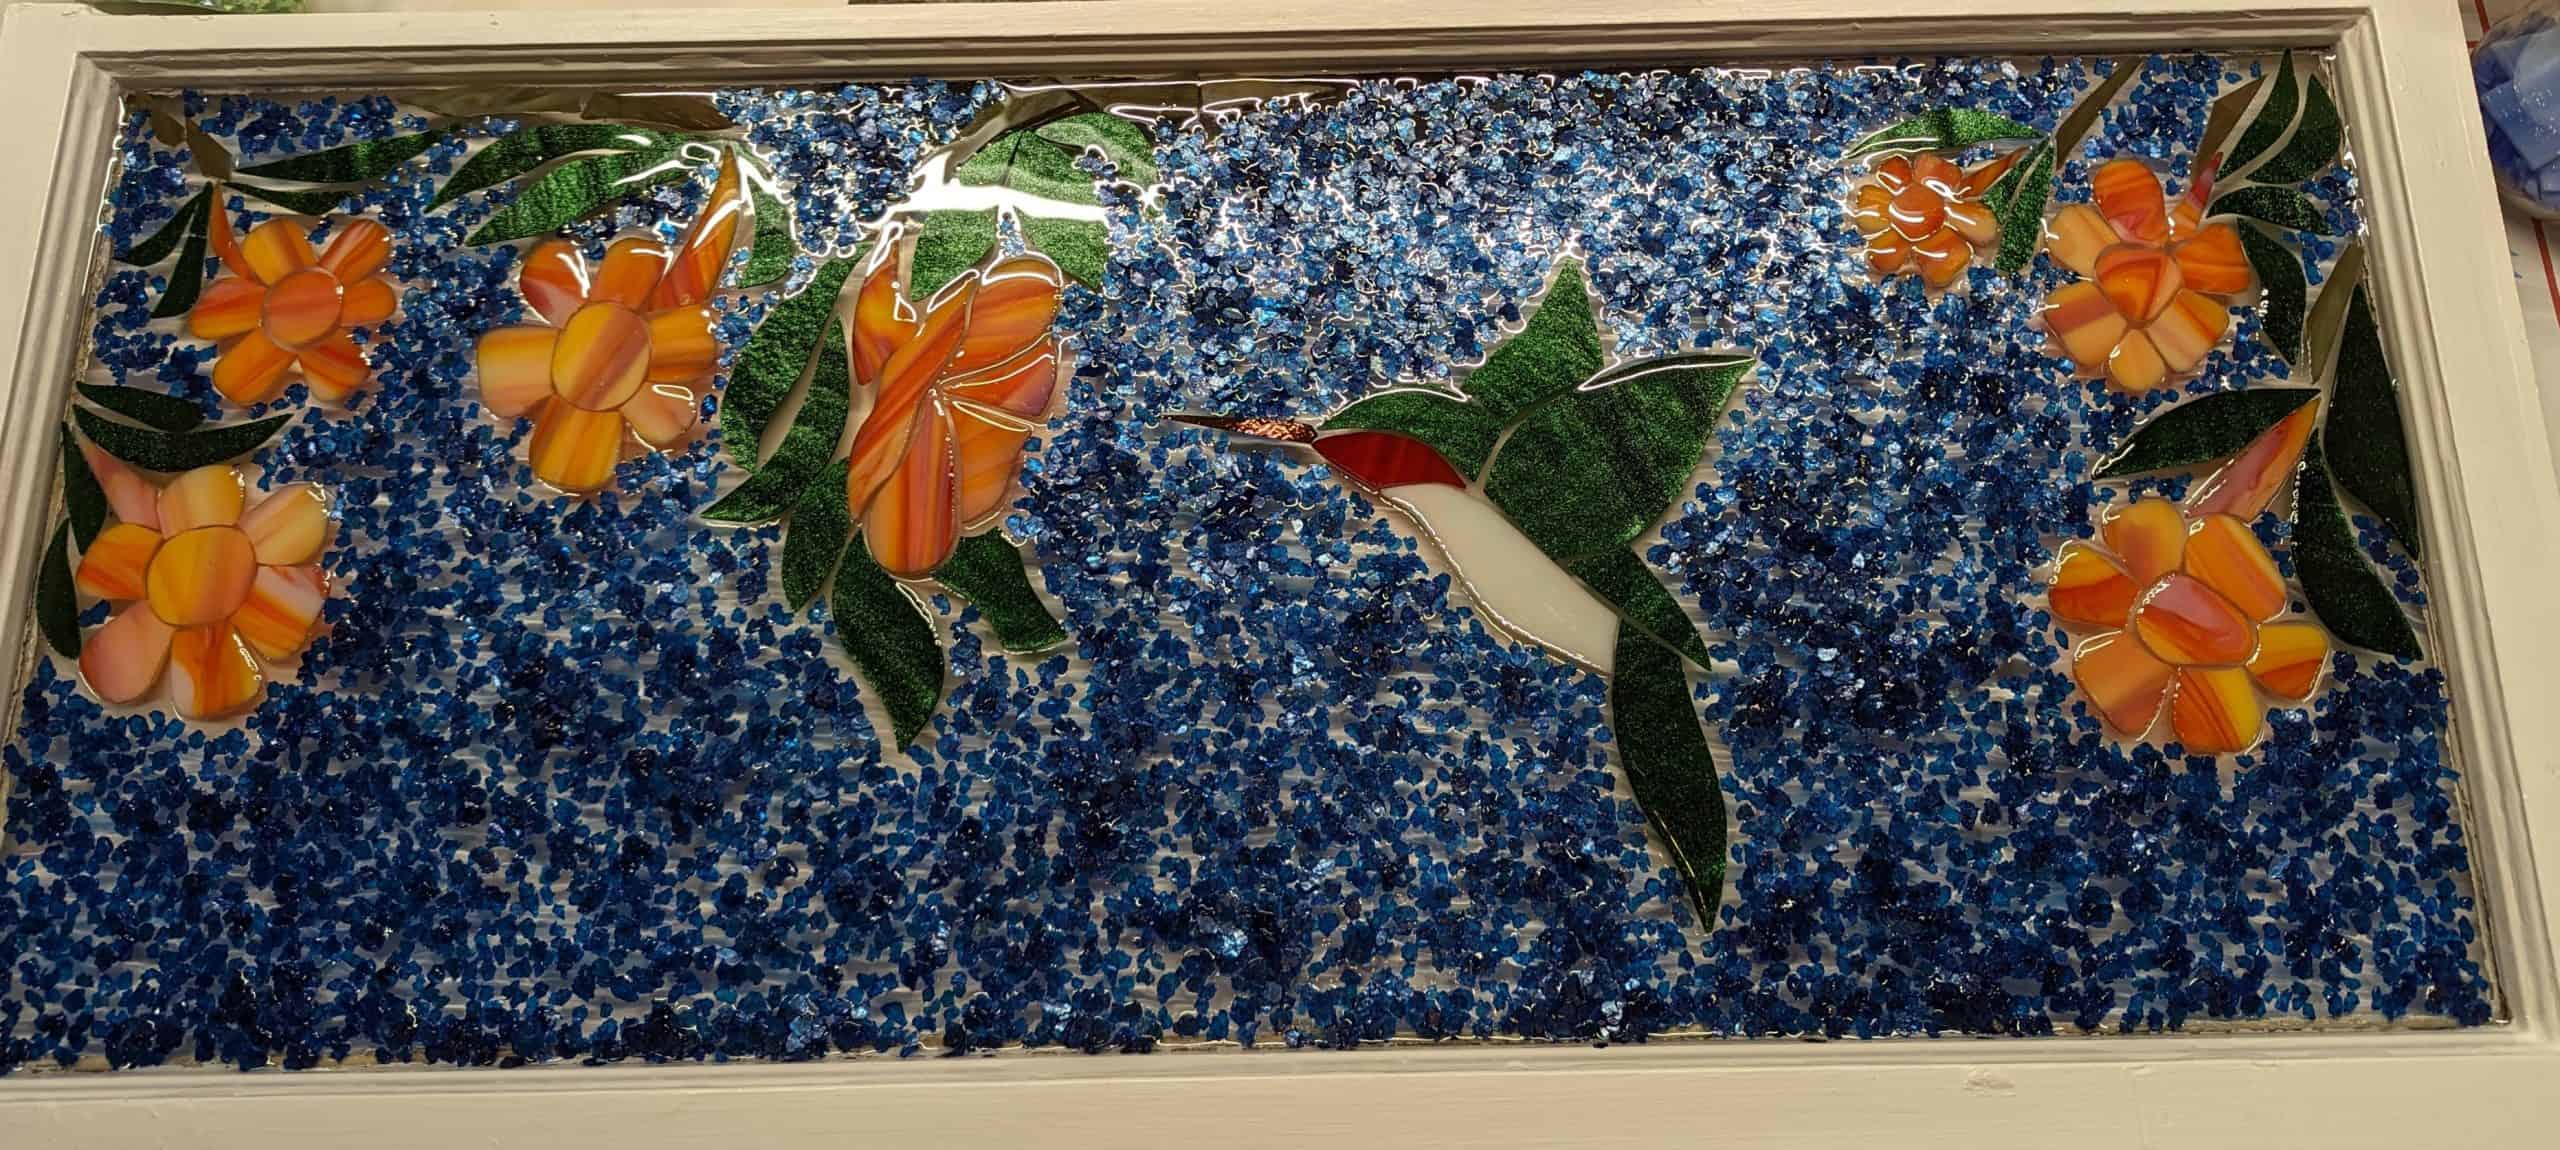
After it set for about 30 minutes, I started filling in the sky / background with sapphire blue mica chips.
Mica flakes addedWindow Curing
These should all be ready for the West Ashley Artisans and Crafters Fair being held at the Citadel Mall from 11am-4pm Saturday November 19th. Please stop by my booth! I will also have a few holiday themed paper crafts on hand.
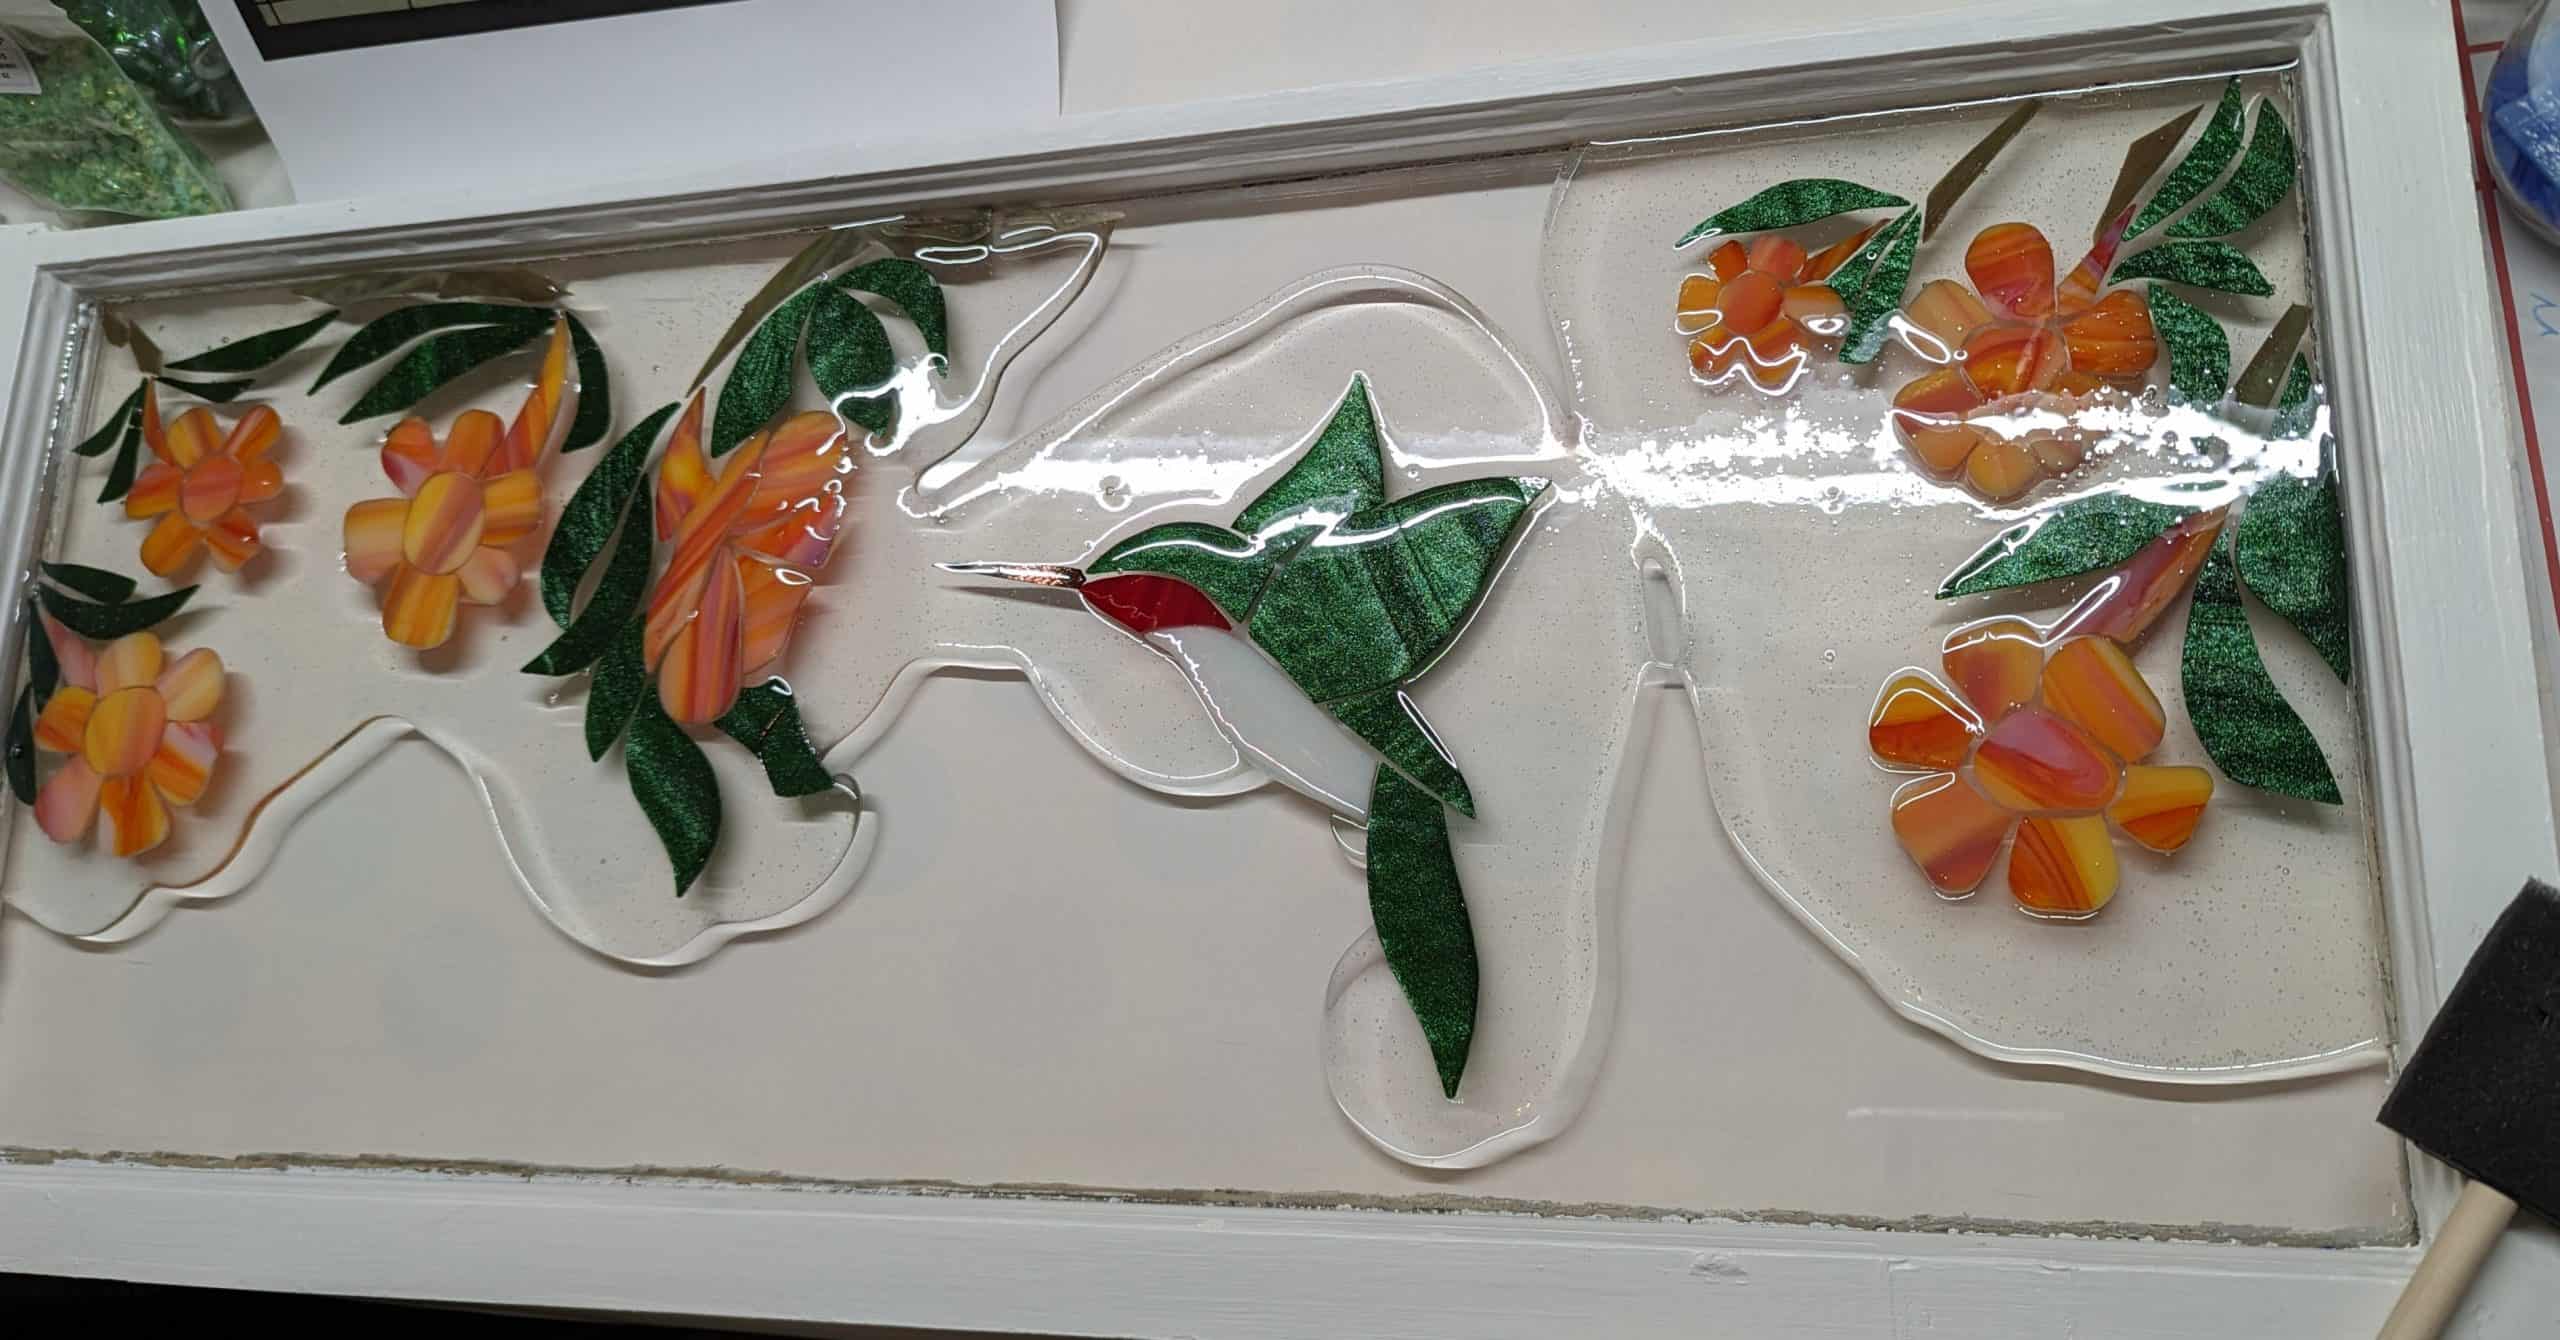
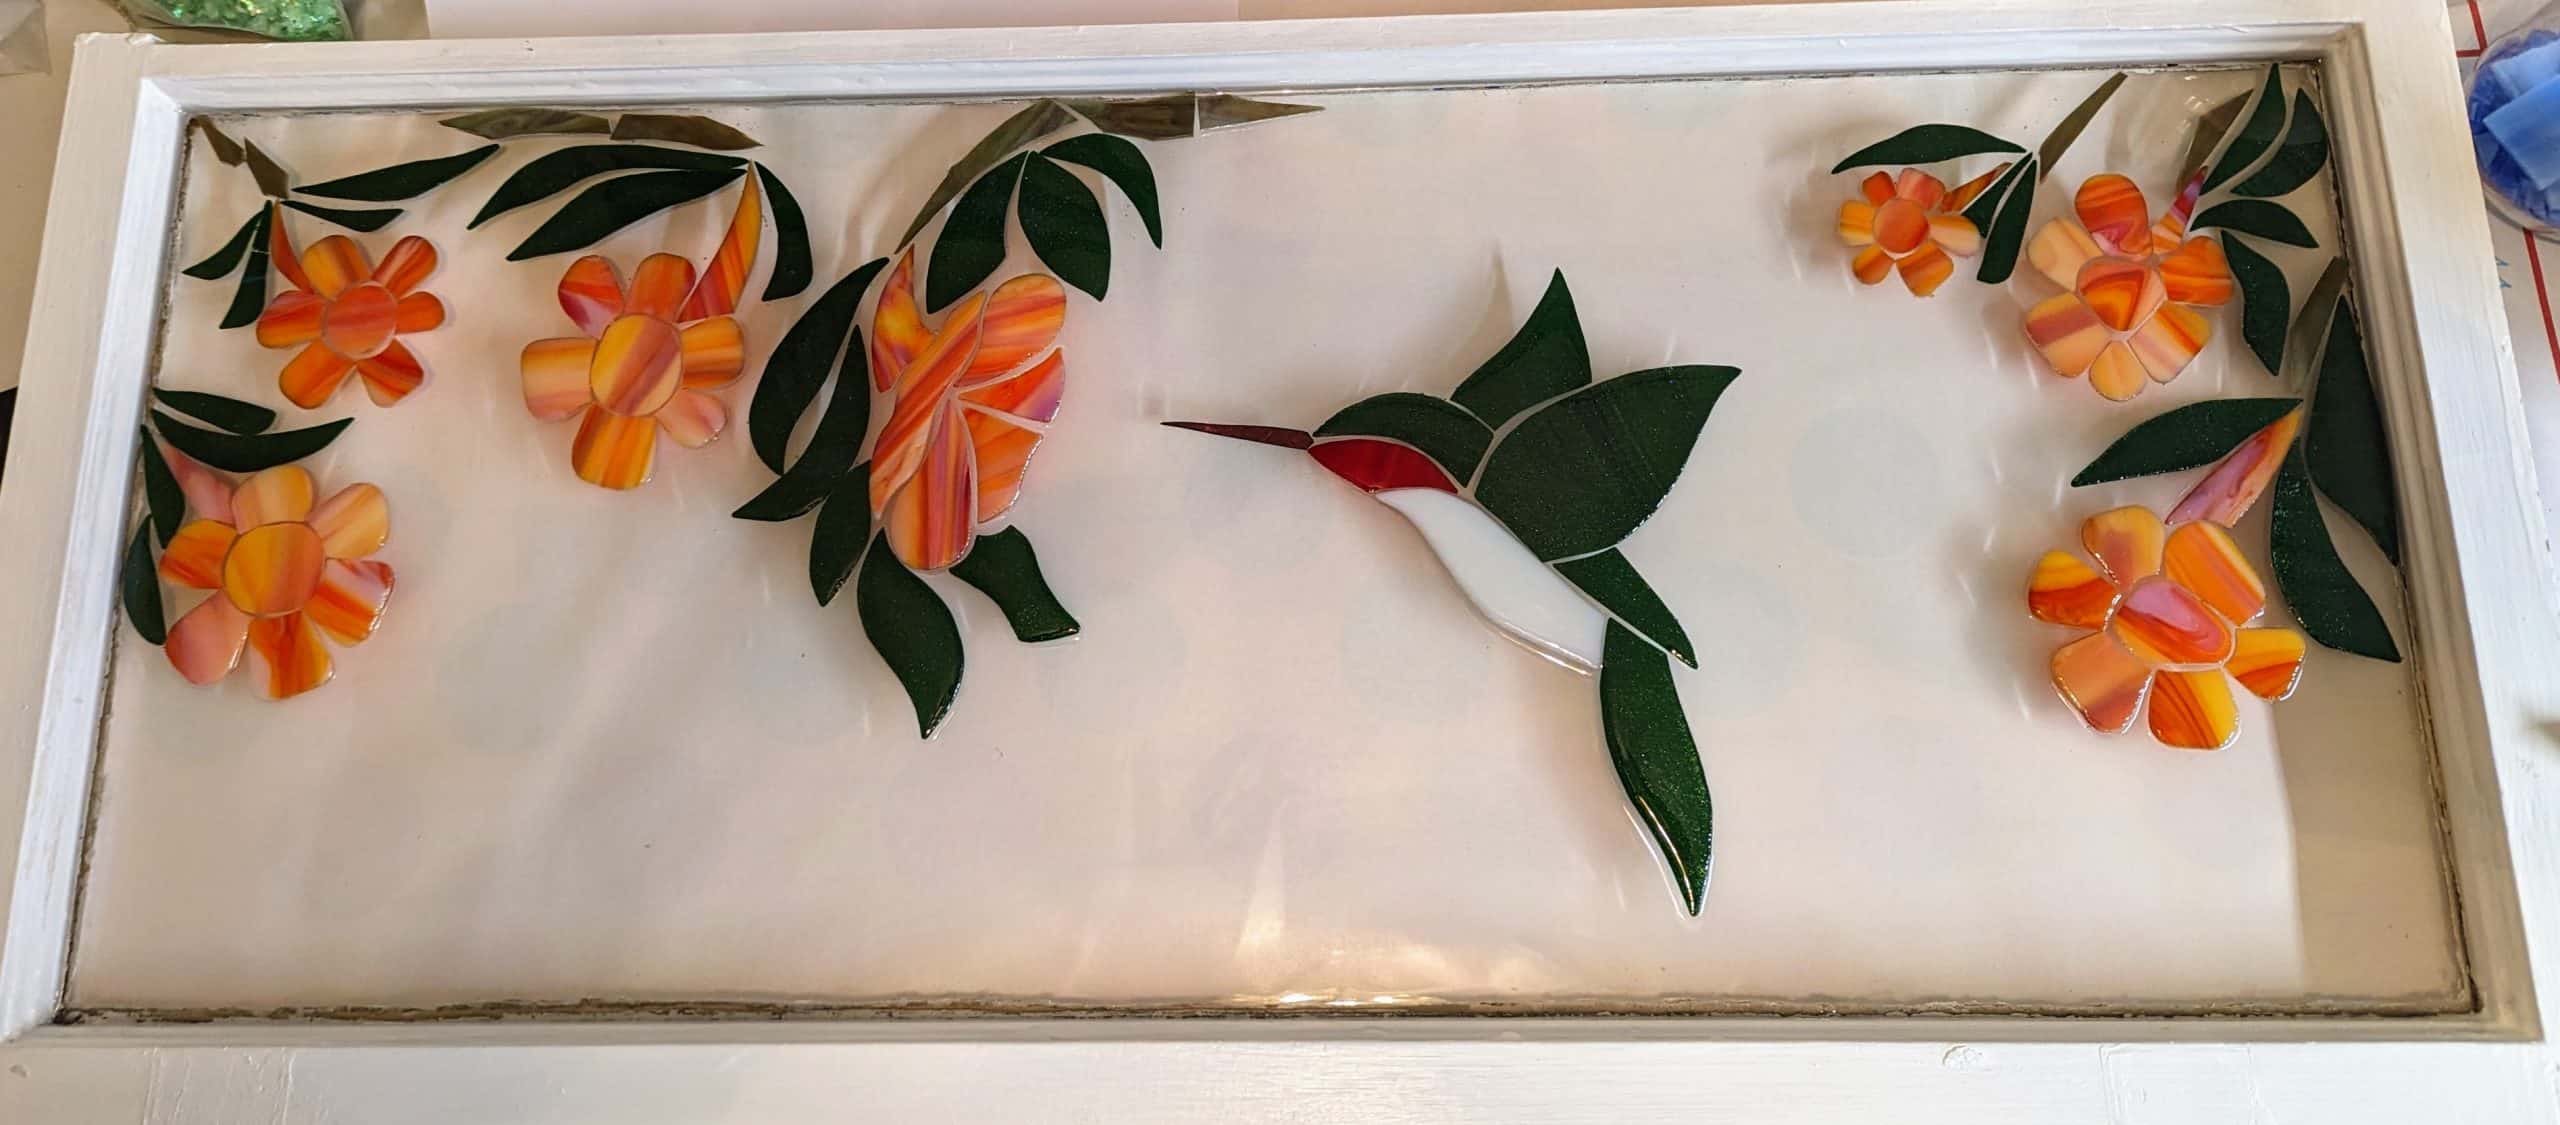
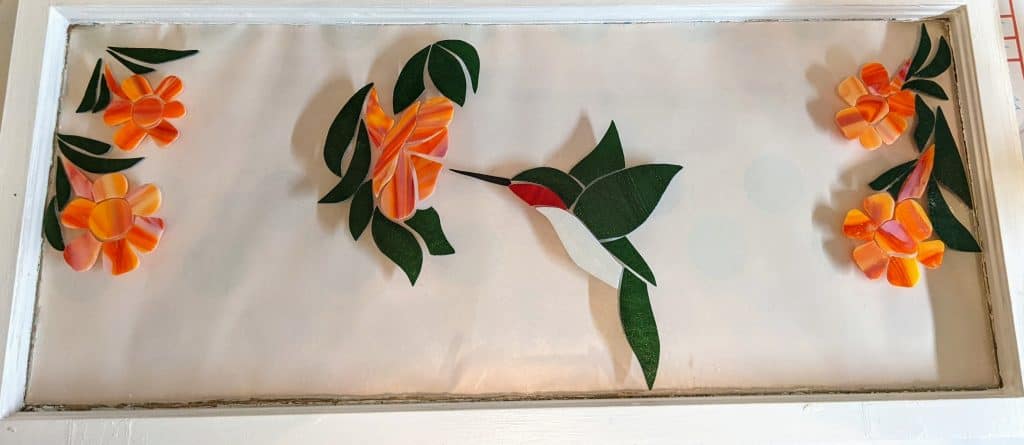
I wanted to fuss around some more with the glass in this window, but I also want to pour the resin before the West Ashley Artisans and Crafters Fair this Saturday at Citadel Mall, so I used mosaic adhesive to adhere all the glass in place – ready for the resin. I plan to use some beautiful sapphire blue mica chips for the sky / background.
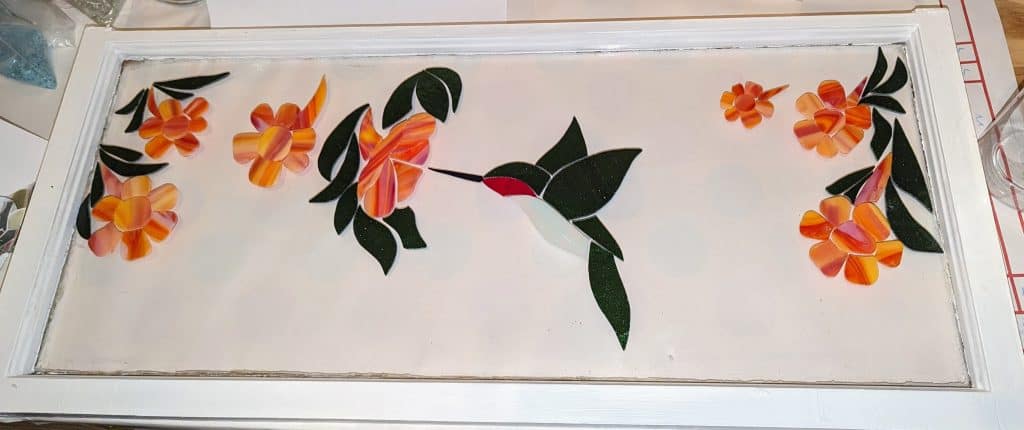
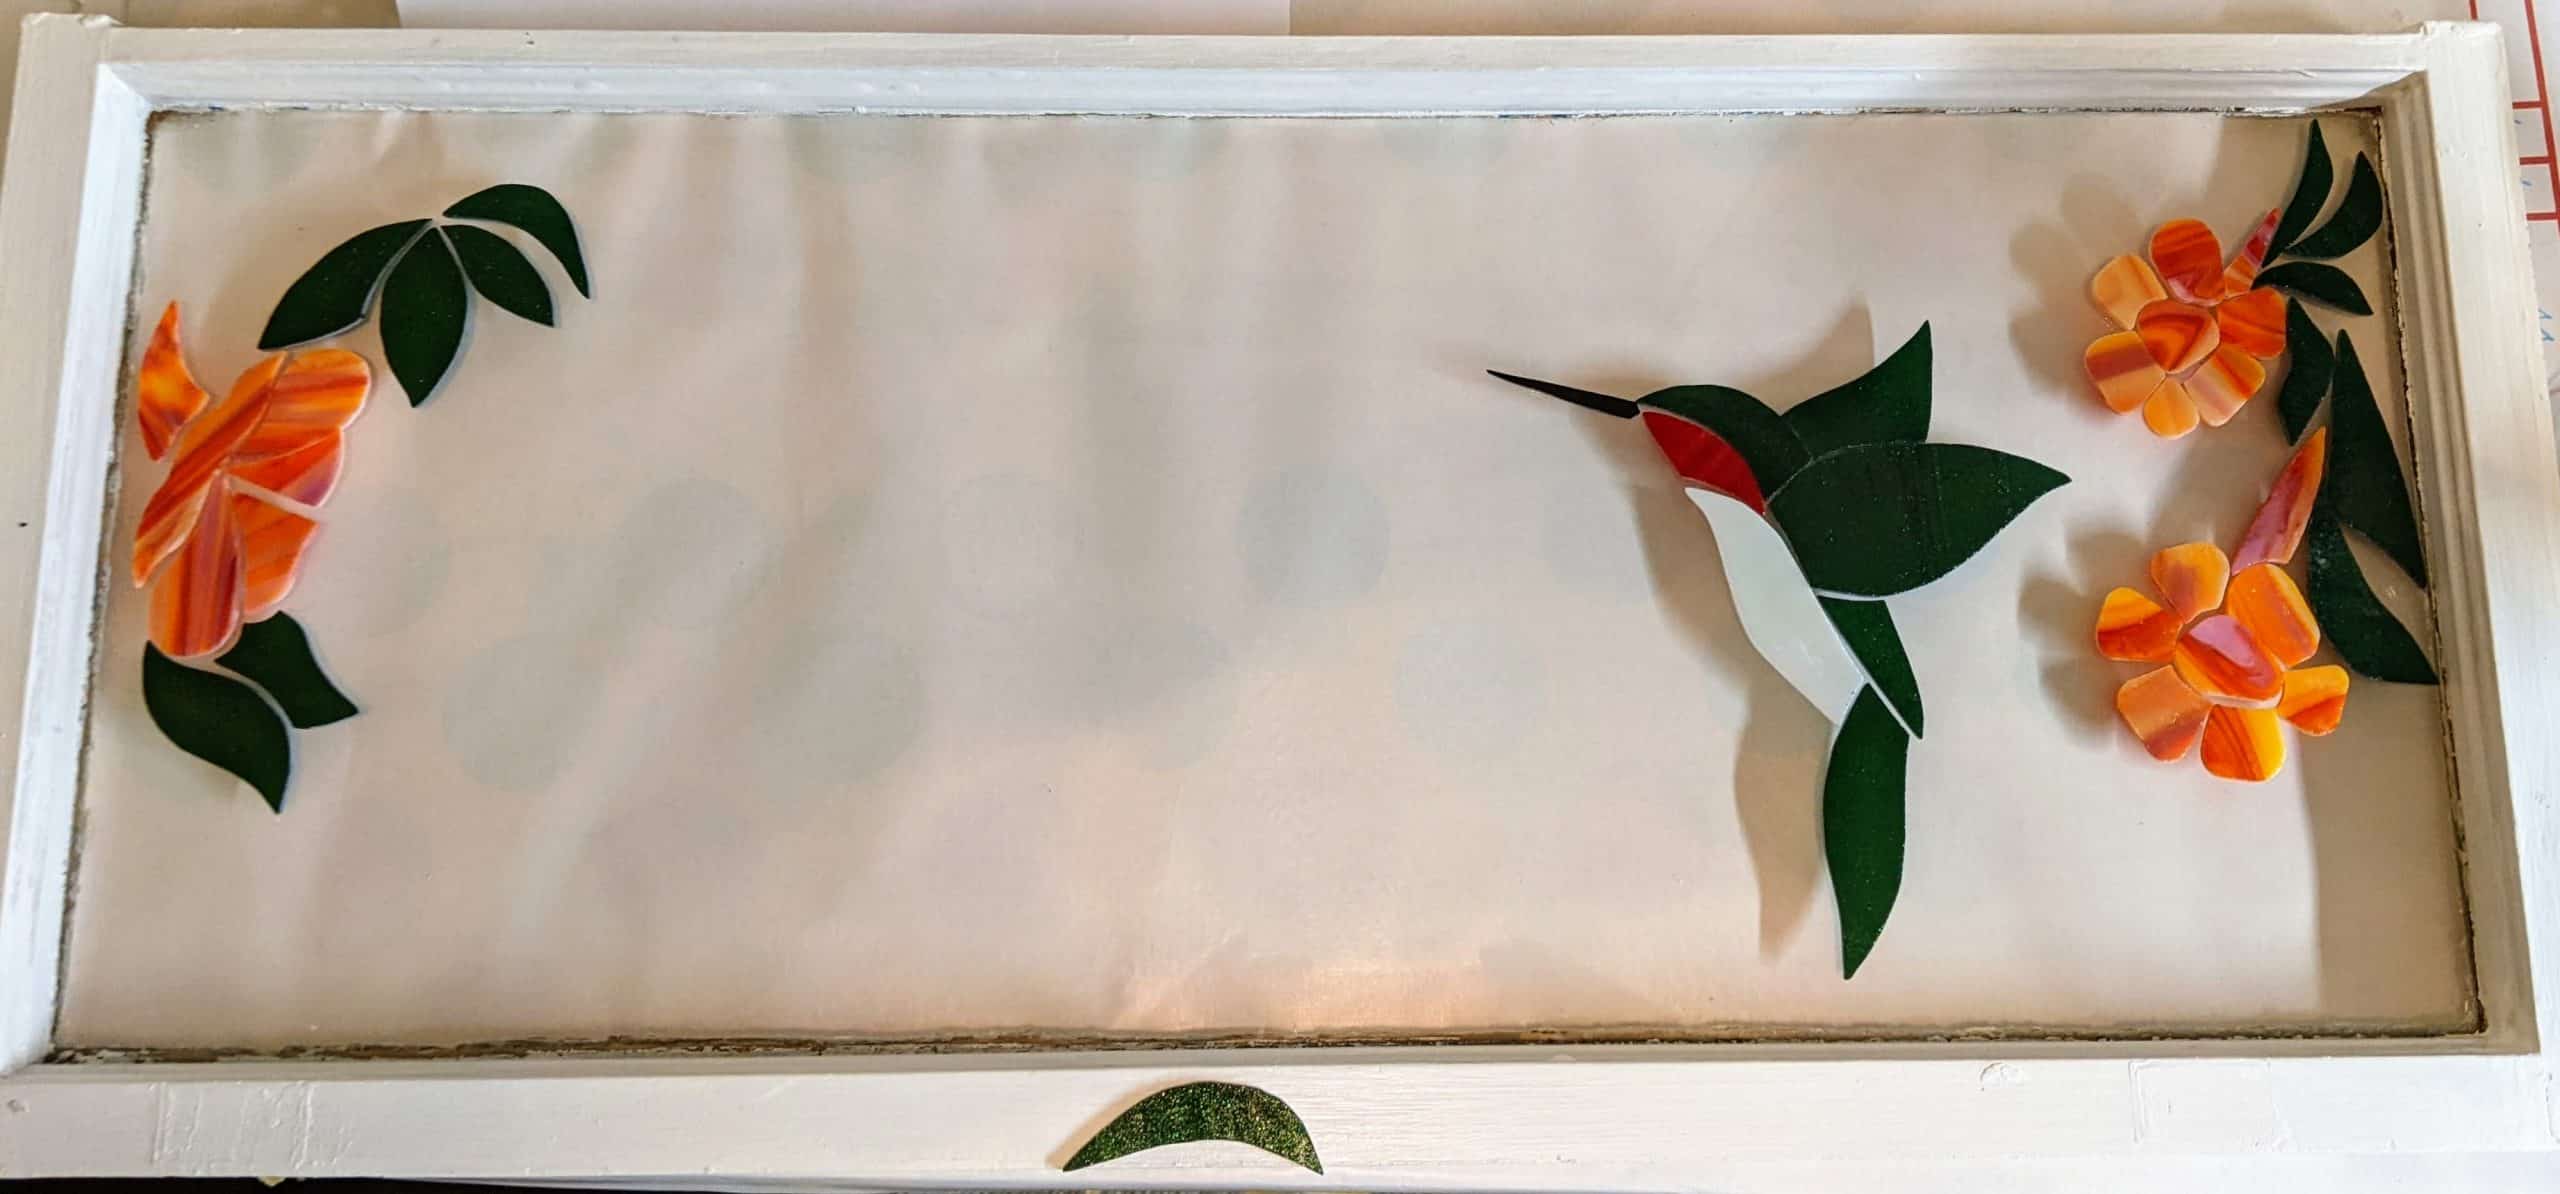
Today’s progress on the hummingbird / flowers window. Still not sure where the flowers will all end up. Will keep slowly filling in and moving things around until I like it.