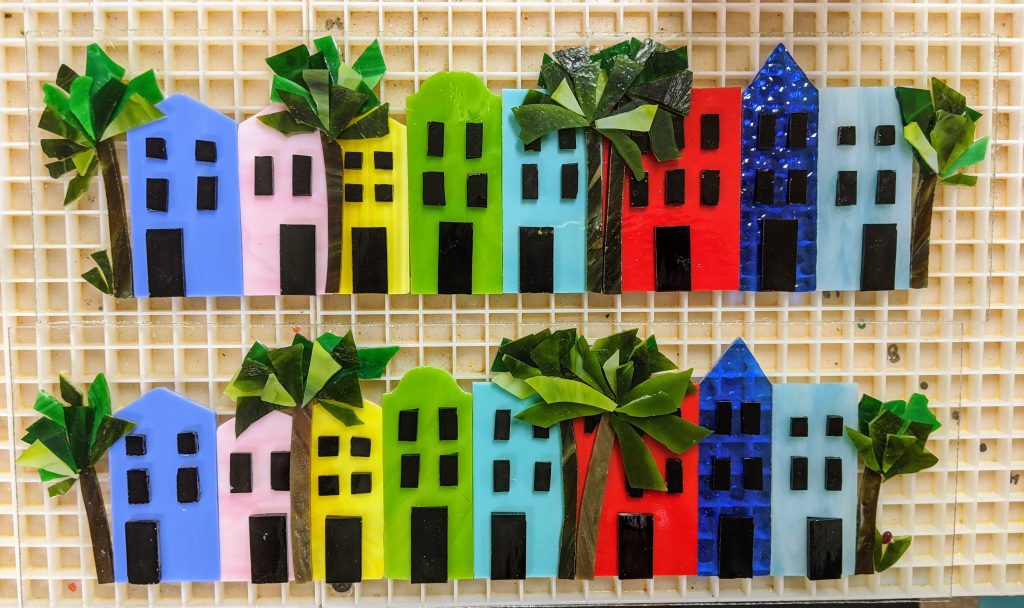
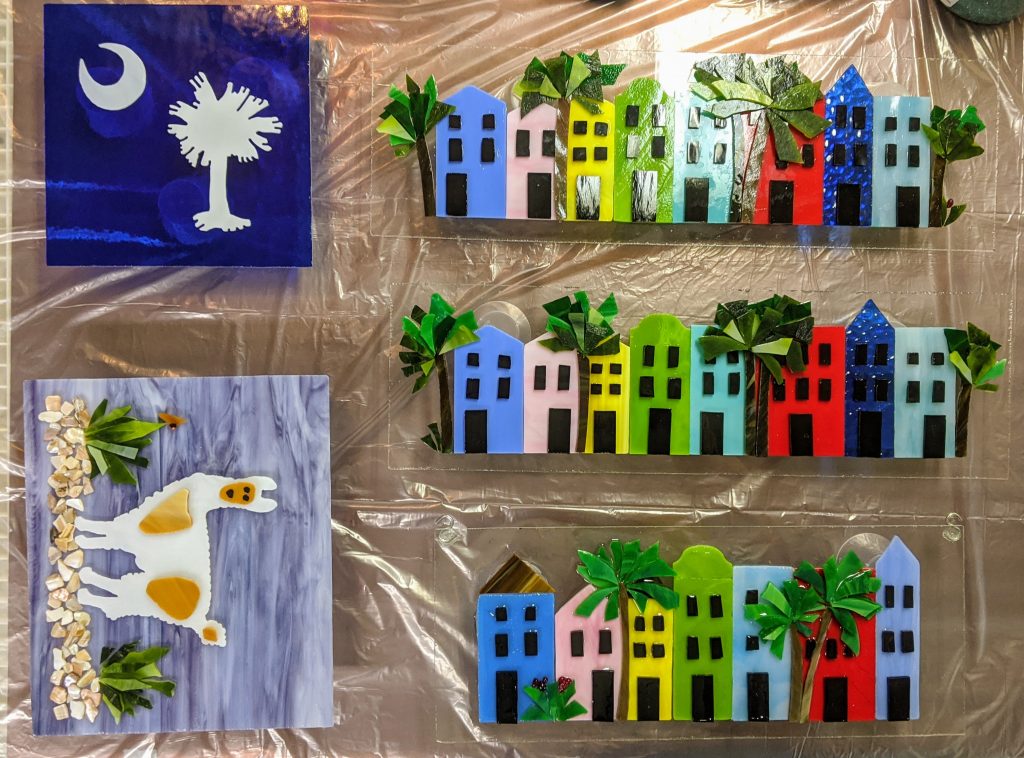
Here are the six small panels I made over the past few weeks and finished yesterday. They are done curing and ready for the runway! For your entertainment while housebound due to COVID-19… 😉
Glass of Sherry
Here are the six small panels I made over the past few weeks and finished yesterday. They are done curing and ready for the runway! For your entertainment while housebound due to COVID-19… 😉
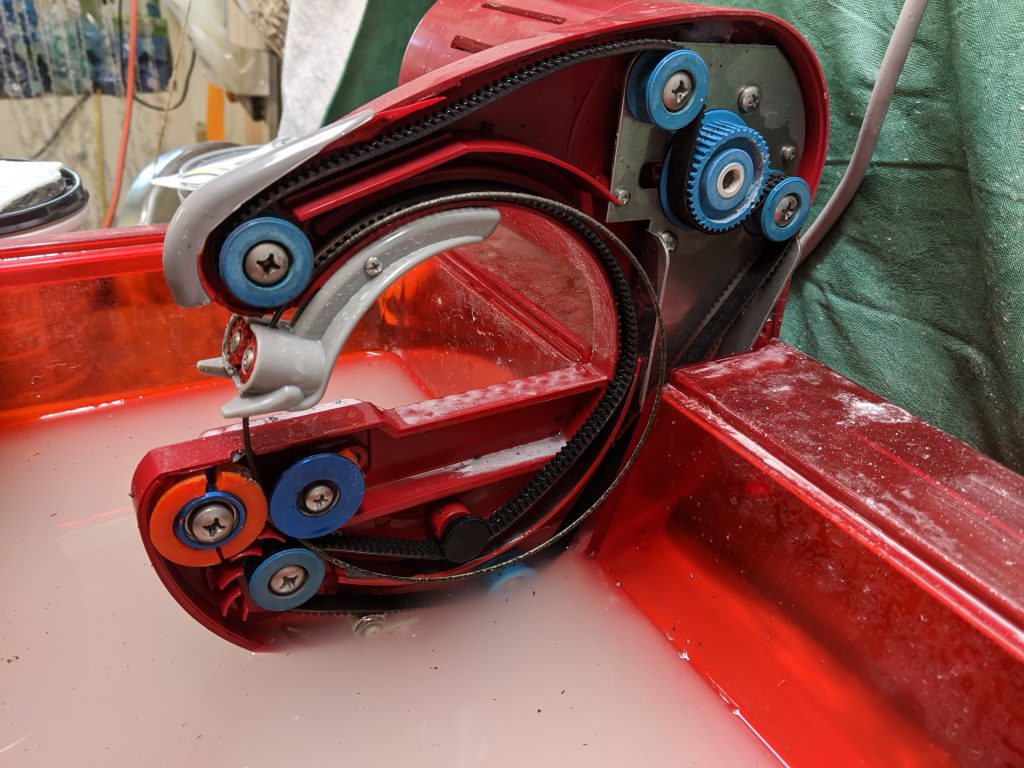
I prepped six small projects over the past few weeks and have them all ready for the resin. I’ve never tried to pour this many at the same time, so we’ll see how it goes. I mixed up 12 ounces of resin and started pouring. The best advice I can give on coating the glass is not to pour too much at once. The fewer drips you have to contend with, the easier it will be to manage. Of course, that’s easier said than done.
First, I cover my work surface (I used wrapping paper over my glass cutting board, then a plastic trash bag on top of it). I used little medicine cups (about the size of Dixie cups) to elevate the pieces over the surface.
I generally try to pour the resin directly onto the parts of the piece with the most layering / texture and then spread it across everything else with the sponge on a stick. I can also use my heat gun to do a bit of spreading later.
After I’ve spread the resin over the entire piece, I use the heat gun to remove the bubbles and help move the resin around to fill in any empty spots.
I have 6 pieces I’m juggling at once, plus I mixed a bit too much resin, so I poured some of the excess into some coaster molds I have on standby for just such an occasion. I don’t think I’ll try to finish this many pieces at the same time again, as it was a bit stressful. Having them so close together on my work surface made it difficult to tend the resin around the edges of the pieces. I think I pulled it off, though.
For some pieces, I like to add glass chips or other decorative items to the resin. Once the resin is poured and I’ve removed the bubbles with the heat gun, I try to remove any drips from the undersides of the pieces with a craft stick and then I can sprinkle the glass chips on top. The resin will move a little, so I use a craft stick to help keep the edges neat.
It is possible to tape the undersides of the edges to more easily remove the excess resin after it cures, or to scrape drips off afterward, but I’ve found this method works best for me. I have cracked a few pieces trying to remove drips after they have cured.
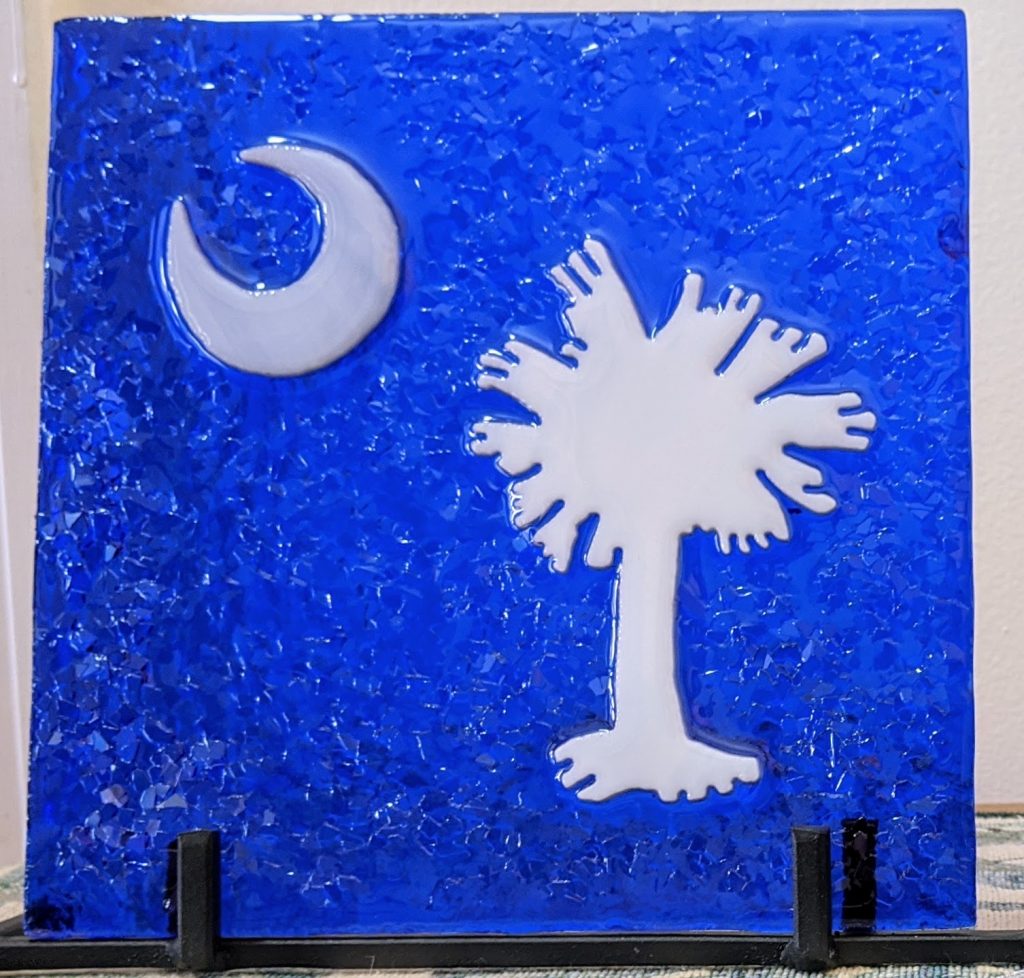
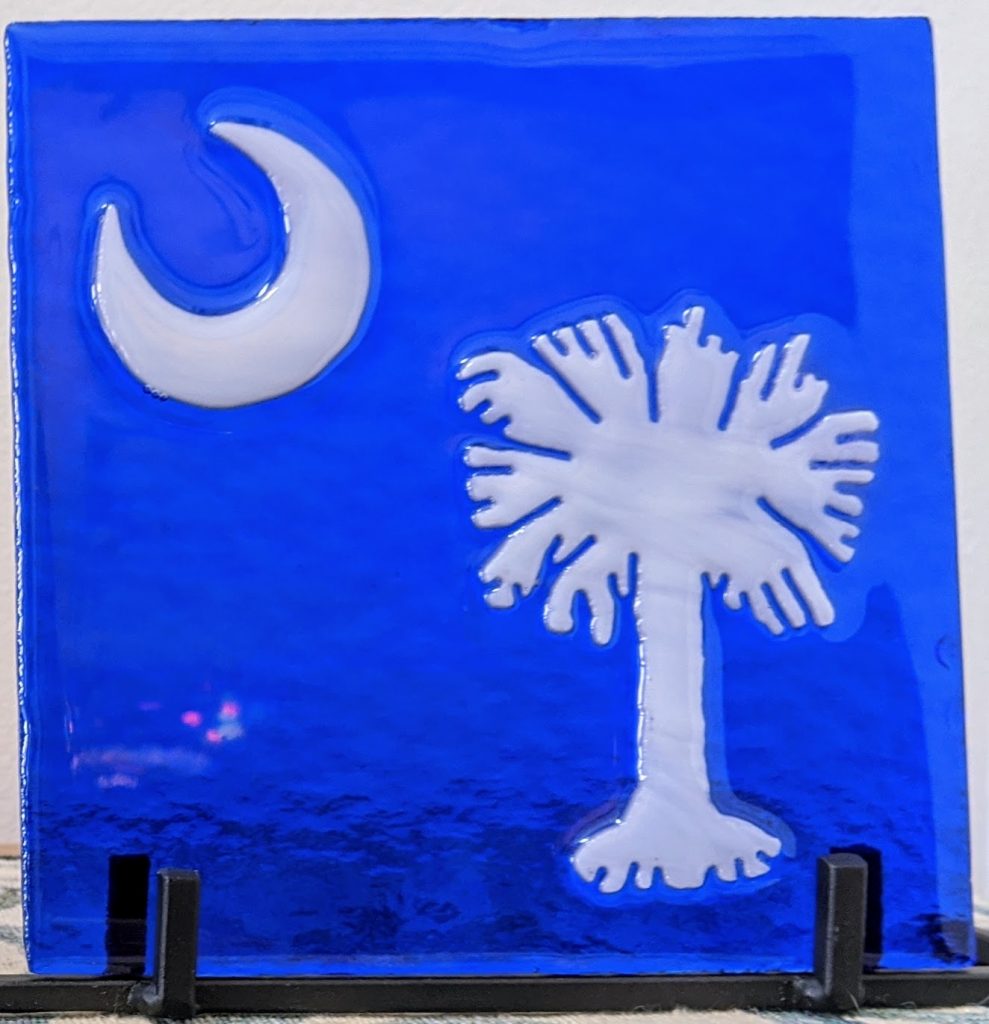
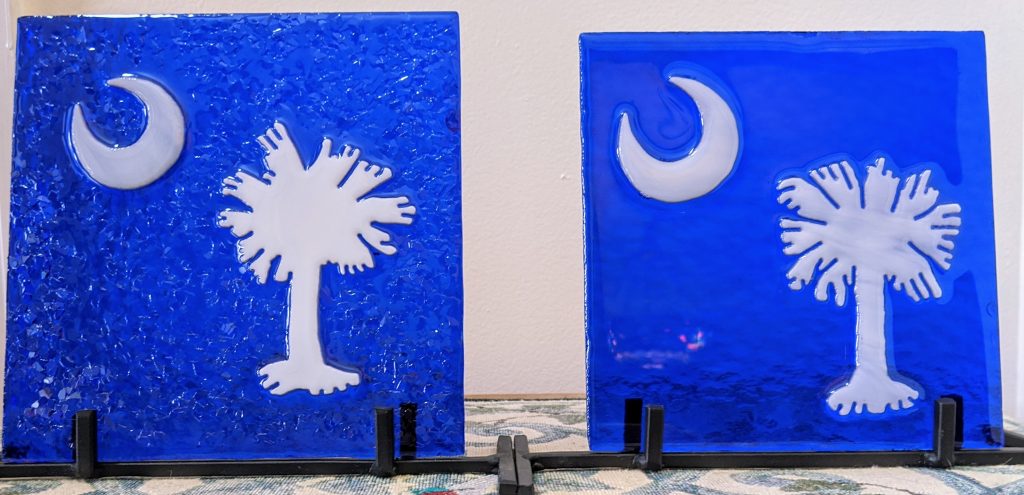
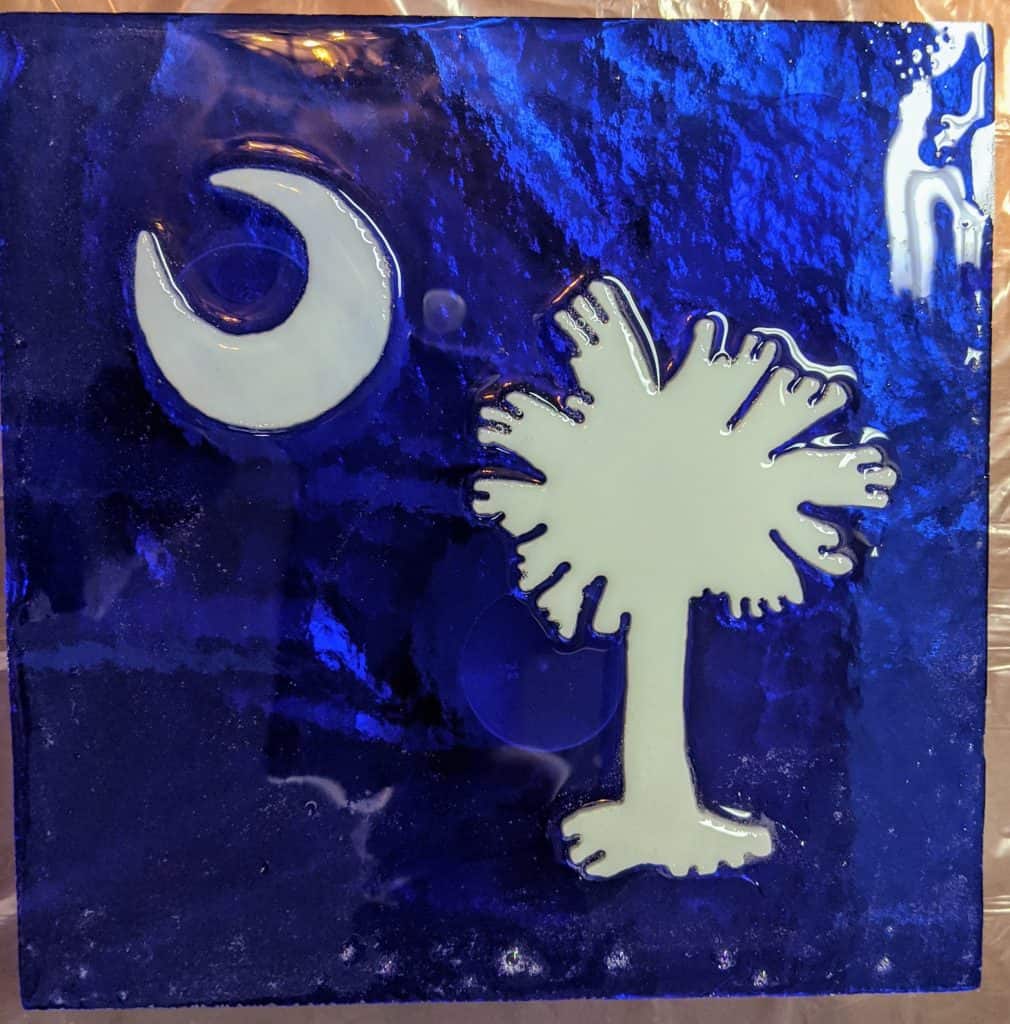
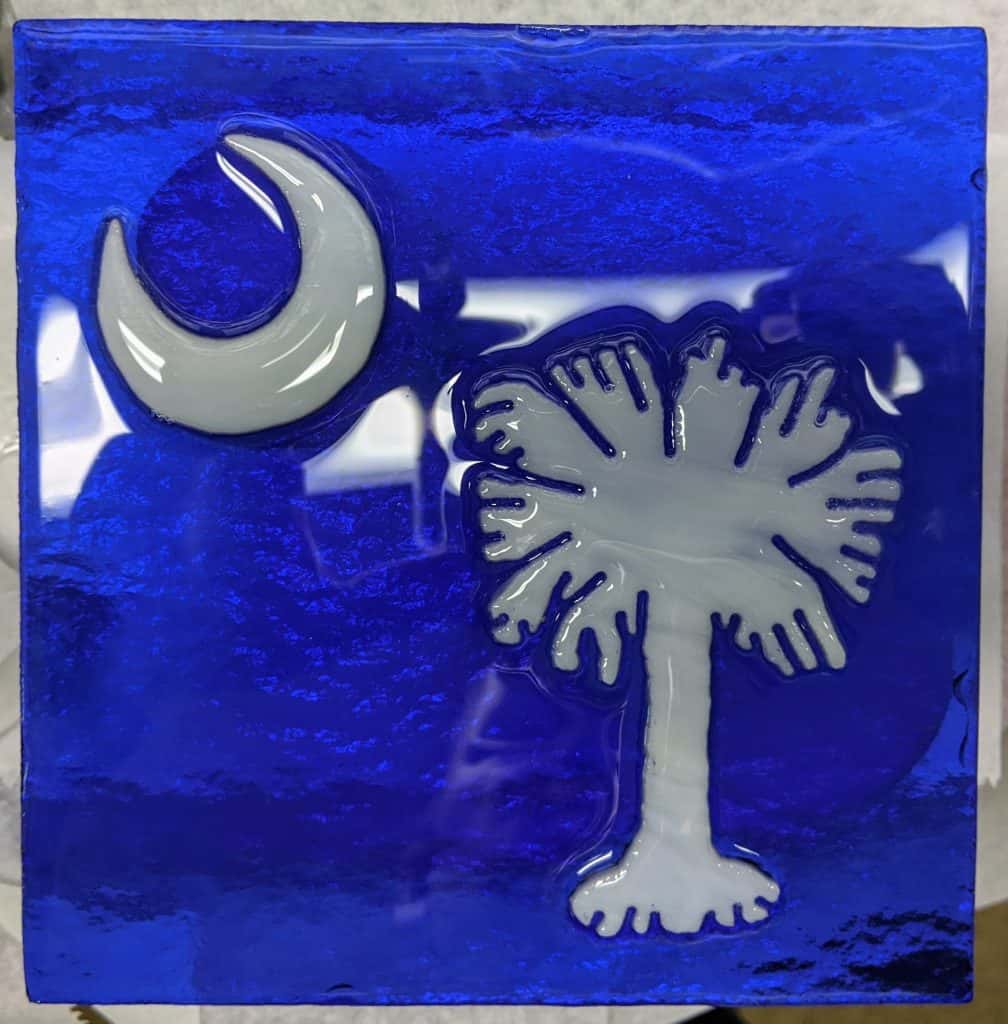
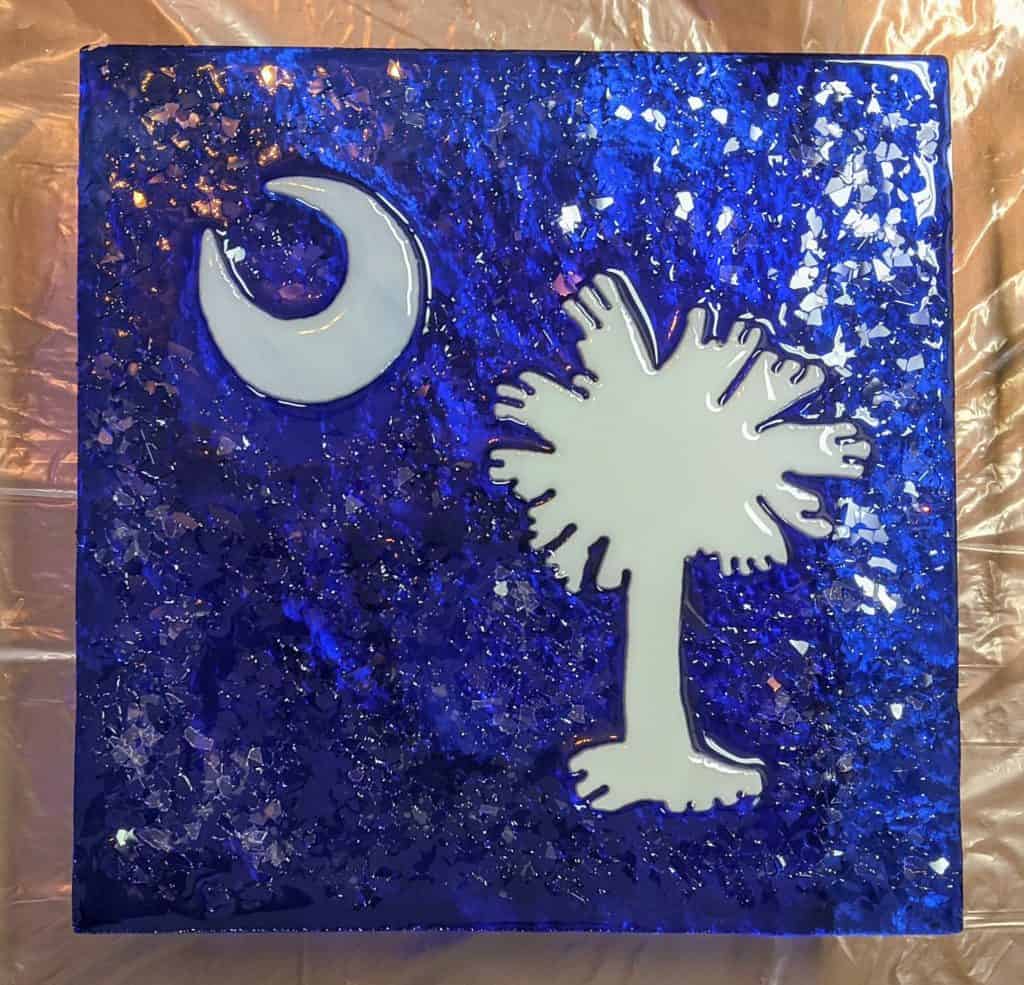
I decided to see how the glass chips would look on a colored piece. Since I made two similar SC Flag pieces in this batch, it will be a good opportunity to compare the two effects (one with and one without glass chips).
Now I have to wait overnight for the resin to cure. We’ll see how everything turned out tomorrow!
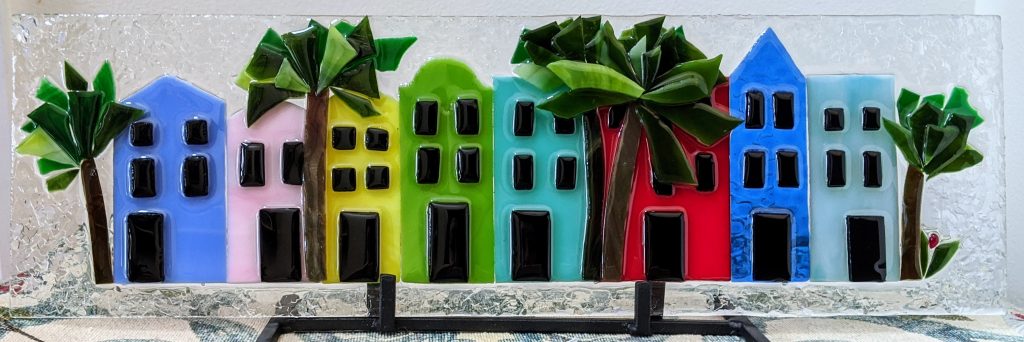
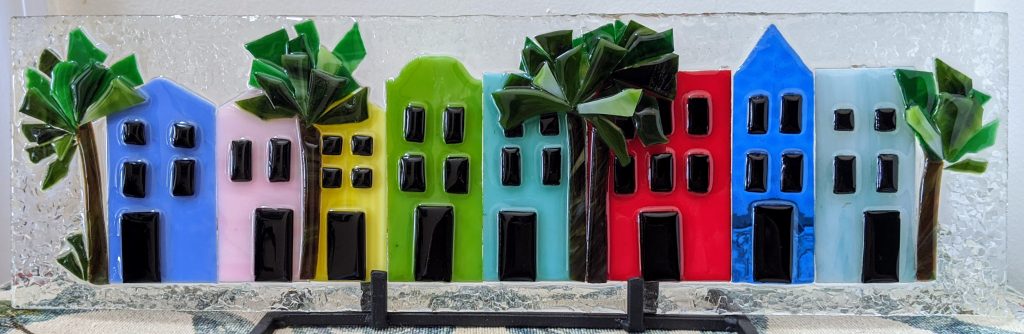
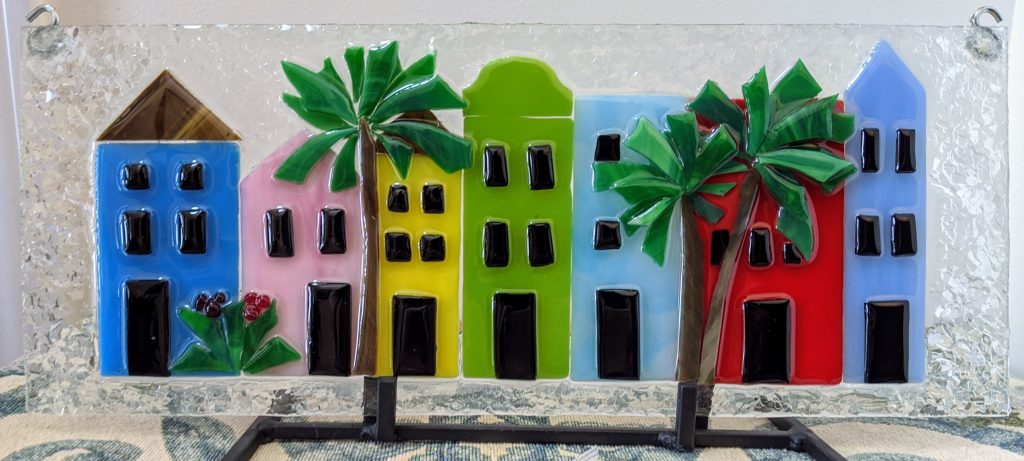
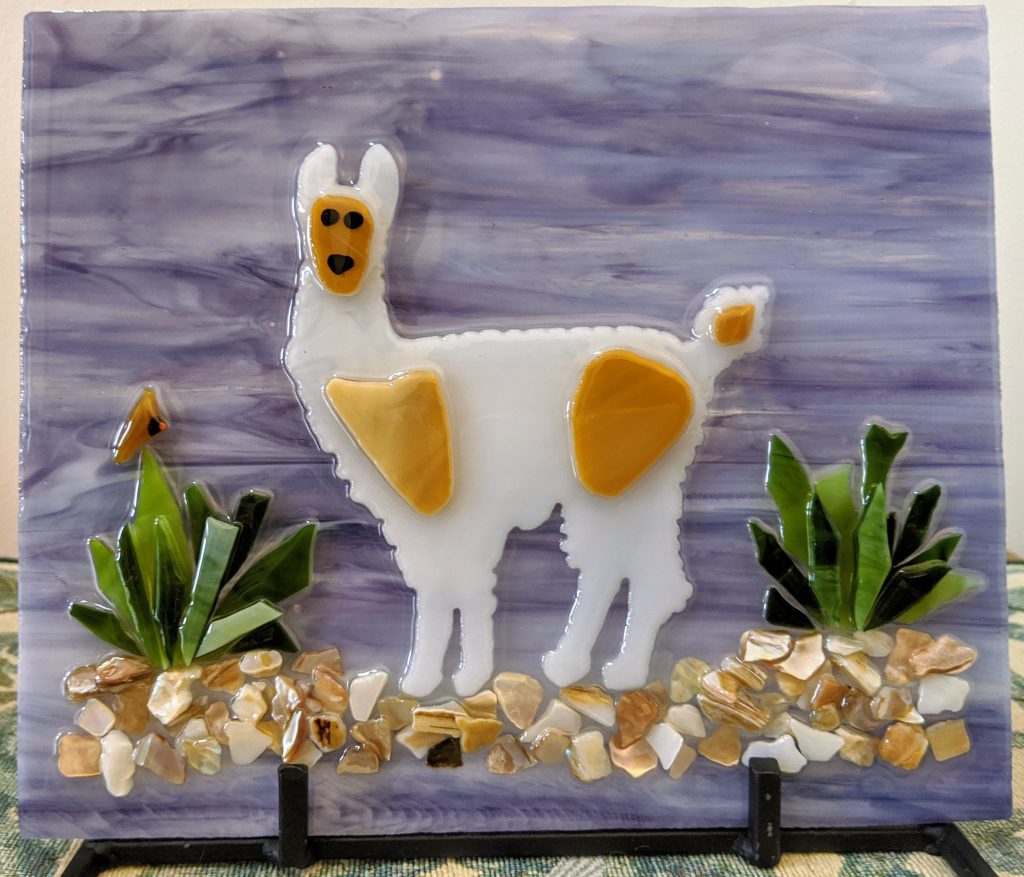
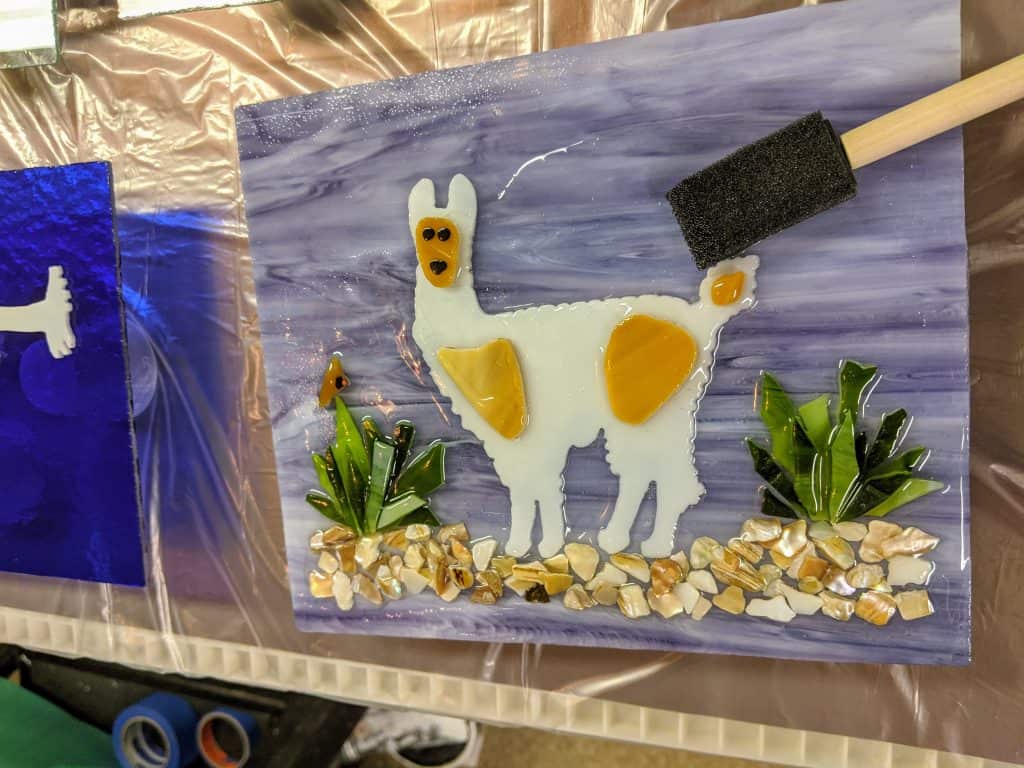
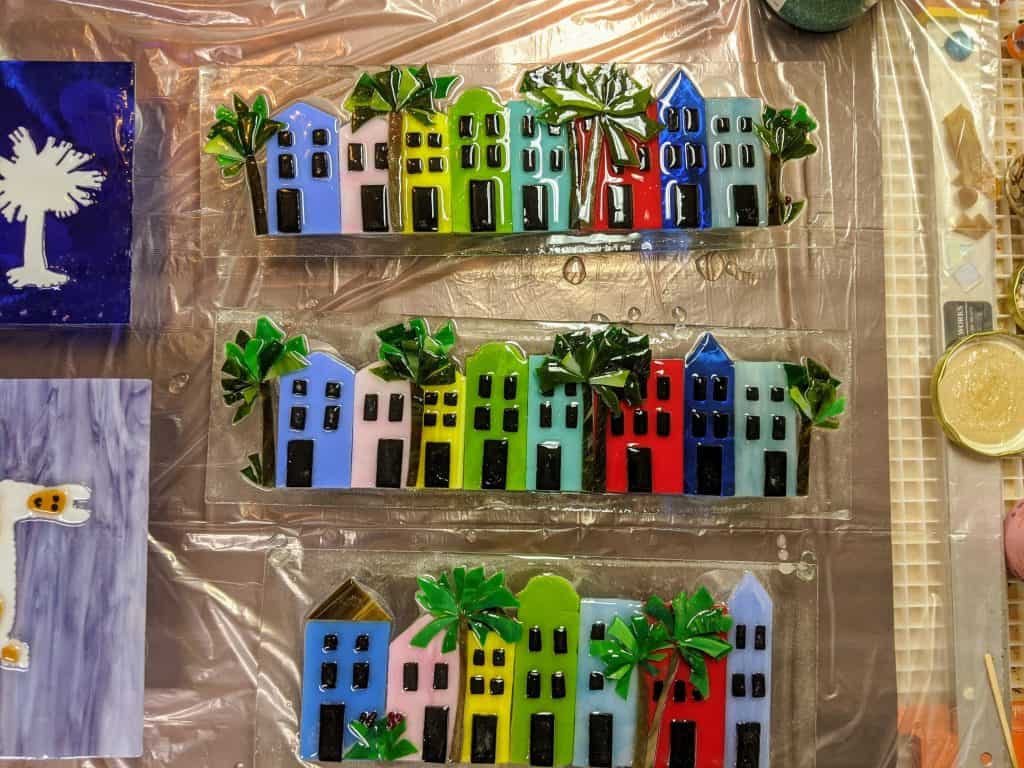
Today I put the last few touches on two Rainbow Rows and the Llama and geared up to get the resin poured on everything. I’m still not sure about the Llama – need to decide if I like it with or without the little bird (why am I obsessing over such a small detail?).
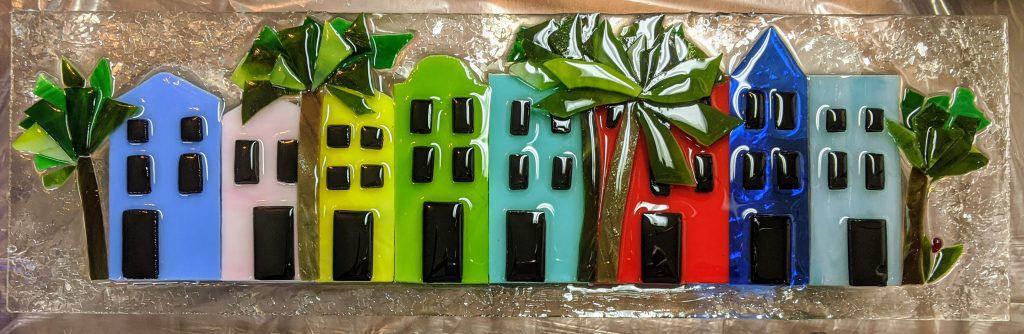
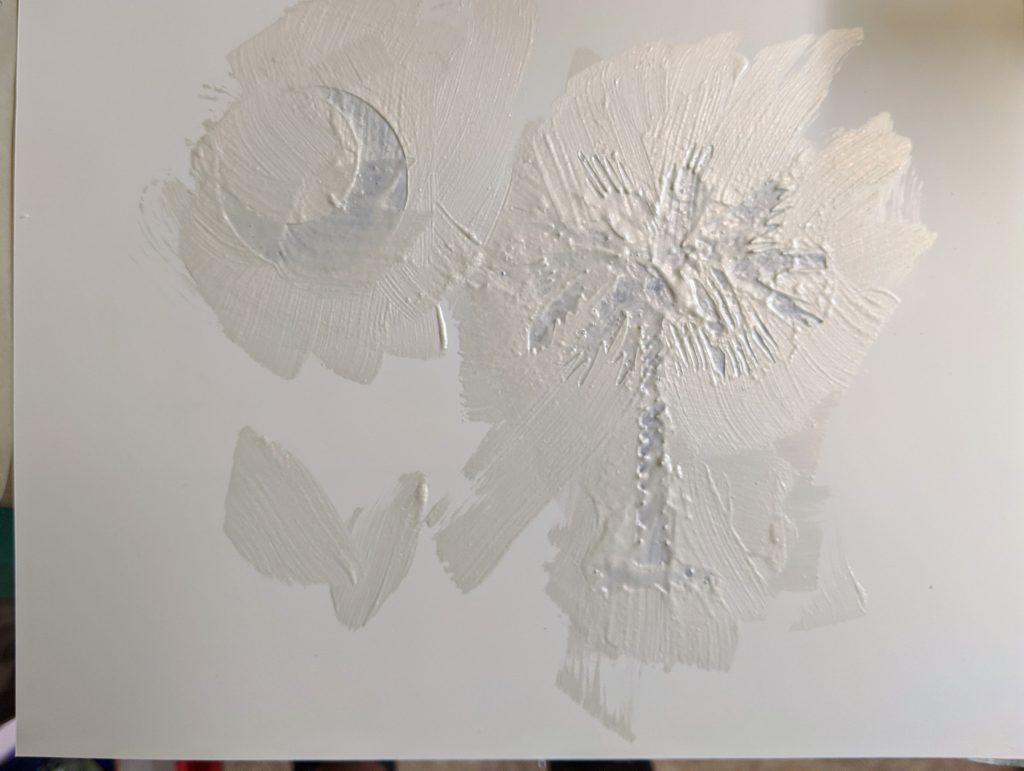
I also added several more palm fronds (leaves) to the palm trees on my two Rainbow Rows, and some grass on one and a little tulip type flower on the other. I think I’m ready to resin these, as well as the SC flag I made the other day.
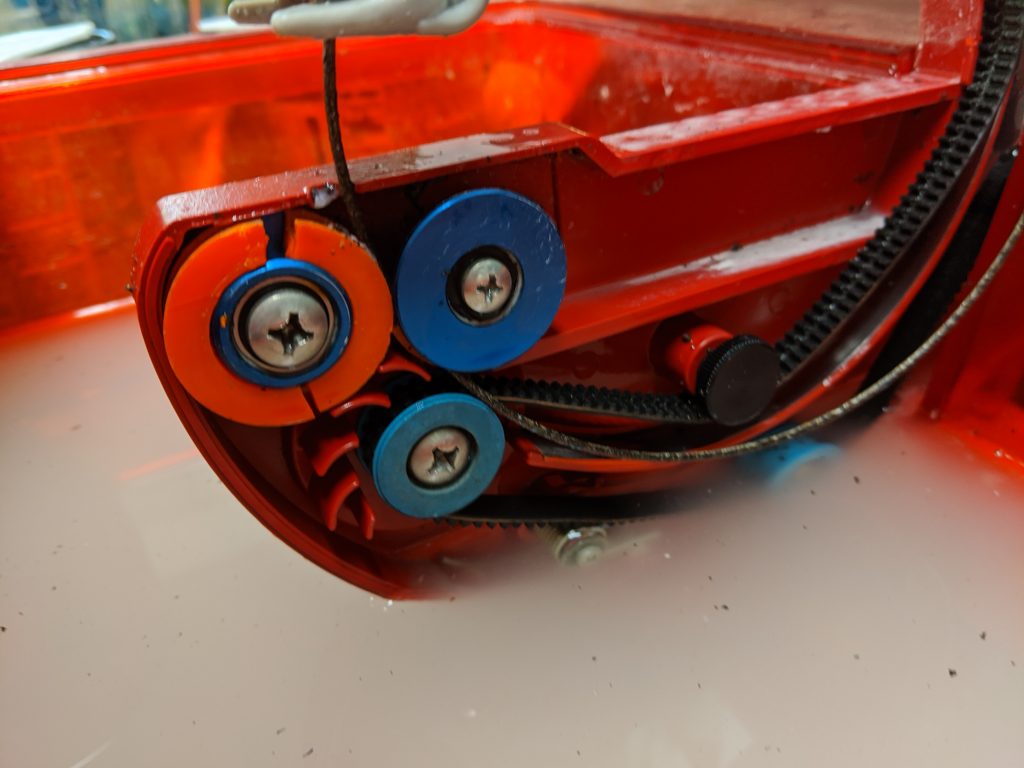
I have two more blue backgrounds cut for additional SC flags, so I thought I would go ahead and cut out the trees / crescents to go on them. However, after finishing the first Palmetto tree and starting on a crescent, my saw had an orange grommet failure and that halted progress on anything that requires the saw for a few days until I can get a replacement part and (hopefully) repair it. I say hopefully because I’m hoping only the orange grommet failed and I can get away with just swapping it out – but there could be other things going on that I haven’t noticed yet. Ah, the joys of using a ring saw!
My saw is a Taurus 3 and is many years old. I haven’t used it regularly in recent years and I probably should just replace all the rubber parts inside. I need it for projects like the Llama and the SC flag. For most of my other projects I generally cut the glass by hand and use a grinder to shape / smooth the pieces. I was able to finish up the crescent I was working on by hand cutting and then grinding the glass.
At least I can pour the resin on these projects while I wait for the replacement parts to come in the mail.
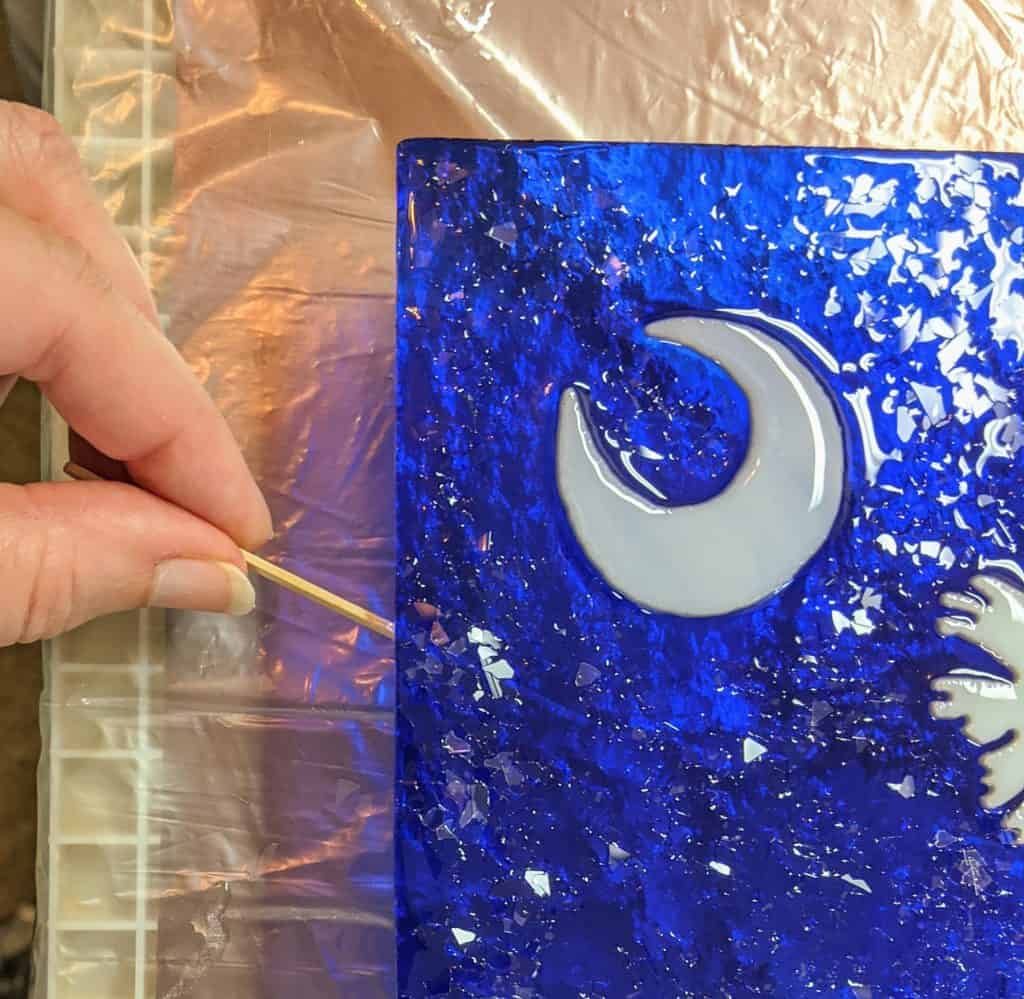
Today was a multitasking day. I have several projects going on at the moment: three rainbow rows (one just waiting for resin), two SC flags and an unexpected….llama? I’m also planning another resin/canvas project that will be a new area for me to pursue. So… today I glued down the SC flag I had cut out the other day:
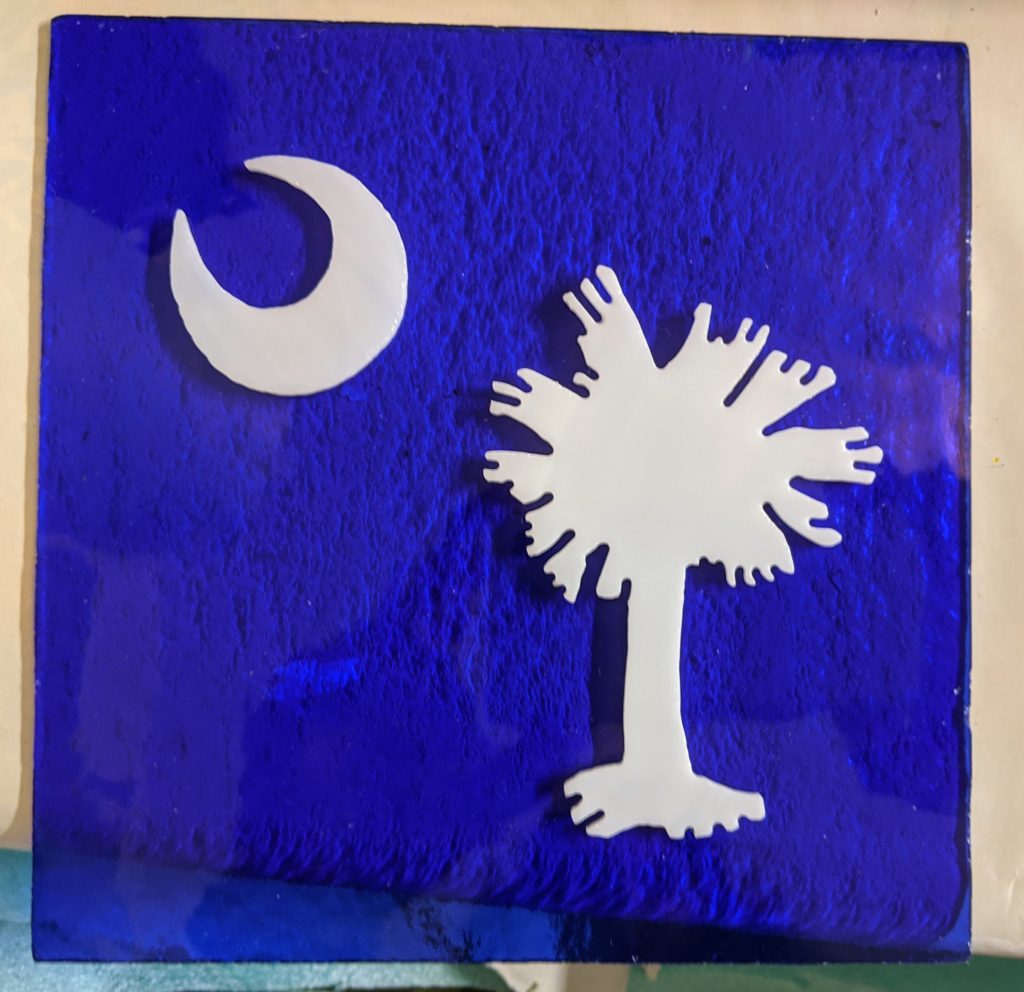
Next I decided to try out a new stencil I got this week. I have not used stencils before, so this is a new direction. I’m going to try painting the flag design on the glass and then coating it in resin. I think it will take several coats of paint, though.
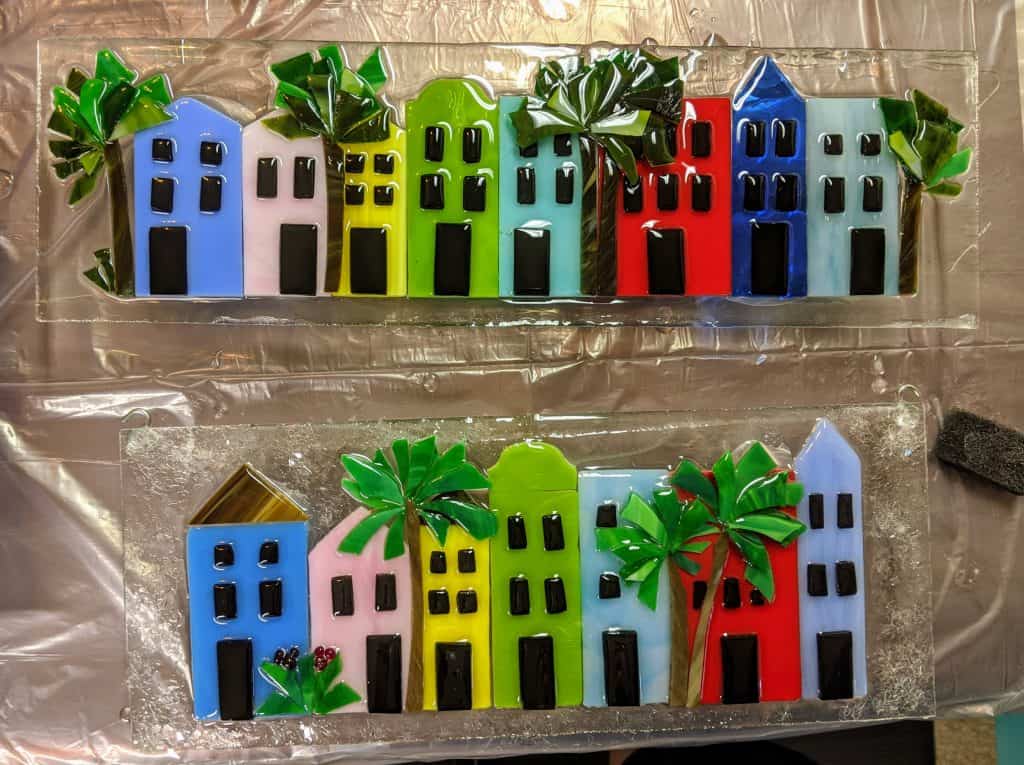
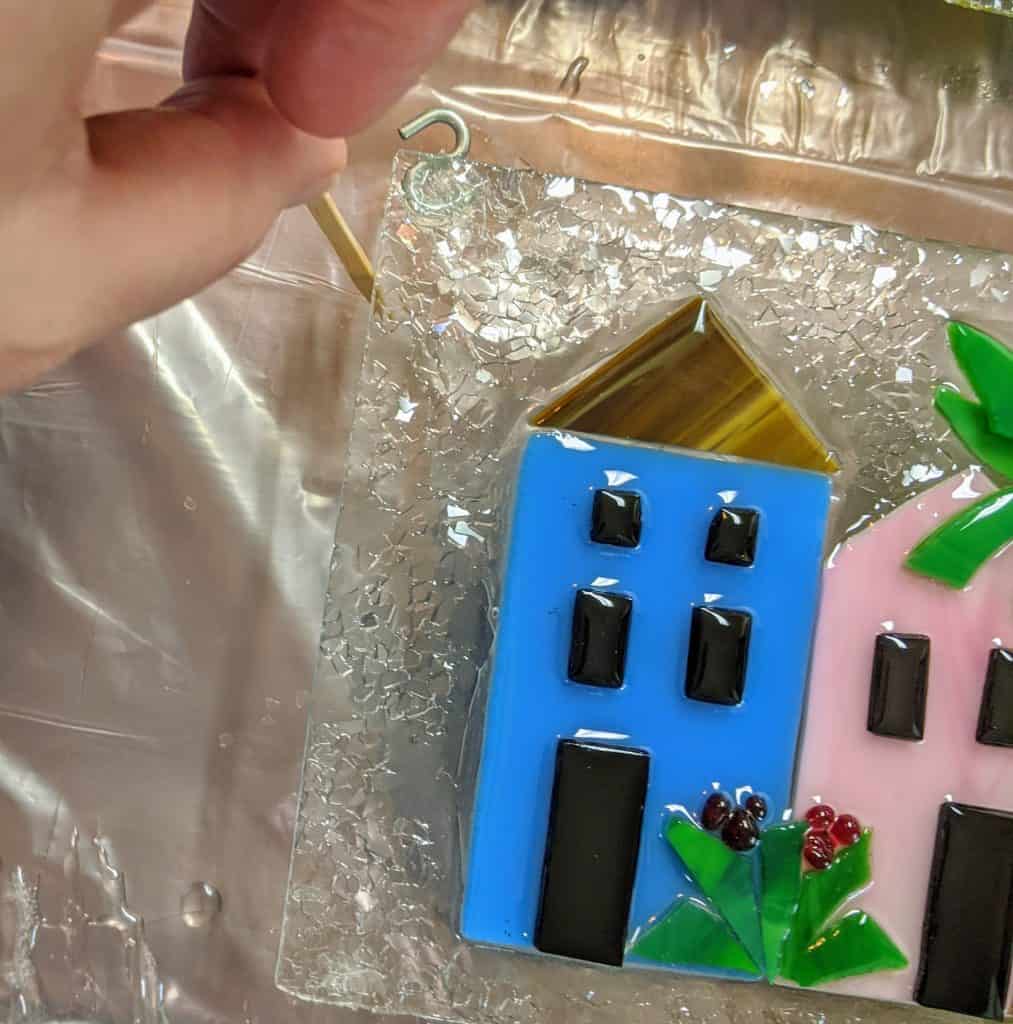
Next, I needed to glue down the tree trunks, windows and doors on these two Rainbow Rows as well as fill in the palmetto leaves / fronds. These two have one more house than my first two because I had a longer piece of backer glass. I got all of those glued in place this afternoon:

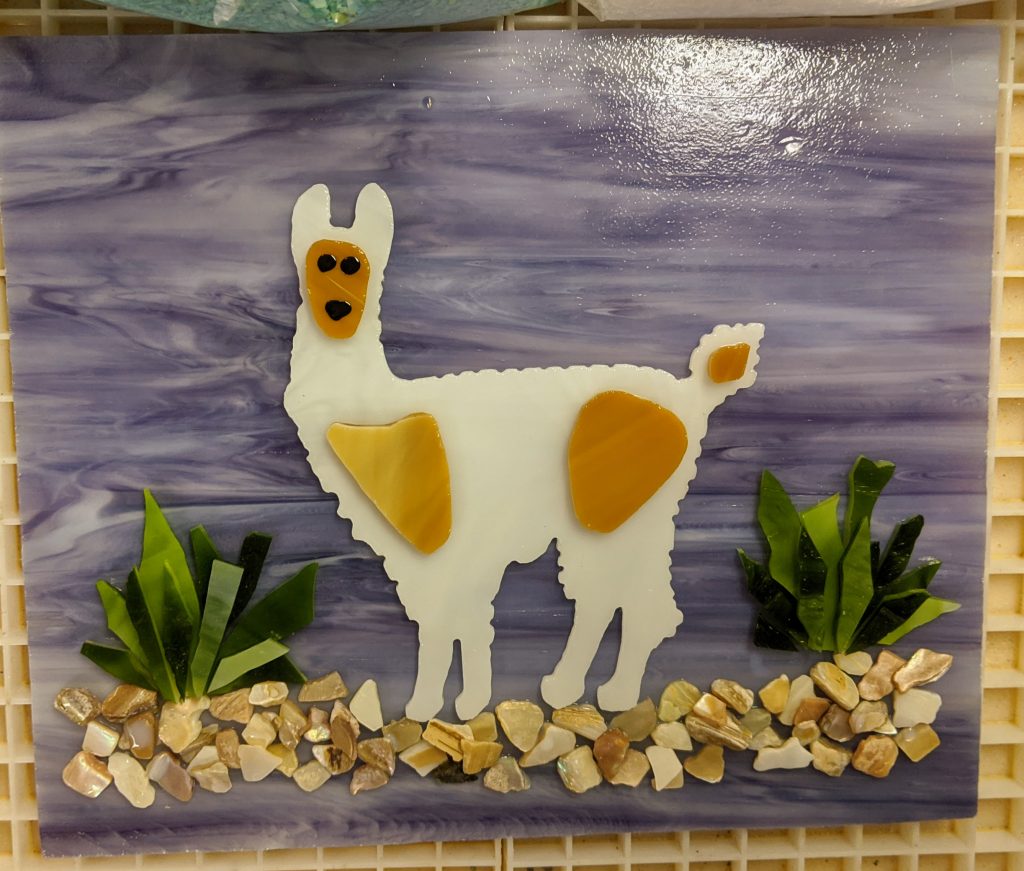
Finally, I had a request from a friend to make a Llama….with purple. Hmm. I have a couple of different shades of purple glass, and she chose the darker shade. In the meantime, I googled pictures of Llamas, printed one out and traced it onto some white glass. I coated the marker lines with mark stay because I needed to use the saw for this level of detail.
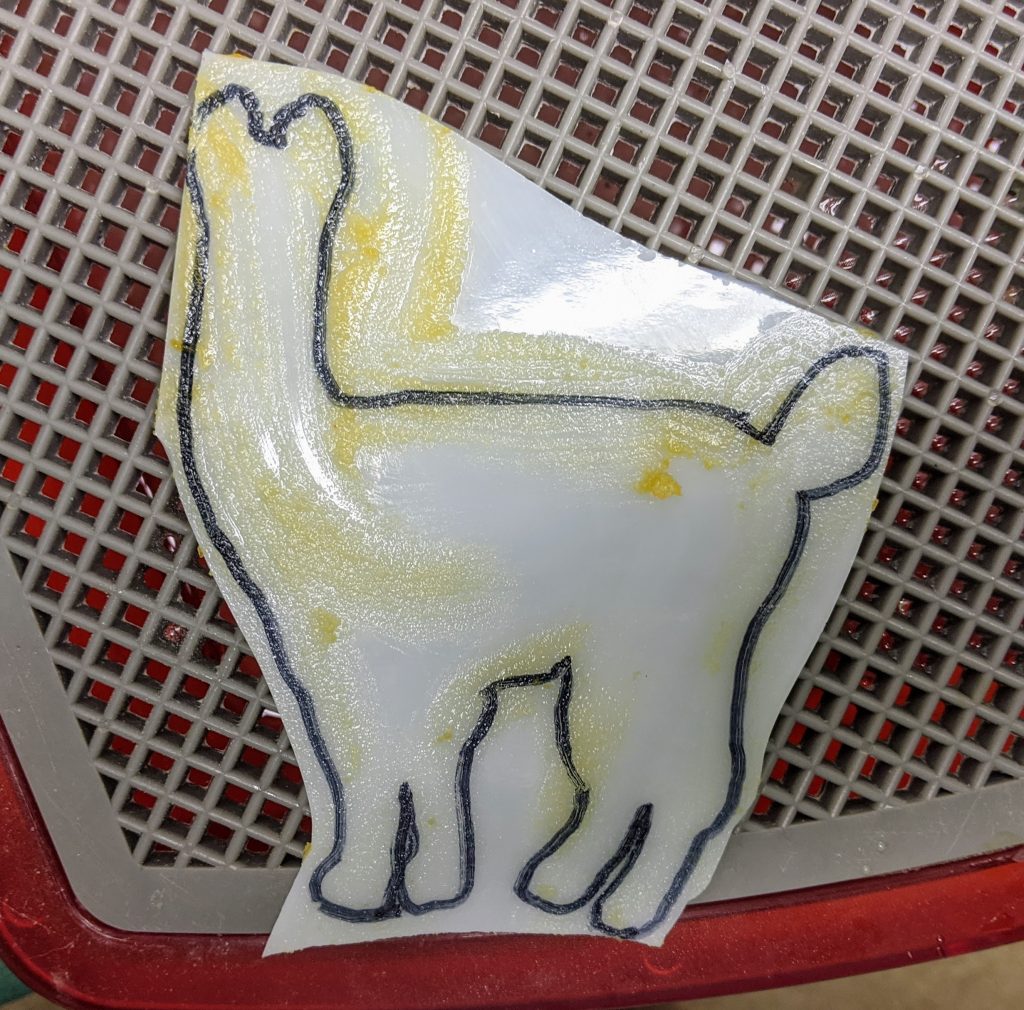
First I cut the Llama out, then I went back and made the “fluff” around the edges of the Llama with a second pass with the saw. My friend indicated that she likes lots of colors, so this Llama is going to have some spots. Tomorrow I hope to be ready to glue him / her to the purple art glass background and then I’ll have several items ready for resin.
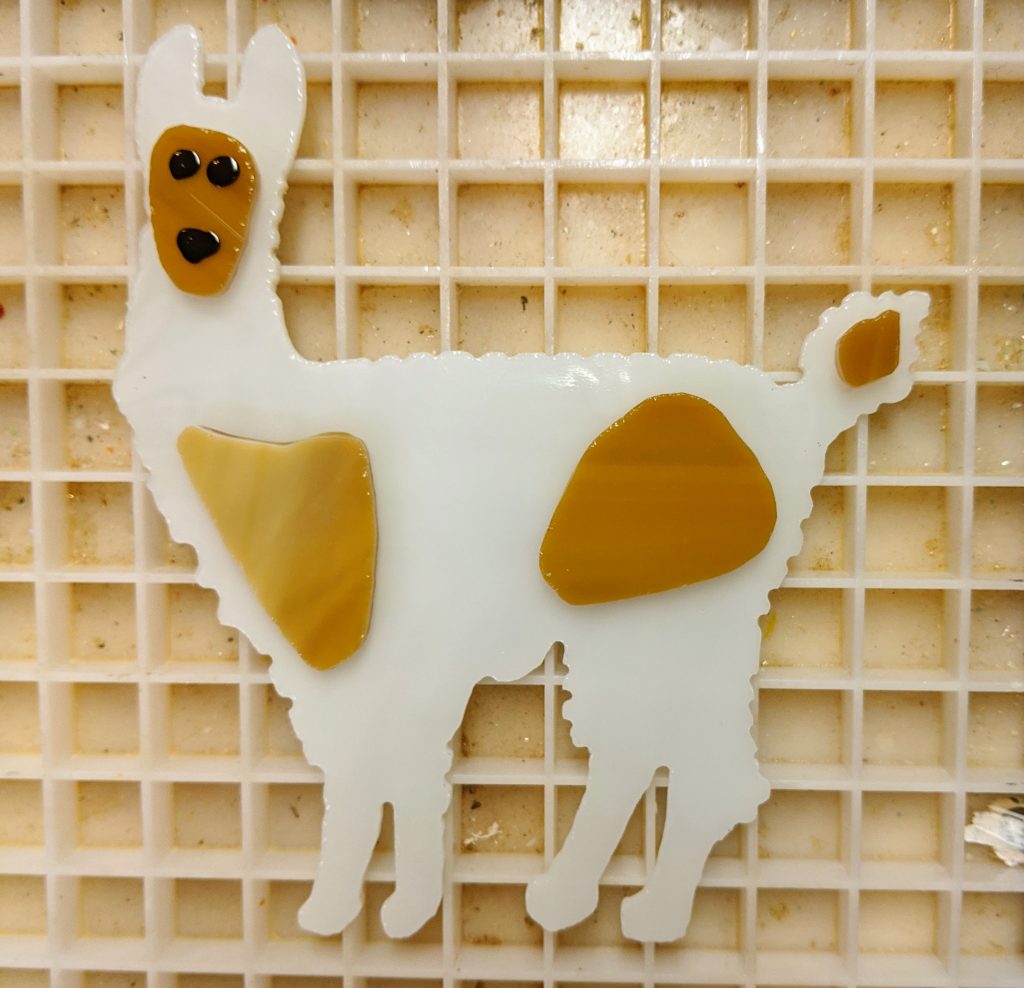
If I ever make another Llama, I think I will make the spots fuzzy like the outer edges of the Llama. I already glued these spots in place, but I may try to pry them off tomorrow and fluff them up a bit.