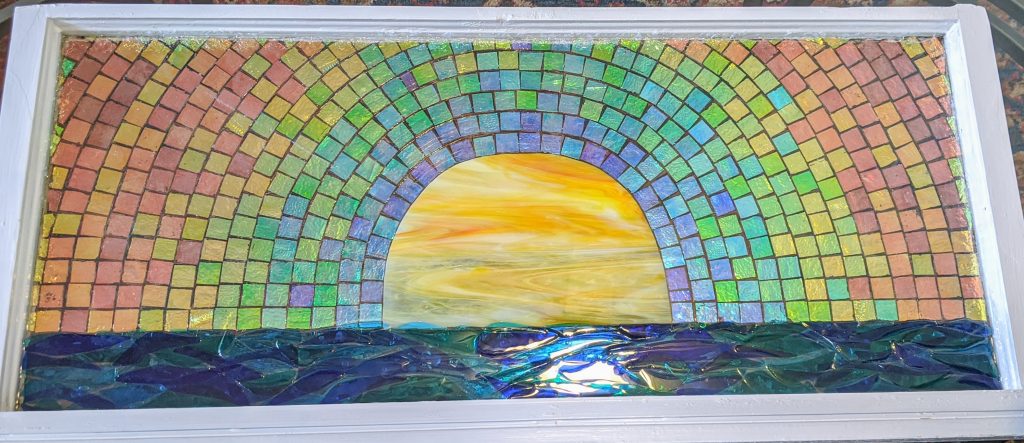
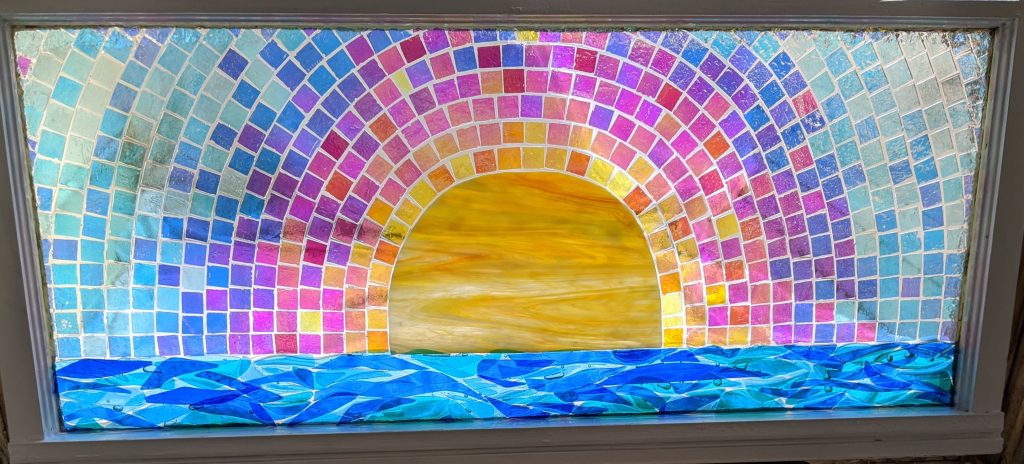
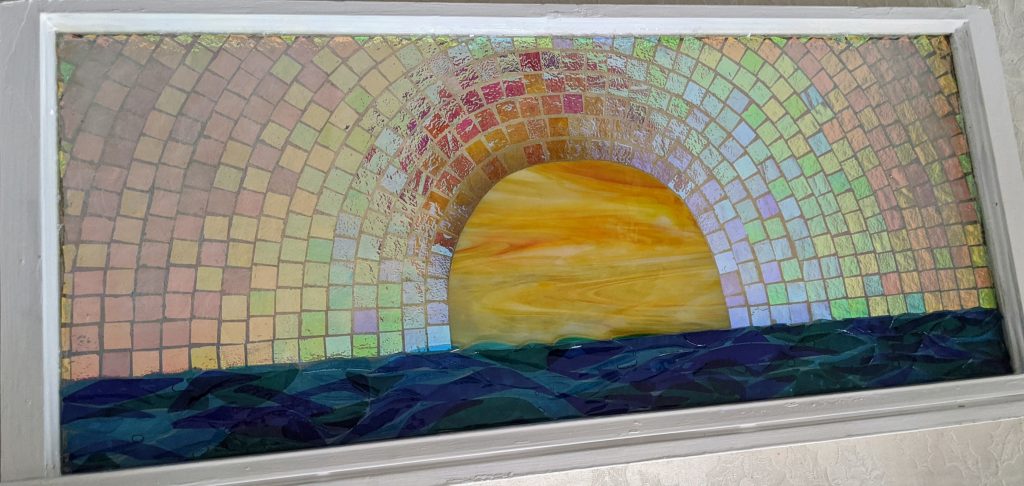
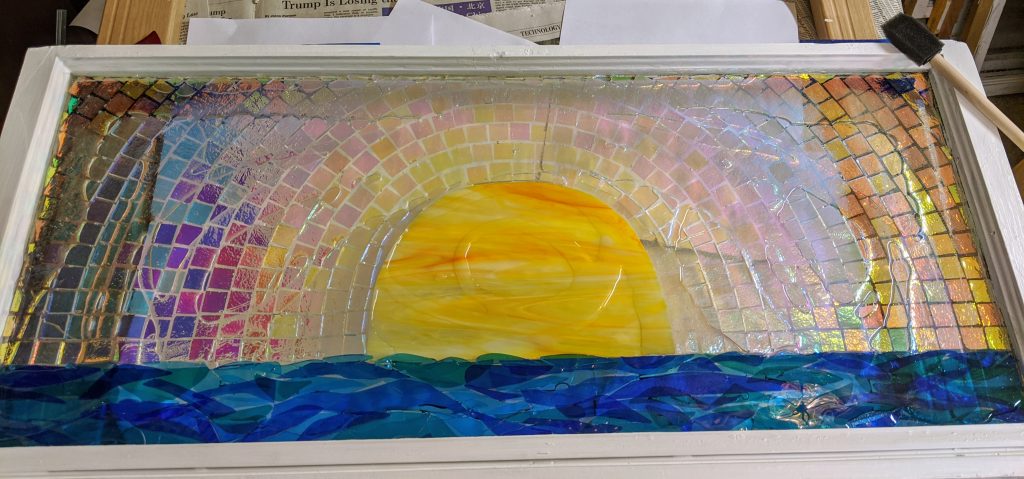
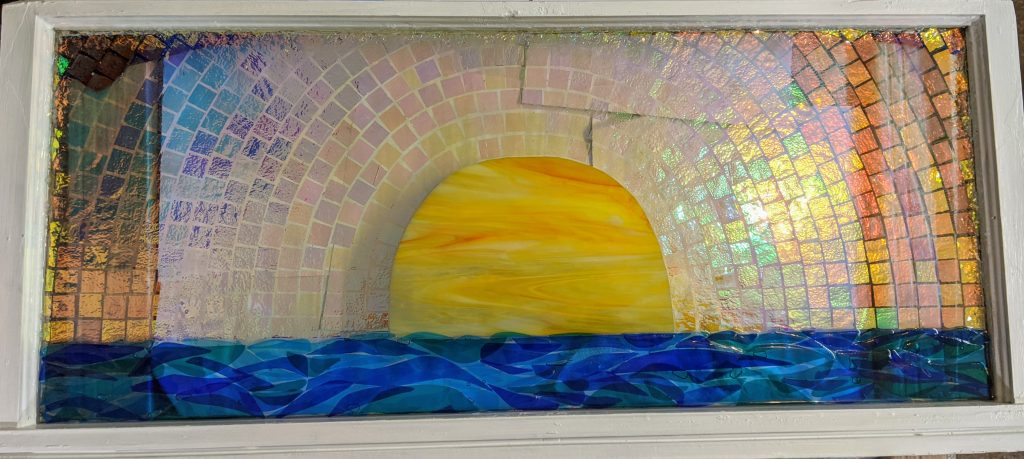
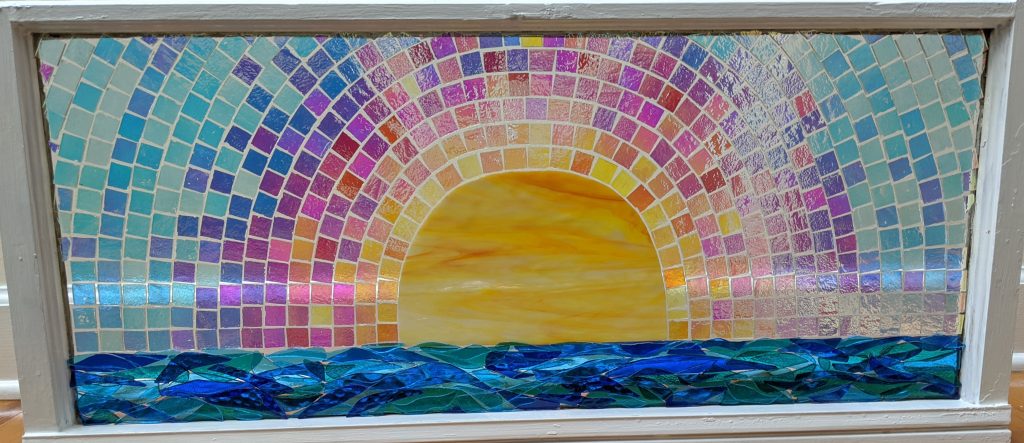
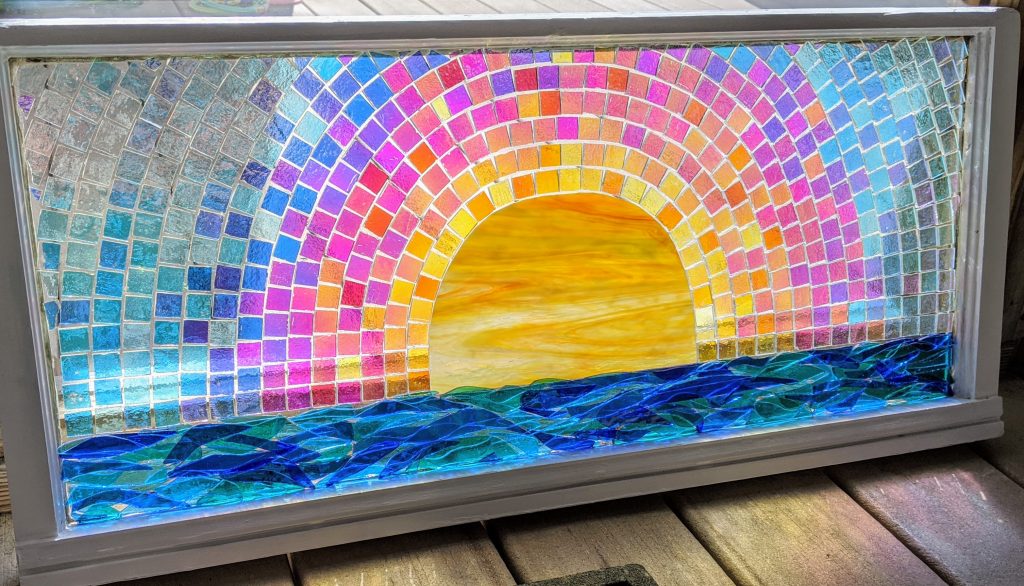
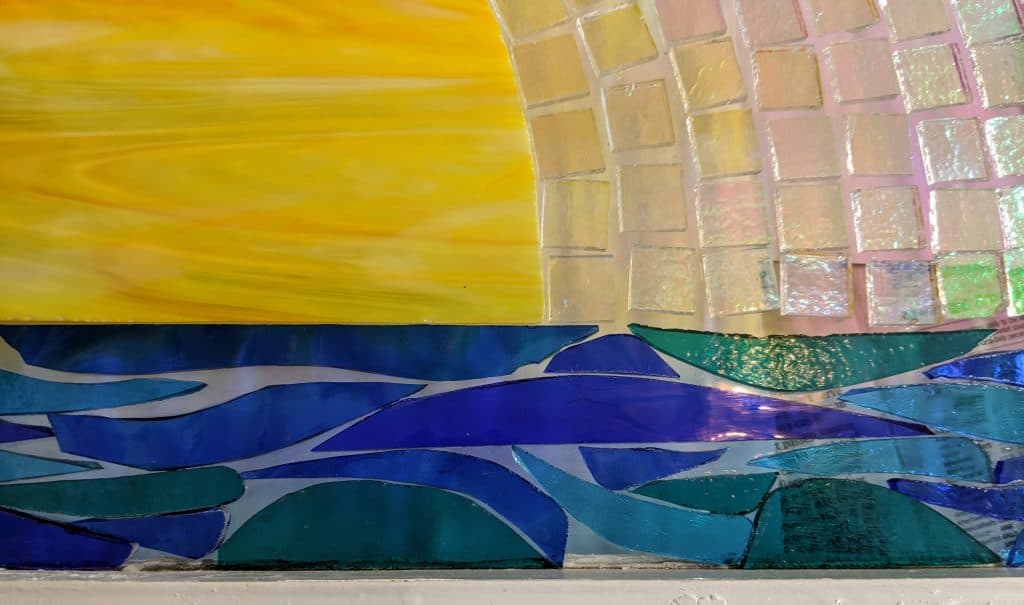
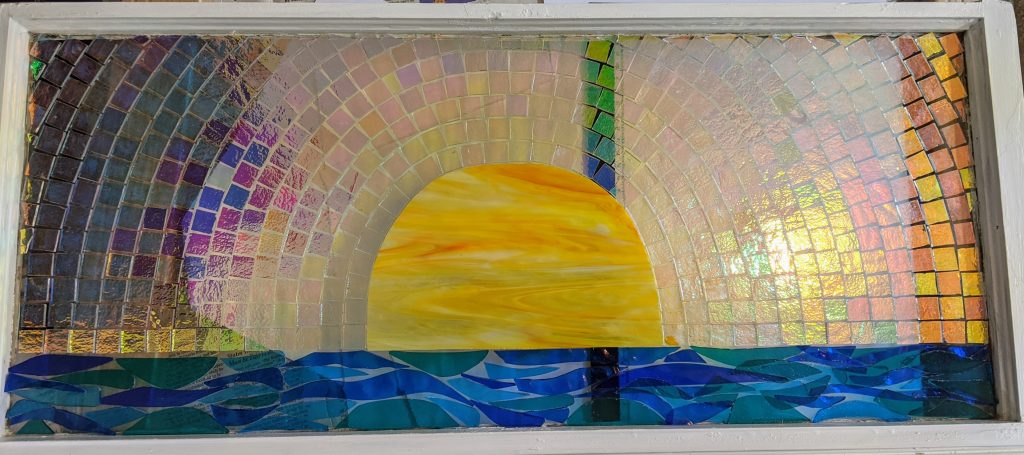
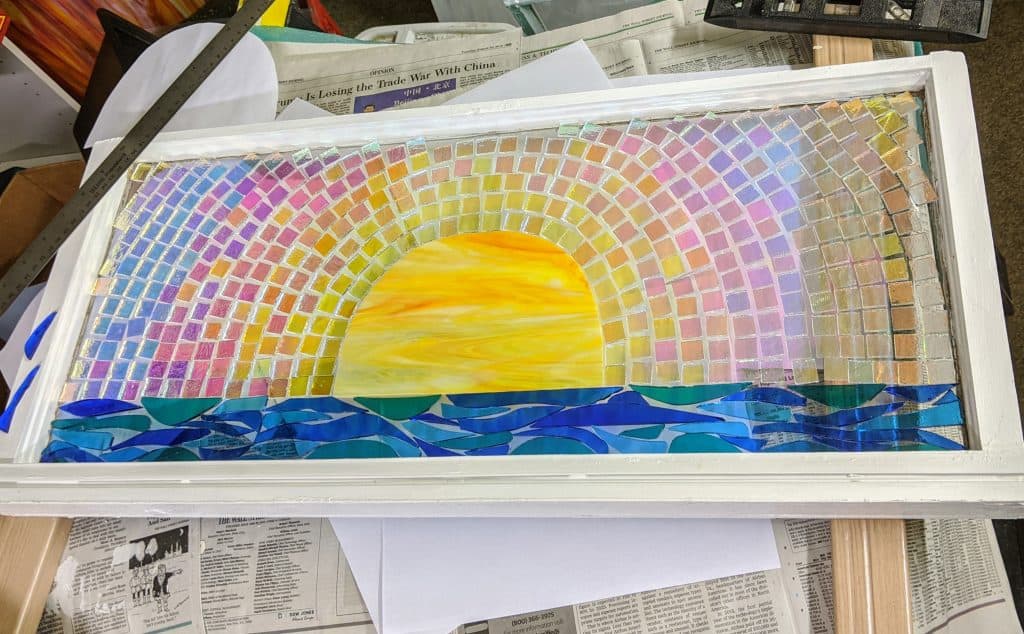
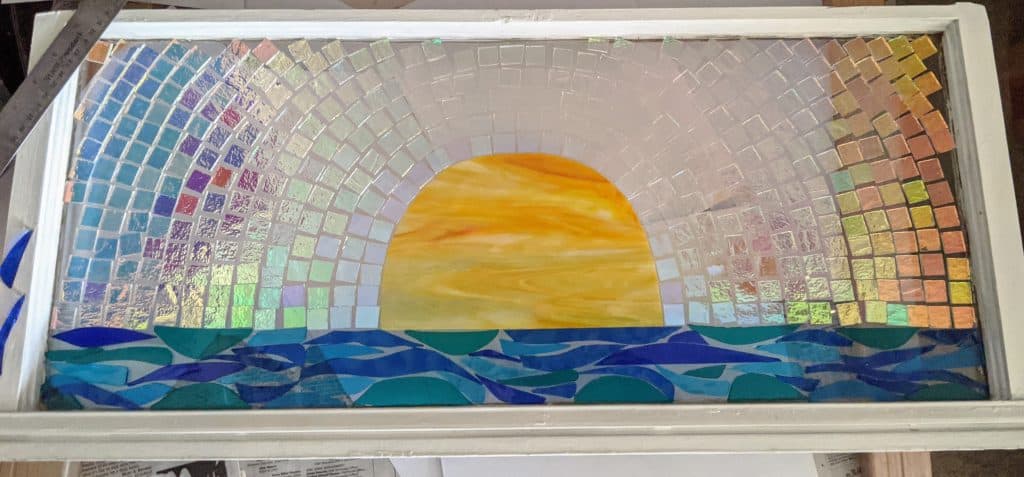
Sunset – stained and dichroic glass coated with resin and glass chips. Approximately 30″ x 13.5″. This piece has many different looks depending on the ambient lighting. All of the below photos are of the same mosaic in different lighting conditions.

Glass of Sherry
Sunset – stained and dichroic glass coated with resin and glass chips. Approximately 30″ x 13.5″. This piece has many different looks depending on the ambient lighting. All of the below photos are of the same mosaic in different lighting conditions.
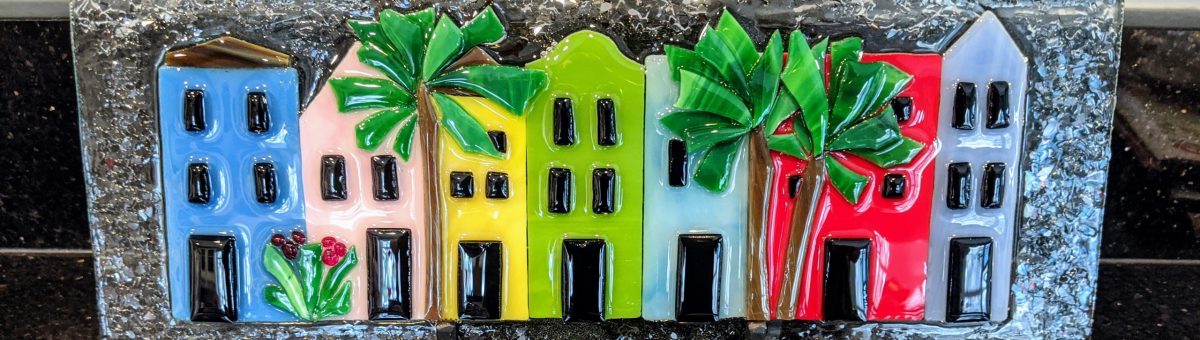
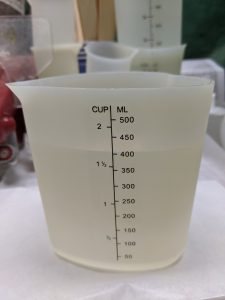
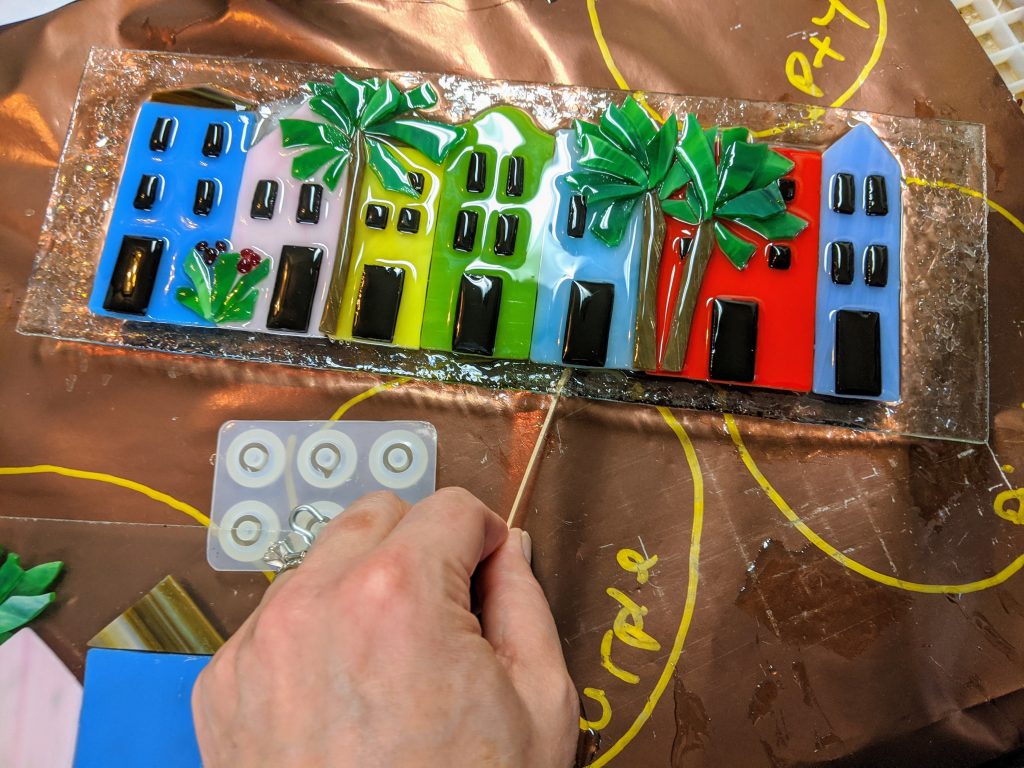
Today was the day to pour resin on the Rainbow Row / Sunset mosaics. I originally planned to do all three, but at the last minute I decided to make one of the Rainbow Rows “hangable” and affixed hardware for that purpose to the back of the piece, so I couldn’t really pour the resin on it today (need to give the adhesive time to cure). I used E6000 glue for the hardware, but I will also coat it with resin later. I started off by mixing my 400 ml of resin. It was 69 degrees in my work area, so I warmed the two parts a bit with my heat gun before mixing them.
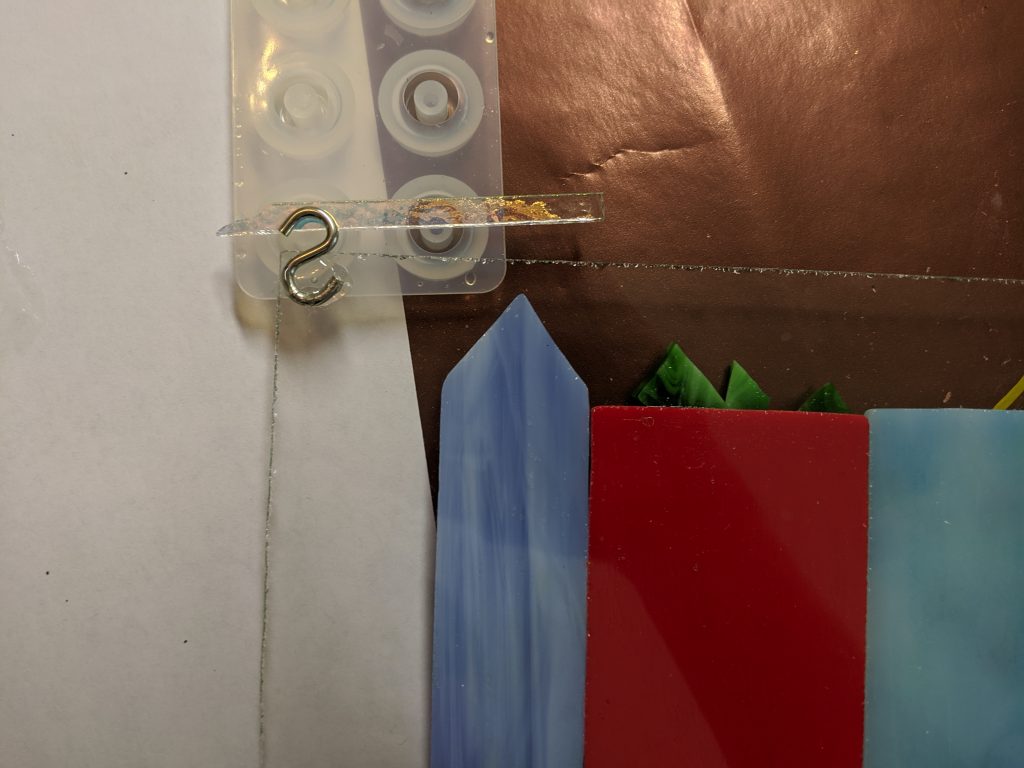
I used a piece of scrap glass to prop up the hardware while I waited for the glue to set.

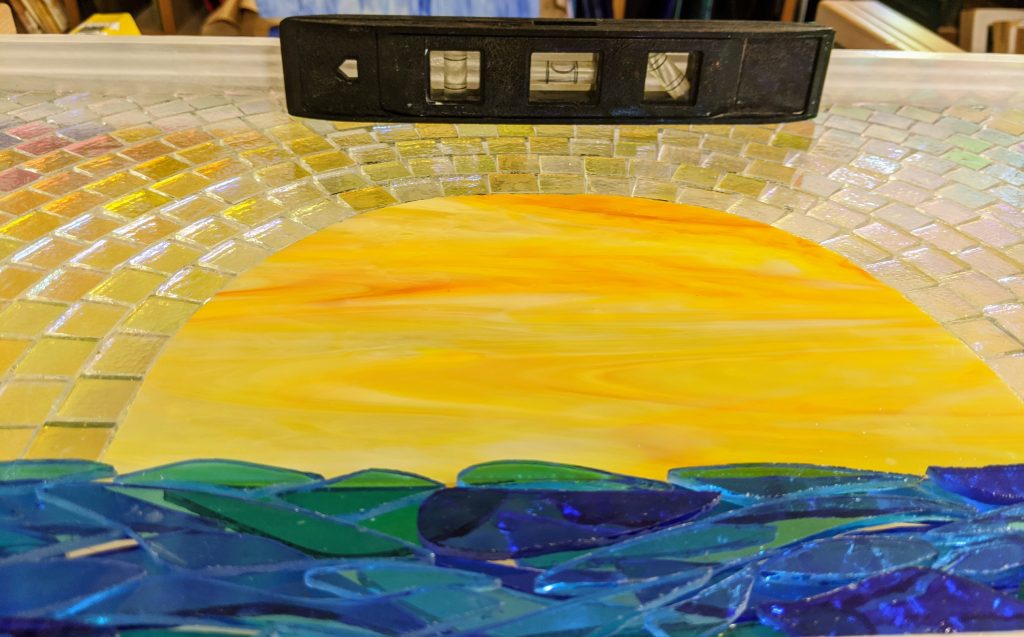
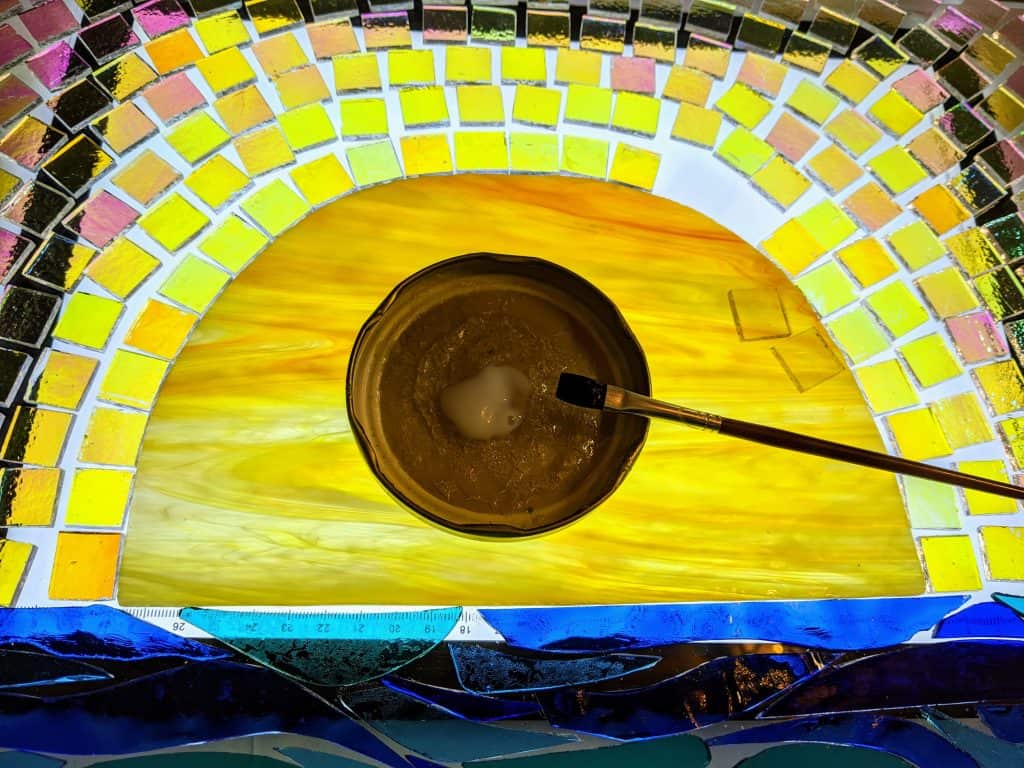
Next I used some scrap glass as “shims” to level the sunset mosaic. This is important so the resin isn’t uneven.
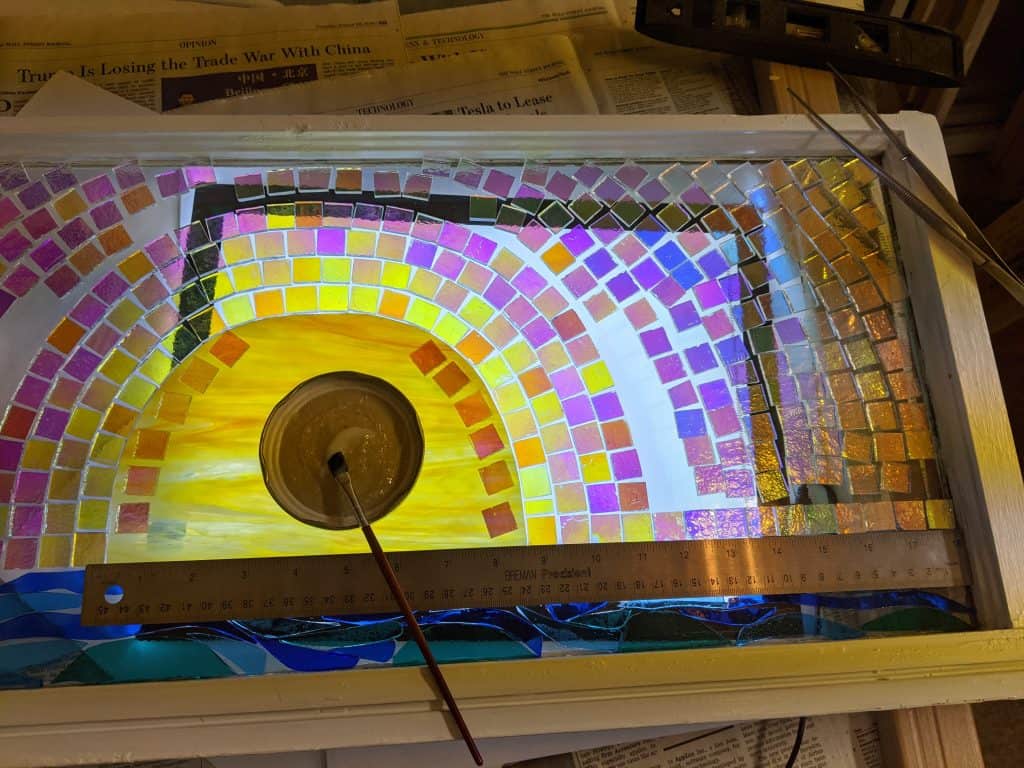
Once everything was level, I poured the resin all over the piece and spread it using a sponge on a stick. Once the resin was pretty much evenly distributed, I used the heat gun to remove bubbles and move it around for even coverage.
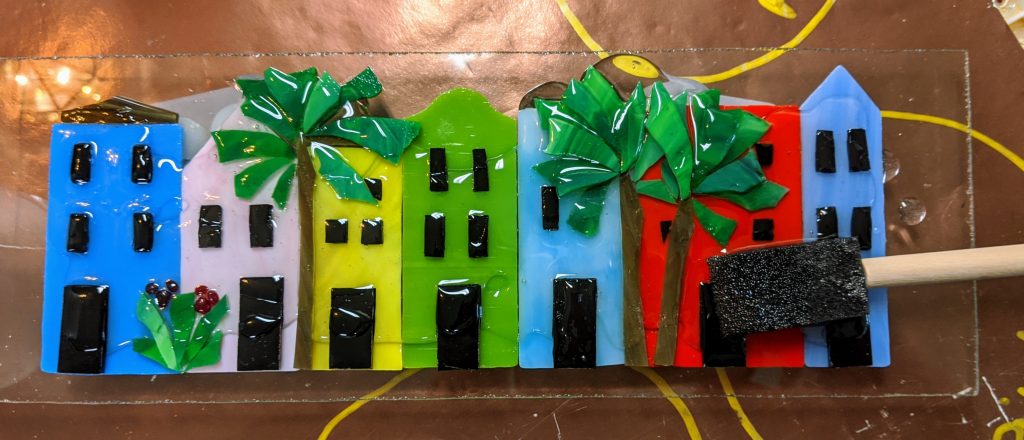
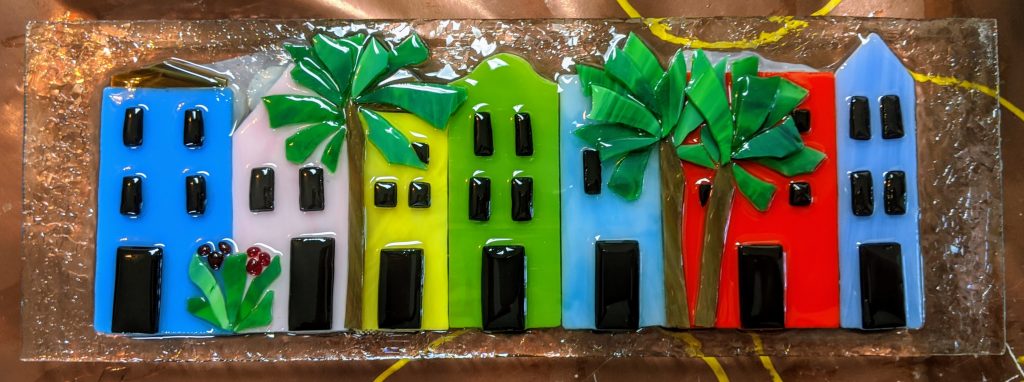
Next, I did the same with the Rainbow Row piece. It is much smaller and unframed, so I used much less resin and relied on spreading it. This helps reduce the amount that drips over the edges, as well.
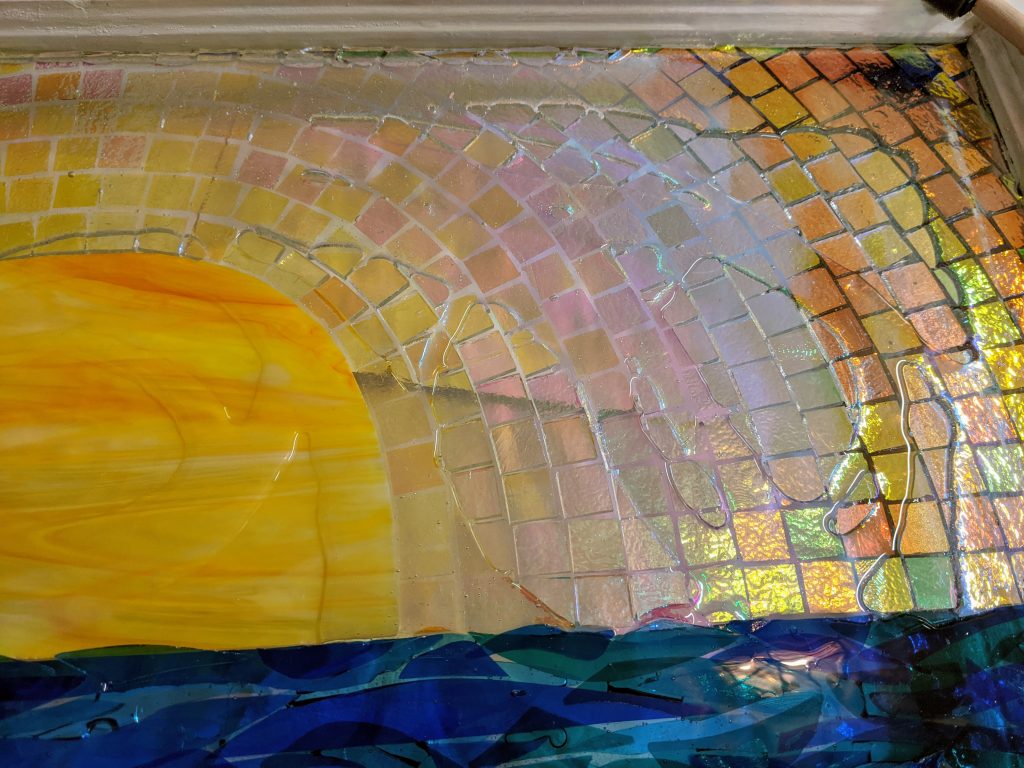
Once the resin was coating all of the surfaces, I sprinkled some clear glass chips around the edges for sparkle and interest. Then, for the next 30 or so minutes, I used a craft stick to scrape excess resin from the edges and underside of the piece. This has to be repeated as needed until the resin sets up enough to stop moving. Any that I miss can be removed afterward, but it is *much* easier to do it now. I have also cracked a few finished pieces trying to remove the drips in the past, so I spend the time up front in order to avoid the scraping later.
I also sprinkled some clear glass chips around the very edges of the sun’s rays adjacent to the frame. I did this to reduce the jagged appearance of the edges of the mosaic.
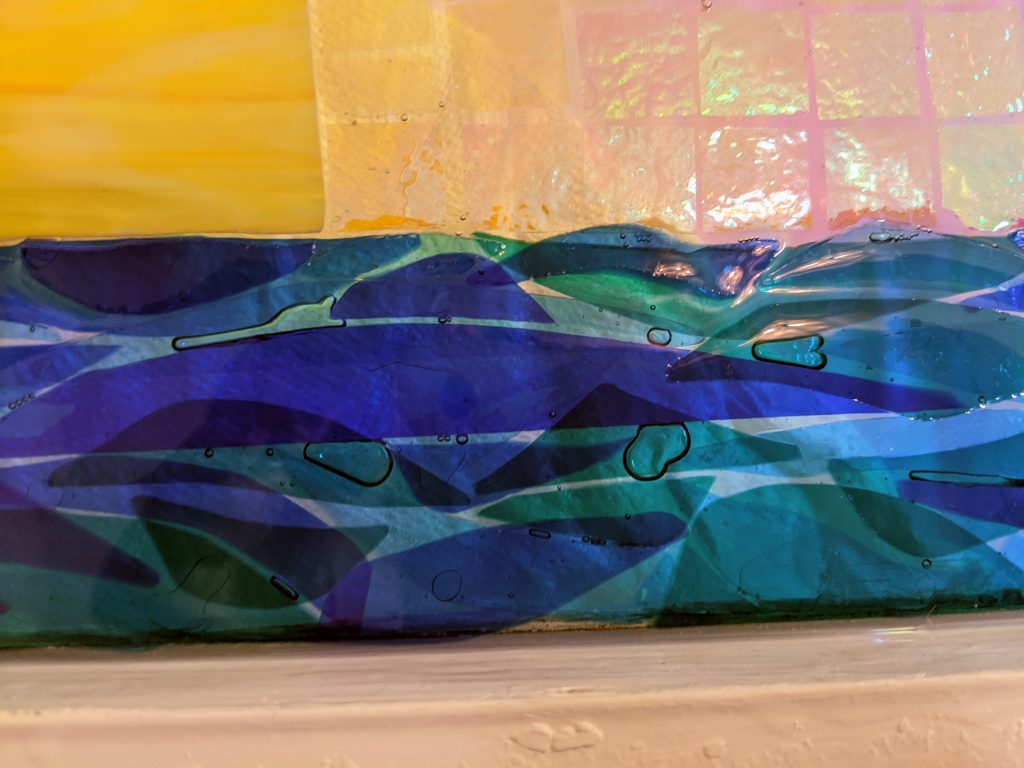
One thing I should have anticipated, but didn’t, is that there were bubbles in the resin that I couldn’t get to under the waves. This was due to the layering of the glass for this part of the piece. In the future, I will have to consider pouring the resin on the first layer, then adding the additional layers afterward. This will be a bit tricky due to the timing involved, but should reduce the bubble issues. Luckily these bubbles are part of the churning sea, so they aren’t as bad as they would be if they were in another area.
During this time, I also use the heat gun to remove surface bubbles on both pieces. This has to be done until the resin is somewhat solidified.

Now we wait! Tomorrow I should be able to get some better photos (and clean up my work area).
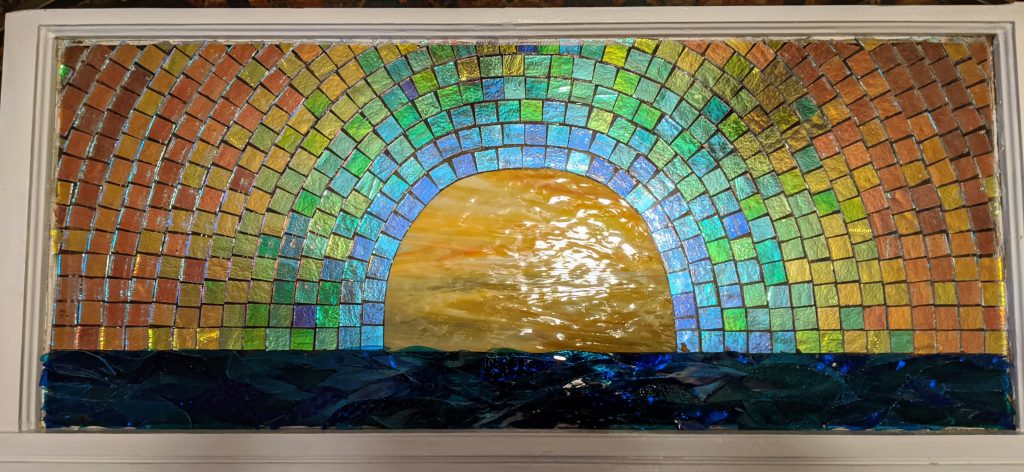
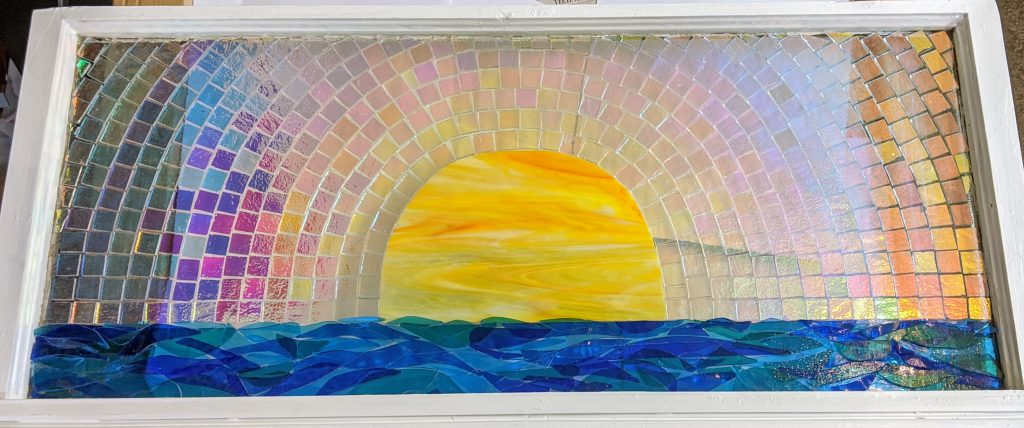
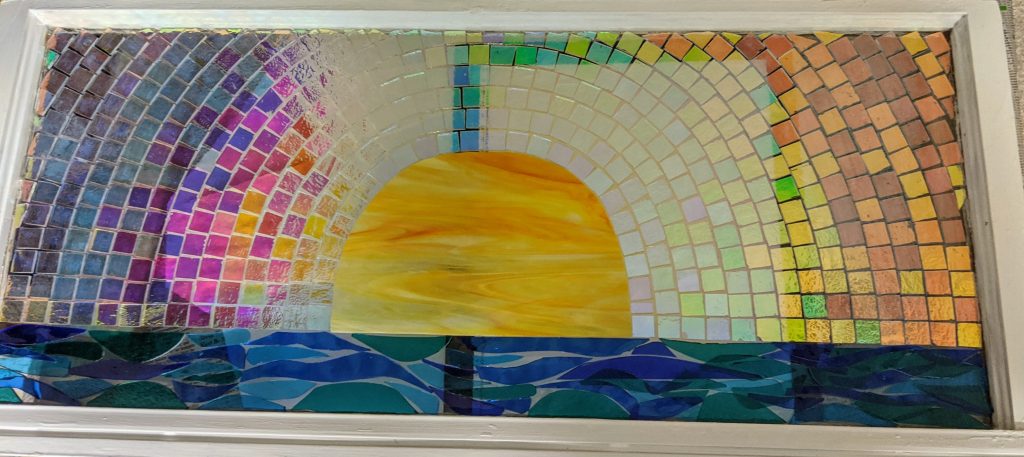
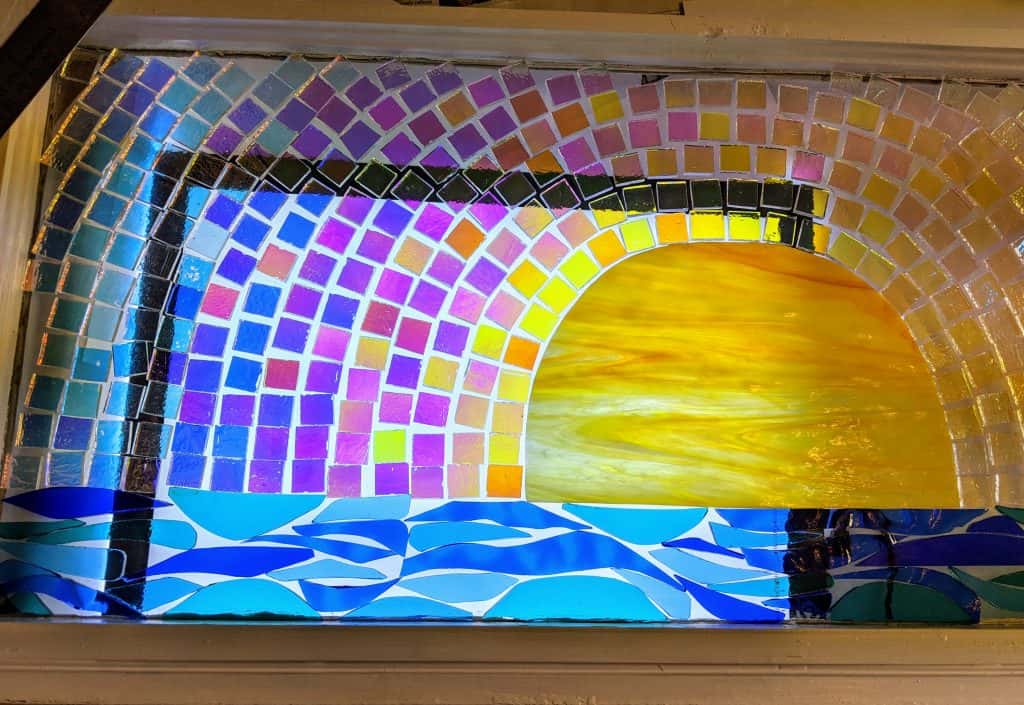
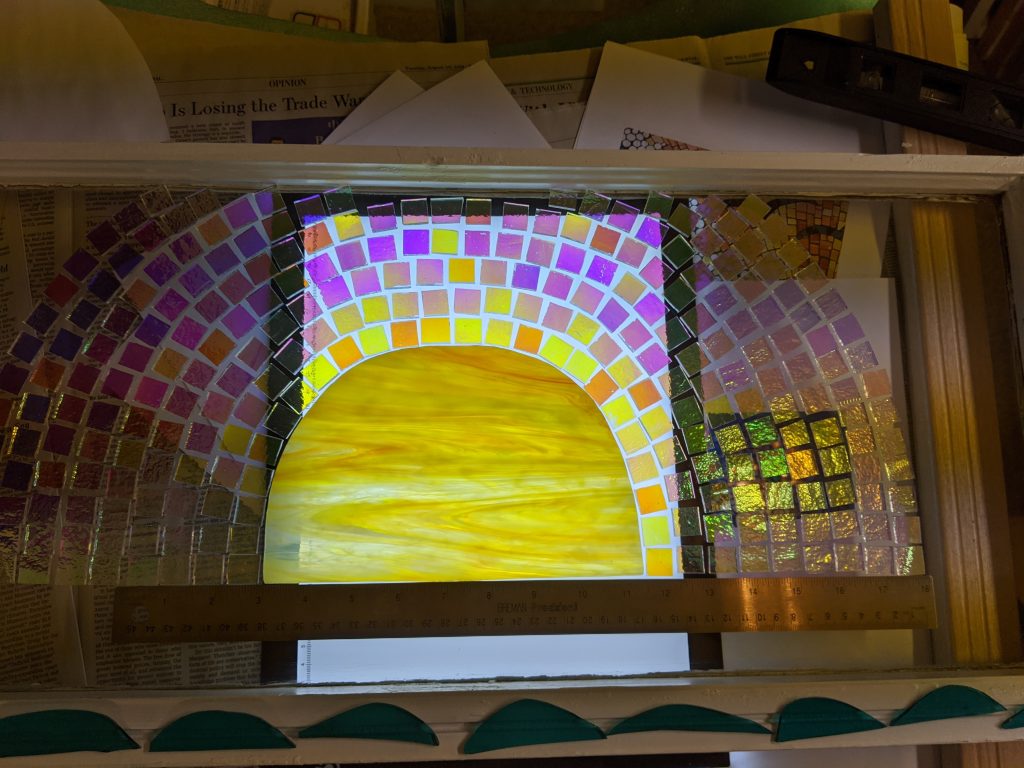
I had a few errant pieces of glass to glue in place today, but I was able to get a nice snapshot of how the mosaic will look in reflective light (in the evening). I’m really pleased with the look. The neat thing about the dichroic glass is your mosaic has two looks – the evening / night look (1st photo) and the daytime / bright sun look (2nd & 3rd photos). Even though I still have to pour the resin, I’m really happy with how this piece is shaping up.
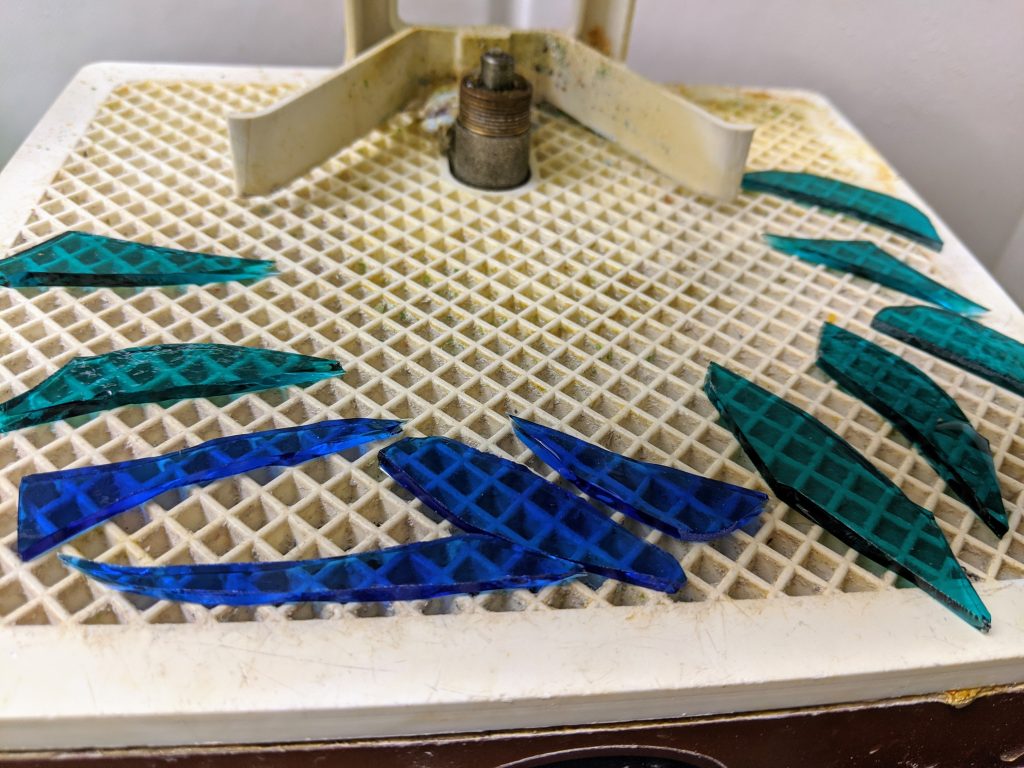
I was able to make a few more waves Tuesday, but managed to really slice one of my fingers while grinding the glass, so I didn’t get as much done as I had planned. Today my finger is feeling better and I was able to make some more waves (this time I was smart and covered my fingers with band aids before I ground the glass for the waves).

I was able to fill in quite a bit of detail on the sea / waves after all. My next step is to wait for the mosaic adhesive to dry, then I will be able to hold the entire window up to a light source to check for areas I want to augment. My light tray only covers about a third of the window at a time and I need to see “the big picture”.

Once I’ve seen the fully lit window, I’ll be able to plan the finishing steps, which will be pouring the resin coating and then decorating some areas of the resin with glass chips / frit. That’s the part I still need to plan. I’m also considering adding a layer of glass around the edges of the sun’s rays (adjacent to the frame), though I haven’t figured out exactly what yet.
I spent most of the day Monday working on gluing down the pieces I had already cut for the rays of the sun, and making waves to start layering the ocean below the sun. First I rough cut some waves, then used my grinder to shape and smooth the edges.
After I got the above pieces ready, I realized that I would need to glue the dichroic glass I had cut and laid out for the suns rays before I started working on the layering for the waves, so I set out to do that.
Using Mac mosaic adhesive and a small paint brush, I spread a thin layer of adhesive onto each piece and then position it where I want it. I already did this step for the main ball of the sun and the first layer of waves last week.
Using a light tray to help me see what I was doing, I worked one row at a time from the inner row to the outer edges. I decided to place the pieces a bit closer together than I previously had them laid out, so I had to rearrange some and also cut quite a few more squares.
Once I had all of the rays glued down, including the smaller filler pieces at the edges, I started gluing the second layer of waves in place.
I will need to make quite a few more waves, but I at least got a start on them today. Gluing the rays in place took most of the day. I really want the mosaic adhesive on the rays to have plenty of time to cure before I pour the resin, otherwise they will be cloudy.

Hopefully I’ll have time on Tuesday to put some additional waves in place. I also need to plan how / if I will embellish the resin when I pour it. I think I would like to do something at least around the edges of the frame.
I needed to cut some more dichroic squares to fill in the rest of the background on the sunset window, and I got some time this afternoon, so I worked on that.
I filled in as I cut, leaving the smaller pieces I will need to cut to fill in the very edges for later. I have been having second thoughts about the overall look of this the past several days, so I haven’t glued anything in place yet. I also worked on the water / waves underneath the sun. So far I’m pretty pleased with the look of the waves. Now the challenge will be gluing the waves in place without jostling the rest of the pieces around too much.
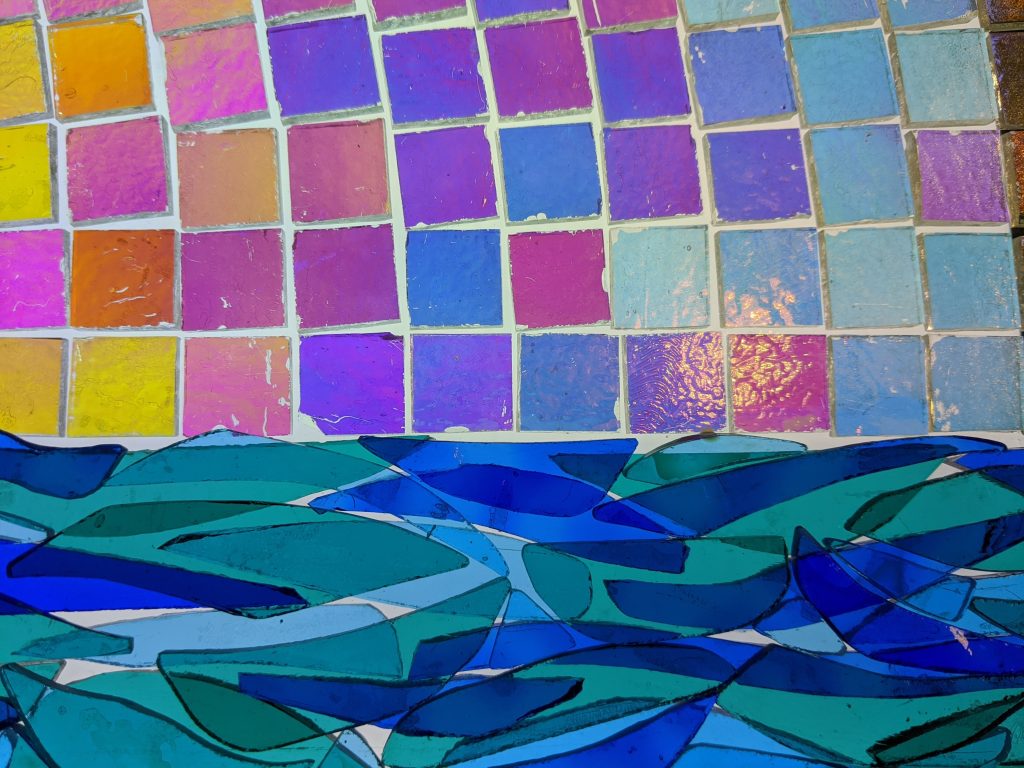
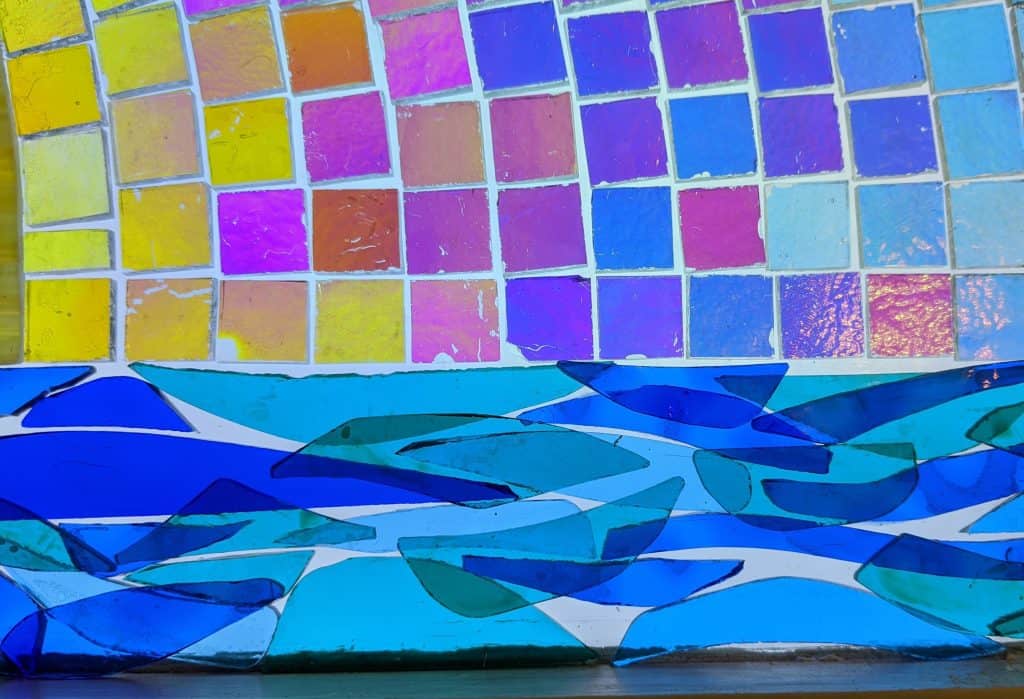
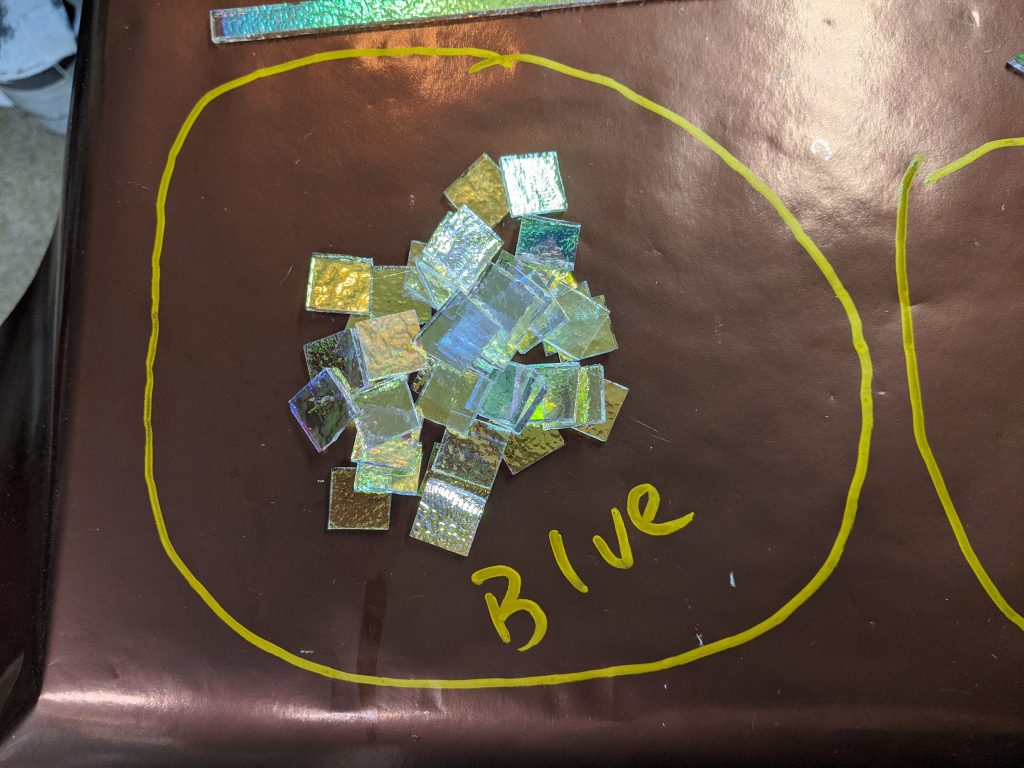
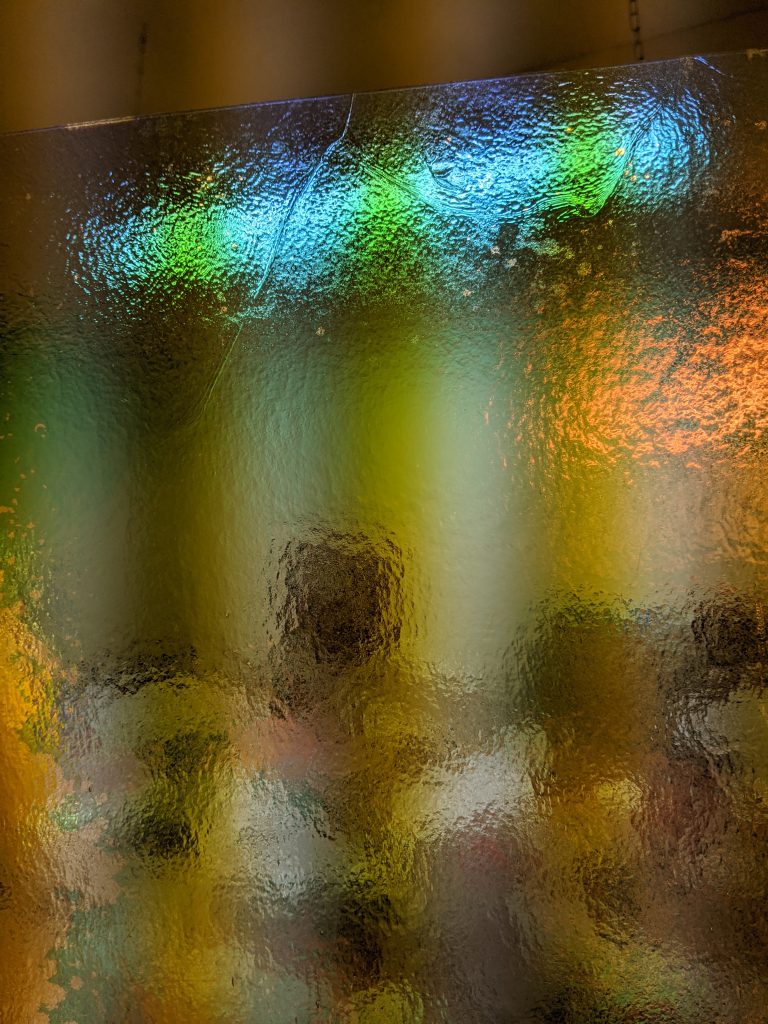
The colors of this glass when the light table is underneath the window are surprisingly bright. I love working with this dichro glass. I am hoping the look of the blue squares I added on the edges today will have the effect I’m going for, as the reflecting color of the dichroic coating is metallic red on these pieces as opposed to silver / gold on the rest of the sunset’s rays.

I tried to get some photos with the light table off and a bit more reflective light, but it’s pretty challenging to do with my phone in this lighting. Later on I’ll get my husband to help with the photos, as he’s got better equipment and a lot more experience taking photos.
I still need to glue down these pieces, then start cutting smaller pieces to fill in the gaps, especially around the edges and between the waves. I might try using some decorative flakes in the resin when I pour it, but I’m several days away from getting to that point right now. At least my confidence is up quite a bit now that I have most of the window filled in. I was procrastinating because I was afraid it would look too simplistic, but the progress I made today has made me more satisfied with the overall look. I will probably layer the waves to give them more texture, so they will have more depth (no pun intended).
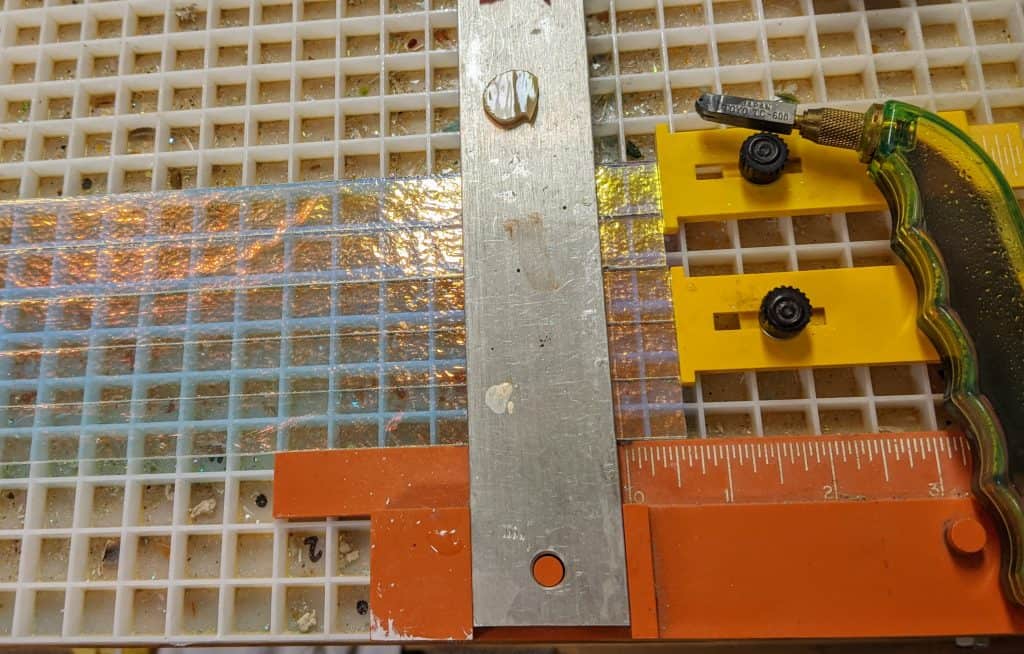
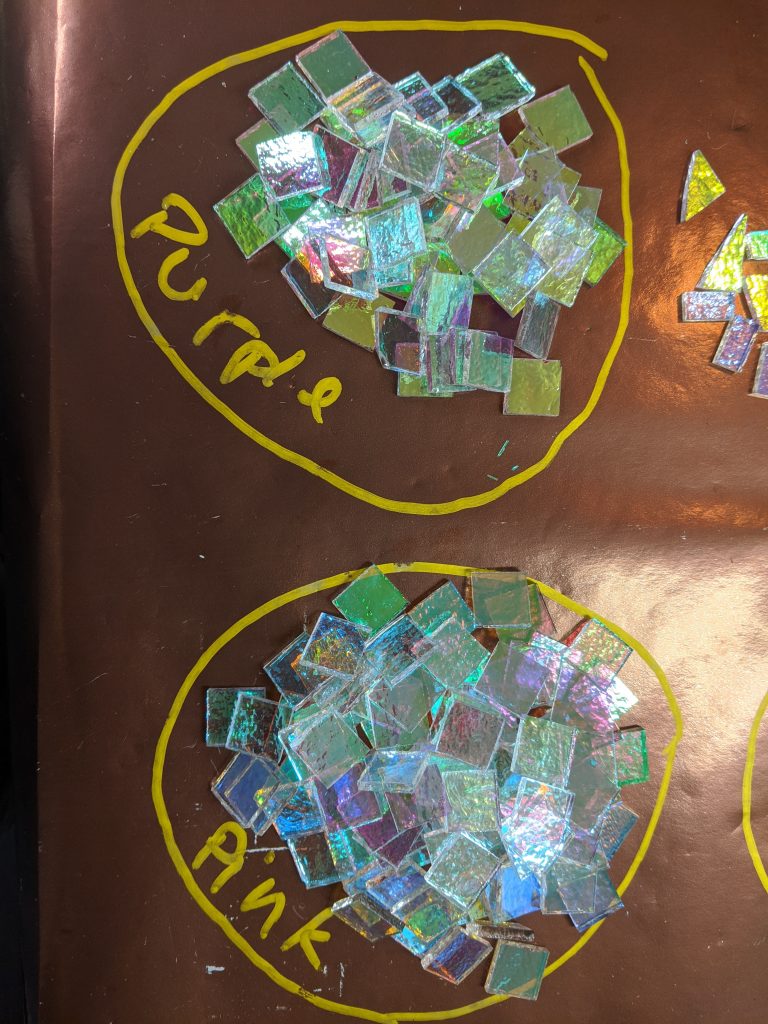
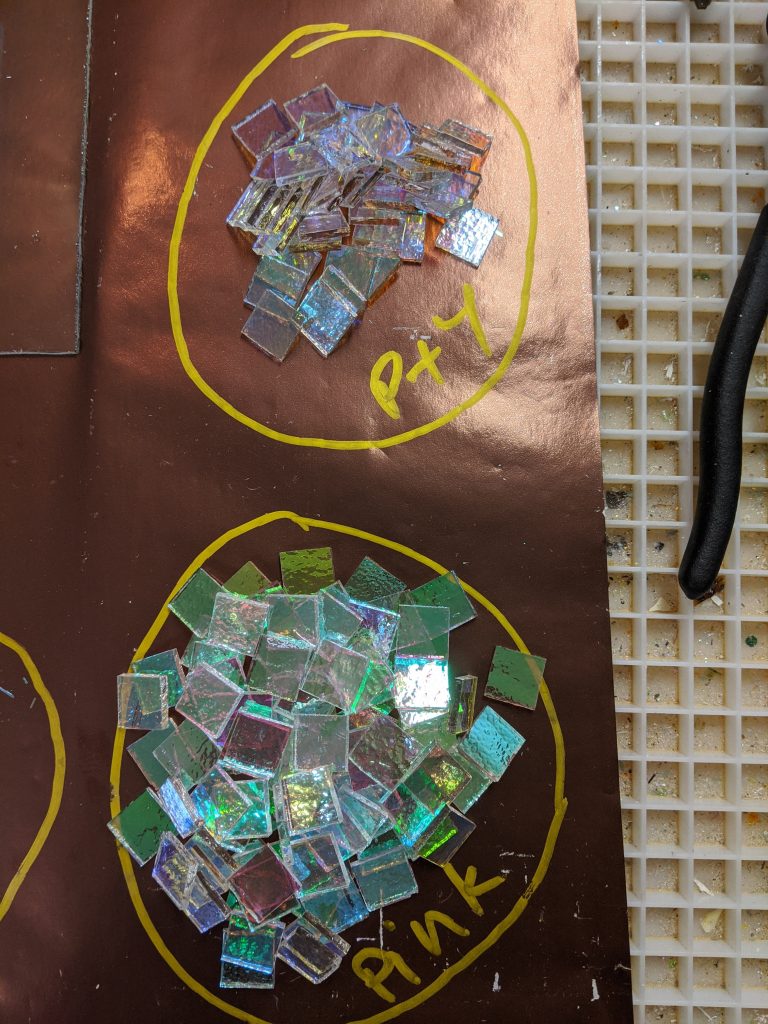
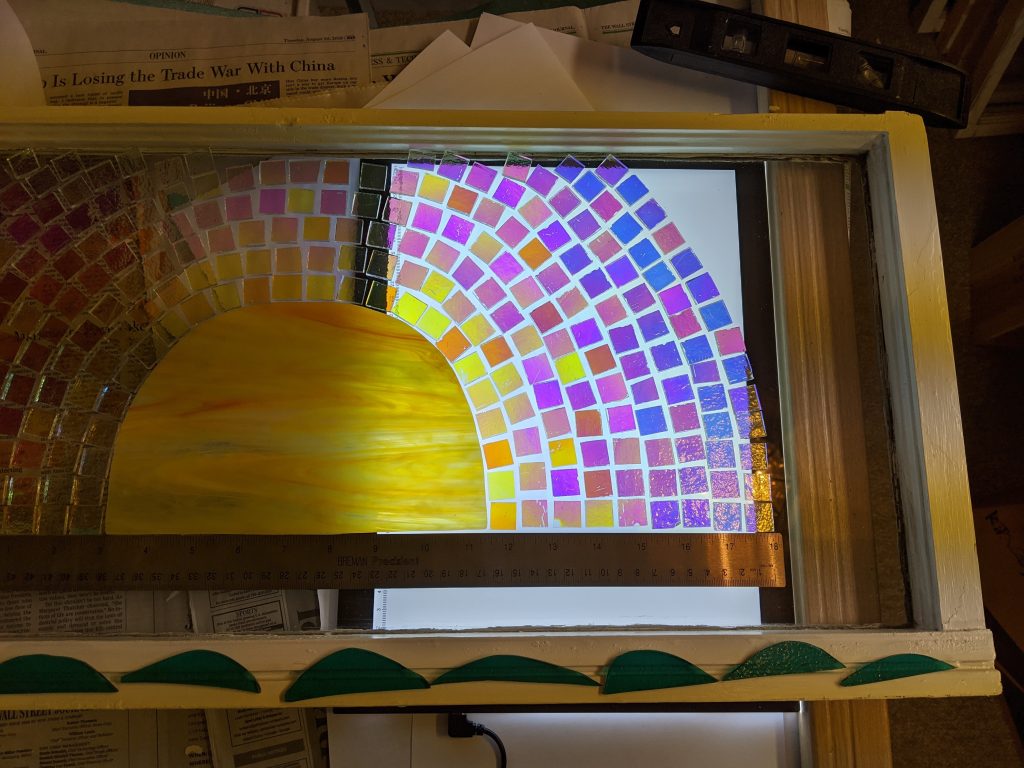
My Rainbow Row panels are waiting for warmer weather to get their resin coating, so in the mean time I revisited my dichroic sunset window project. I’d been stumped on what glass to use for the main sun in the center of the window, but today I made a commitment (well, at least cut out the shape even if I haven’t yet glued it in place). It was also time to sort the dichroic pieces I cut for the background by color. The sheets of dichro glass I am using are gradients of colors varying from yellow – pink – purple – blue. The pieces look like they are the same color when the light is reflecting off of the surface, so I have to use a light tray underneath to sort them out.
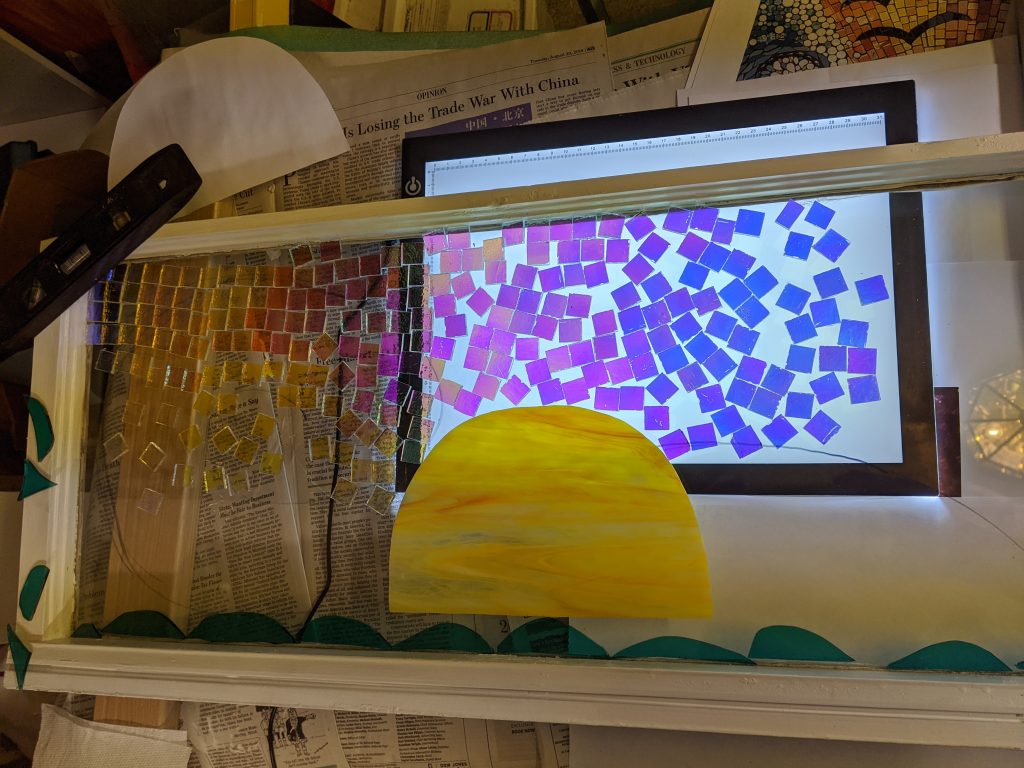
Once the background pieces were sorted, I laid them out in concentric rings around the sun. I still haven’t decided on how I am going to make the water beneath the sun. I started making wave shapes, but I’m starting to think I would like to use triangles, so I am putting that off for now.
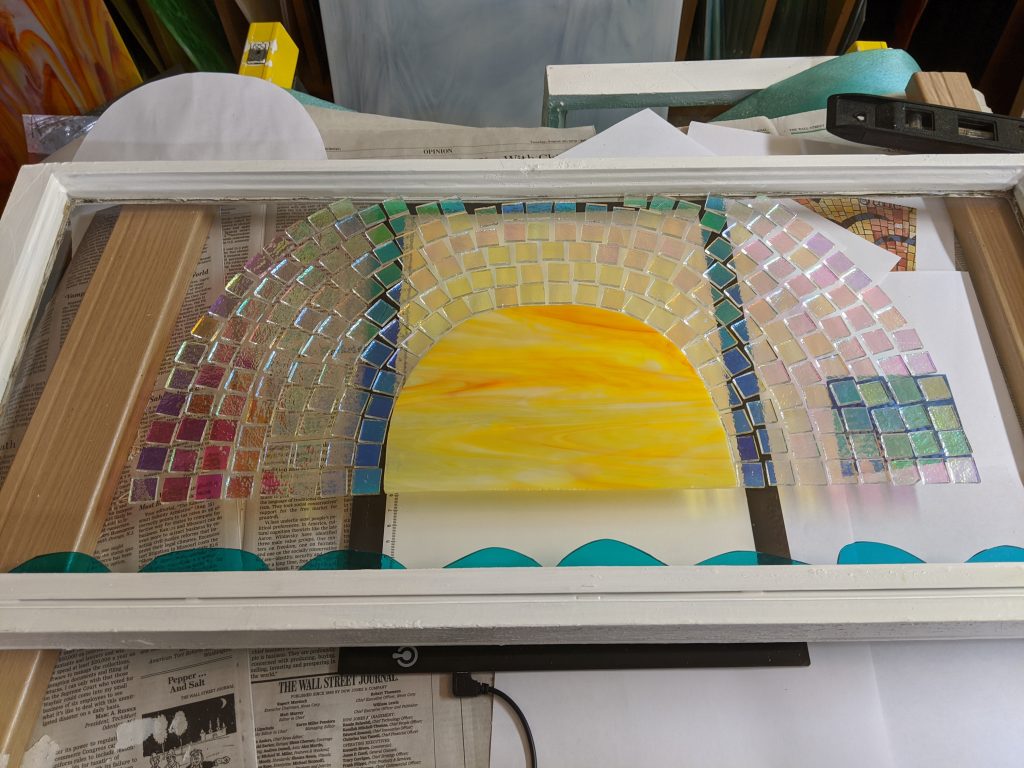
I laid the concentric background pieces for the rays of the sunset out in general in yellow – pink – purple – blue order with some variation for interest. In the next three photos, I’m moving the light tray from left to right underneath the window.
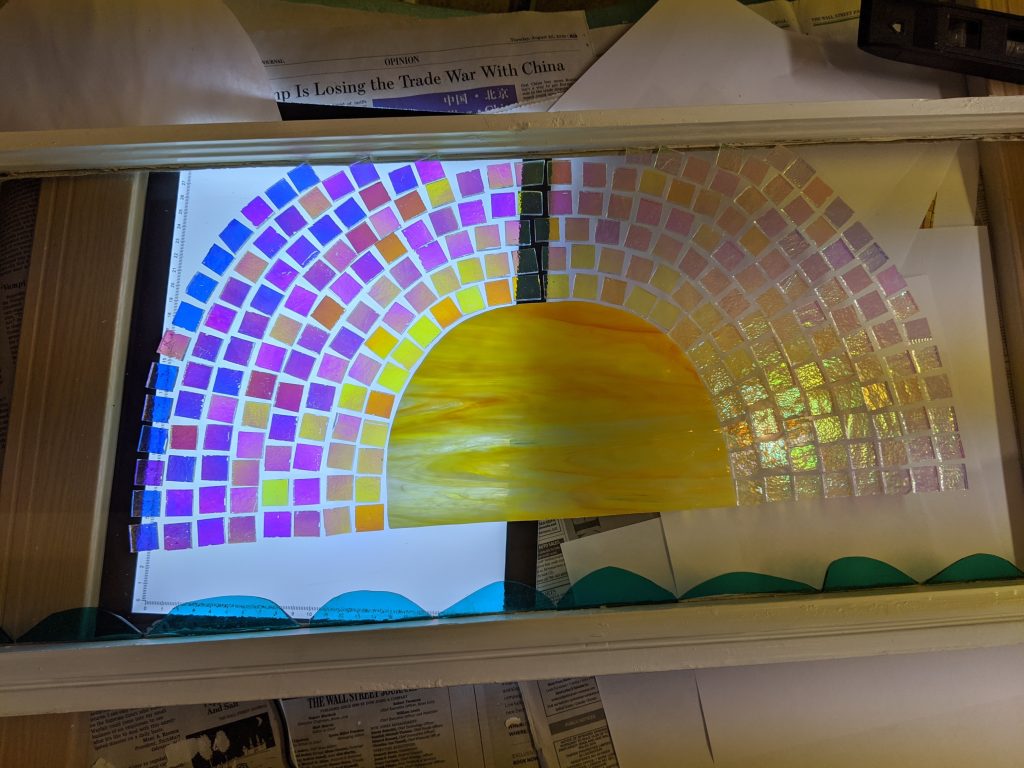
I will need to fill in the top rows with some pieces cut to fit the window later on. For now I’m just getting a feel for whether this is the look I wanted. My next decision is what color dichro or otherwise glass to use to fill out the edges. I have a neat piece of dichro that is very light blue when on the light table, but has a deep red metallic tint on the reflective view.
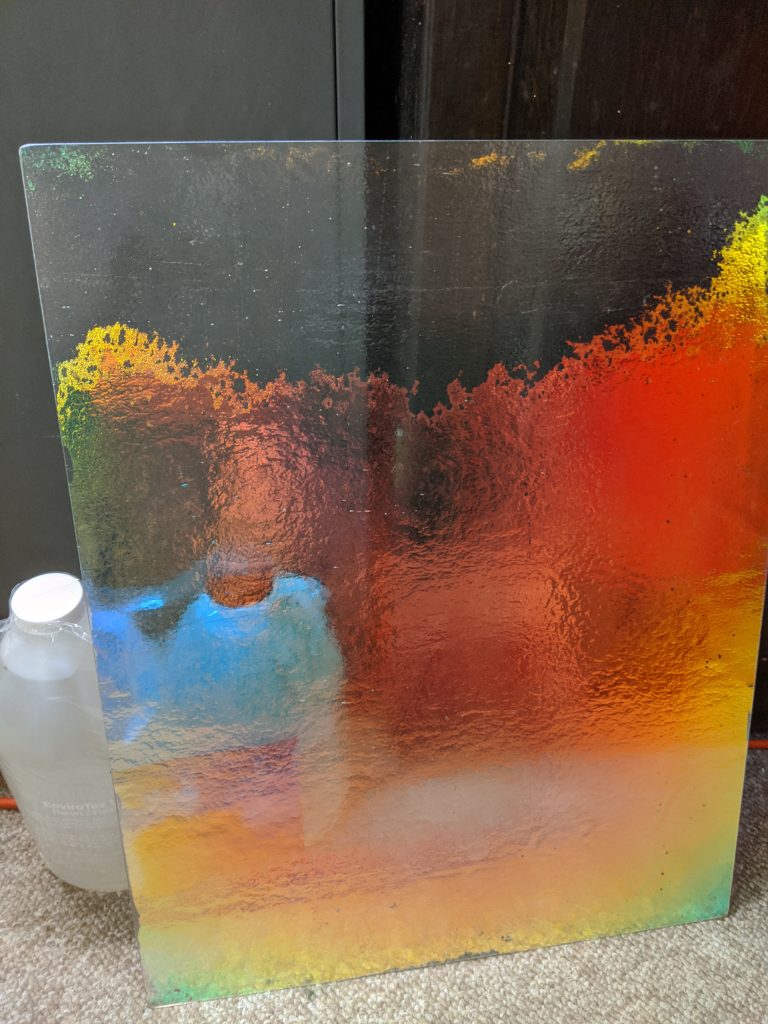

I used some resin spray on this sheet of dichroic as the coating is unstable and could flake off when I’m cutting it. Now my work area smells like resin spray, so I called it a night. I will revisit cutting the background sheet into squares once the resin spray dries and the fumes dissipate.
I’m also still not sure I like the center of the sun being a different type of glass (non-dichroic). I want to look at it for awhile before I glue it in place.