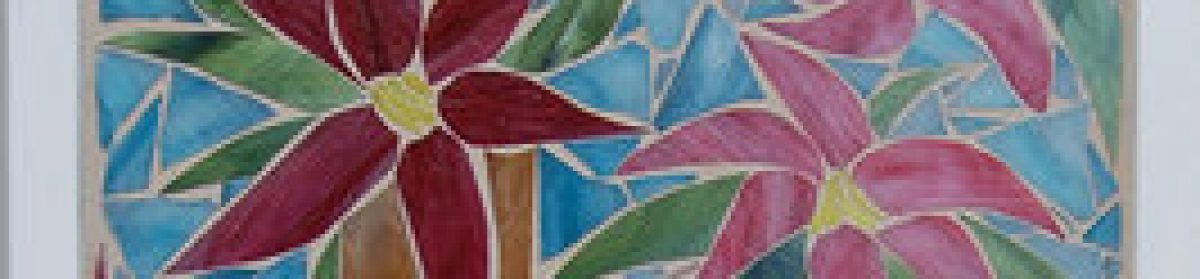
Today was a very busy, but productive, day. I finished the sun panel by pouring the resin over it, set a few memory beads in their molds, and made 8 coasters using the layer method where you don’t cure the resin overnight between layers. At times I felt like the proverbial one-armed paper hanger! It was a challenge doing all this in one day, but hopefully it was a success. I will find out tomorrow when I can take the beads and coasters out of their molds. Here is the basic rundown of the methodology and things to note.
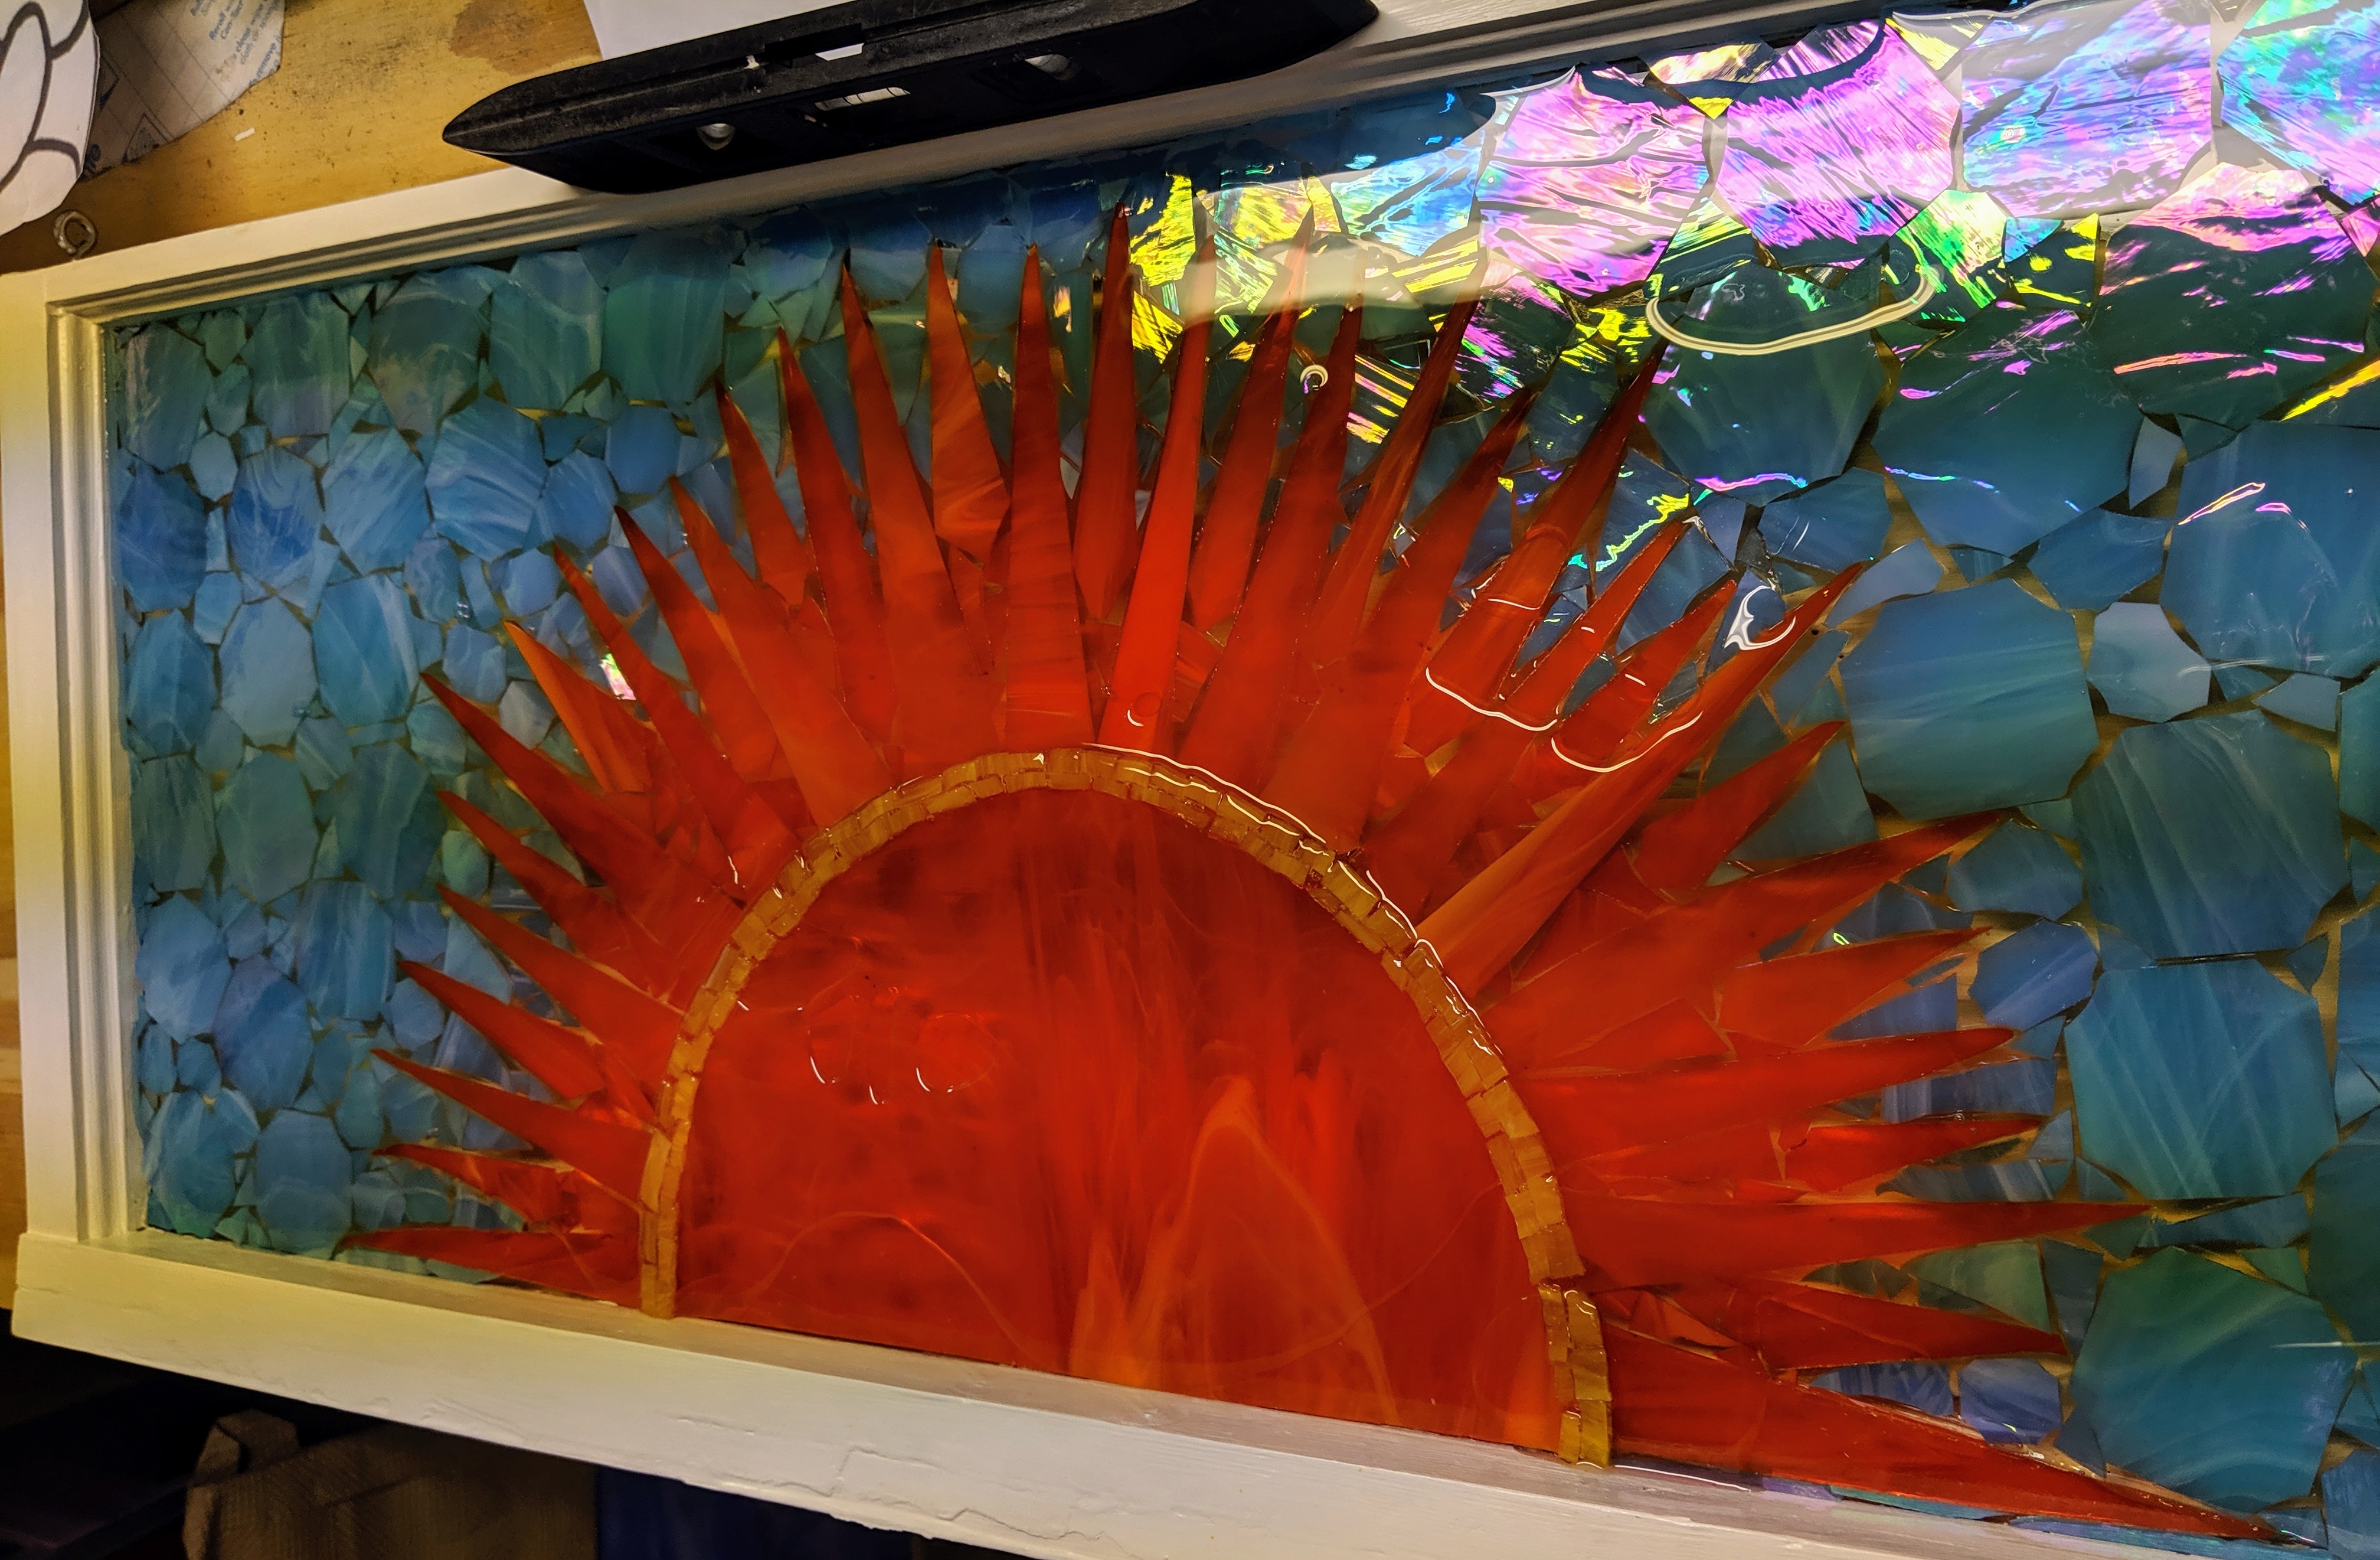
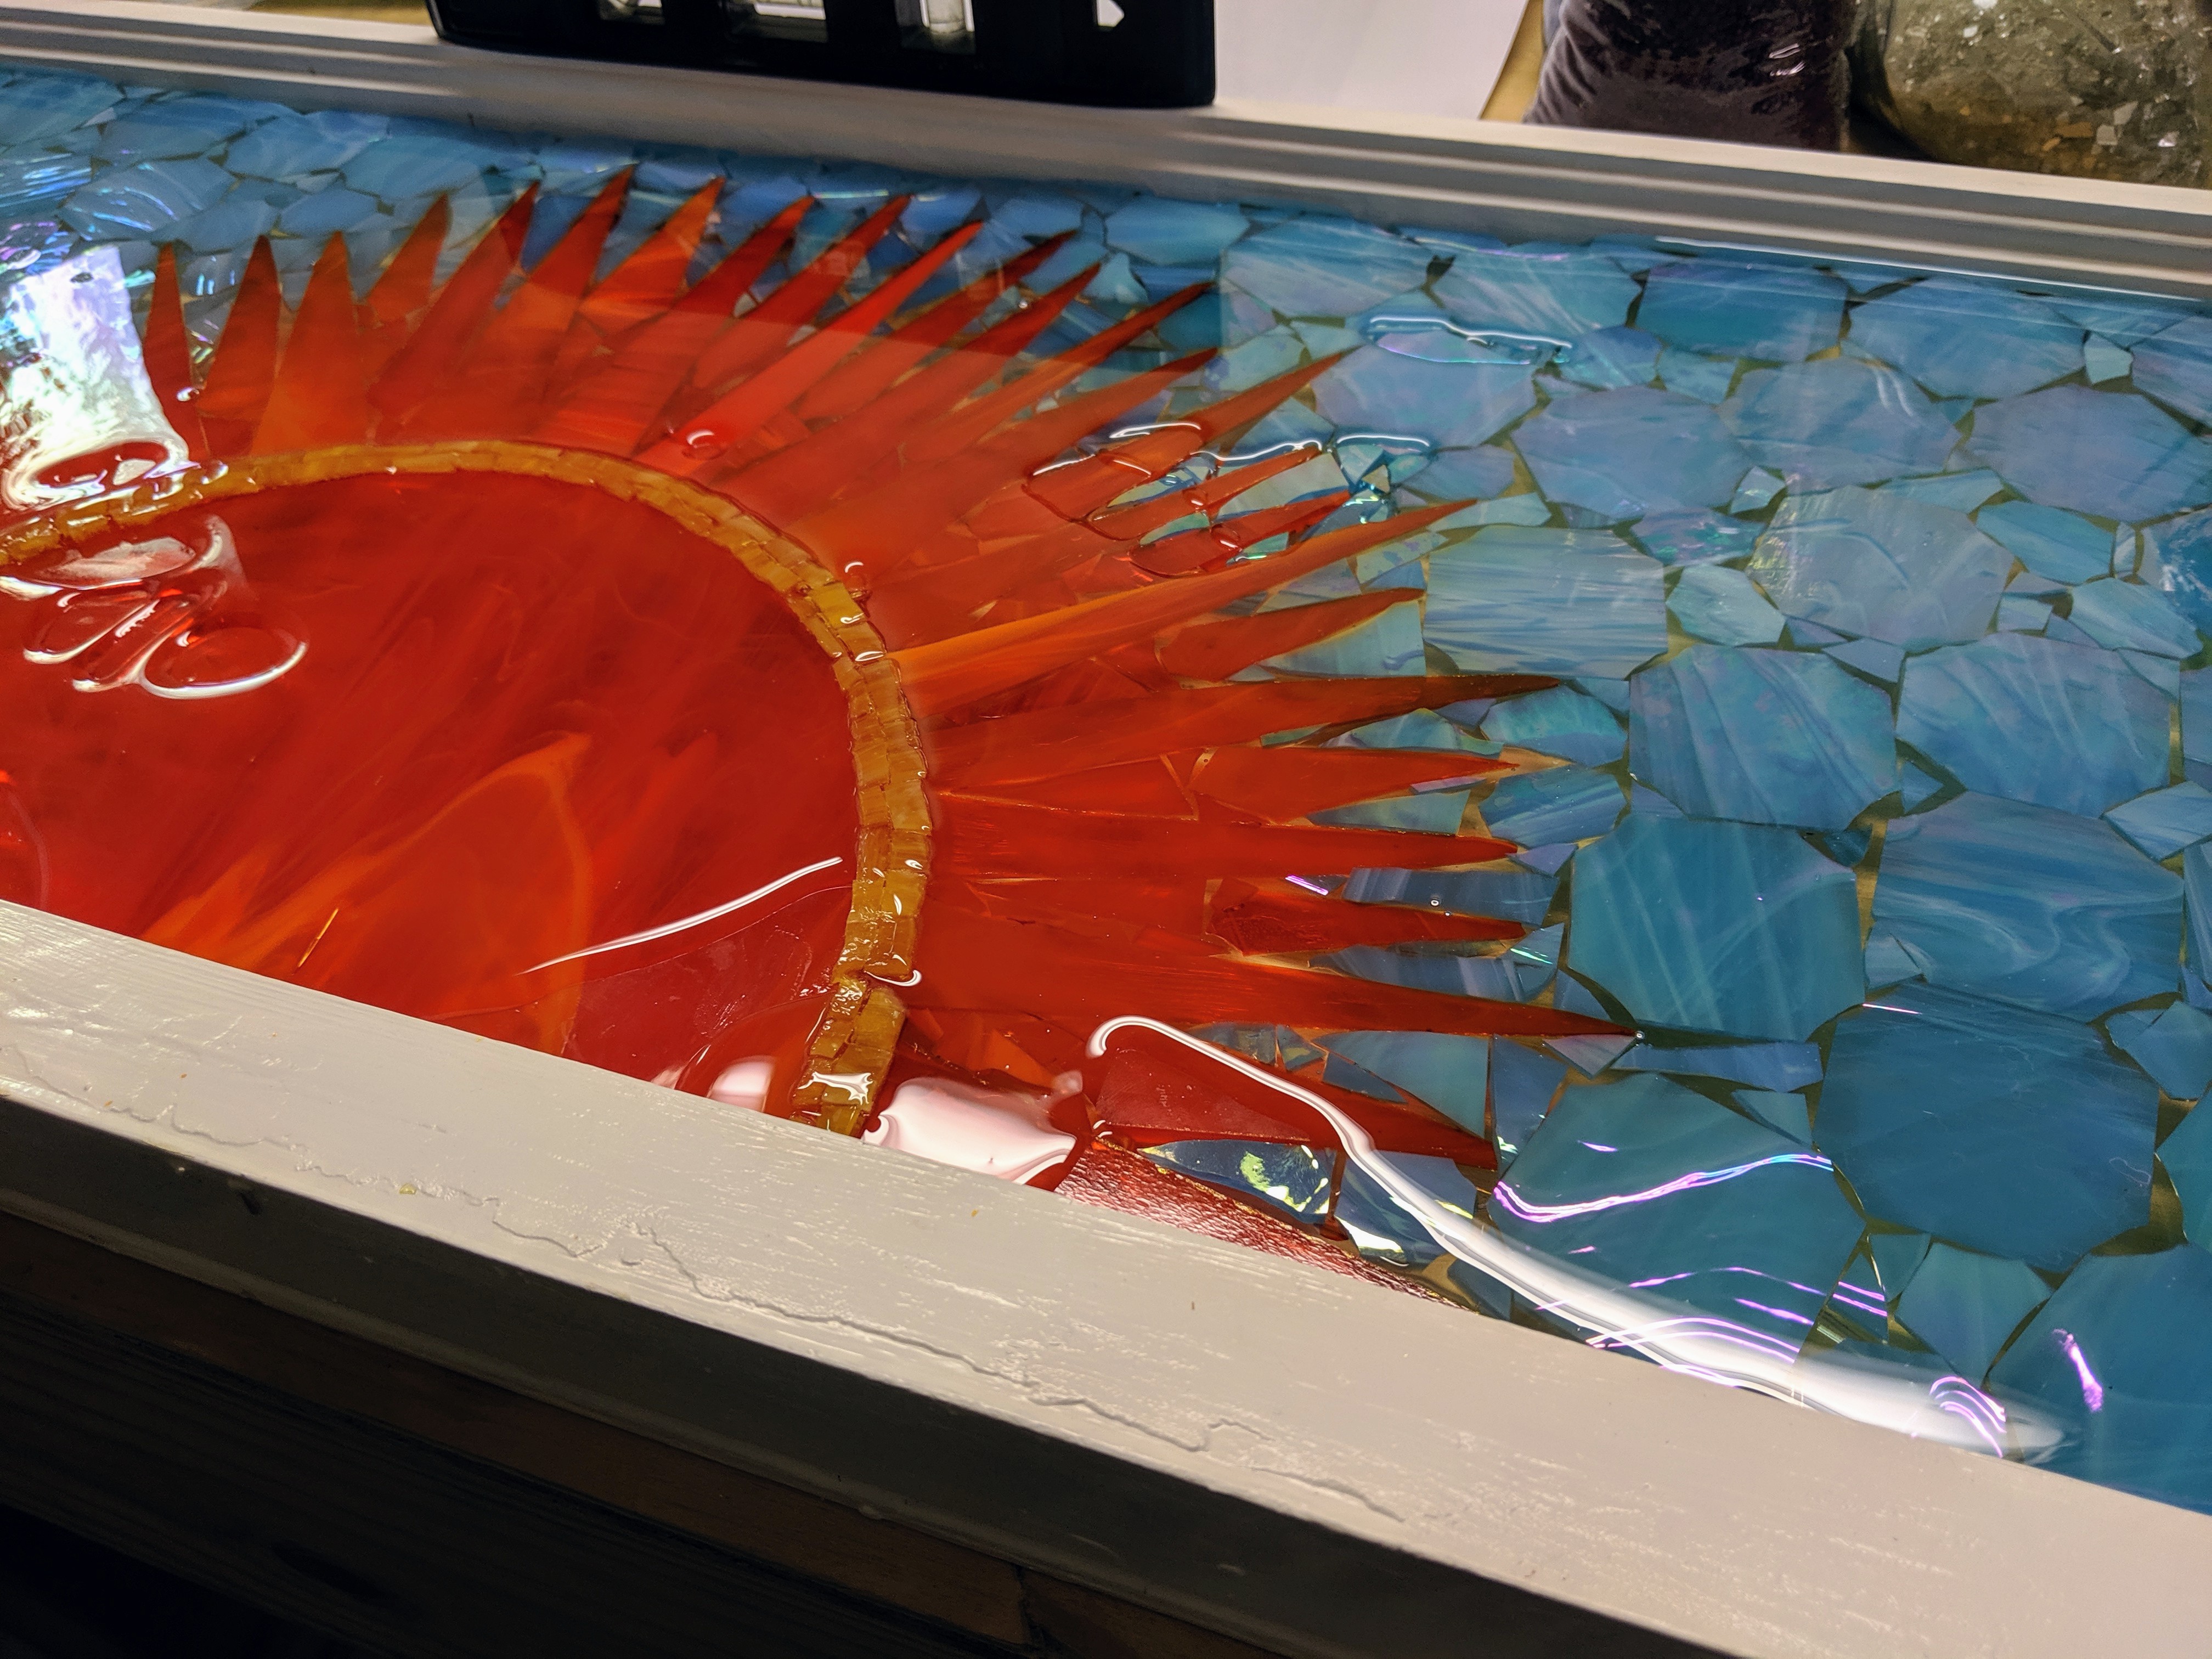
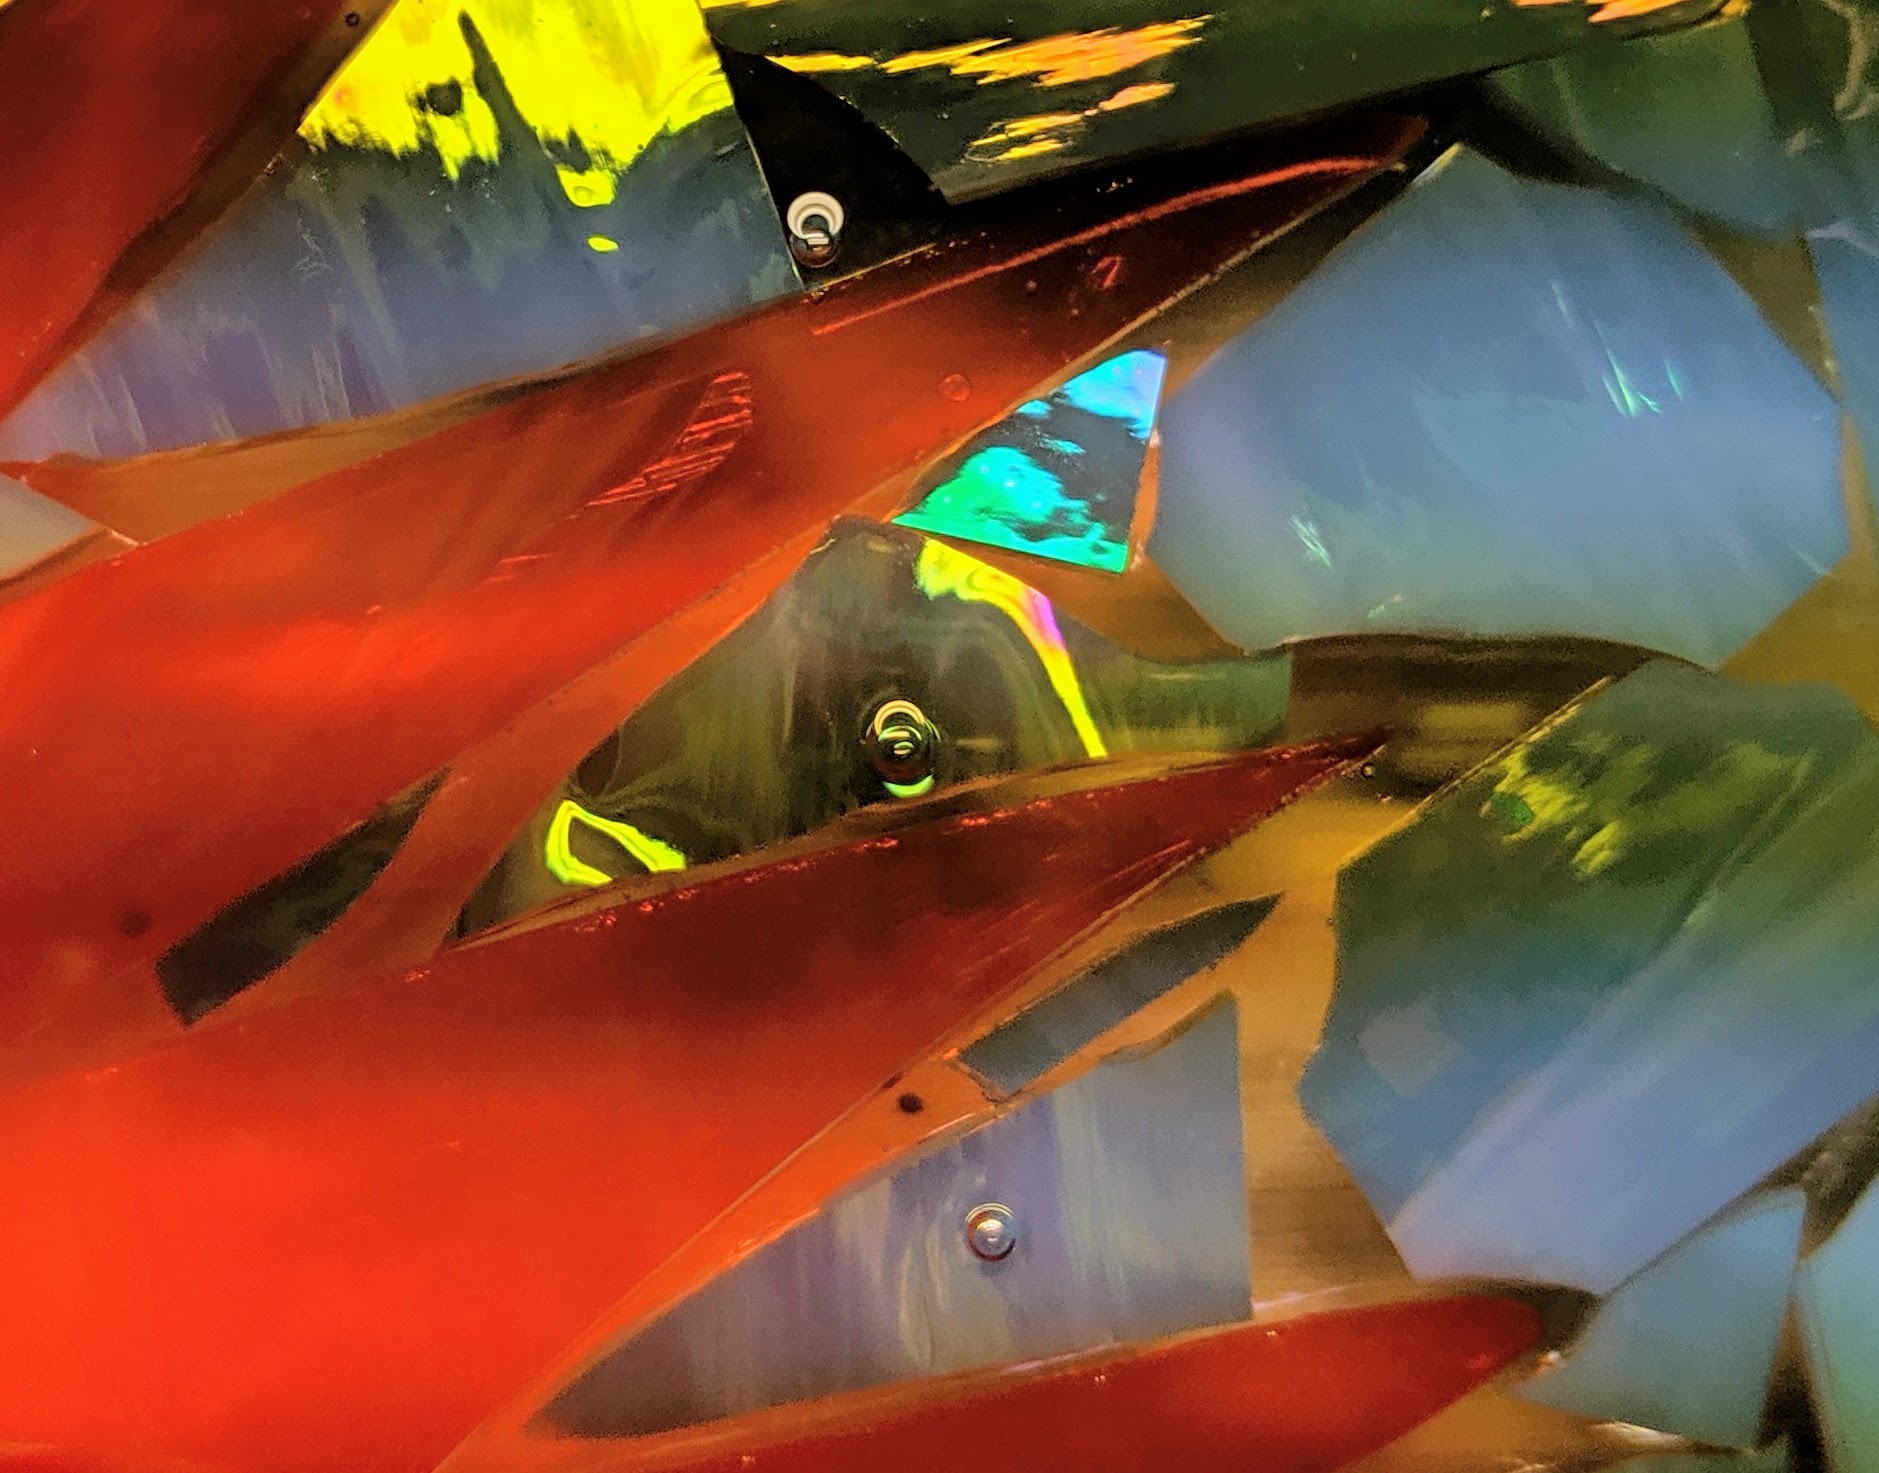
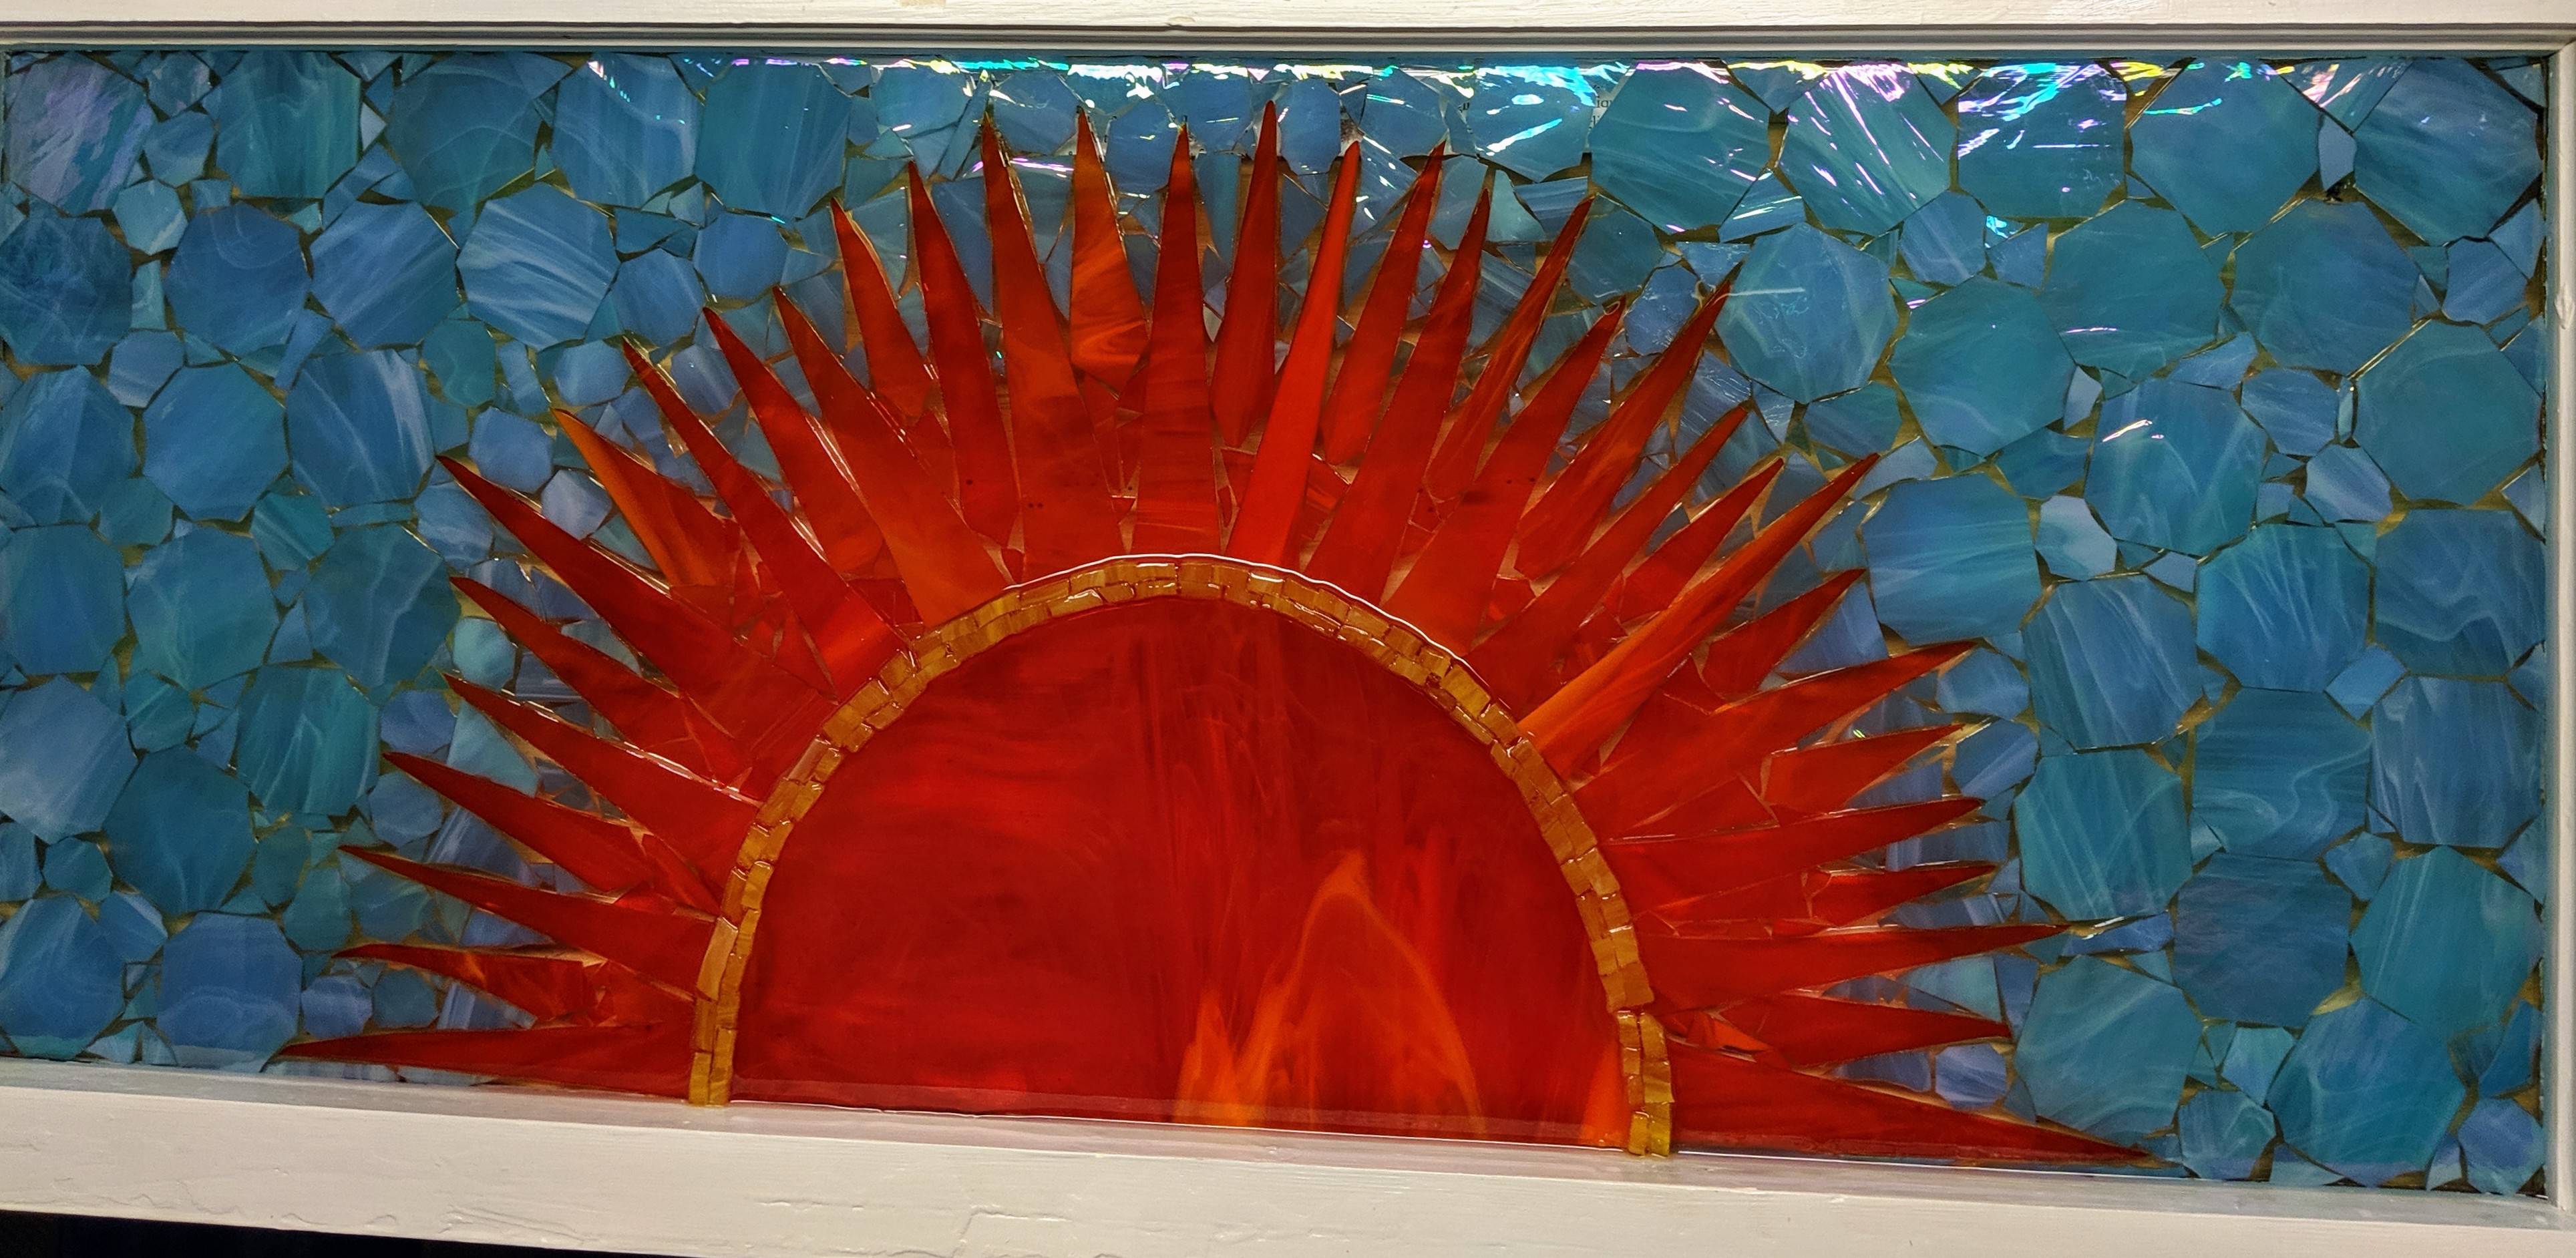
Pouring the resin on the sun mosaic was pretty straightforward, since everything was pretty much secured in place one way or another. I mixed up 16 ounces of resin and used almost all of it to cover the glass. After pouring, I immediately used my heat gun to help distribute the resin evenly across the window as well as to remove bubbles that form as the resin settles under the individual pieces of glass.
I thought about adding some glass chips to the resin, like I had planned to do, but I just wasn’t sure how that would look in the end, so I decided to save that to try on a smaller project that won’t be such a big deal if I don’t like the way it ends up looking. I normally use the glass chips in a clear background, but this whole window has glass in it, so I chickened out.
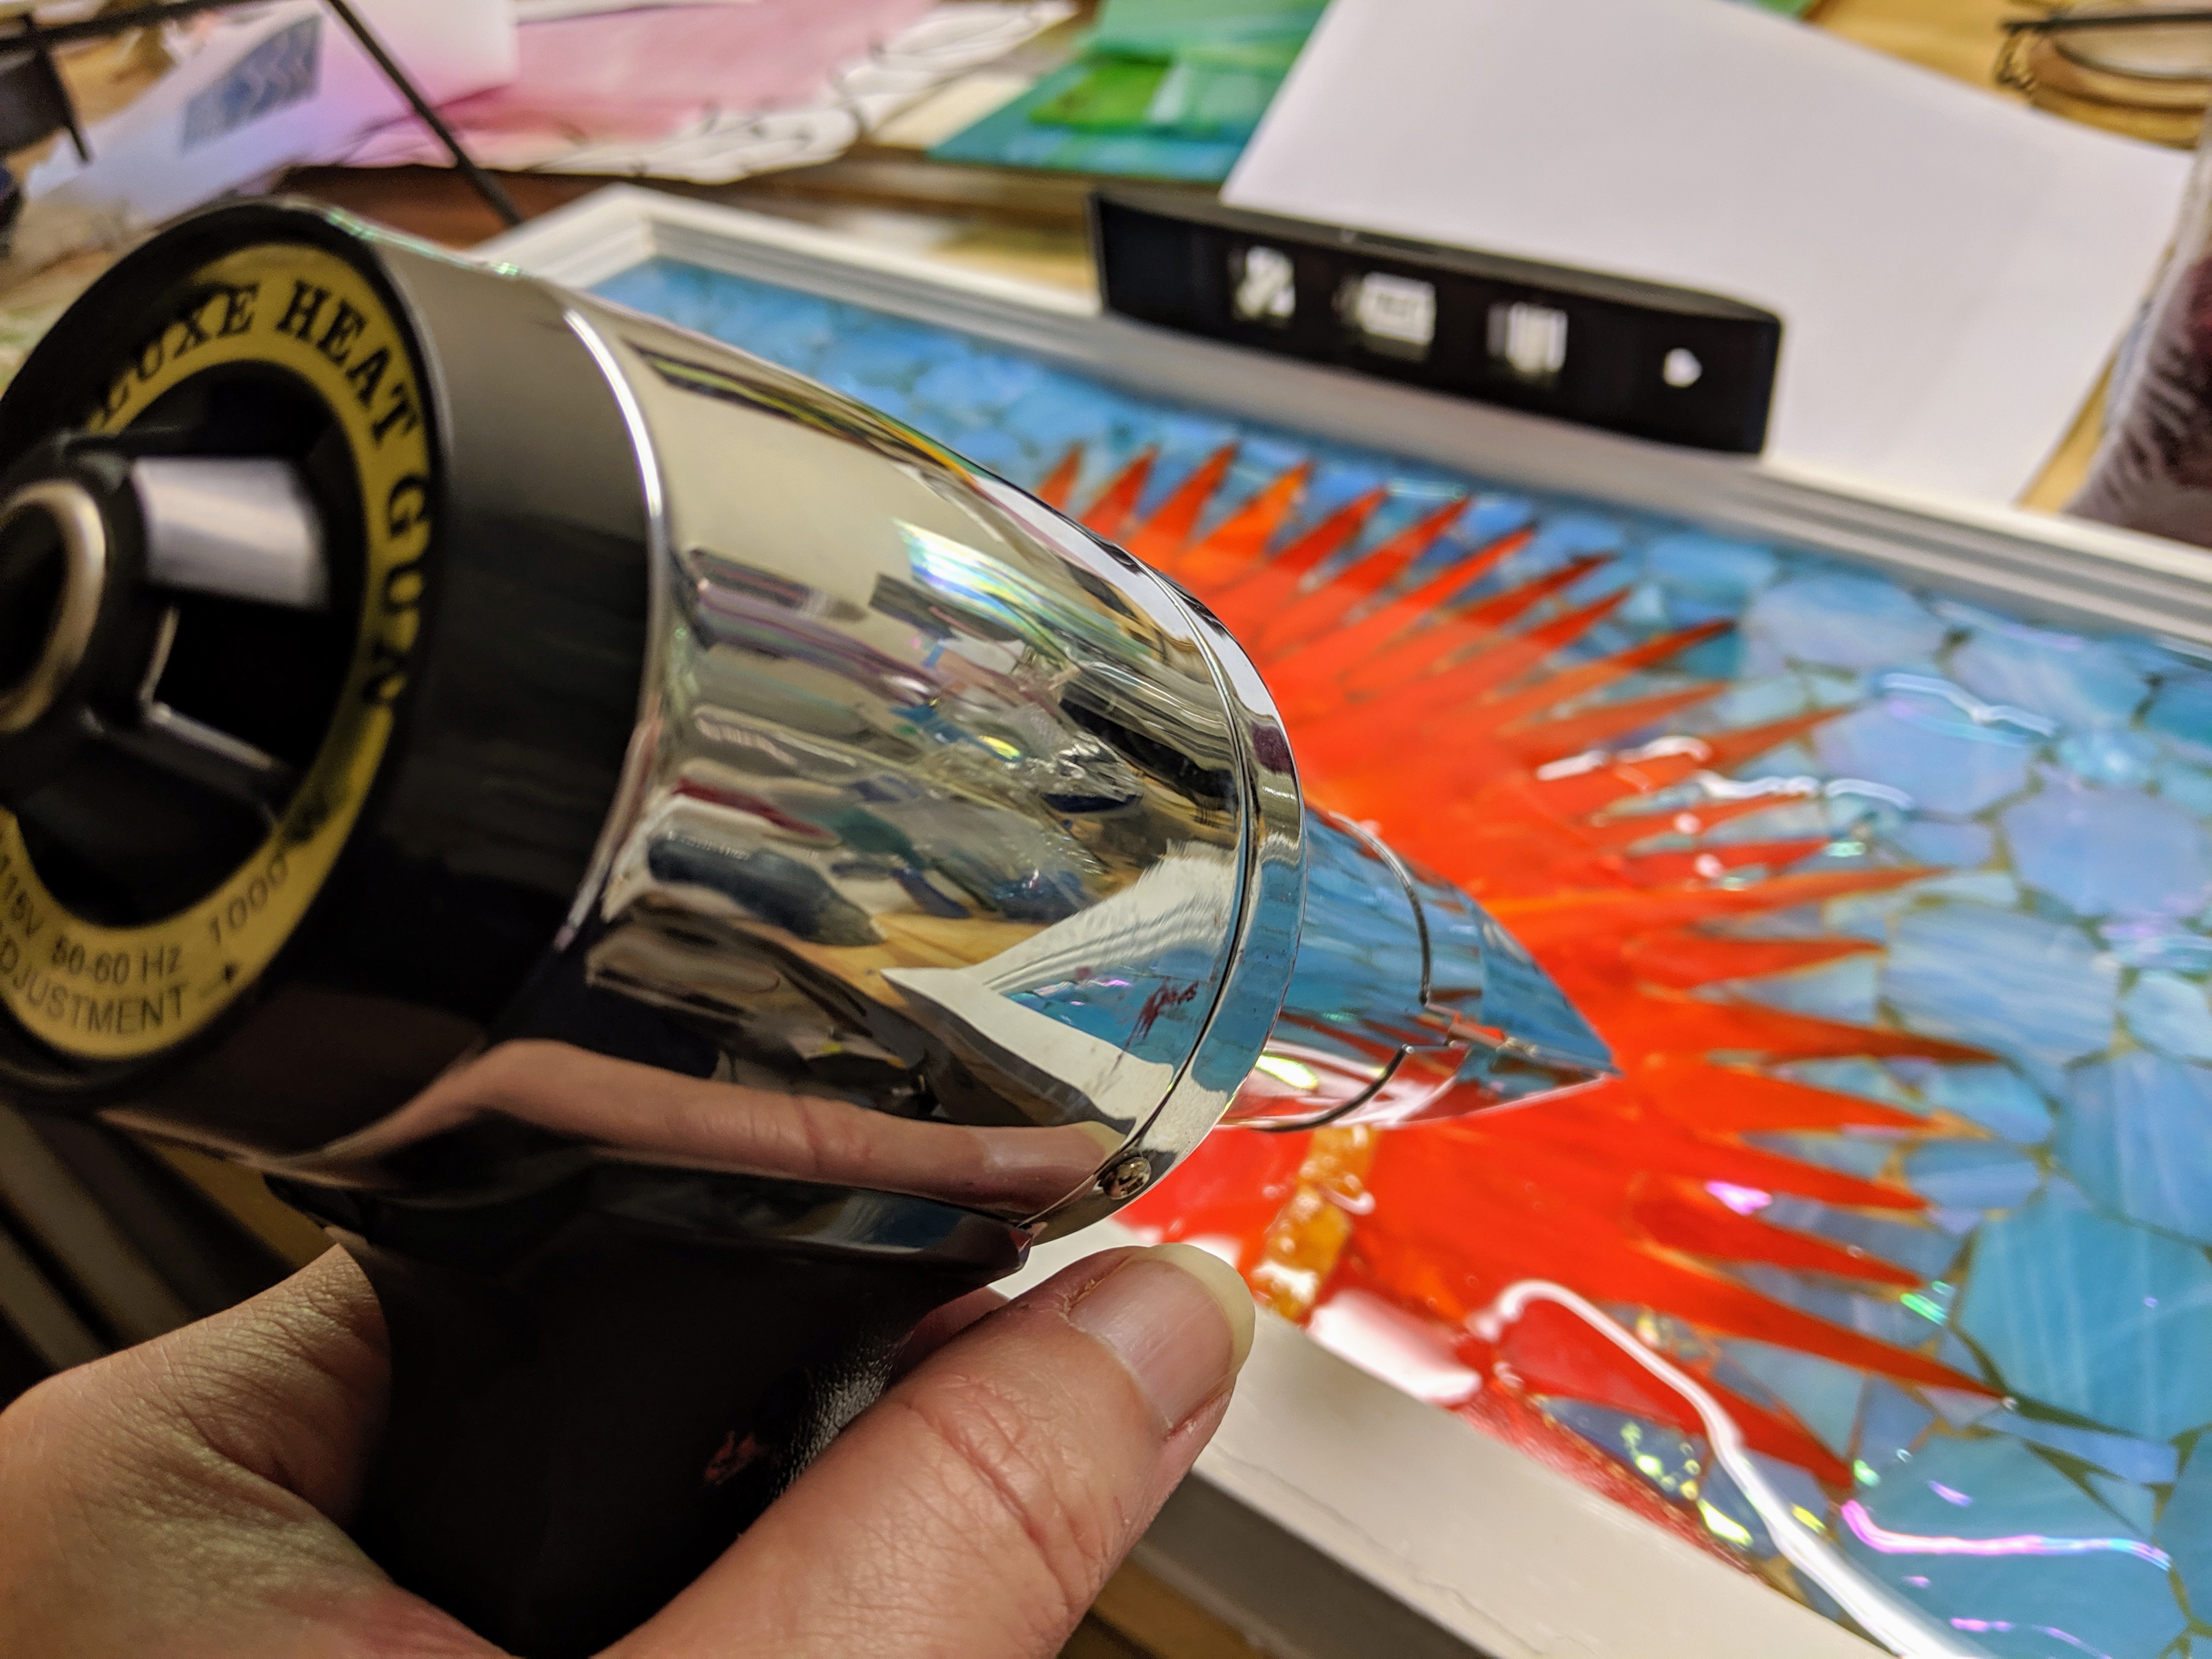
The difficult part comes after the resin is poured and bubbles start to emerge. For the next 45 minutes to an hour, I had to repeatedly use the heat gun to remove bubbles as they emerged in the resin.
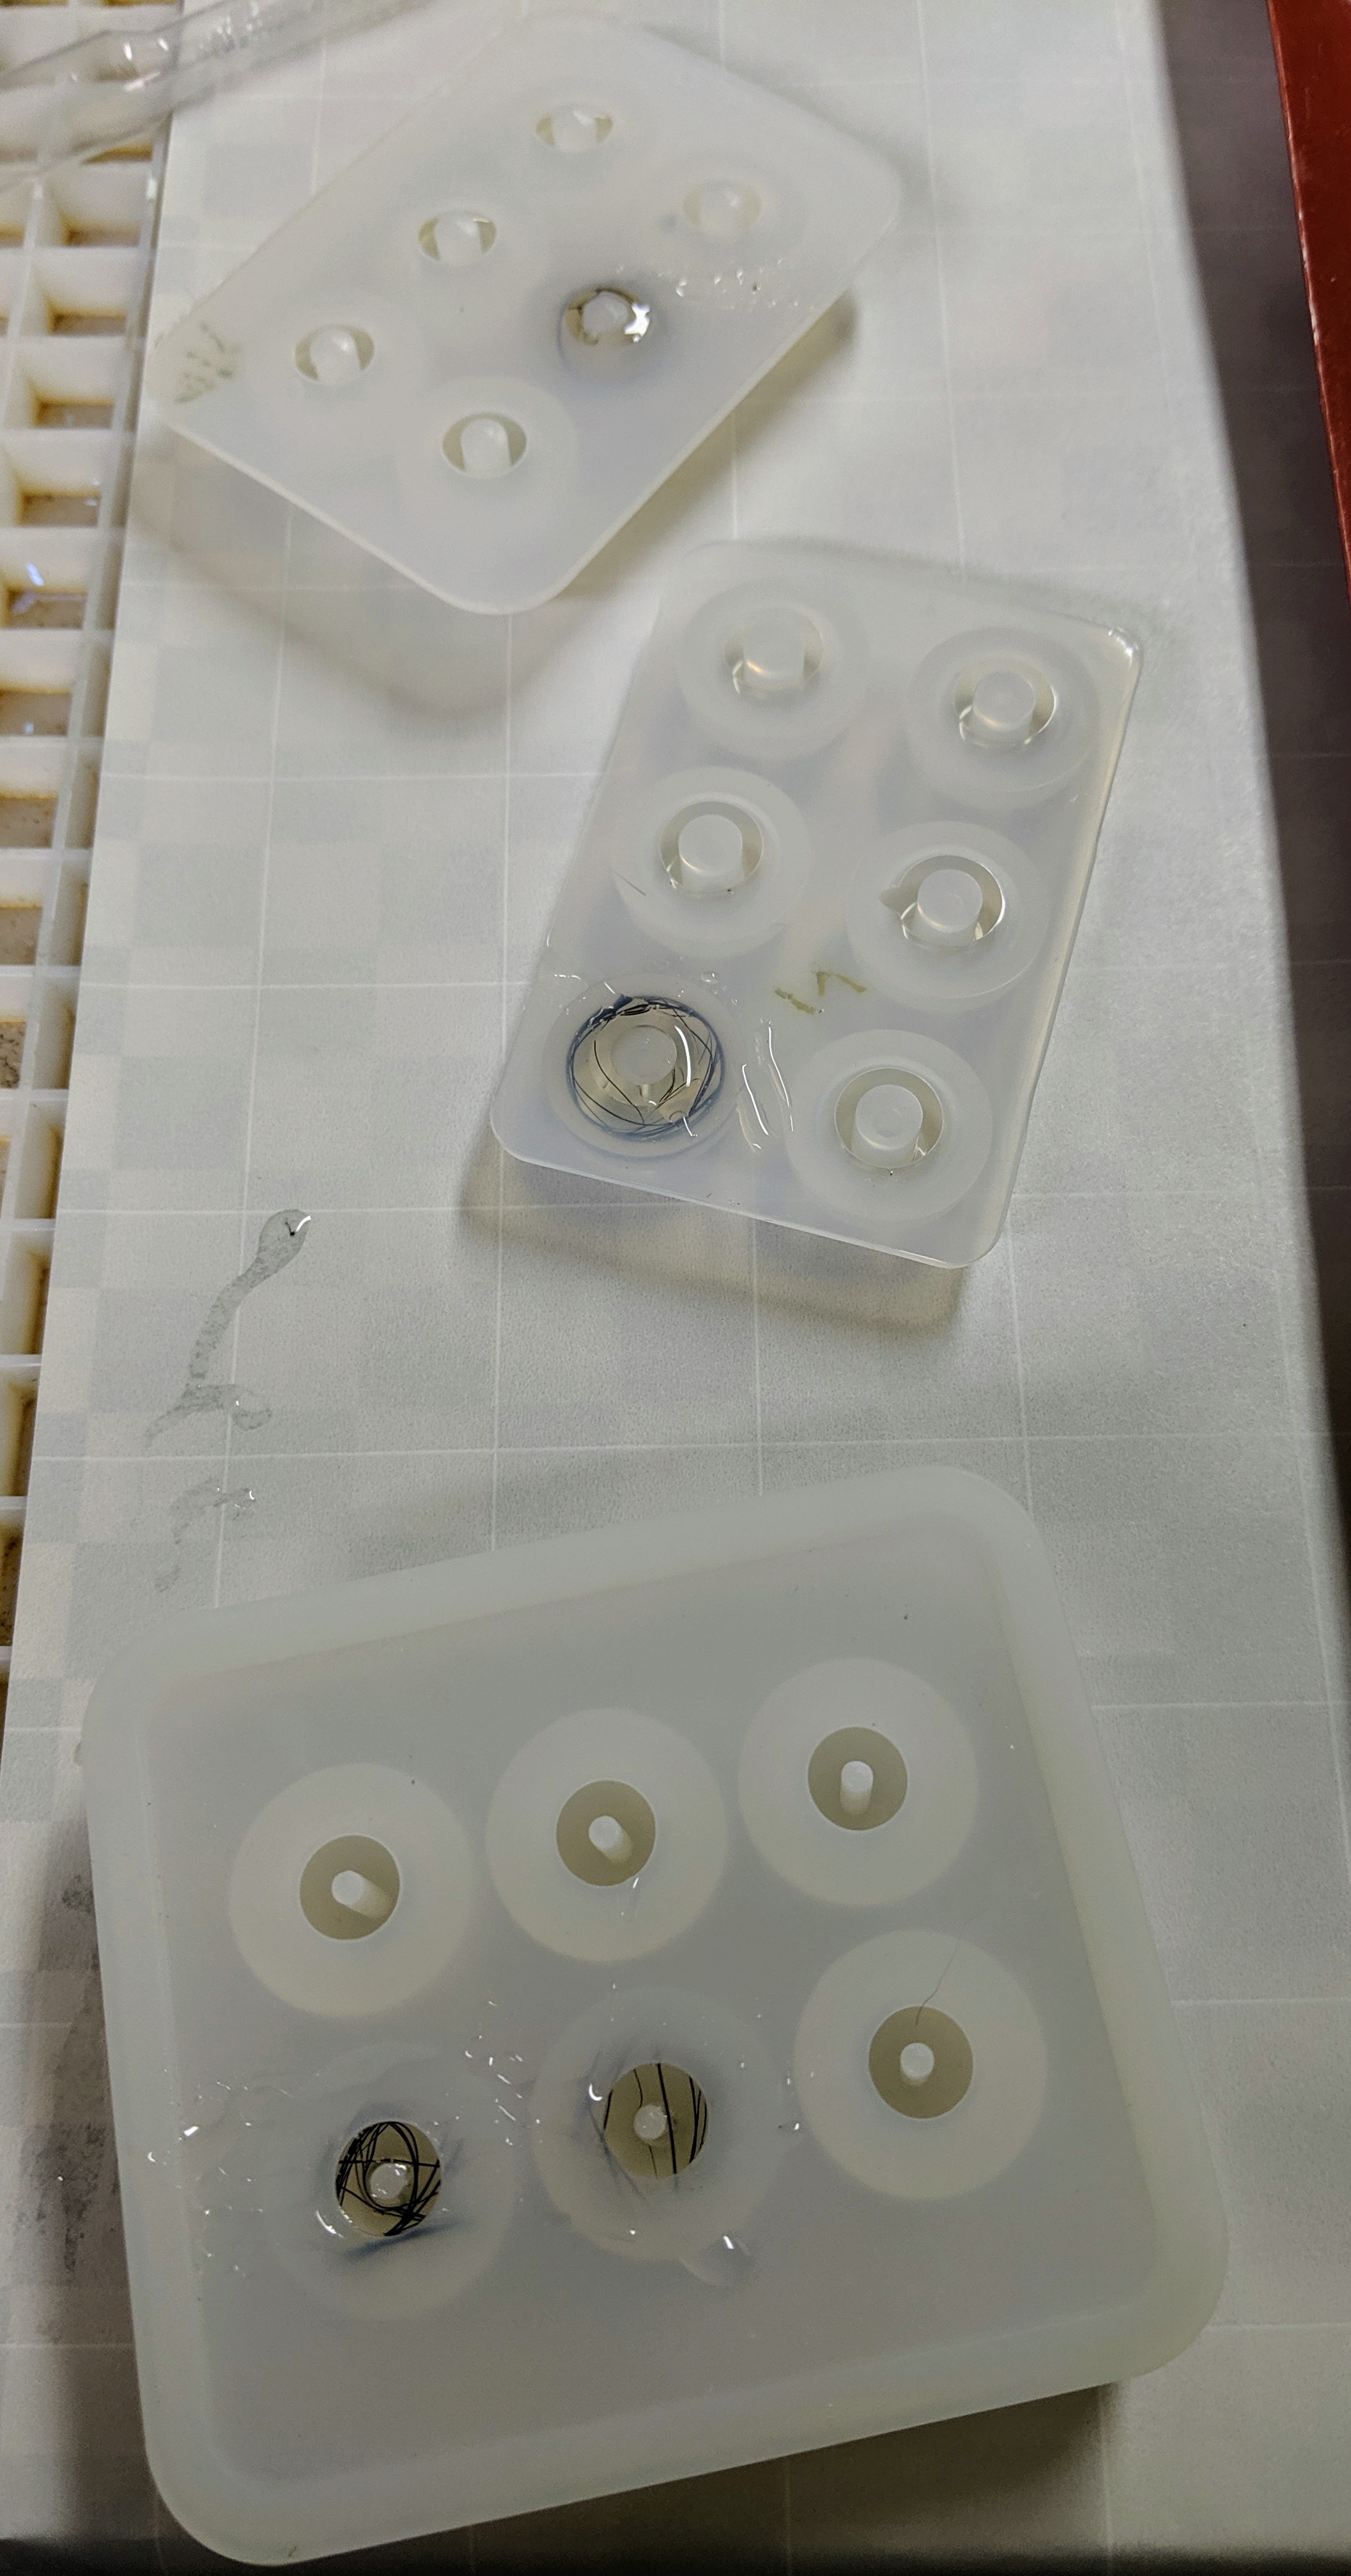
While I monitored the bubbles on the sun mosaic, I used a bit of the resin to make a few memory beads. The beads take very little resin, and I had enough left to make about four of them.
Since the bubbles in the mosaic weren’t slowing down, I decided to make another batch of resin and try to do the coasters in layers without curing in between. I read that this results in a stronger end product, though I haven’t had any “strength” issues with my previous creations.
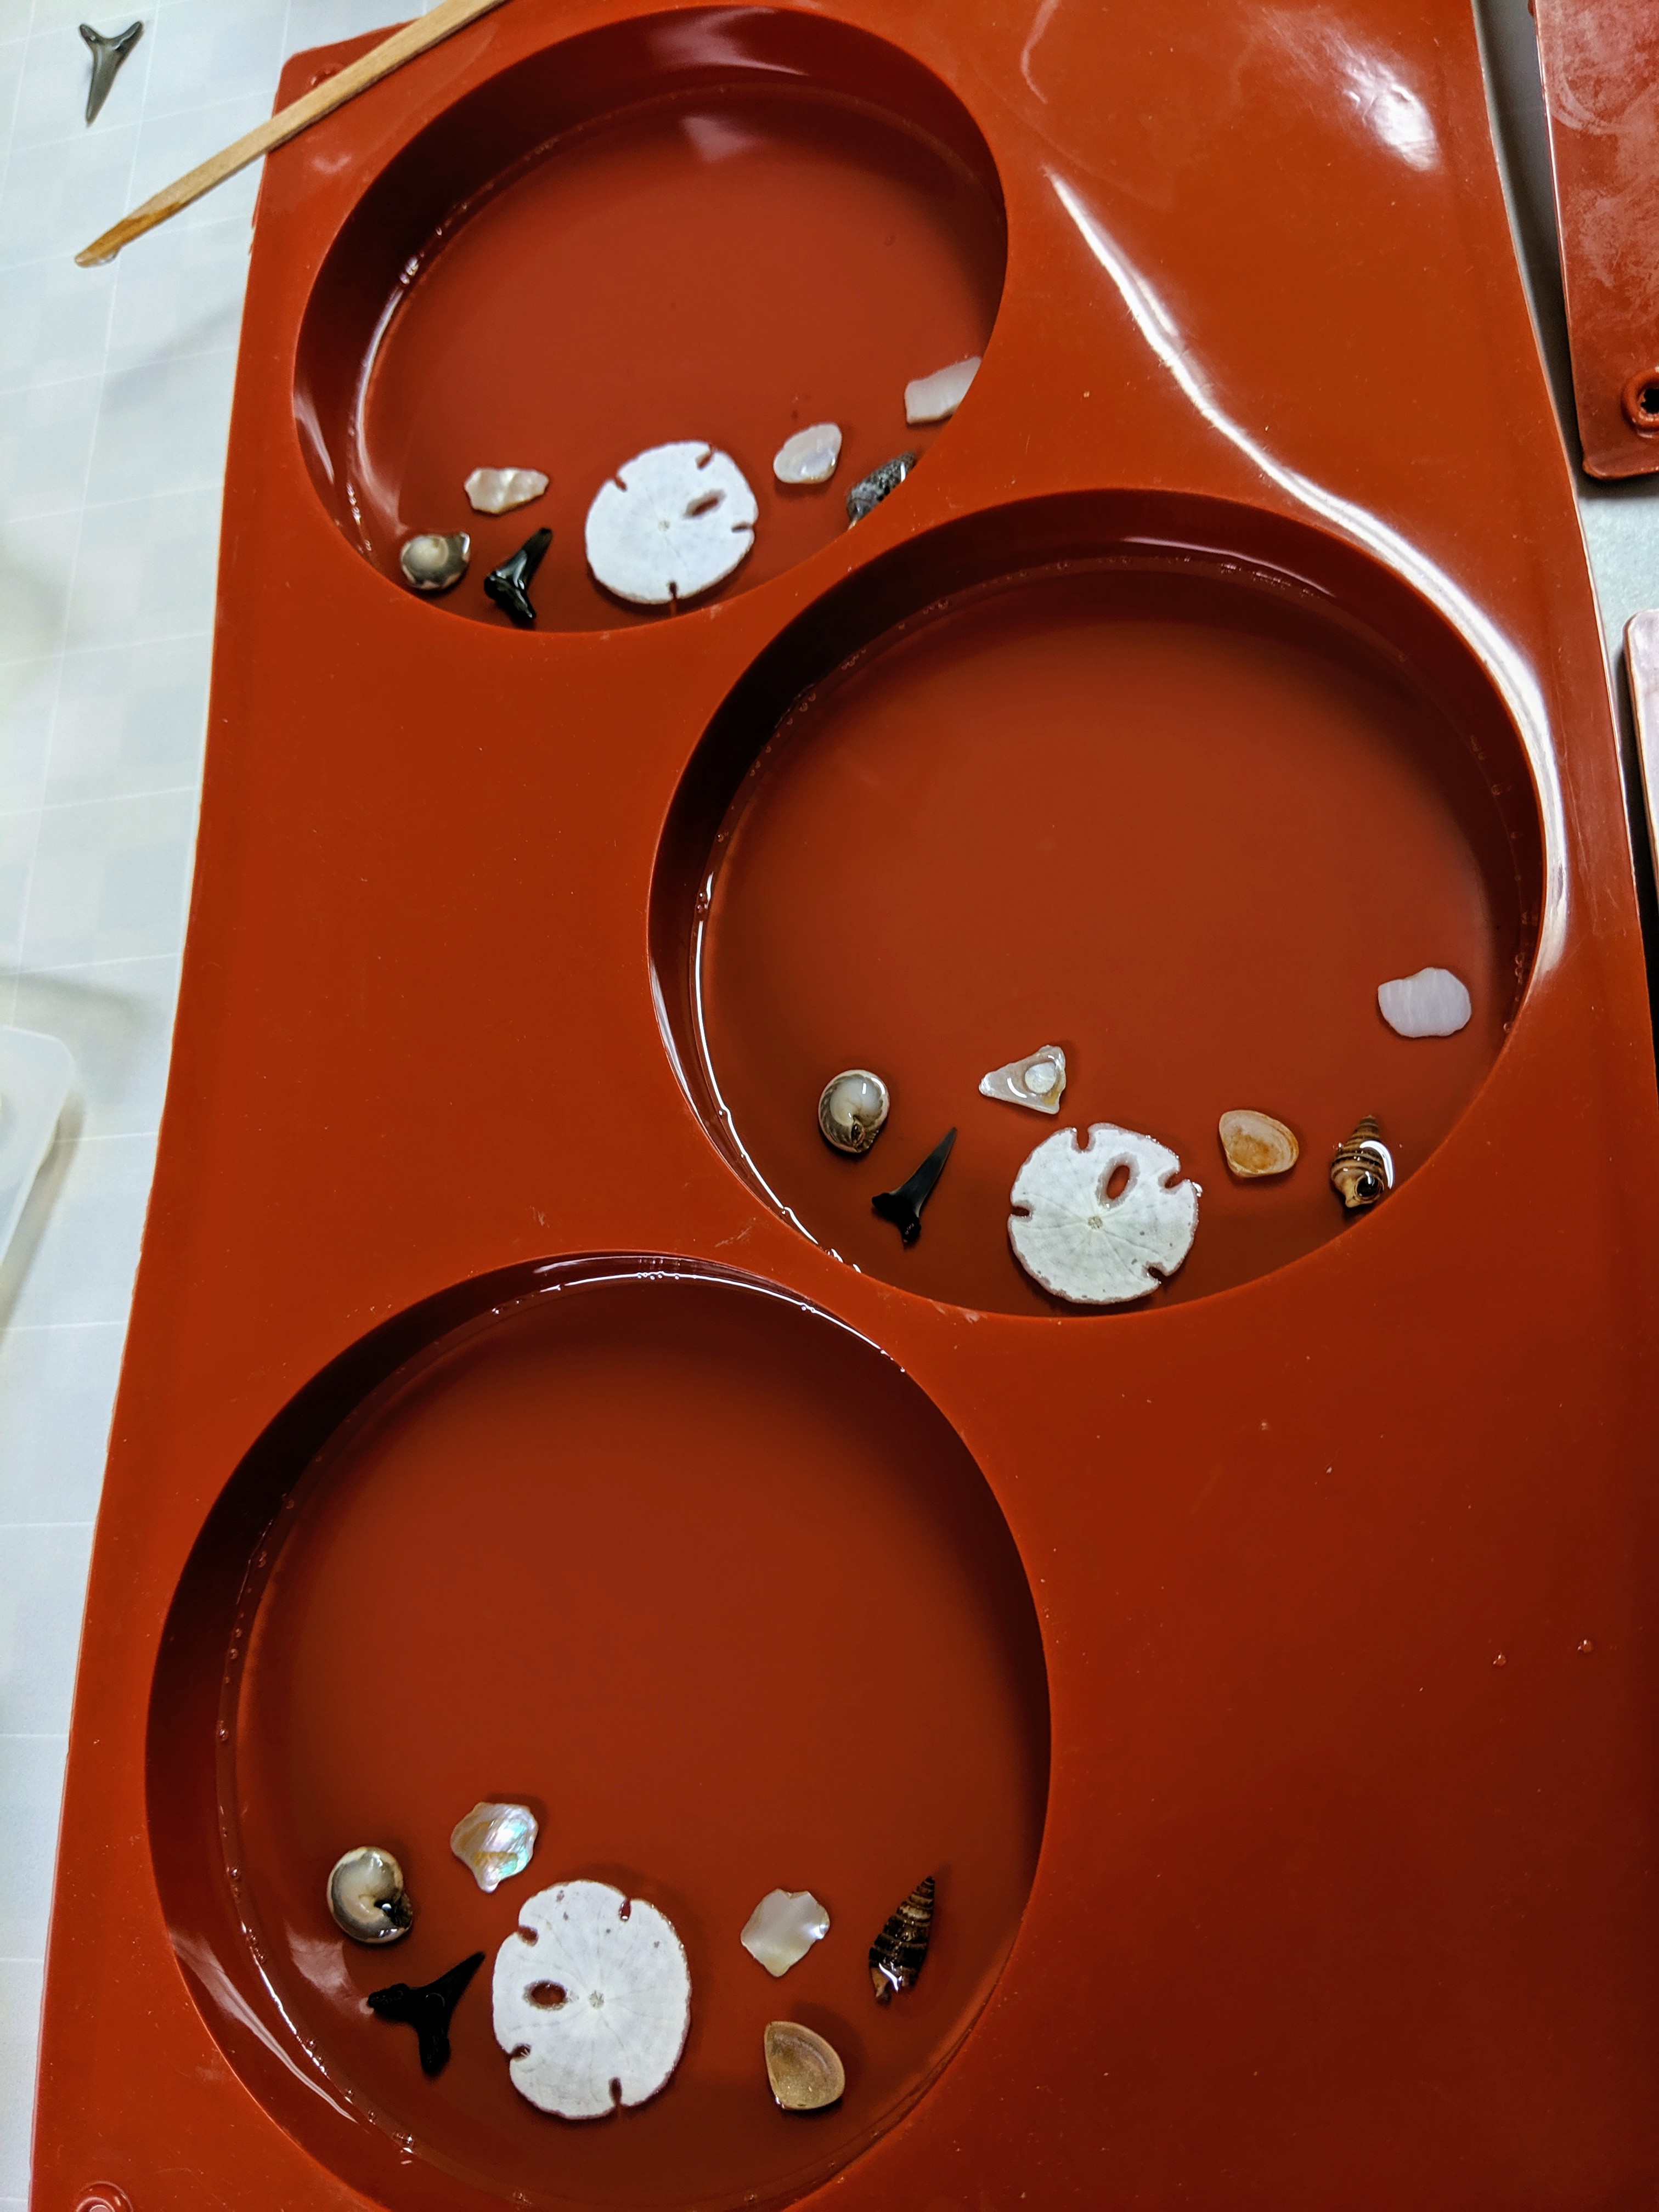
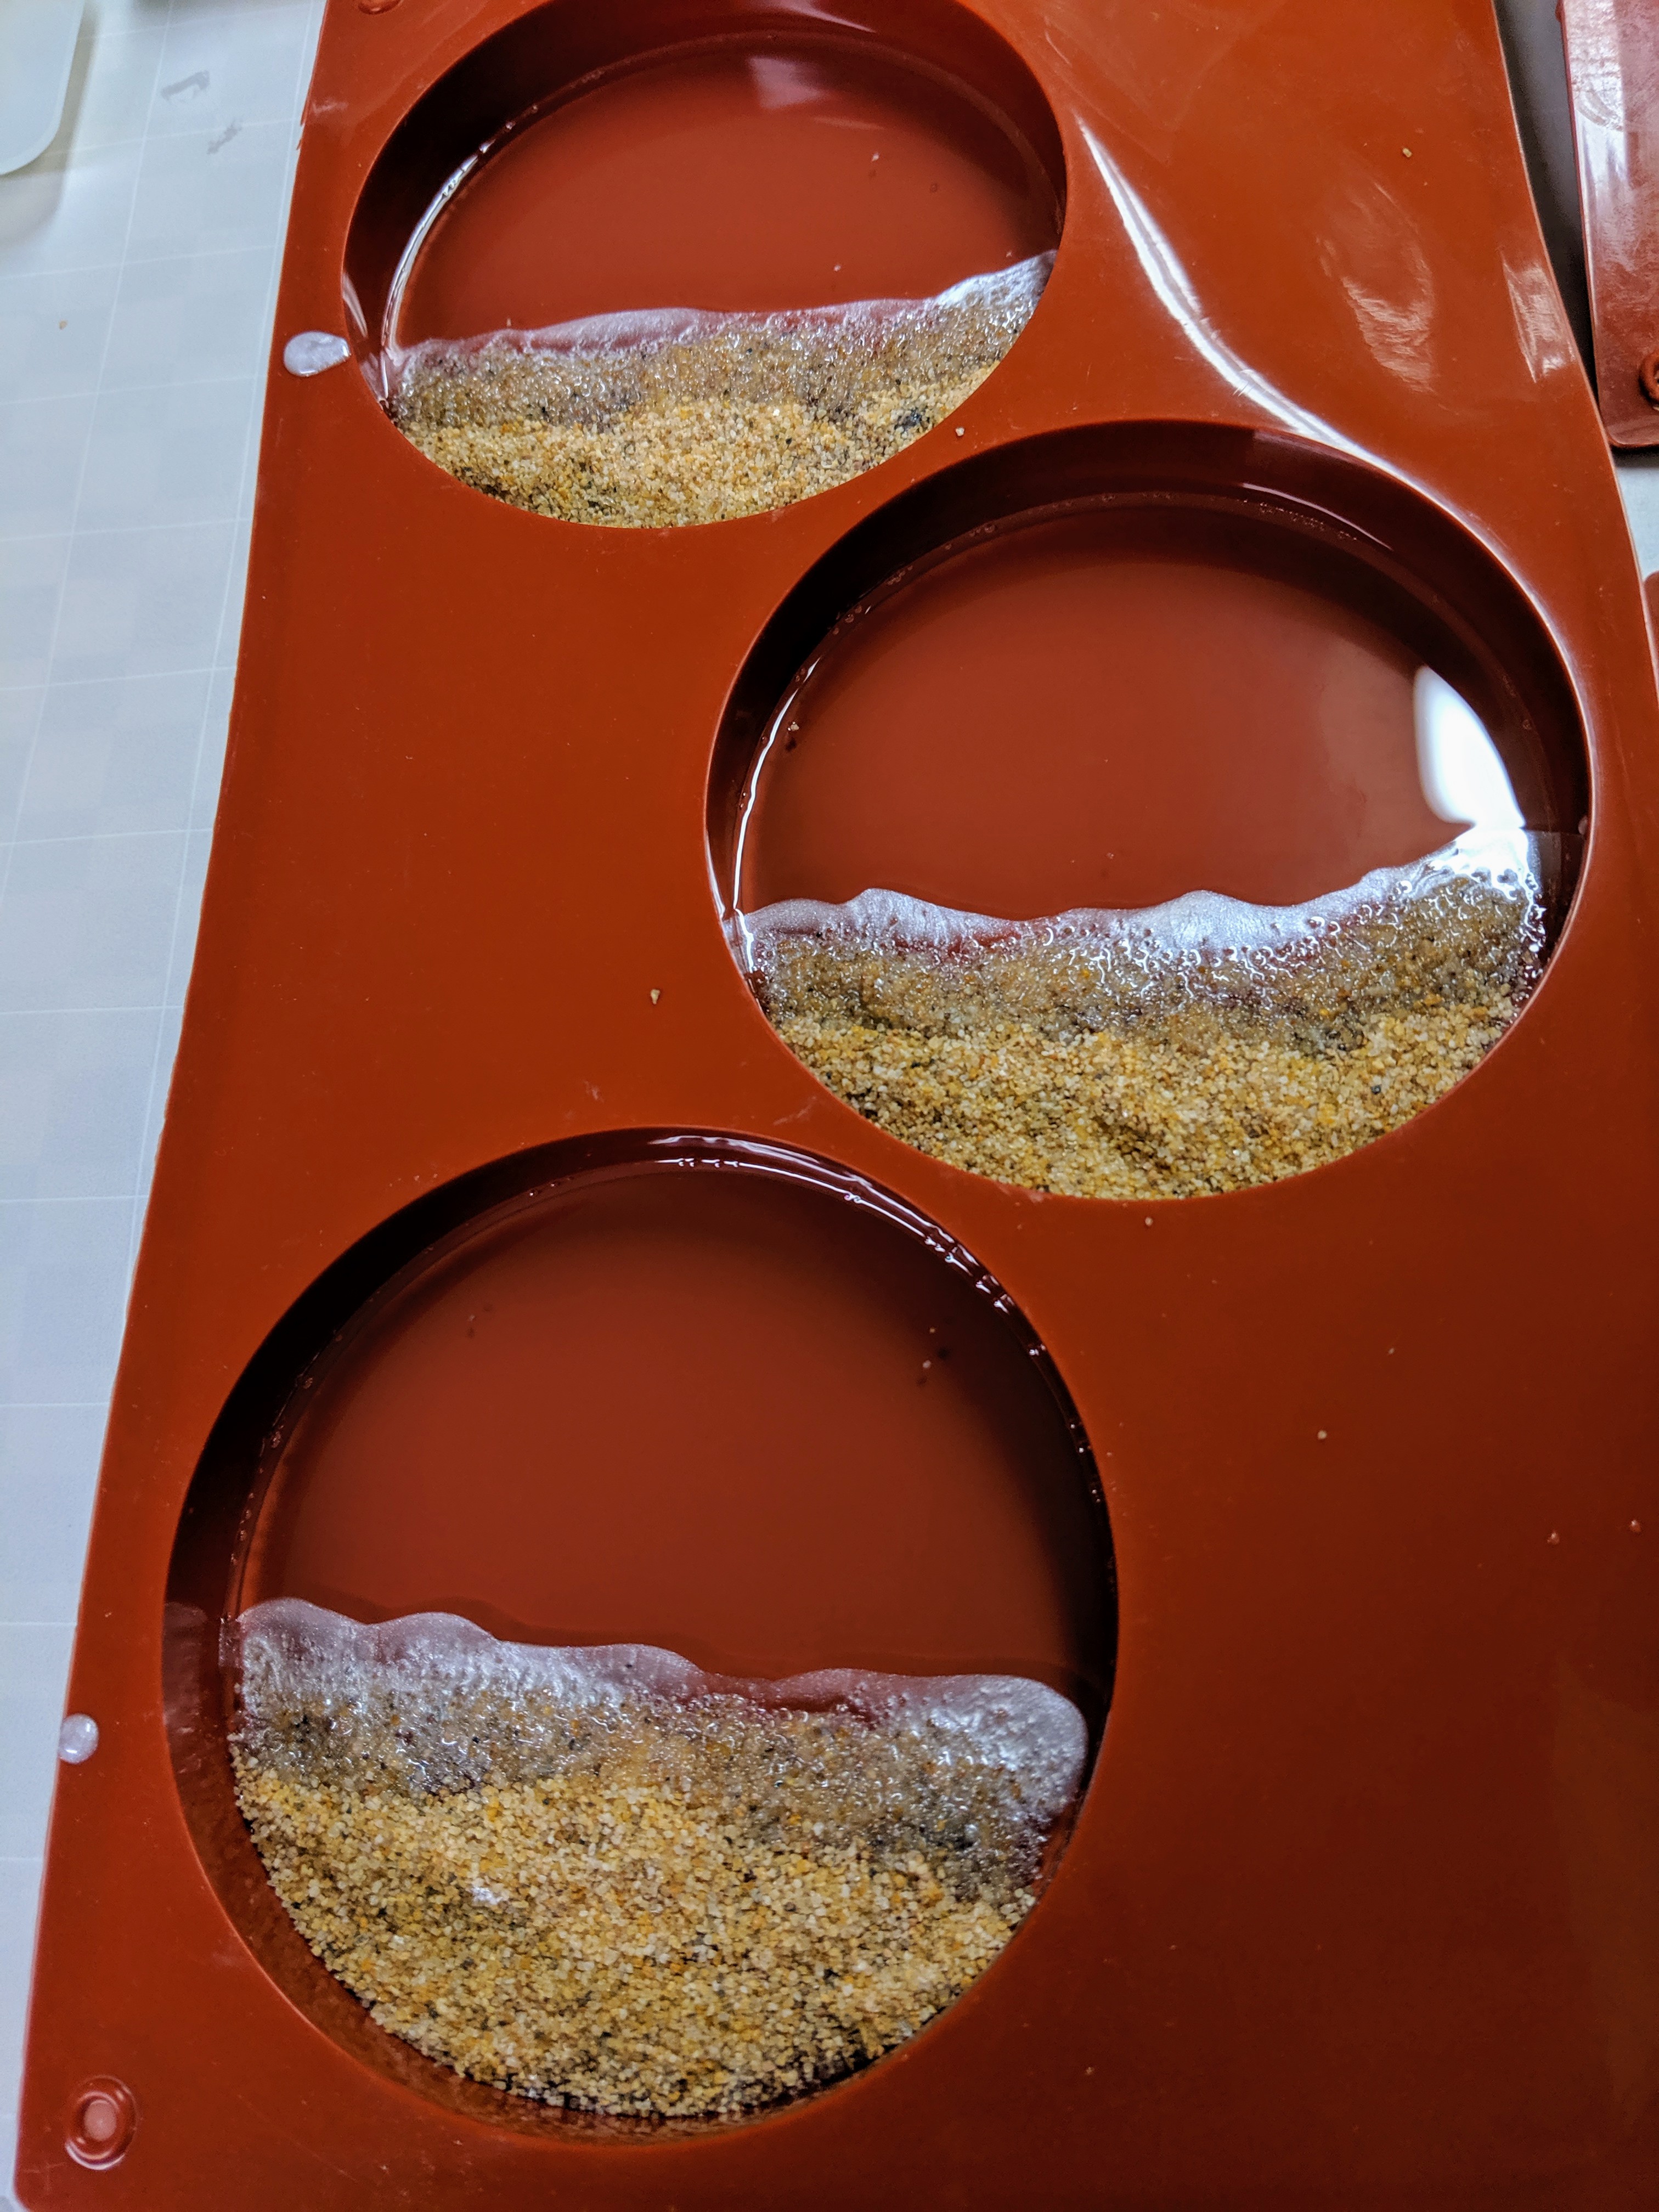
I poured about an ounce of resin in each mold, waited about half an hour, then started placing the shells, shark teeth, etc in the resin. I then waited about 2 hours before the next step.
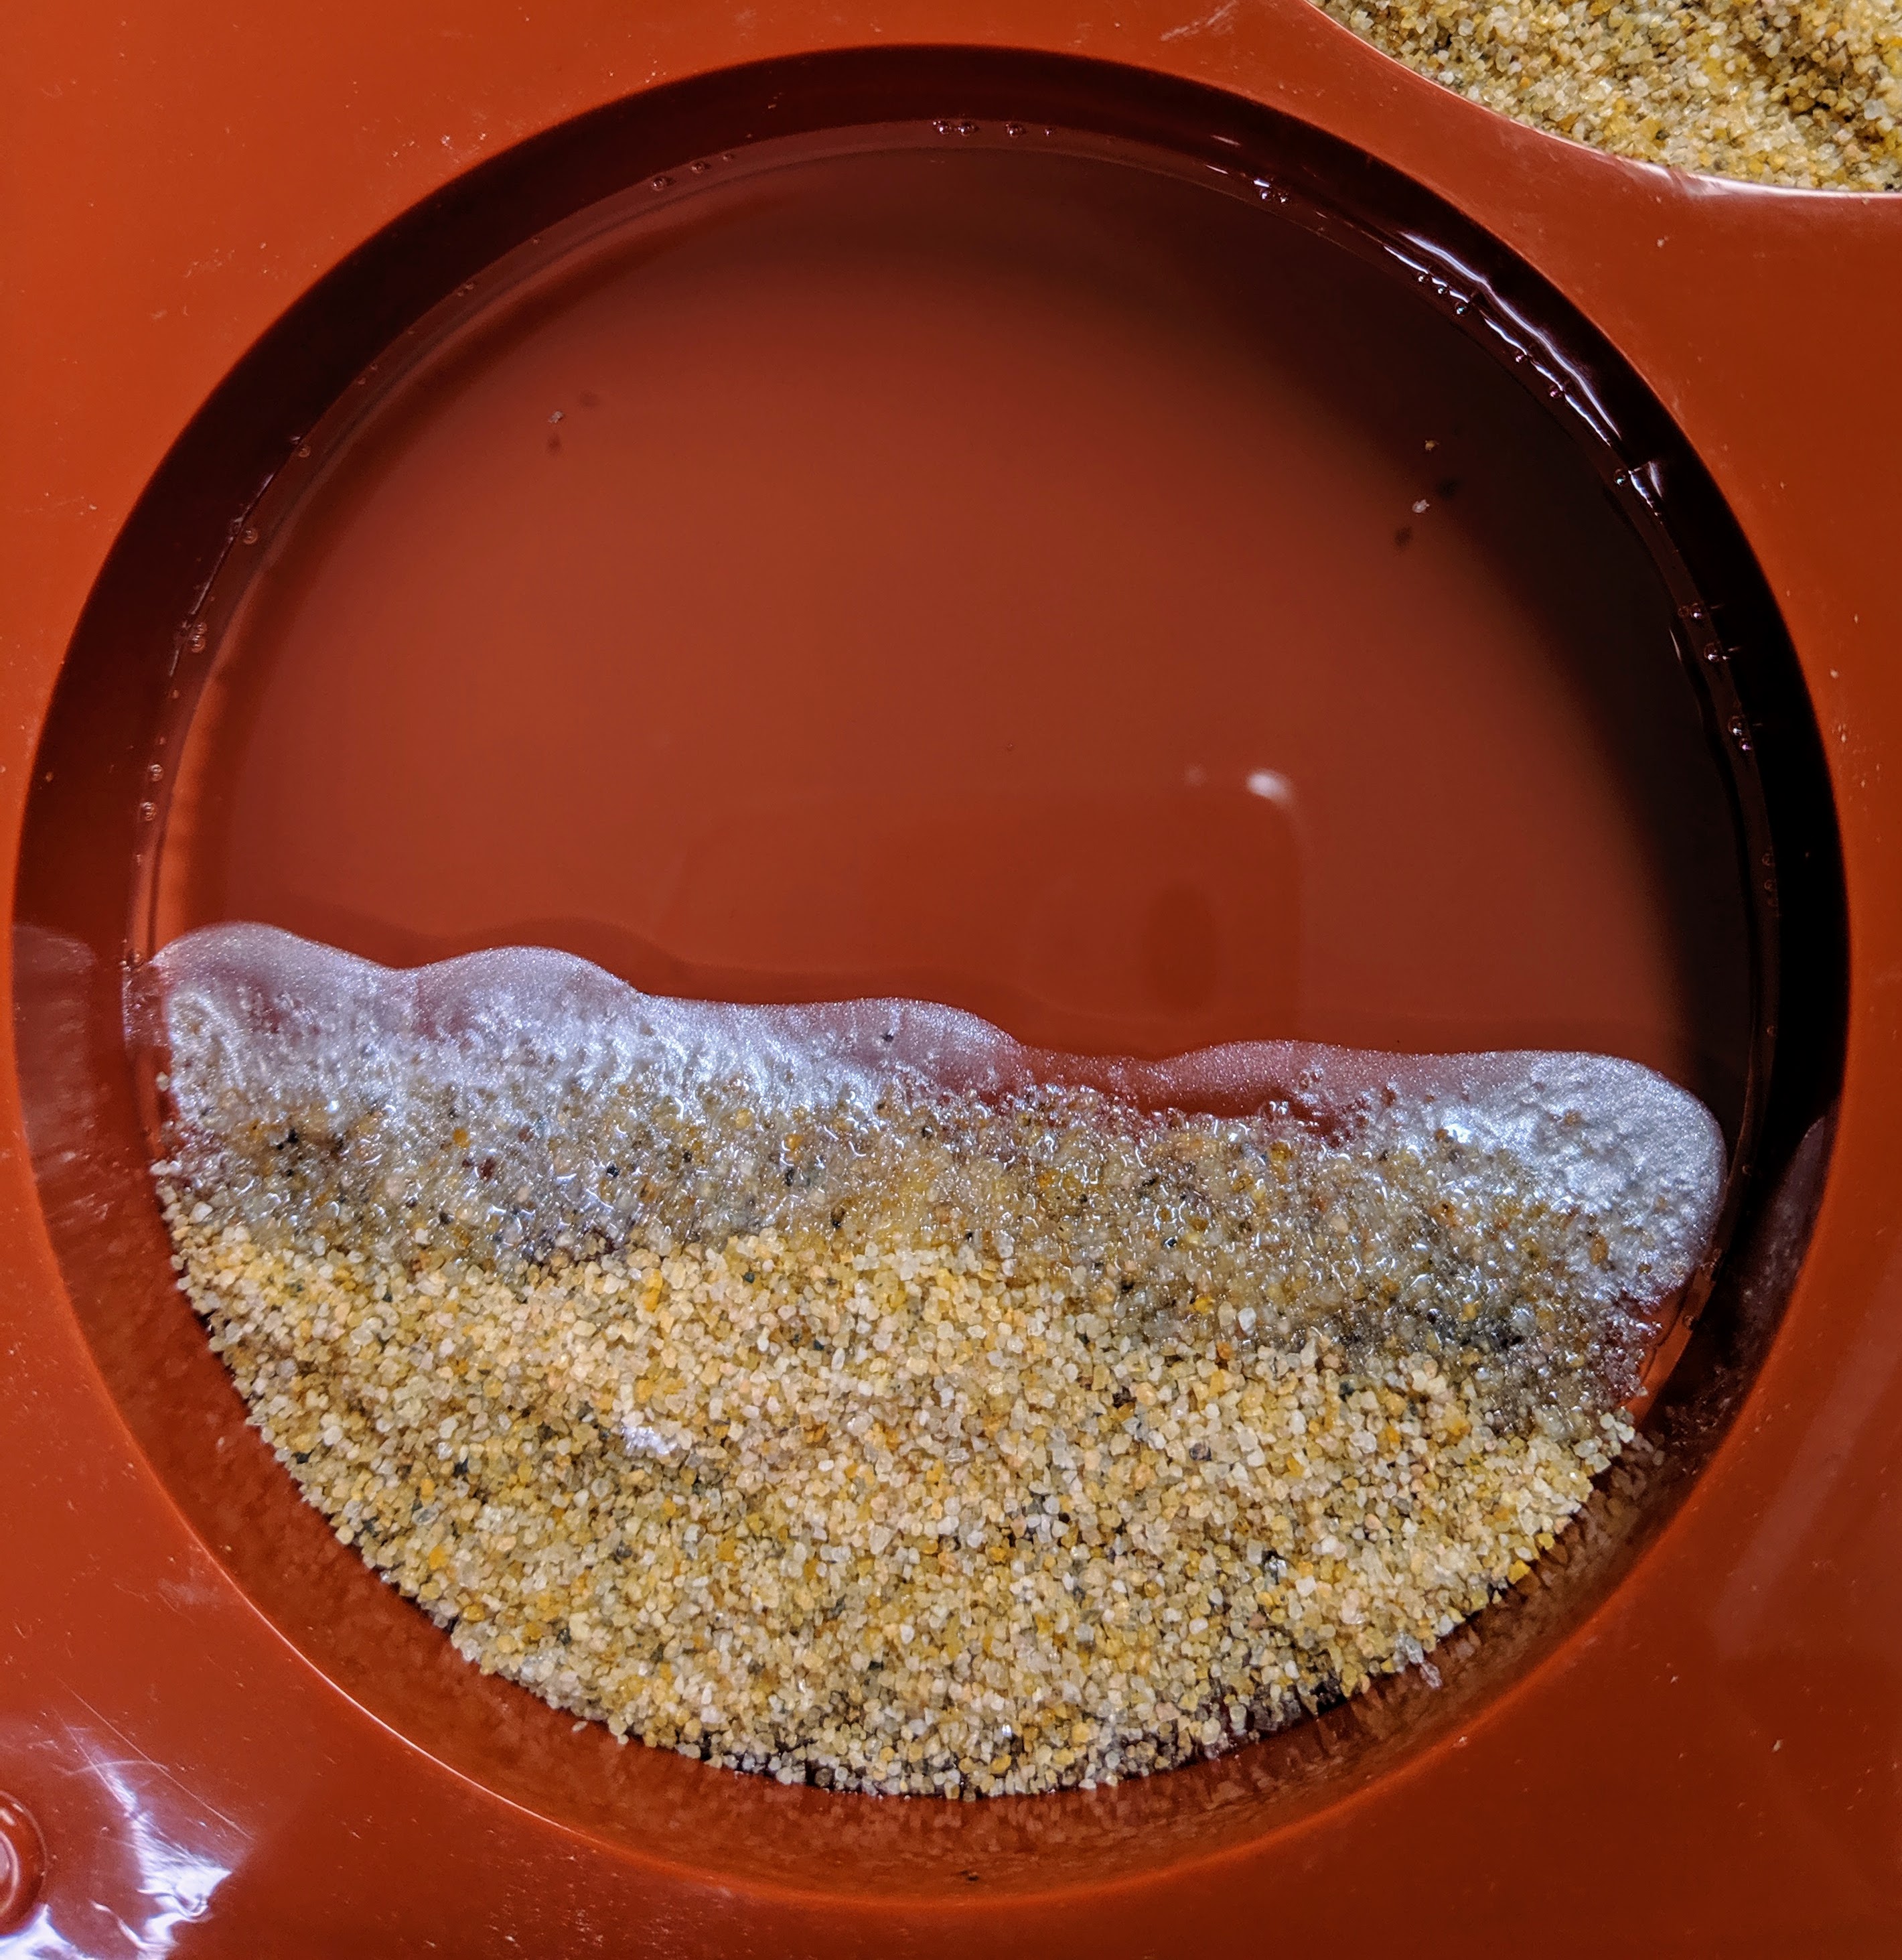
First I added the sand for the beach, which I made smaller than usual in this batch. I mixed up just about 3 CCs of resin and added the white pigment, then drizzled it in a line along the edge of the “beach” using a small craft stick. I went back and added a bit more after it dissipated a little. I also had enough white resin left over to make a couple of experimental beads. The white resin still spread out a bit more than I anticipated. I just drizzled a thin line and by the time I took photos, it had spread into the sand.
I wanted to let this layer cure enough that it would be more gel-like than liquid, as I believe that causes the white pigment to spread out more than I want it to (I really want it to be a thin layer at the edge of the sand and water to look like bubbles when the waves are crashing at the beach). Since it was just a small amount of resin, that didn’t take very long, and I started mixing up the various colors of pigment for the water.
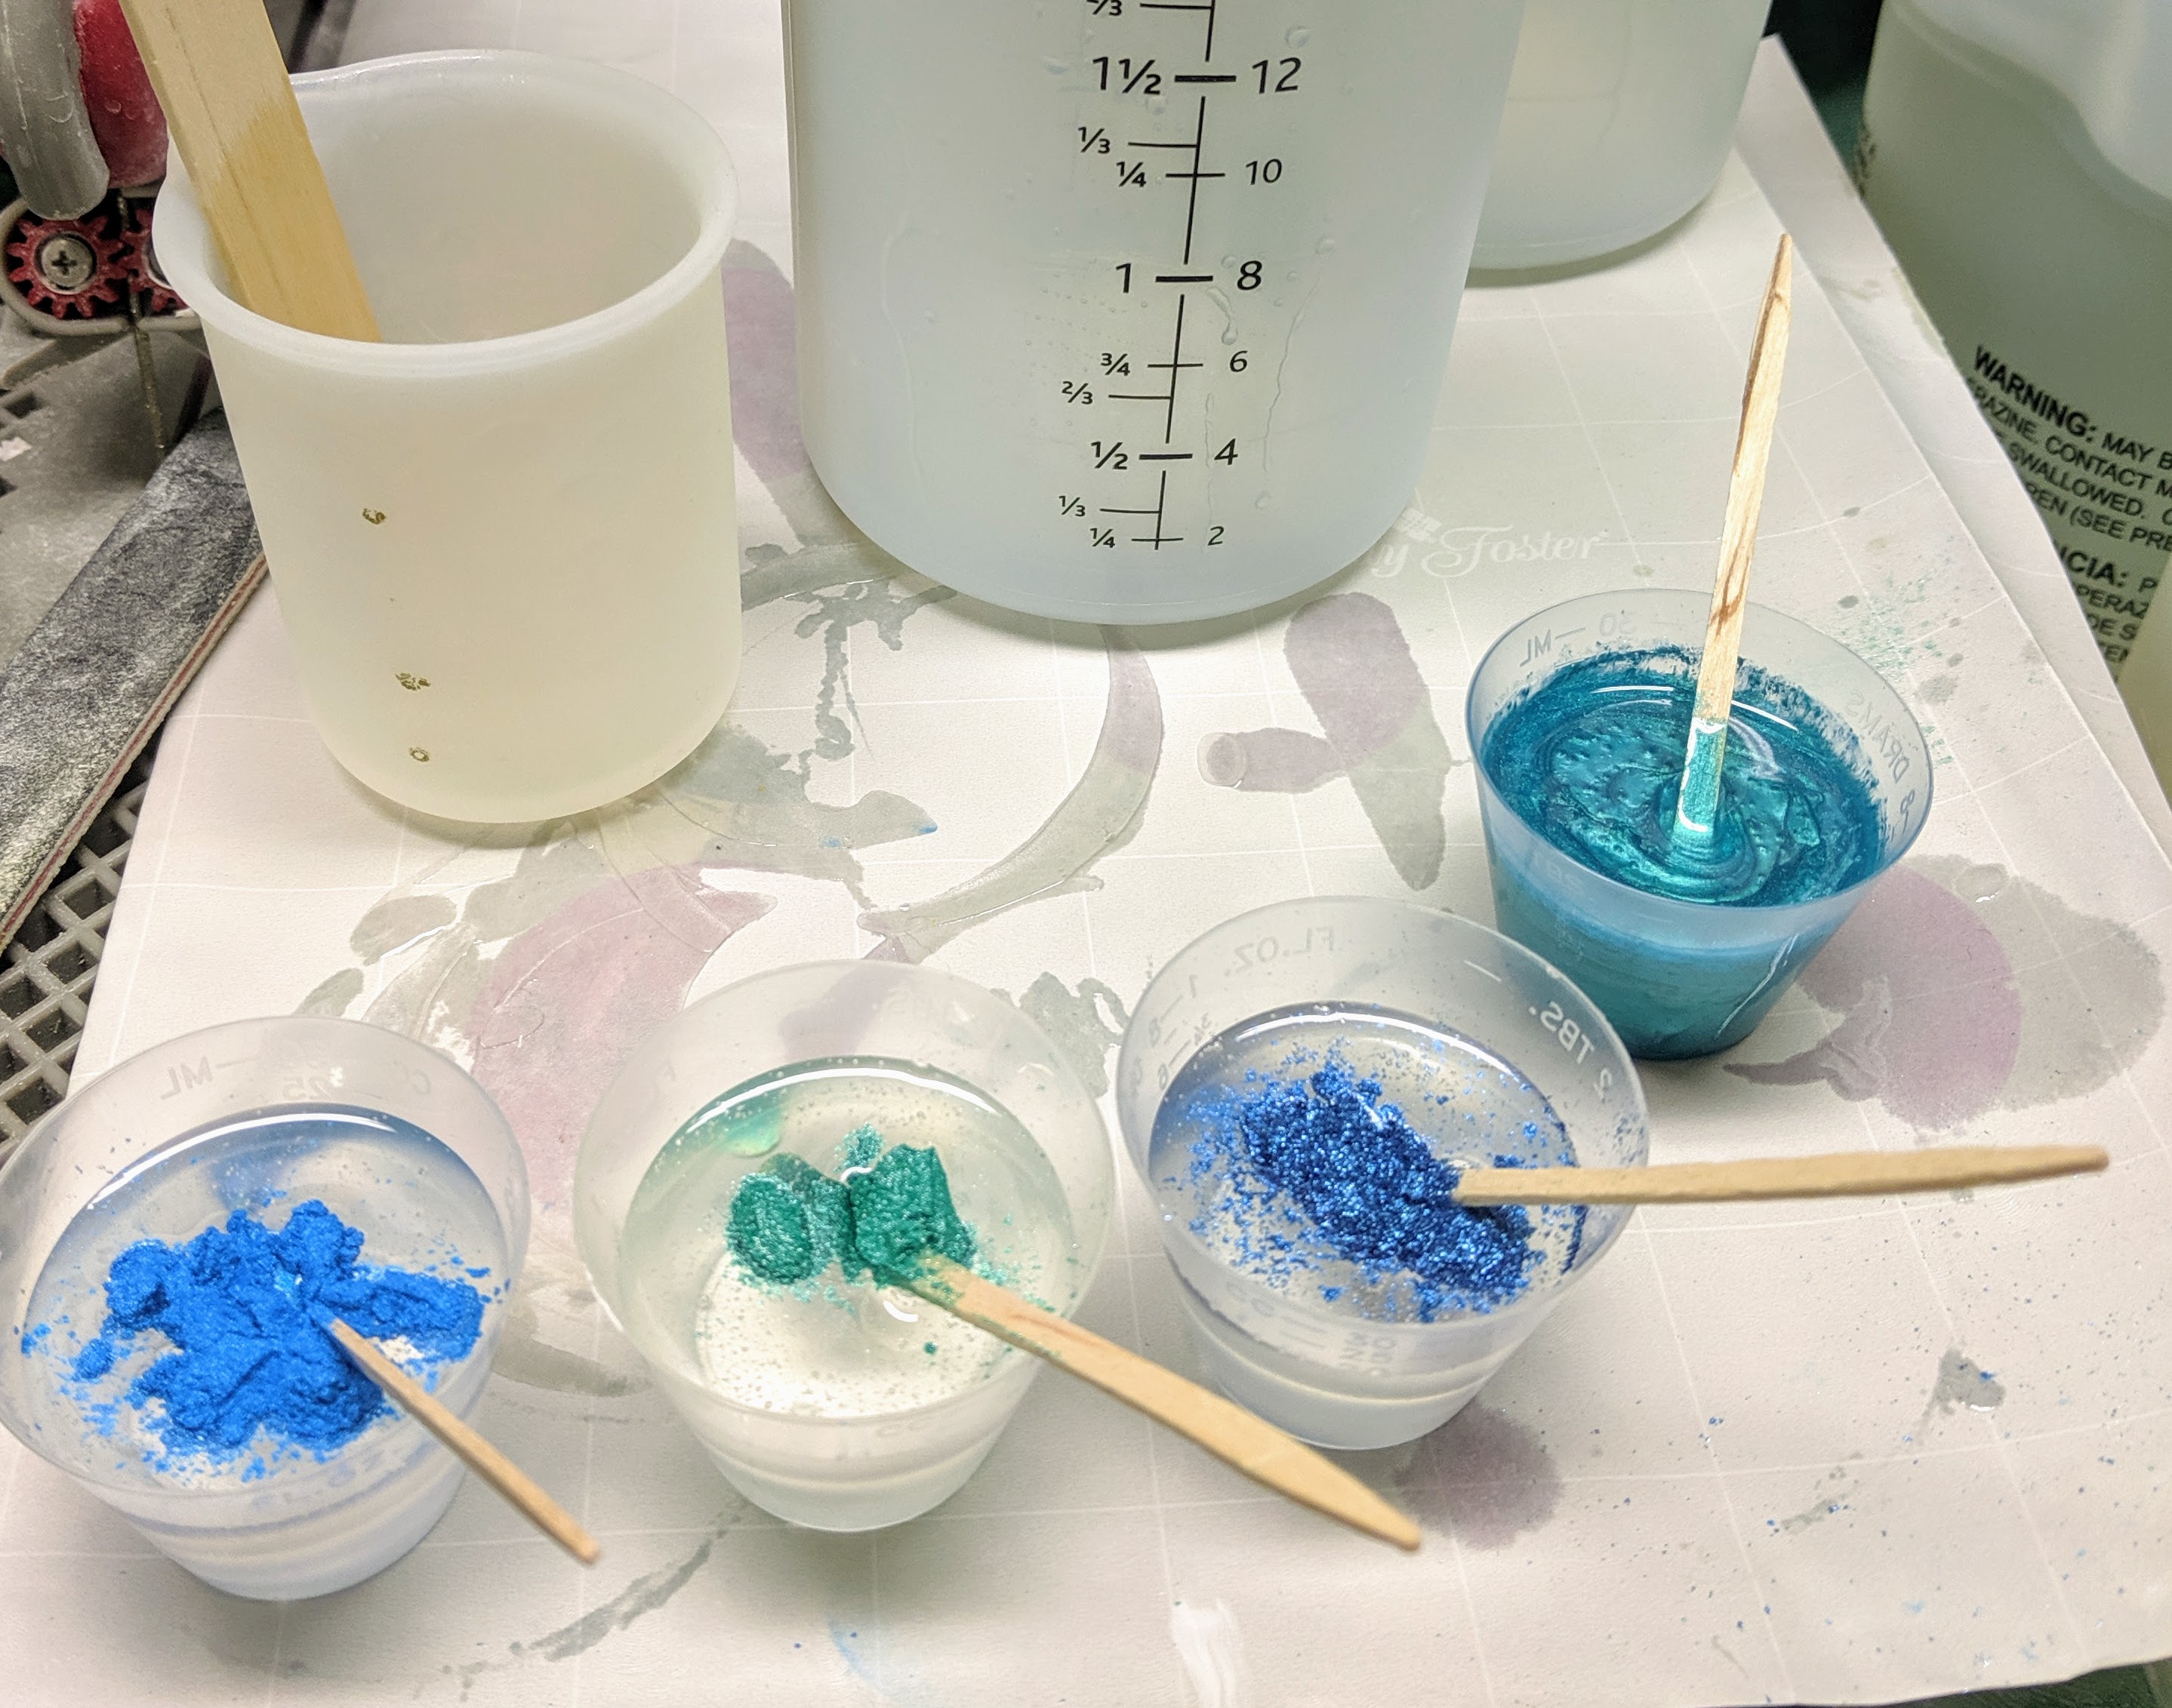
I mixed up 80 ccs of resin using a small silicone measuring cup, then split it evenly between the four medicine cups. I then scooped a bit of pigment powder into each cup and mixed it together. After all the colors were ready, I drizzled some of the Caribbean Blue (far right in the above photo) in a few lines into the mold. It will be interesting to see if making lines with the pigmented resin results in a different look for the water in the coasters.
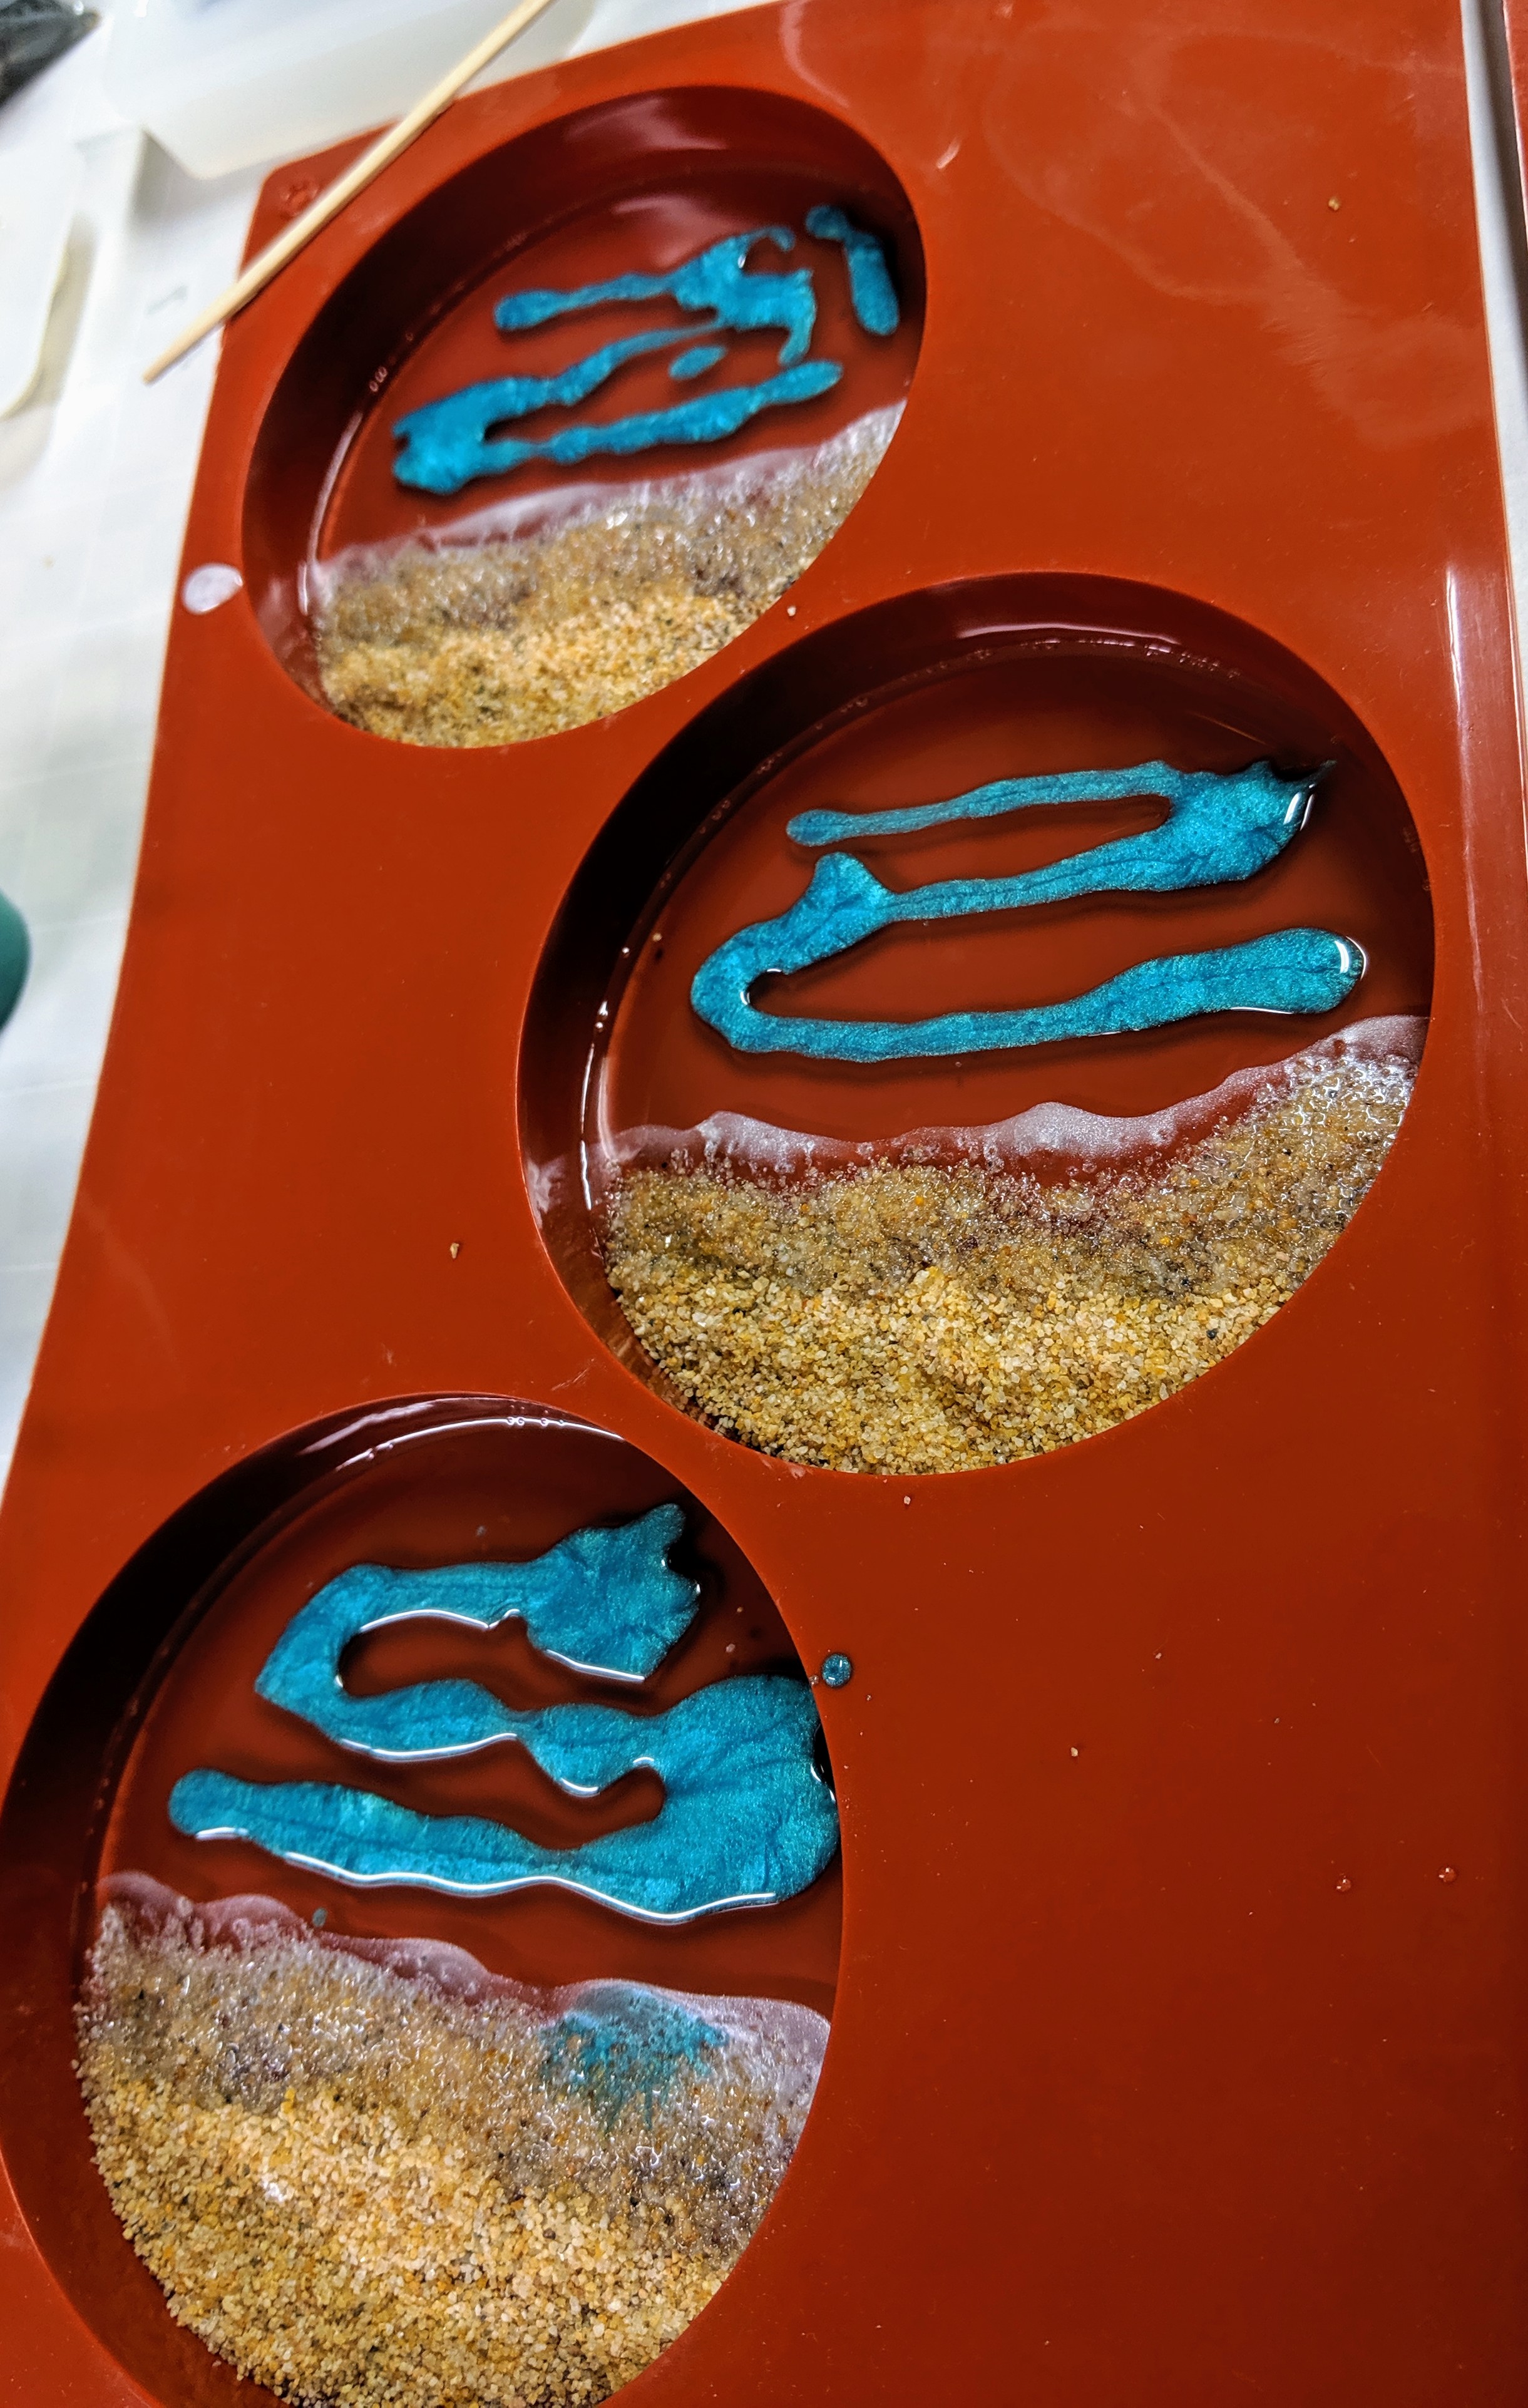
After that, I repeated the steps for each of the other three colors. I tried to fill in empty areas with each color. I didn’t add any of the water-pigmented resin to the sand, but I knew it would drift over it a bit after the last step.
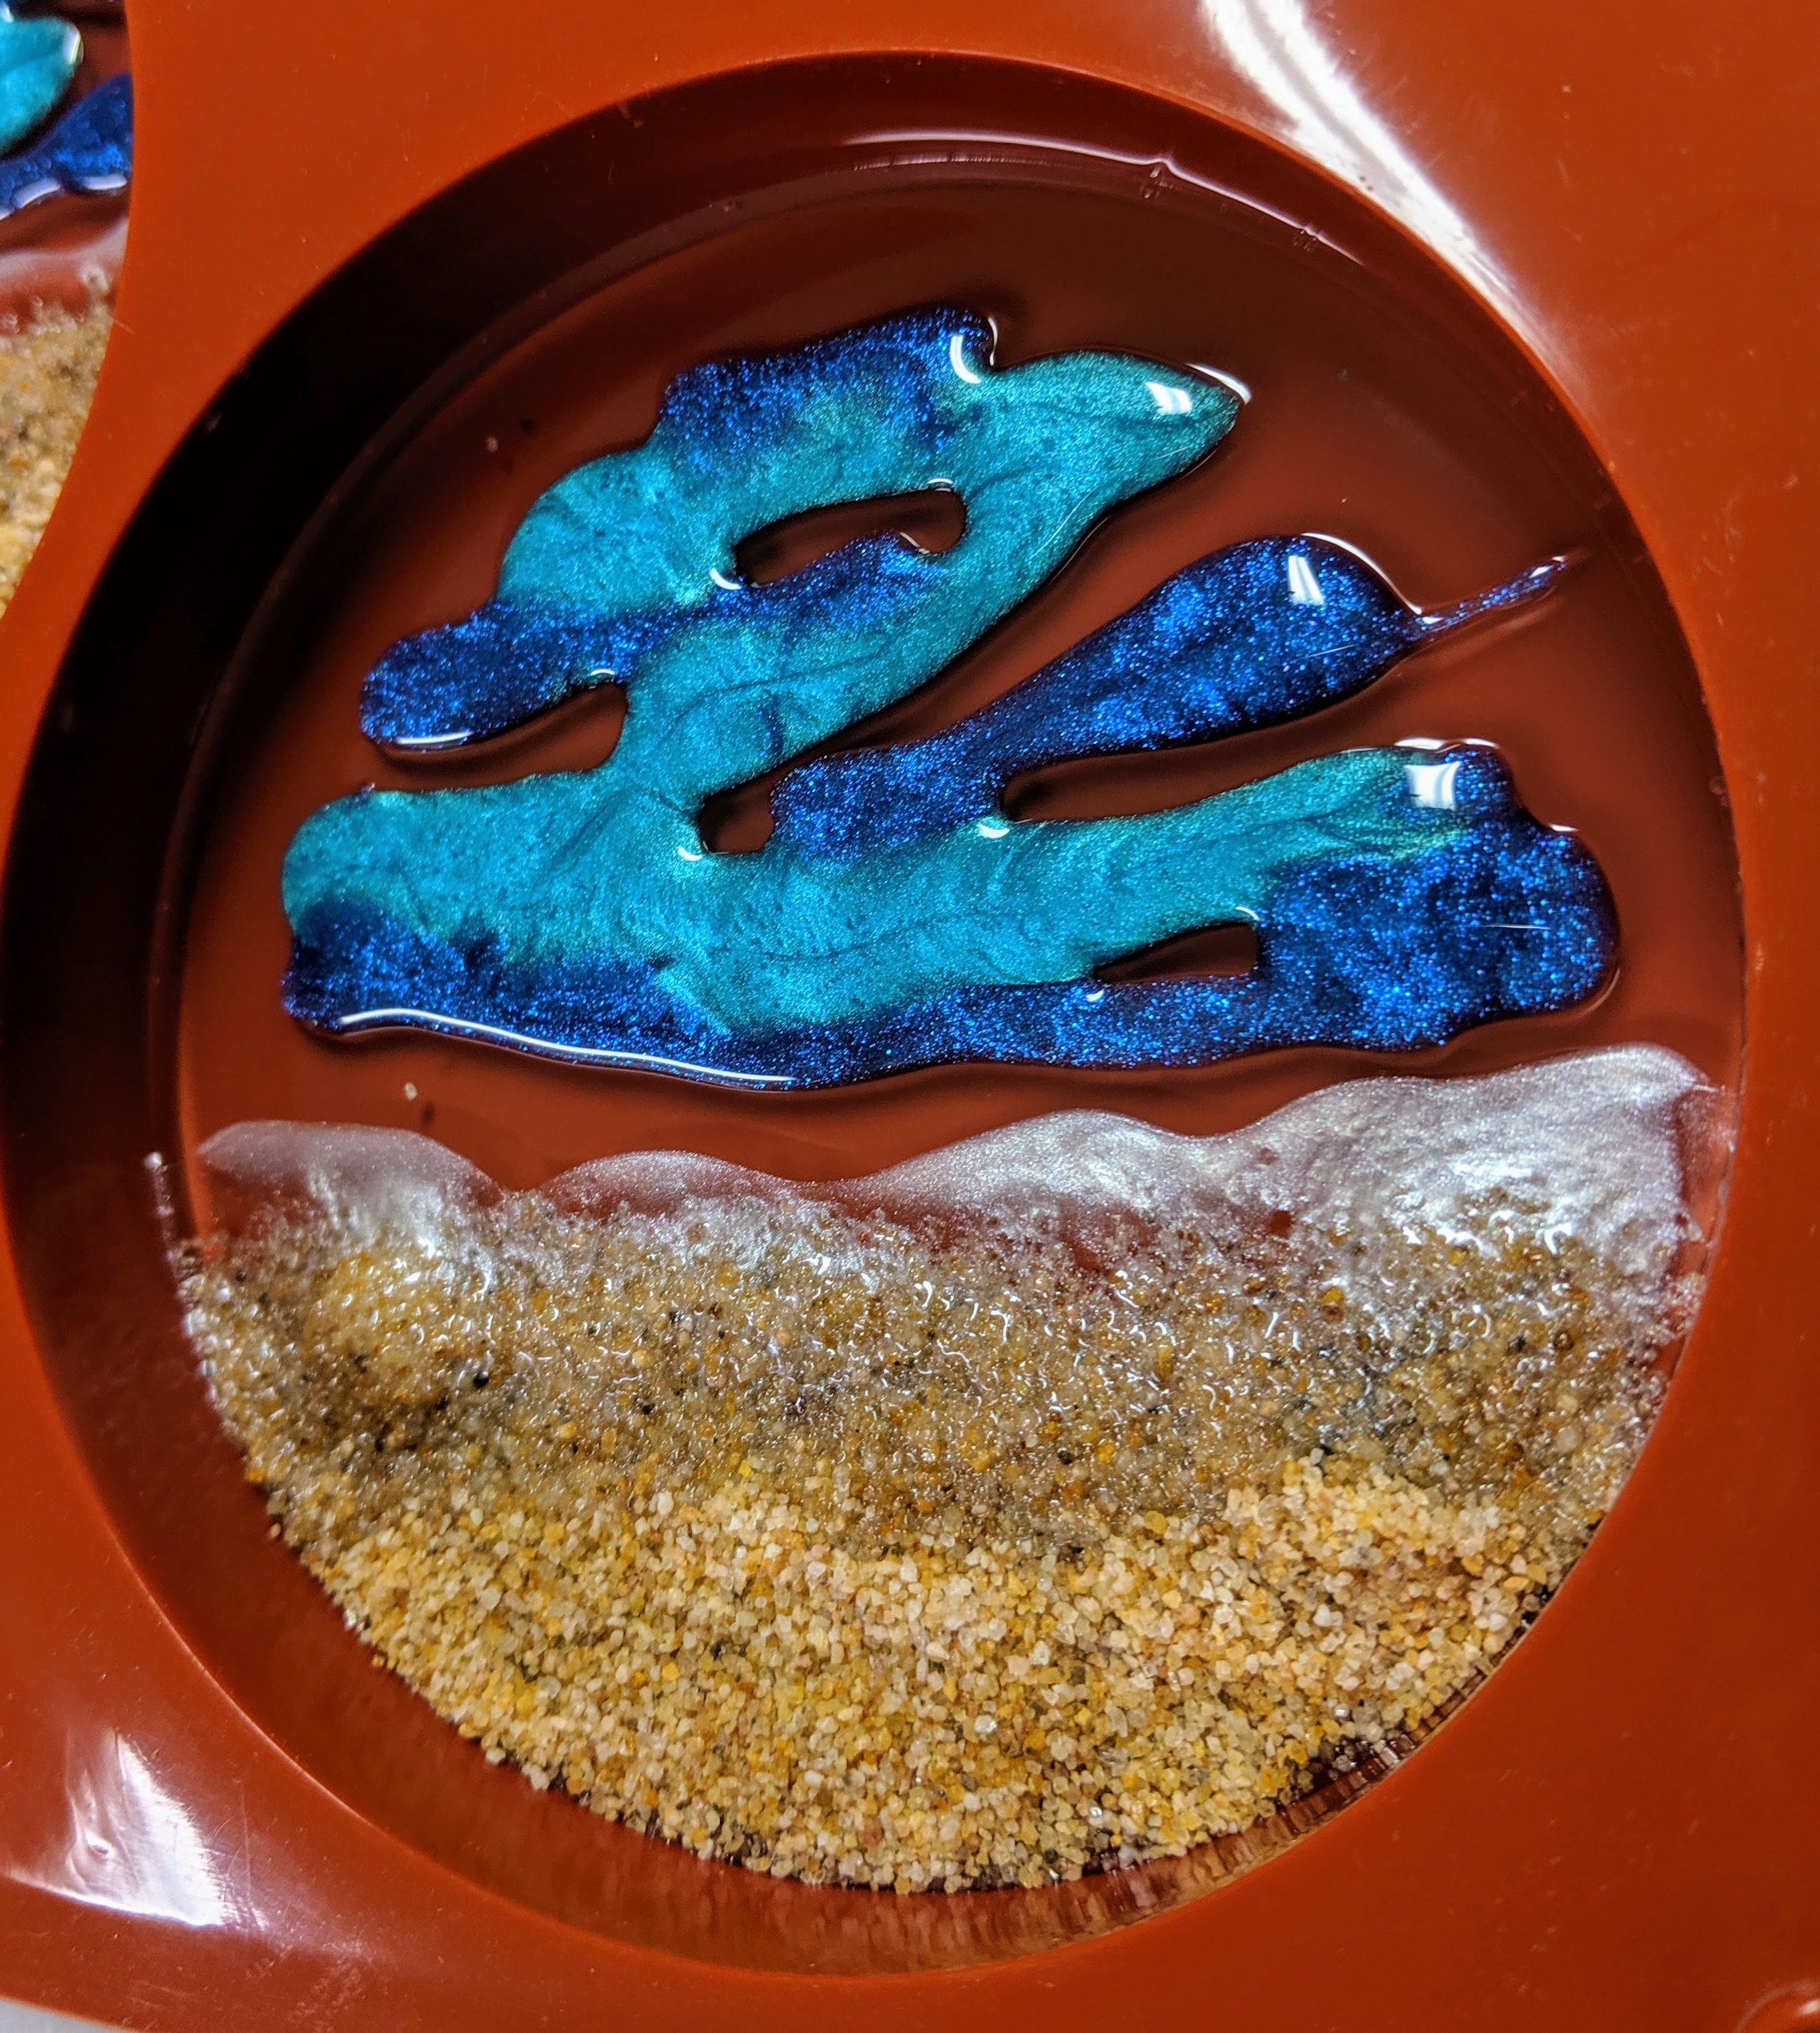
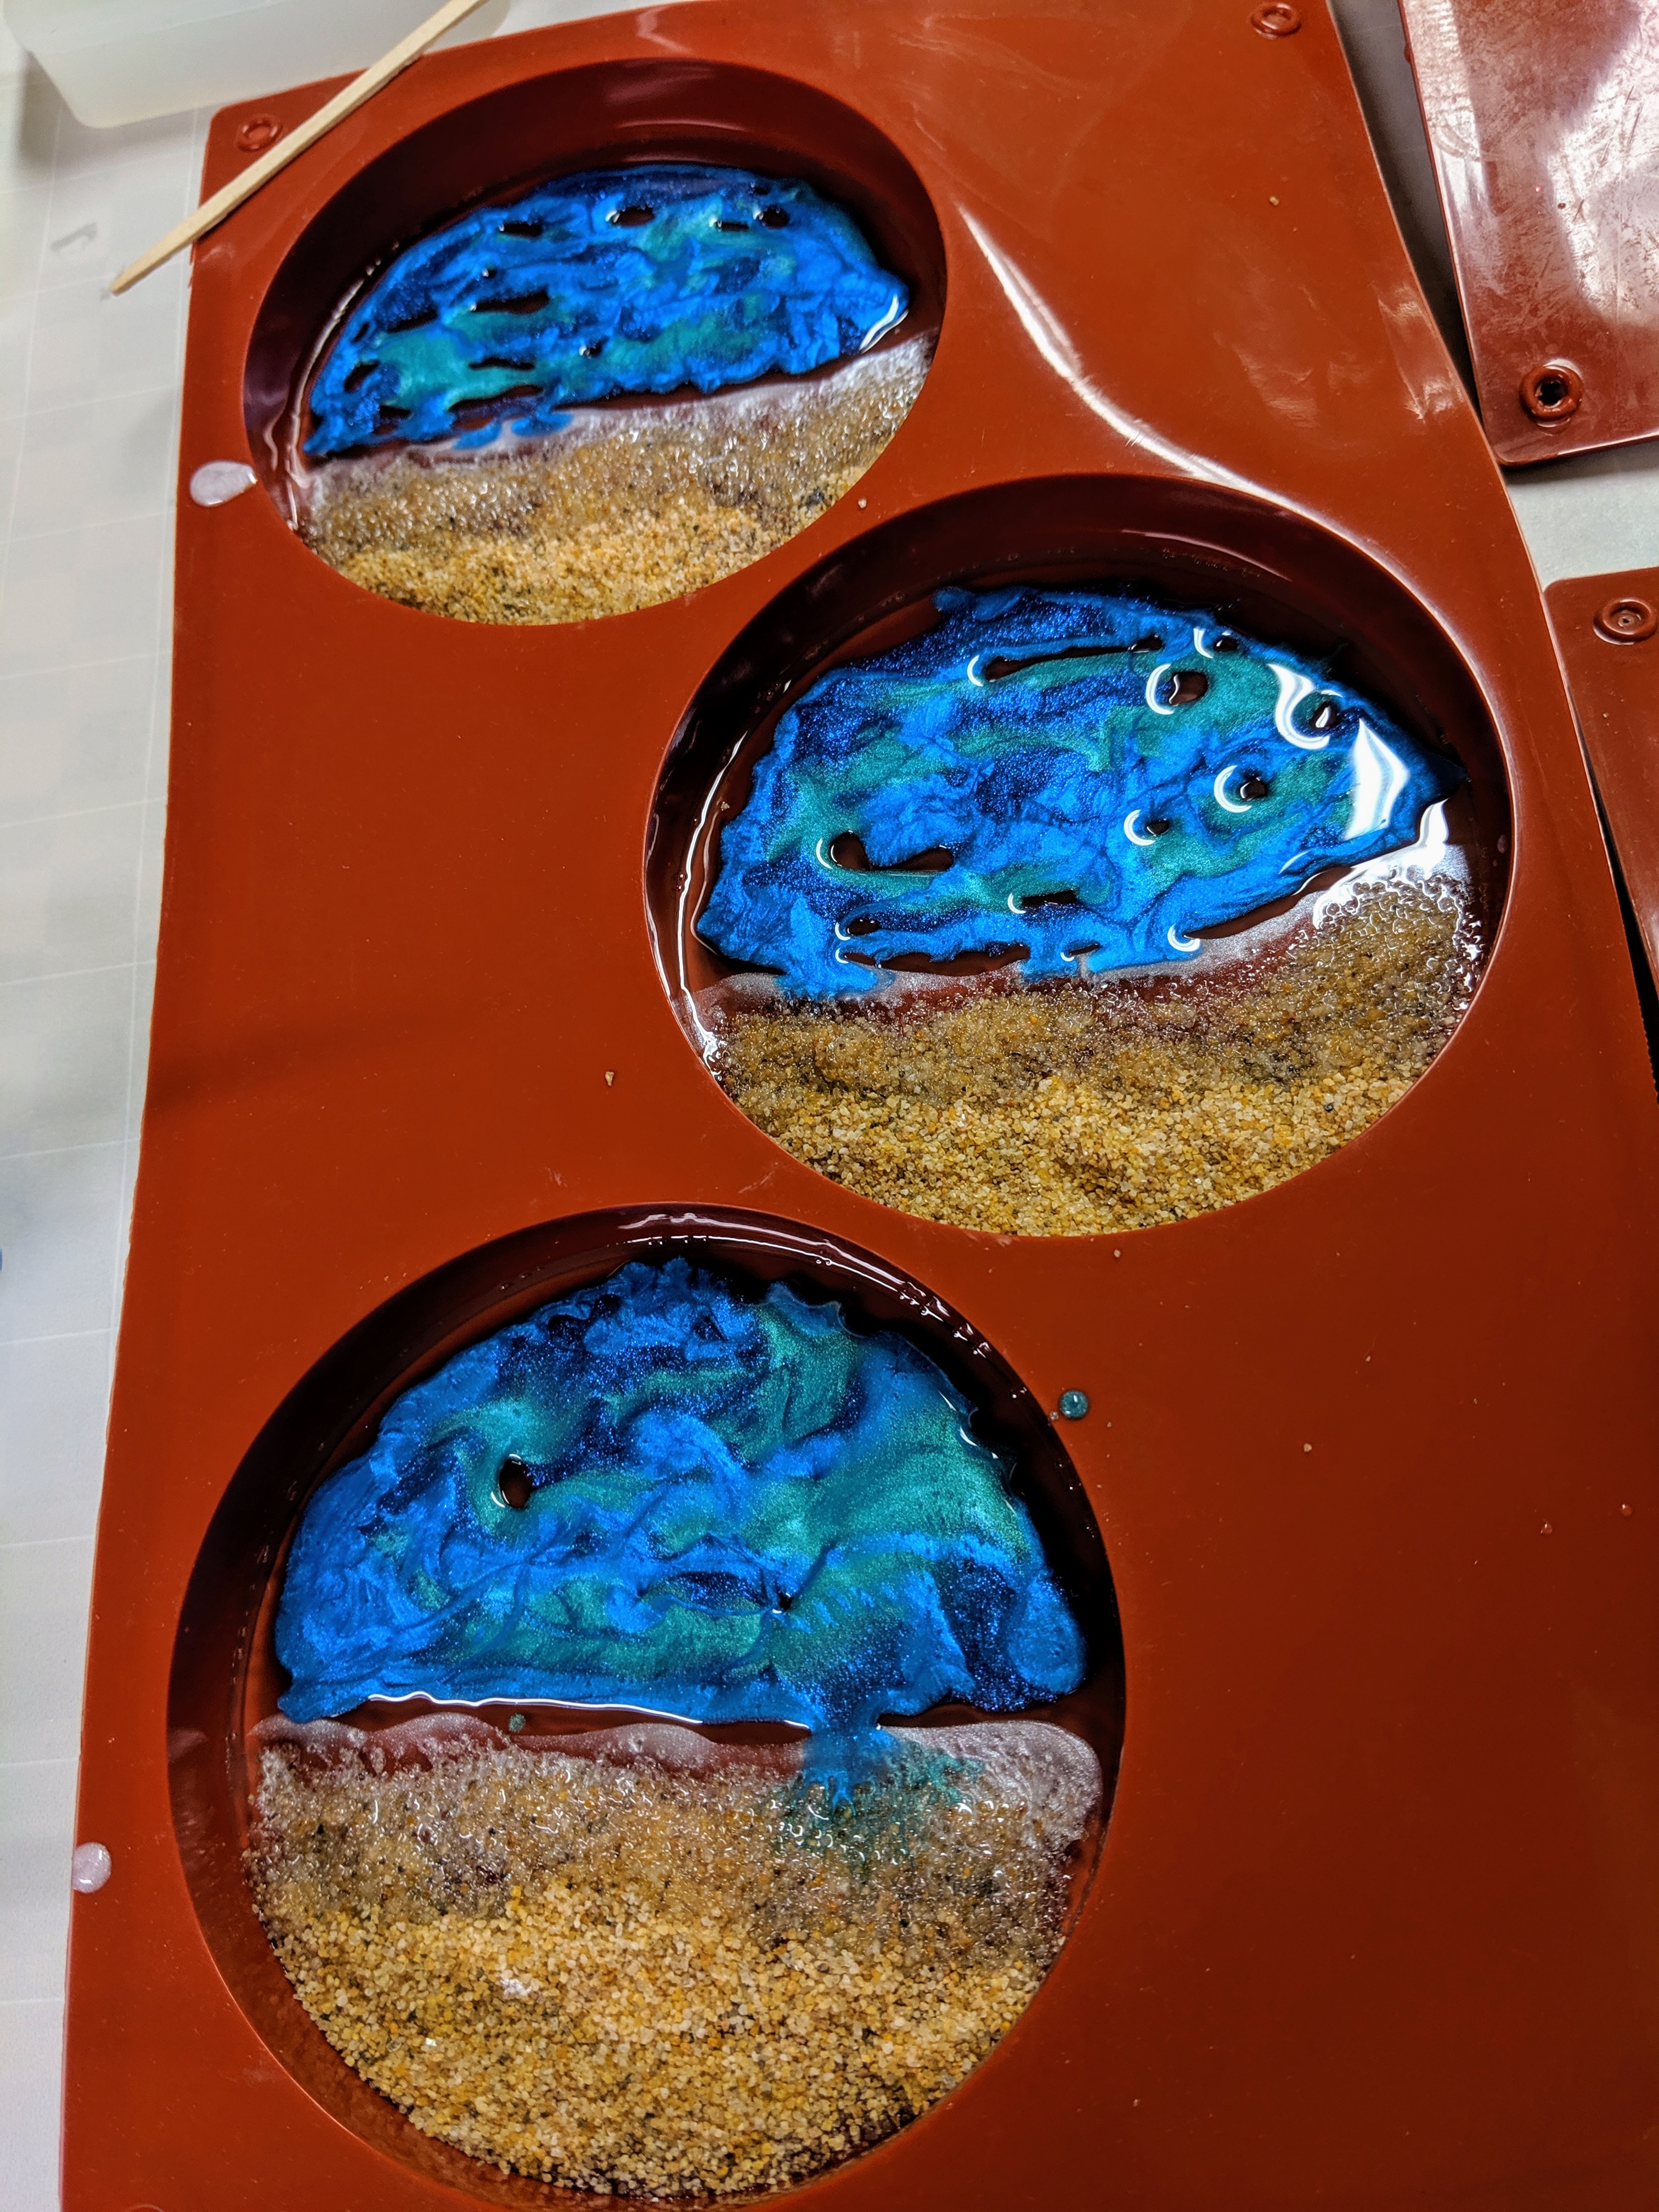
I used up every last usable drop of the pigmented resin I mixed for the water. I really wanted to fill in all the gaps.
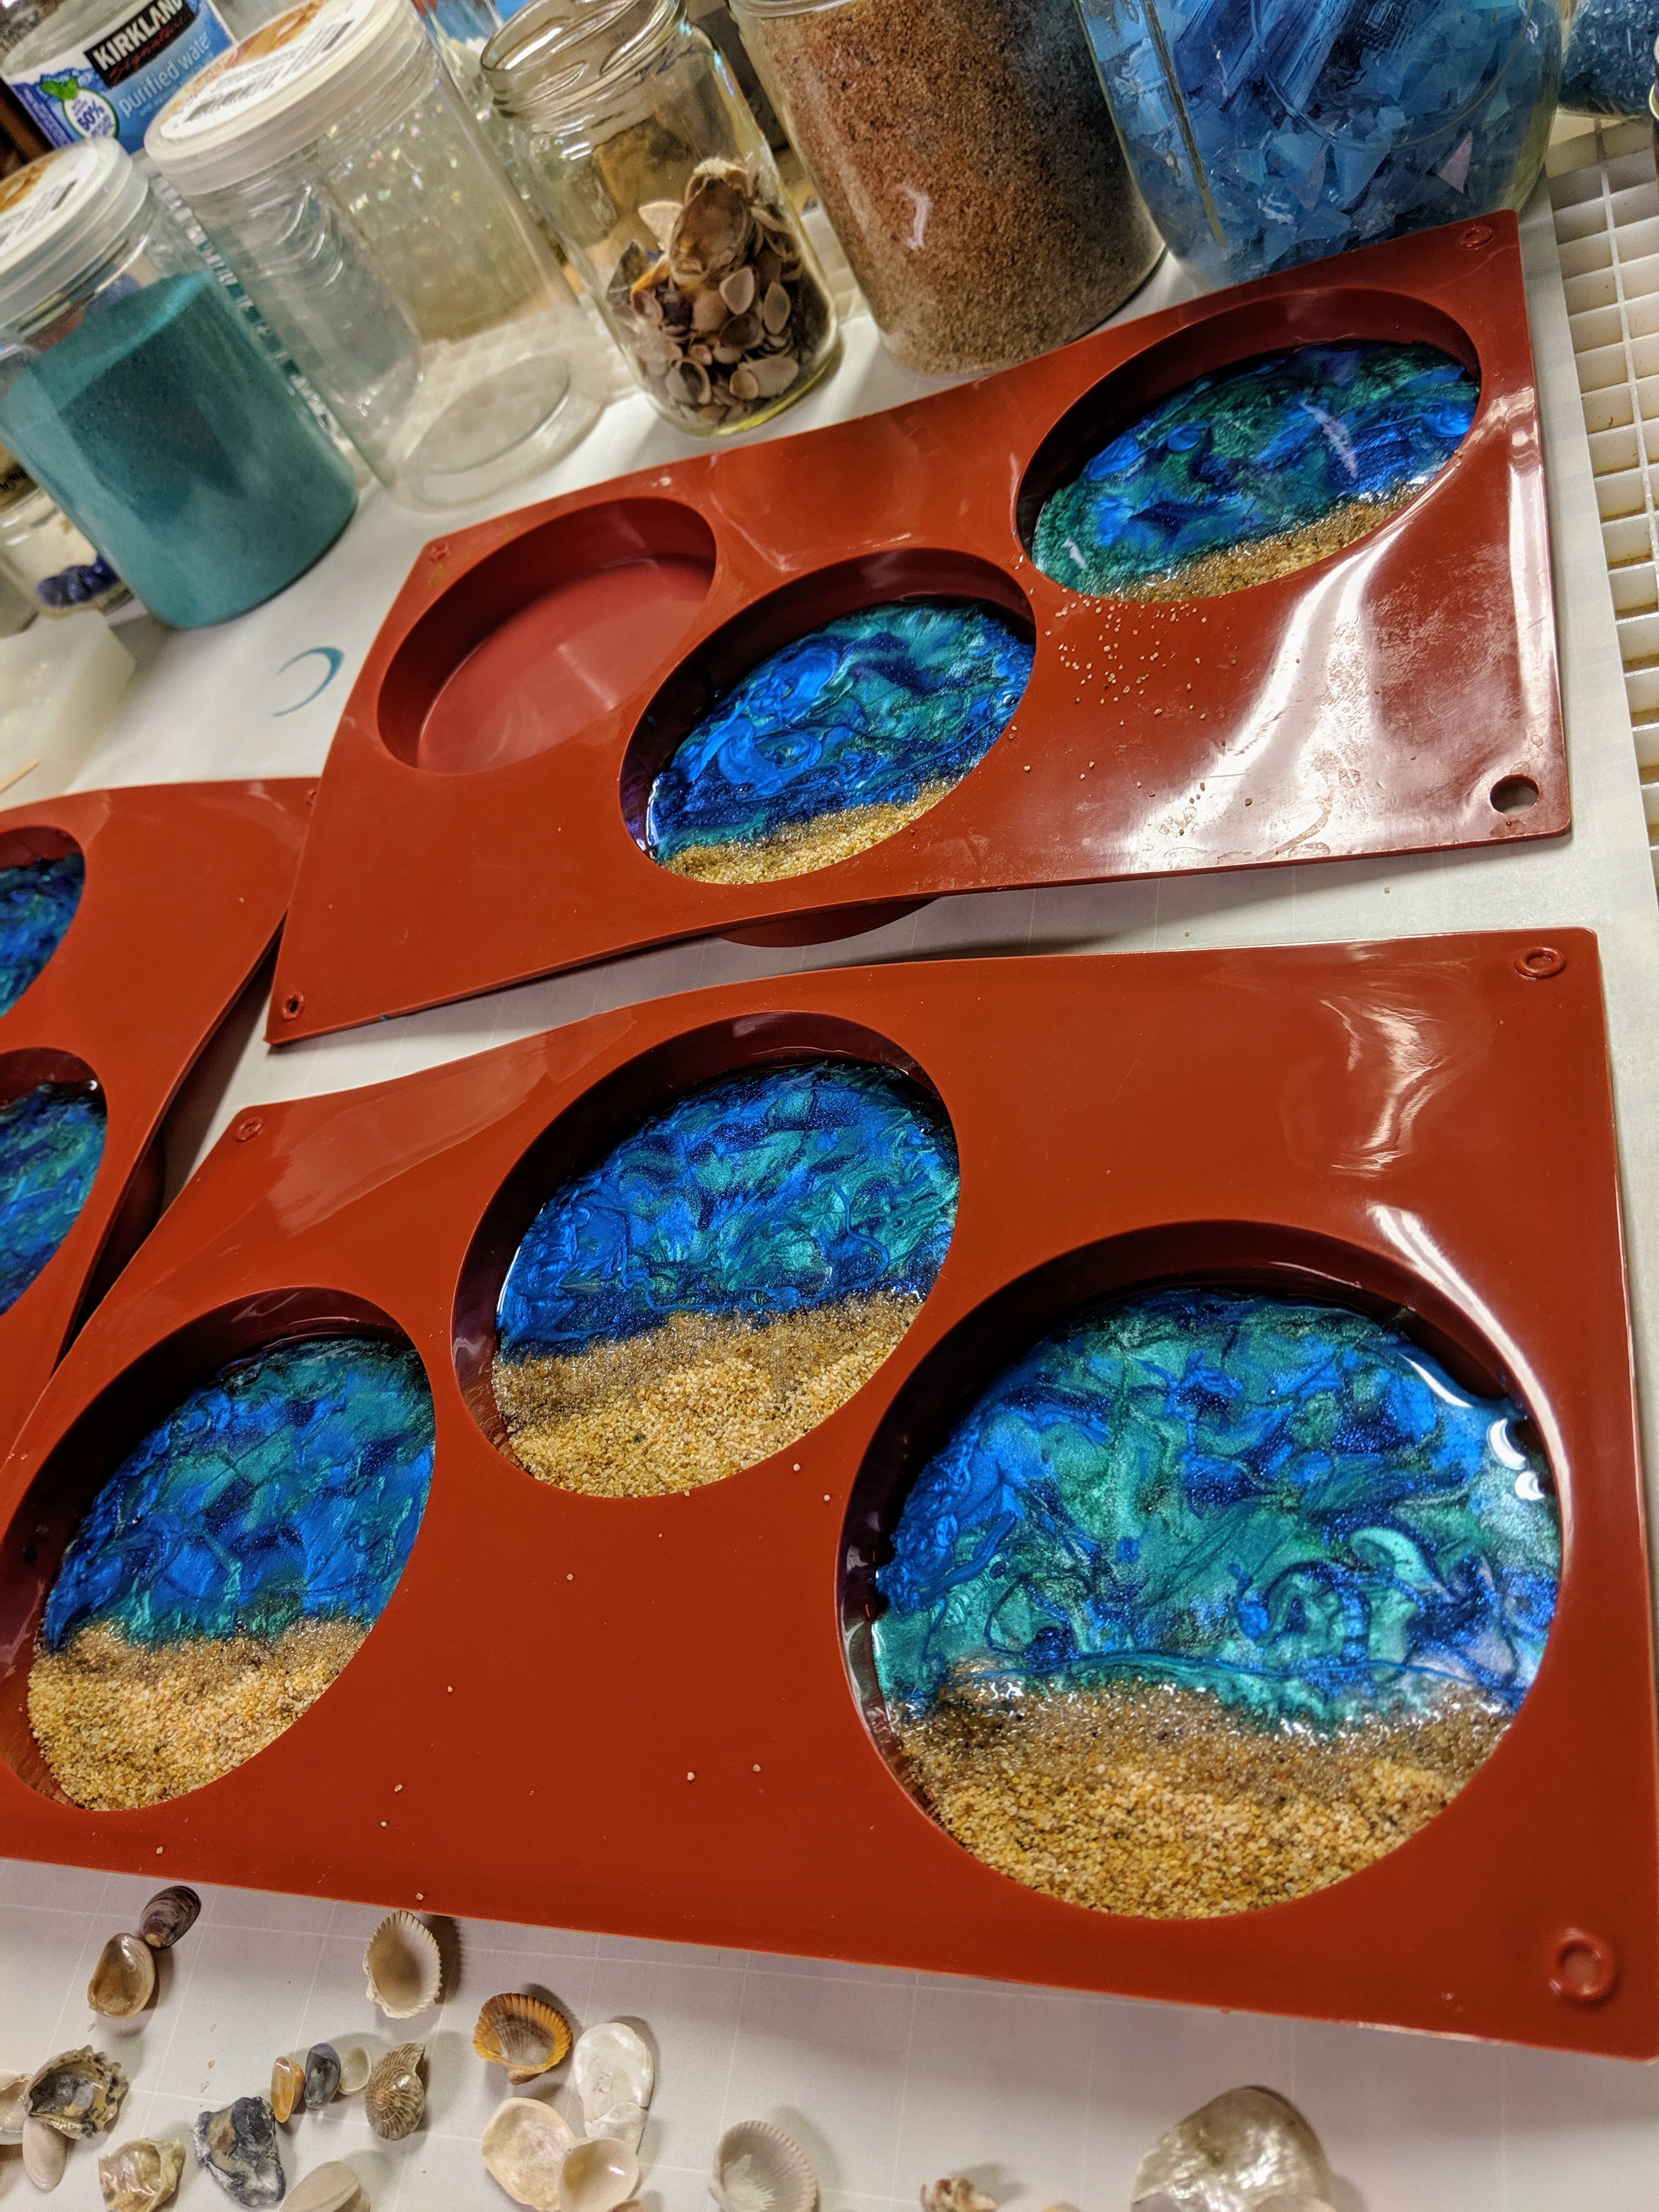
The final step was to add the last layer of clear resin, so I mixed up my last batch of the day, 14 ounces of resin. The reason I go back and forth between ccs and ounces is because my measuring cups have different measurements which I use for different purposes, just for convenience and ease of reading. For some reason, these really had a lot of late-emerging bubbles – much more persistent than I usually see with coasters. That could be a side effect of not letting the layers cure fully between pours. Having to use the heat gun so much moved the pigment / water around quite a bit (at least on the bottom of the coasters). I might need to get a blow torch, as I think they might be more precise in removing bubbles without moving the resin around so much. I’m a bit impatient to see how these turn out, but I have no other choice but to wait until they fully cure to find out how they look. Unlike the sun mosaic, which I can look at while it cures. The only problem with that is keeping curious fingers out of the resin while it is still soft (yes, my children have been known to poke at things during this stage). Hopefully tomorrow I can bring it upstairs to photograph.
Just a side note – I’m normally a day behind posting these, but I try to write the post the same day as I do the project so all the details are fresh in my memory. That means when I reference “today”, it’s not usually the same day as the post went live. I’ll actually be pulling these out of their molds on the 30th, but I will also schedule this to post on the 30th at a somewhat random time.