Thinking upside-down

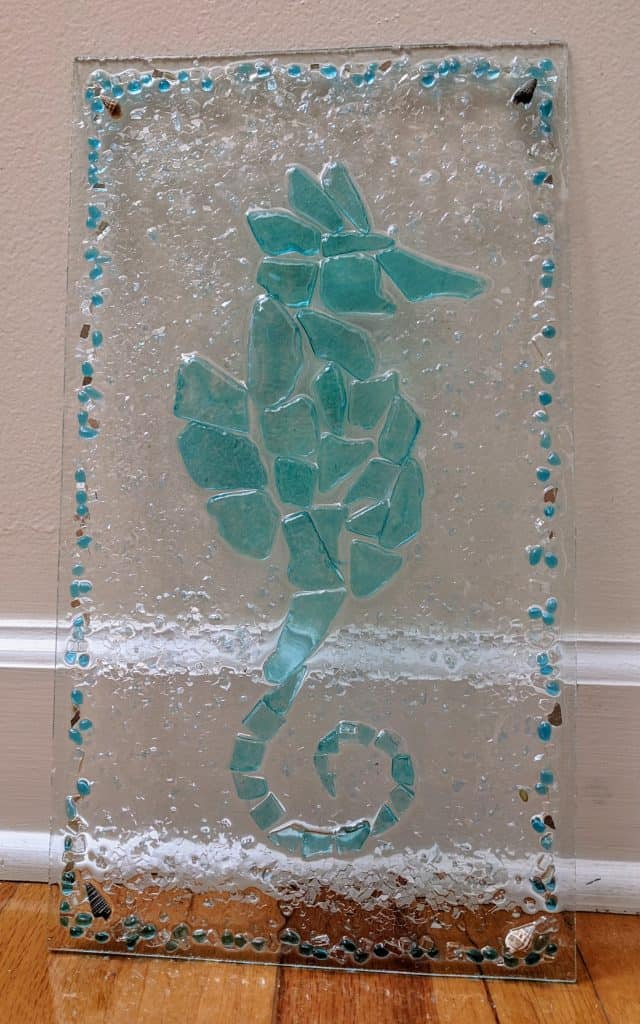
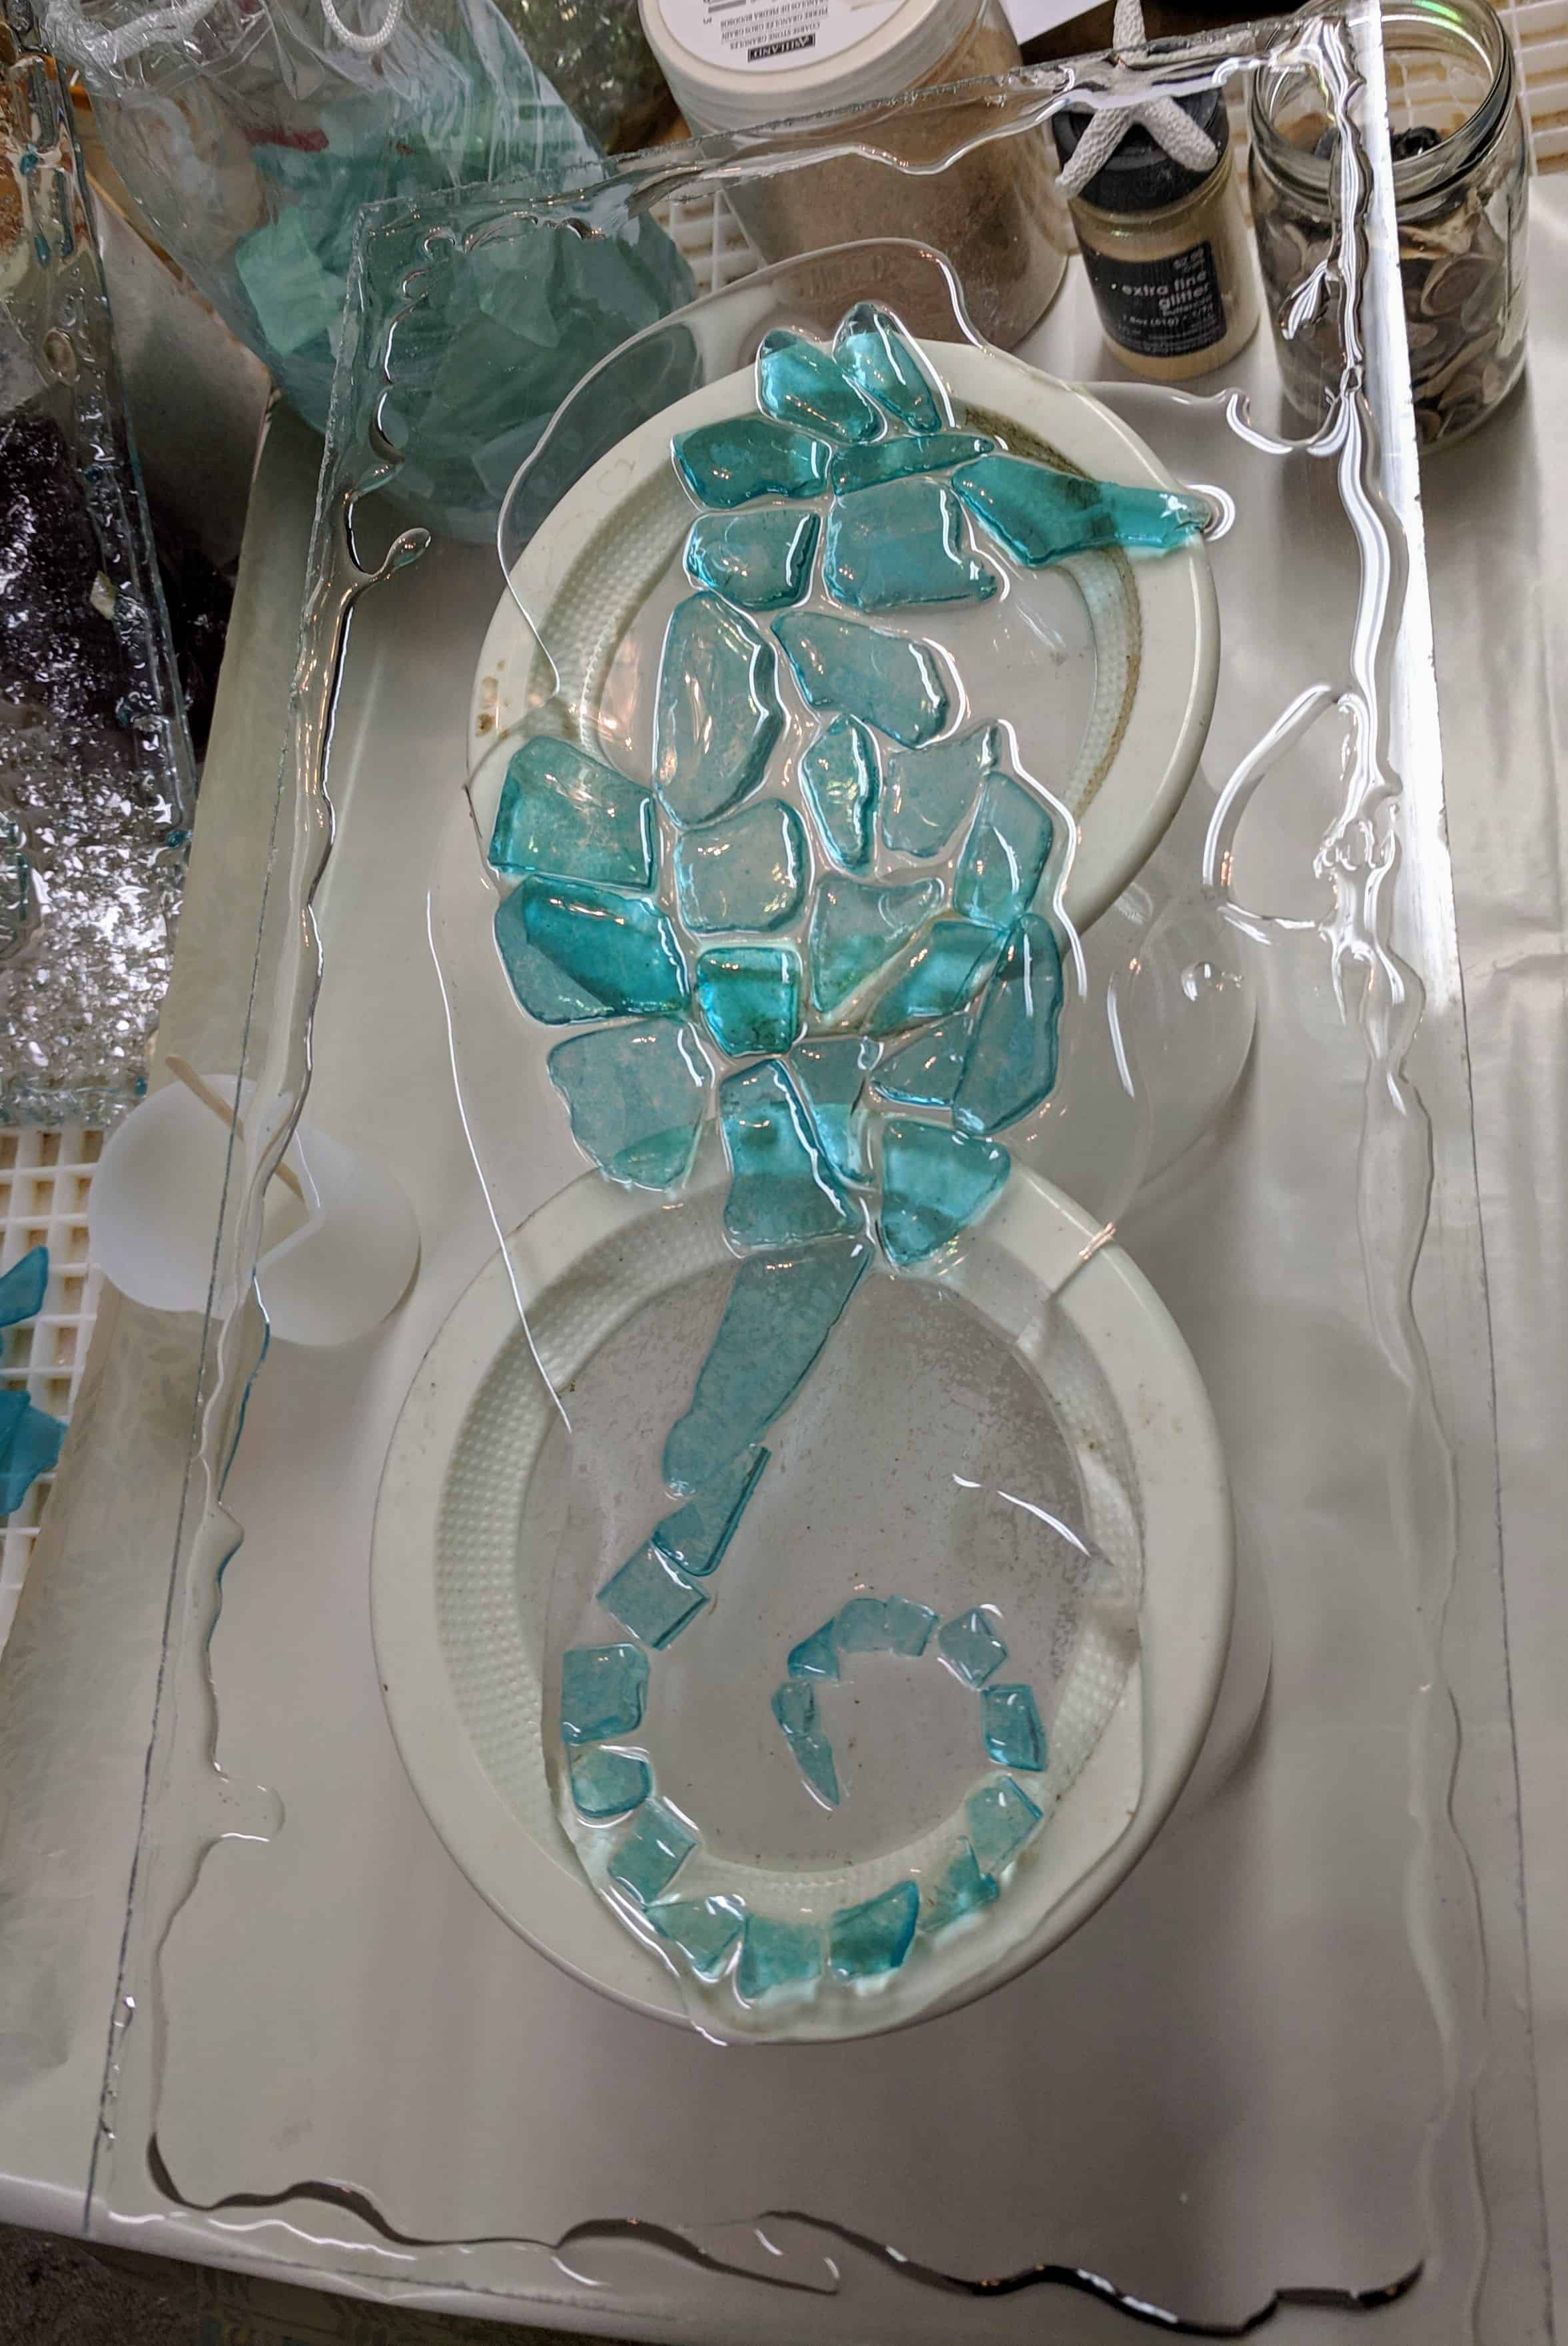
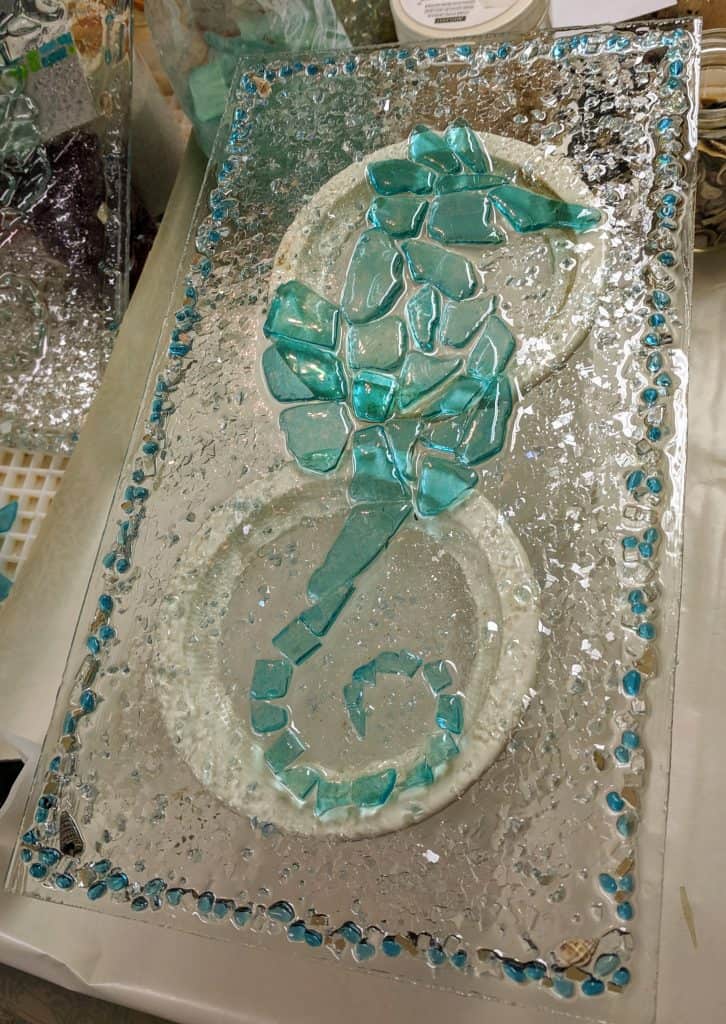
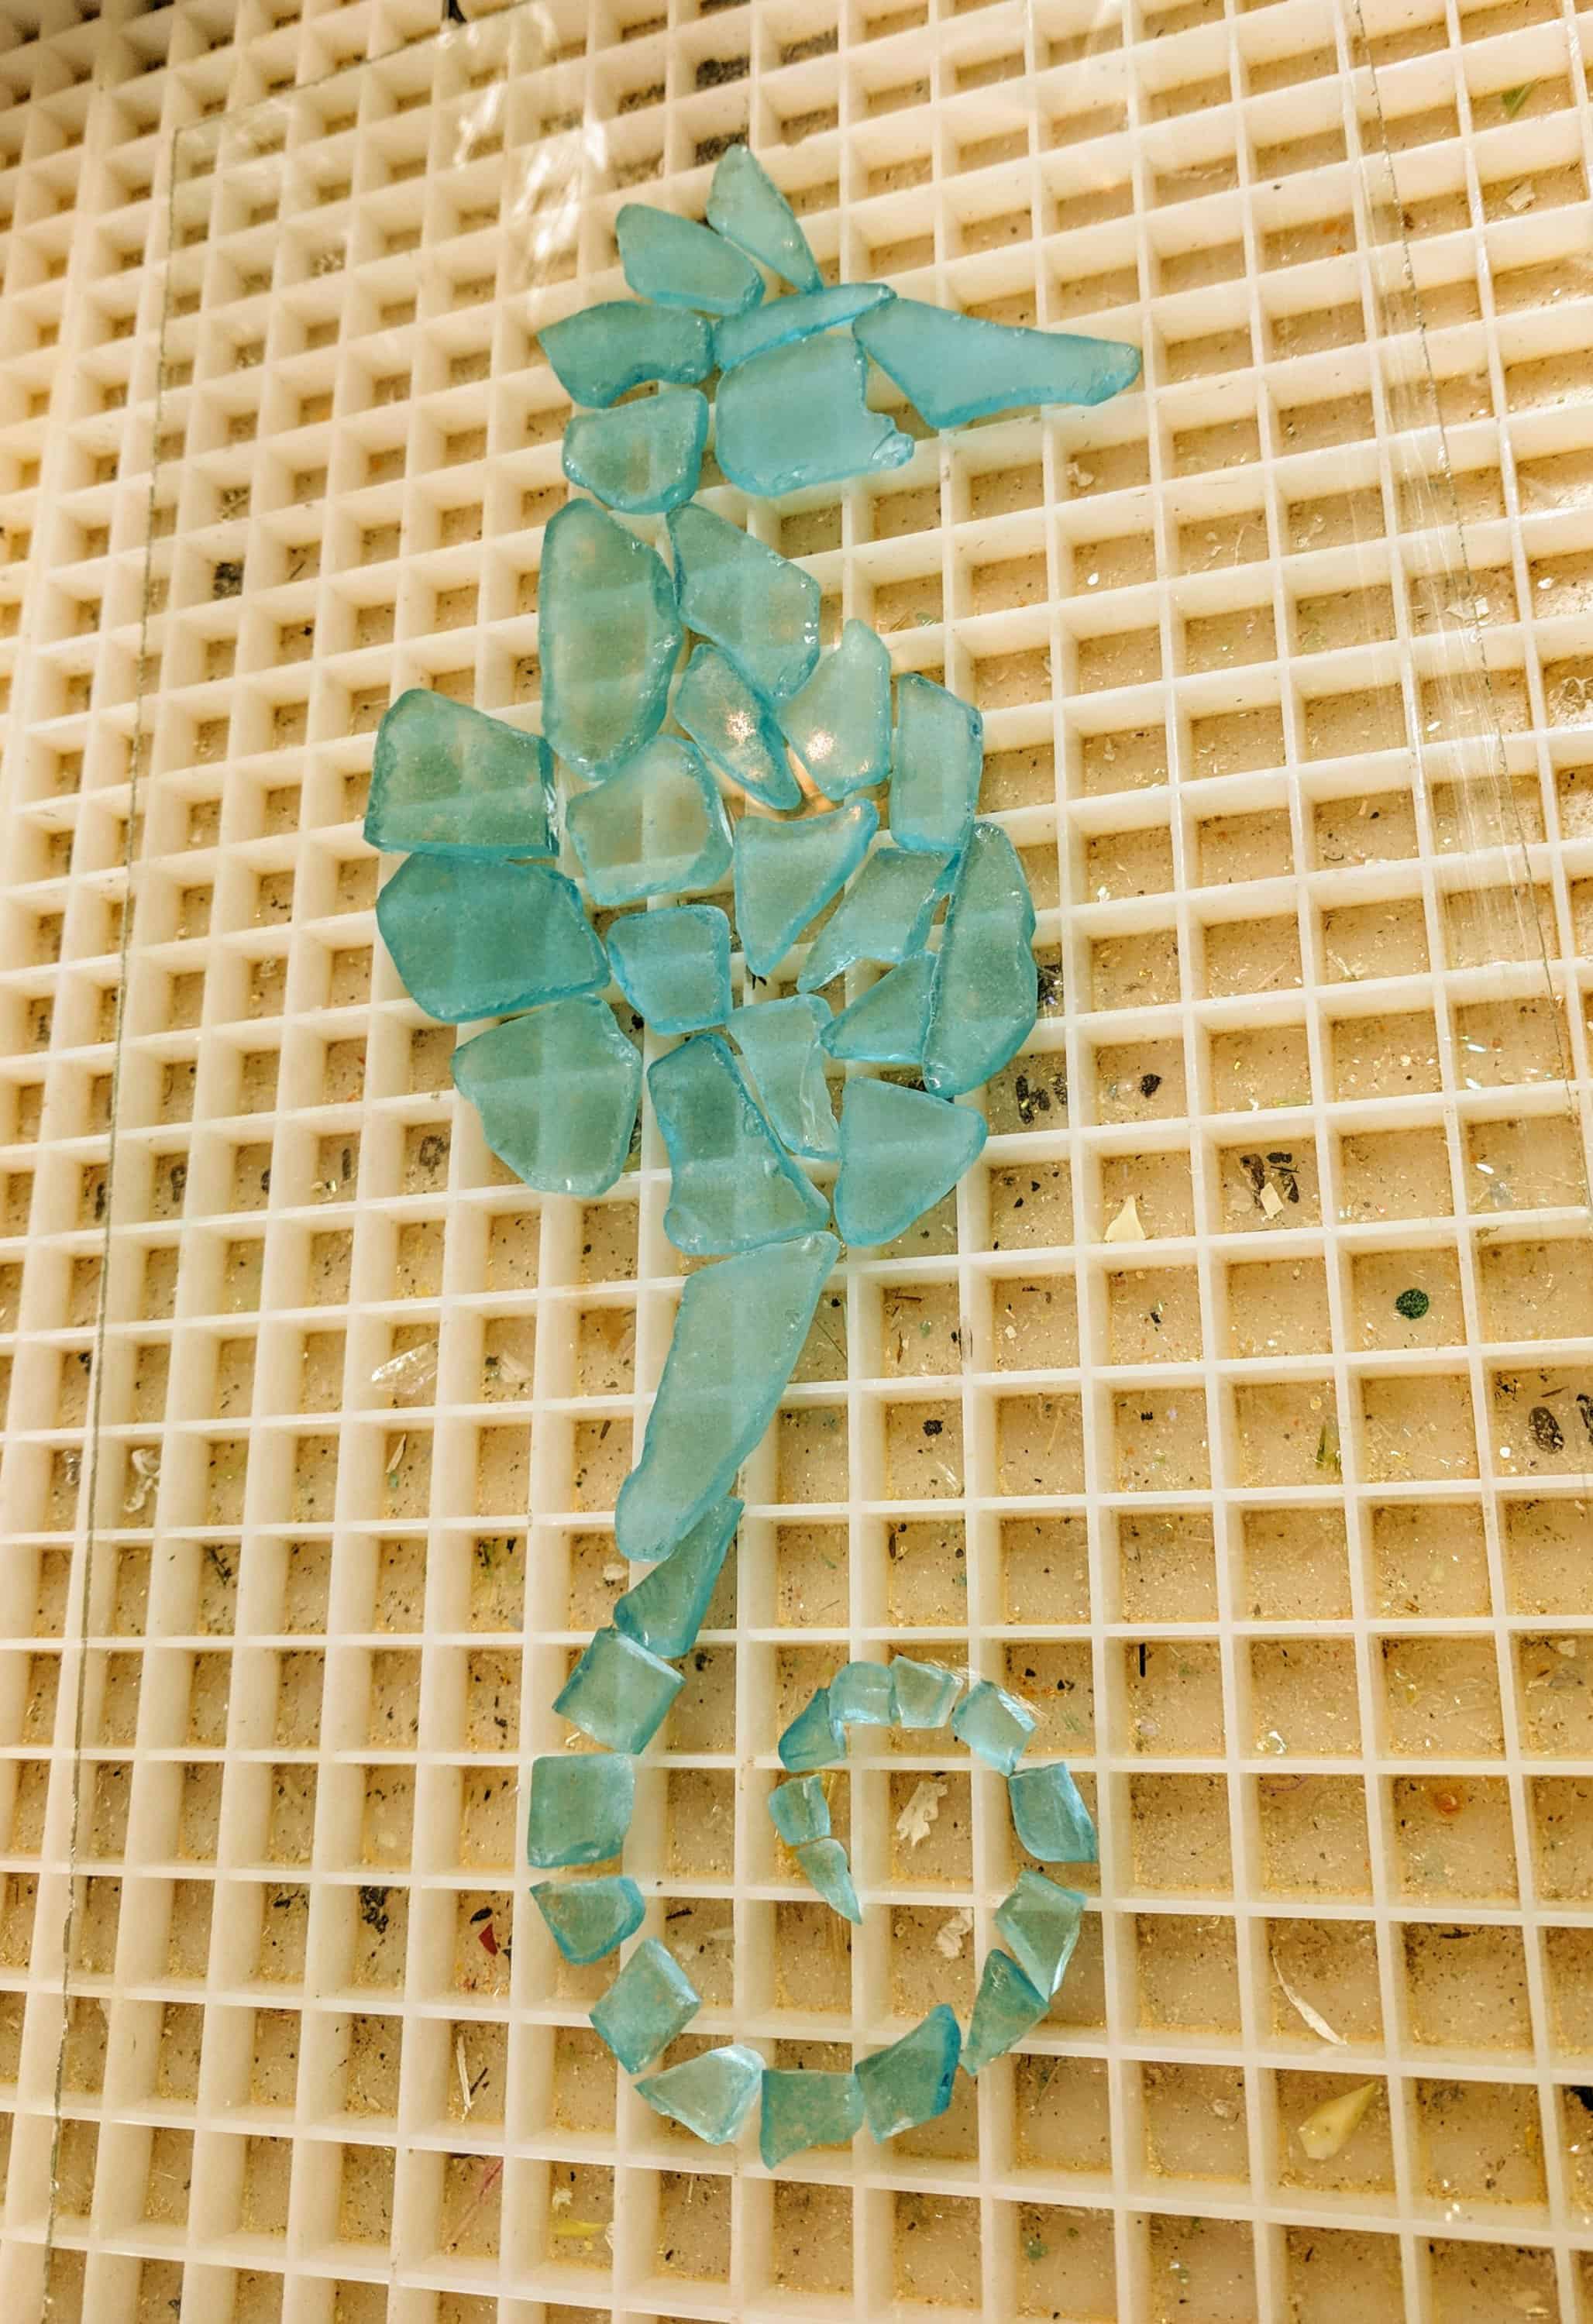
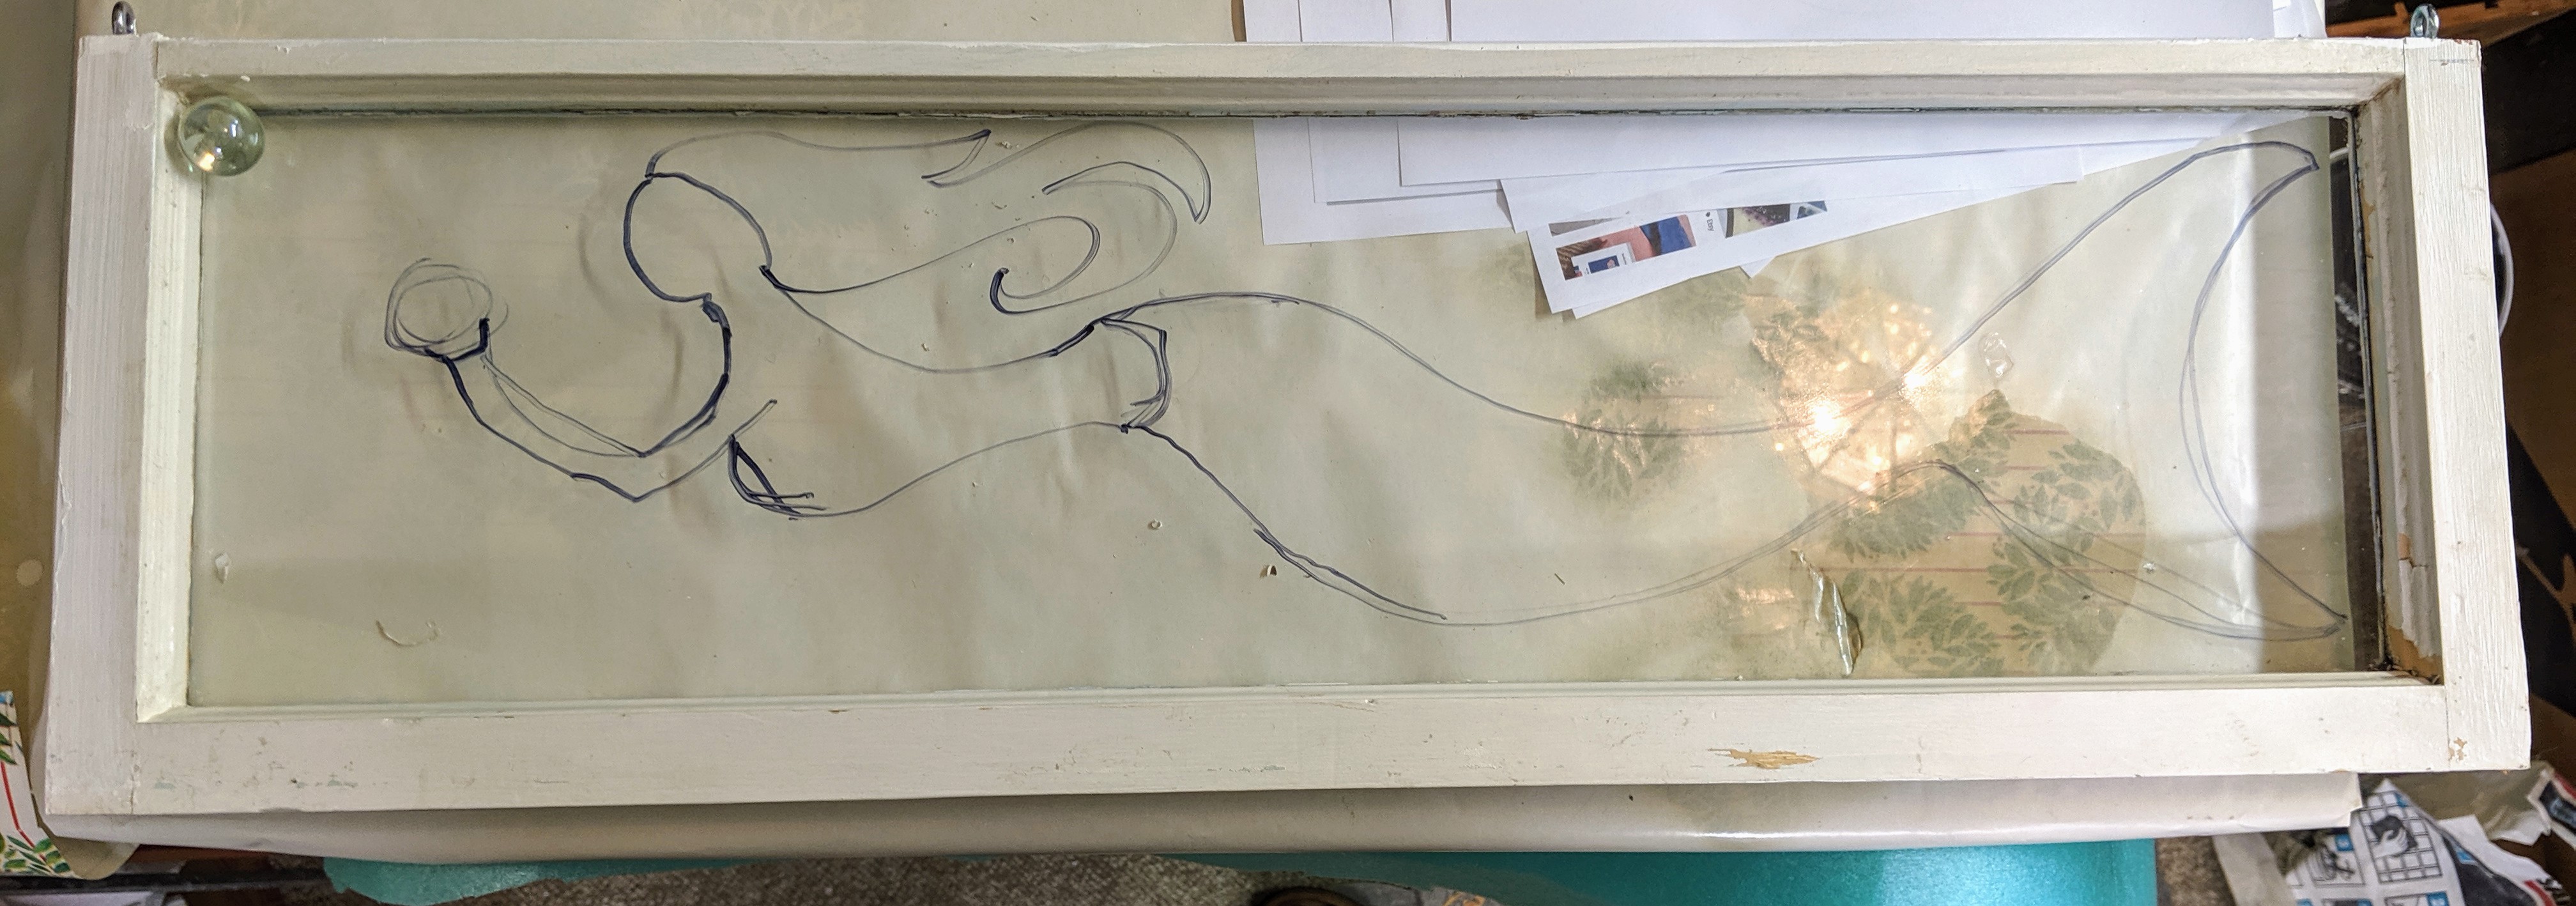
Today was more cleanup on the window frame (I have to paint one side at a time), a bit of planning for the mermaid, and another layer in the next set of coasters. Below is actually the back side of the window. I sketched a rough outline of a mermaid I’m hoping to make before I put a coat of paint on the frame. When I’m done using the sketch as a guideline for the mosaic, the Sharpie ink will wipe right off with a wet paper towel. I also chose the glass (a blue Spectrum iridized) I want to use for the mermaid’s tail. I had to think upside down to do all of this today – the mermaid will end up facing the other direction and the coasters are built in backwards layers.

Rough outline of a mermaid drawn with Sharpie marker.

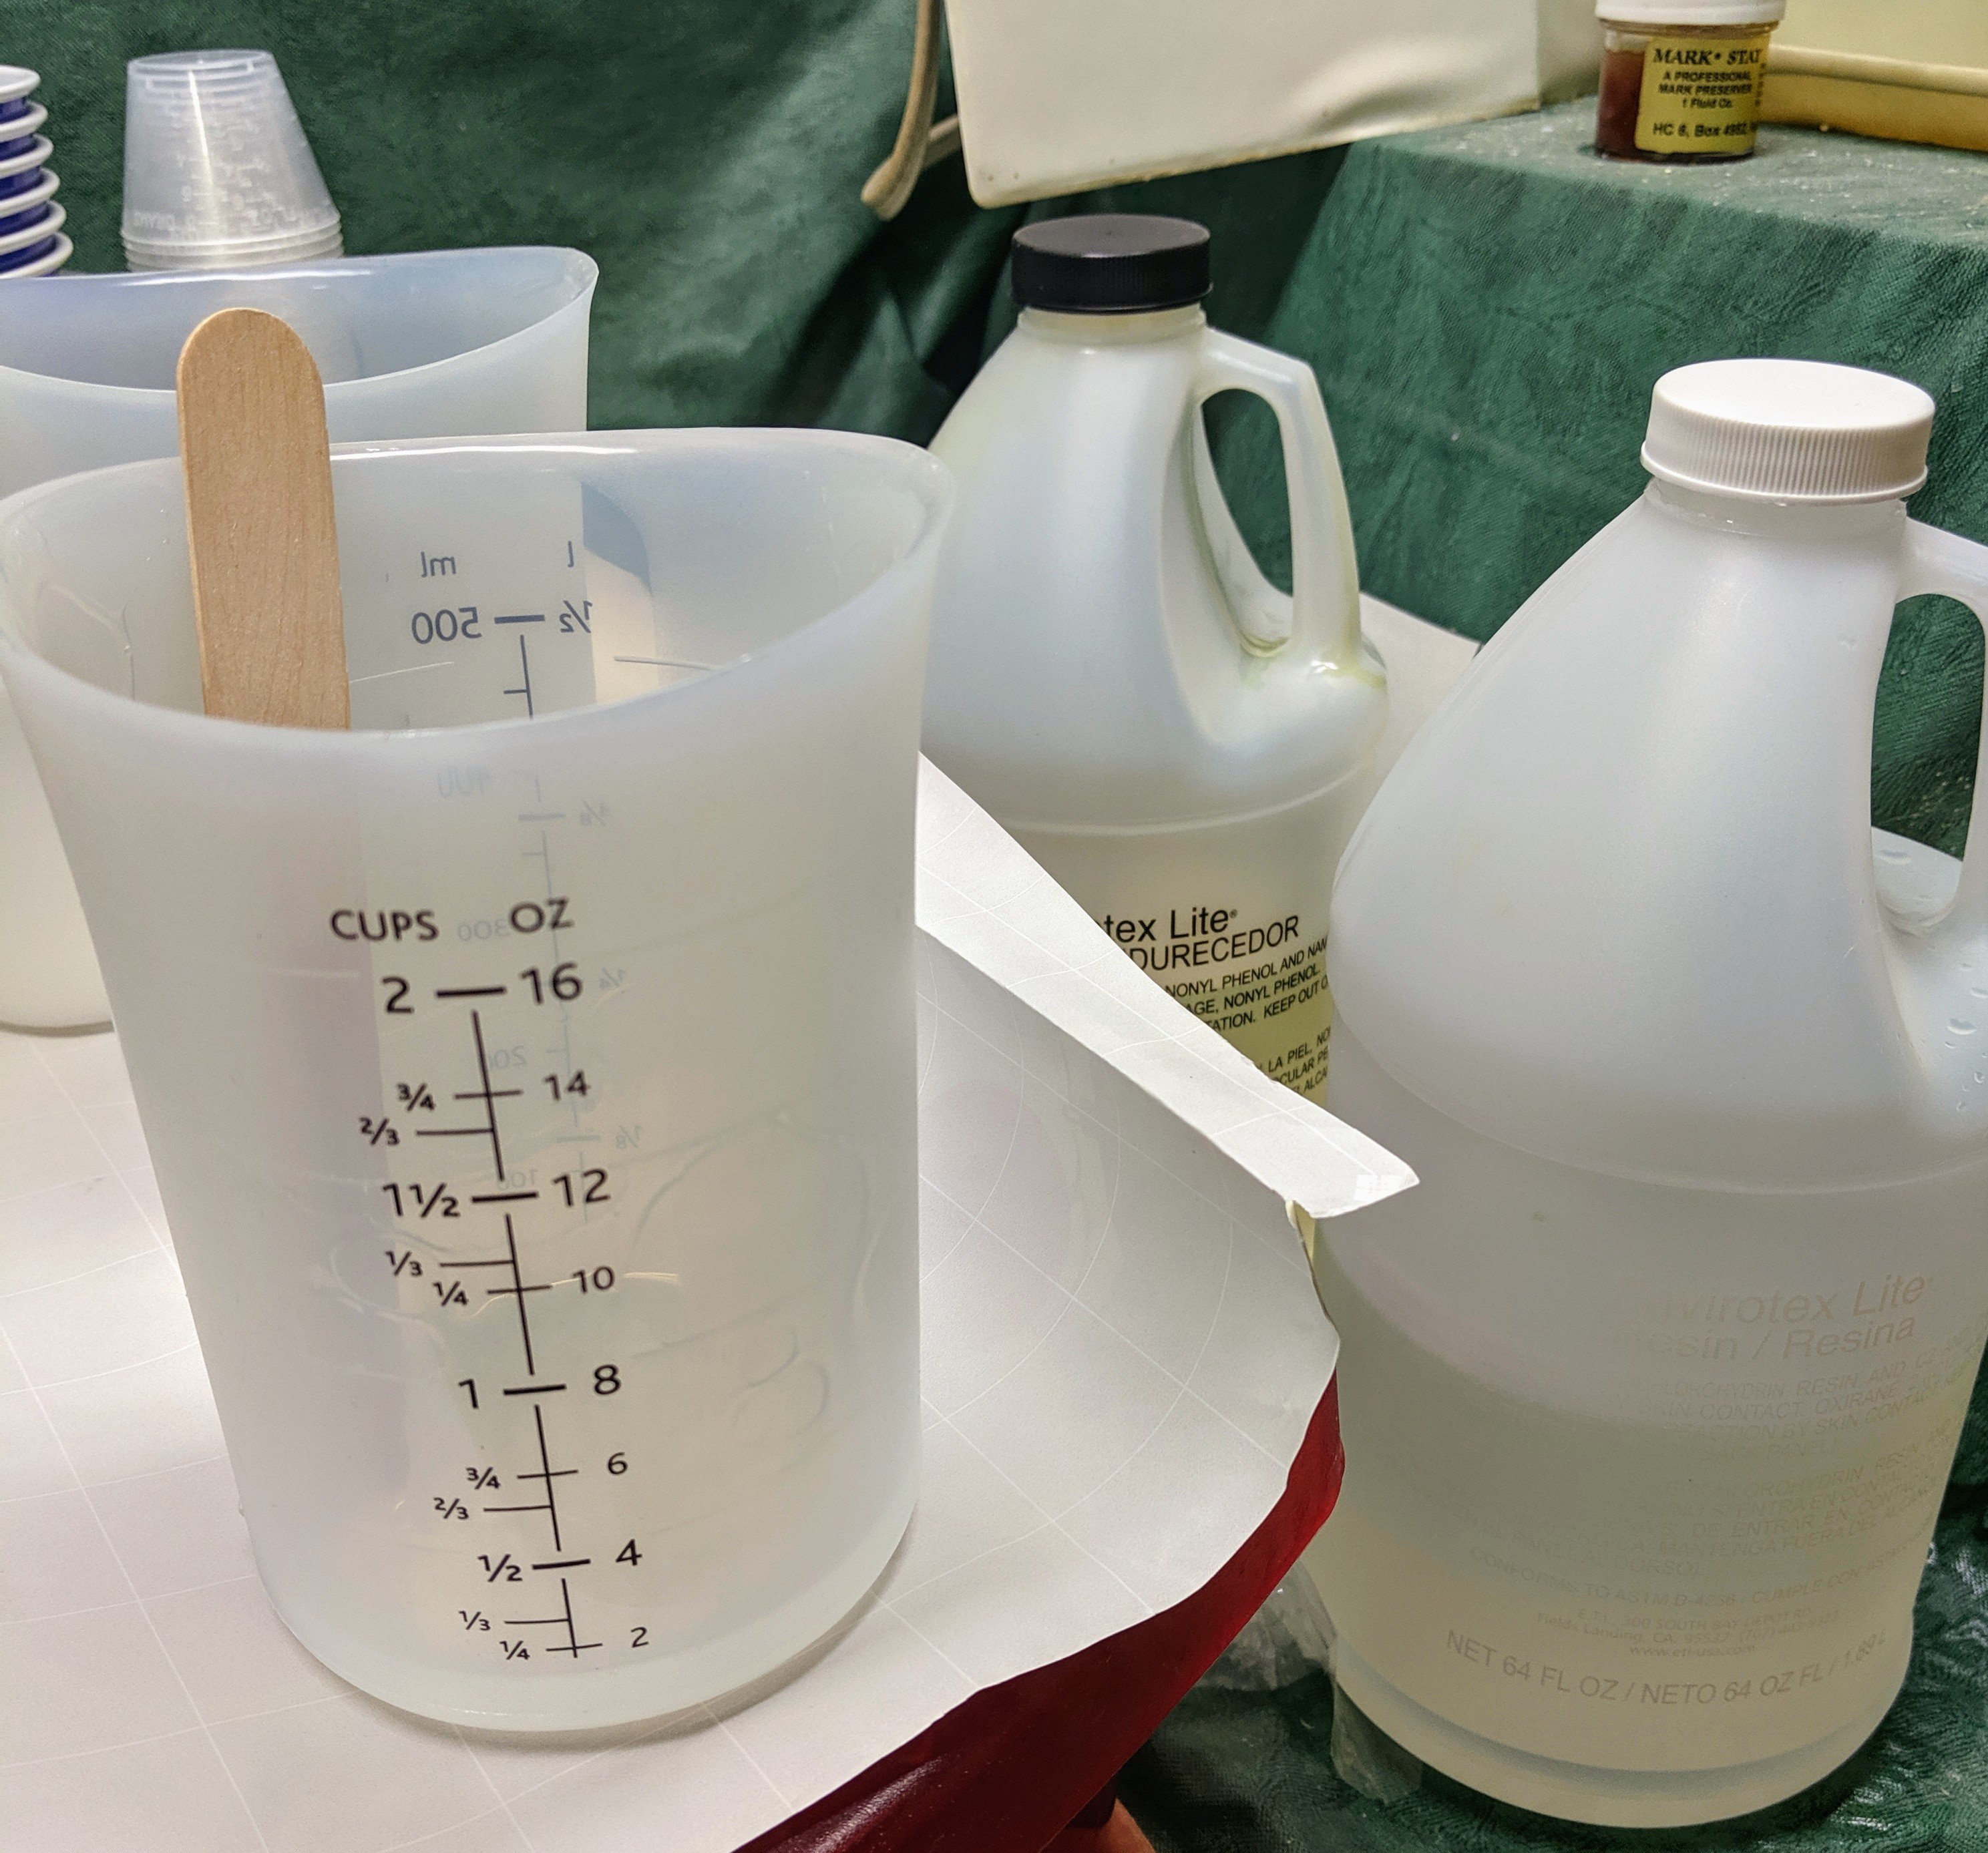
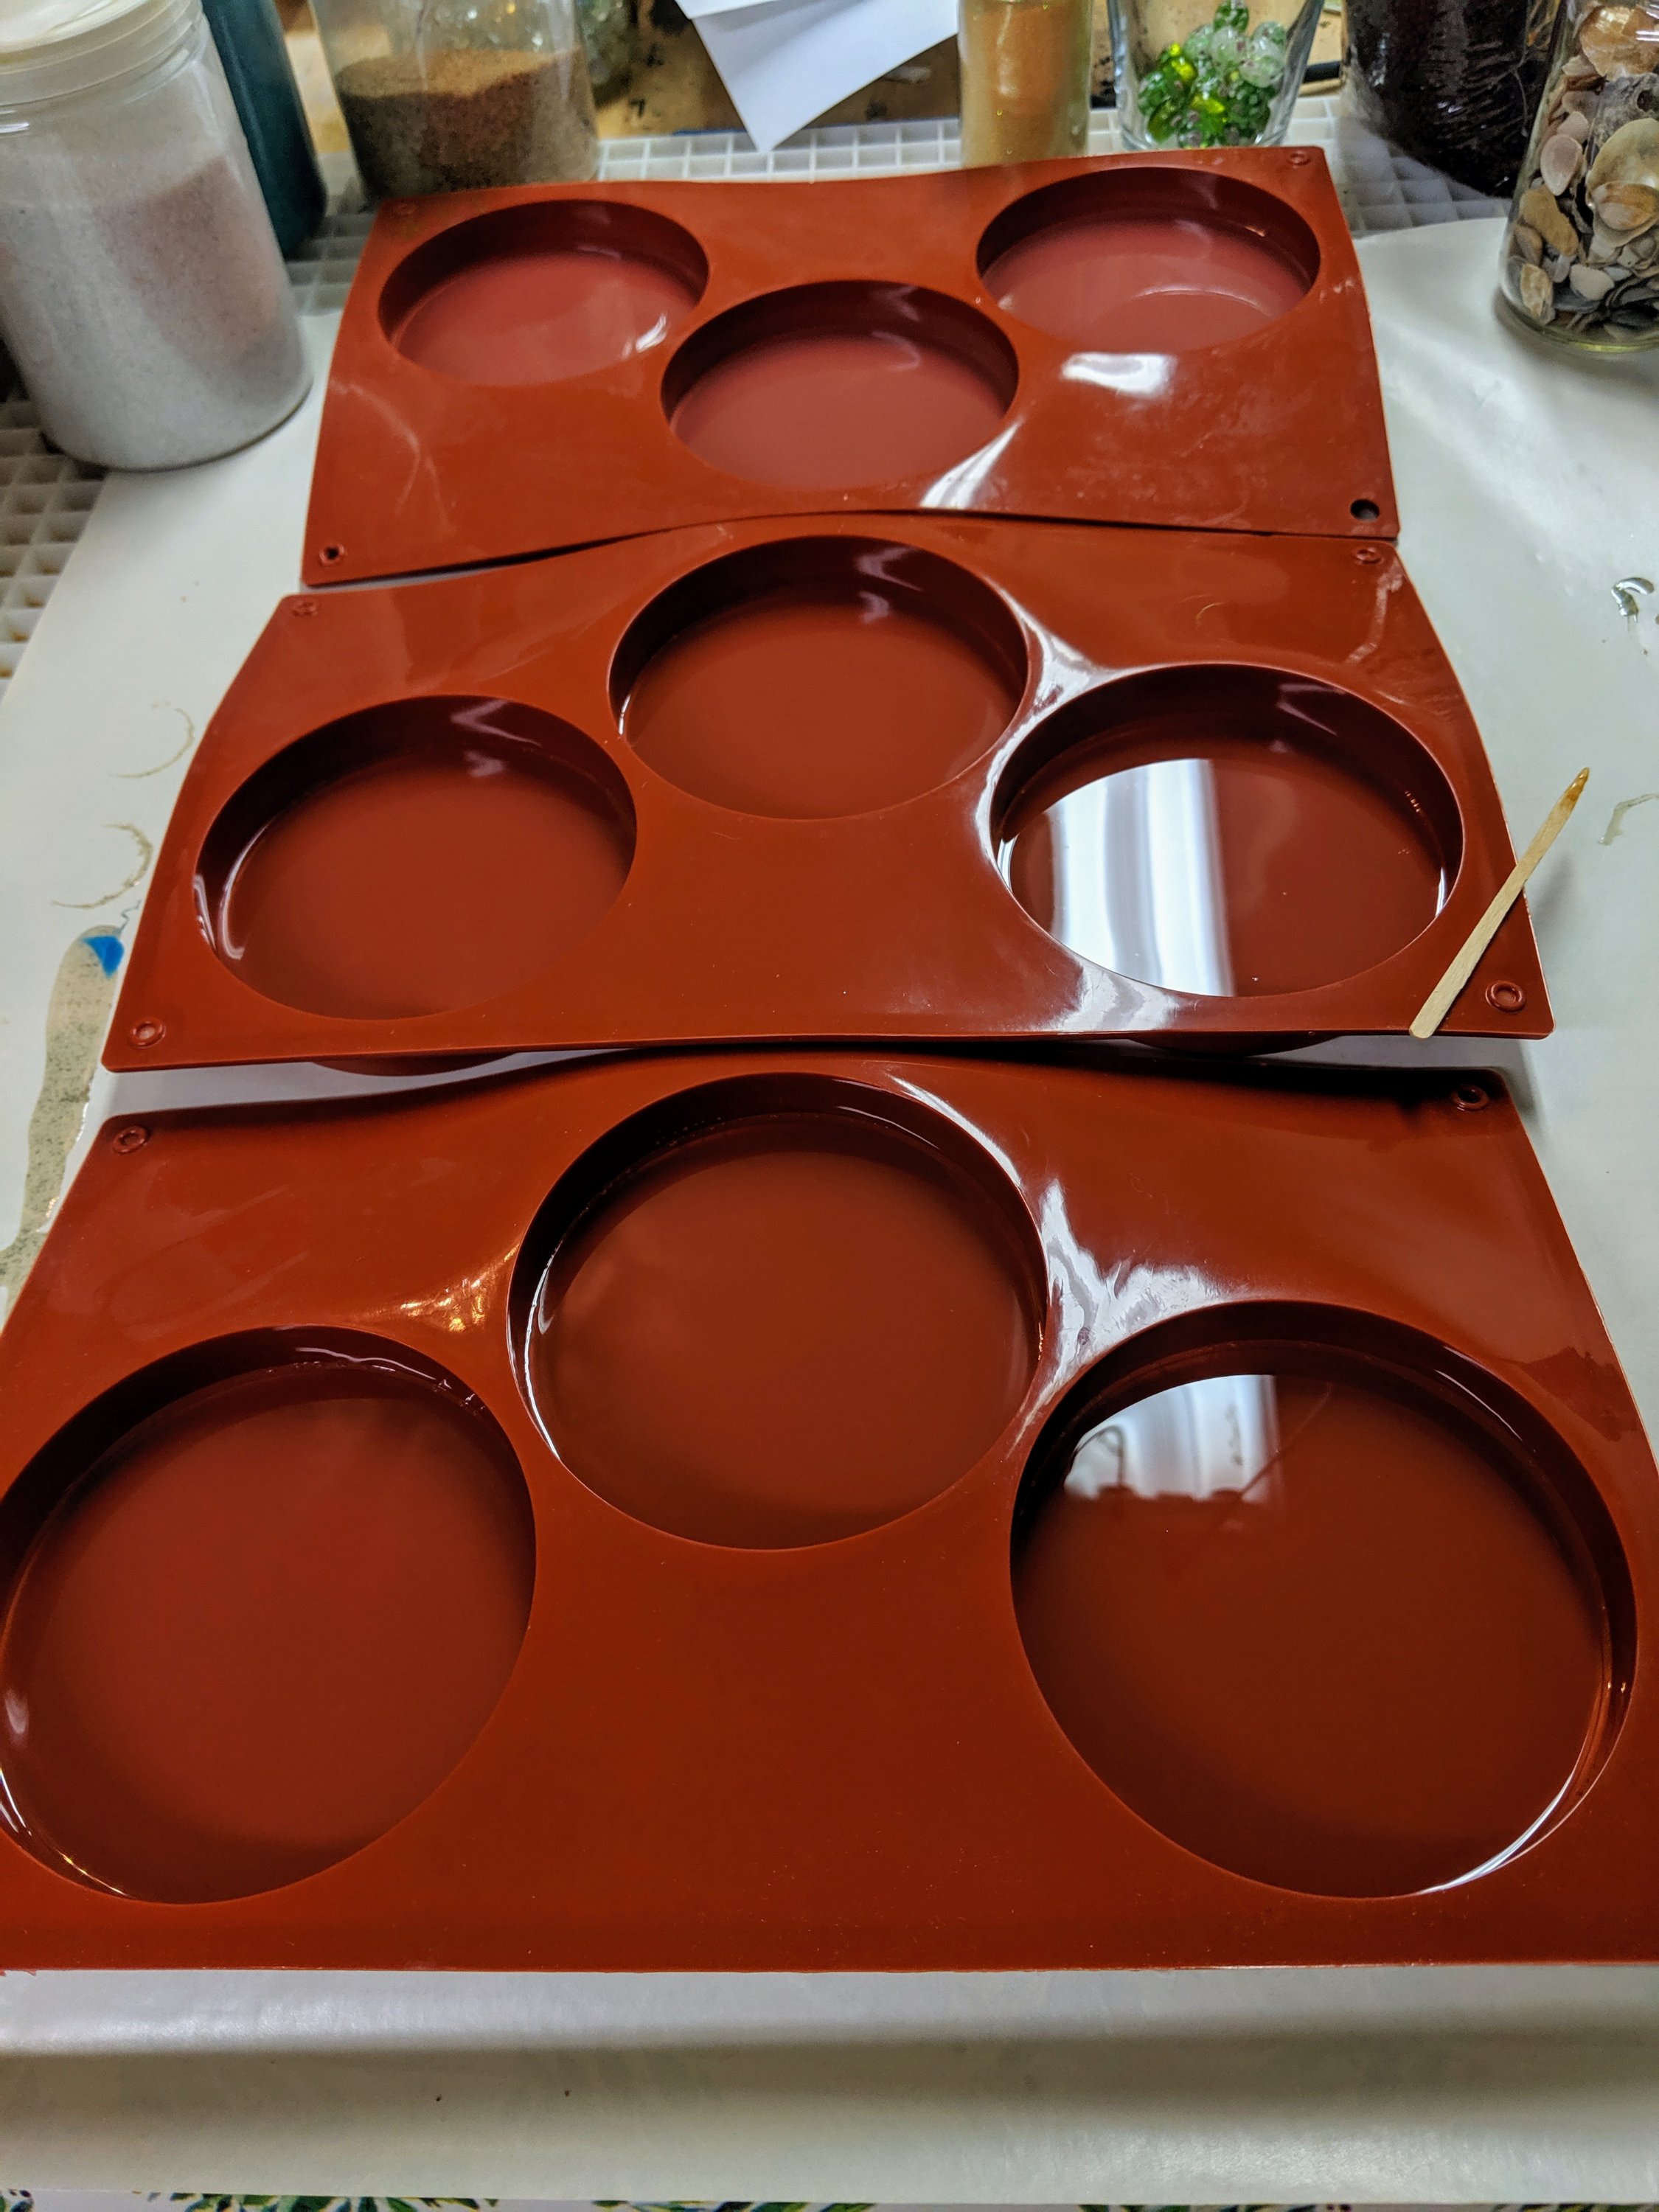
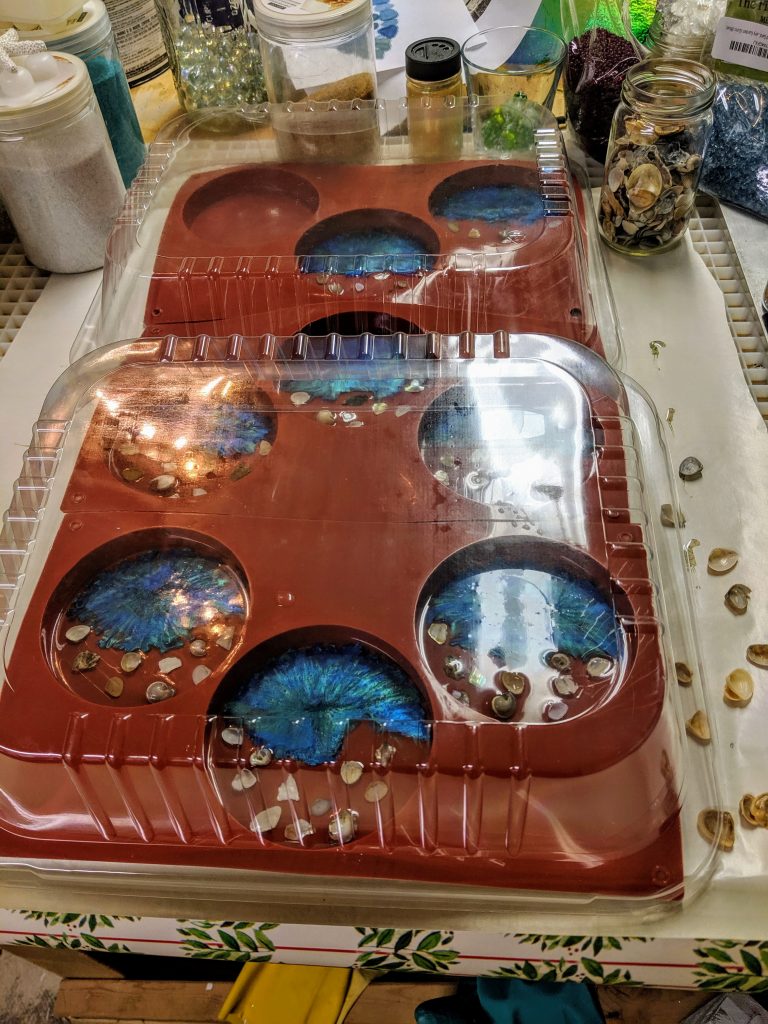
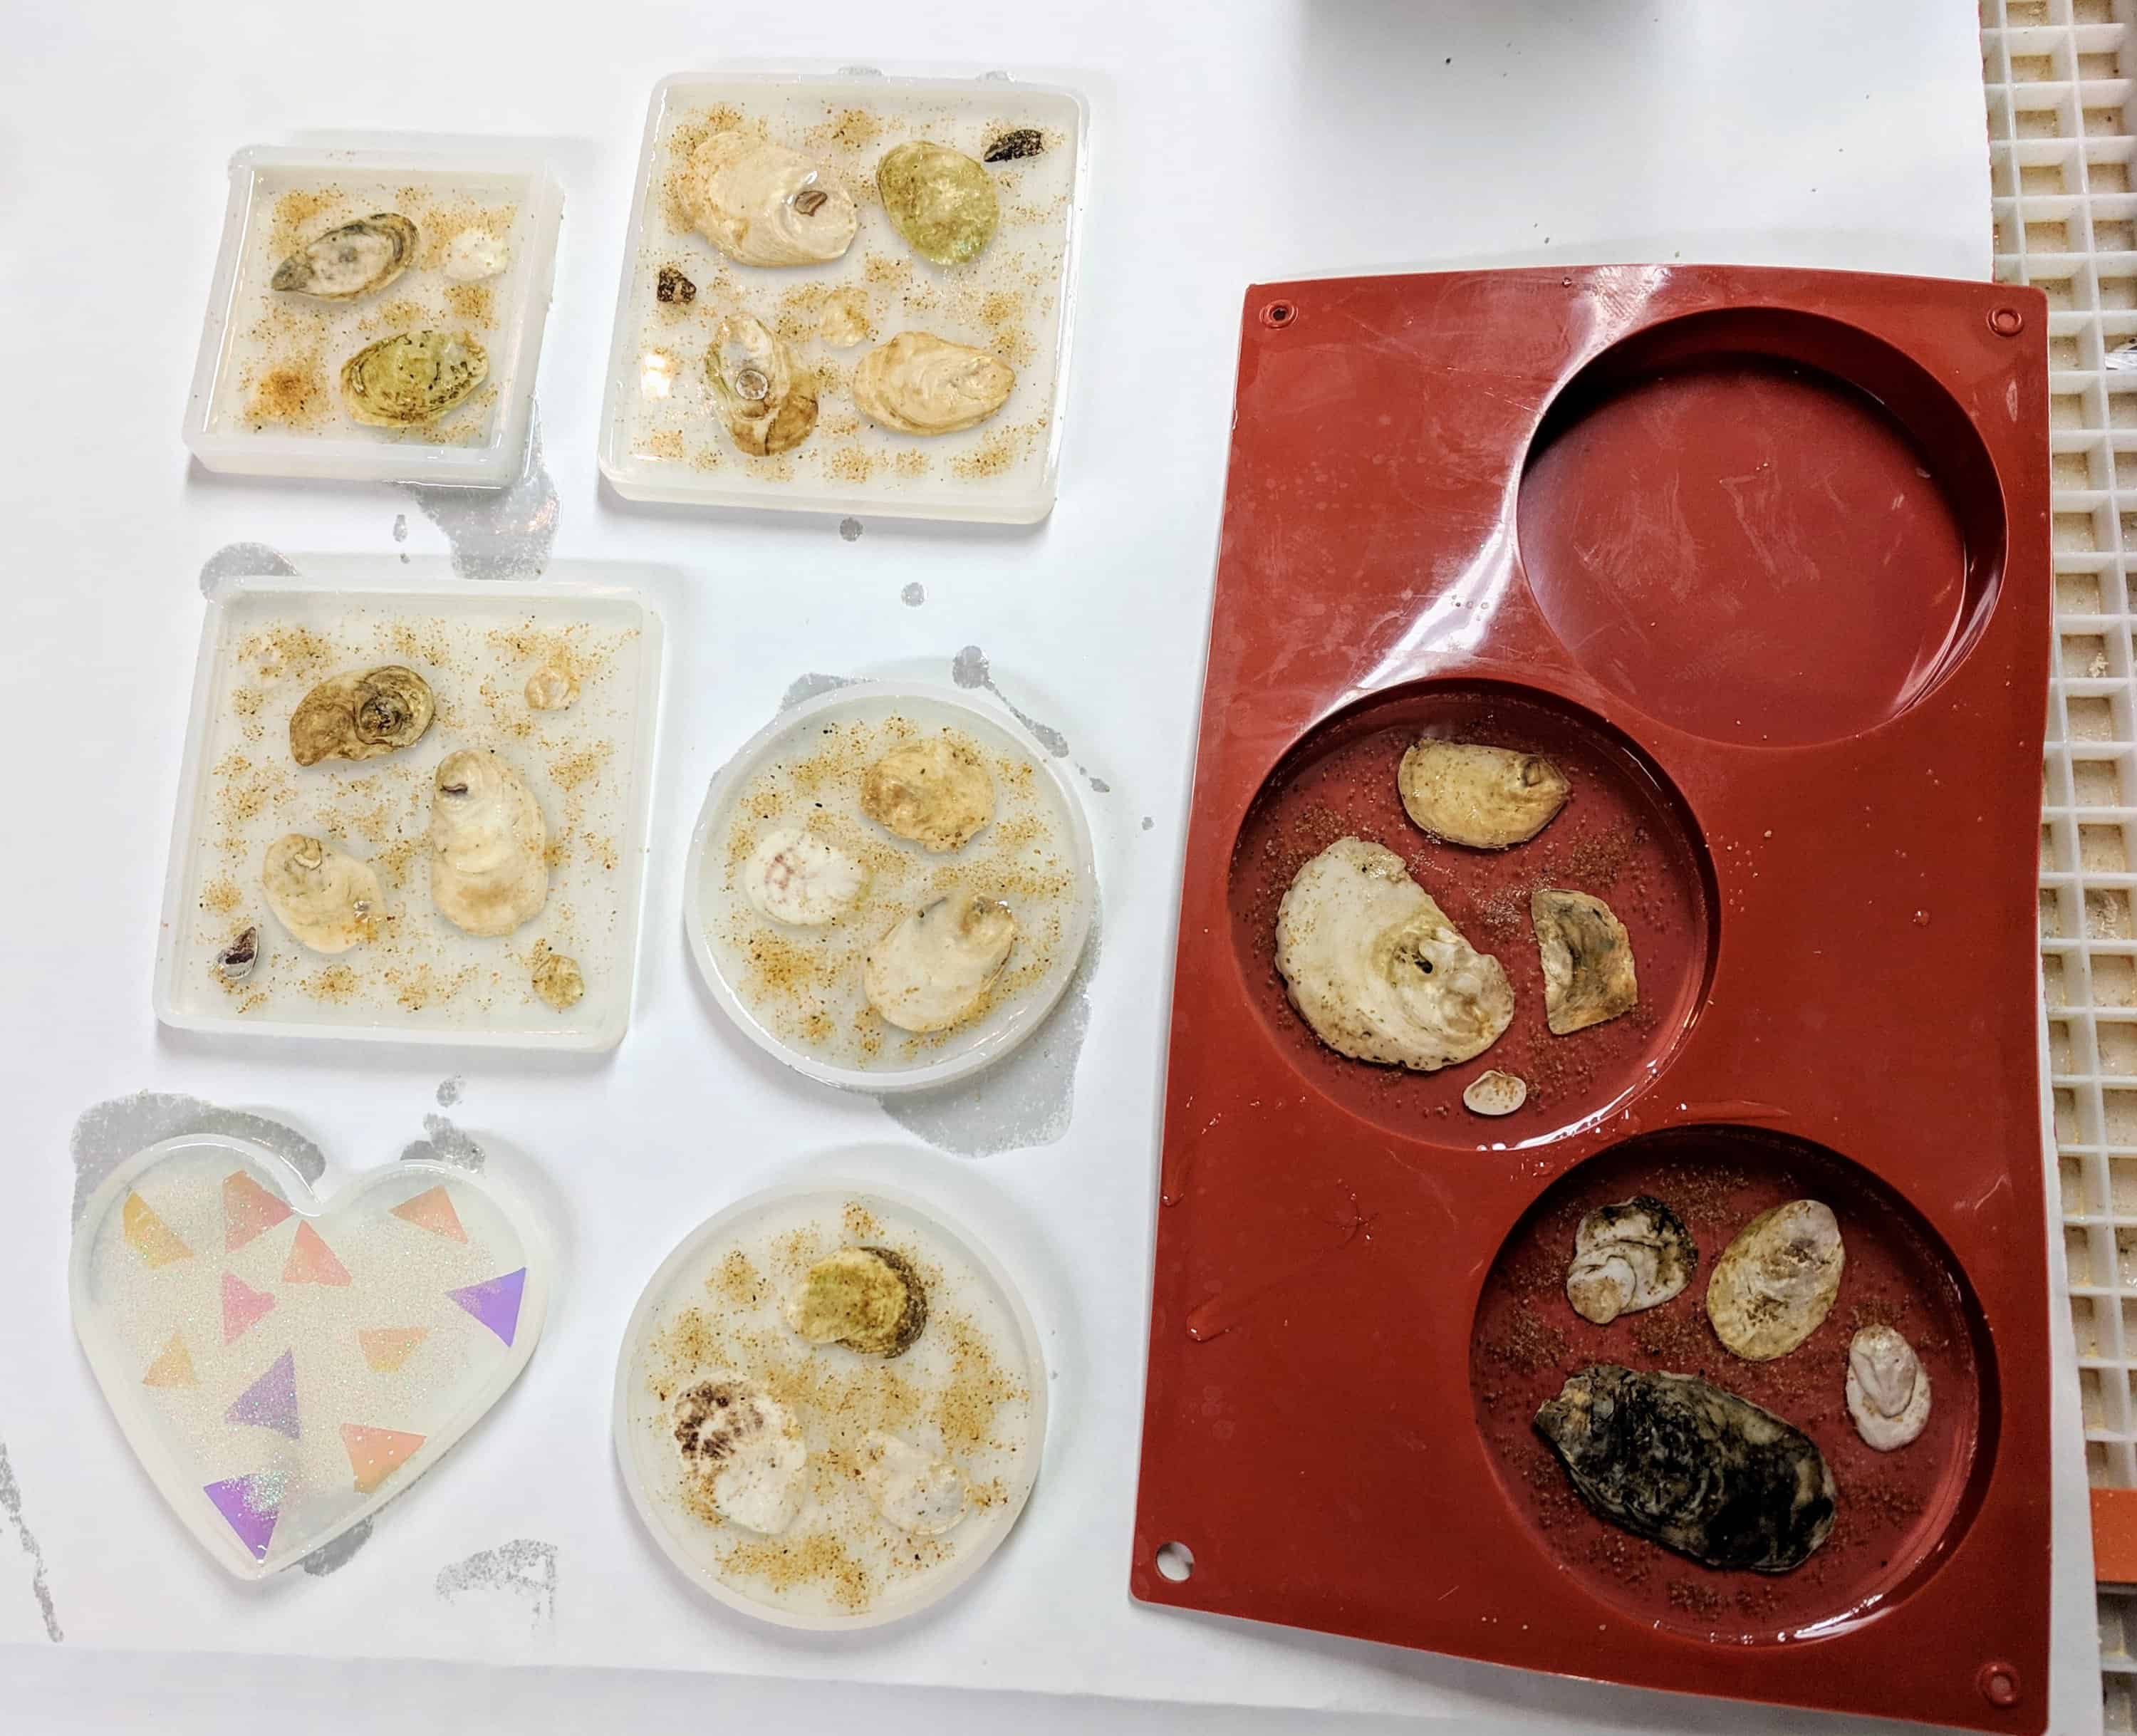
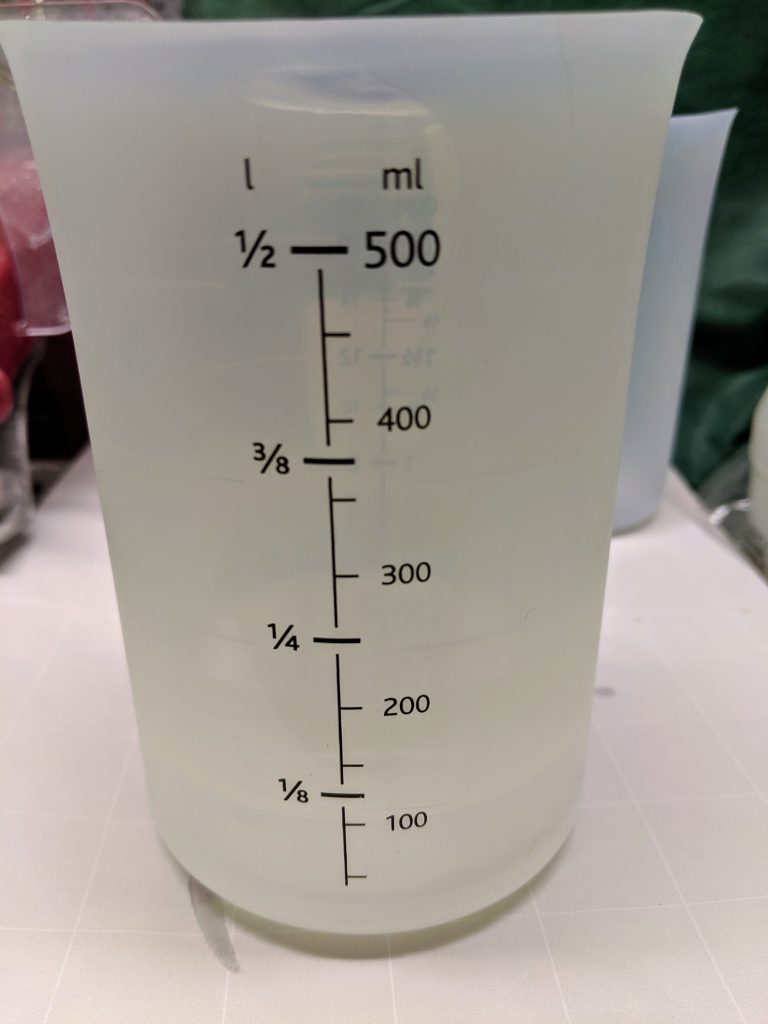
While the paint was drying on the frame, I mixed up 200 ml of resin for the next layer of decorations in the coasters. I poured a thin base layer for the coasters yesterday, so this is for layer #2. I had a little extra left over after pouring layers in 9 coasters.

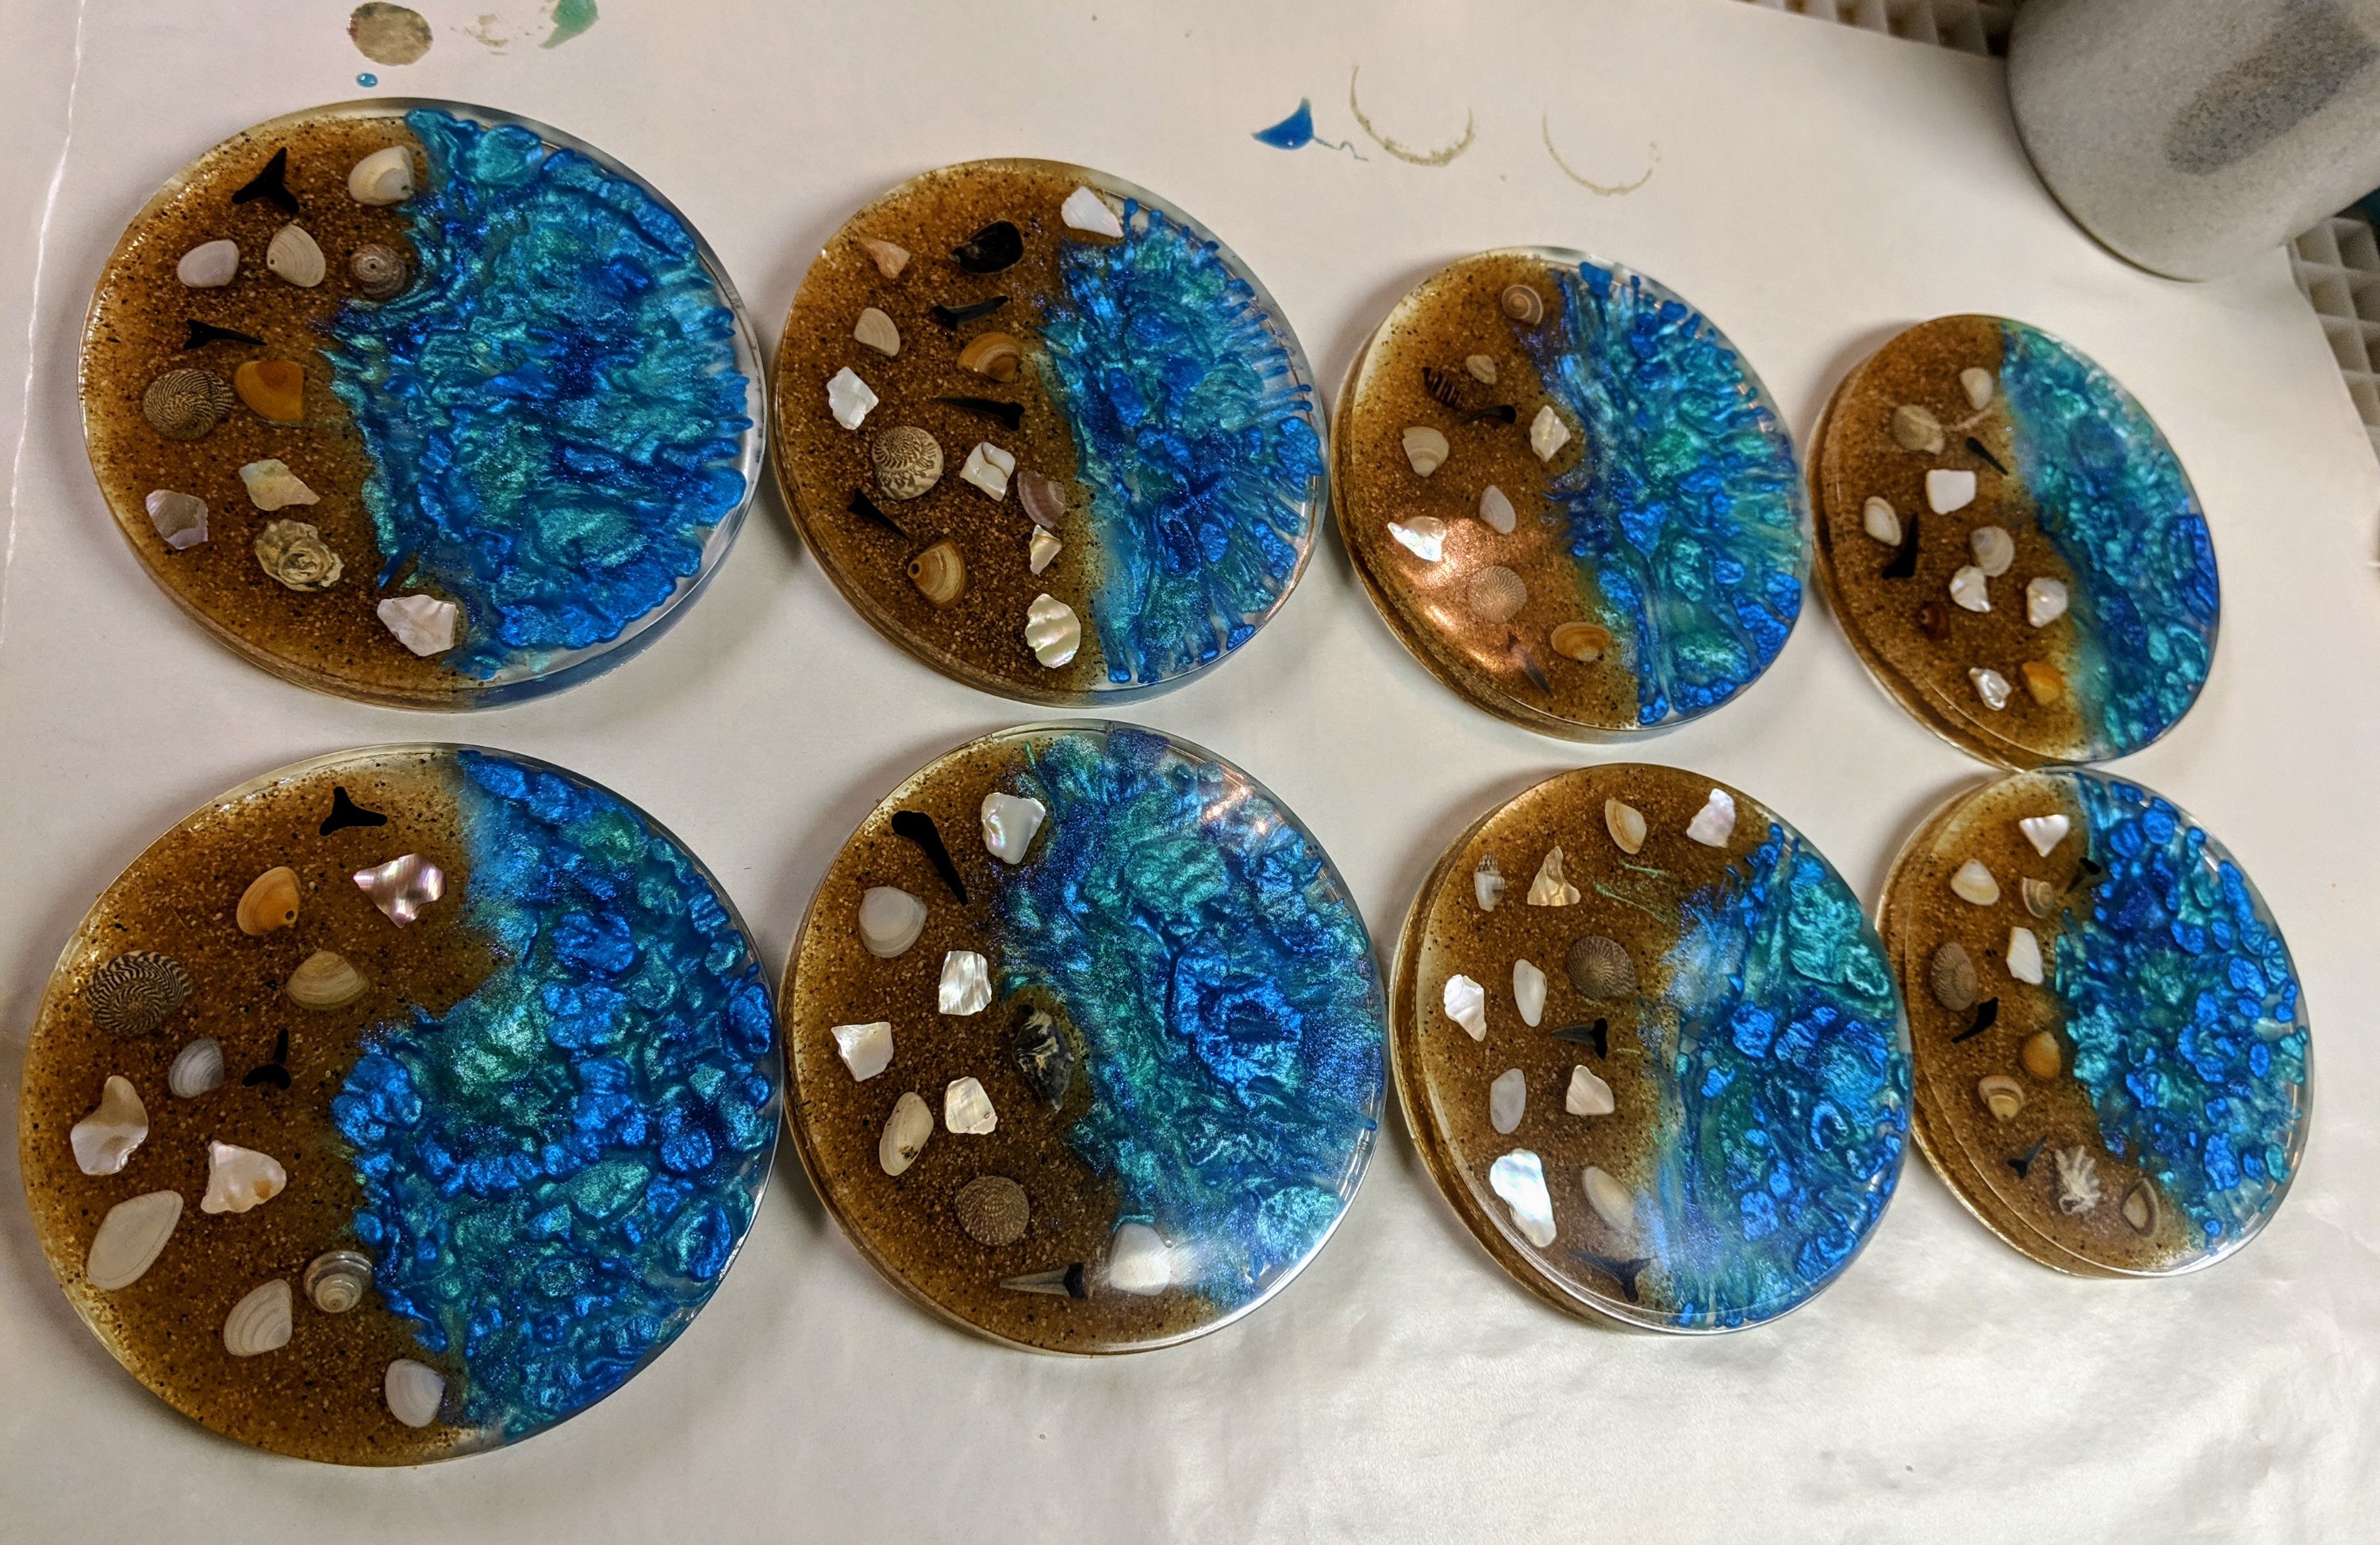
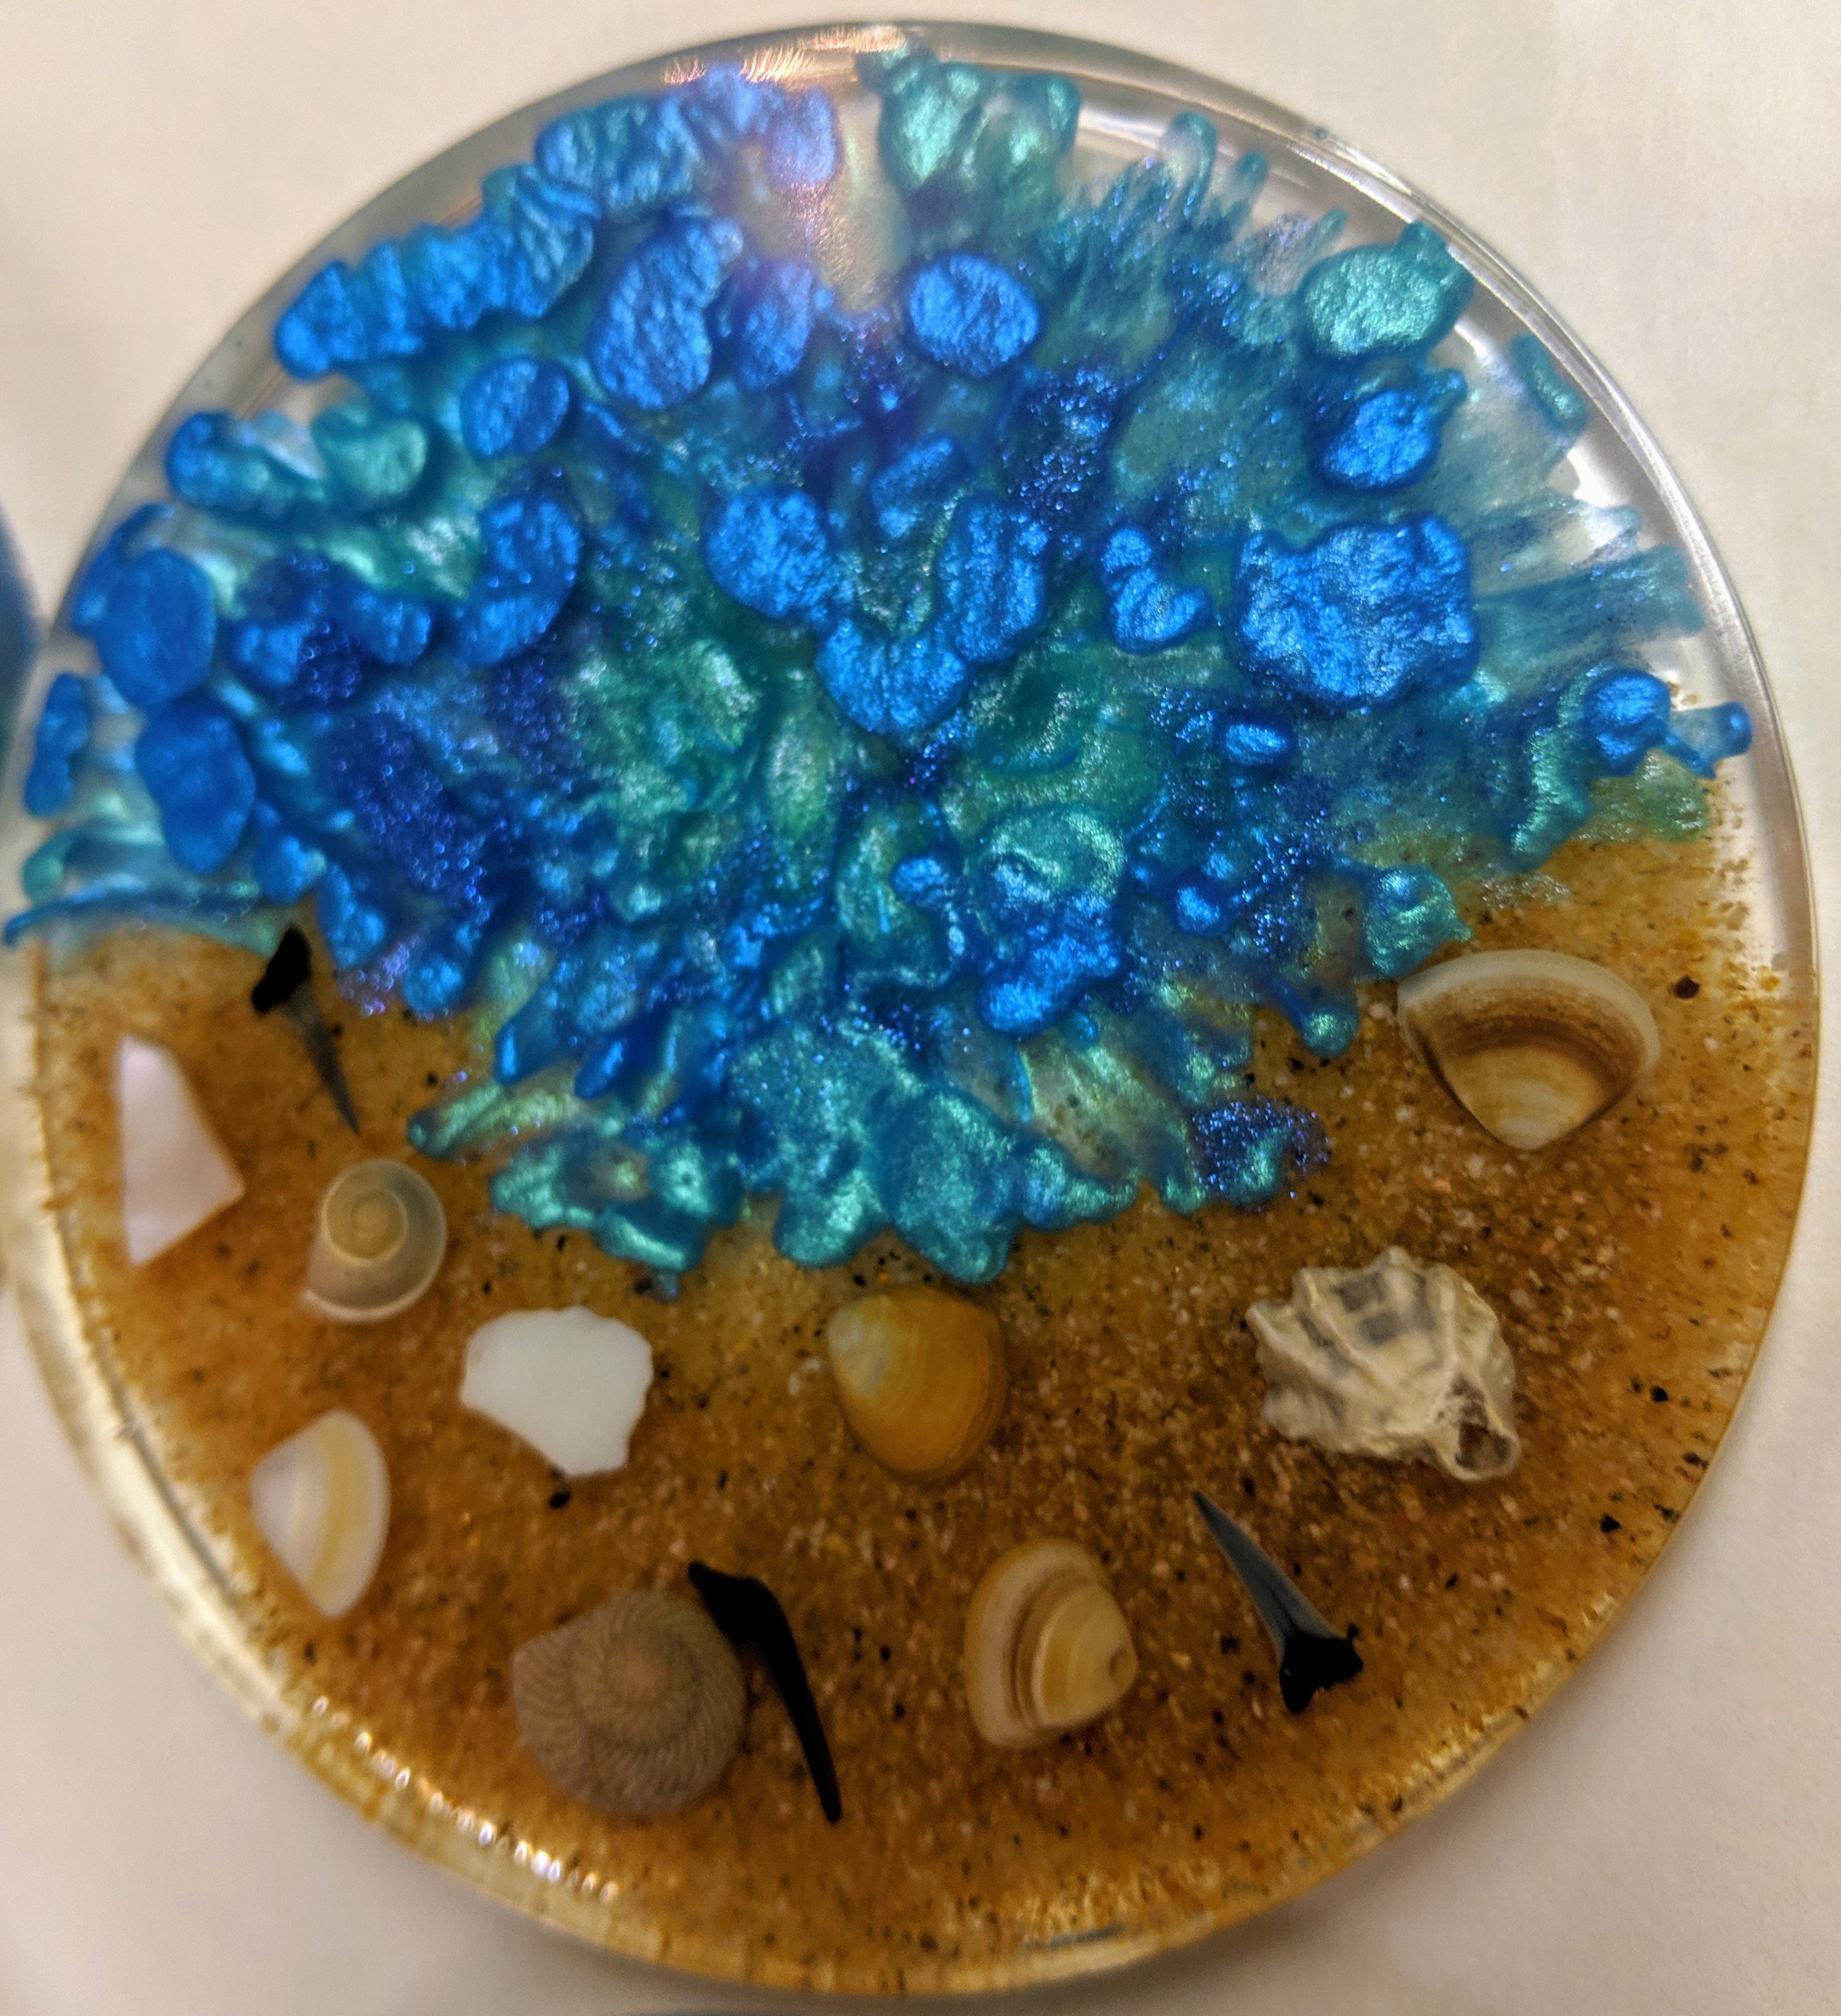
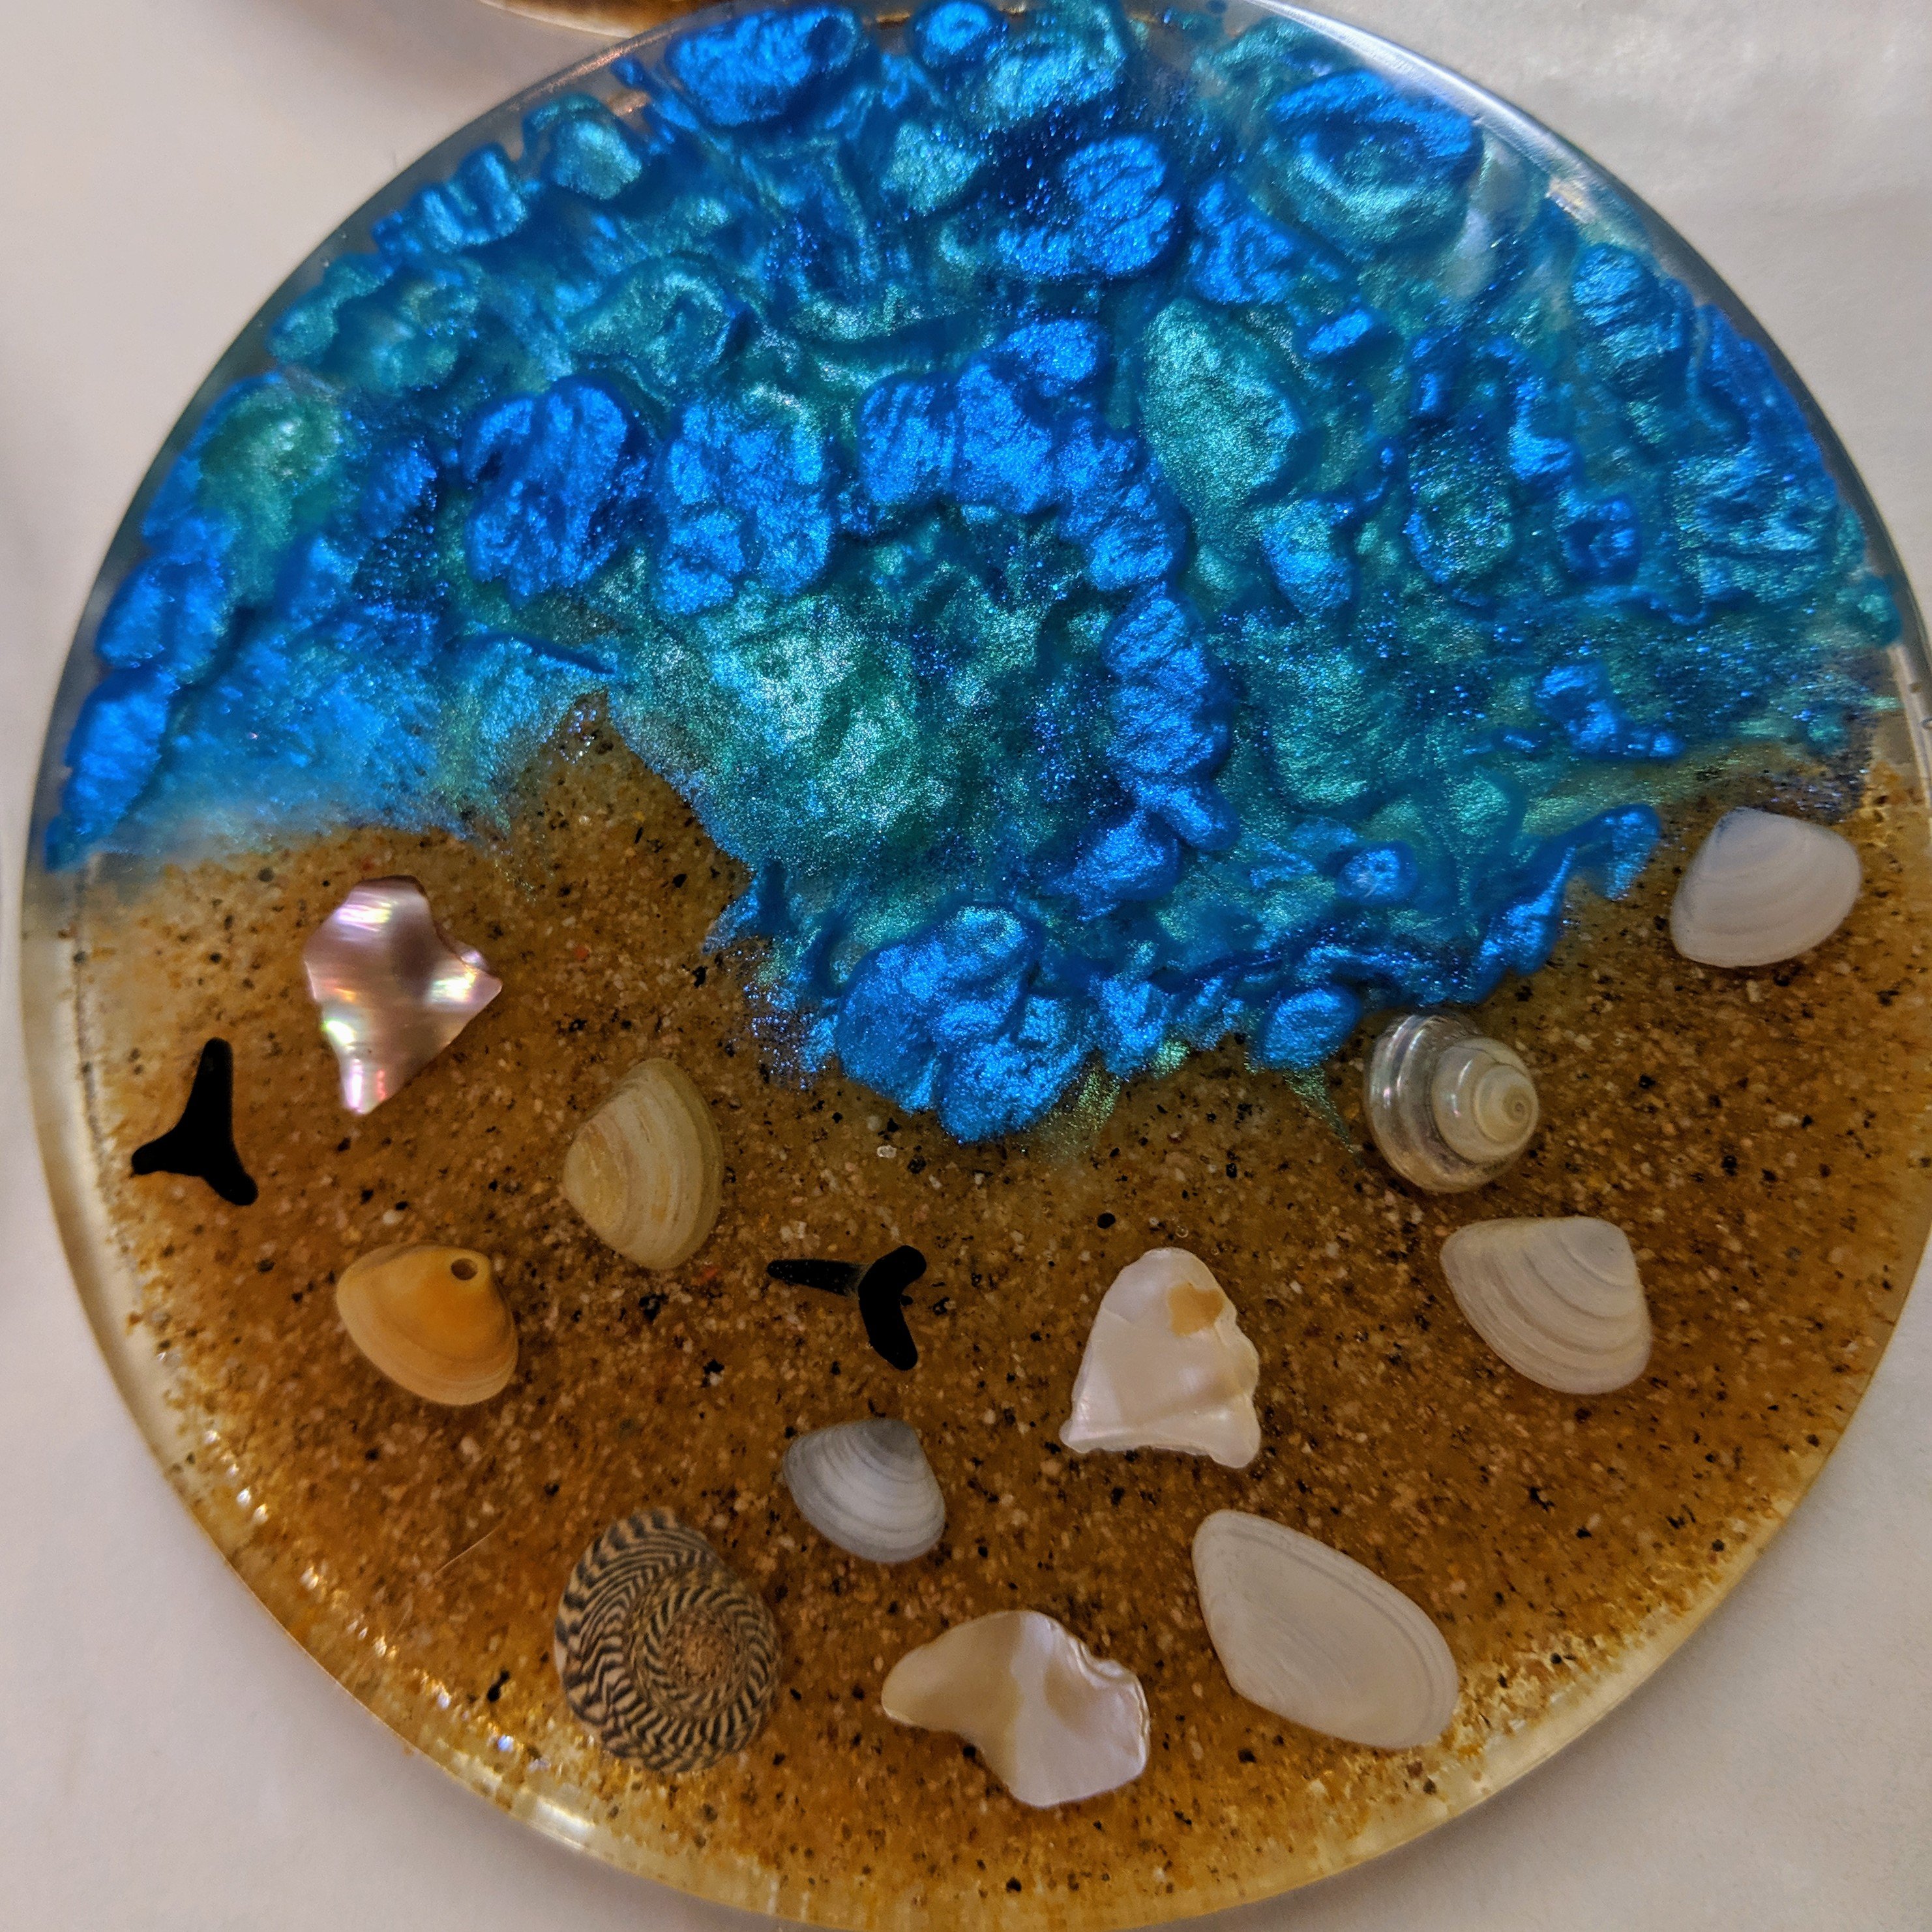
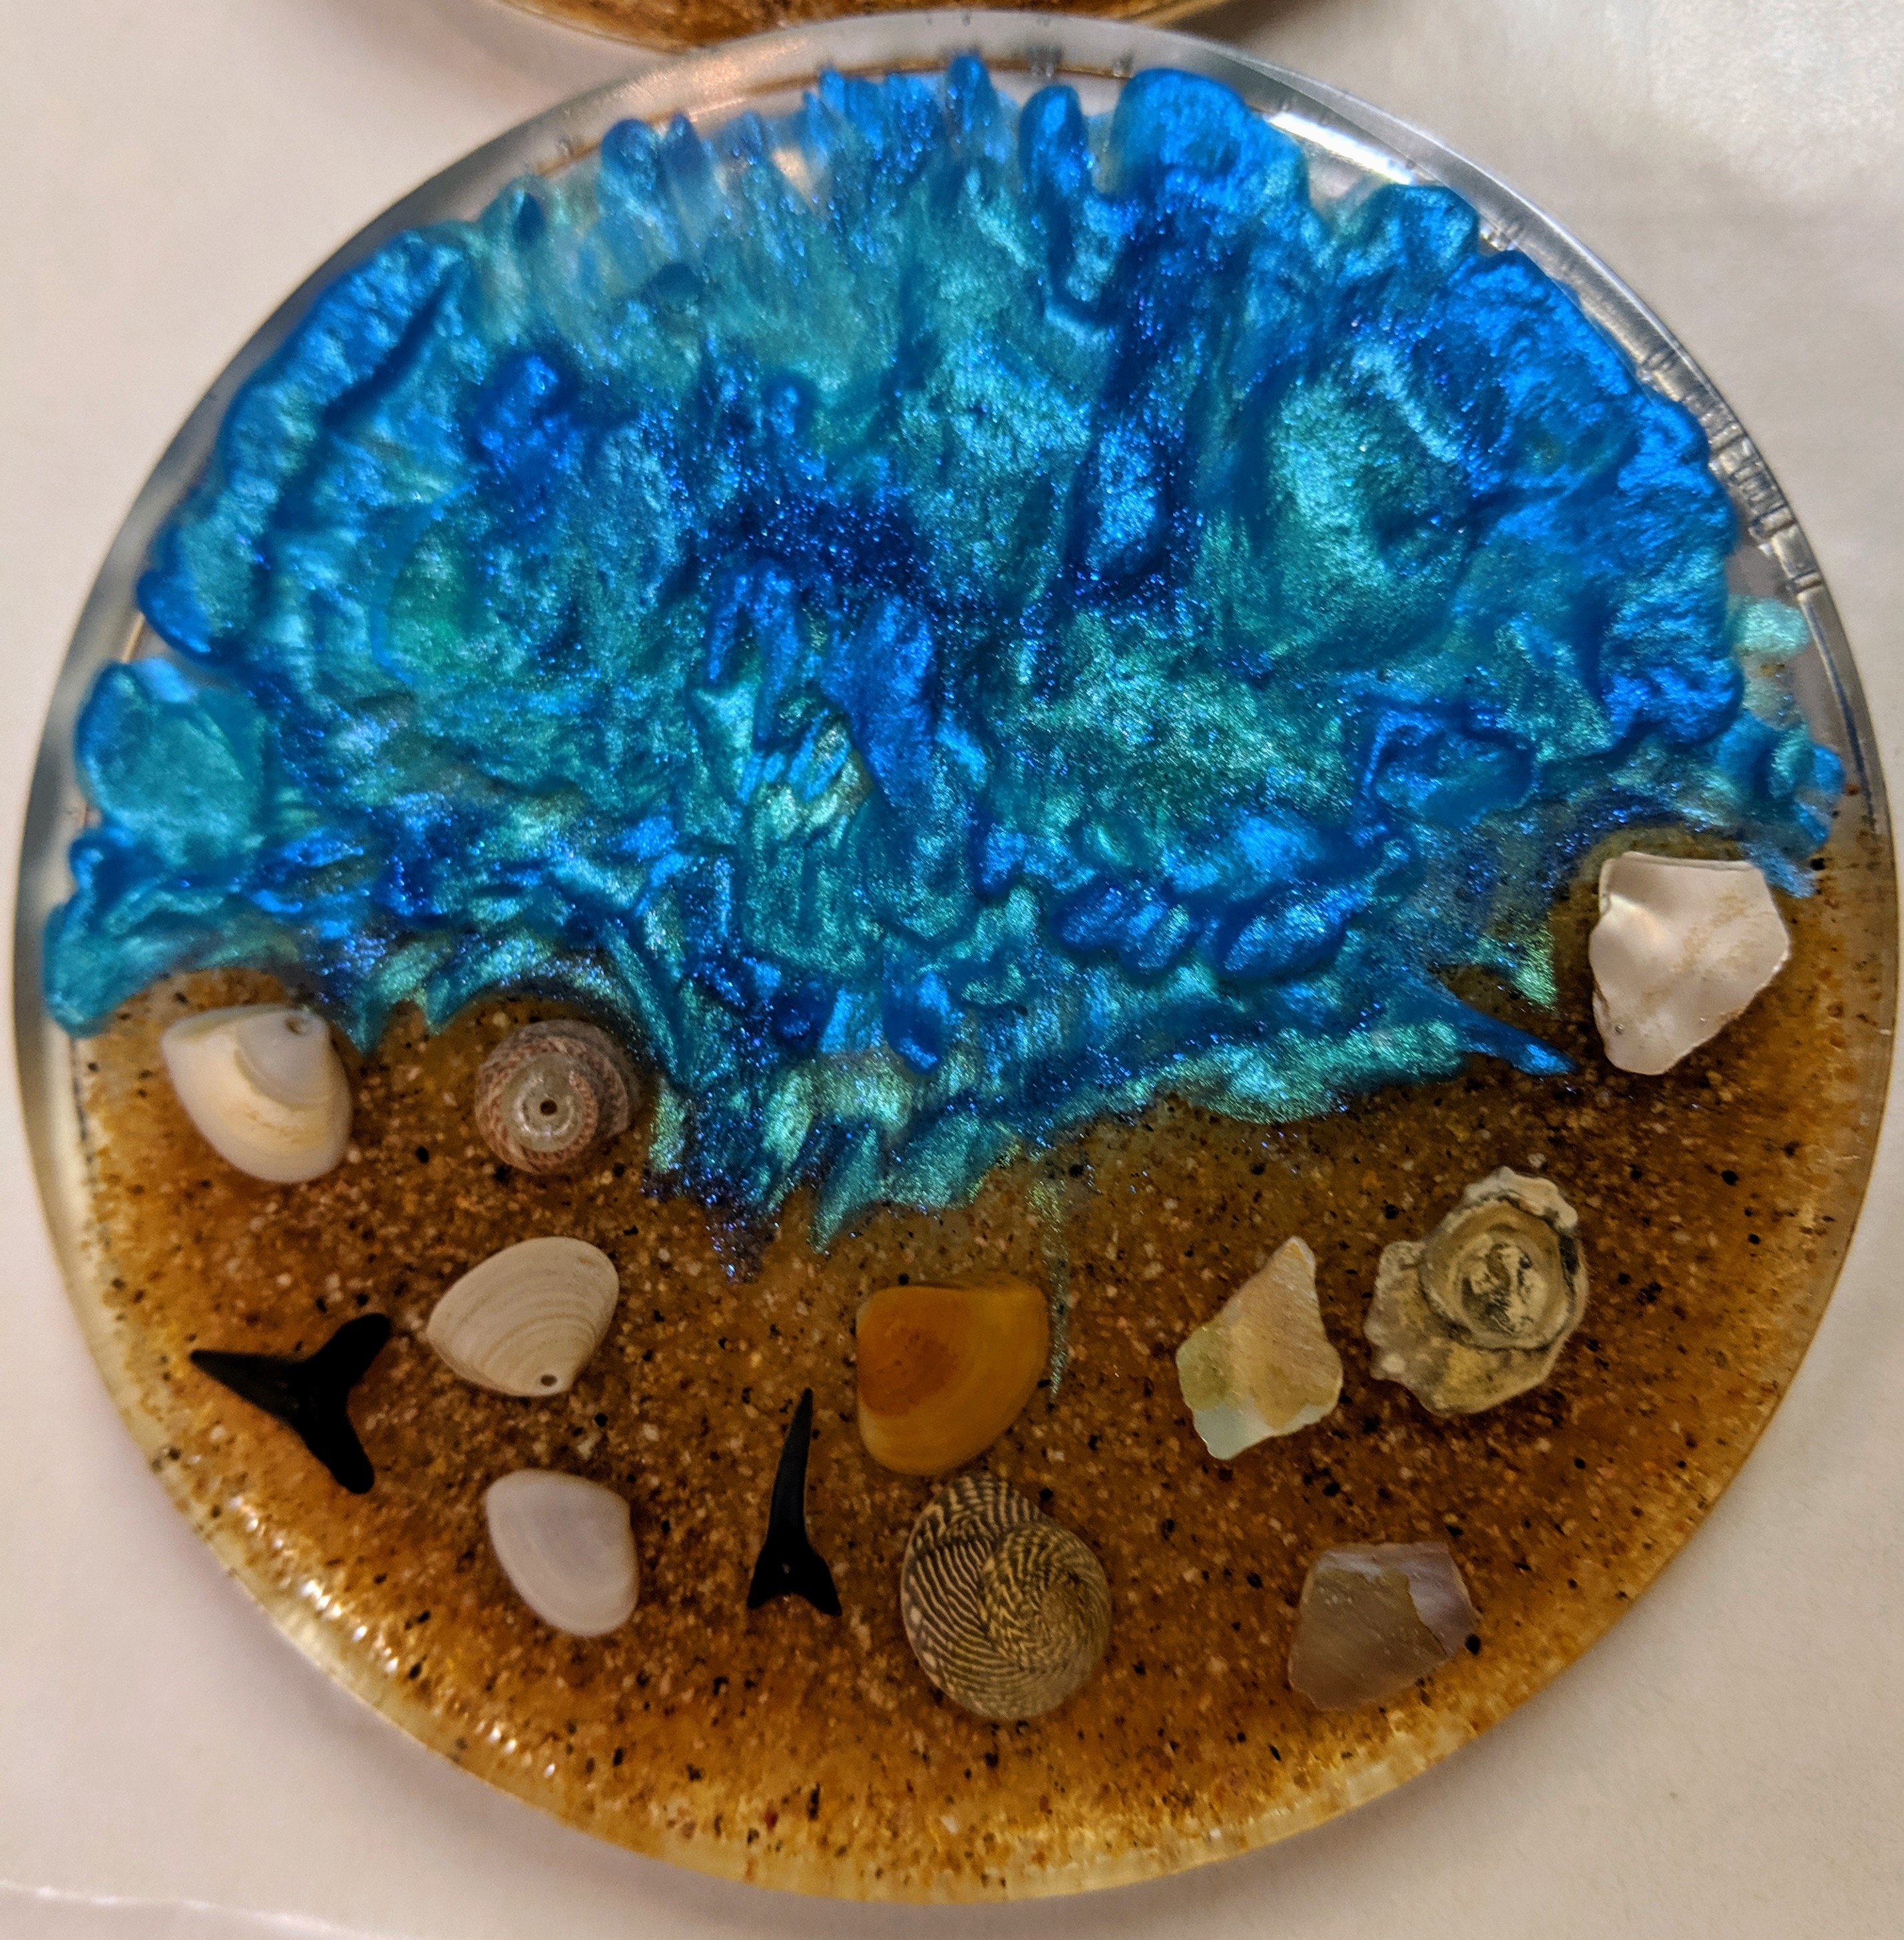
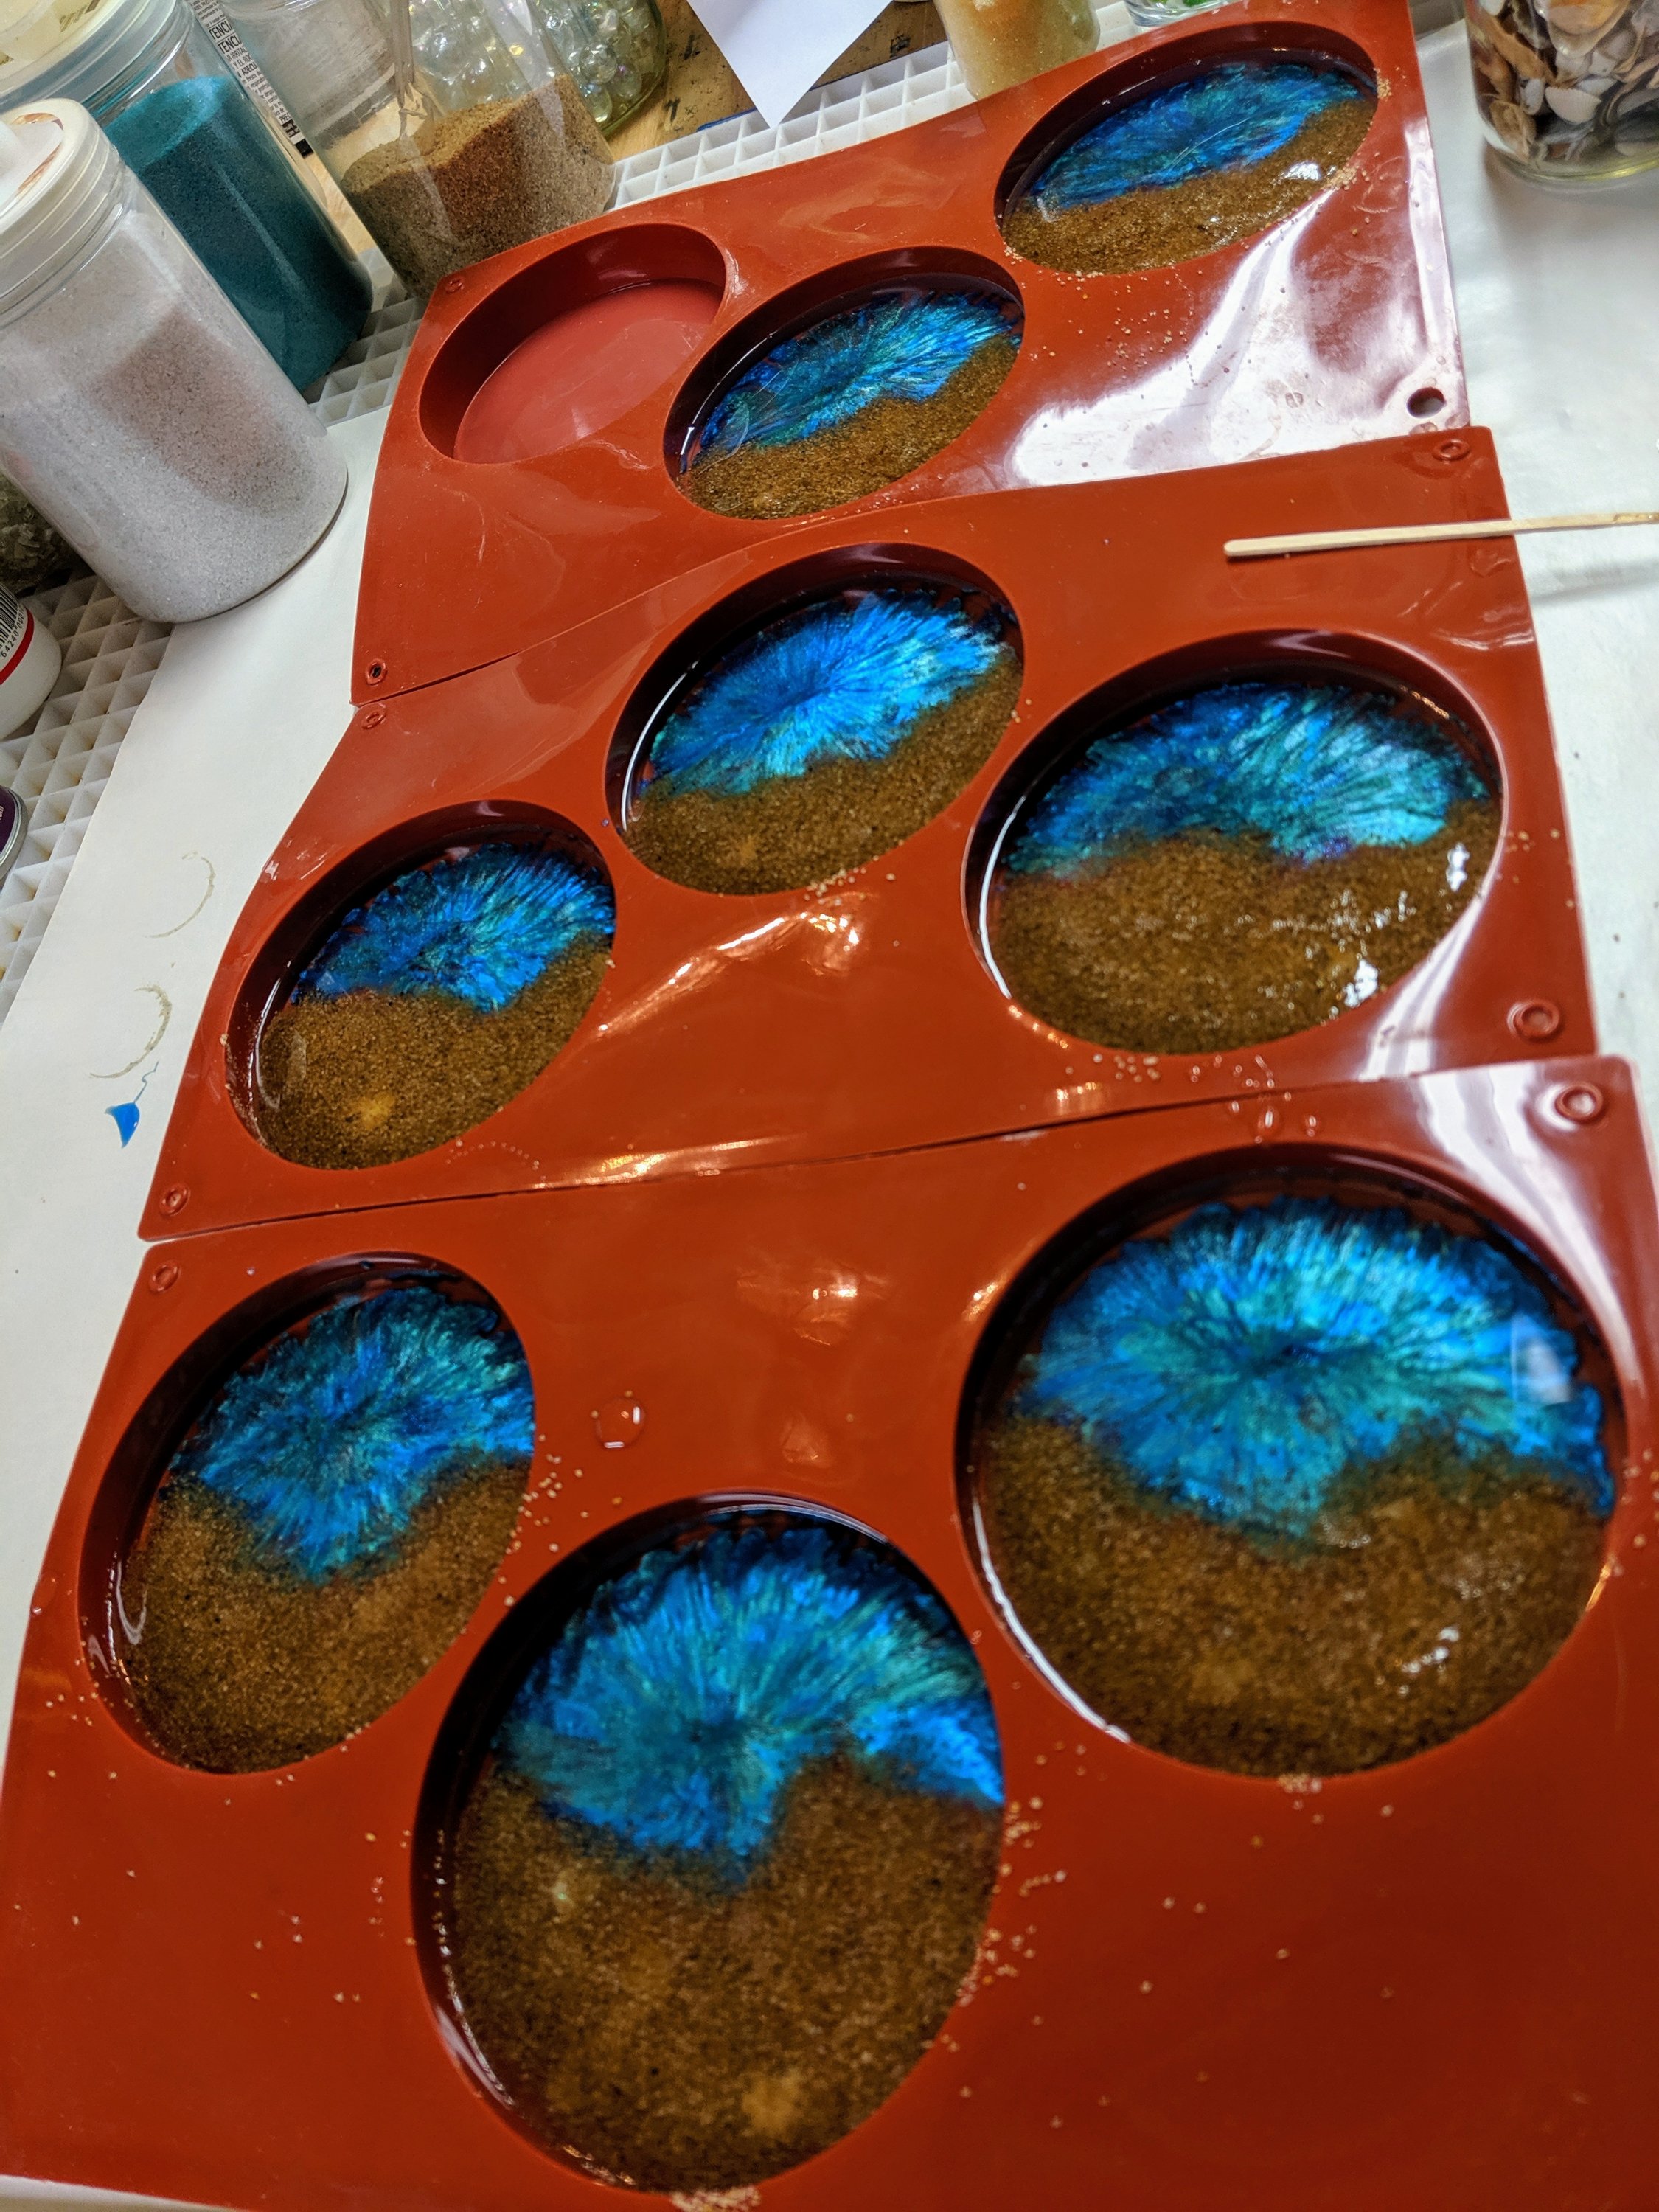
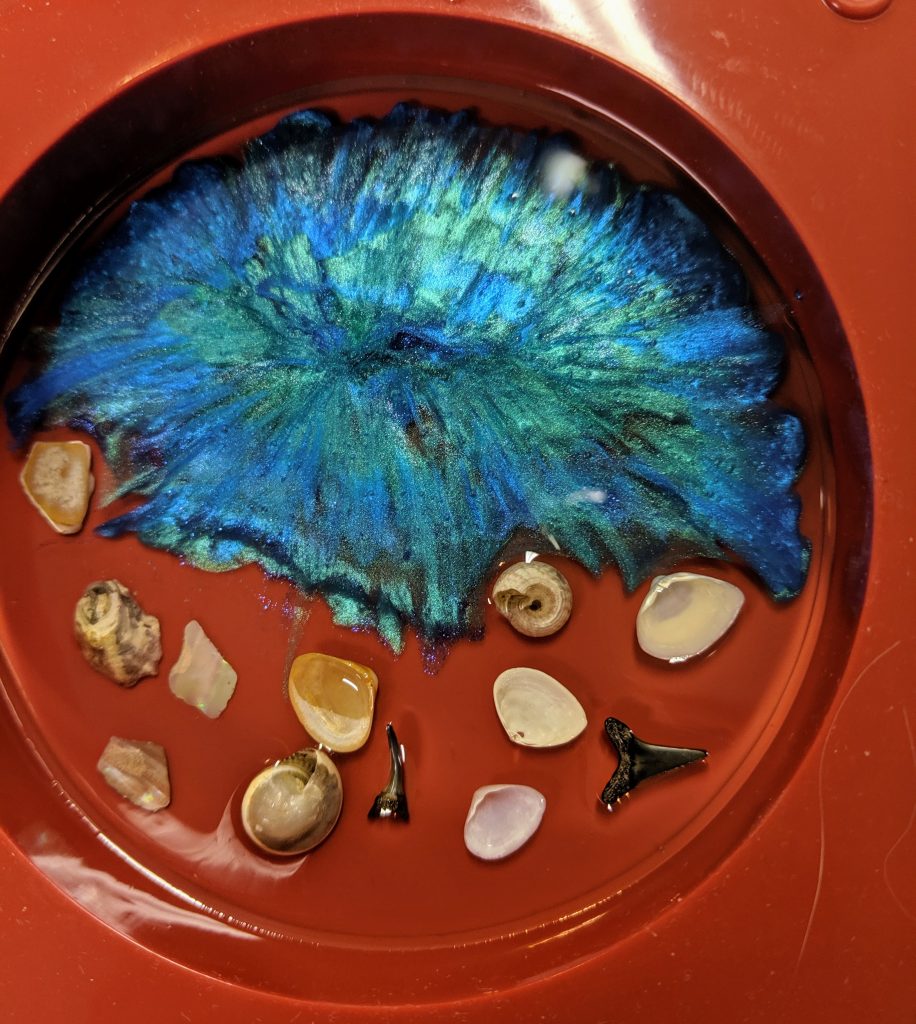
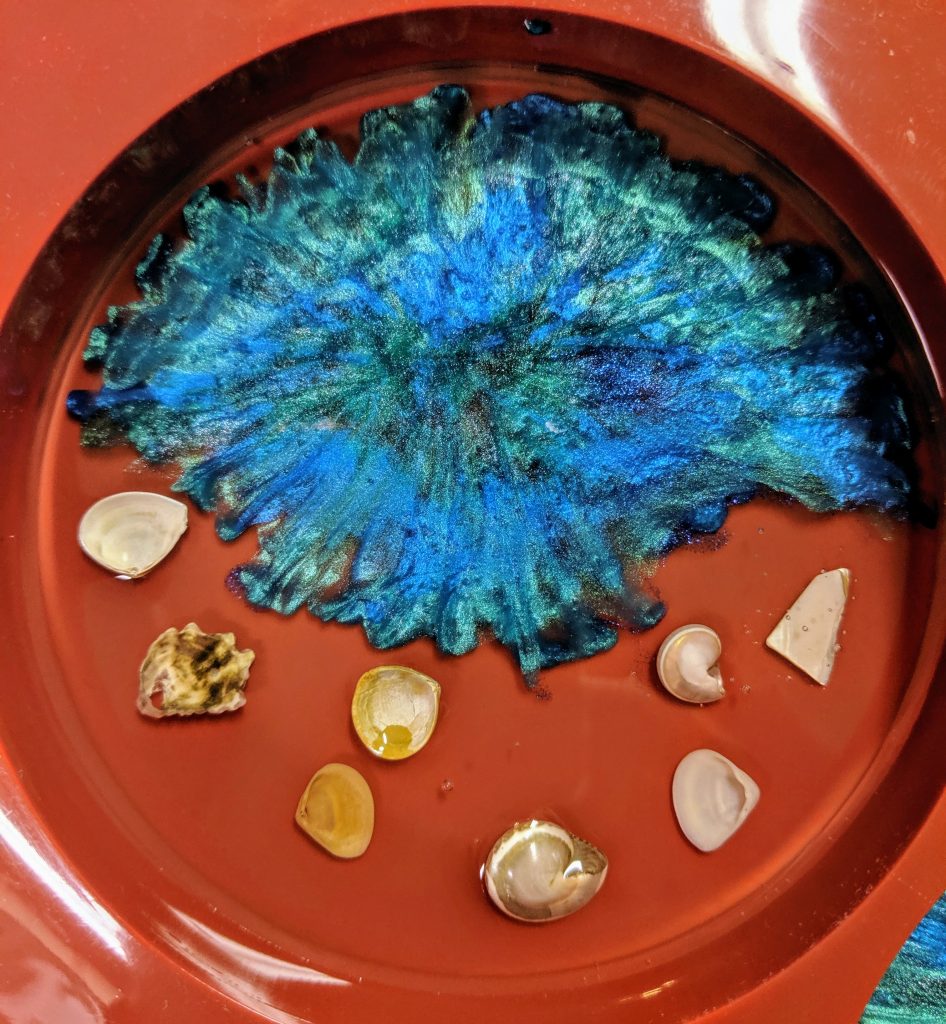
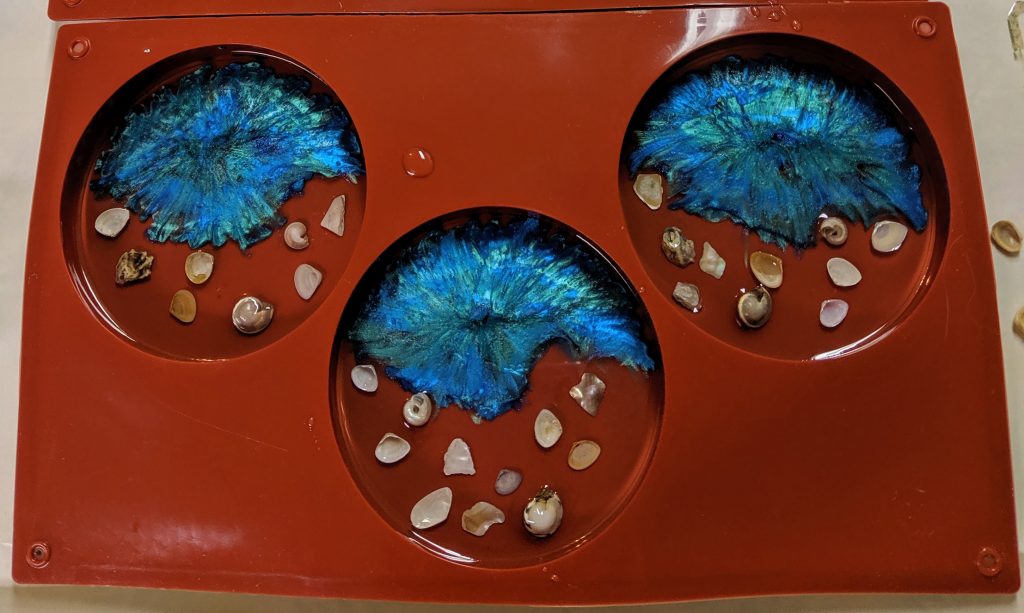
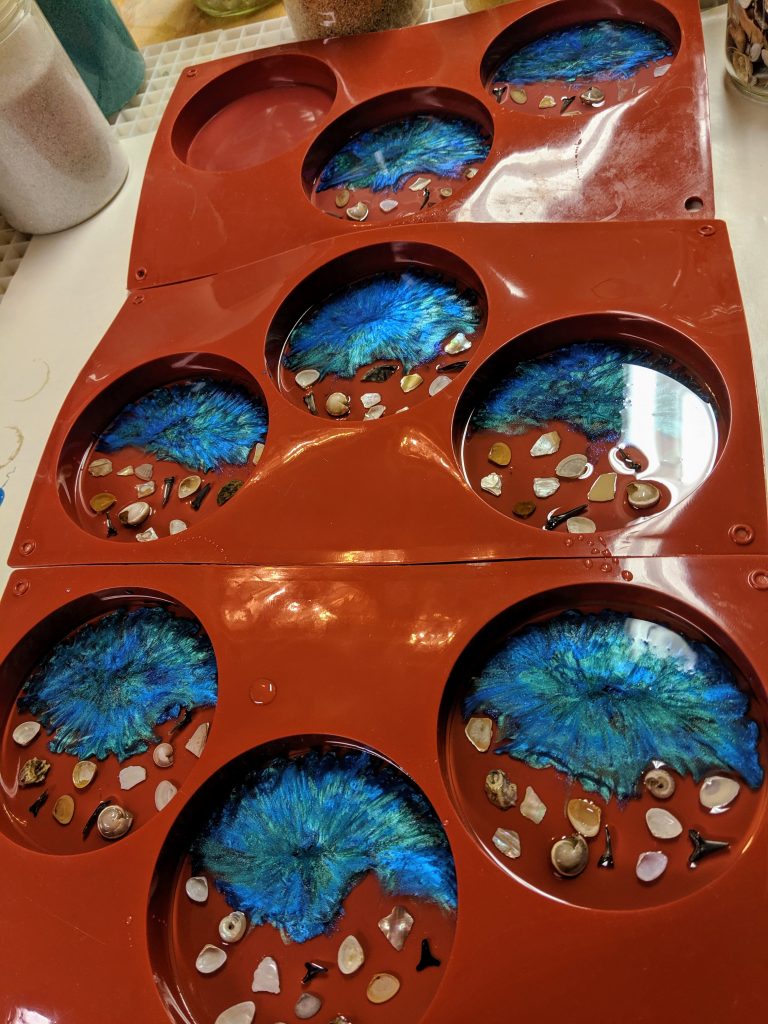
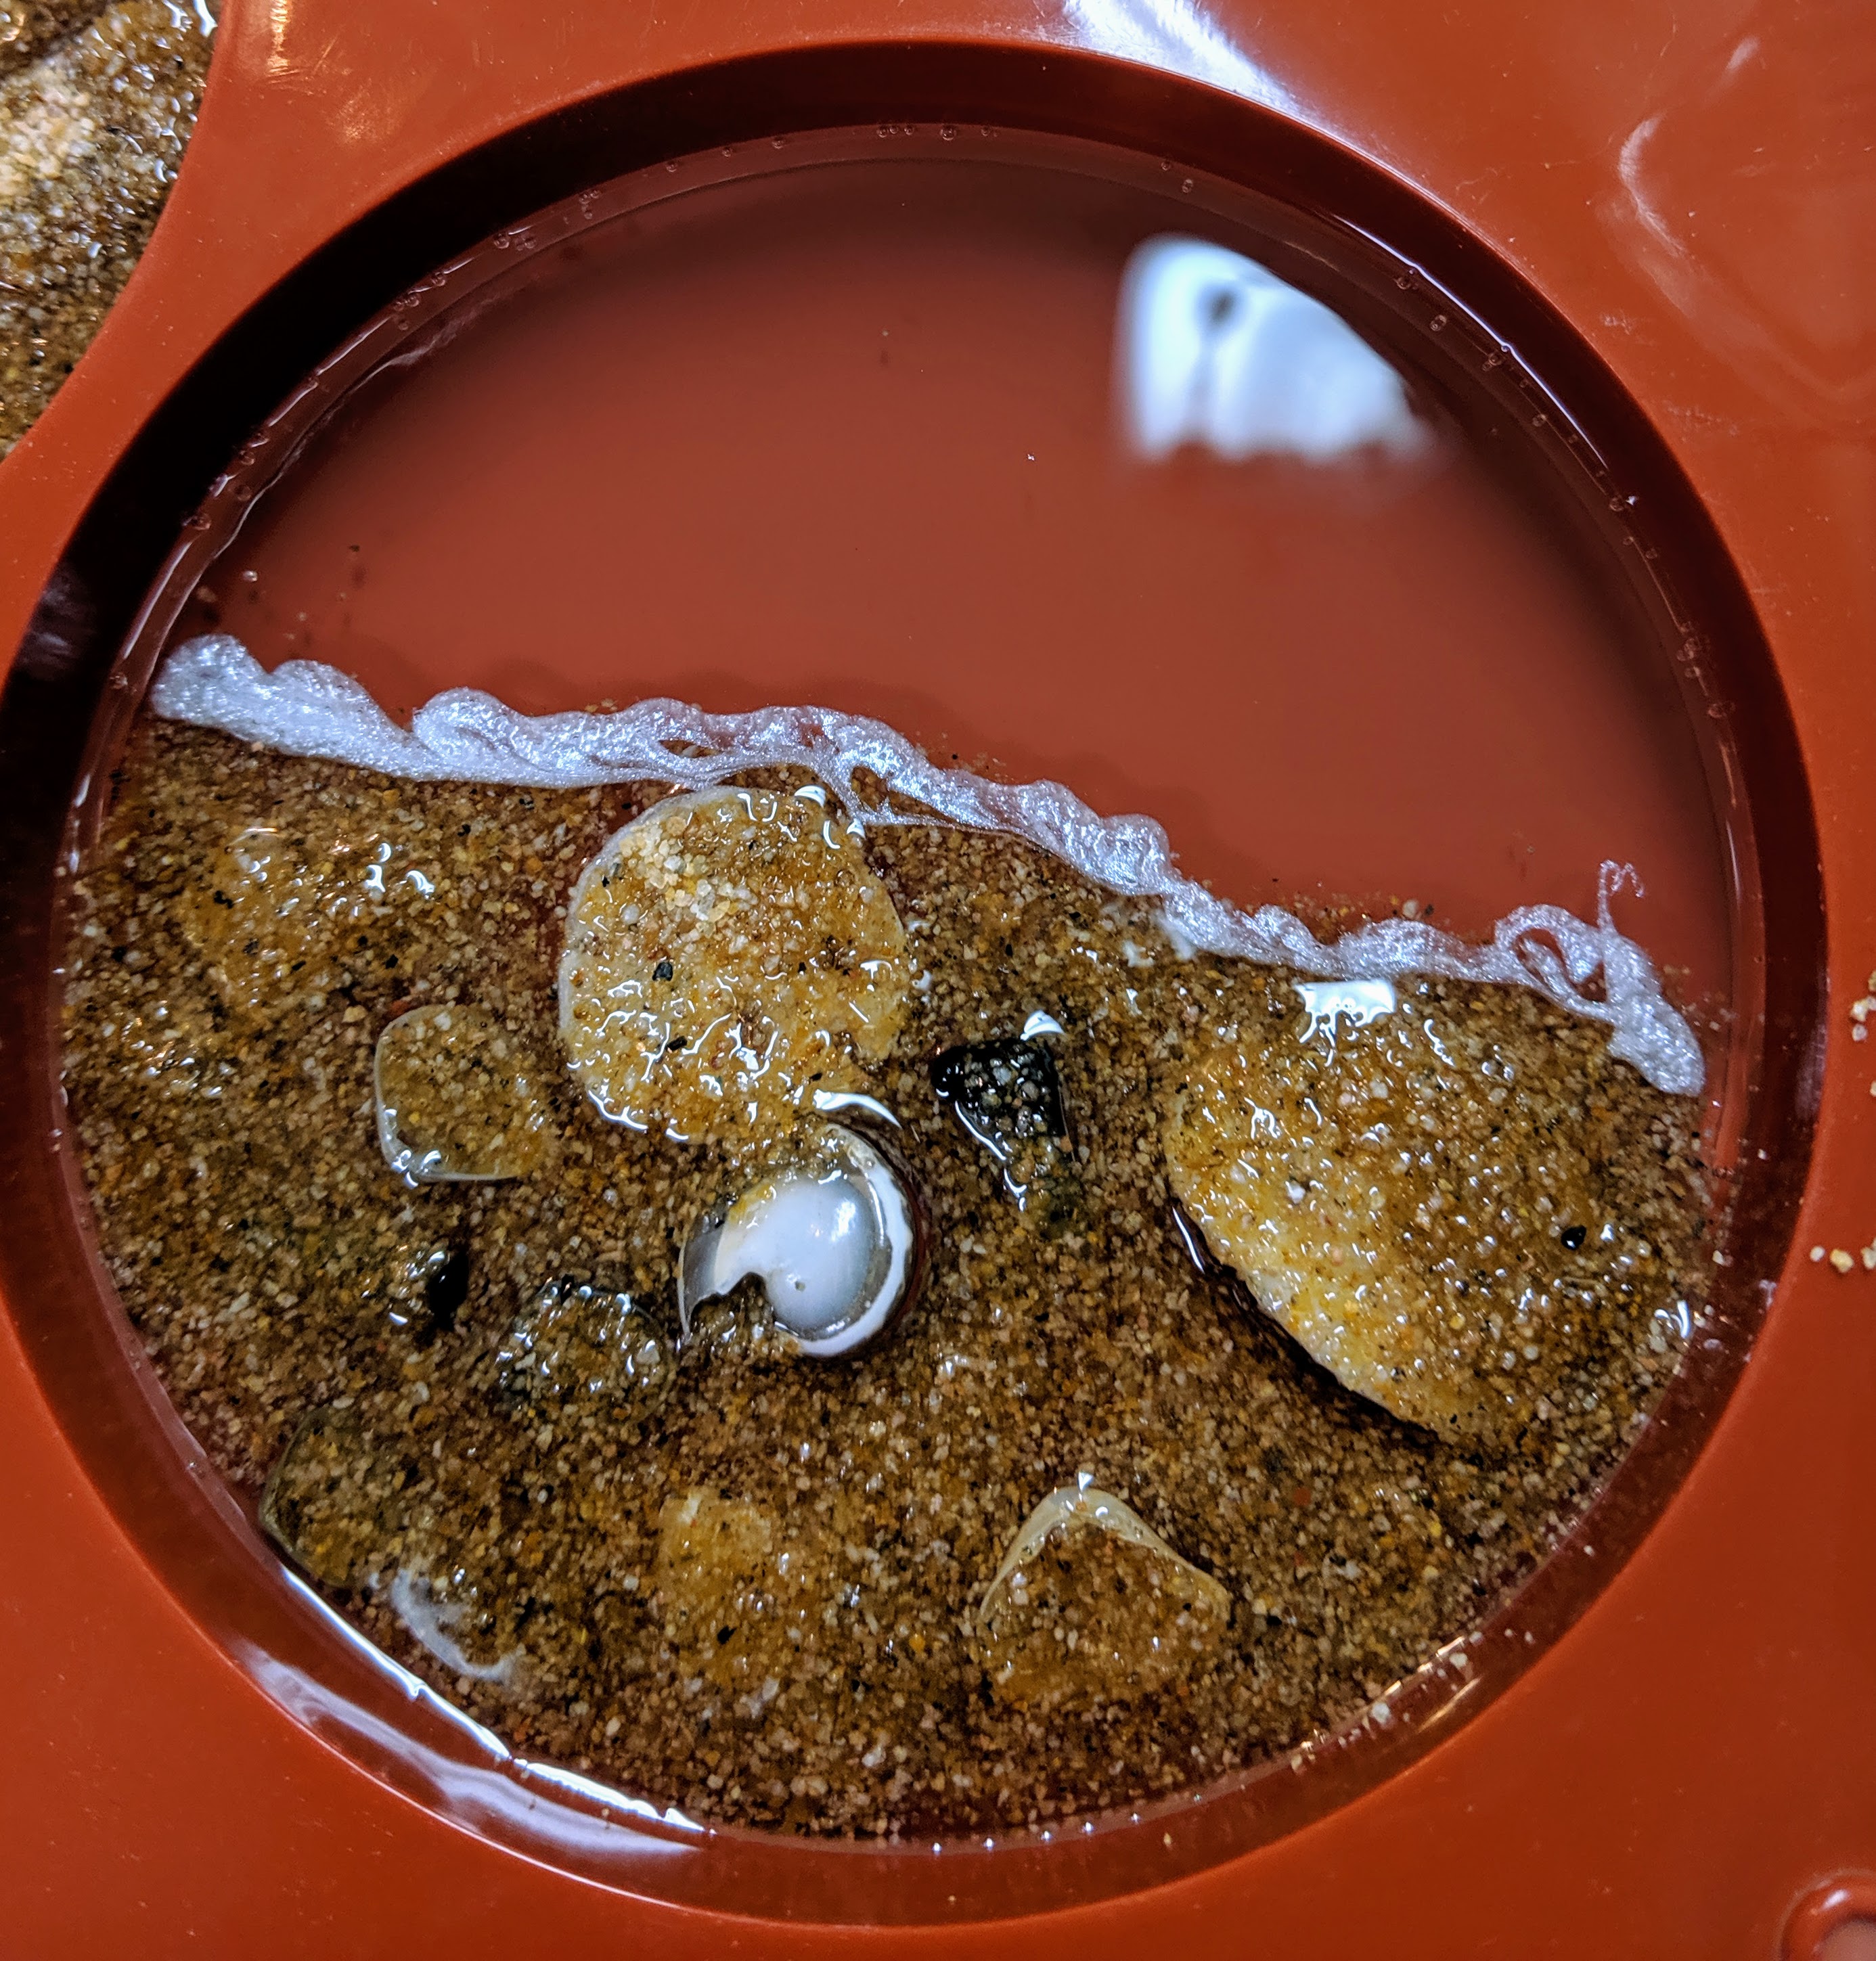
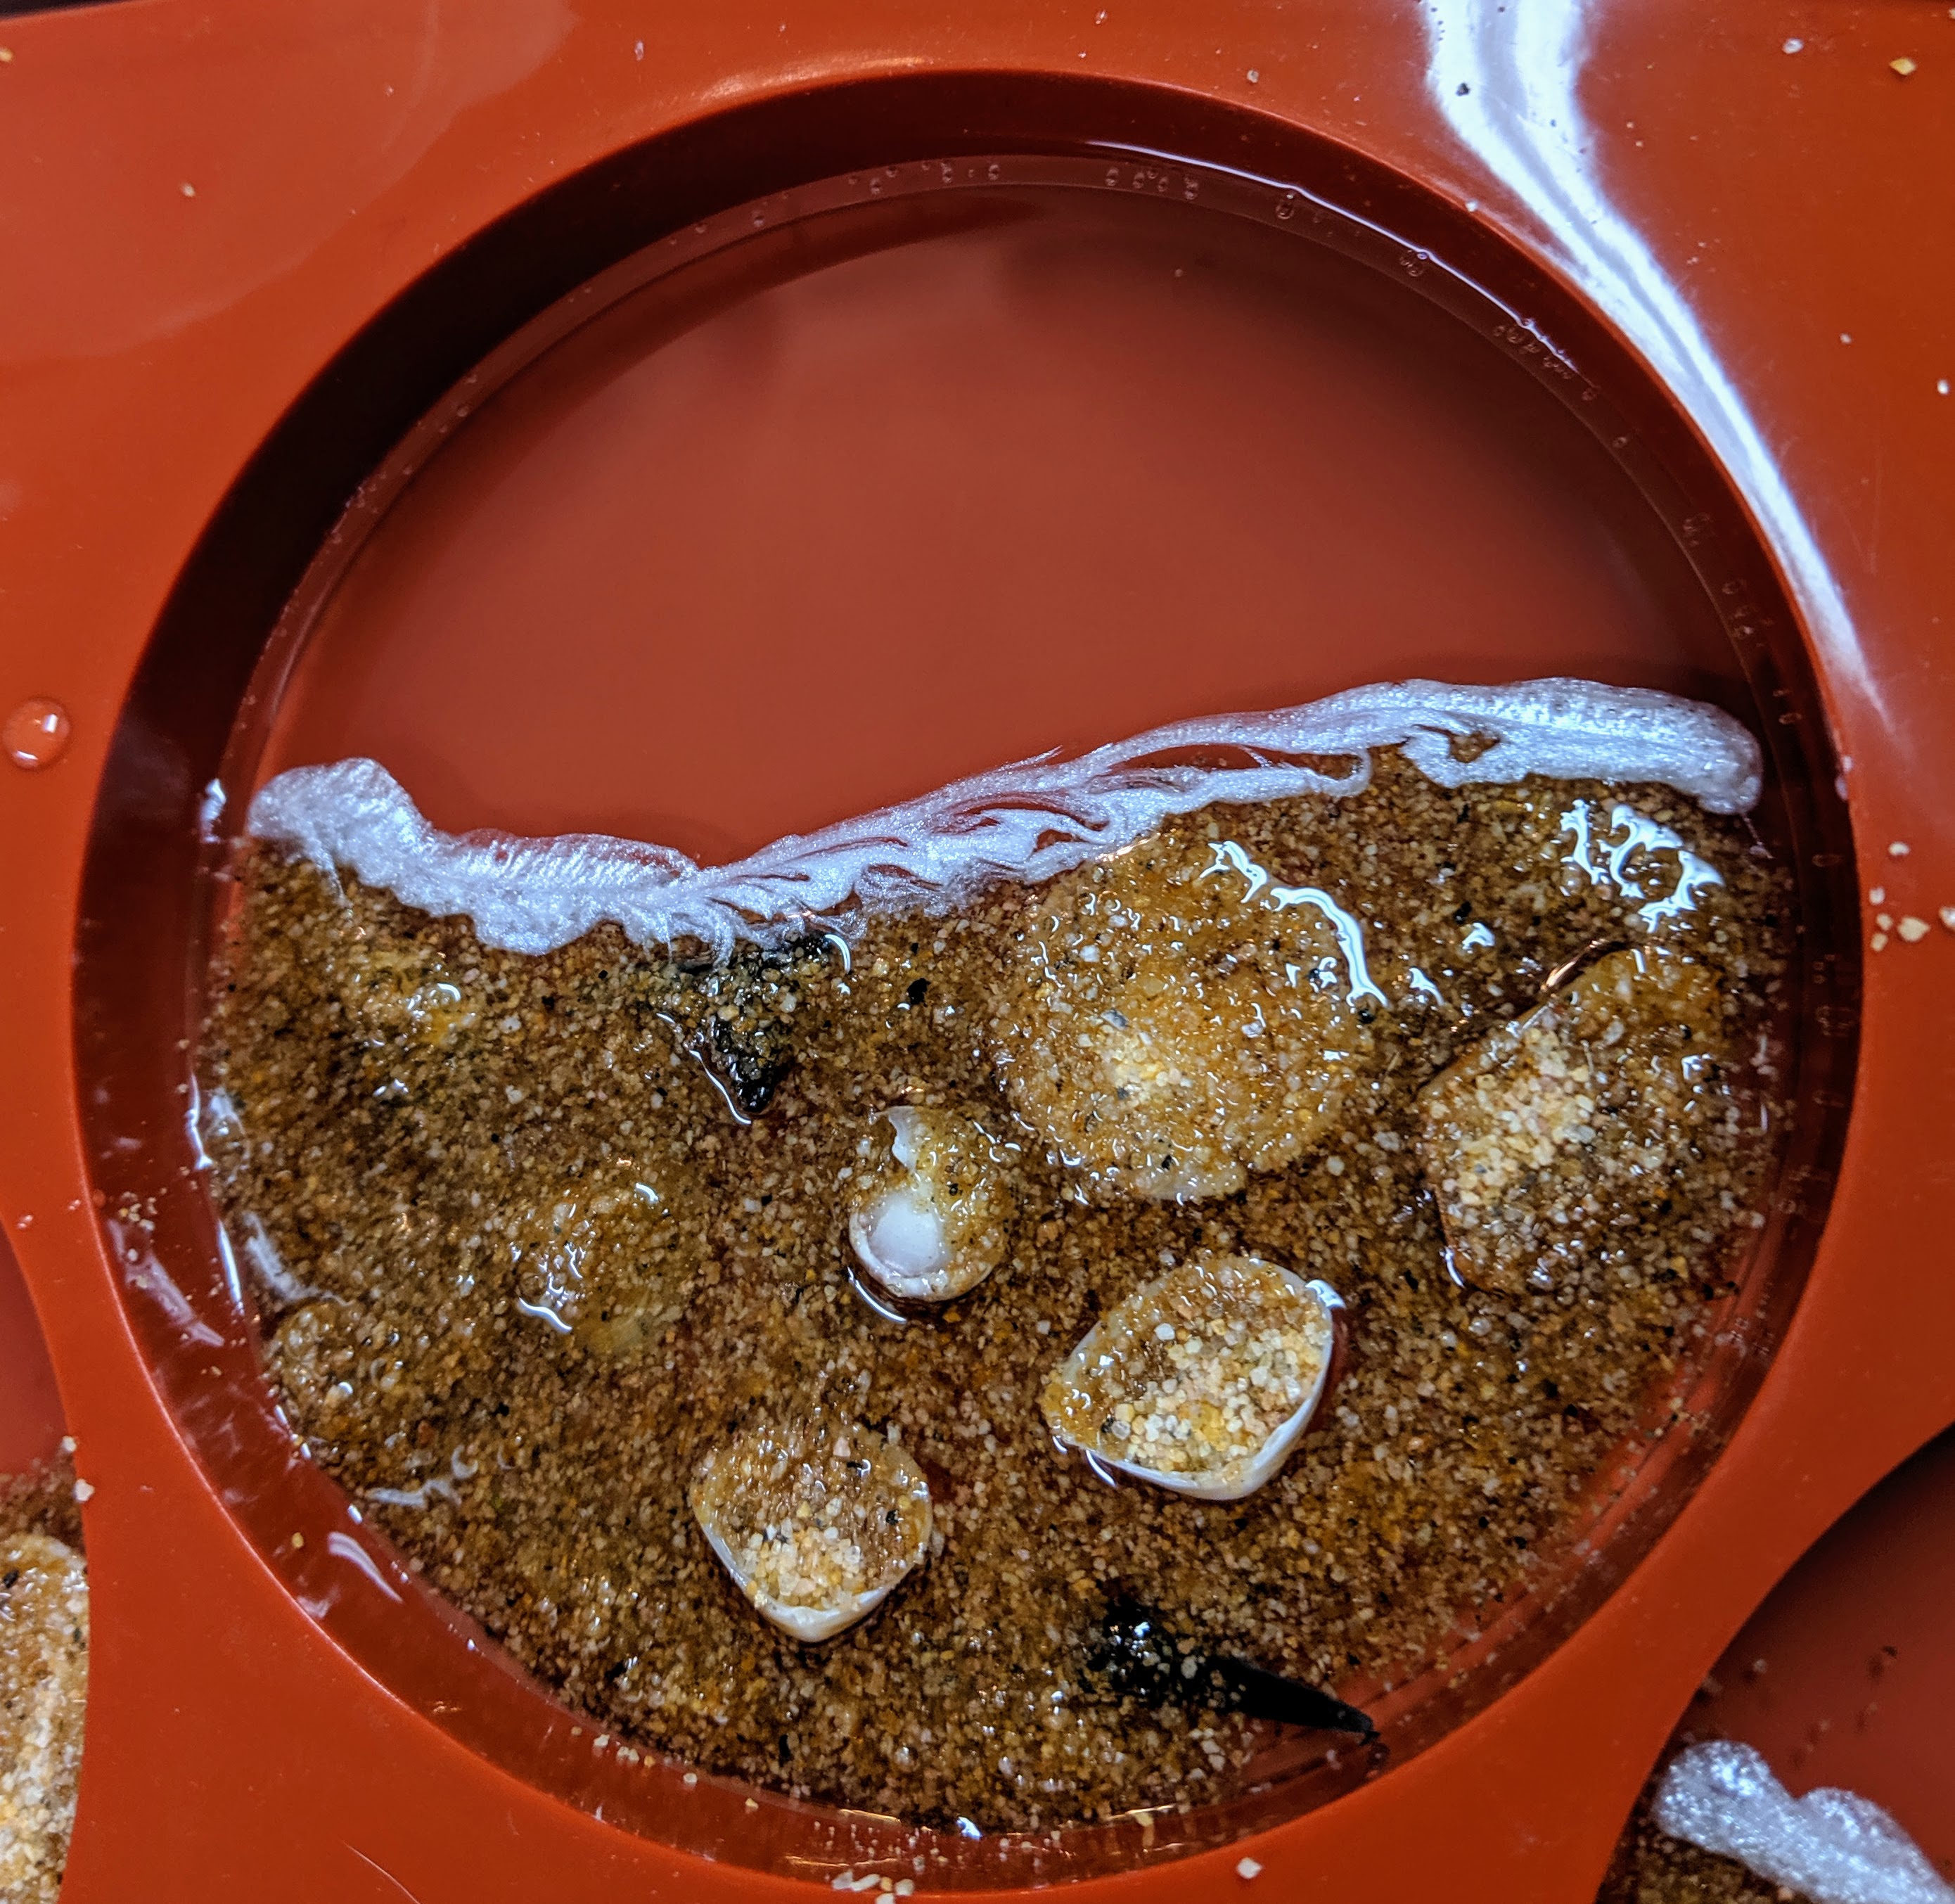
For my last set of coasters, I poured the water before I added the sand background. I decided I wanted to try reversing the order and add the shells and sandy beach background first this time around.

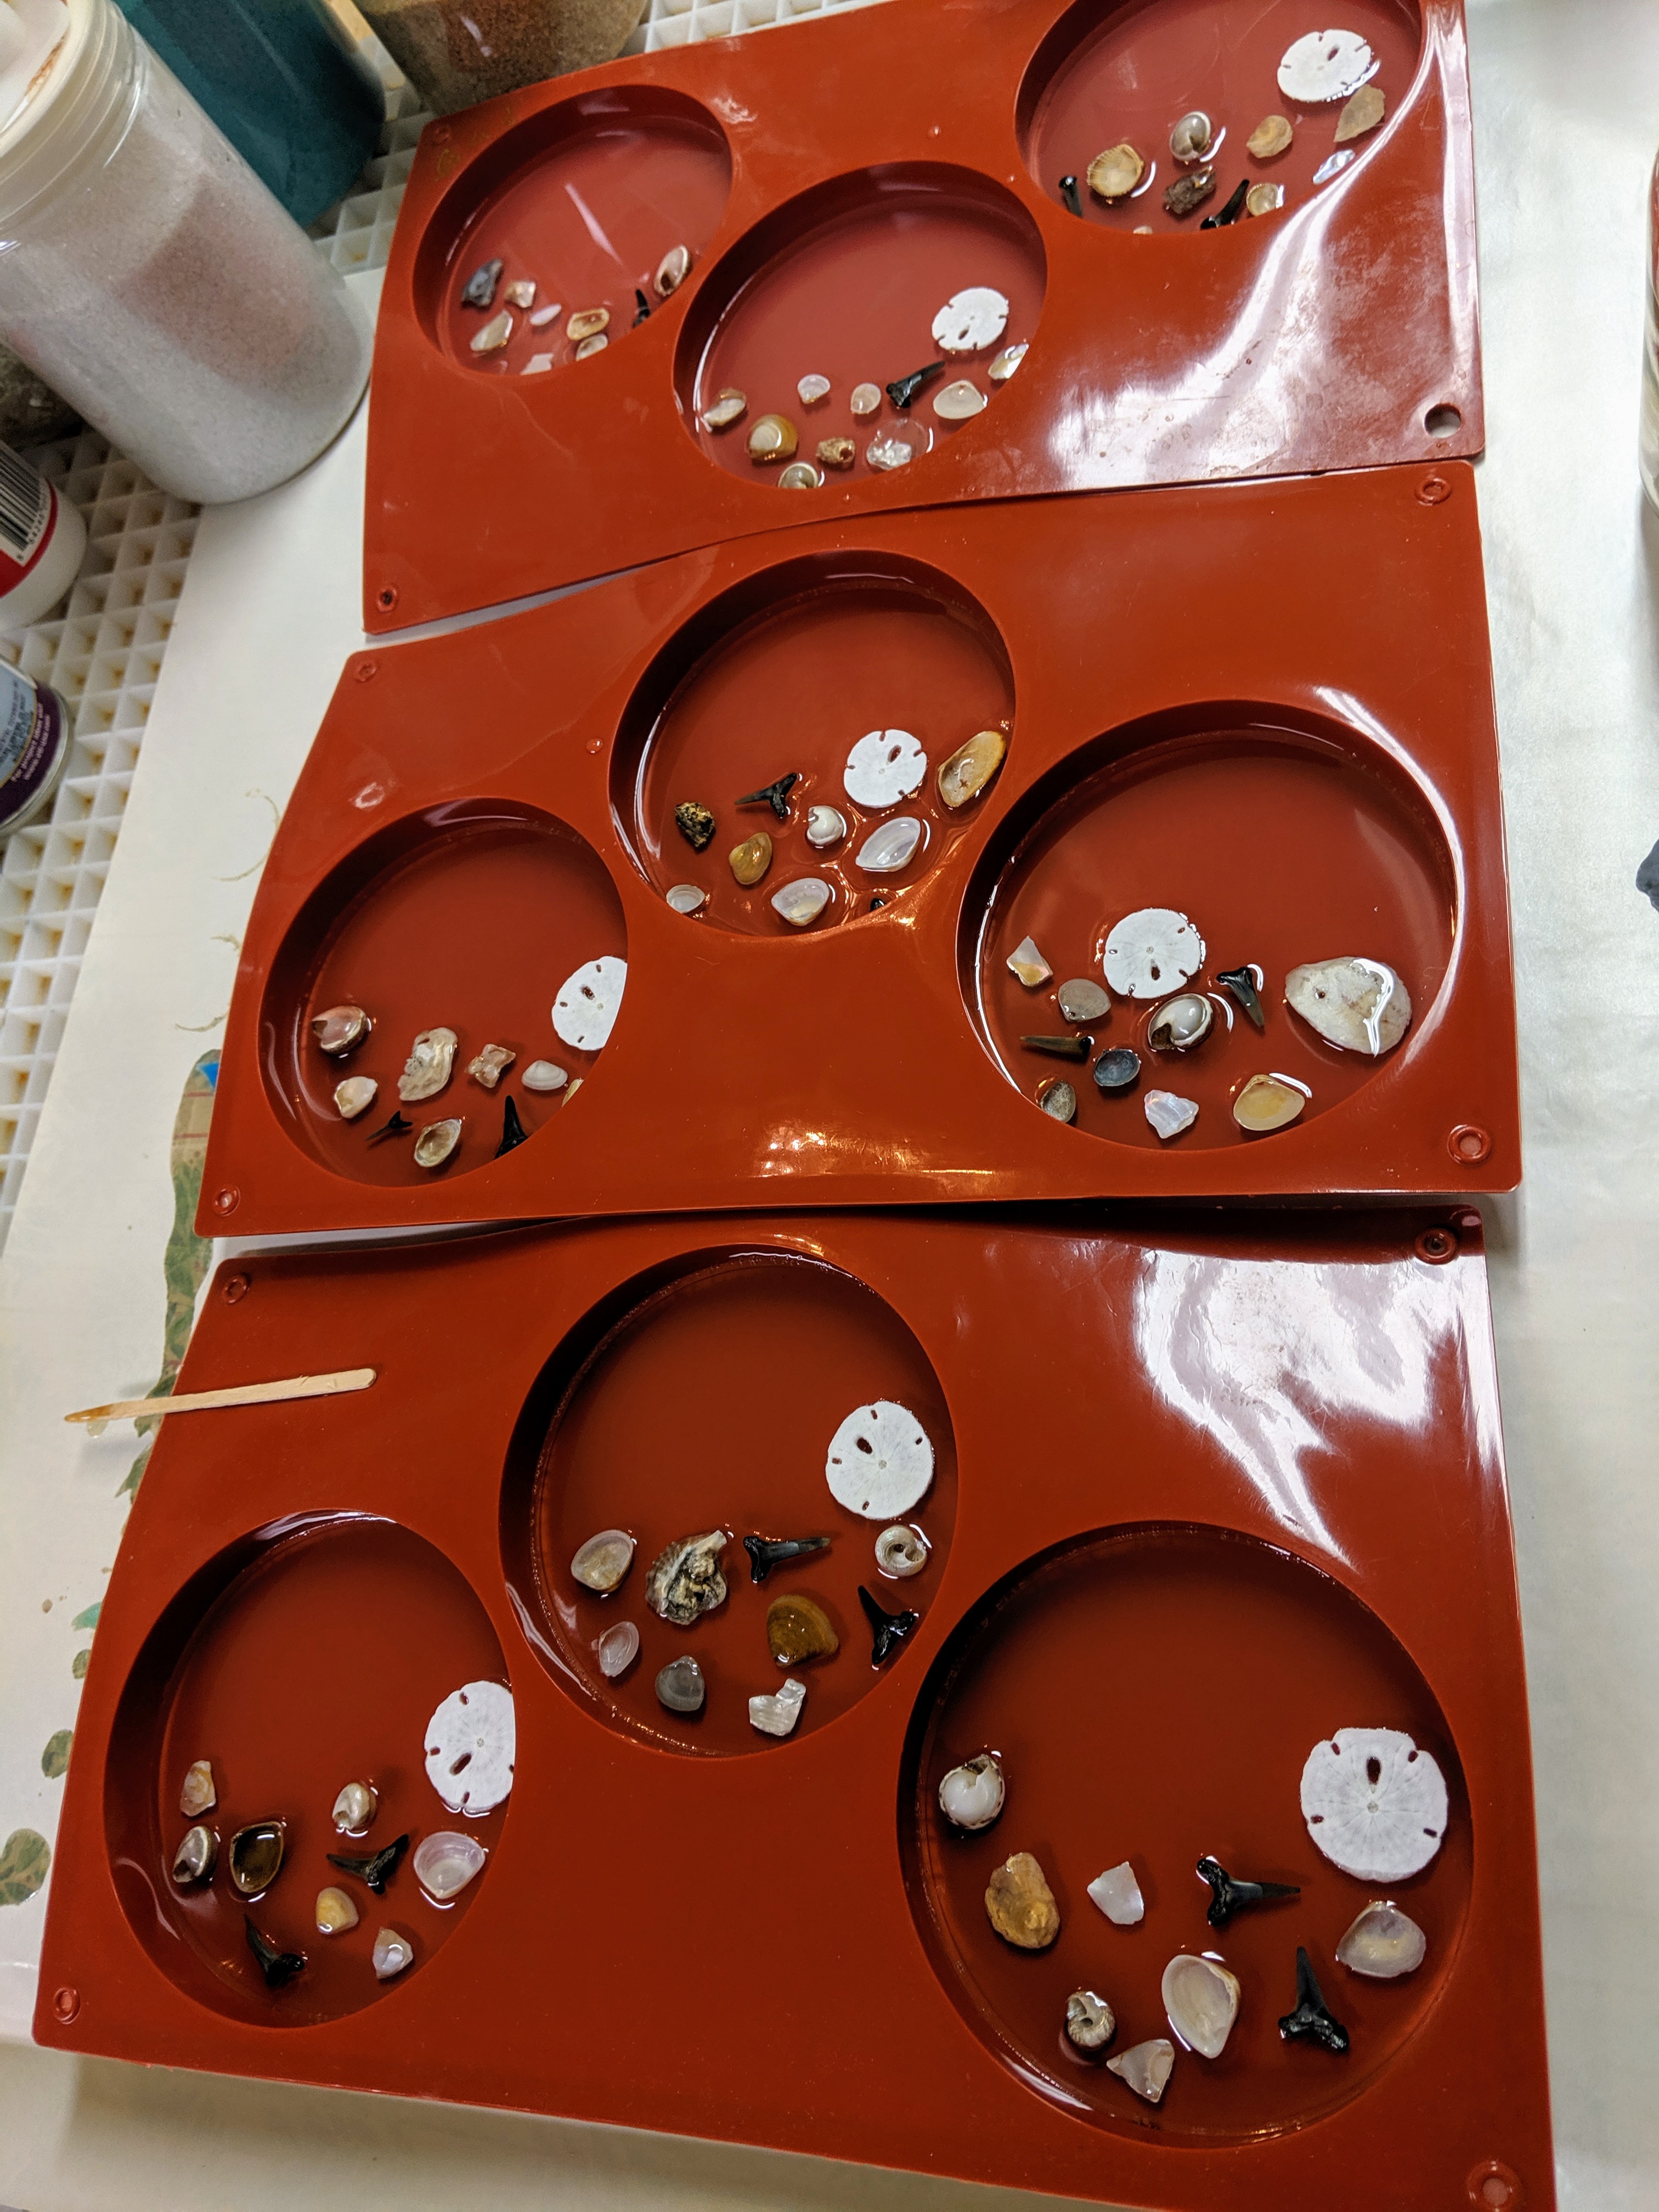
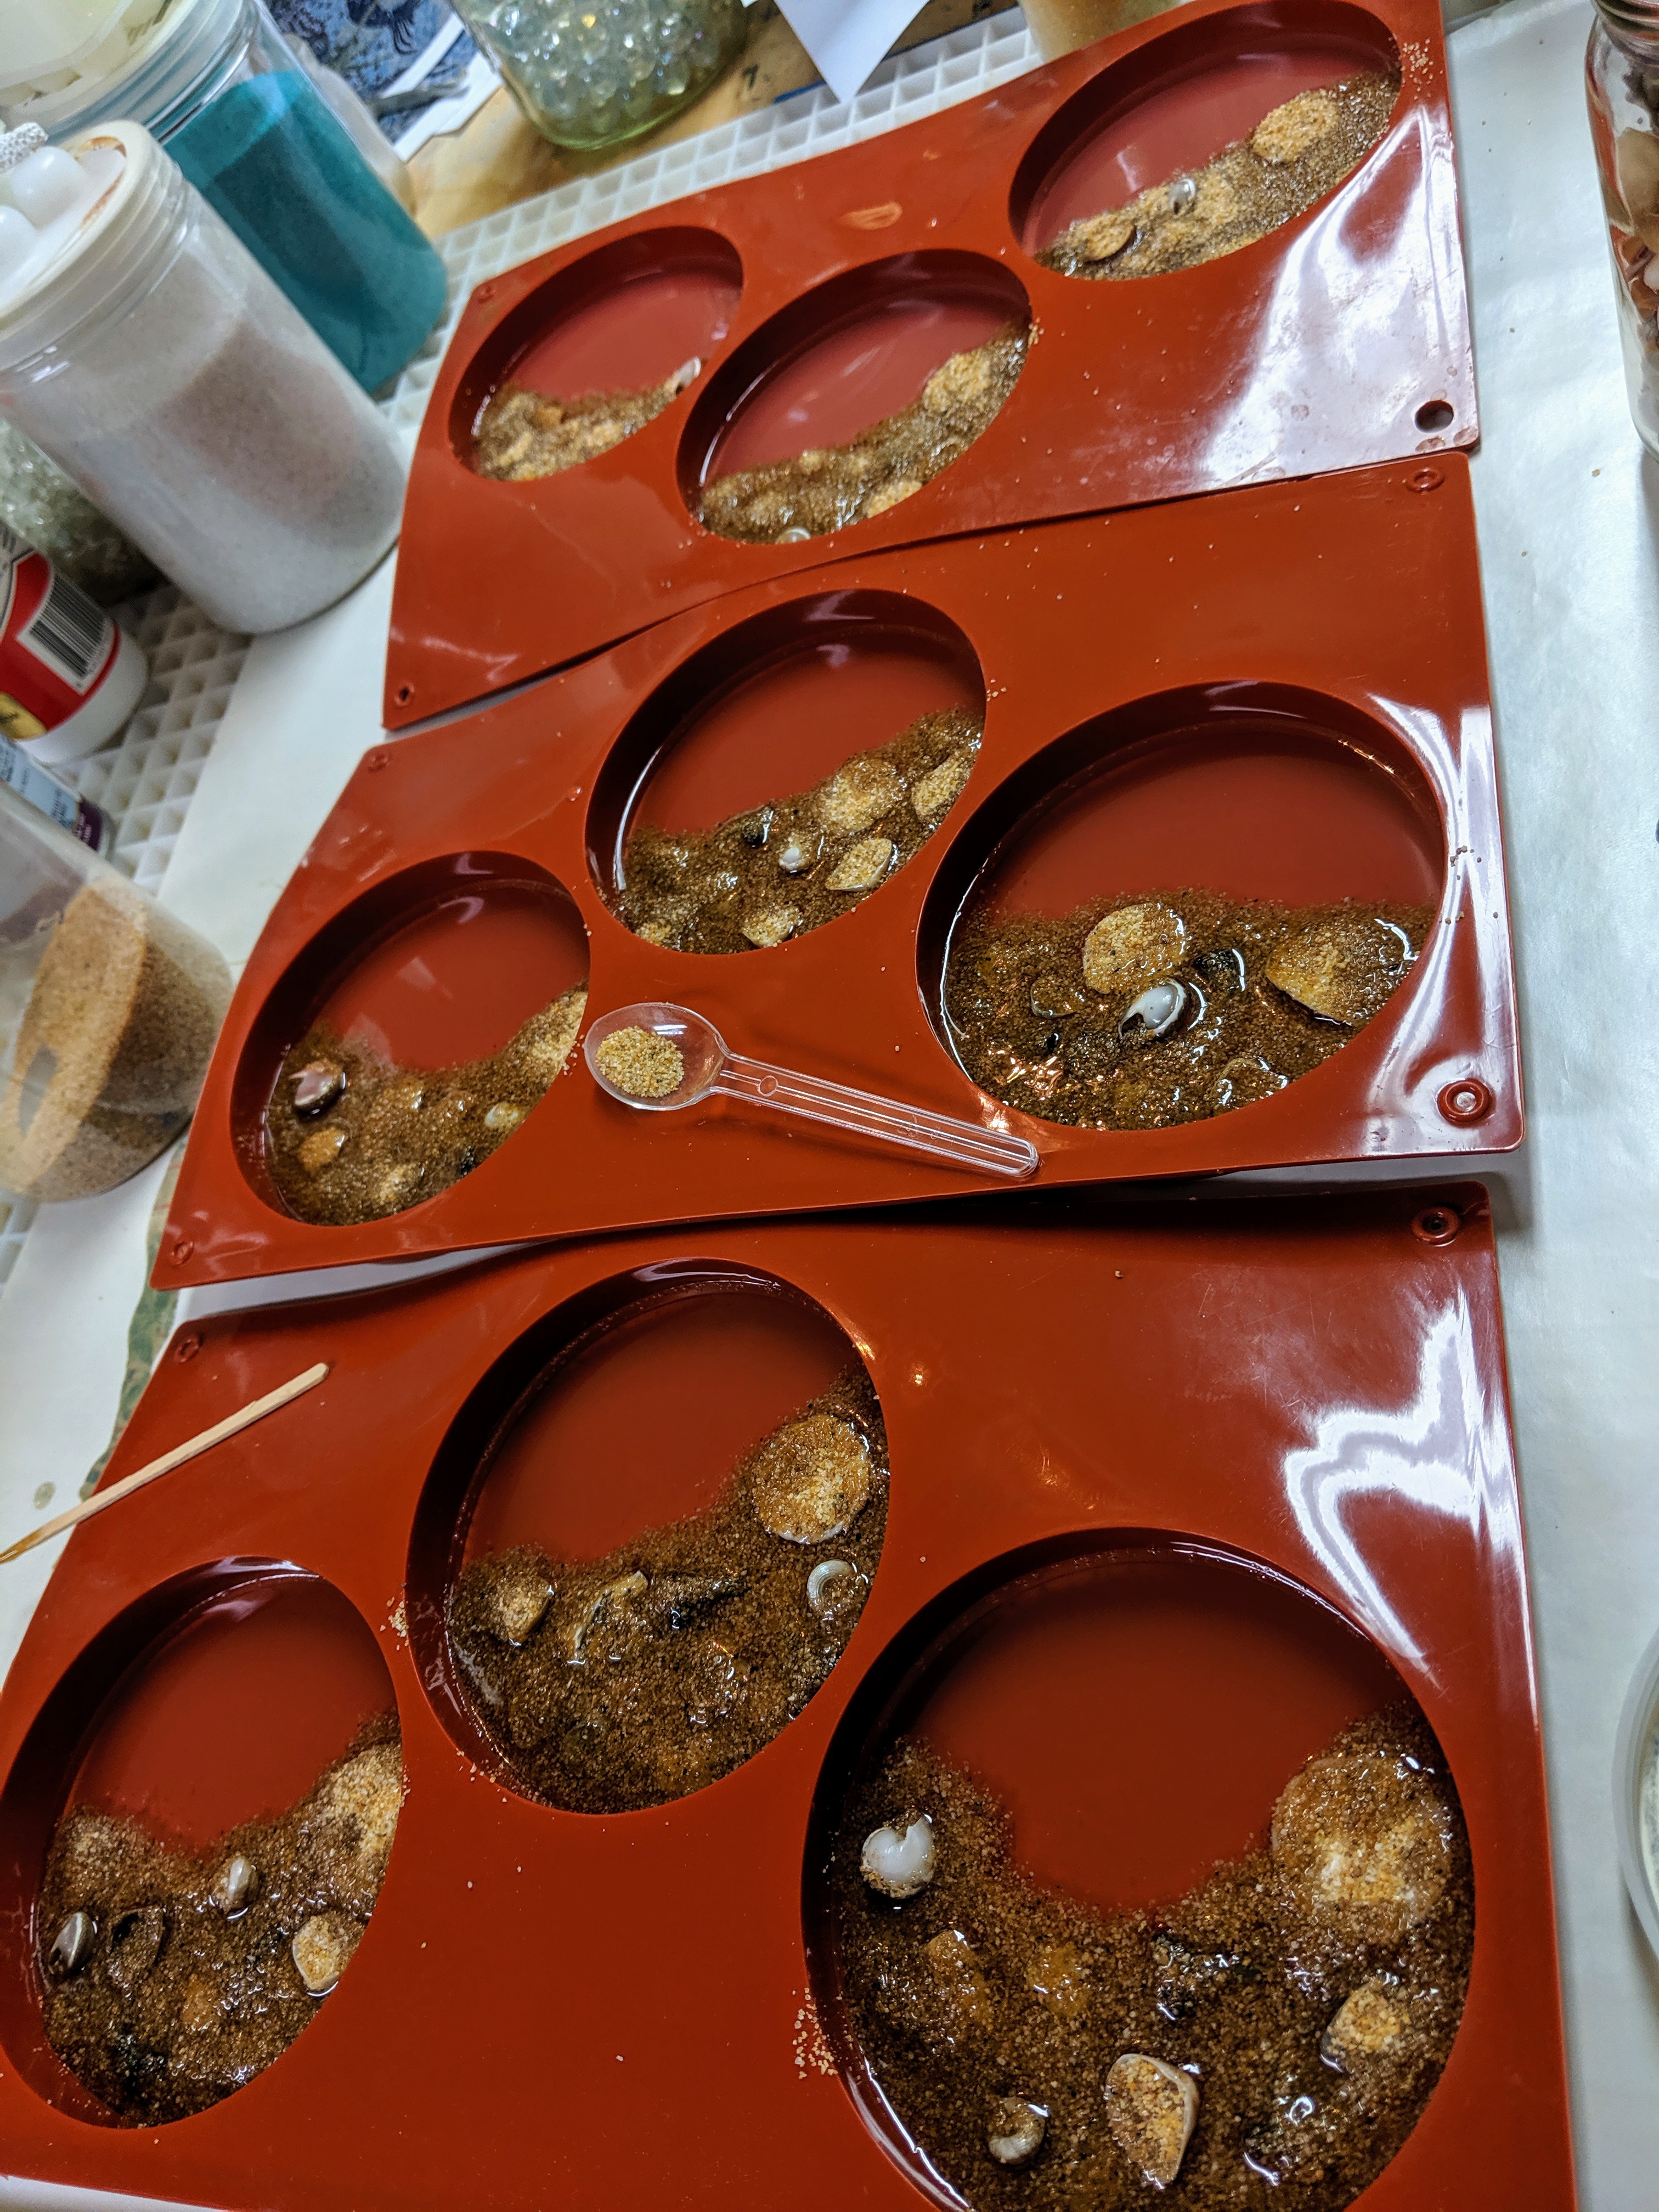
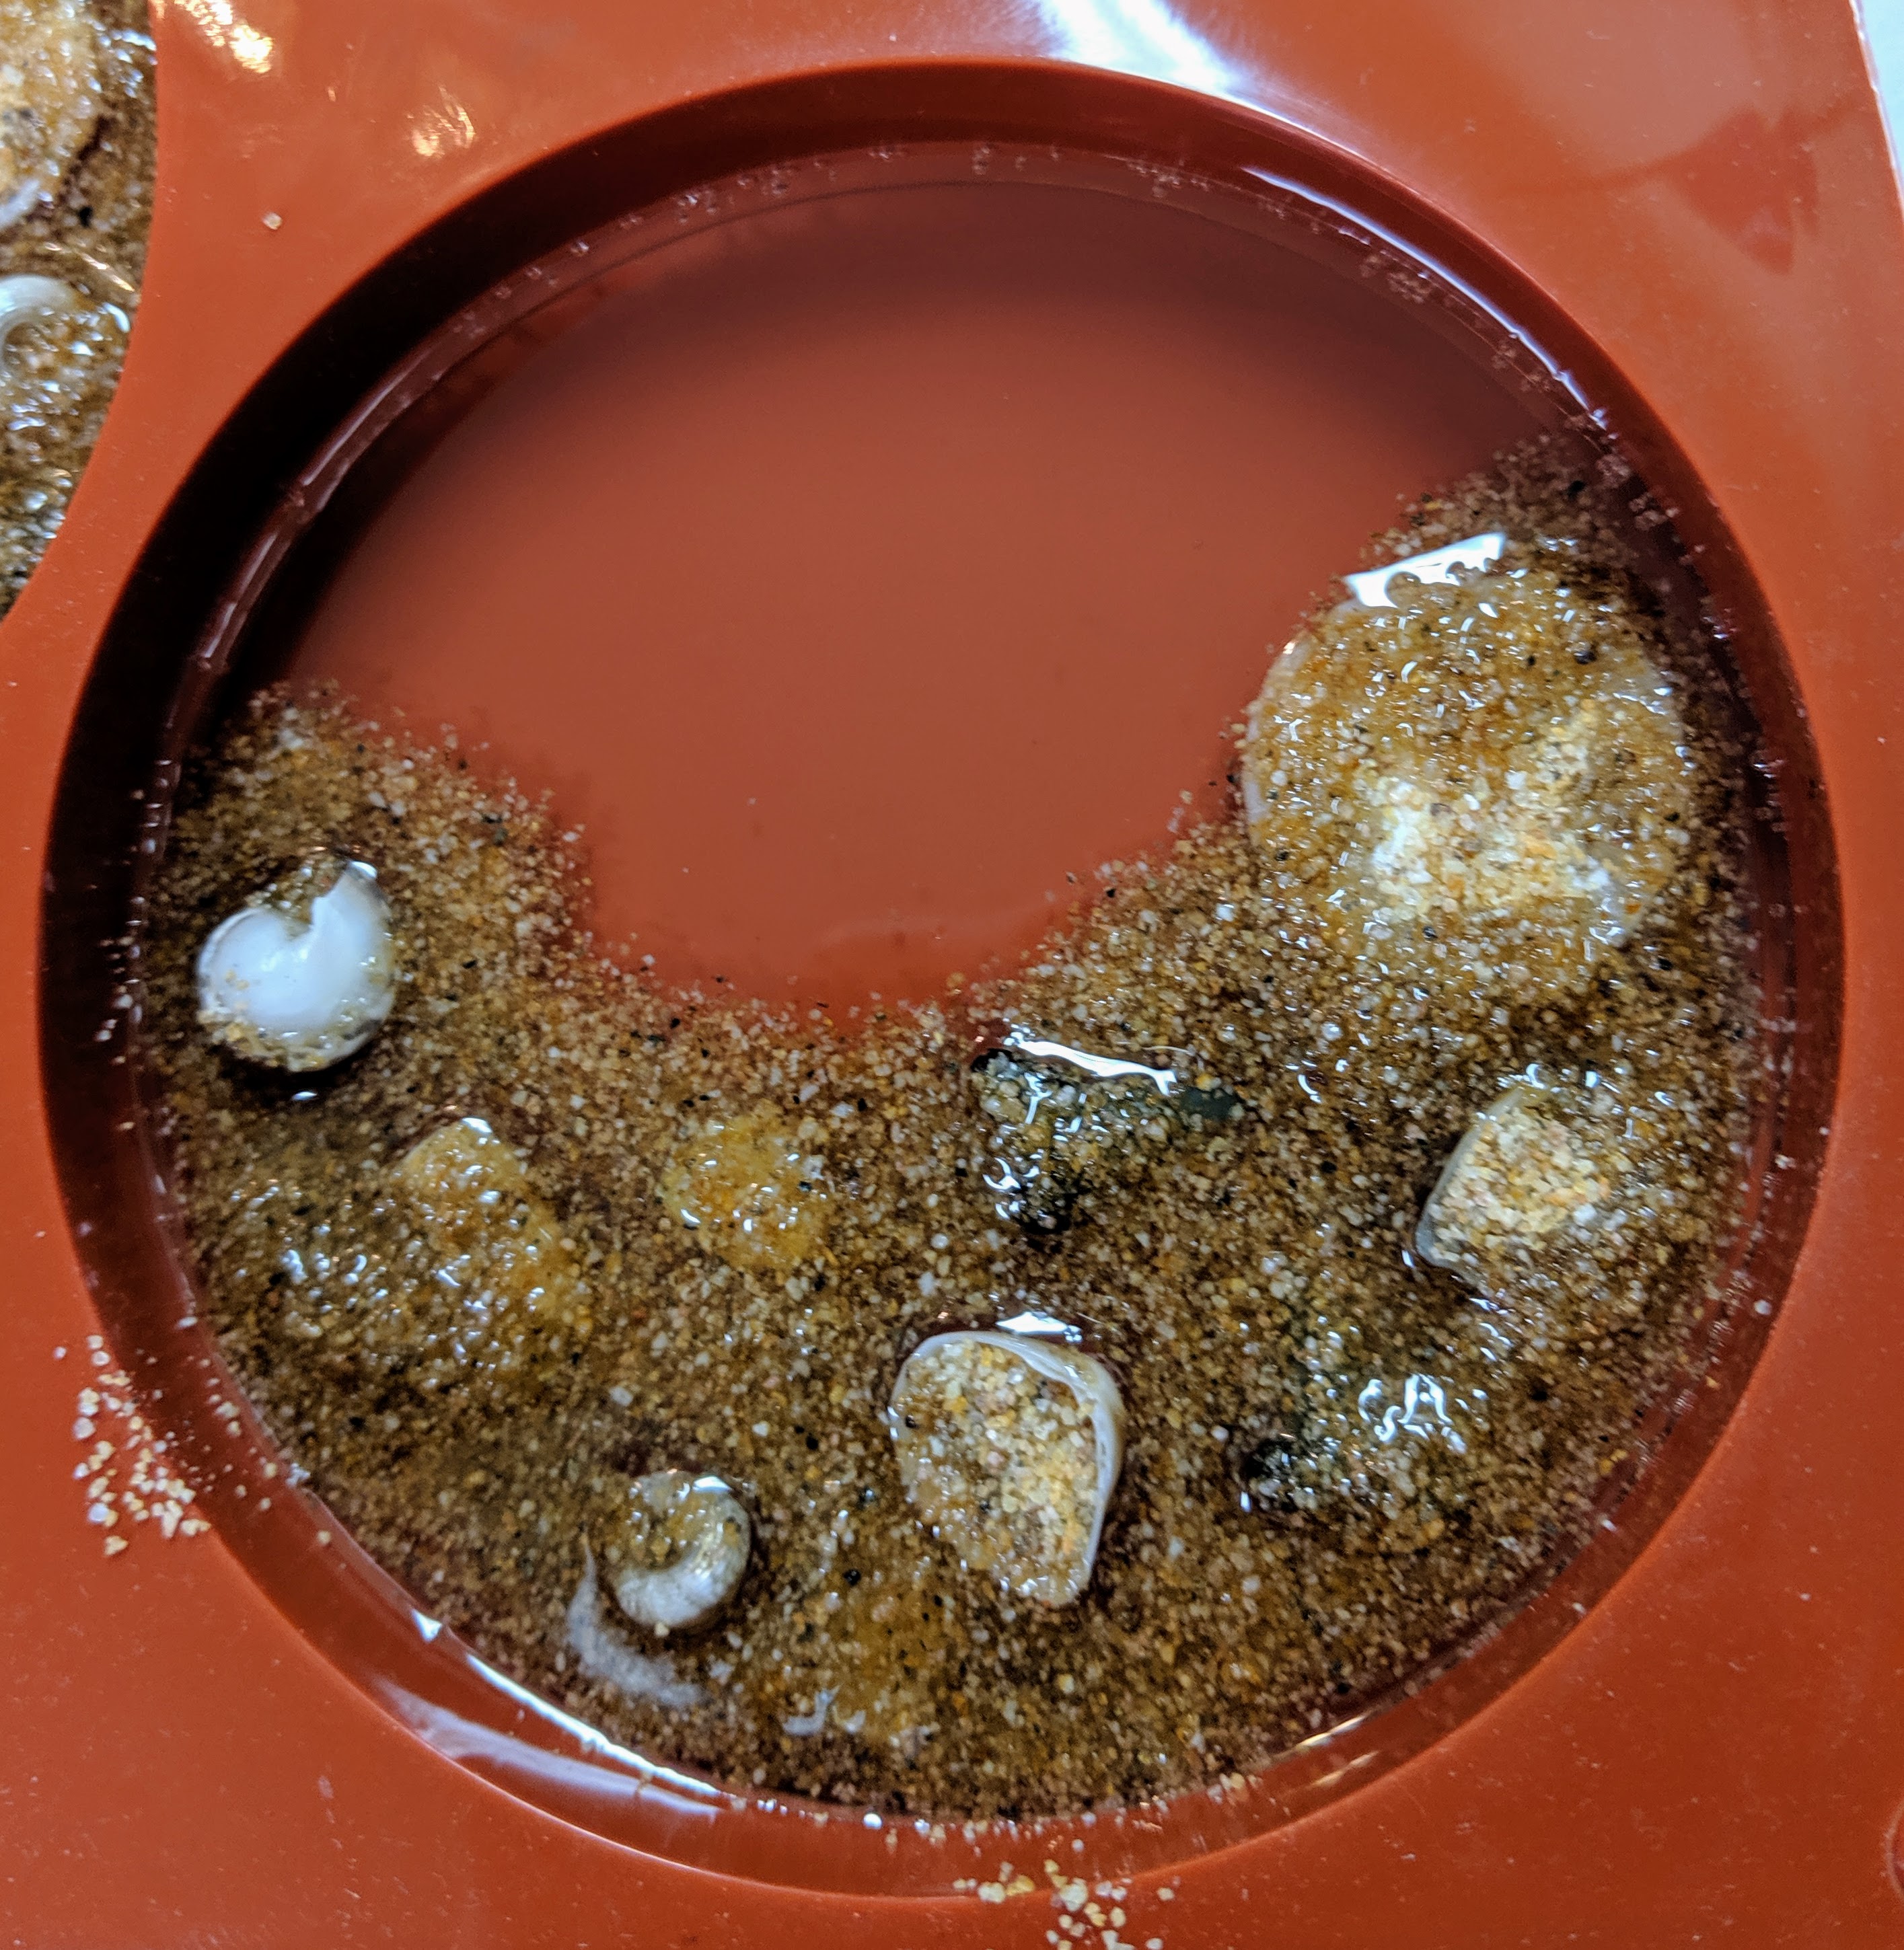
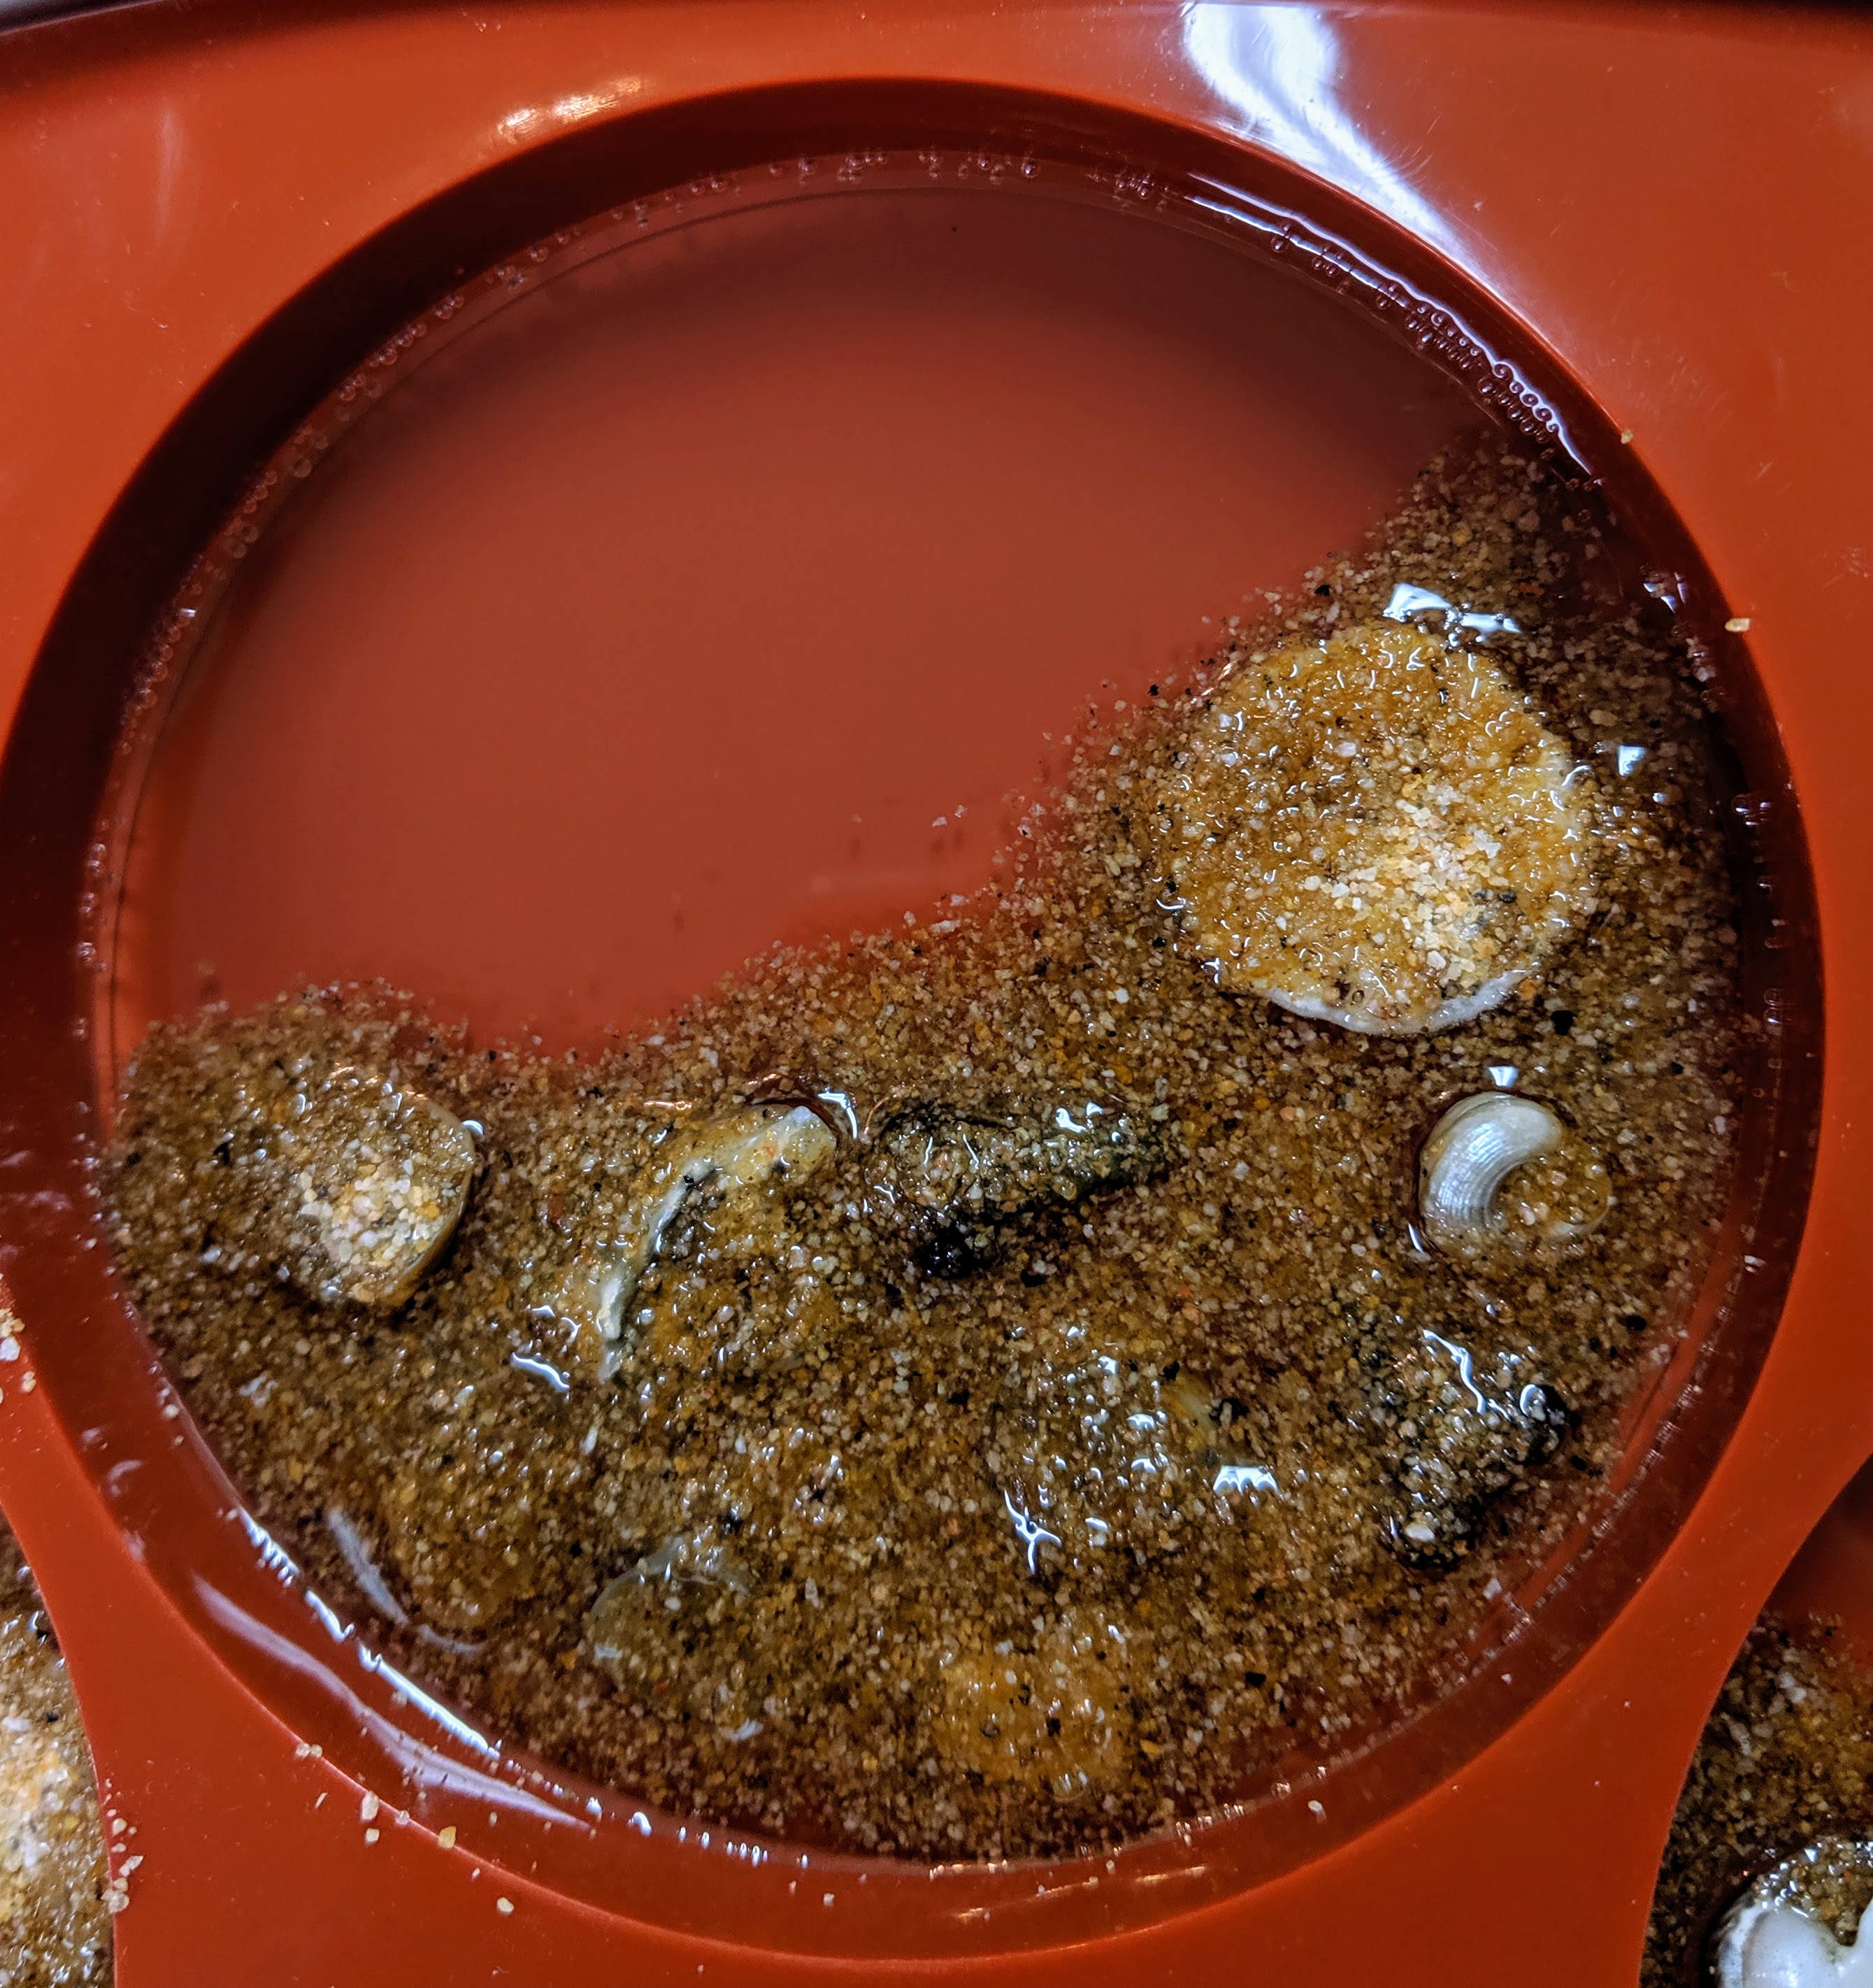
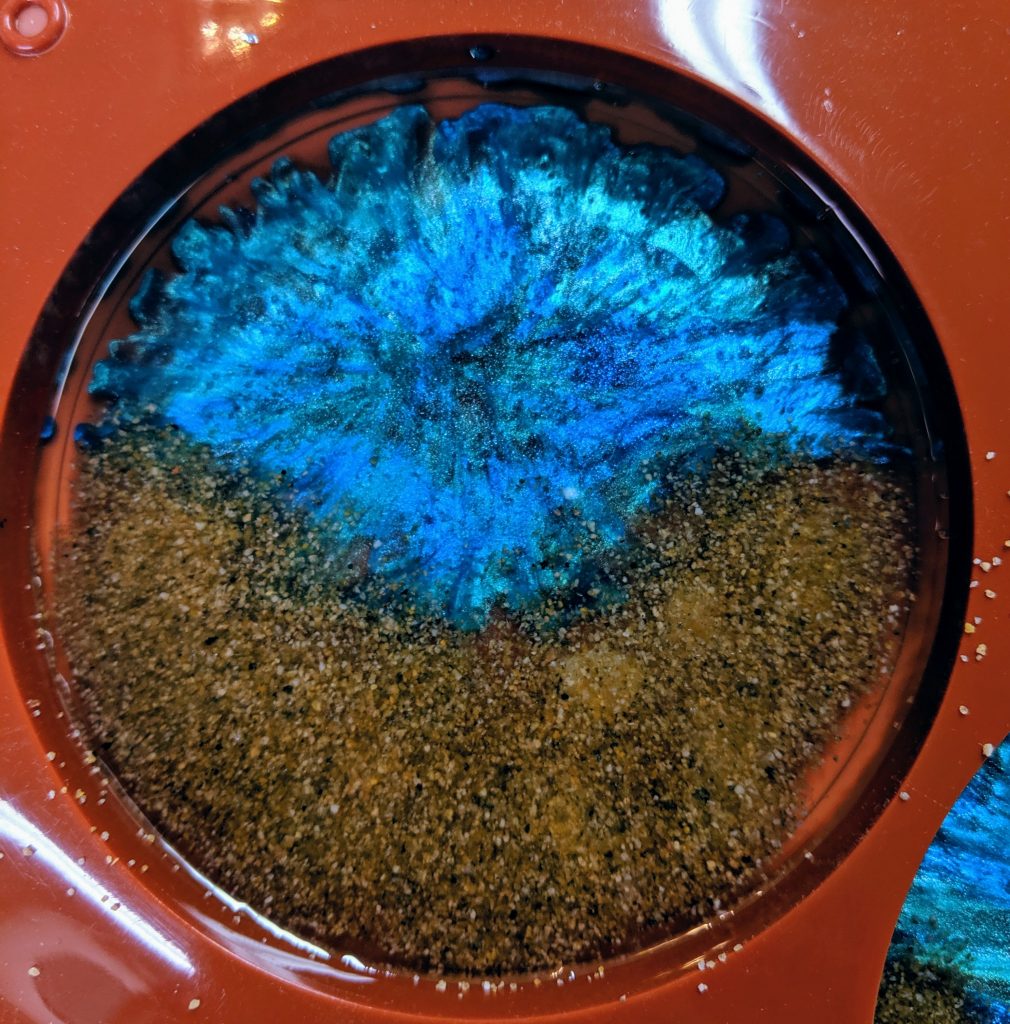
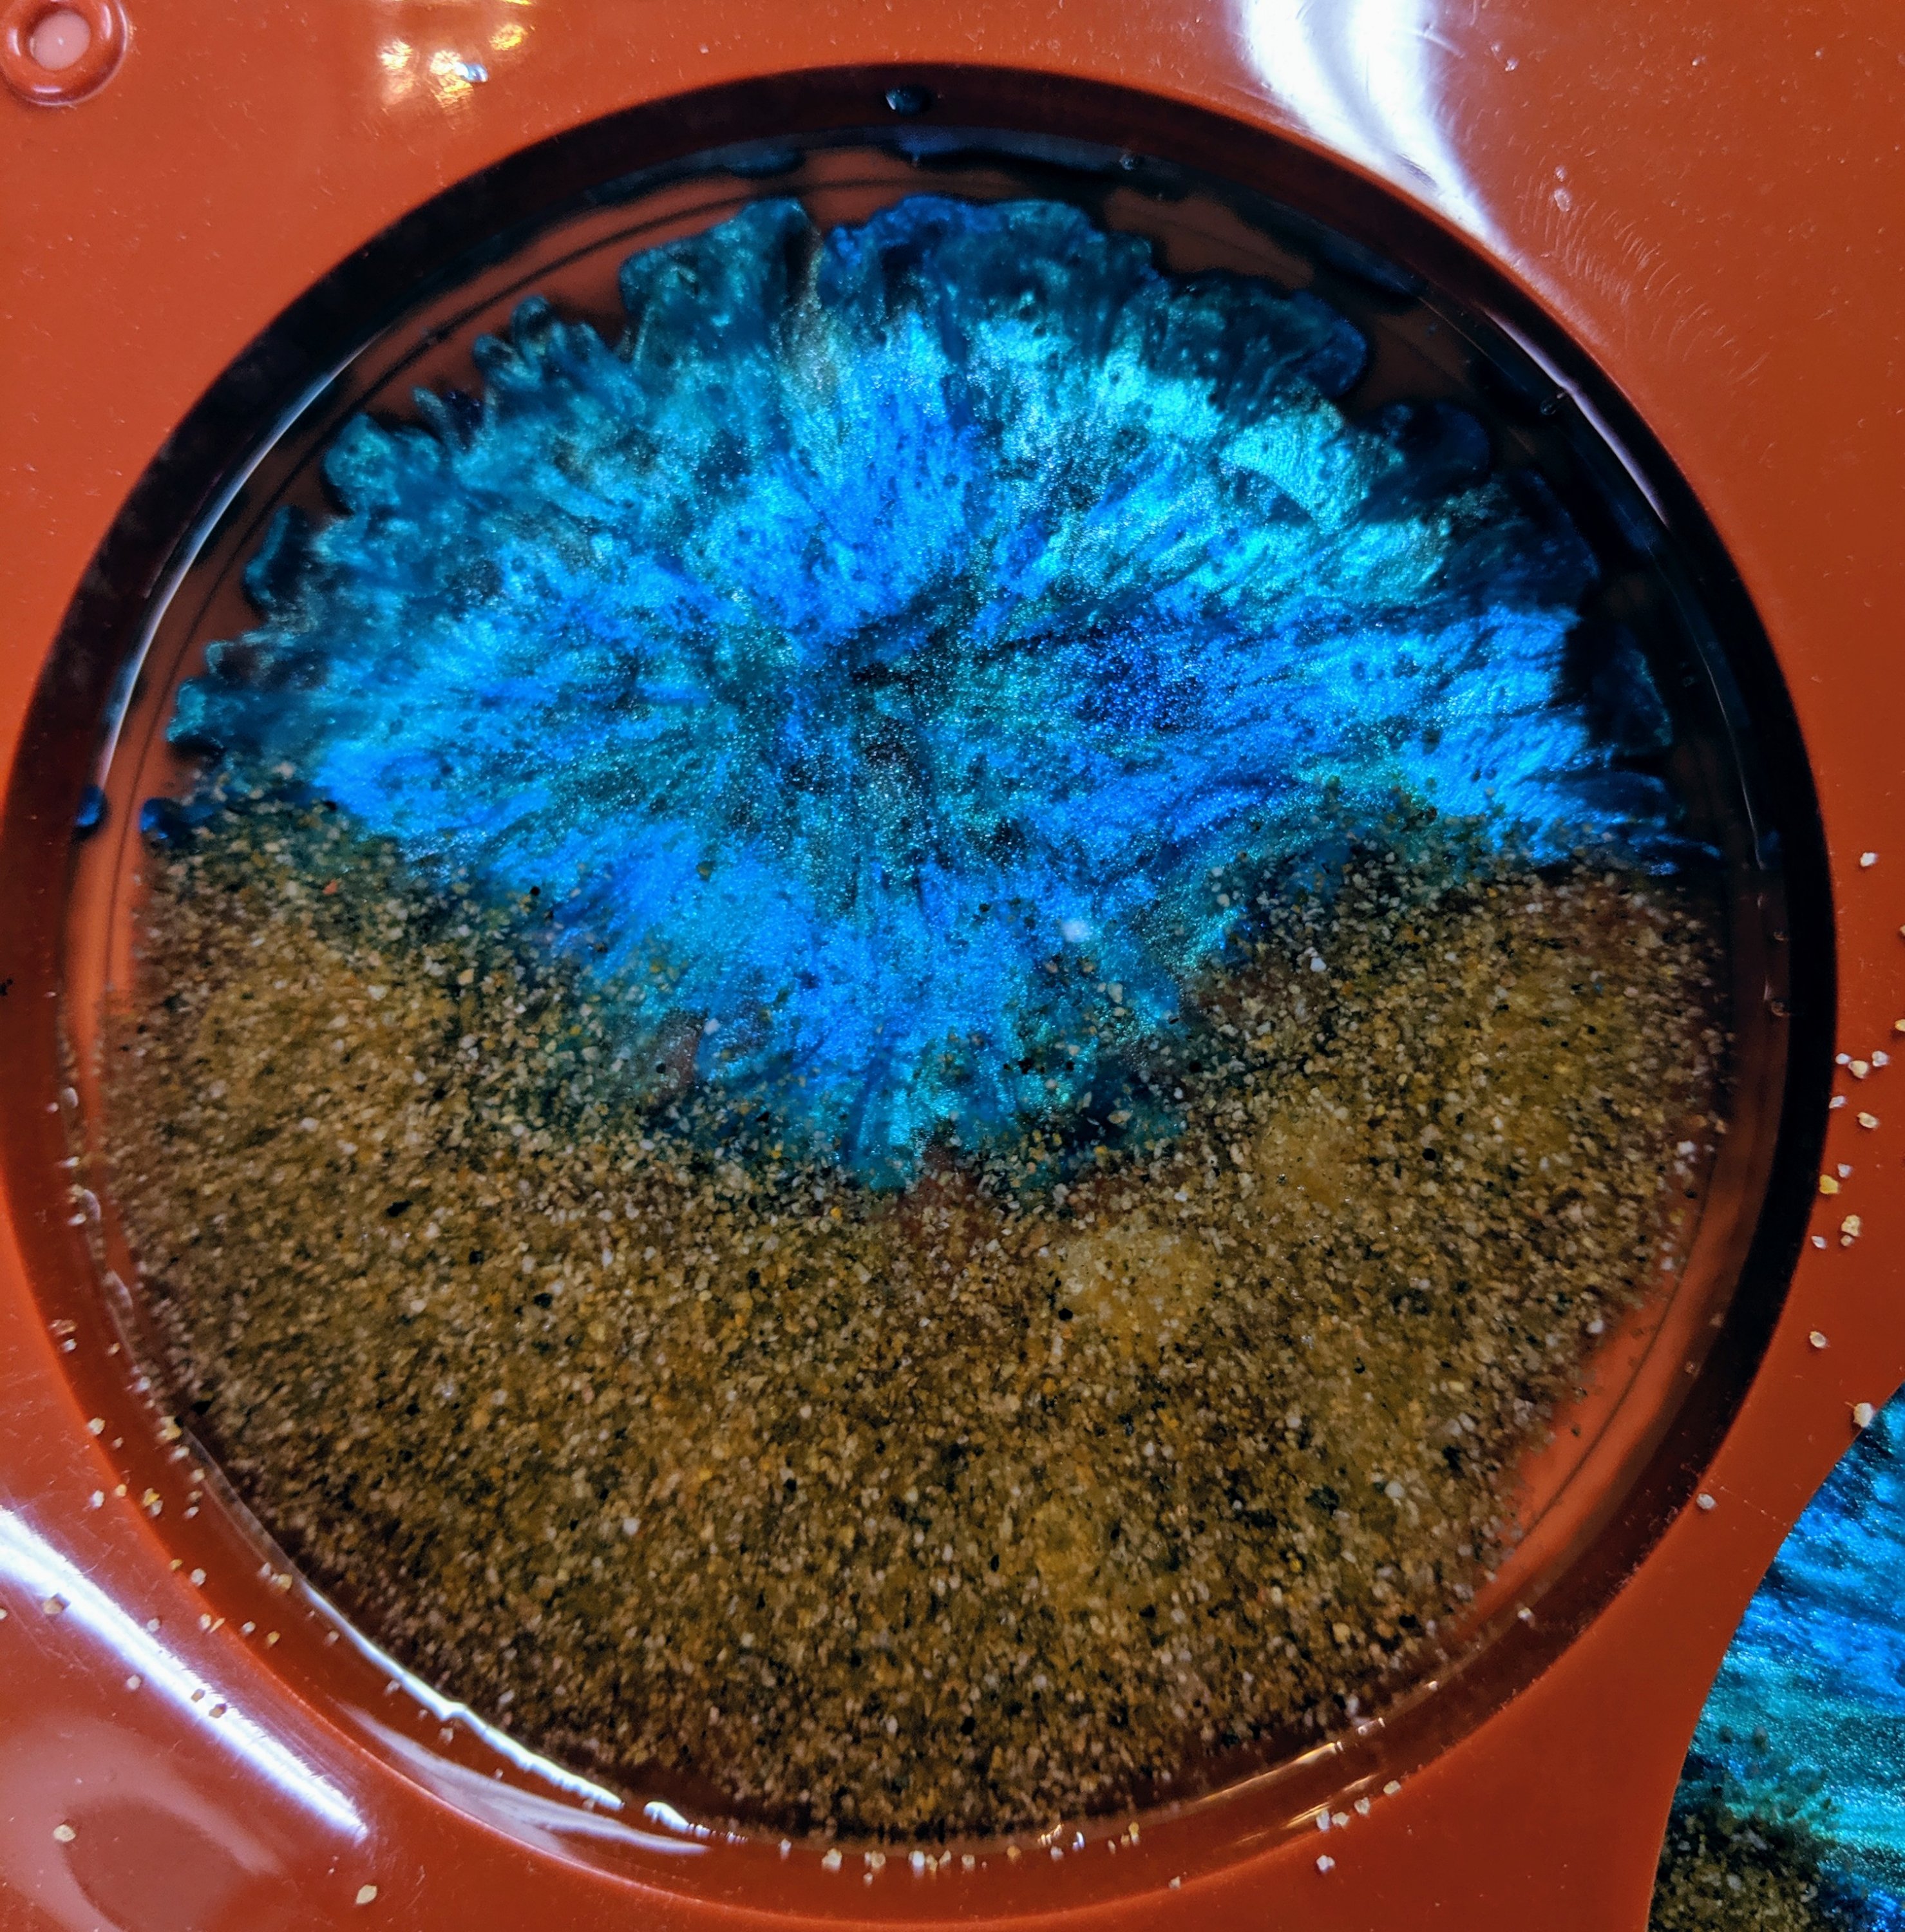
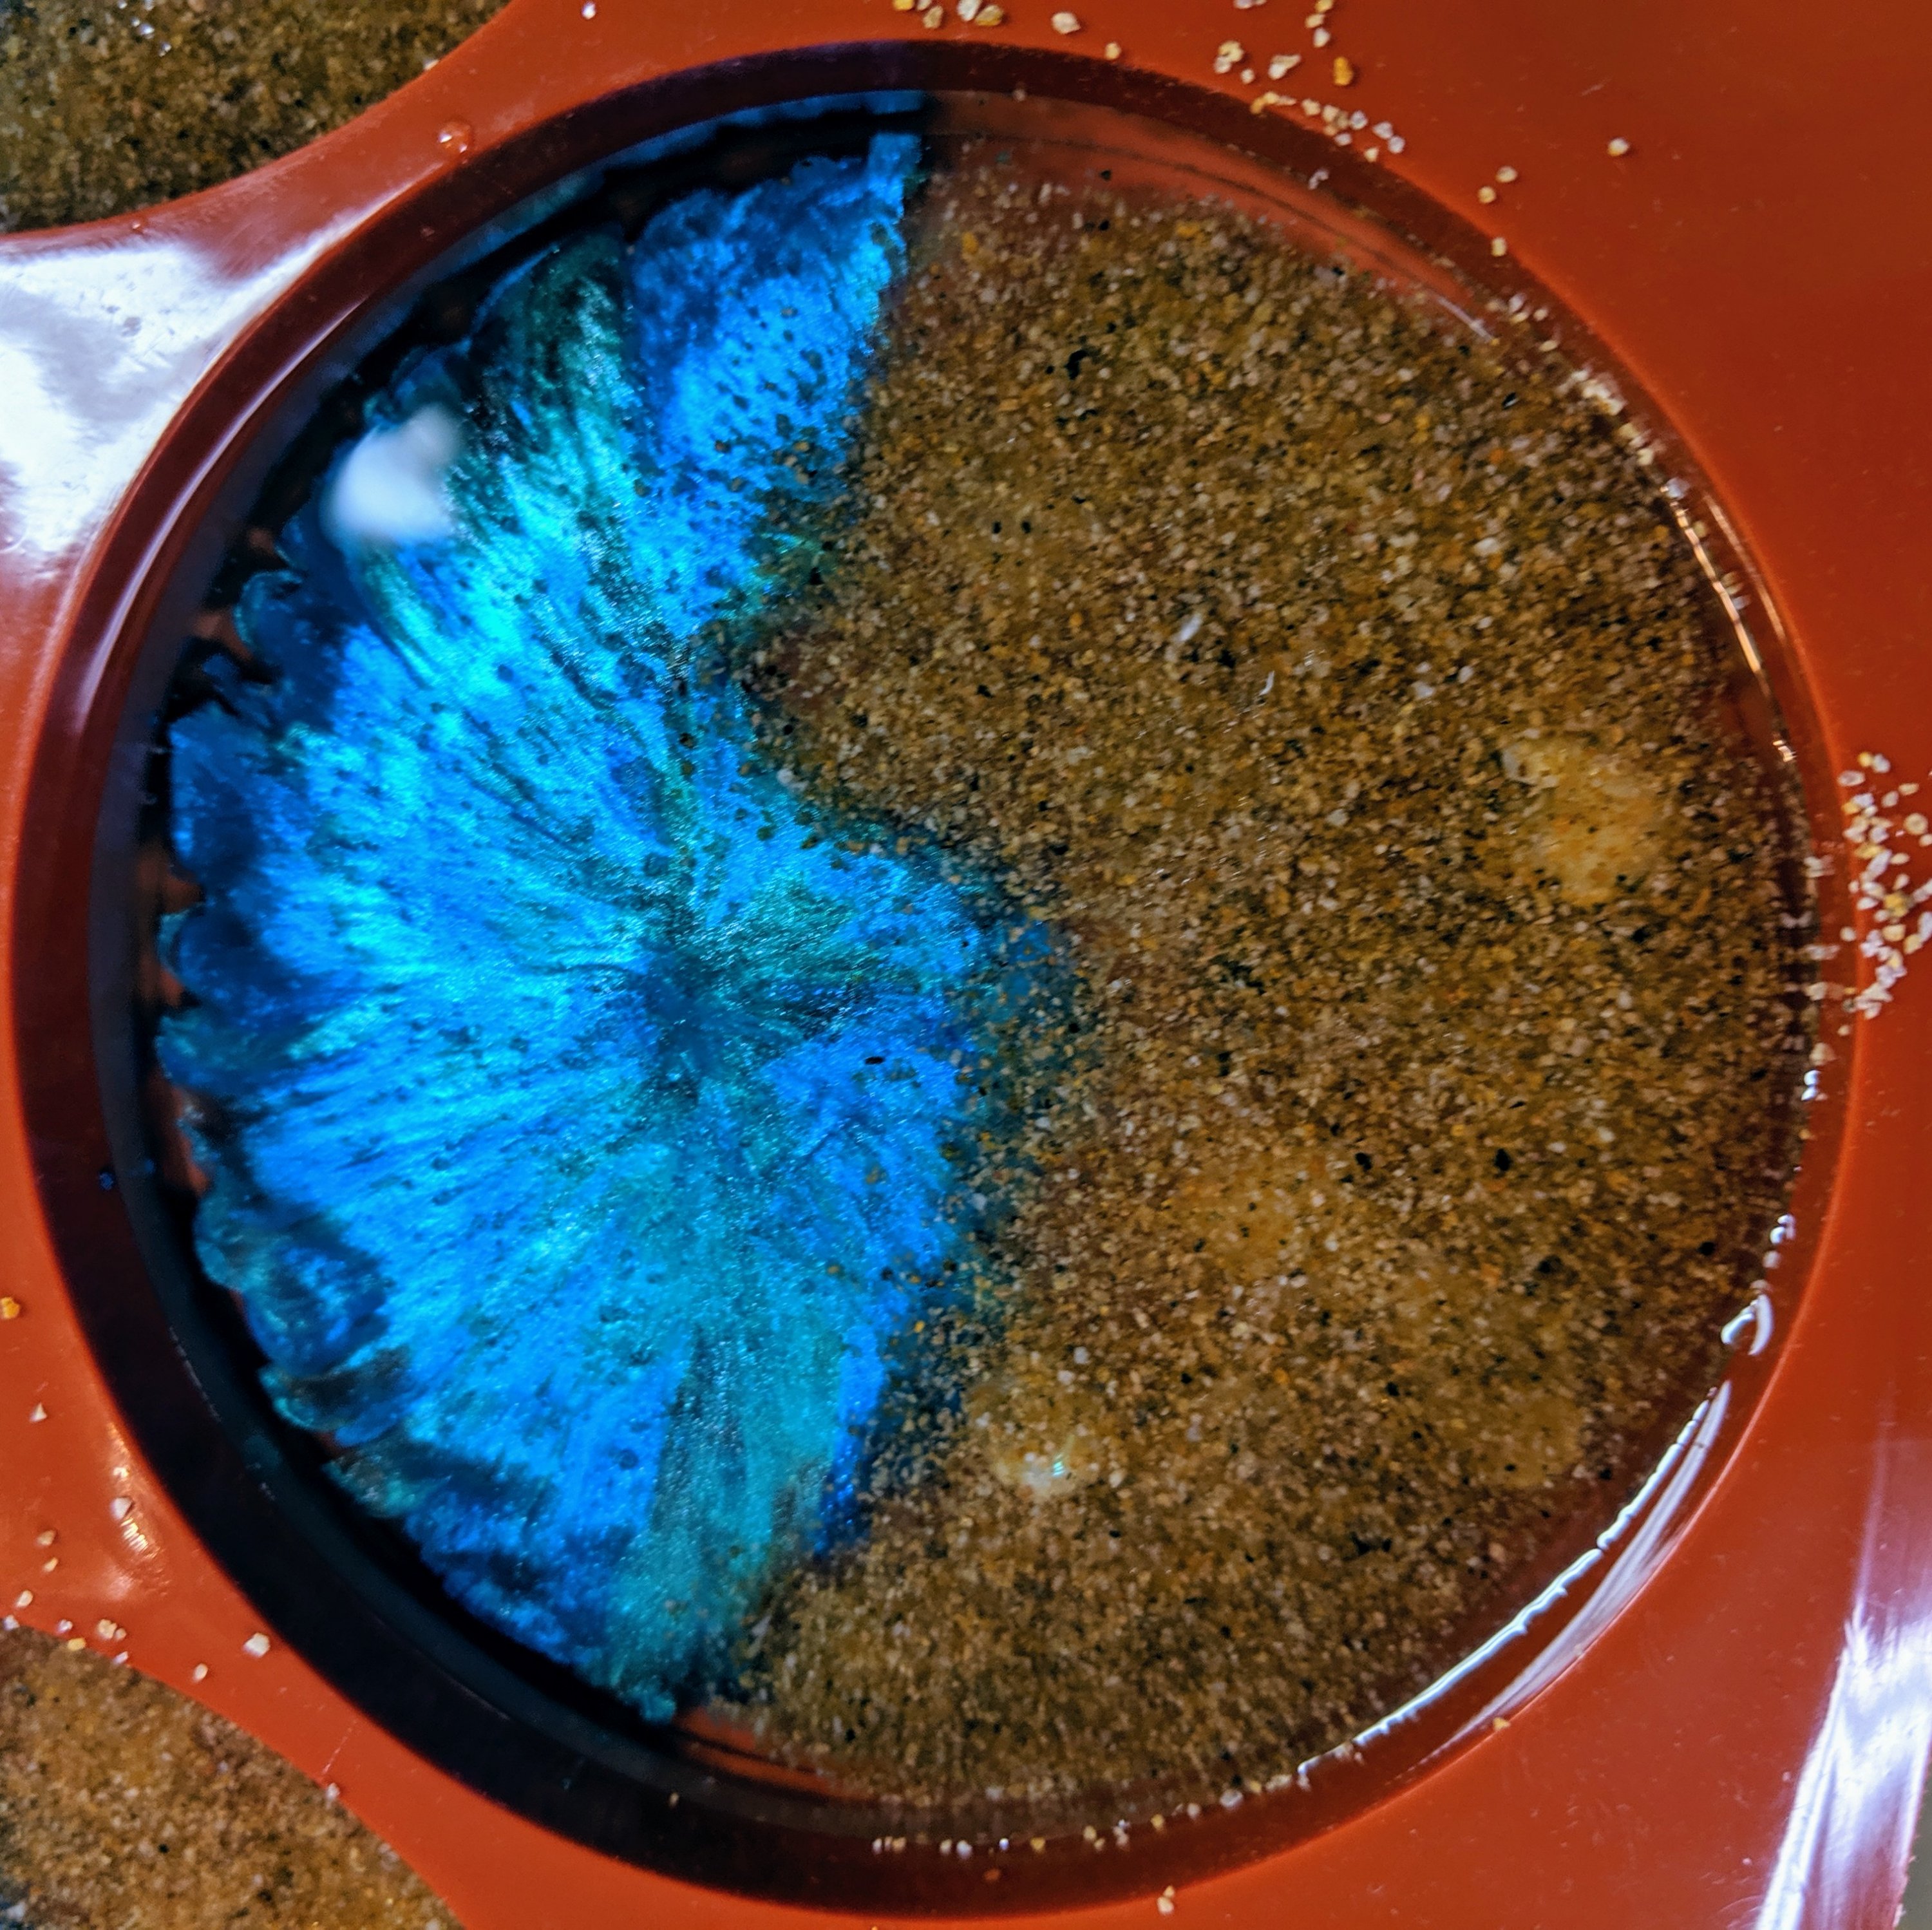
I also wanted to try adding the white pigment at the edge of the sand where the water meets the beach, so to speak, to make it look more like the bubbles you would see when the water washes up in waves. I mixed some white pigment and drizzled it along the edge of the sand in 5 of the coasters, so I will have four without the bubbles to compare.

These will need to cure at least overnight before I can add the blue green pigmented water layer.

My least favorite thing

Today is a prep day. I have to do a little cleanup / painting on this window frame, clean up my resin measuring cups and pour a base layer of resin in my next batch of coasters before I can do the fun, creative part.

I’m thinking about doing a mermaid in this window.

When I started using resin, I used disposable cups for measuring. That seemed wasteful, so I switched over to these silicone cups that I can clean and reuse indefinitely.

I use old gift wrap to cover my work surfaces when I work with the resin.

When I’m done pouring the resin, I just leave the stir stick in place to dry for a day or two. Once the resin cures, it is easy to just pull the stick out of the cup, bringing with it any leftover resin in the bottom.

I then cut off enough duct tape to fit two fingers in and use it to pick up the rest of the cured resin from the inside of the measuring cup. It comes right off and leaves a nice, clean, ready to use surface.

In the above photo, you can see the little drops of cured resin stuck to the sides of the silicone measuring cup. Below is how it looks when I use the duct tape to remove the drops from the cup.

I decided to pour another base layer of coasters while I was at it. Now I just have to wait for the paint to dry and the resin to cure before I can continue.

Beach coasters w/pigment sea

Interestingly, the front side of the pigment didn’t distribute the same as it did on the underside. I’m still very pleased with the final outcome, and my original concern that the “water” layer should be behind the sand is now not a concern at all. I still might try it in reverse order, but I like the way the water looks like it is washing over the sand in these. I need to work on my technique to see if I can add a white layer of bubbles at the edge of the water. I can likely do this at the last step after pouring the water by adding white pigmented resin at the edge of the water. It will take a bit of practice.

Resin coasters with shells, shark teeth, sand and resin pigments – 4″ round.
Back side of one of these coasters – note how the pigment (water layer) distributed almost as if it was brushed while the top layer retained more of the look that it had as it was applied.

Adding background

Today I added sand in another layer of resin to create the beachy background behind the shells in these coasters. I think I may need another thin layer of resin after this, maybe tomorrow if everything cures well. It also occurred to me that I should probably do the water / pigment layer last (instead of first), after the shells and sand. I’ll have to try that on the next batch.

More coasters with pigment

Today I was planning on doing some more prep work to an old window (cleaning up the wood frame / painting it) so I can use it for a mosaic. I hate doing that, so it wasn’t hard to get side tracked into making another batch of beachy coasters. My neighbor has been asking me to make some for her with the pigment as water (instead of beads / glass that I often use), so I cleared off my work surface and got creative.

Coaster using powdered pigments

For these, I poured a very thin layer of clear resin in the mold and let it sit for a while. While it was sitting, I mixed the pigments up (four different colors, three blues and one green) in separate cups. I then placed some shells and shark teeth in the resin. My sister recently sent me a bag of shark teeth (mostly found during my childhood in and around the Potomac River) to use in my projects.

I was pleasantly surprised by the way the pigment distributed itself. I didn’t get any snapshots, but I really just drizzled the pigments one at a time into the clear resin base (still tacky and not cured, but it had been sitting for probably 20 minutes). They went from squiggly / ropey designs to this! I poured some of it a bit too close to the shells, but overall I’m really happy with how the pigment looks (at least from the underside). Adding a bit more clear resin at the edge of the pigmented resin helped keep it off the shells. I will let it cure overnight before I pour the next layer and add the sand.

All poured
Covered for curing

I covered the molds with plastic lids to keep any dust out of the resin while it cures. Hopefully in a few days I will be able to pop them out of the molds and see how they look from the top, as the view in the molds is of the bottom of the coasters.

Seahorse #2 Poured

So it took a lot longer than I planned to pour the background for this cute guy, but it’s finally ready to cure. I used approximately 40 ml of resin, and had planned to do it in stages so I could tape the edges, but I decided to try another approach. I think I am getting the hang of containing the resin a bit better. Next time I should tape the glass before I start the mosaic.

Poured the resin – now to wait for it to cure

Seahorse #2 on its way

The upside to redoing a piece you cracked is you can improve the things you weren’t satisfied with the first time around. This little guy hasn’t been glued yet, but he will be – hopefully over the next few days. I used a darker color of beach glass because the resin coating really cut down on the color of the first seahorse and I didn’t feel like it stood out as much as I had anticipated. I also noticed that the resin seemed to add a lot of “bulk” to the first seahorse, where I was going for a leaner line. I might have let the pieces float a bit when I poured the resin (will have to make sure that doesn’t happen this time around), but I also elongated this little guy a bit to compensate. I will likely rethink the background / border a bit, as well, though I haven’t figured out where I’m going with those yet.