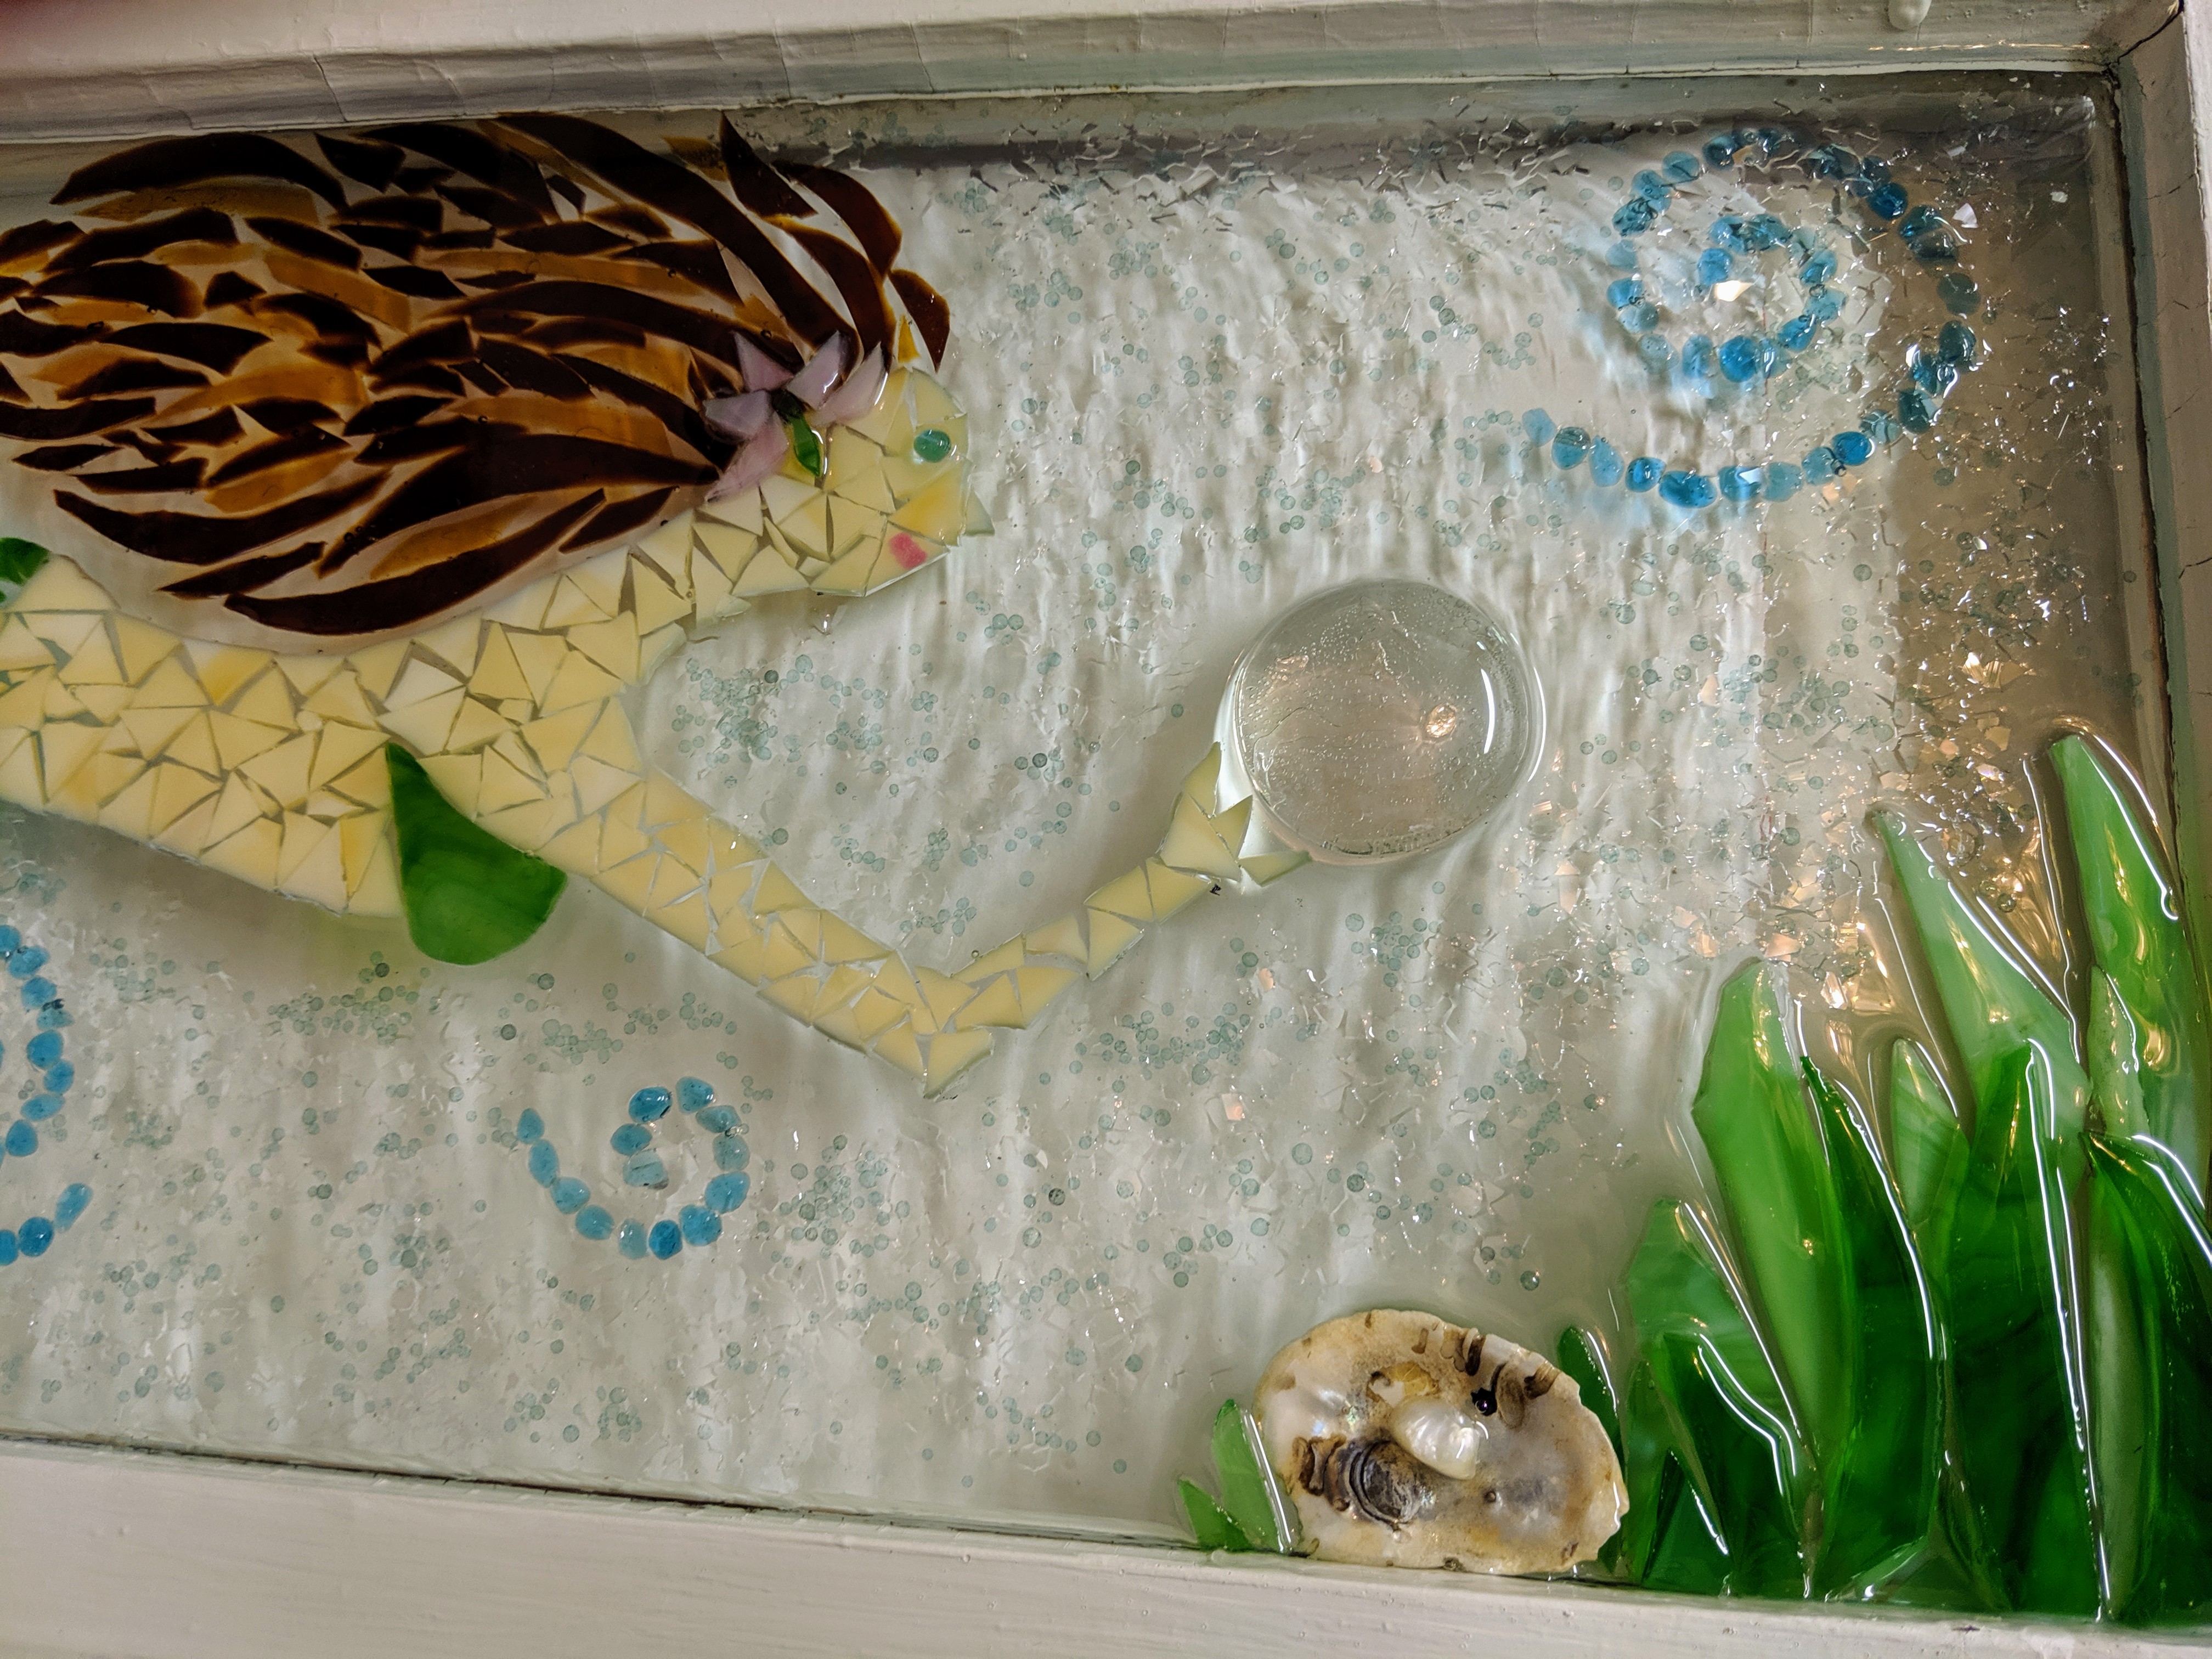
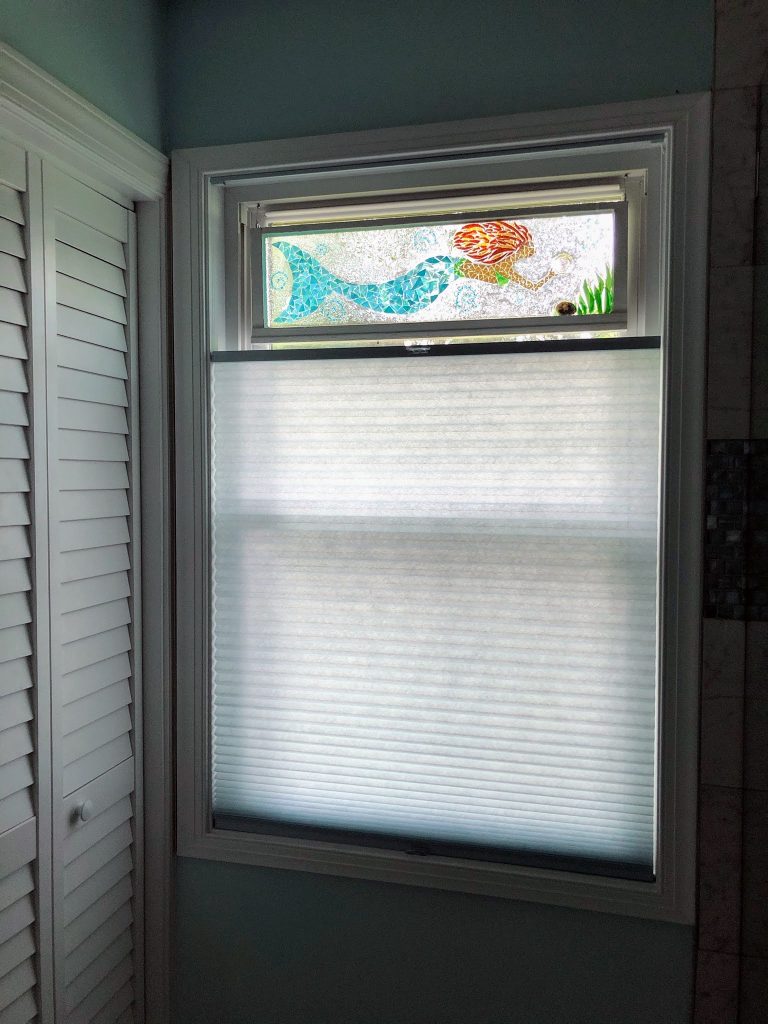
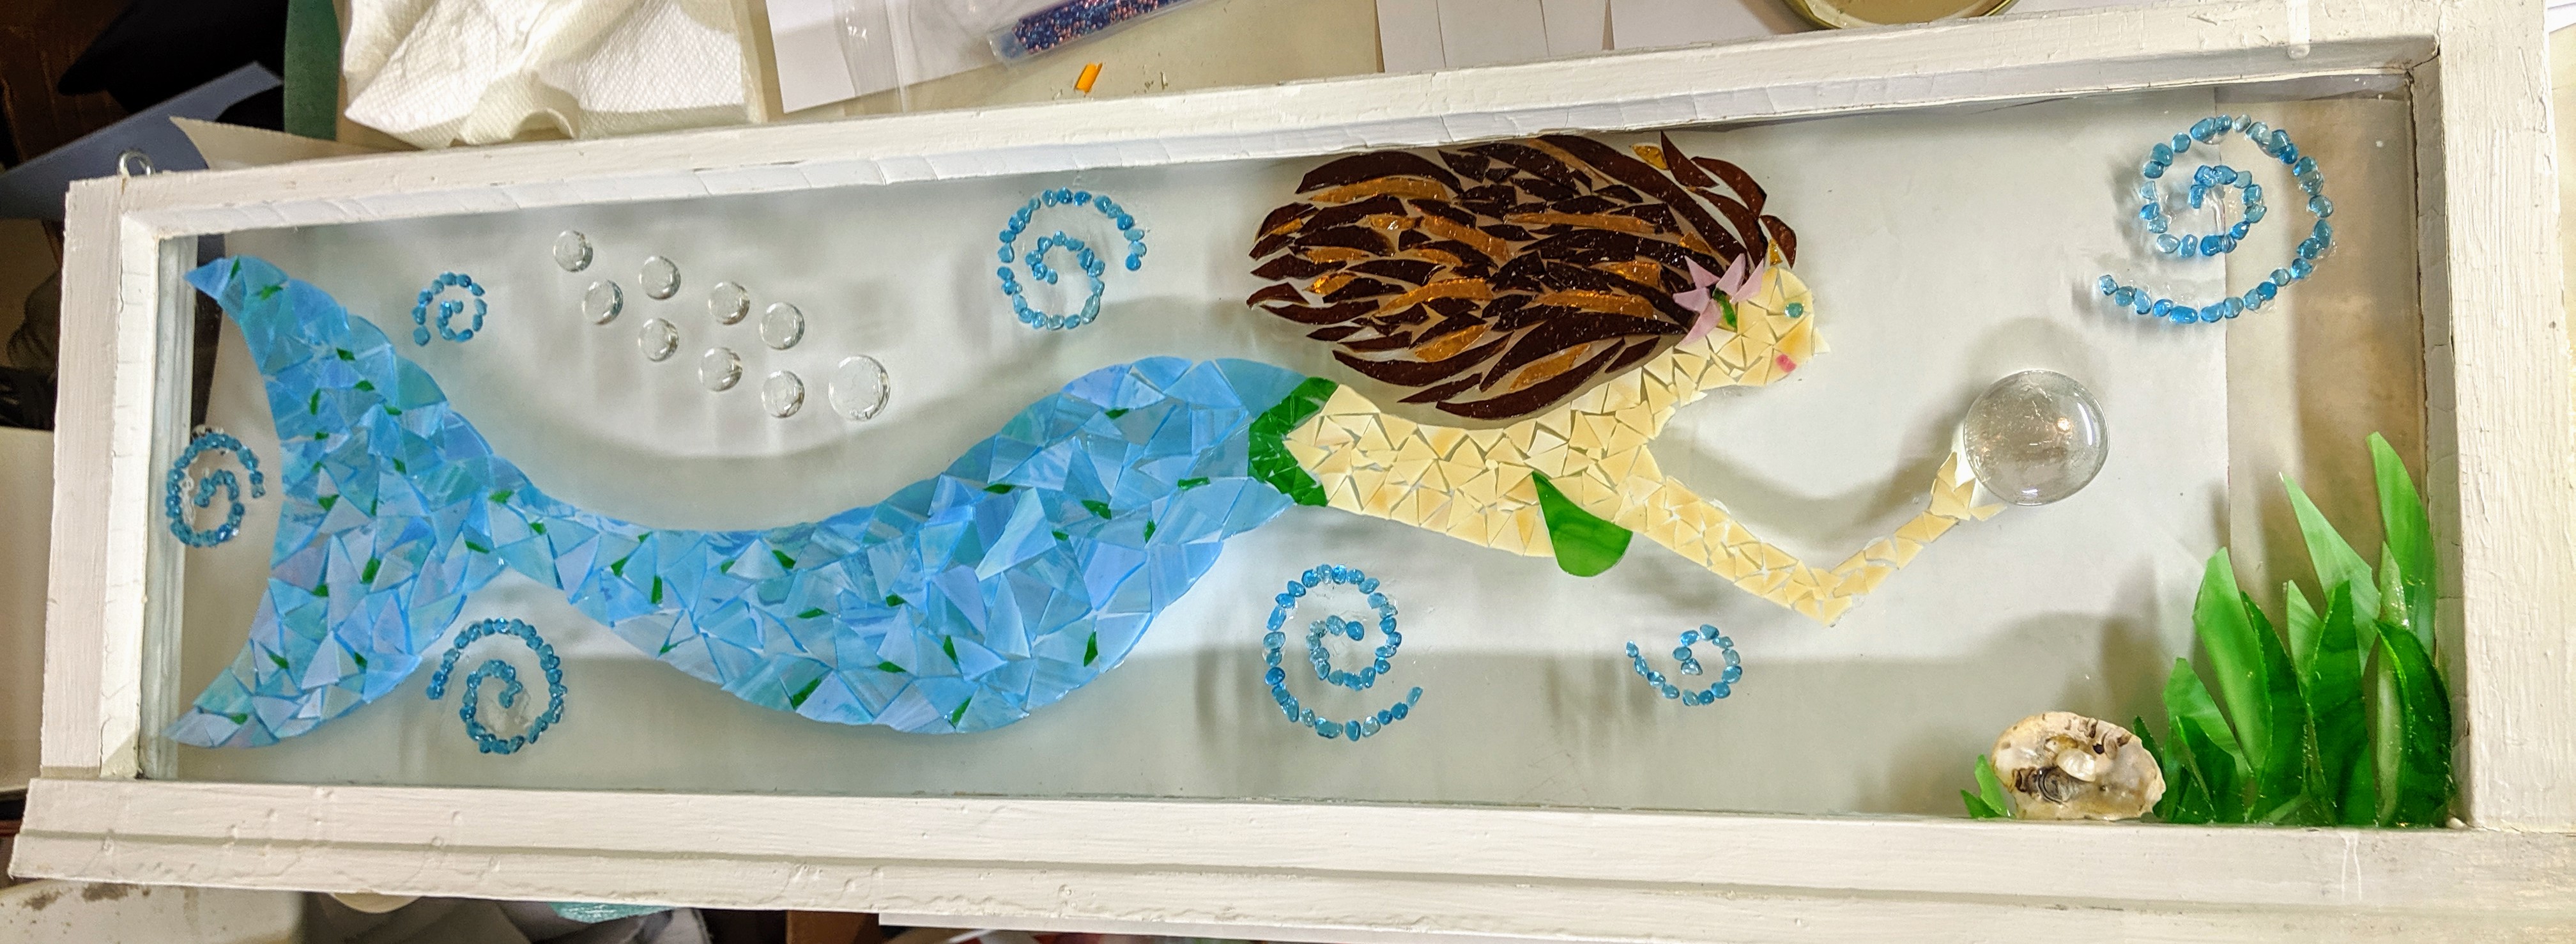
I received a nice note / photo from the adoptive family of my mermaid mosaic. I don’t often get to see the ones that swam away again, so this was a treat!

Glass of Sherry
I received a nice note / photo from the adoptive family of my mermaid mosaic. I don’t often get to see the ones that swam away again, so this was a treat!
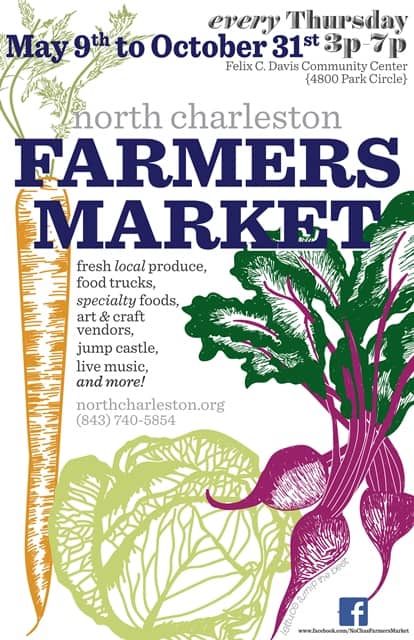
I will have a booth at the North Charleston Harvest Festival on Saturday, October 19th from 4-7pm. Come check it out!
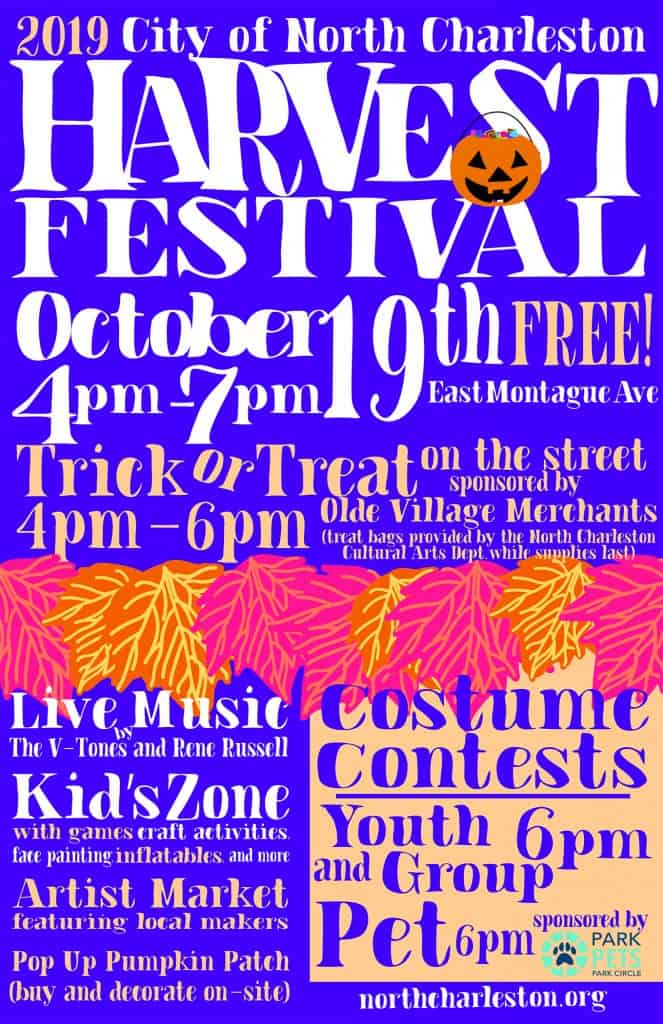
The City of North Charleston announces the 7th Annual Harvest Festival featuring live musical performances, an artist market, costume contests, trick-or-treat on the street, a pop-up pumpkin patch, children’s activities, and more. The fall festivities will take place in the Olde Village of North Charleston, located on East Montague Avenue near Park Circle, on Saturday, October 19, 2019, from 4:00-7:00pm. Admission and parking are free. East Montague Avenue will close to vehicular traffic from Jenkins Avenue to Virginia Avenue at 2:00pm and remain closed for the duration of the event.
The celebration includes live music by the delightfully eclectic V-Tones of Charleston and singer-songwriter Rene Russell. The Kid’s Zone offers a craft activity led by the City’s artist-in-residence Katherine Hester, carnival games, face painting, drumming with RBM African Drum and Dance, and a variety of inflatables. An artist market featuring local artists, crafters, and makers will line two blocks of East Montague Avenue, along with a few festive treat vendors. In addition, many of the restaurants in the Olde Village will offer food and drink specials.
Other highlights include trick-or-treating on the street with free treat bags for kids age 12 and under (4:00-6:00pm, while supplies last); a pop-up pumpkin patch with on-site decorating stations (cash only – prices of pumpkins vary); a mechanical bull, photo booths, and costume contests with categories for youth, groups, and pets. The contests are free to enter and prizes will be furnished by the City of North Charleston Recreation Department, merchants of the North Charleston Olde Village, and Park Pets. Participants for all contests should be prepared to line up for judging at 5:45pm for the contests to begin at 6:00pm.
The annual Harvest Festival is a rain or shine event produced by the City of North Charleston in collaboration with the North Charleston Olde Village merchants. For information on additional programs and events, visit the Arts & Culture section of the City’s website at www.northcharleston.org.
I’ll be at the N. Charleston Farmers Market every Thursday in September and October (weather permitting). Come check out my booth!
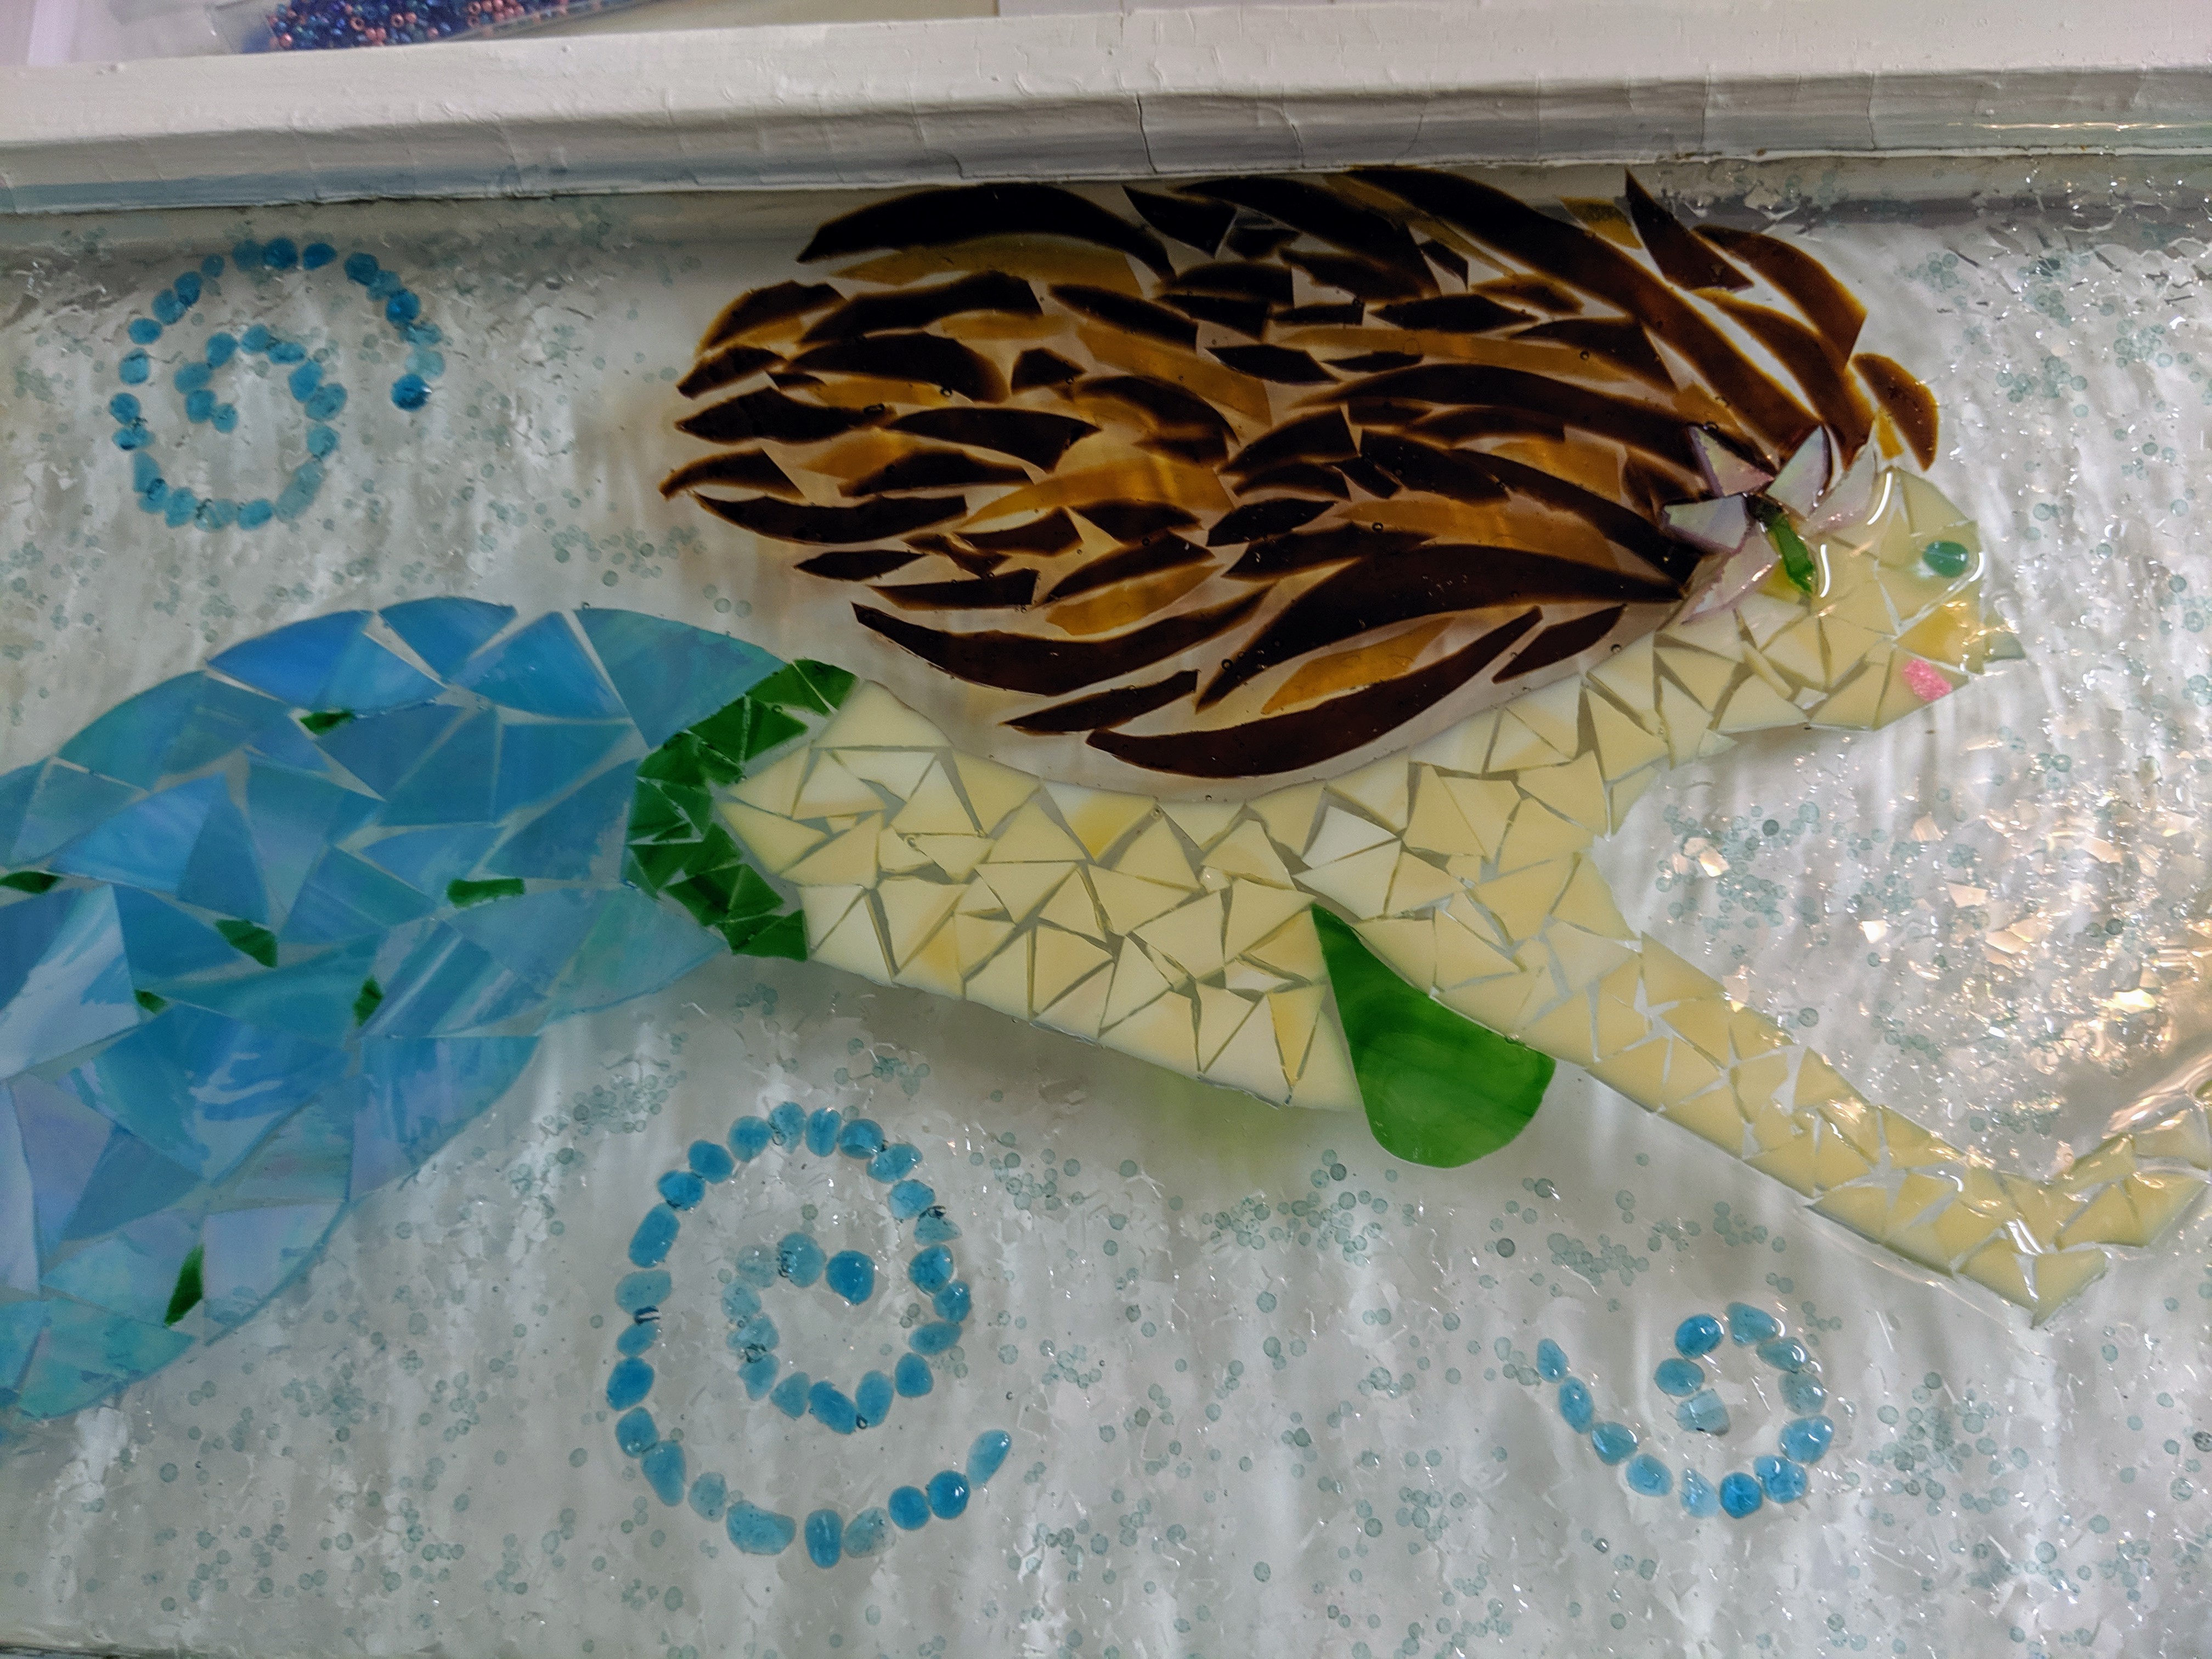
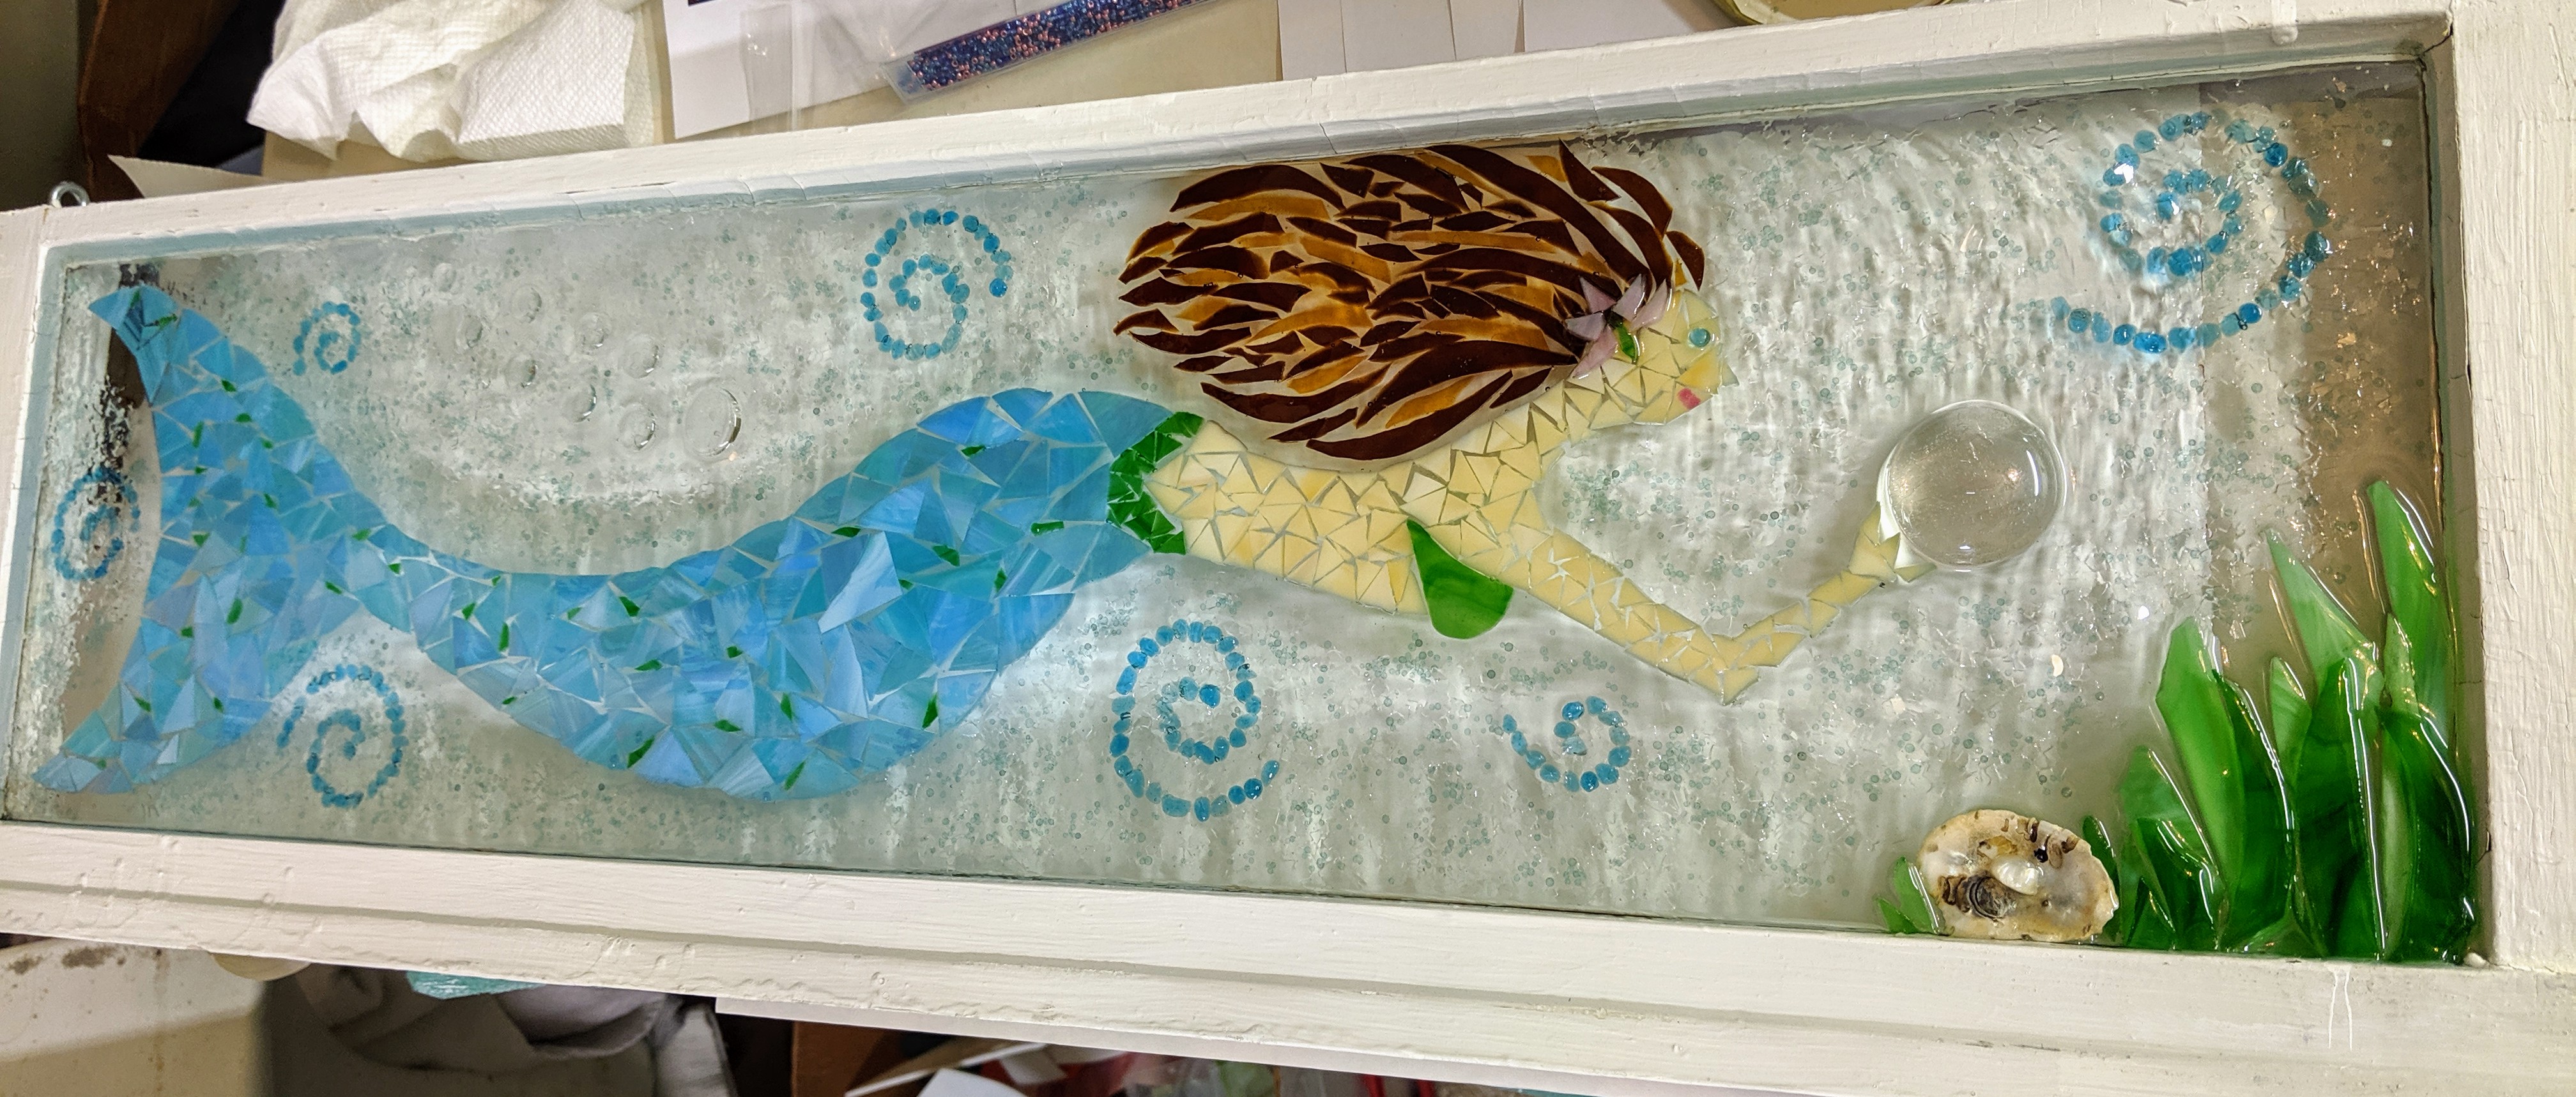
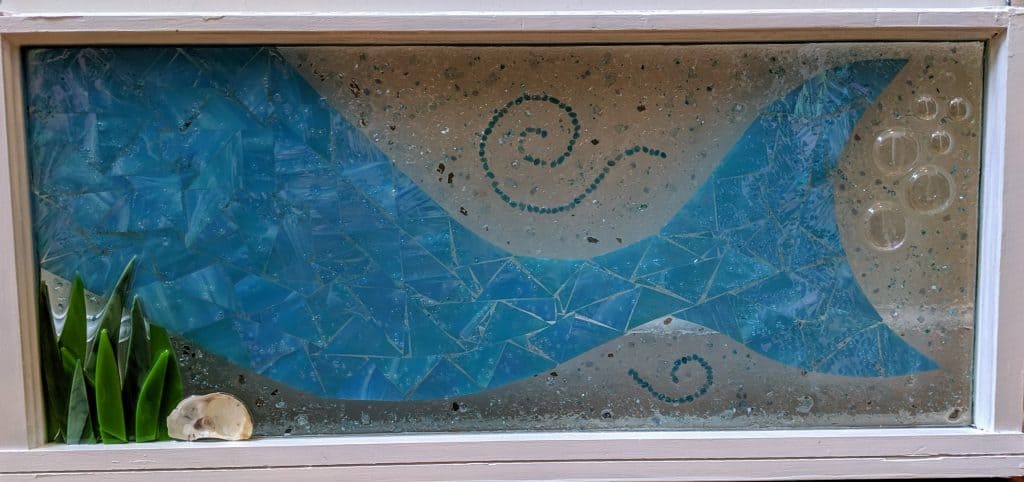
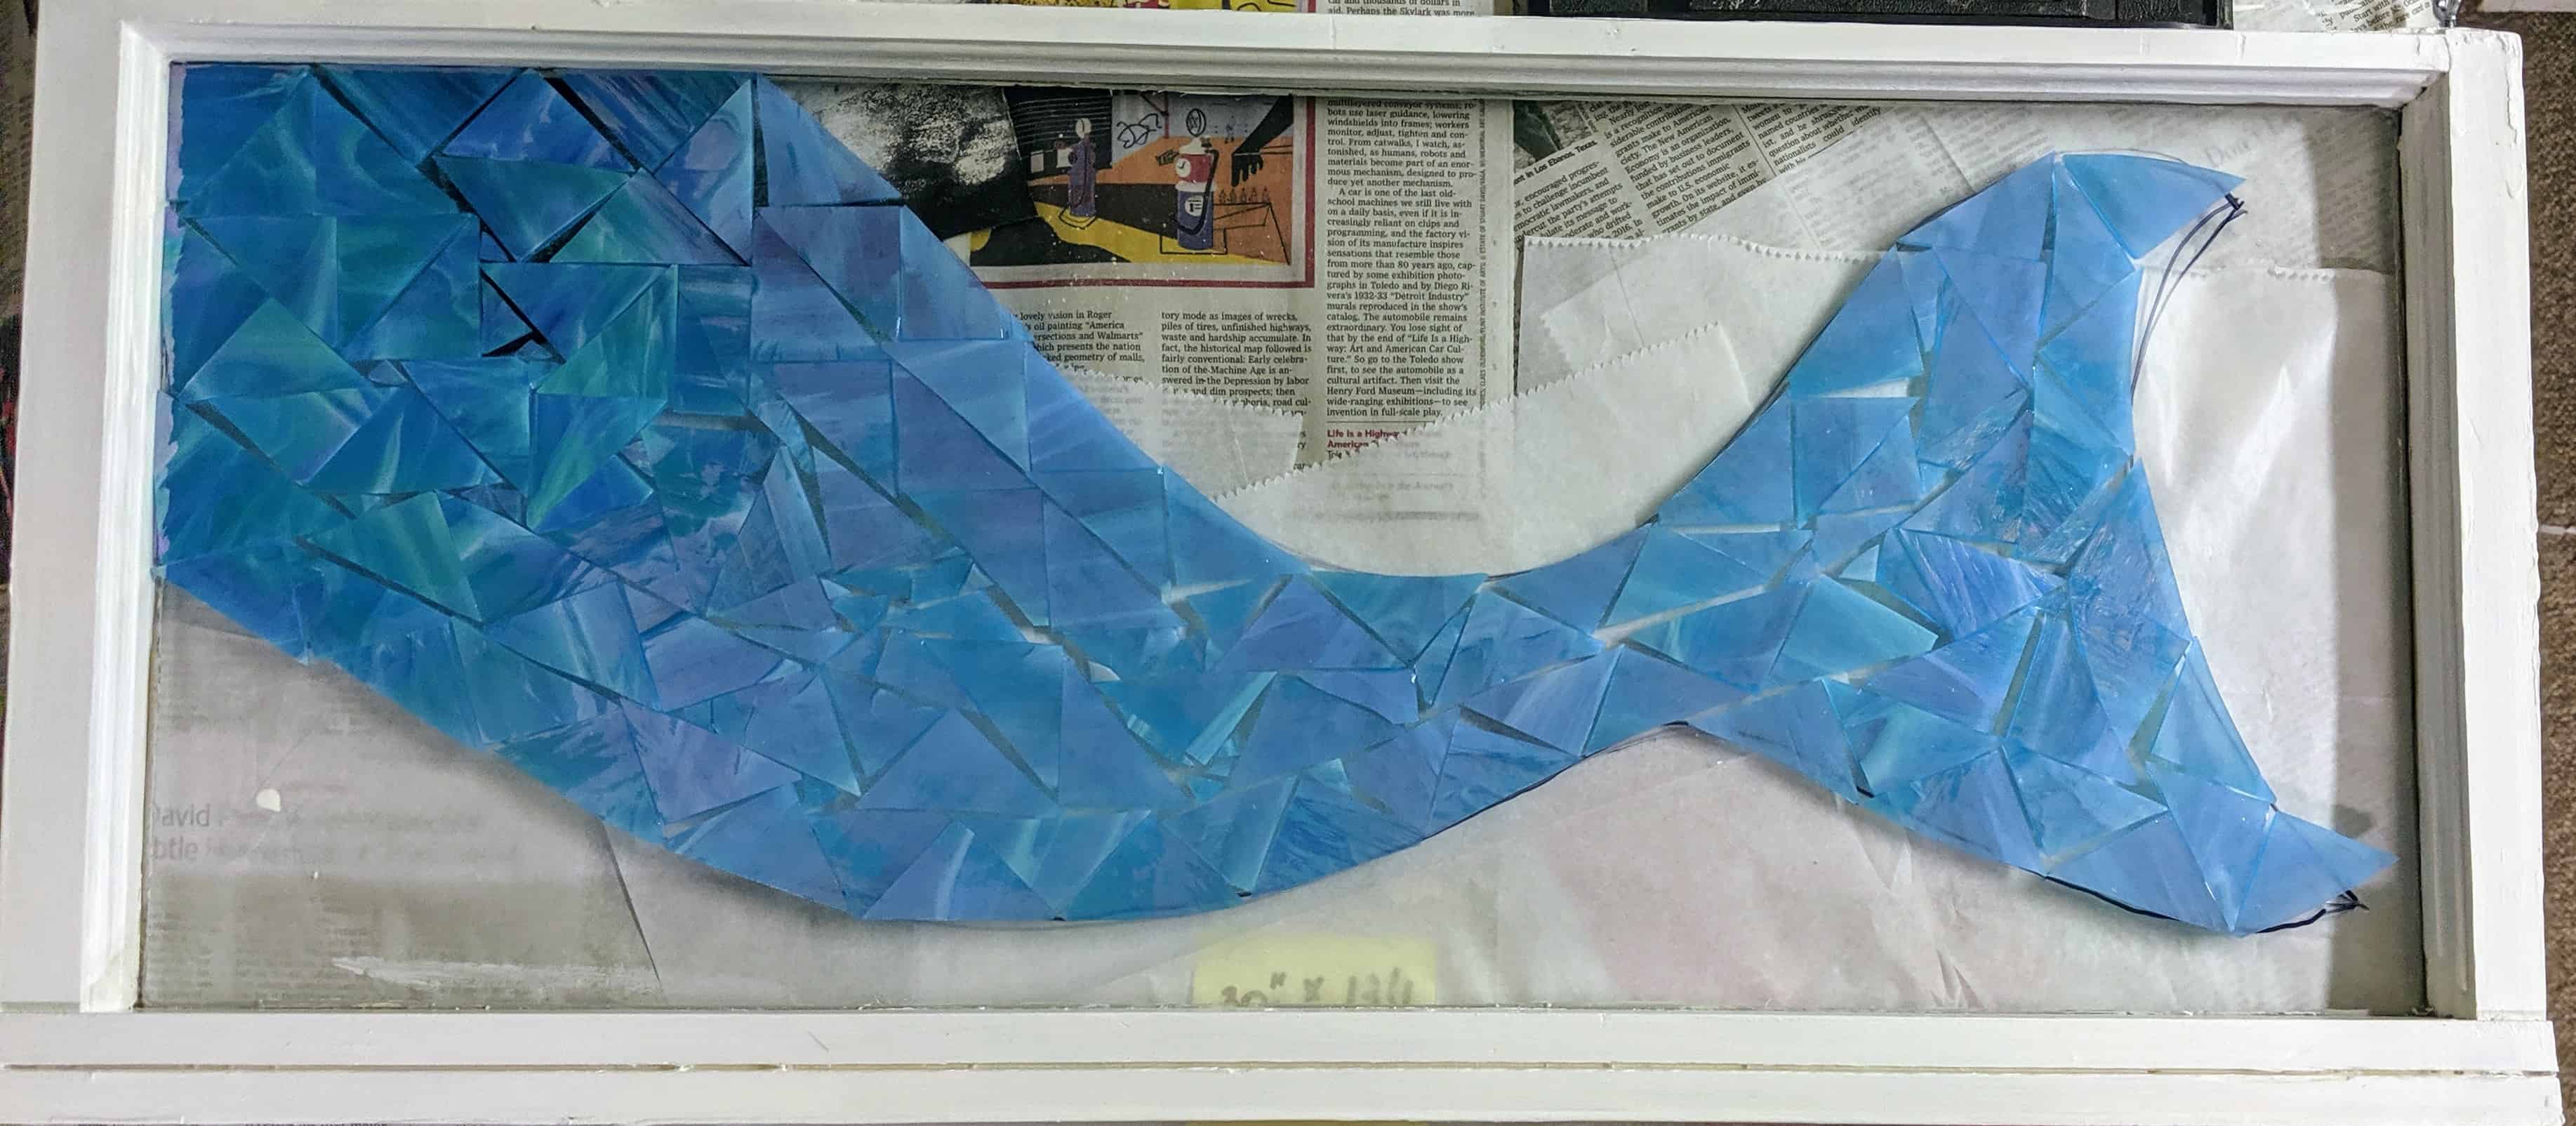
It’s not the best photo (I’m really not good at photographing these), but here is the finished Mermaid Tail Mosaic. Time to clean up a couple more old windows to recycle into the next artwork!
Today I poured the resin on the mermaid tail and decorated it with glass chips, chunks, flakes, etc. I even used a little of the blue shell material. Now it needs to cure before I can bring it upstairs for a better photo.
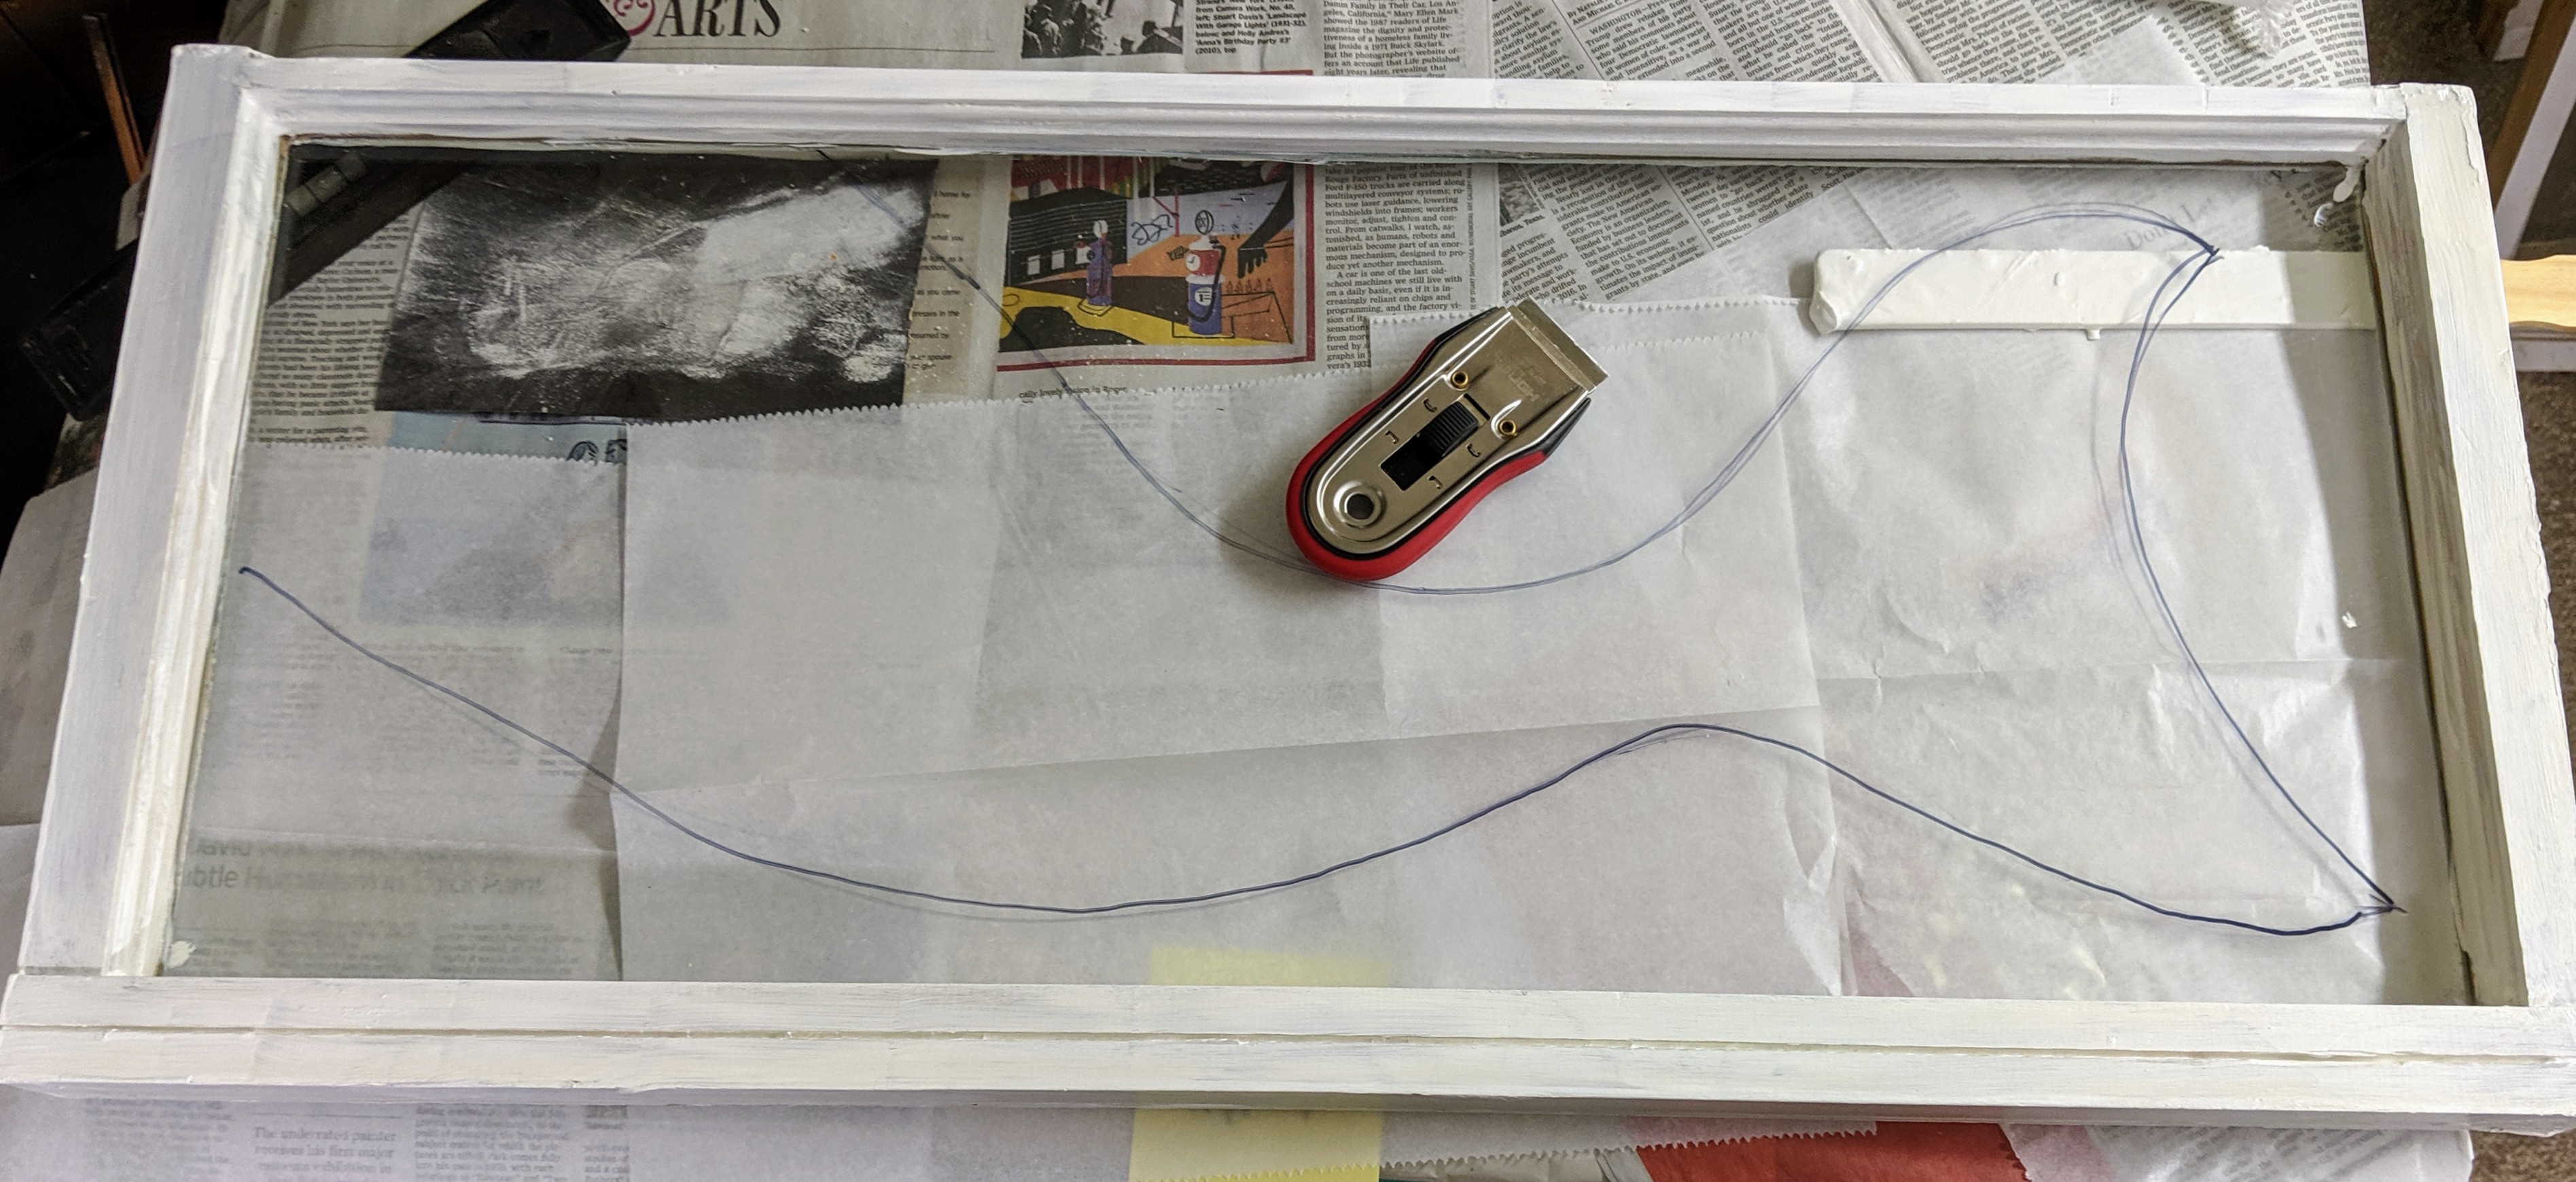
I was having a bit of a mental block with the mermaid tail mosaic, but today I forged ahead and got it pretty much ready to pour the resin after the glue dries, maybe tomorrow.
After I reshaped the tail slightly, I started trying out some different options for decorating.
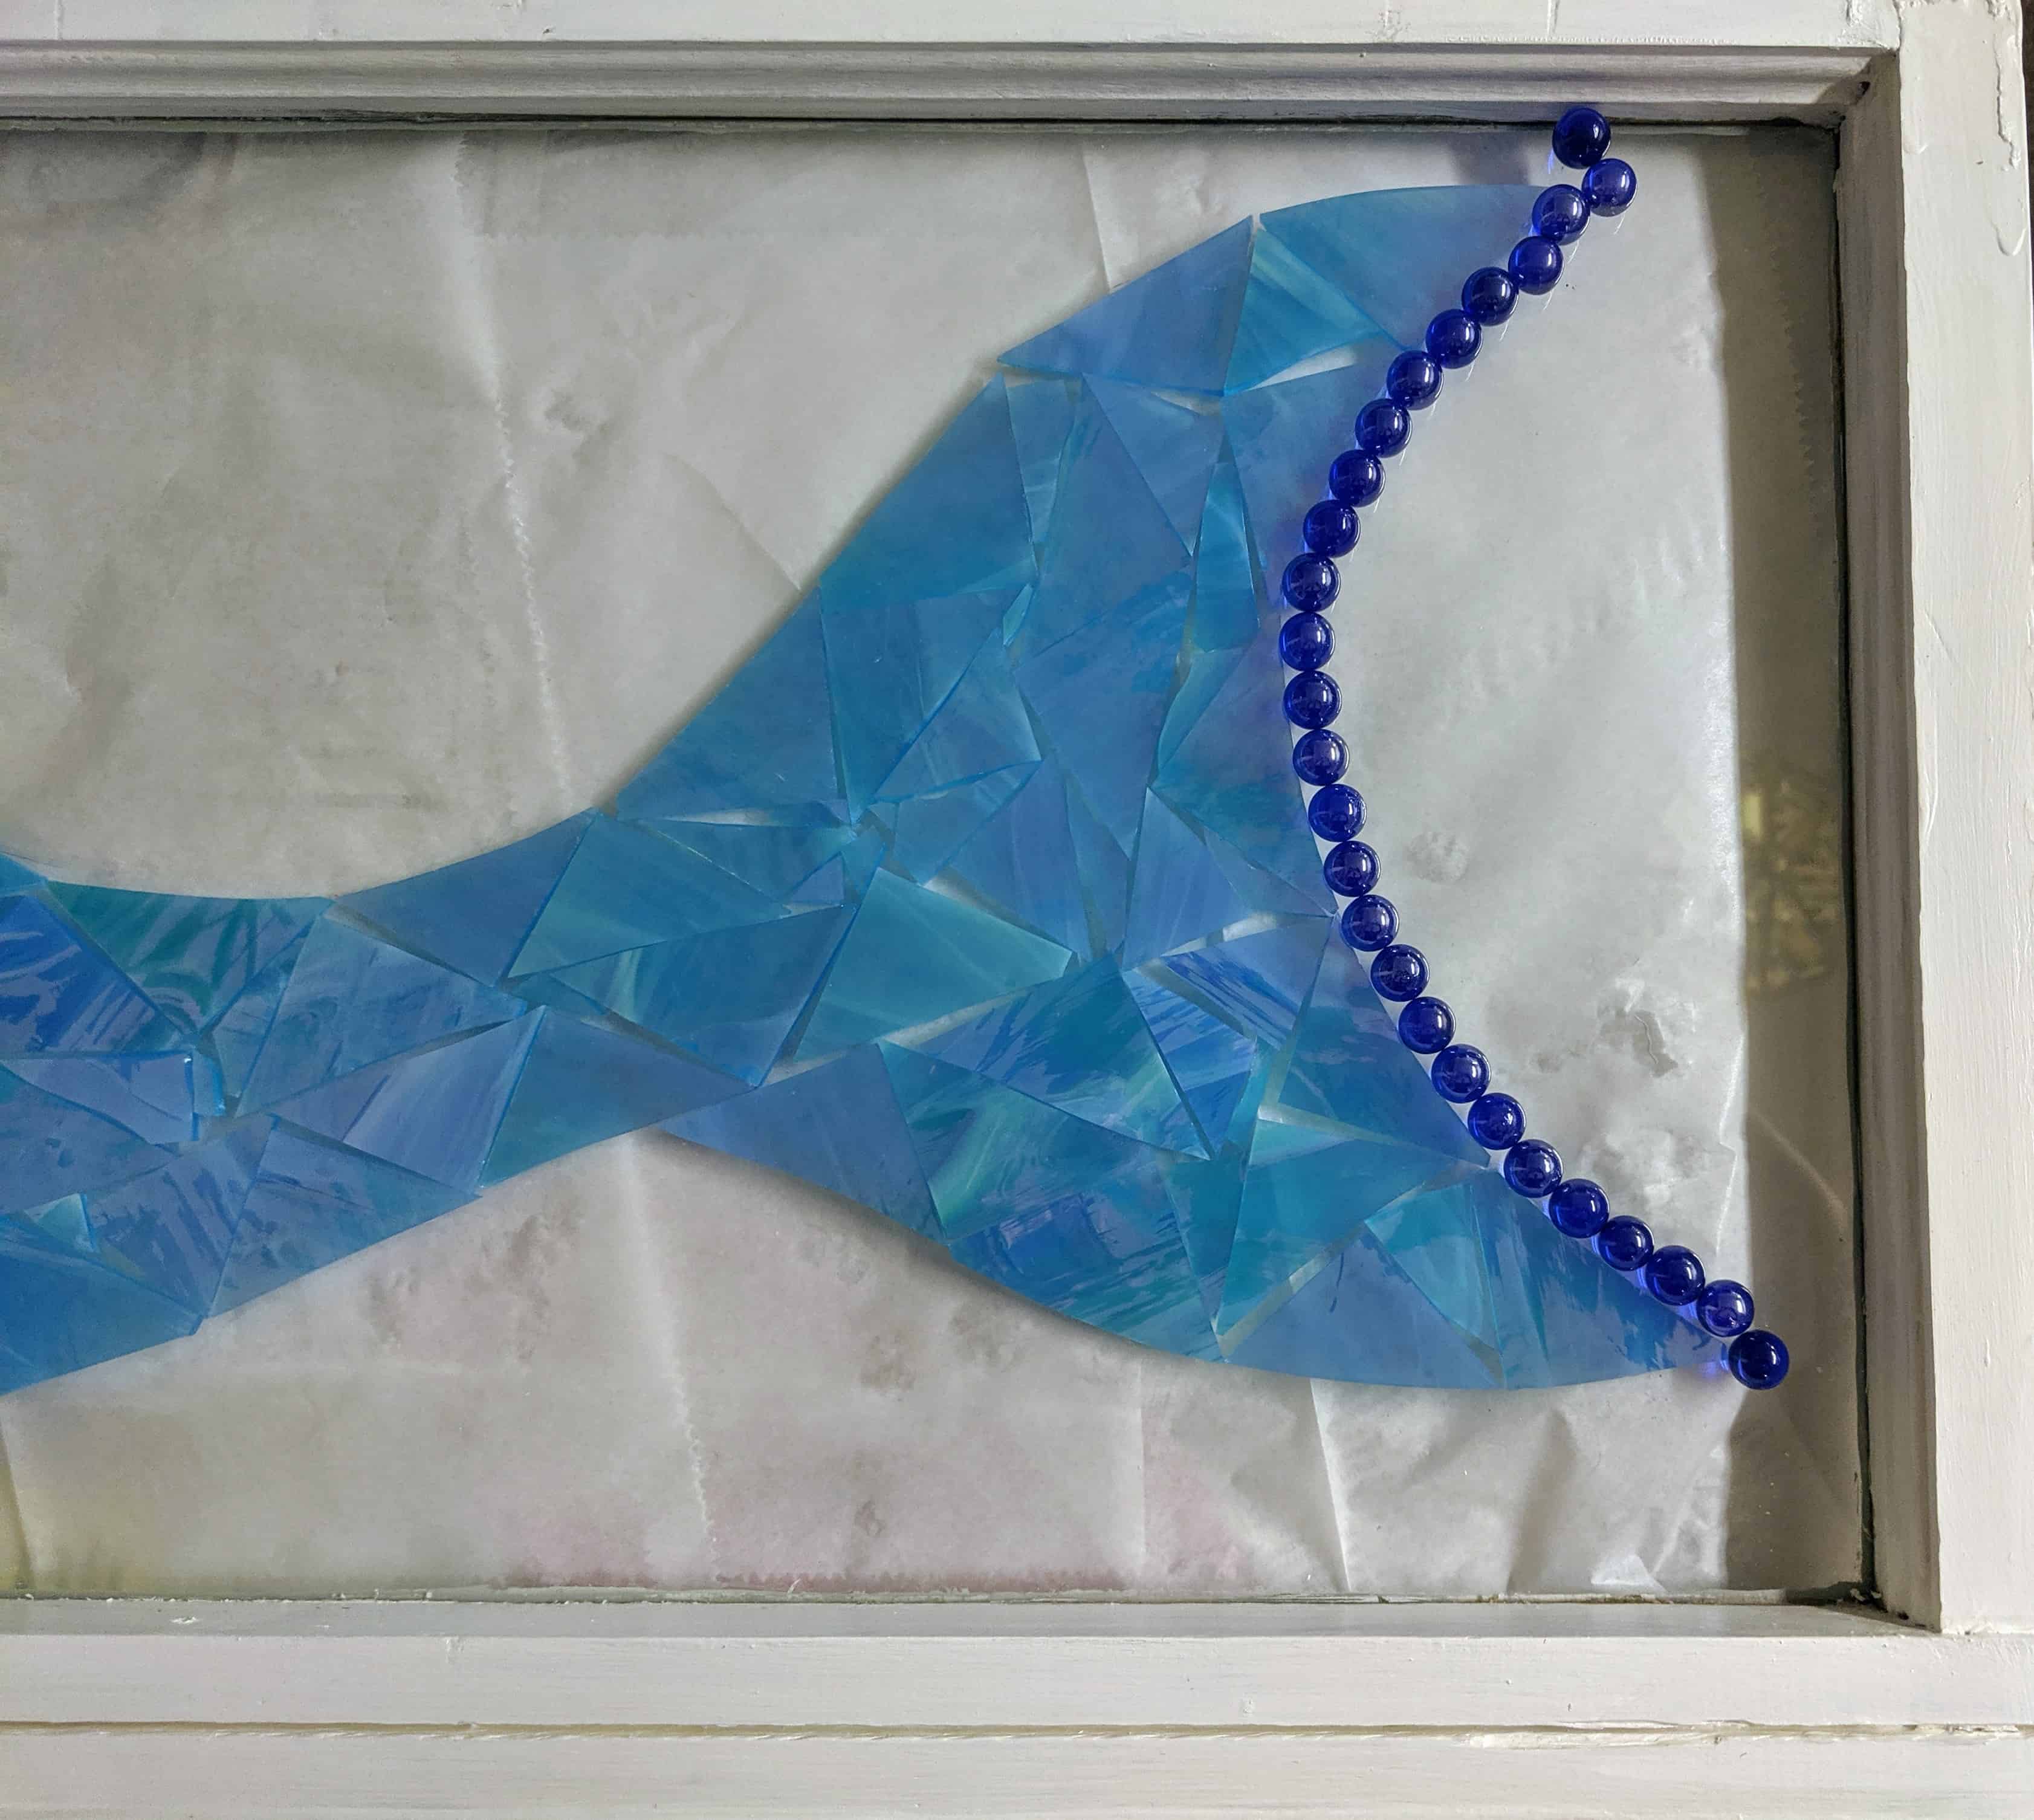

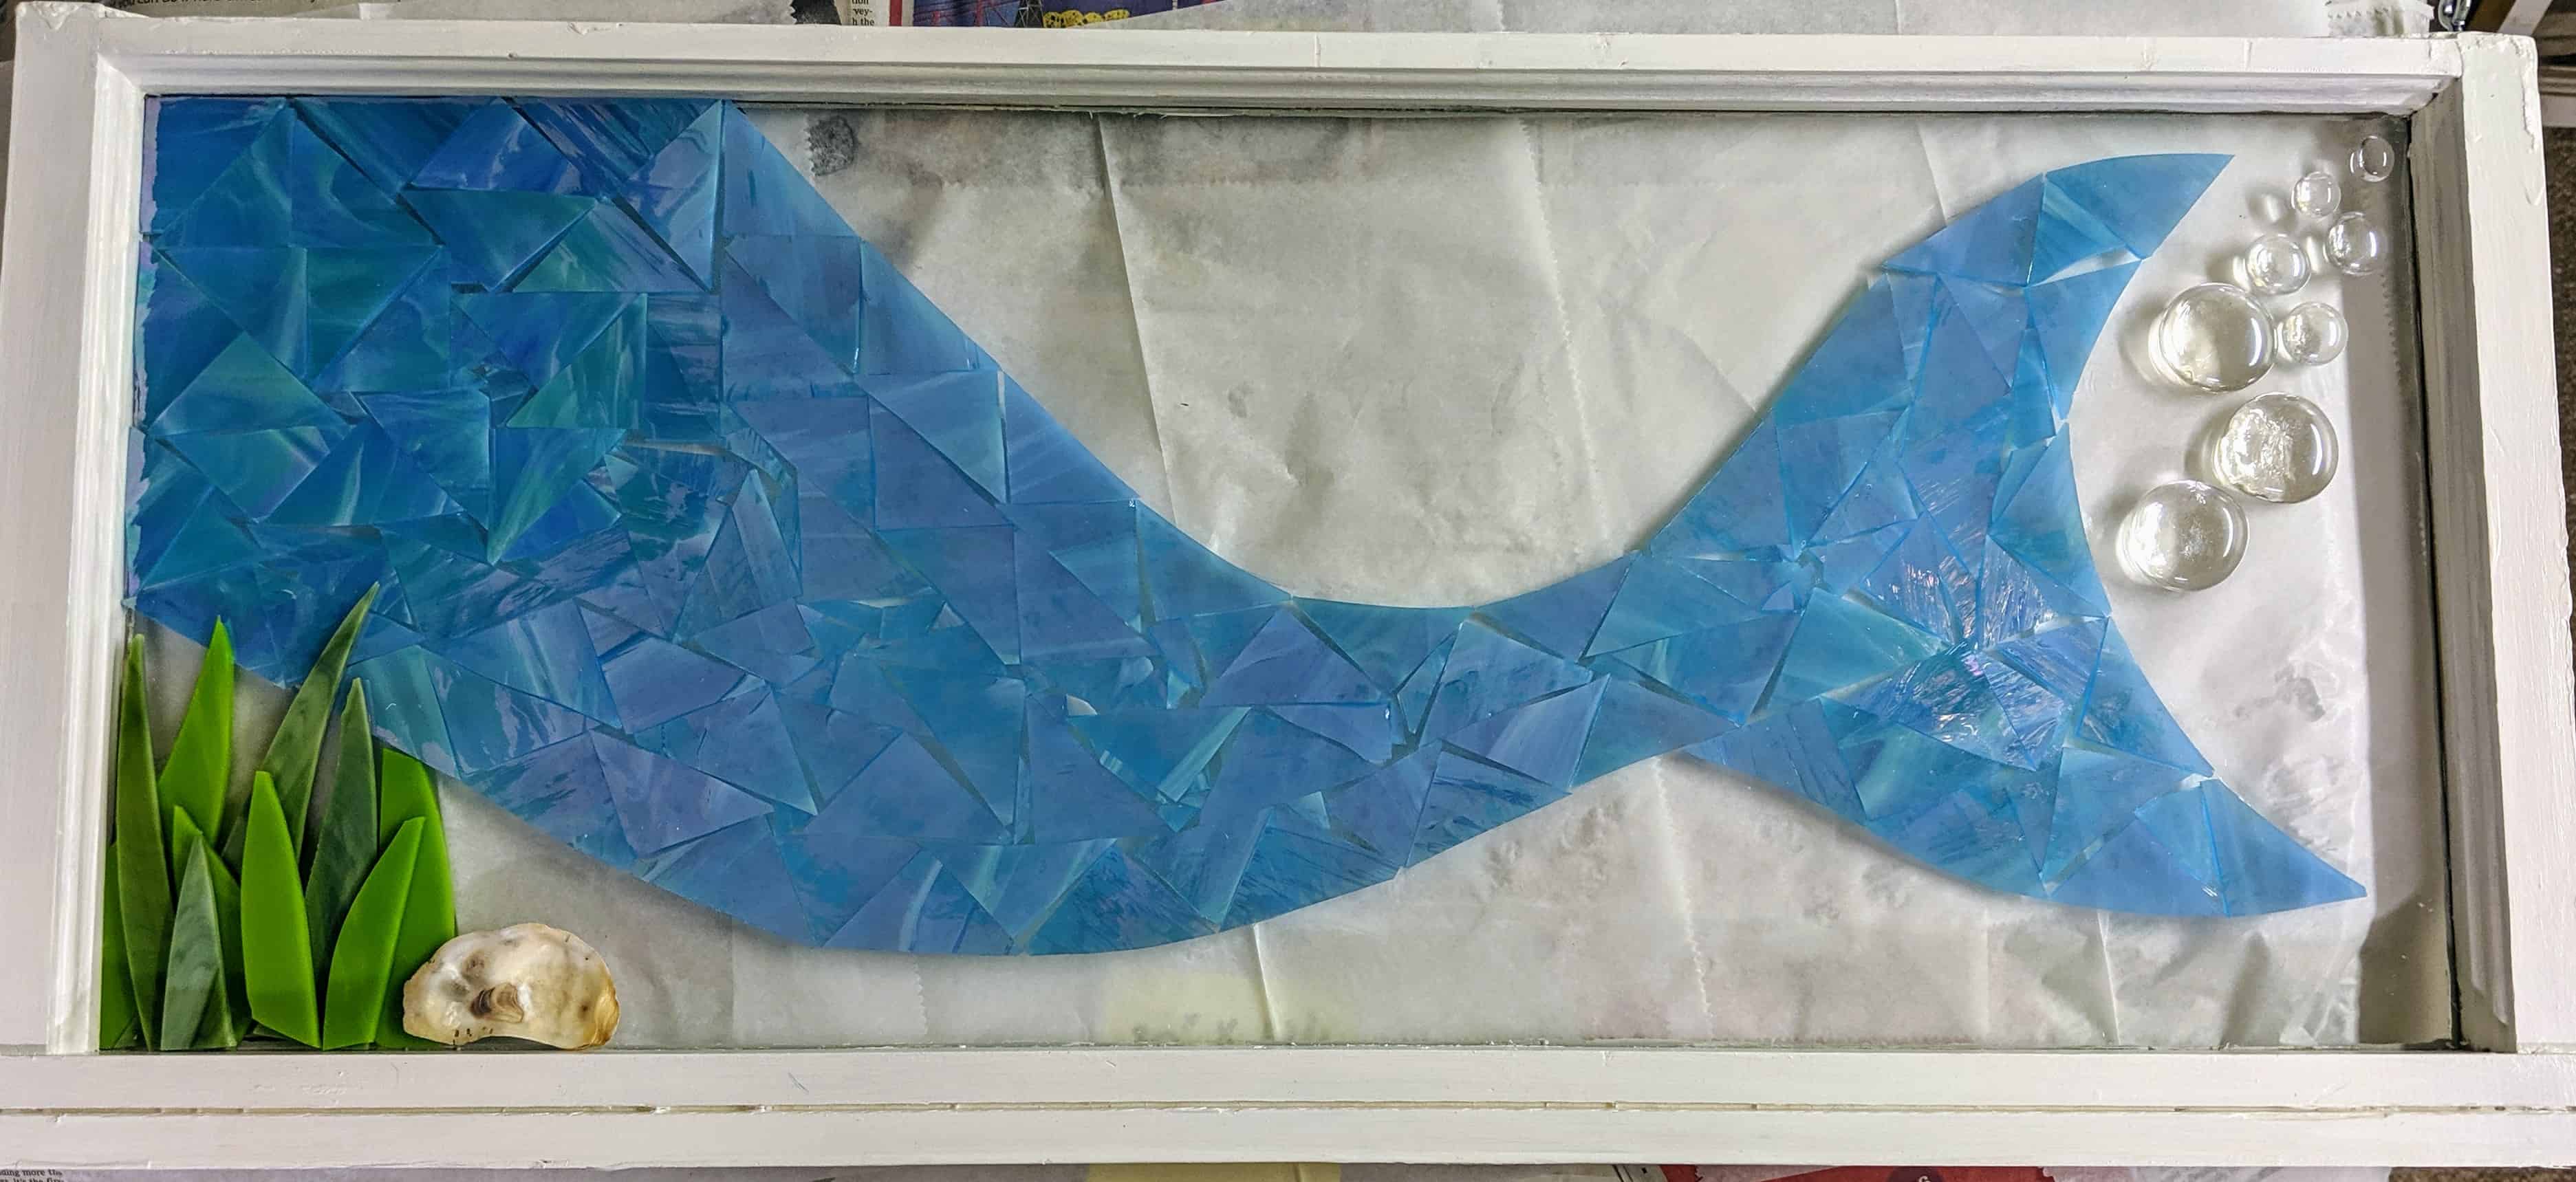
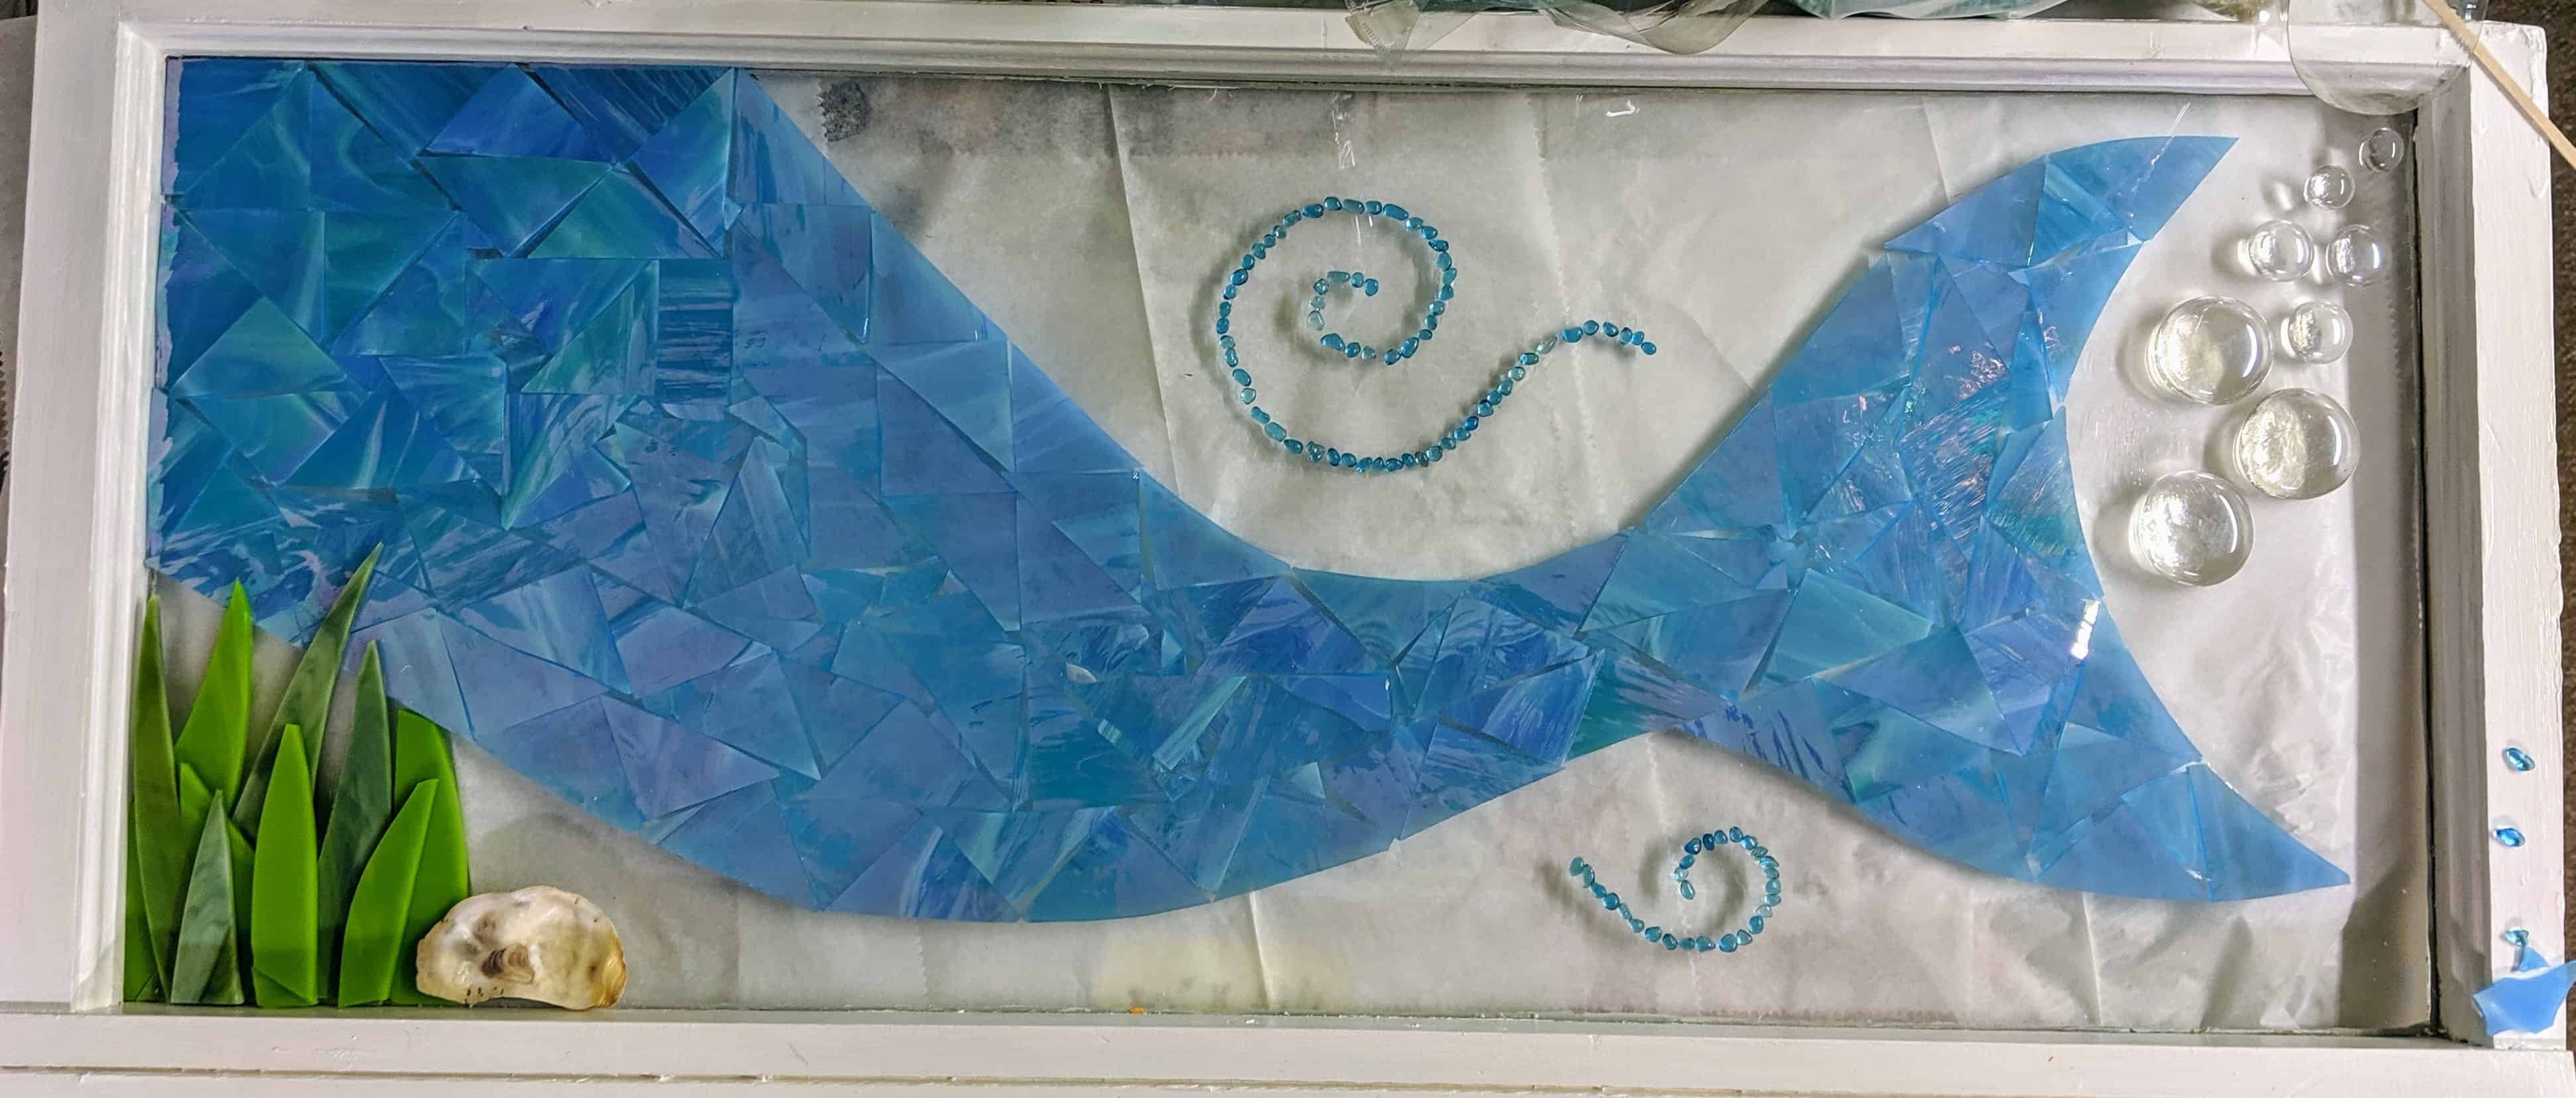
I finally decided I liked the small seaweed and bubbles. I added some swirls and plan to add a variety of glass chips when I pour the resin.
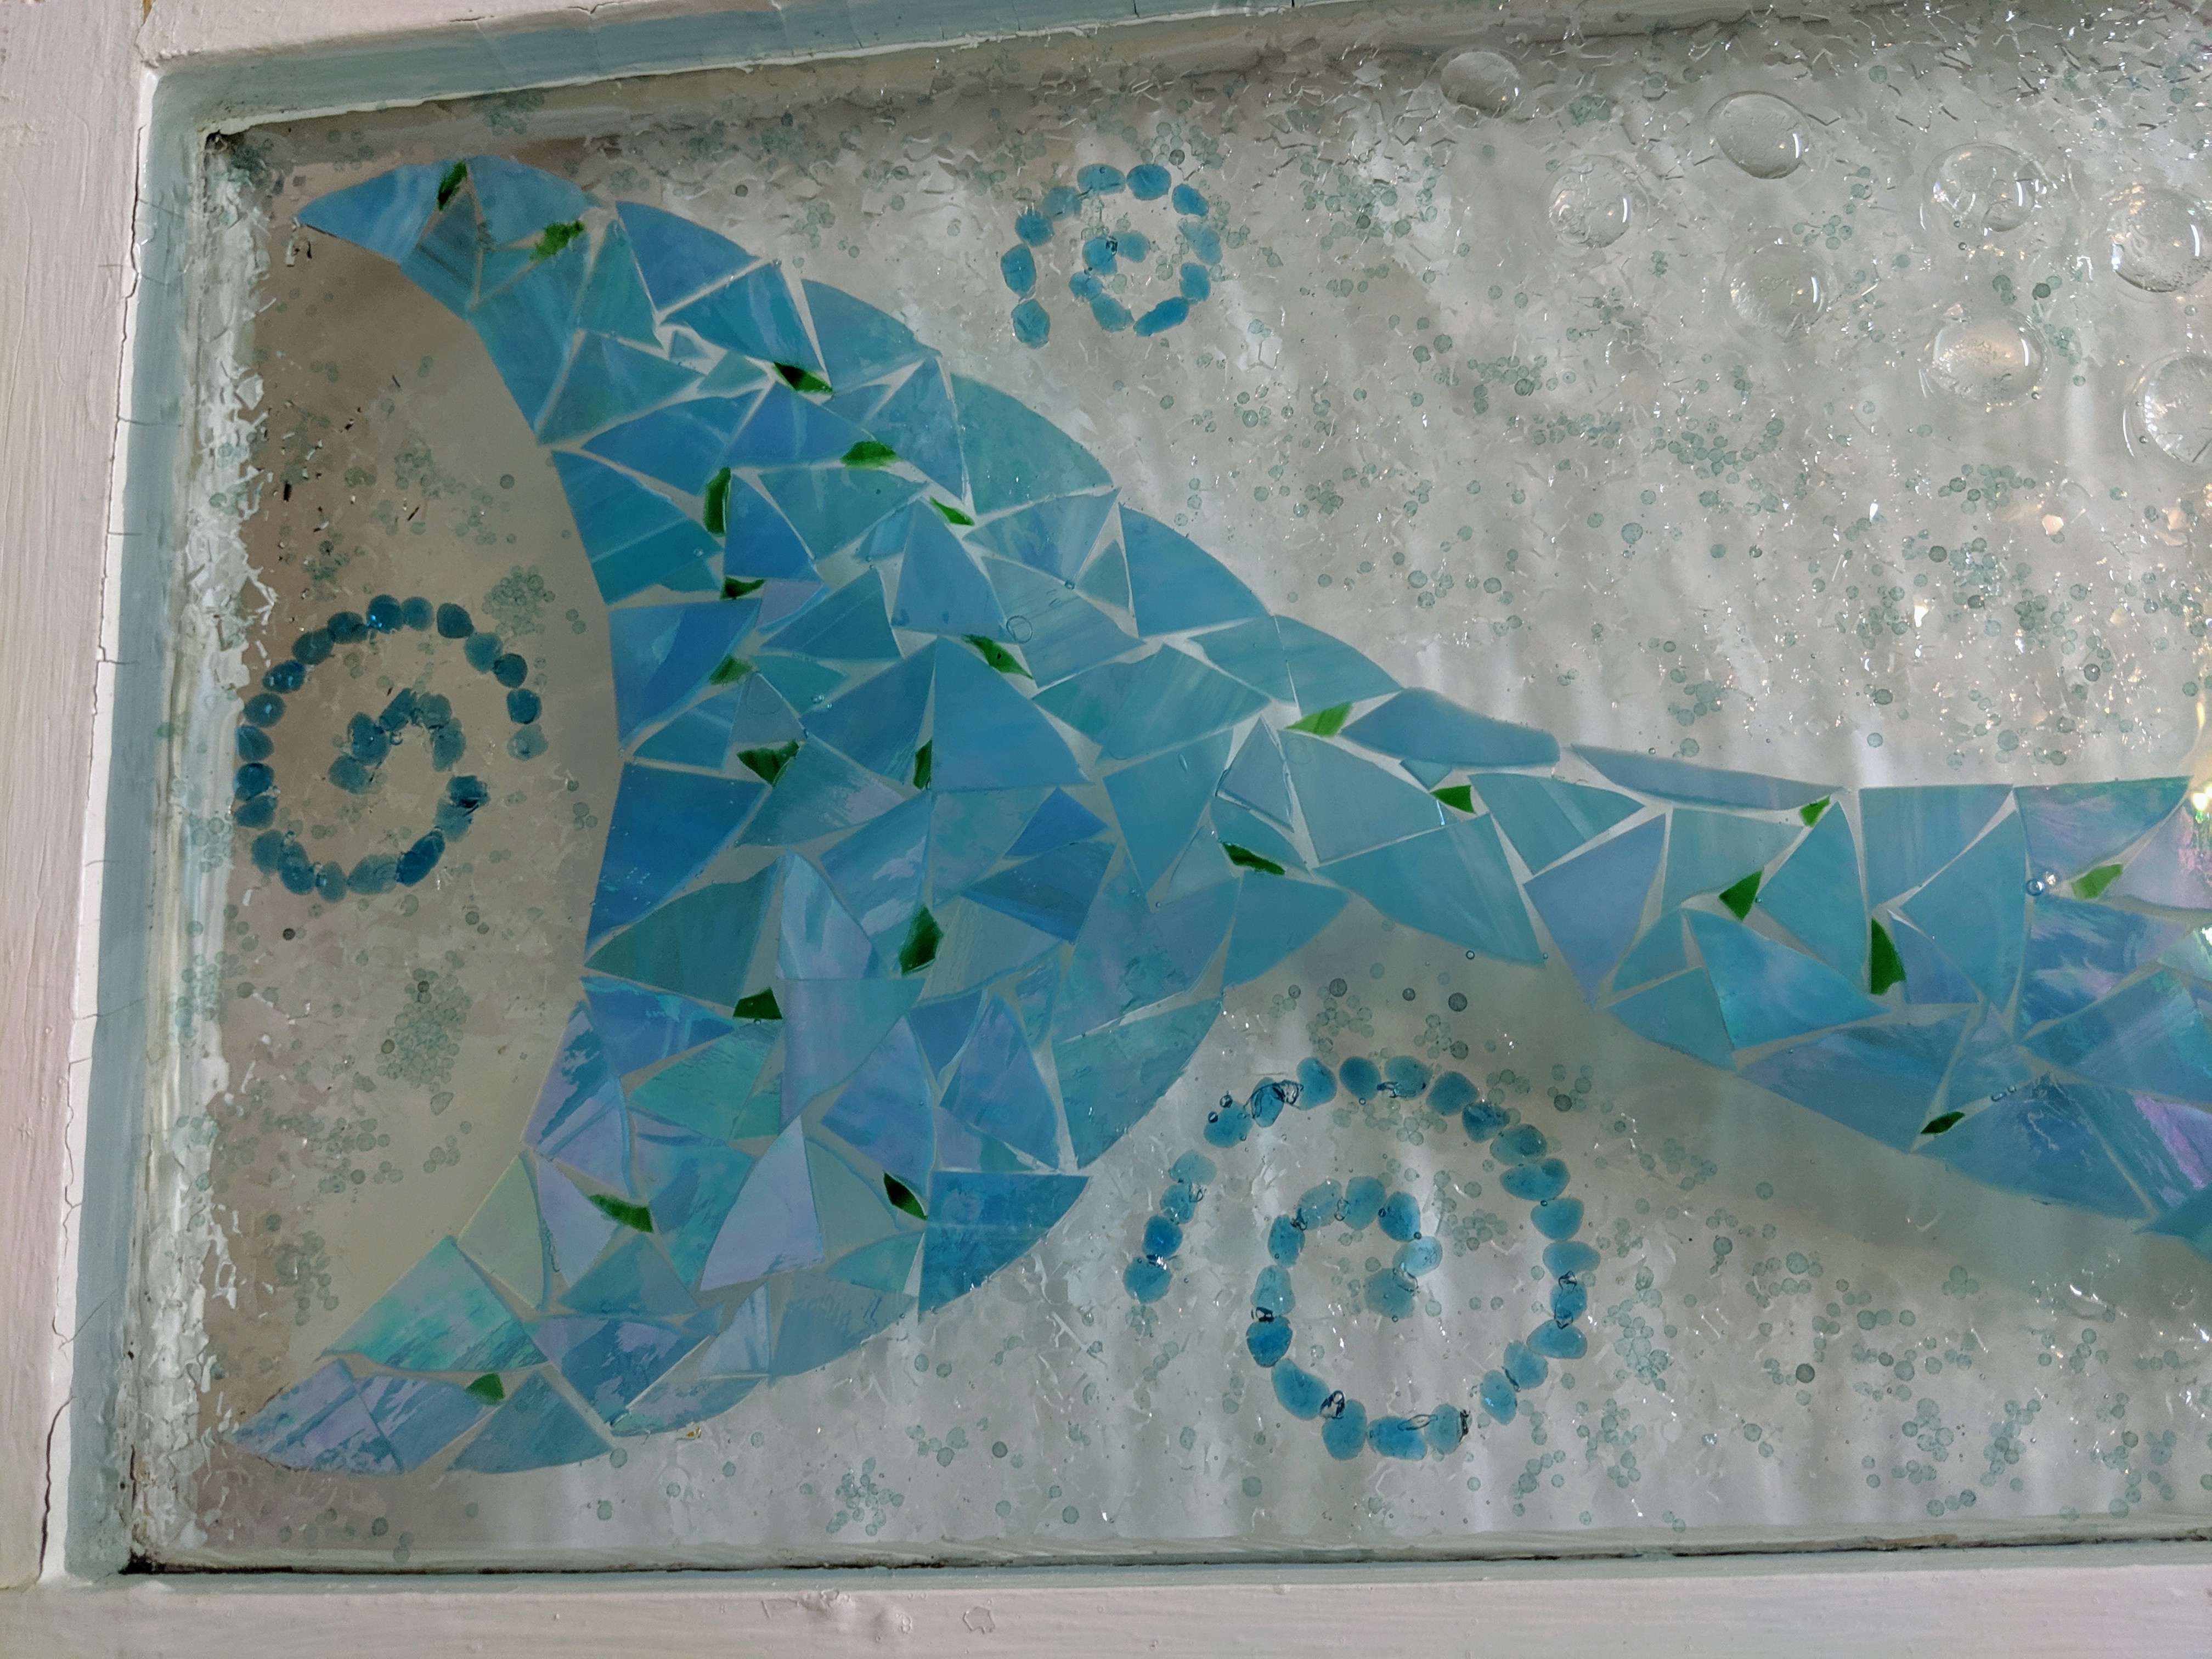
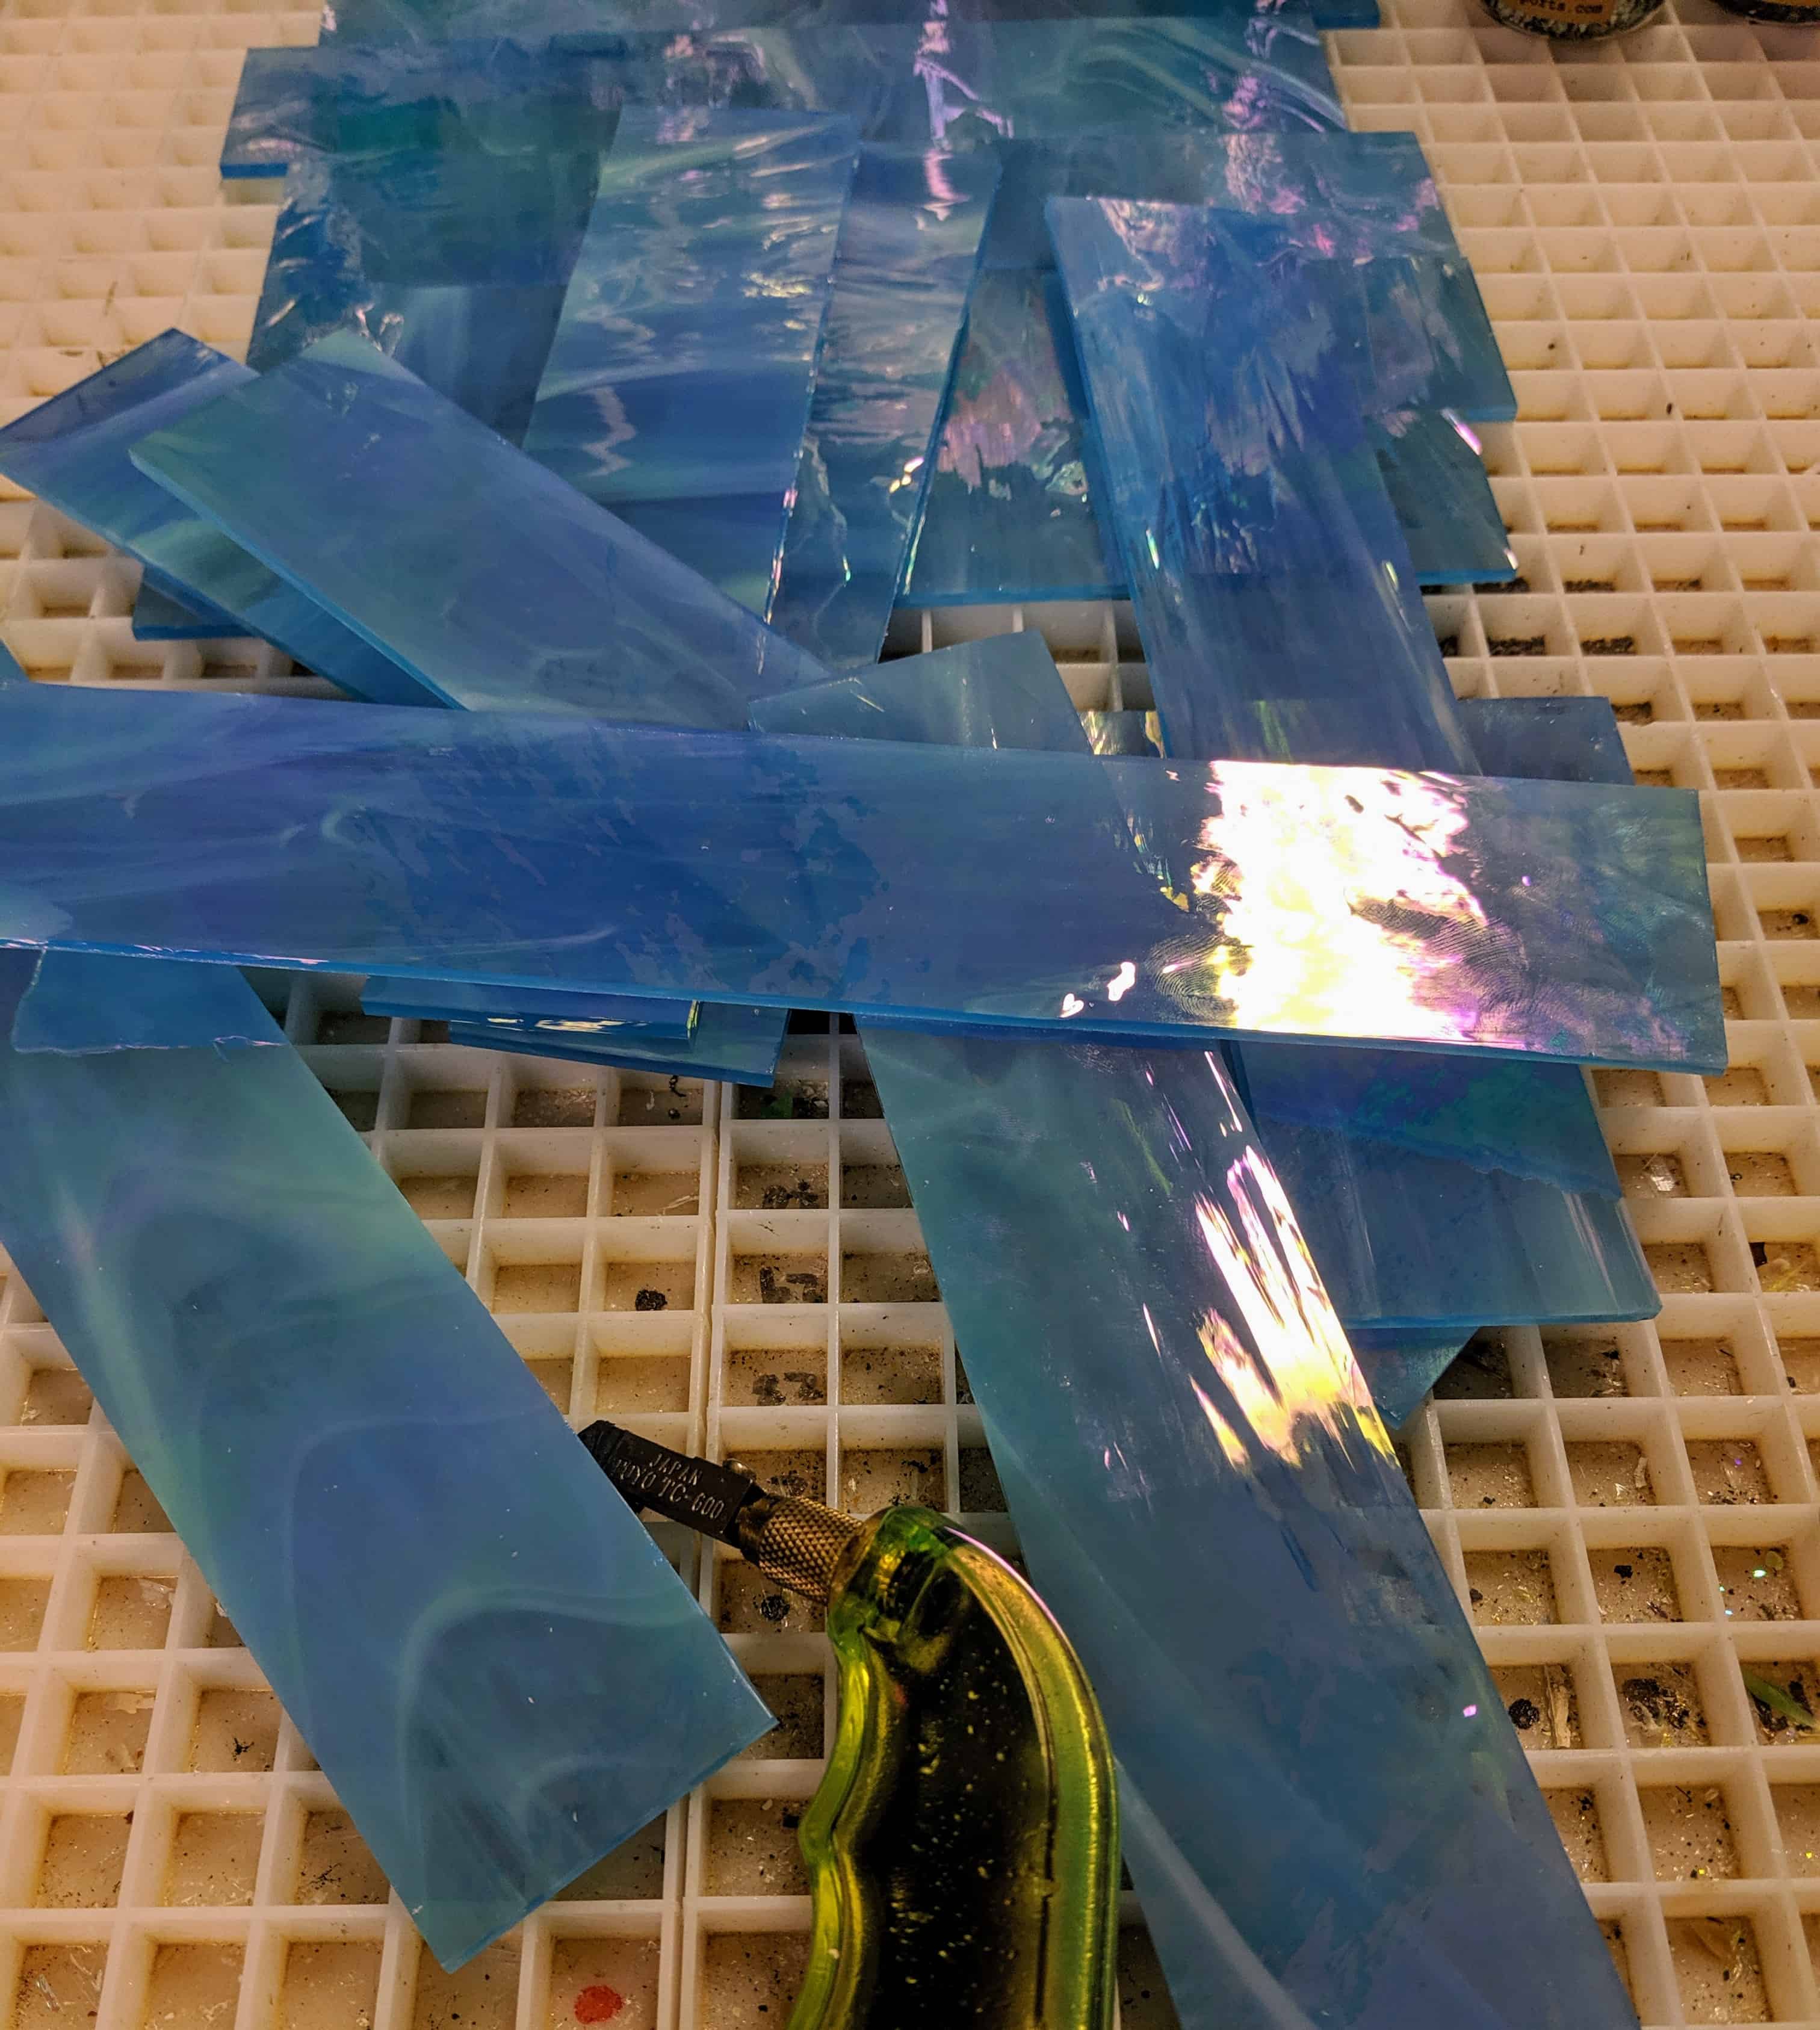
I’ve been pretty busy making beads (petmemorybeads.com) the past couple of weeks, but today I took some time to start another mosaic. I started with a huge sheet of Spectrum light blue iridized glass that I have been holding onto for a long time. I cut a good sized chunk of it off so it would fit on my work space and started to make pieces for the mosaic.
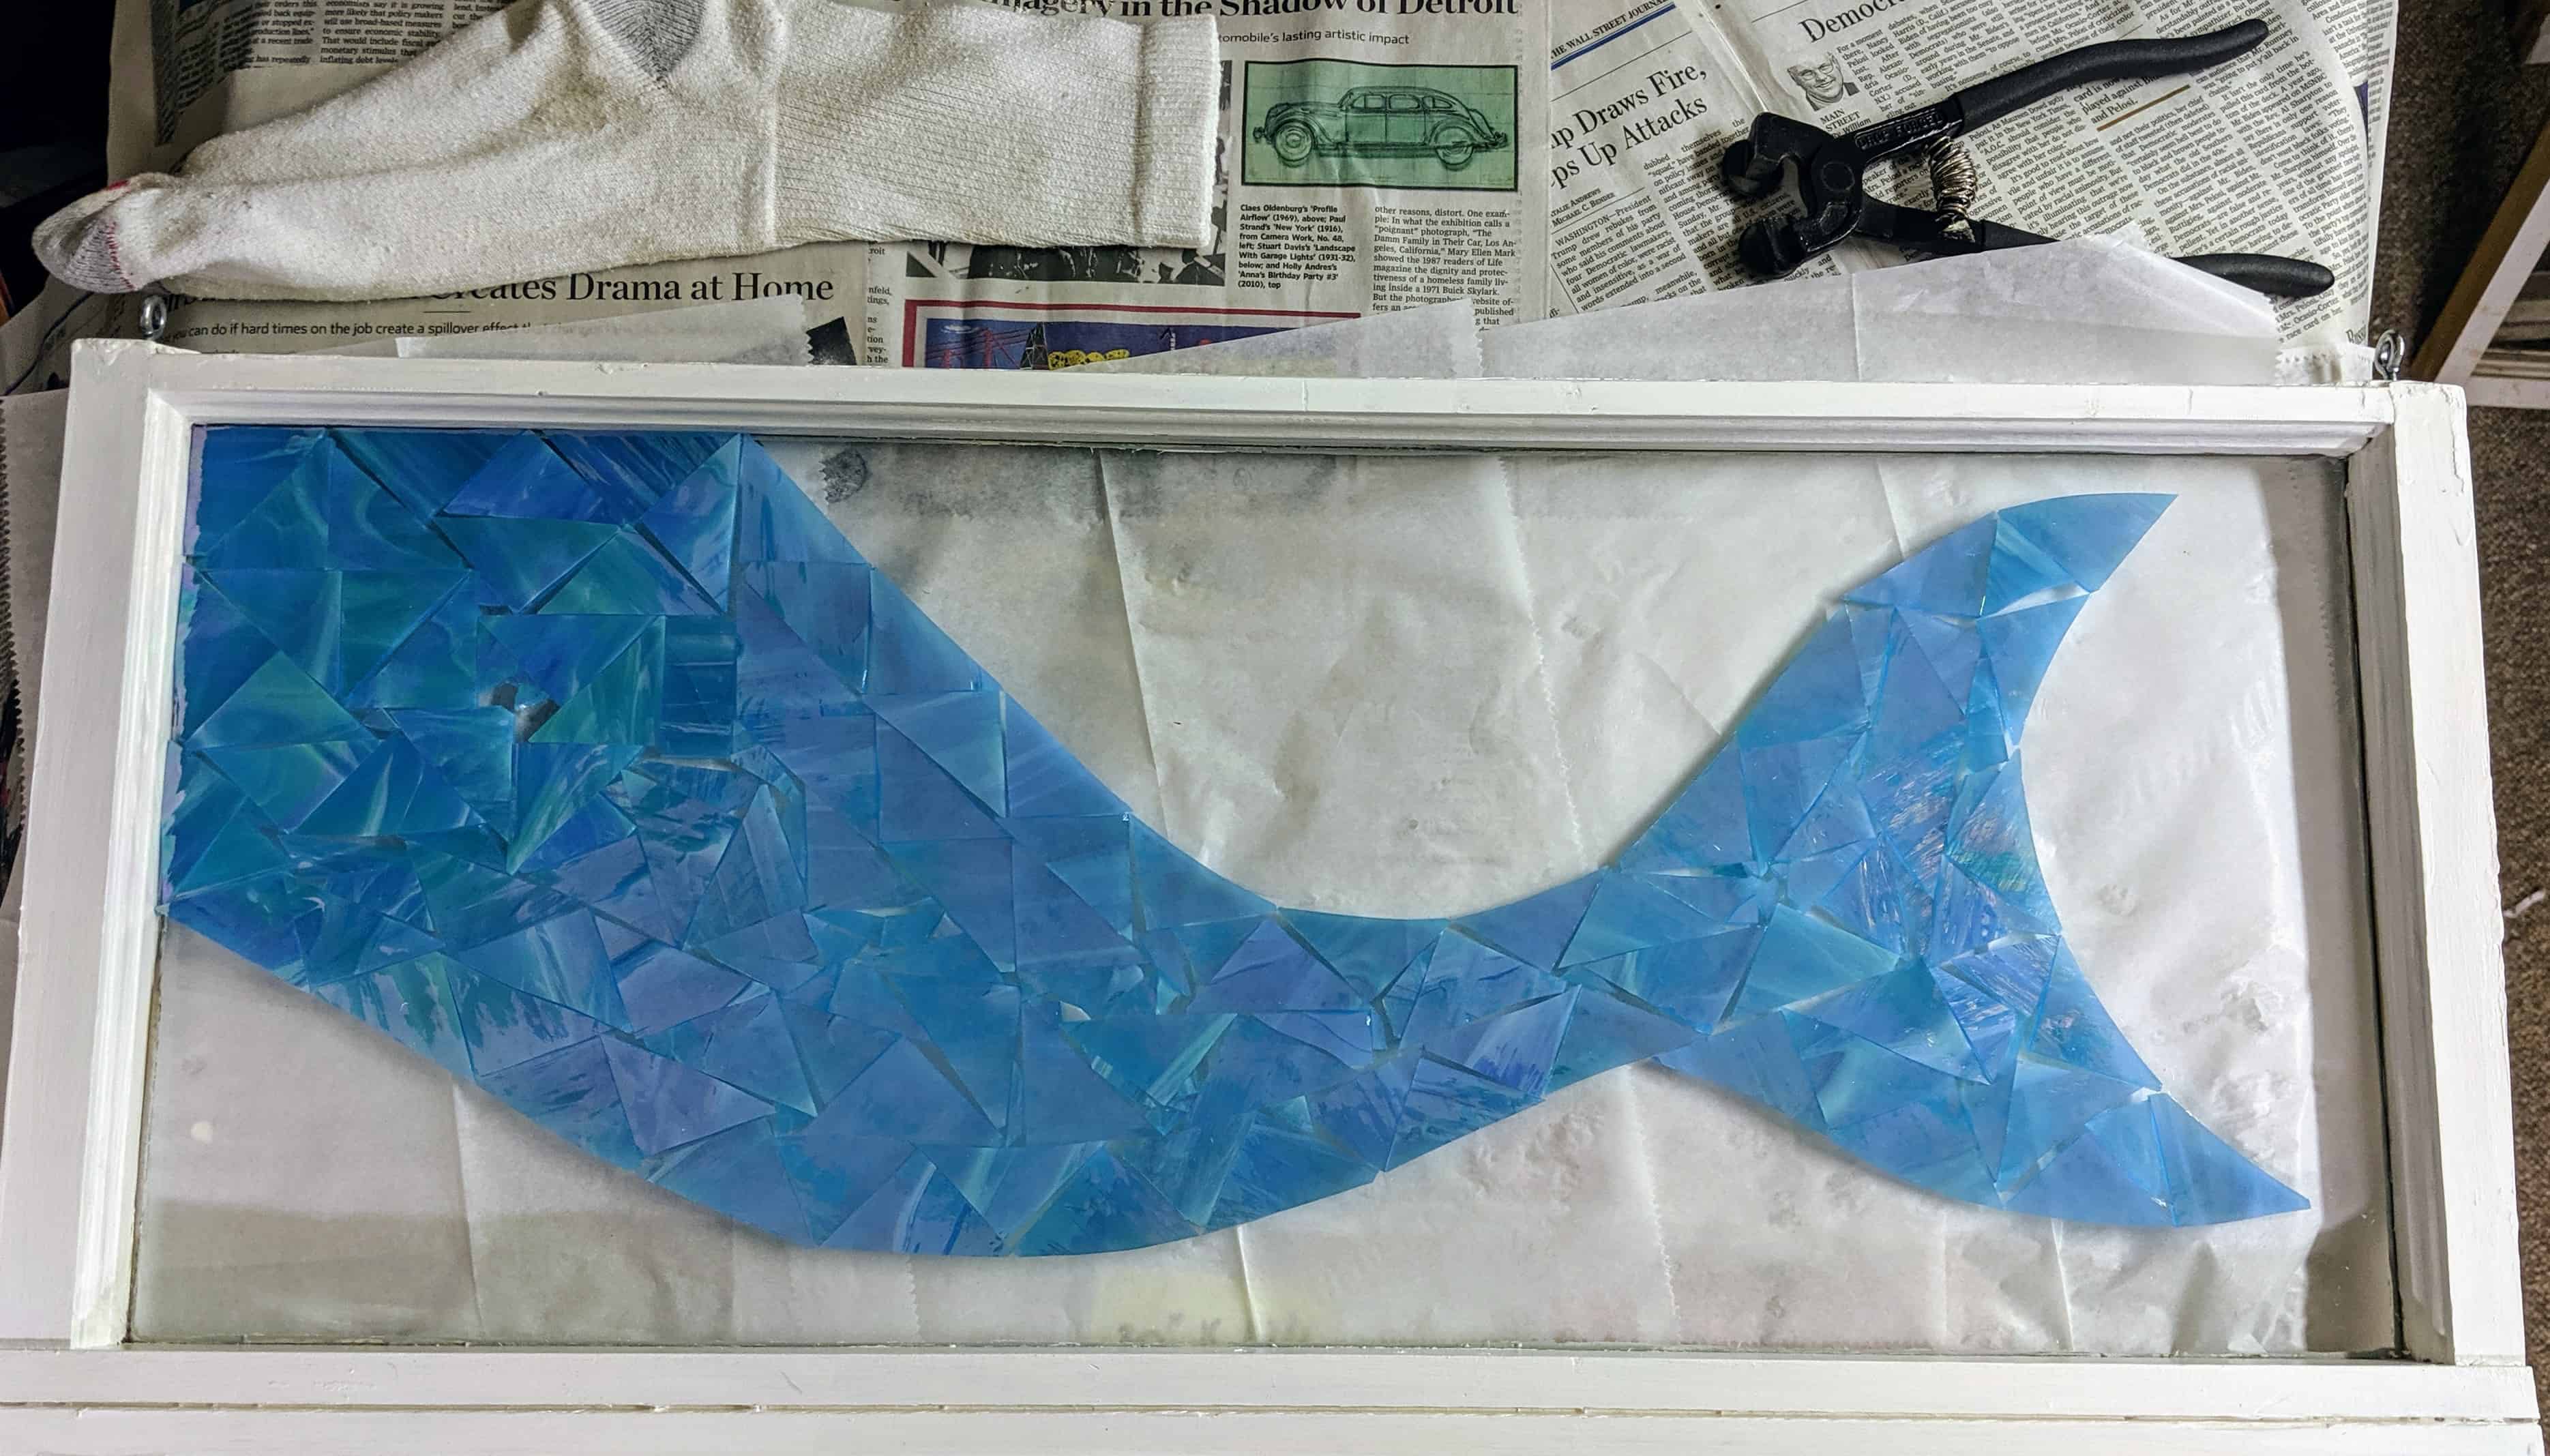
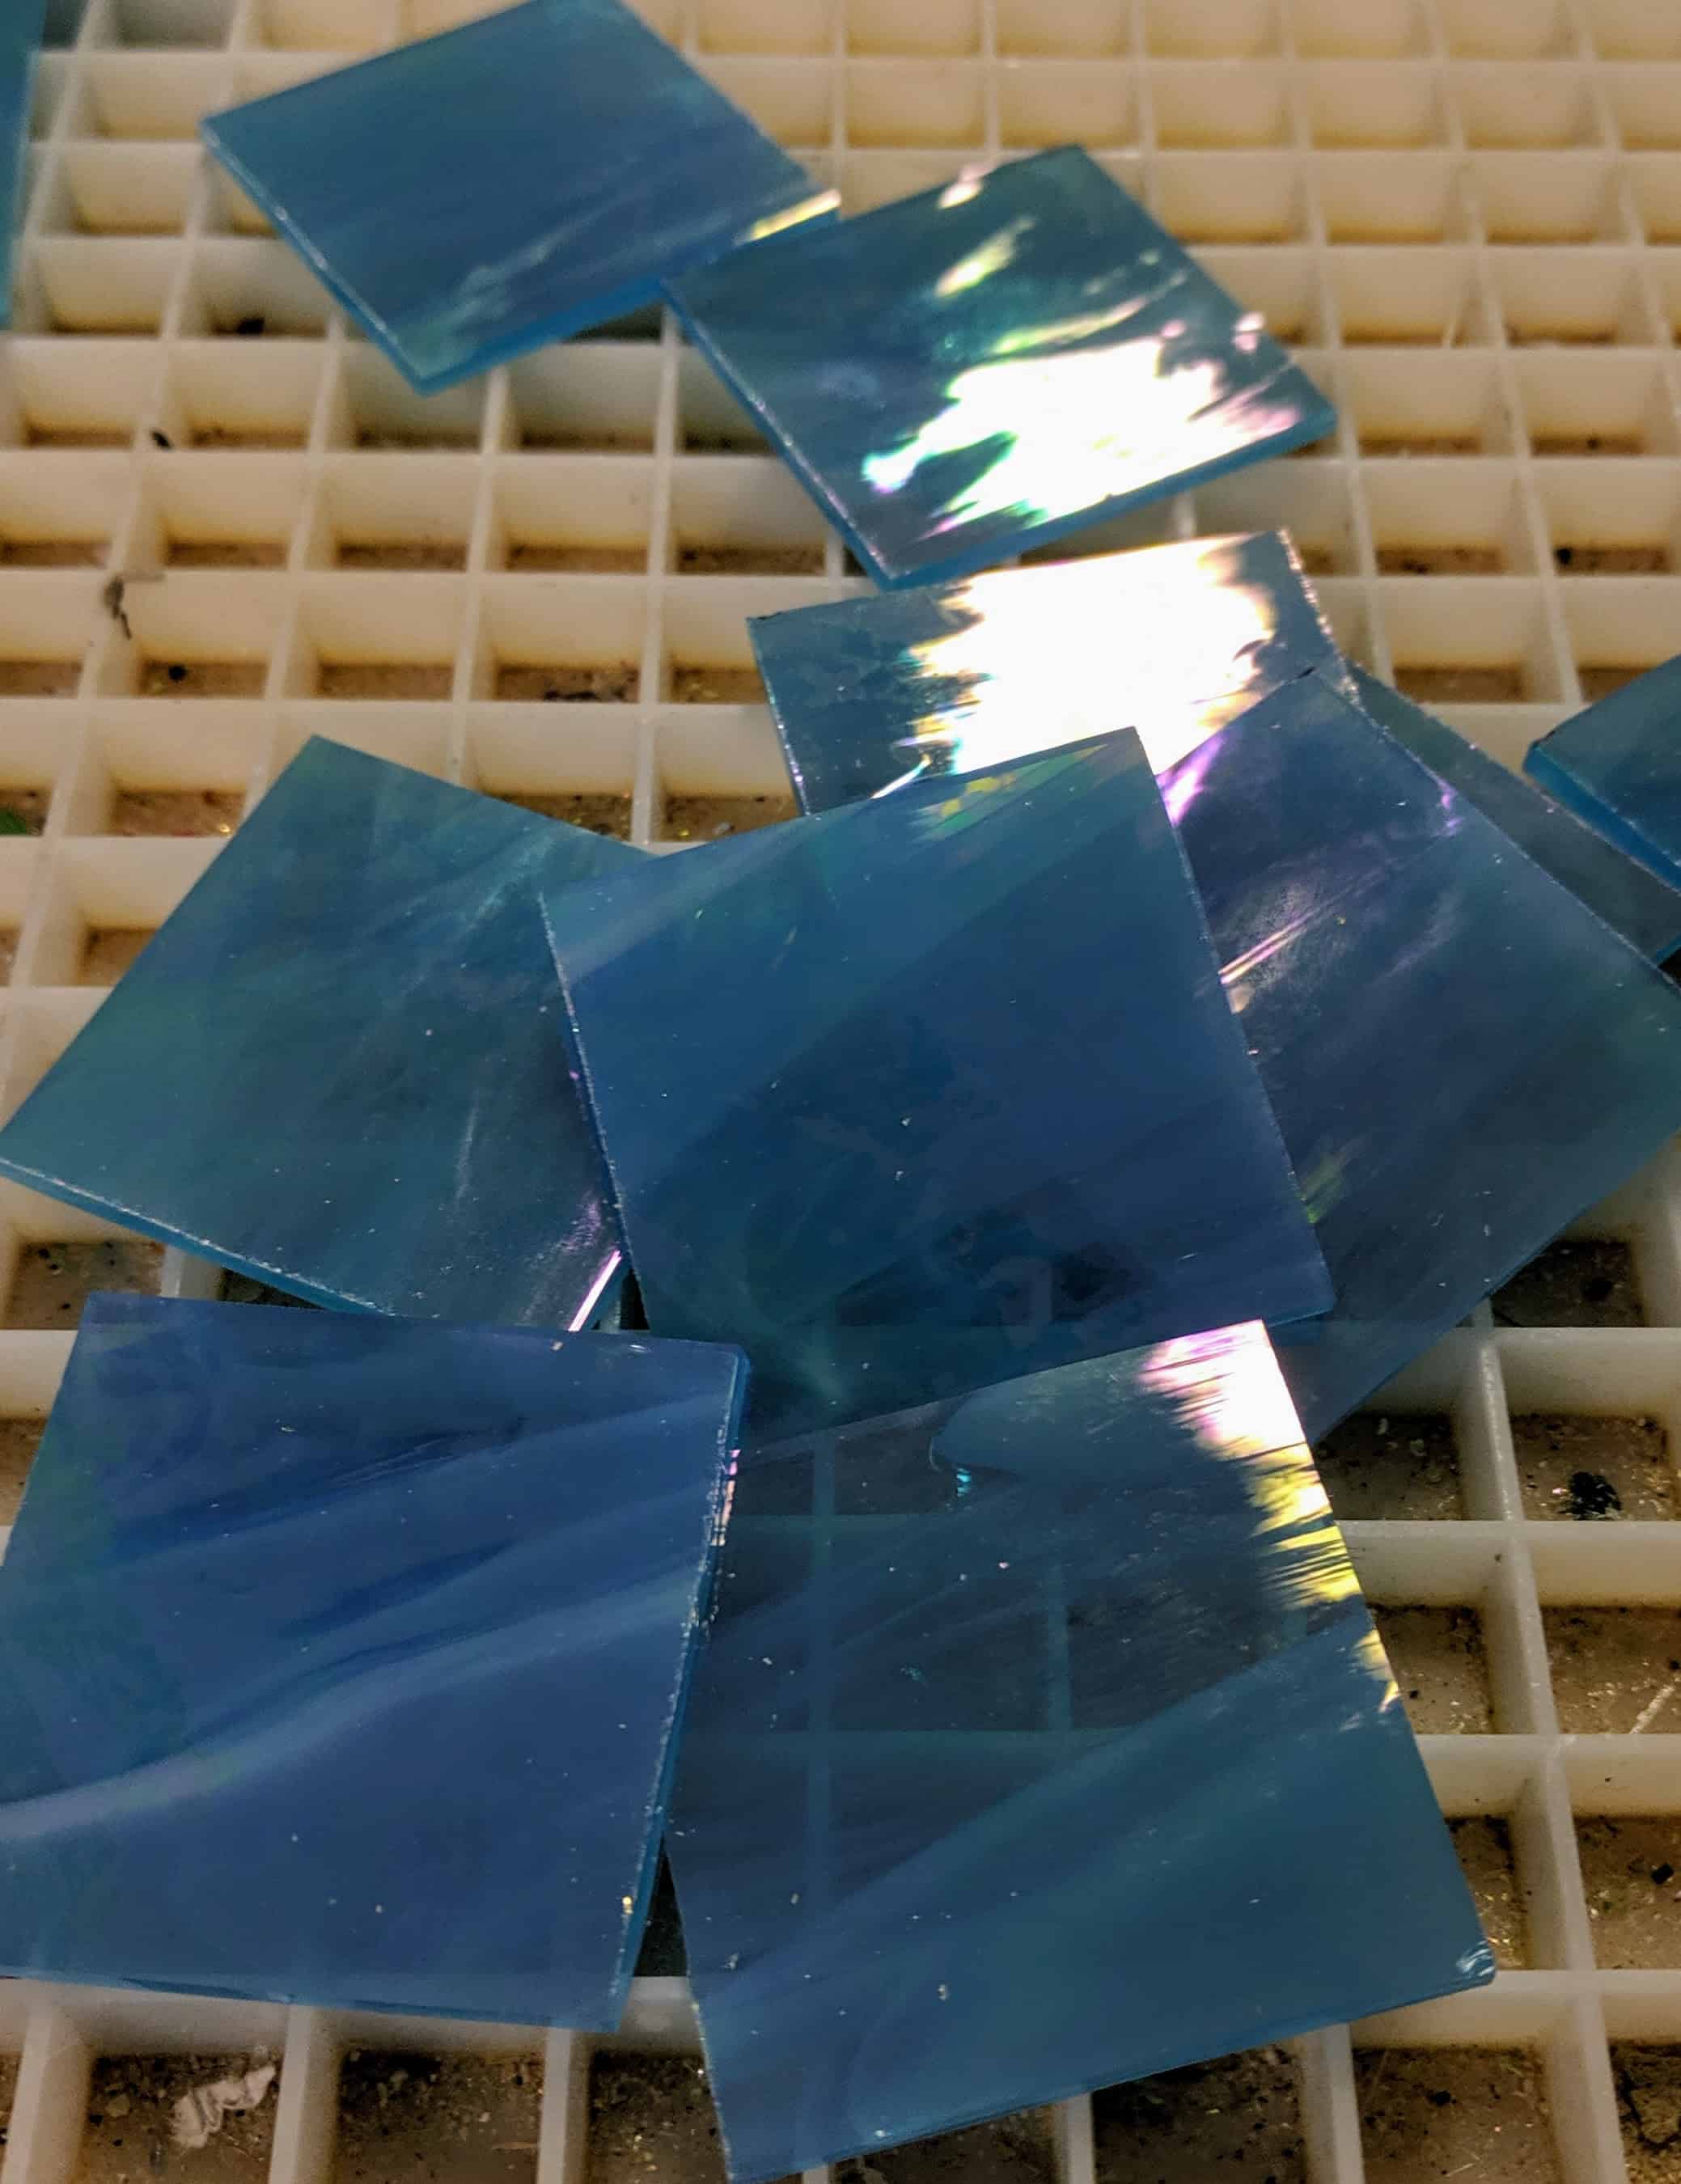
Next I cut the smaller piece of glass into strips, and then into squares, and again into triangles and started arranging them on the window where I drew a mermaid’s tail a week or two ago.
First I laid out the outline of her tail, then started filling in the gaps.
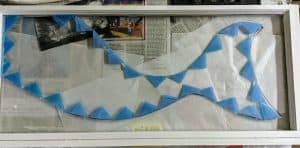
I haven’t glued anything down yet, just getting a feel for how it looks. I need to eyeball it for awhile to make sure I like where it is going before I commit with glue. I plan on filling in some more and then decorating with some glass embellishments after I pour the resin. I also need to decide how I want to decorate the background areas – will there be shells and seaweed? Maybe some swirls and bubbles? Still need to figure that out.
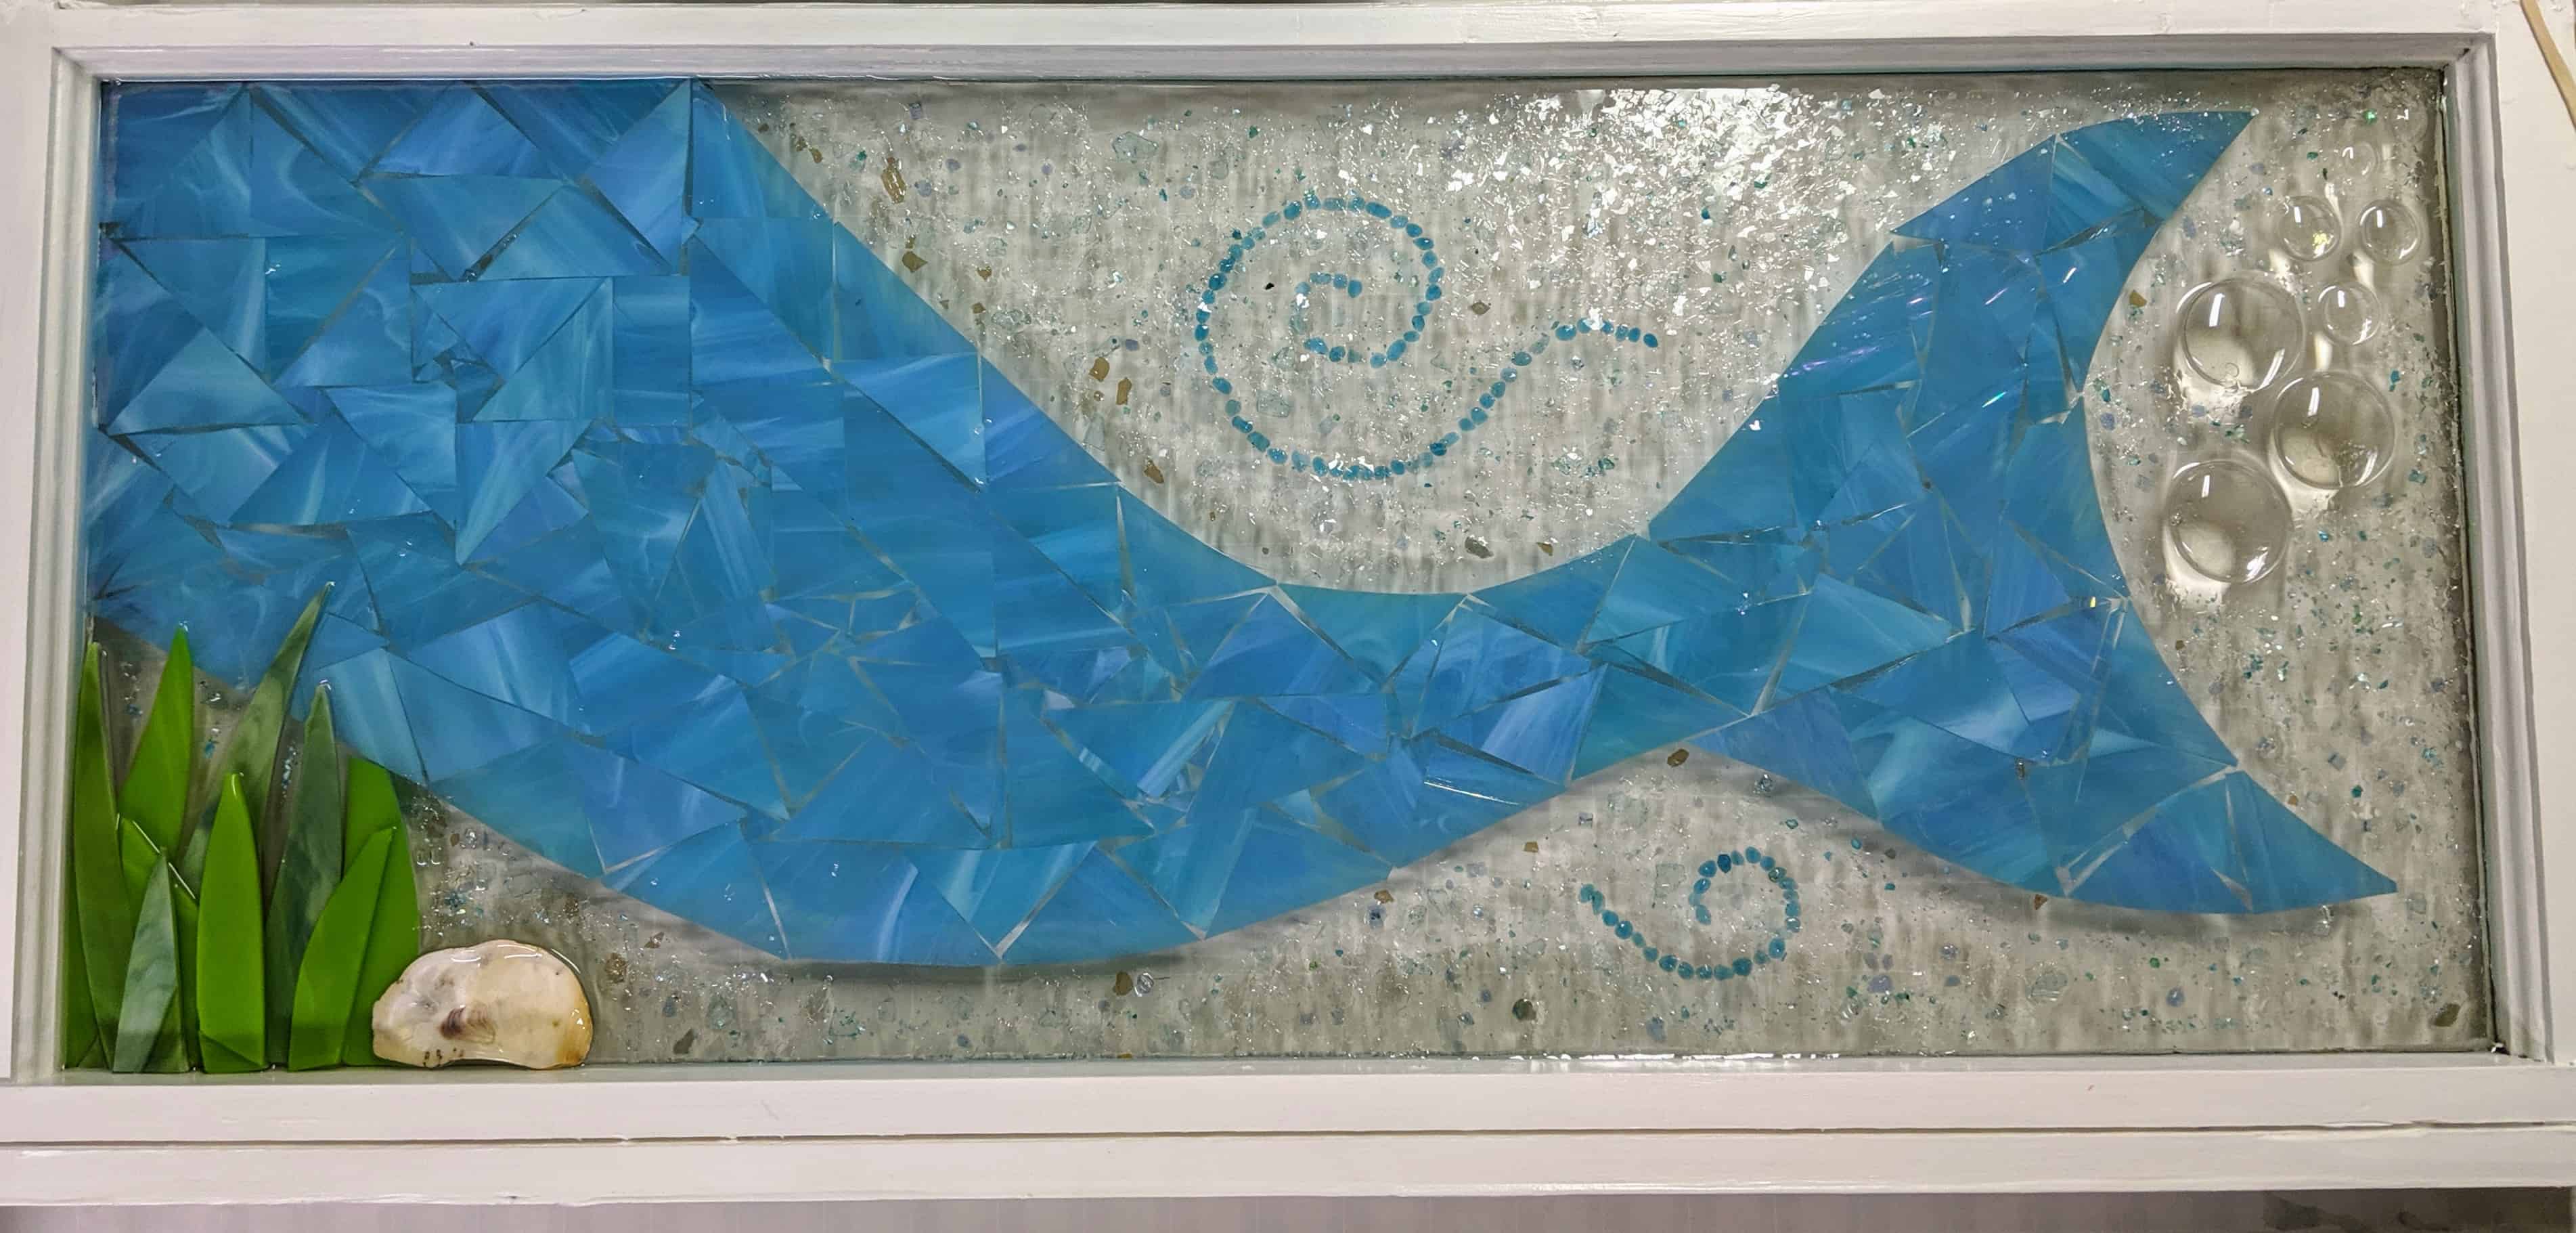
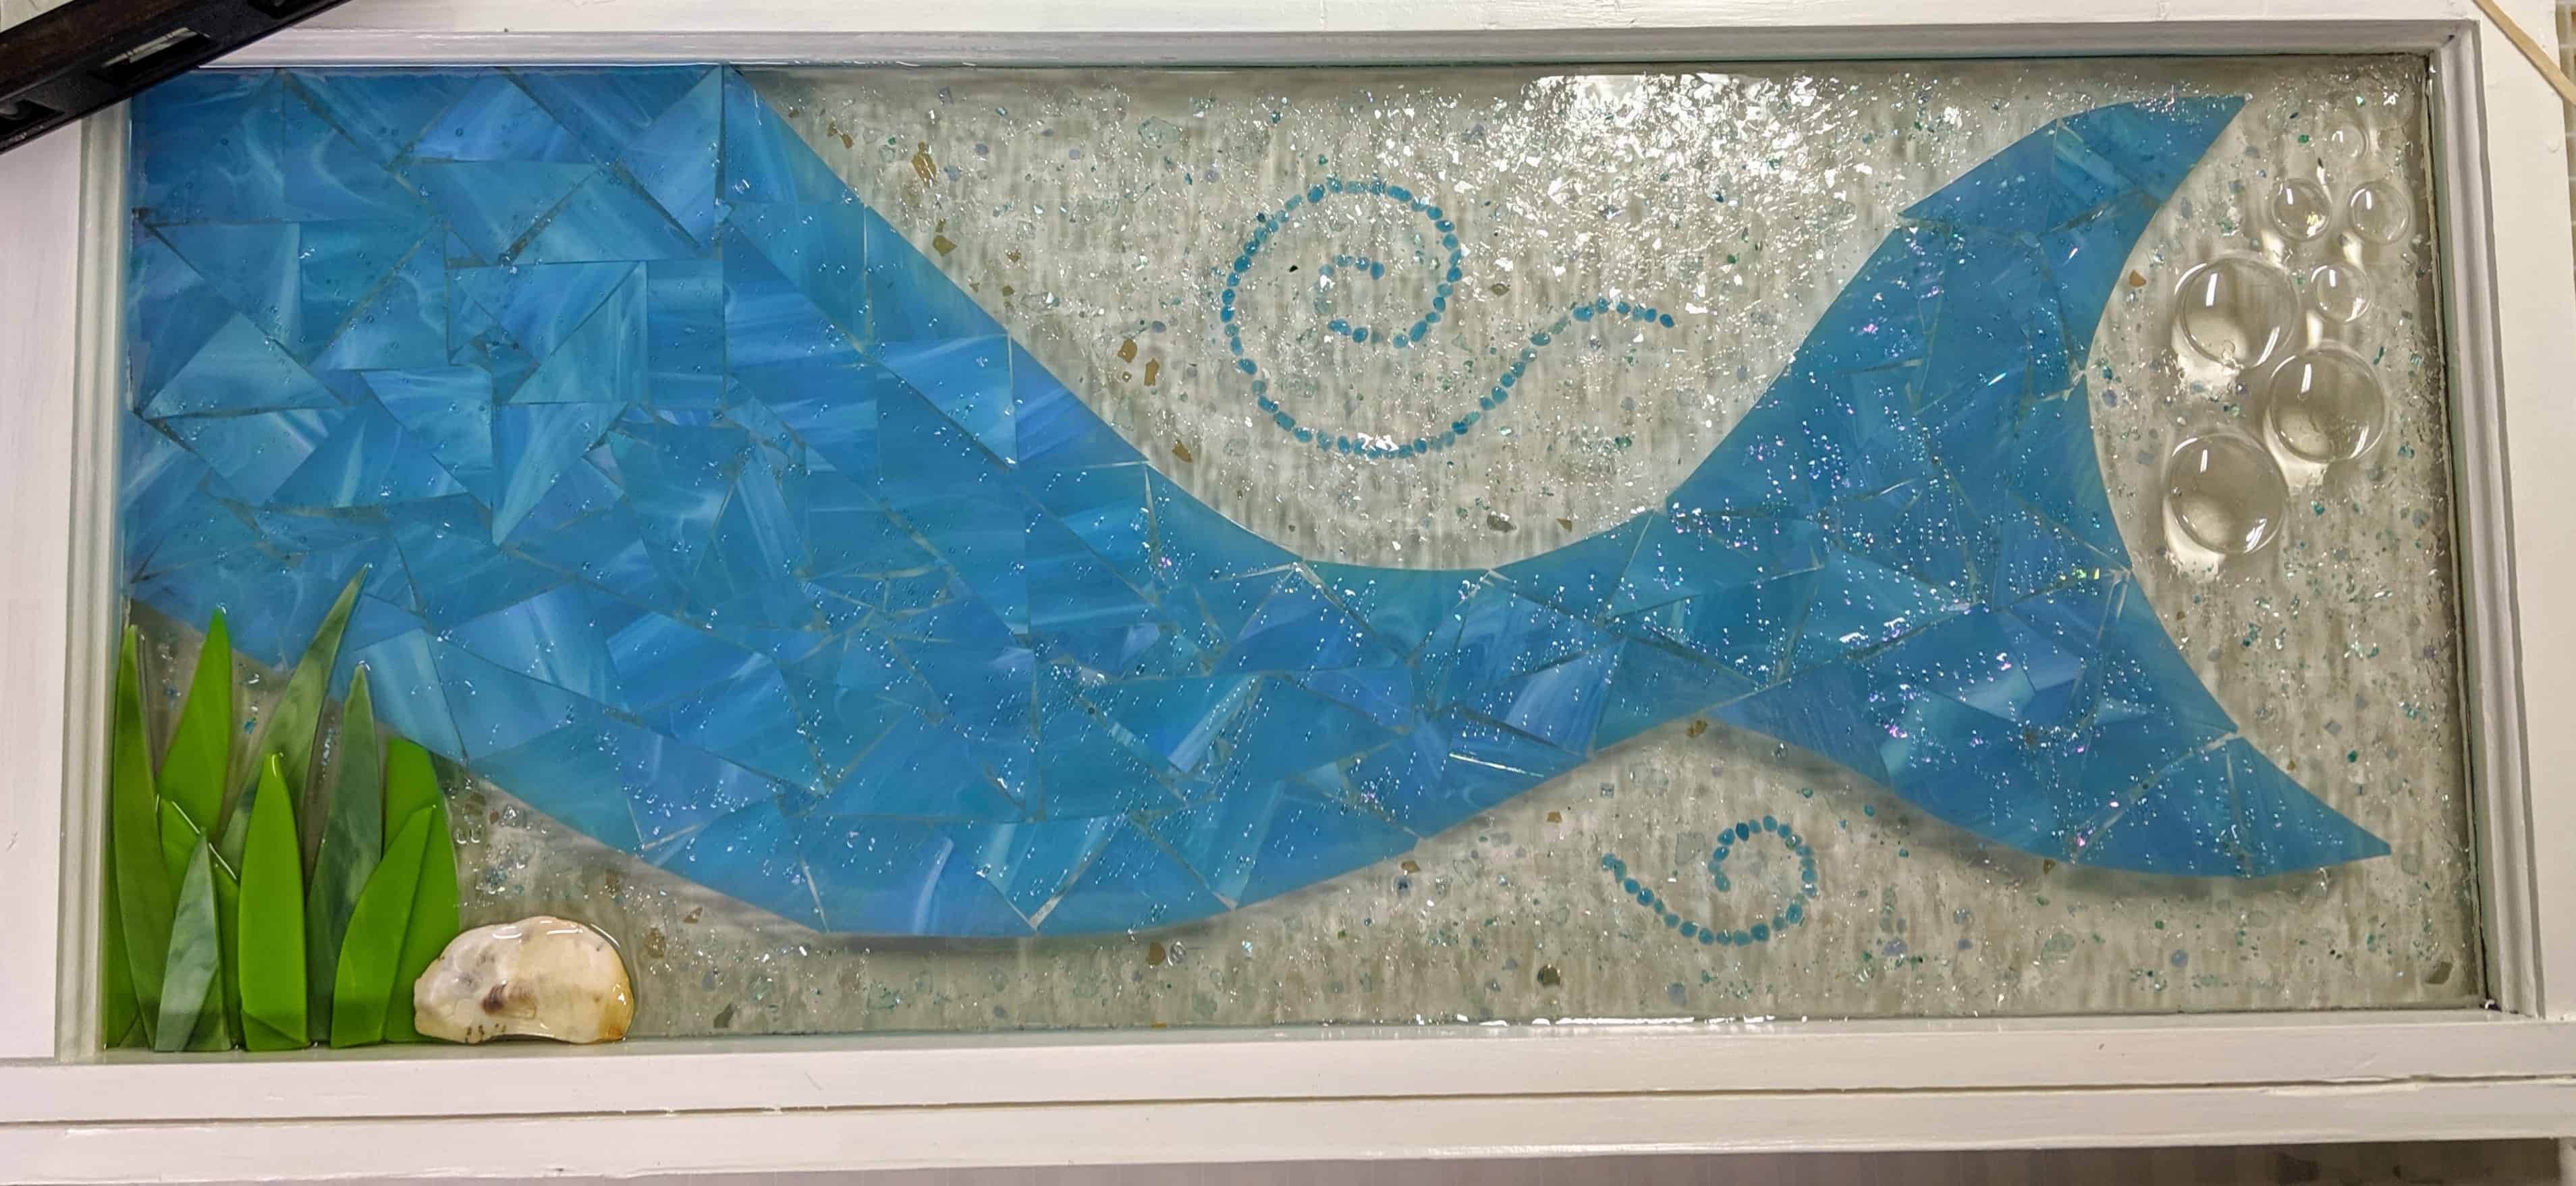
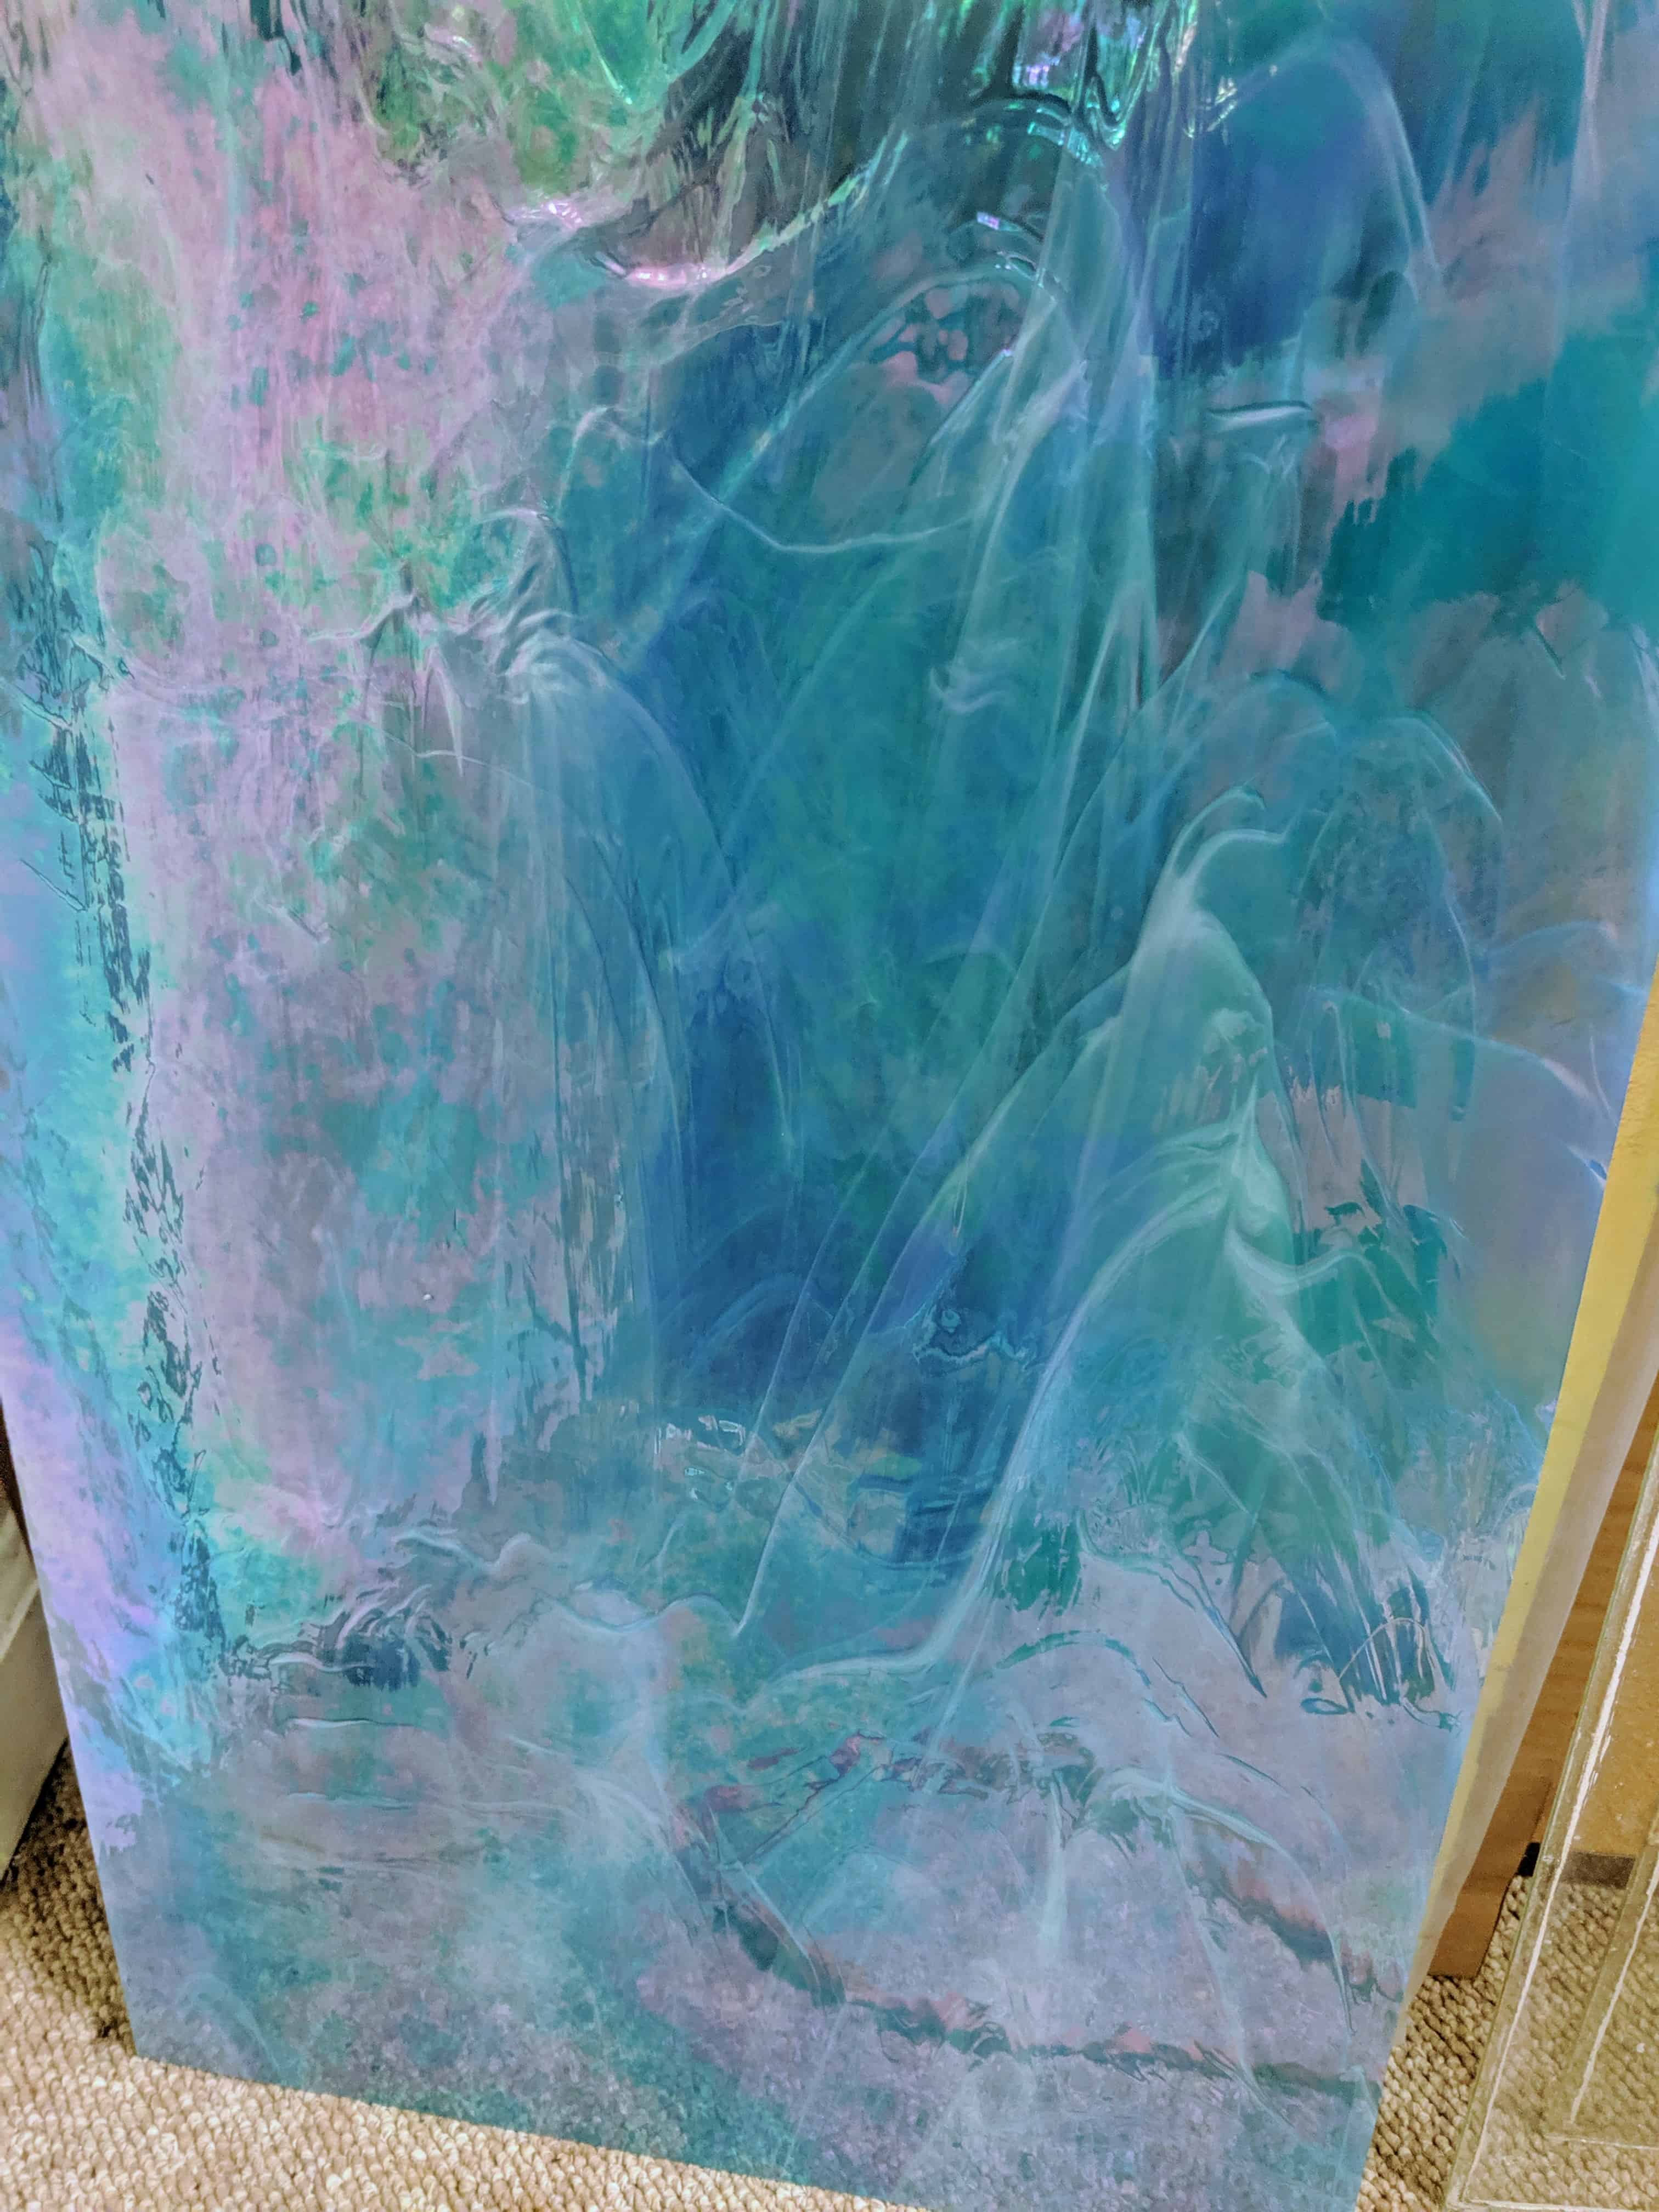
The mermaid mosaic cured enough overnight that I could bring her upstairs to snap a photo in better light. I’m pretty happy with how she turned out.

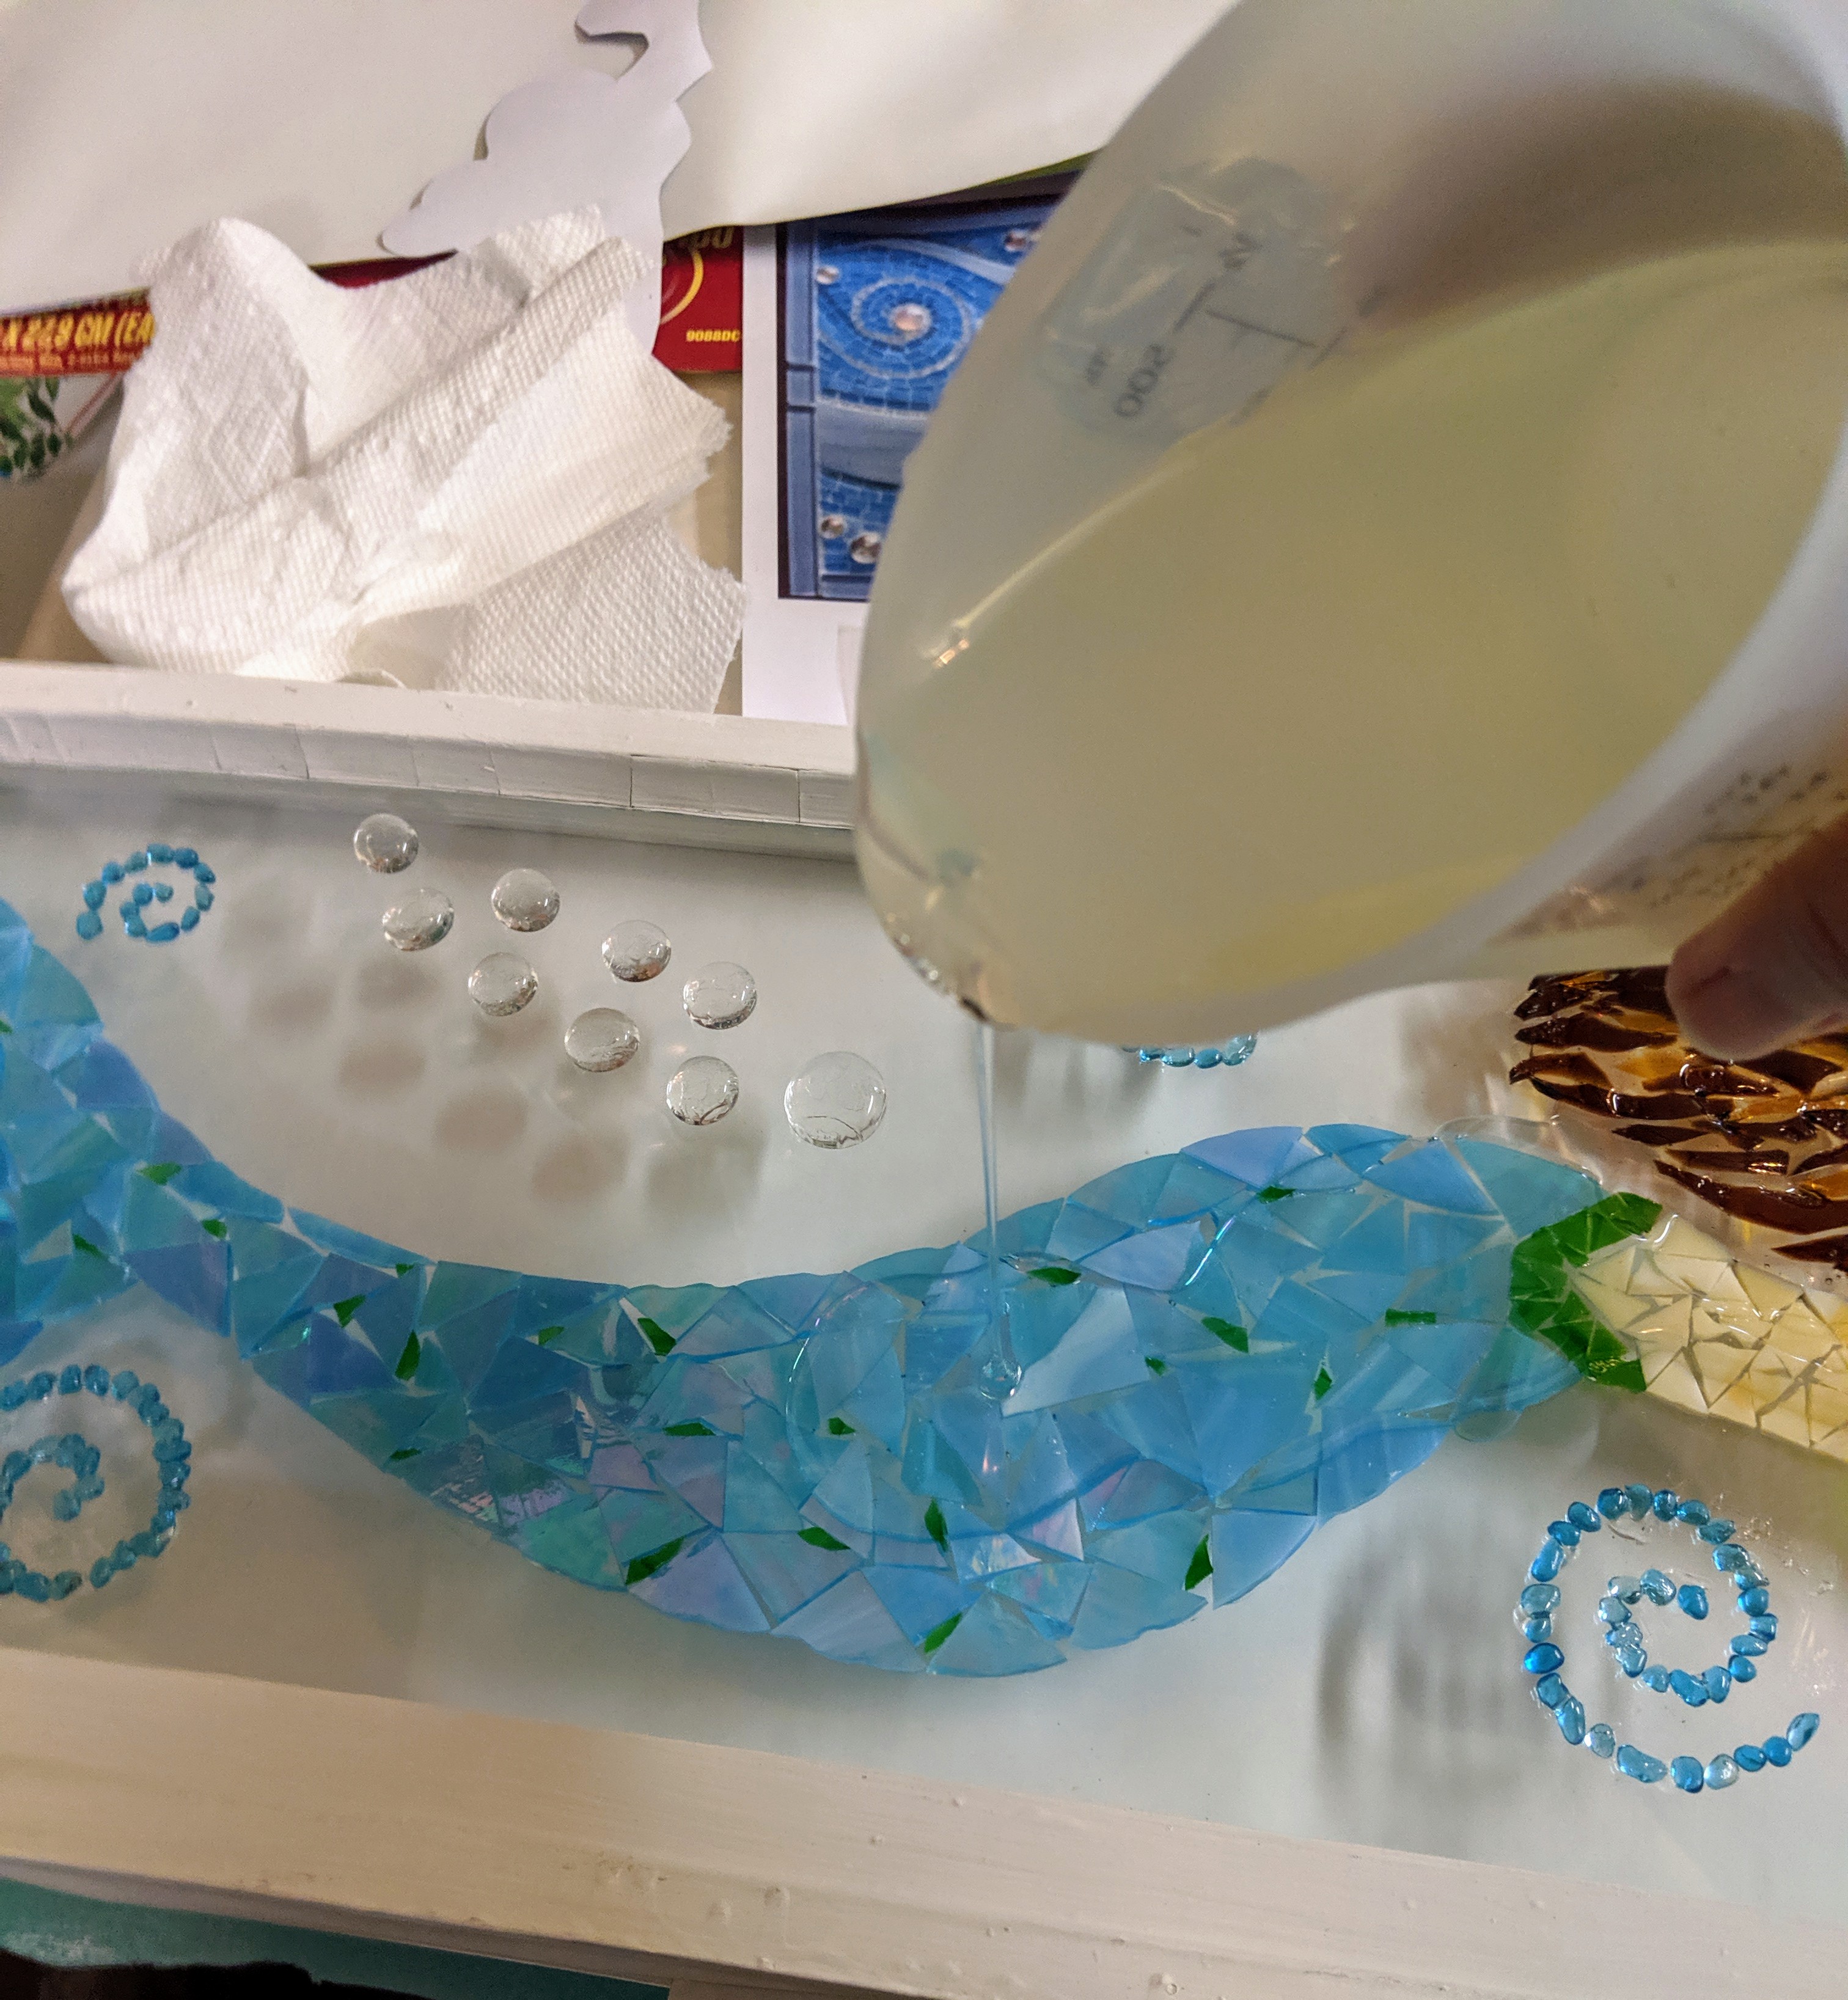
This morning I was able to pour the resin and decorate the background of the 9.5″ x 30″ mermaid window.
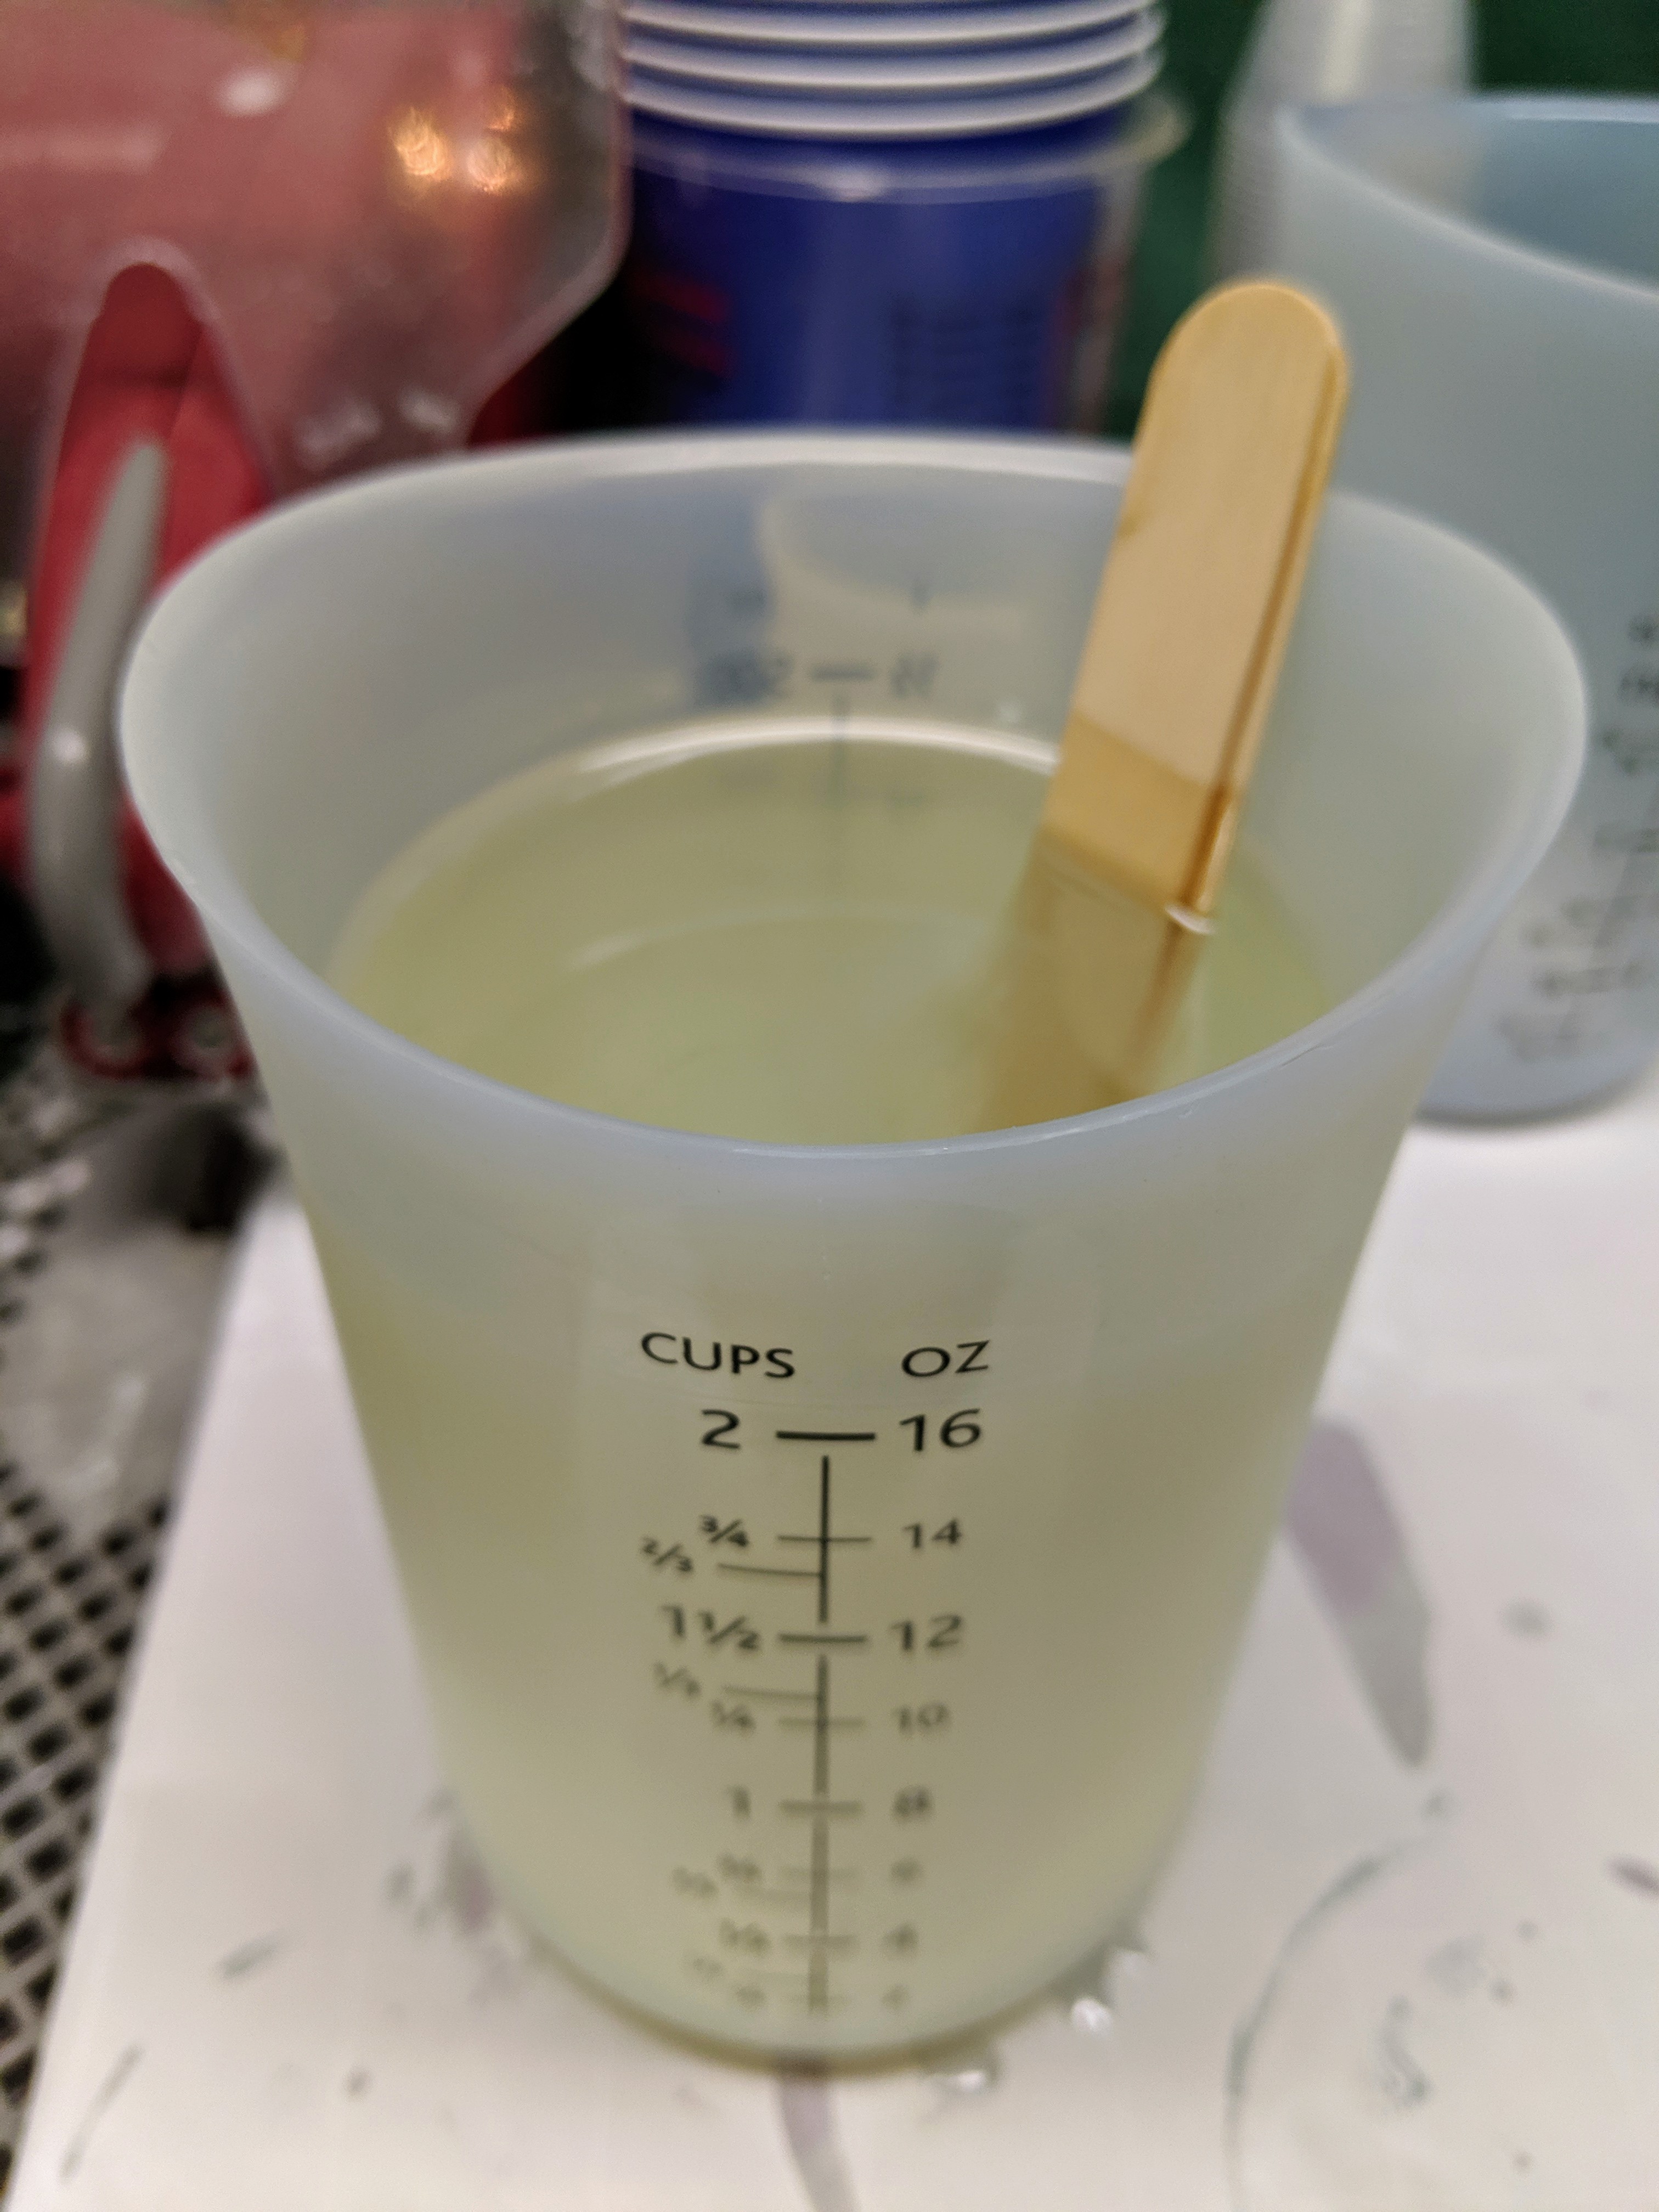
I mixed up 16 ounces of resin, which turned out to be a good amount. I had enough left over to start the first layer of one coaster, so there really wasn’t much in the way of waste. I love these silicone measuring cups because they are reusable and there is plenty of room to stir even when you fill it to 16 ounces.
When the resin is well mixed, I started pouring it gently over the mosaic.
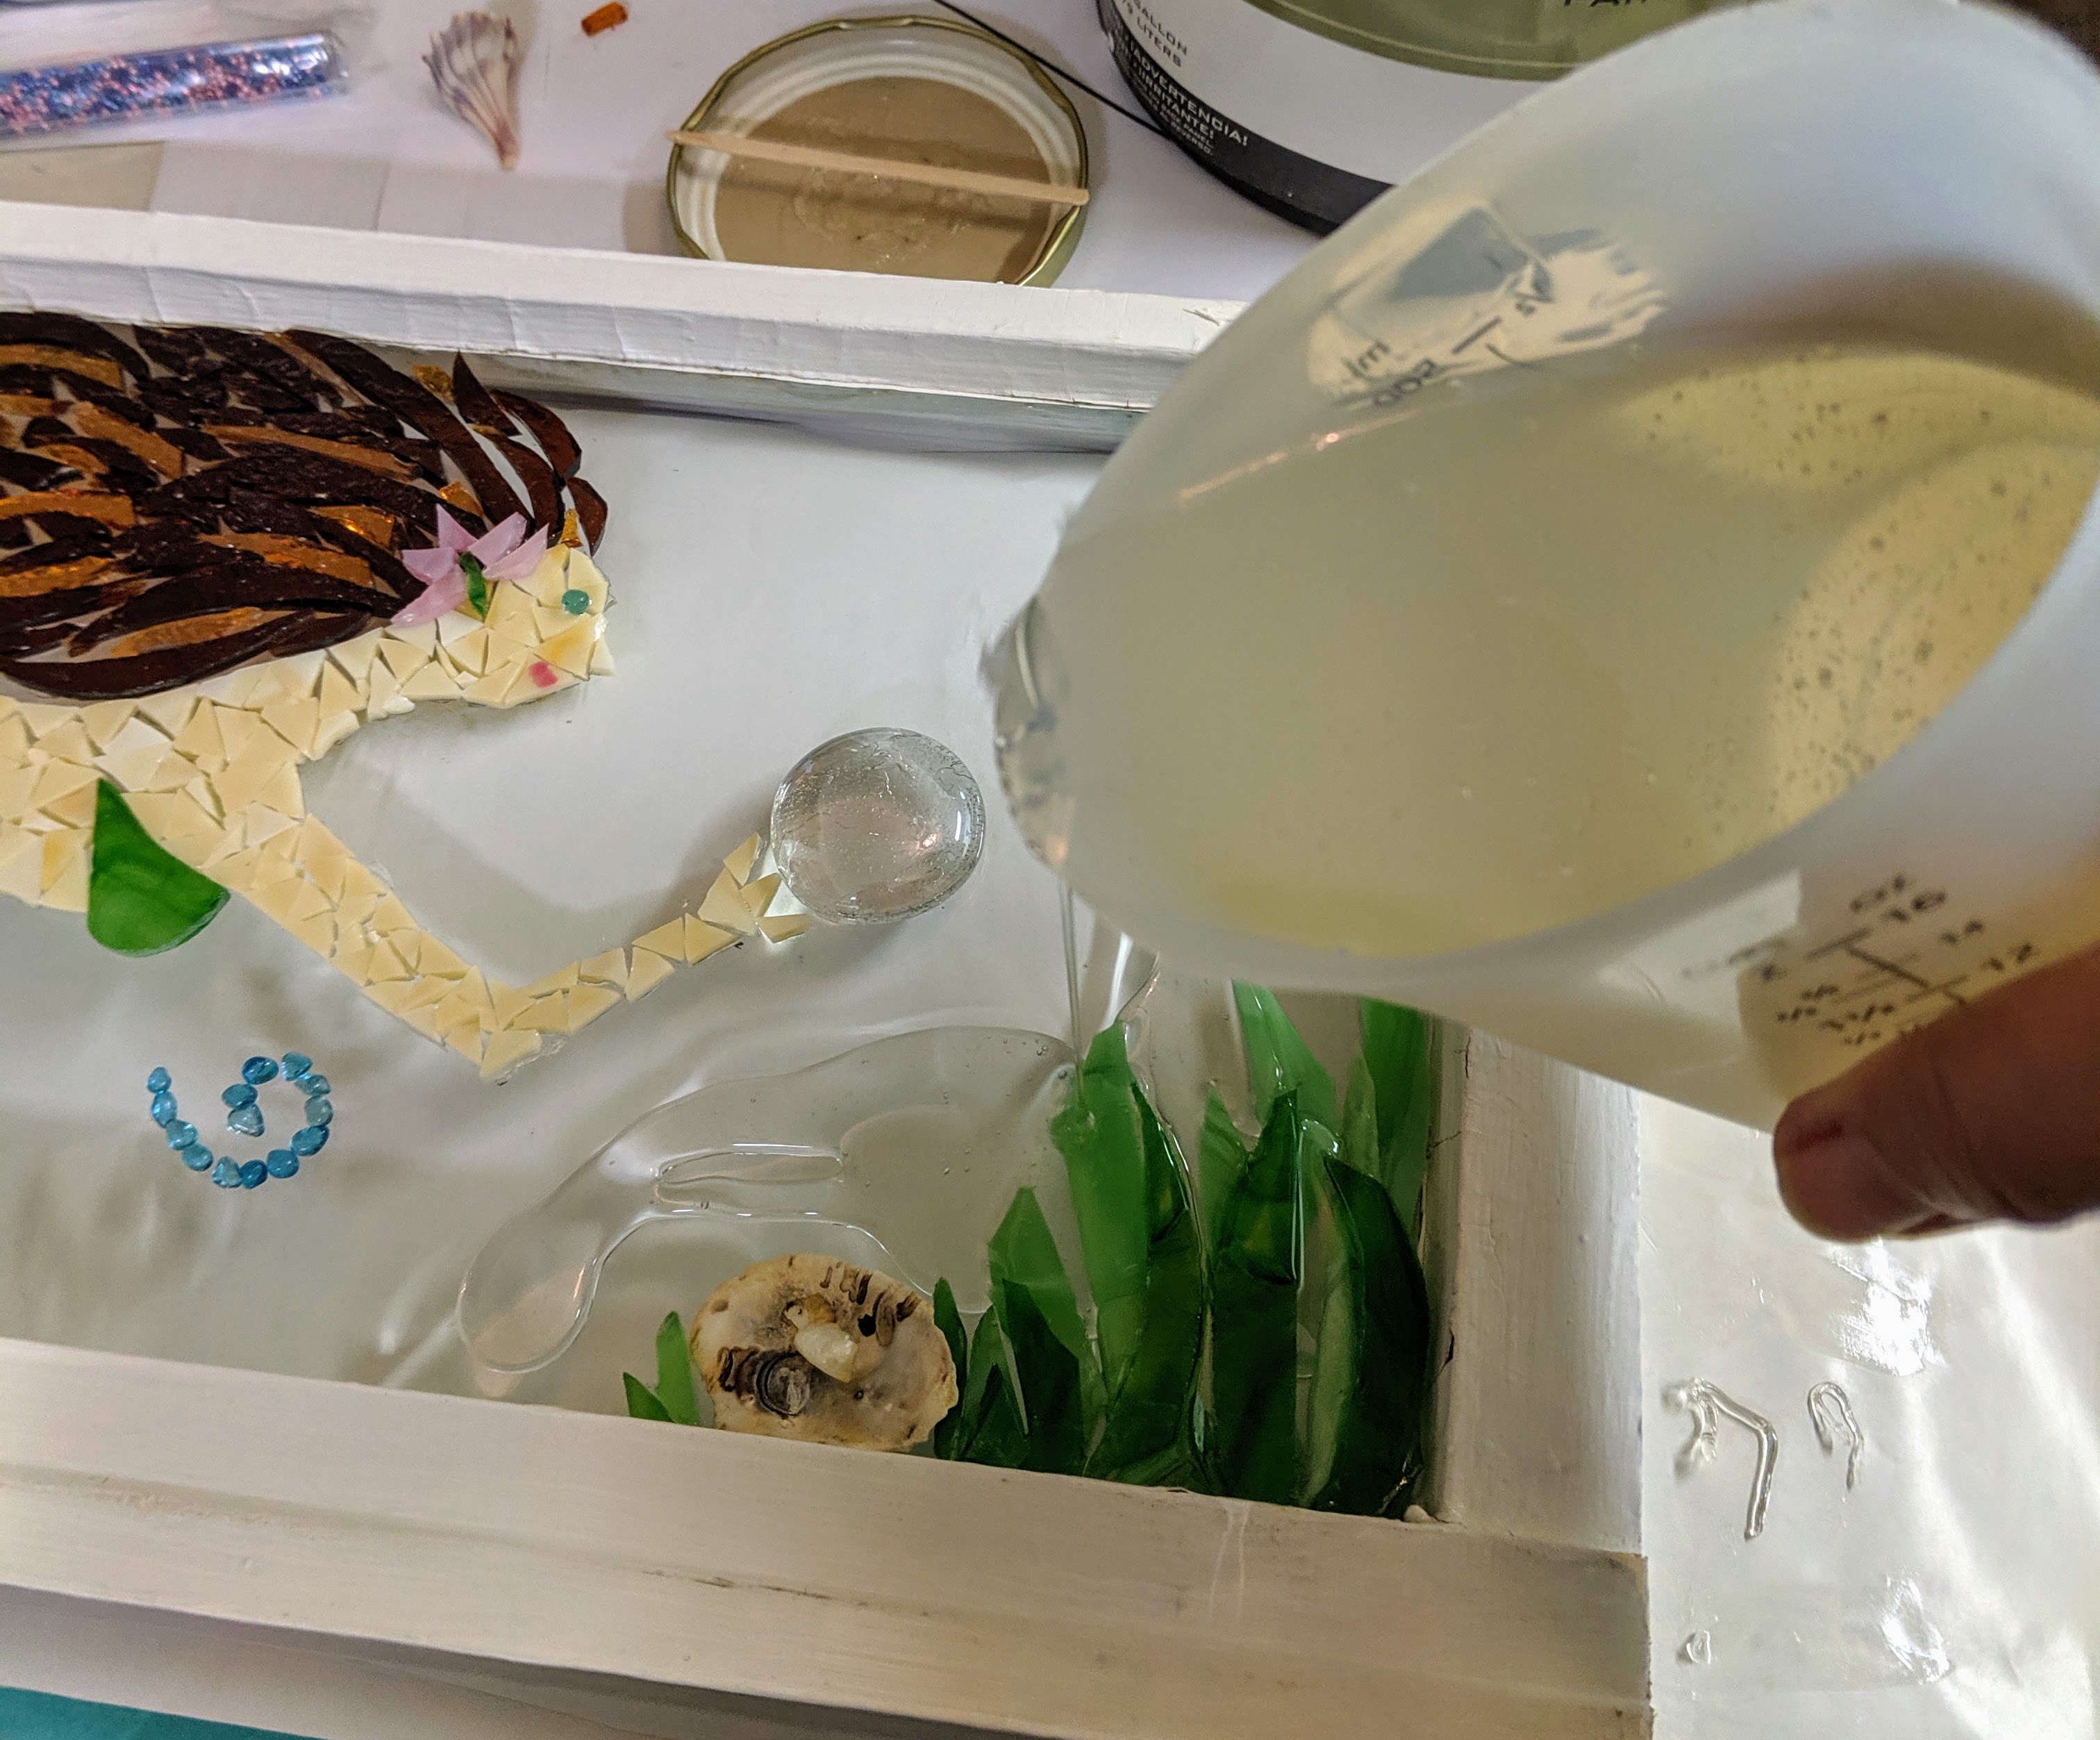
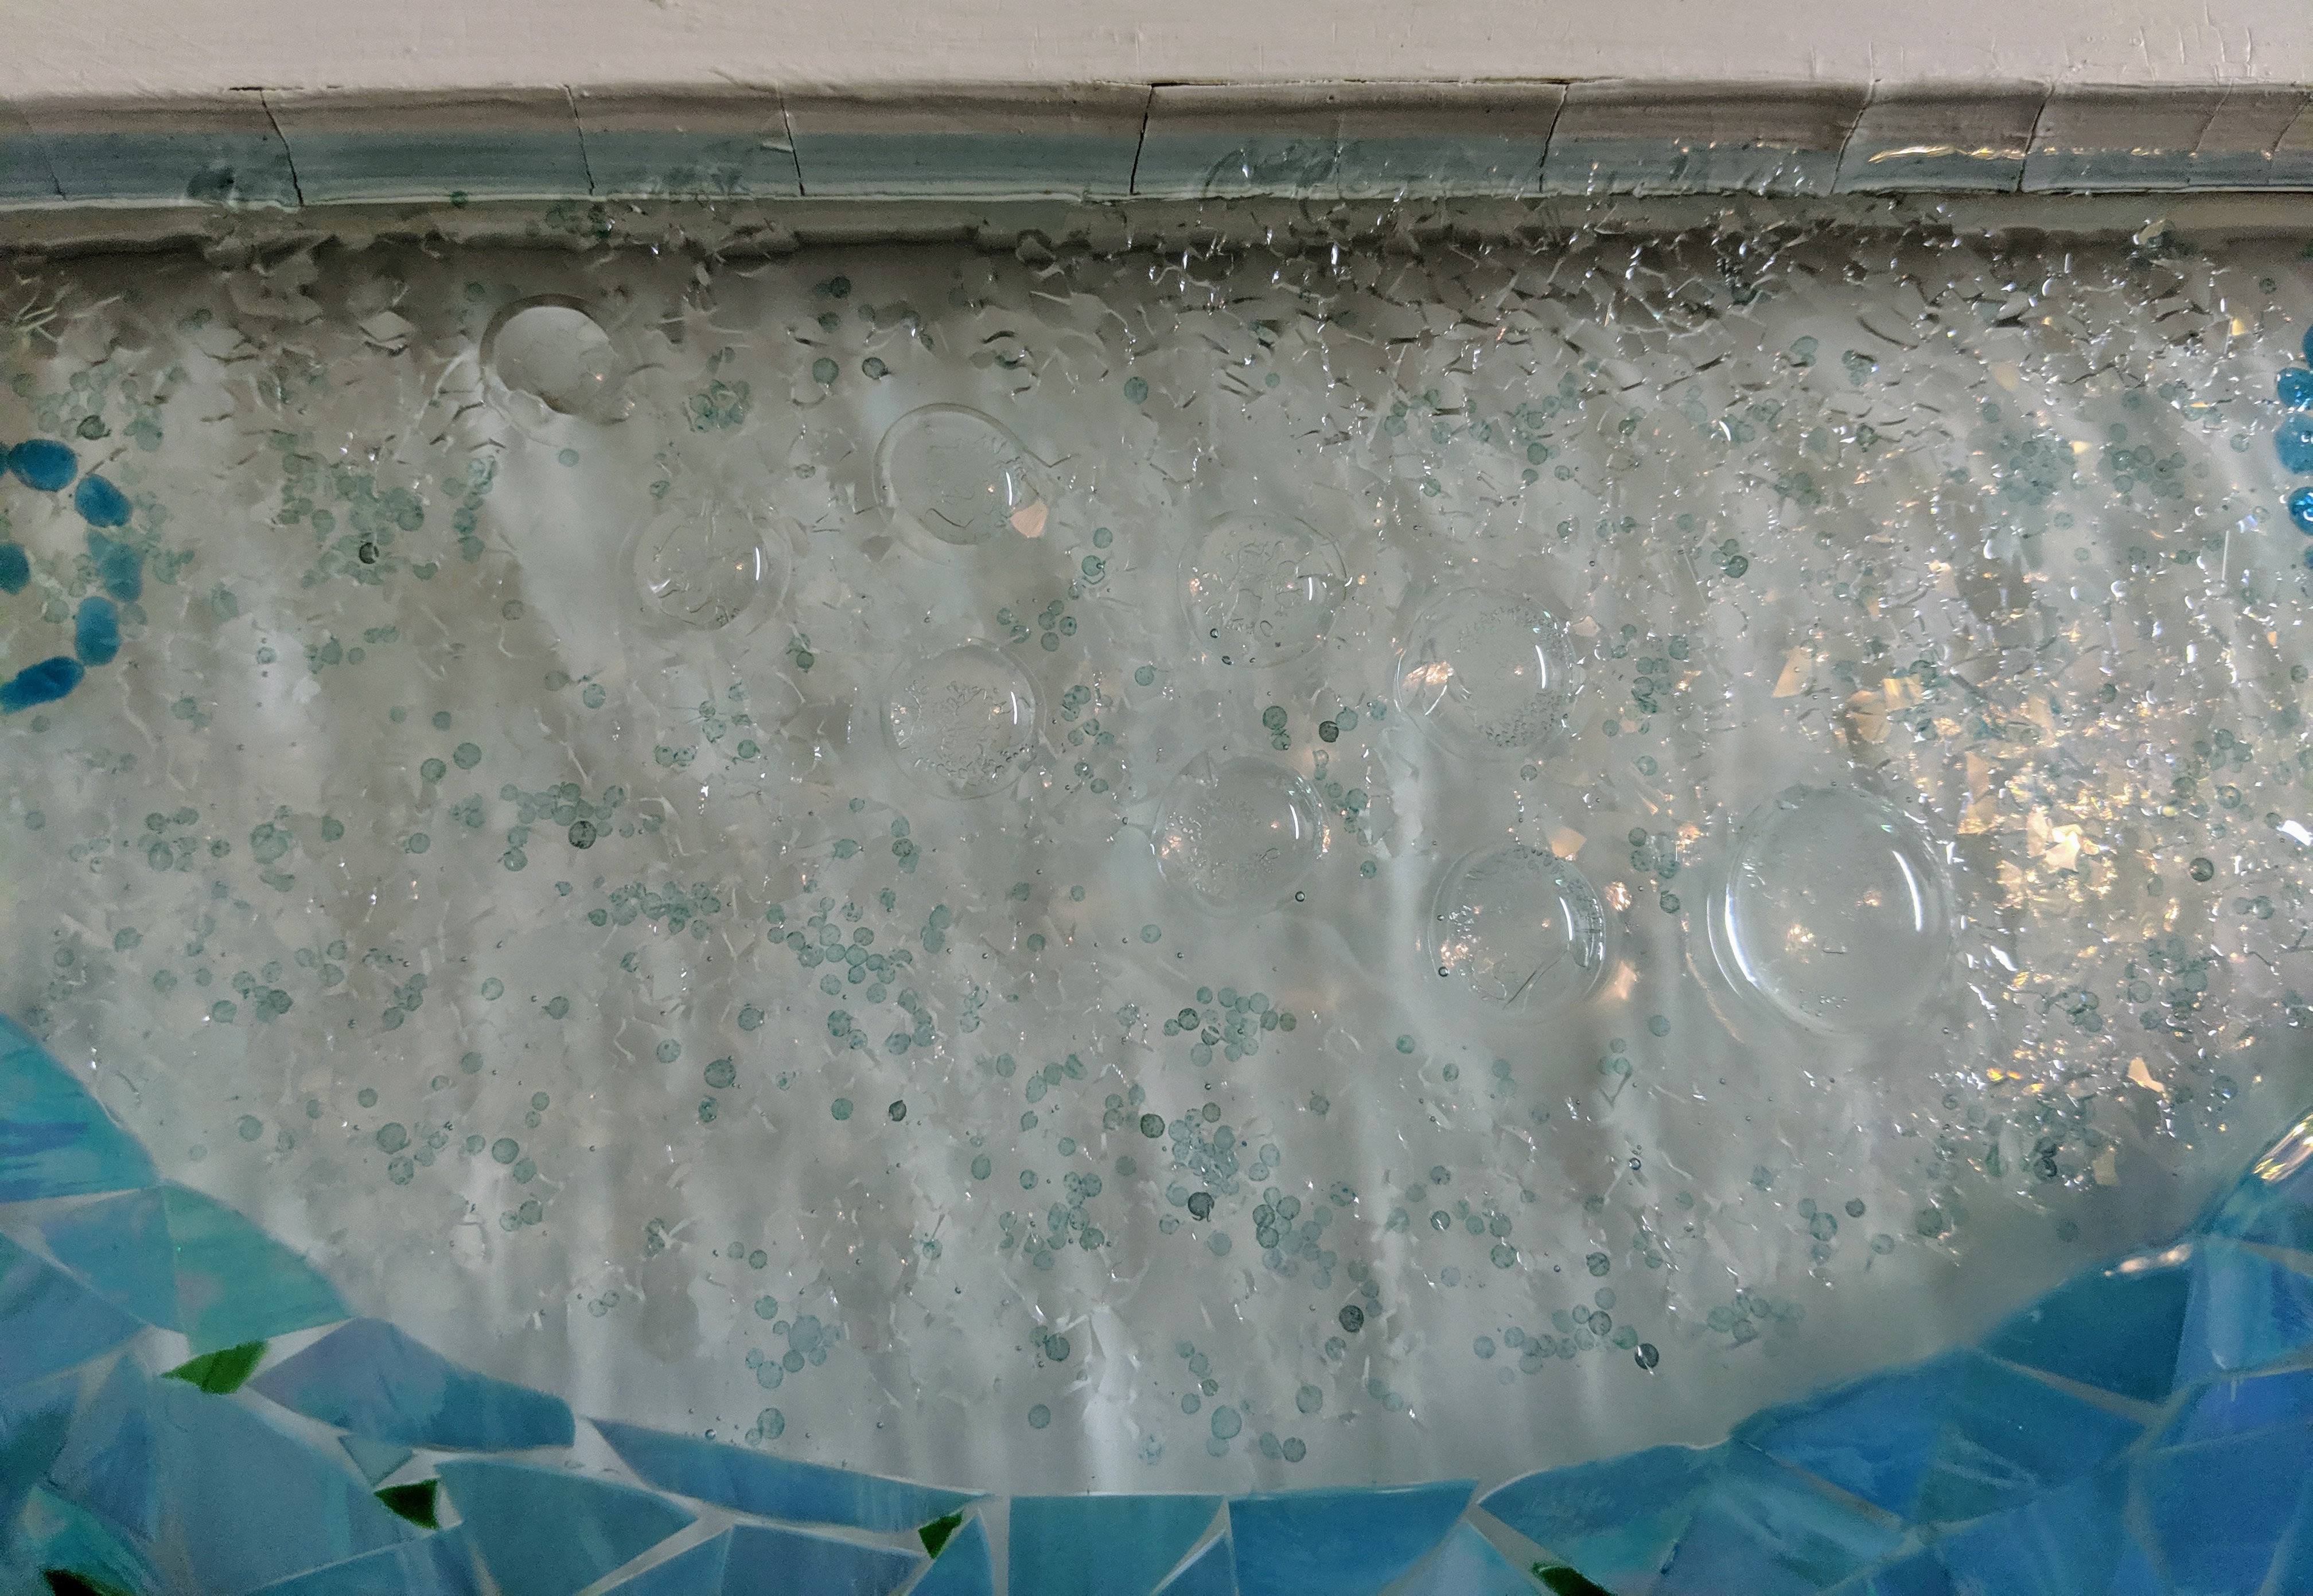
Once I feel like I have everything covered pretty well, it’s time to use the heat gun to remove the bubbles that form in the resin. I have been thinking about getting a craft blow torch for this because the heat gun is hard to control and can move the resin more than I would like.
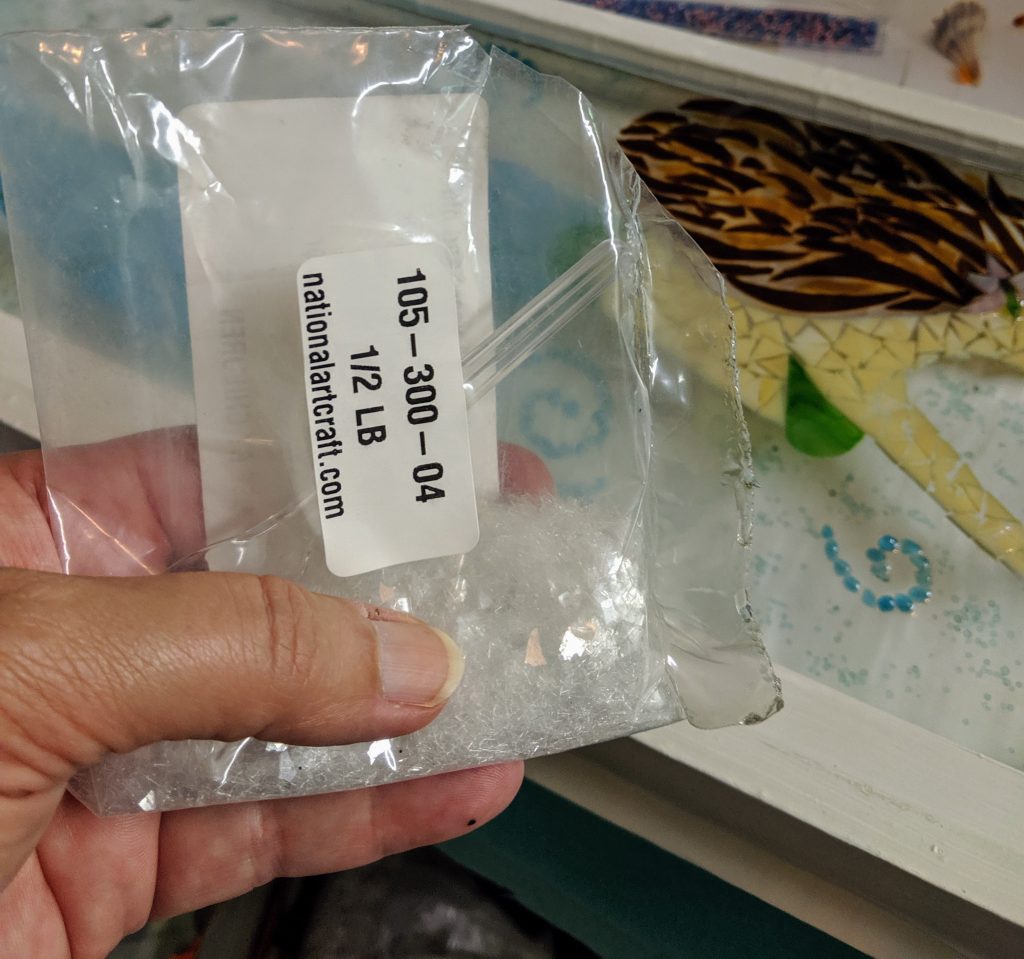
Now it’s time to add the decoration to the background. For this piece, I used some tiny blue filler (which I can’t get anymore because it was discontinued, but that’s another story). After the blue filler, I added clear glass flakes to add sparkle. My sister sent me some beads and I was thinking about using some of them, but I chickened out at the last minute because I haven’t tried them yet and I’m not sure how they will look in the resin. I’ll probably try them in a coaster first, rather than a larger piece like this.
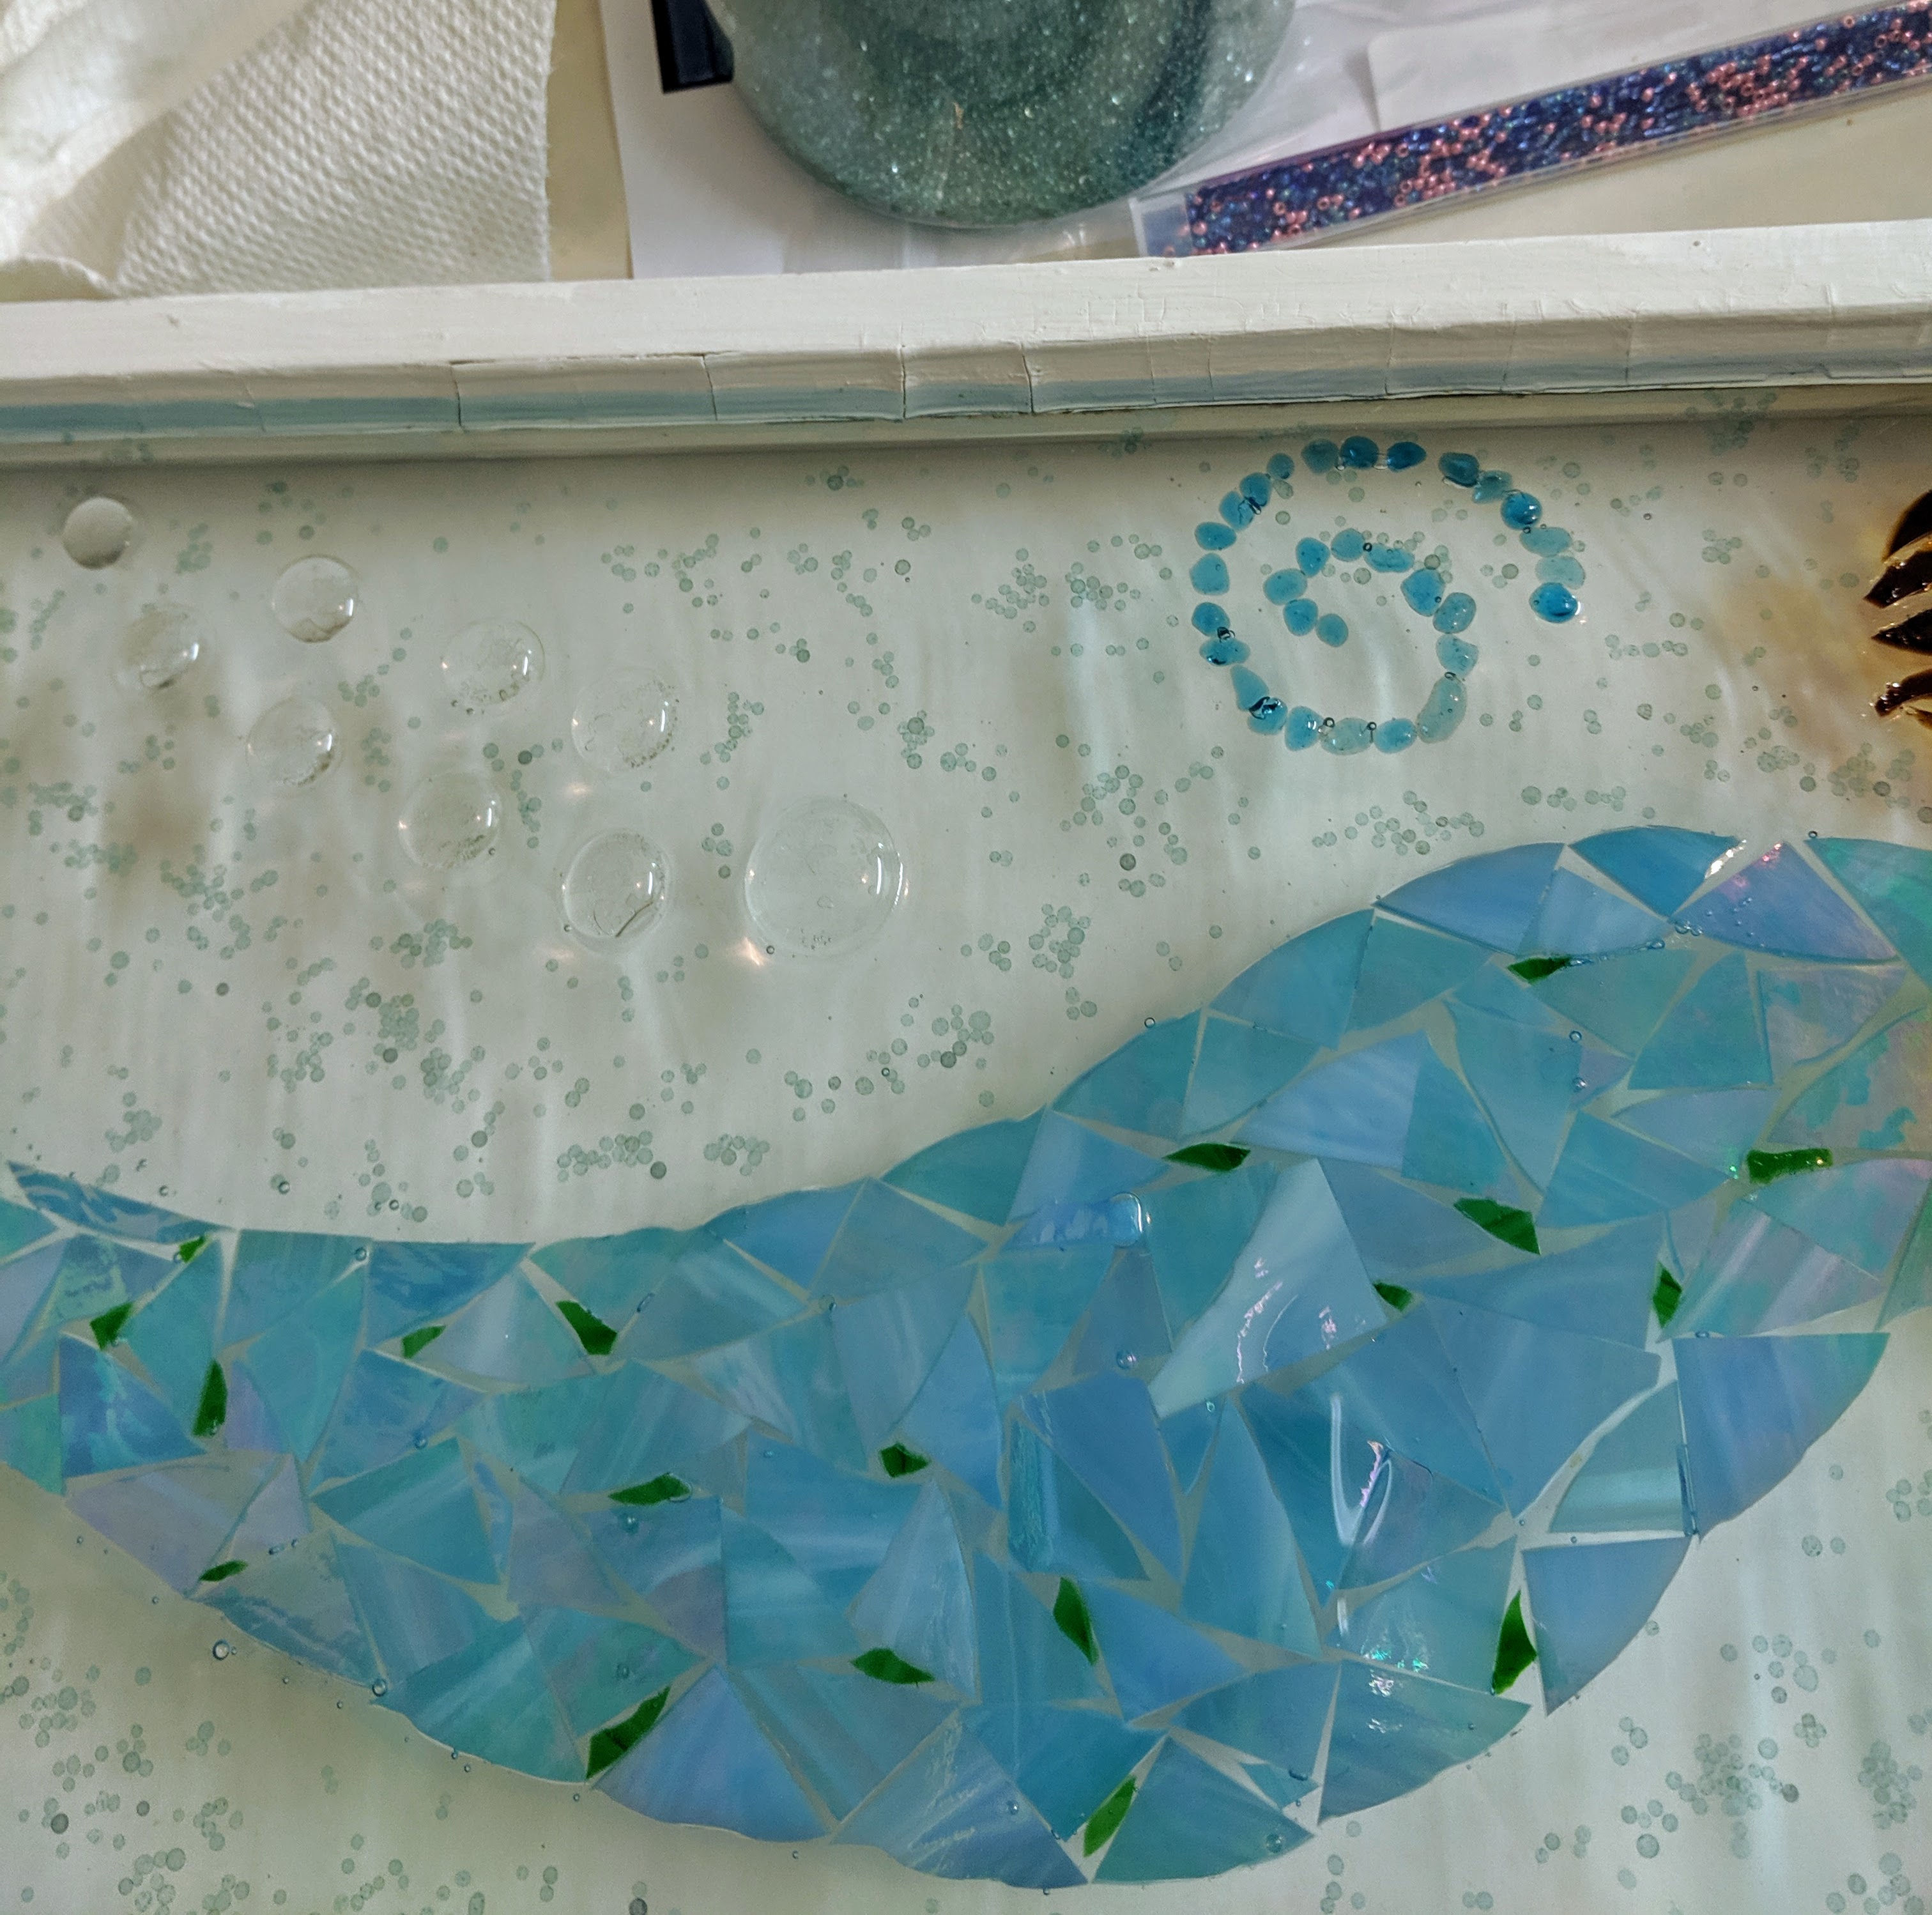
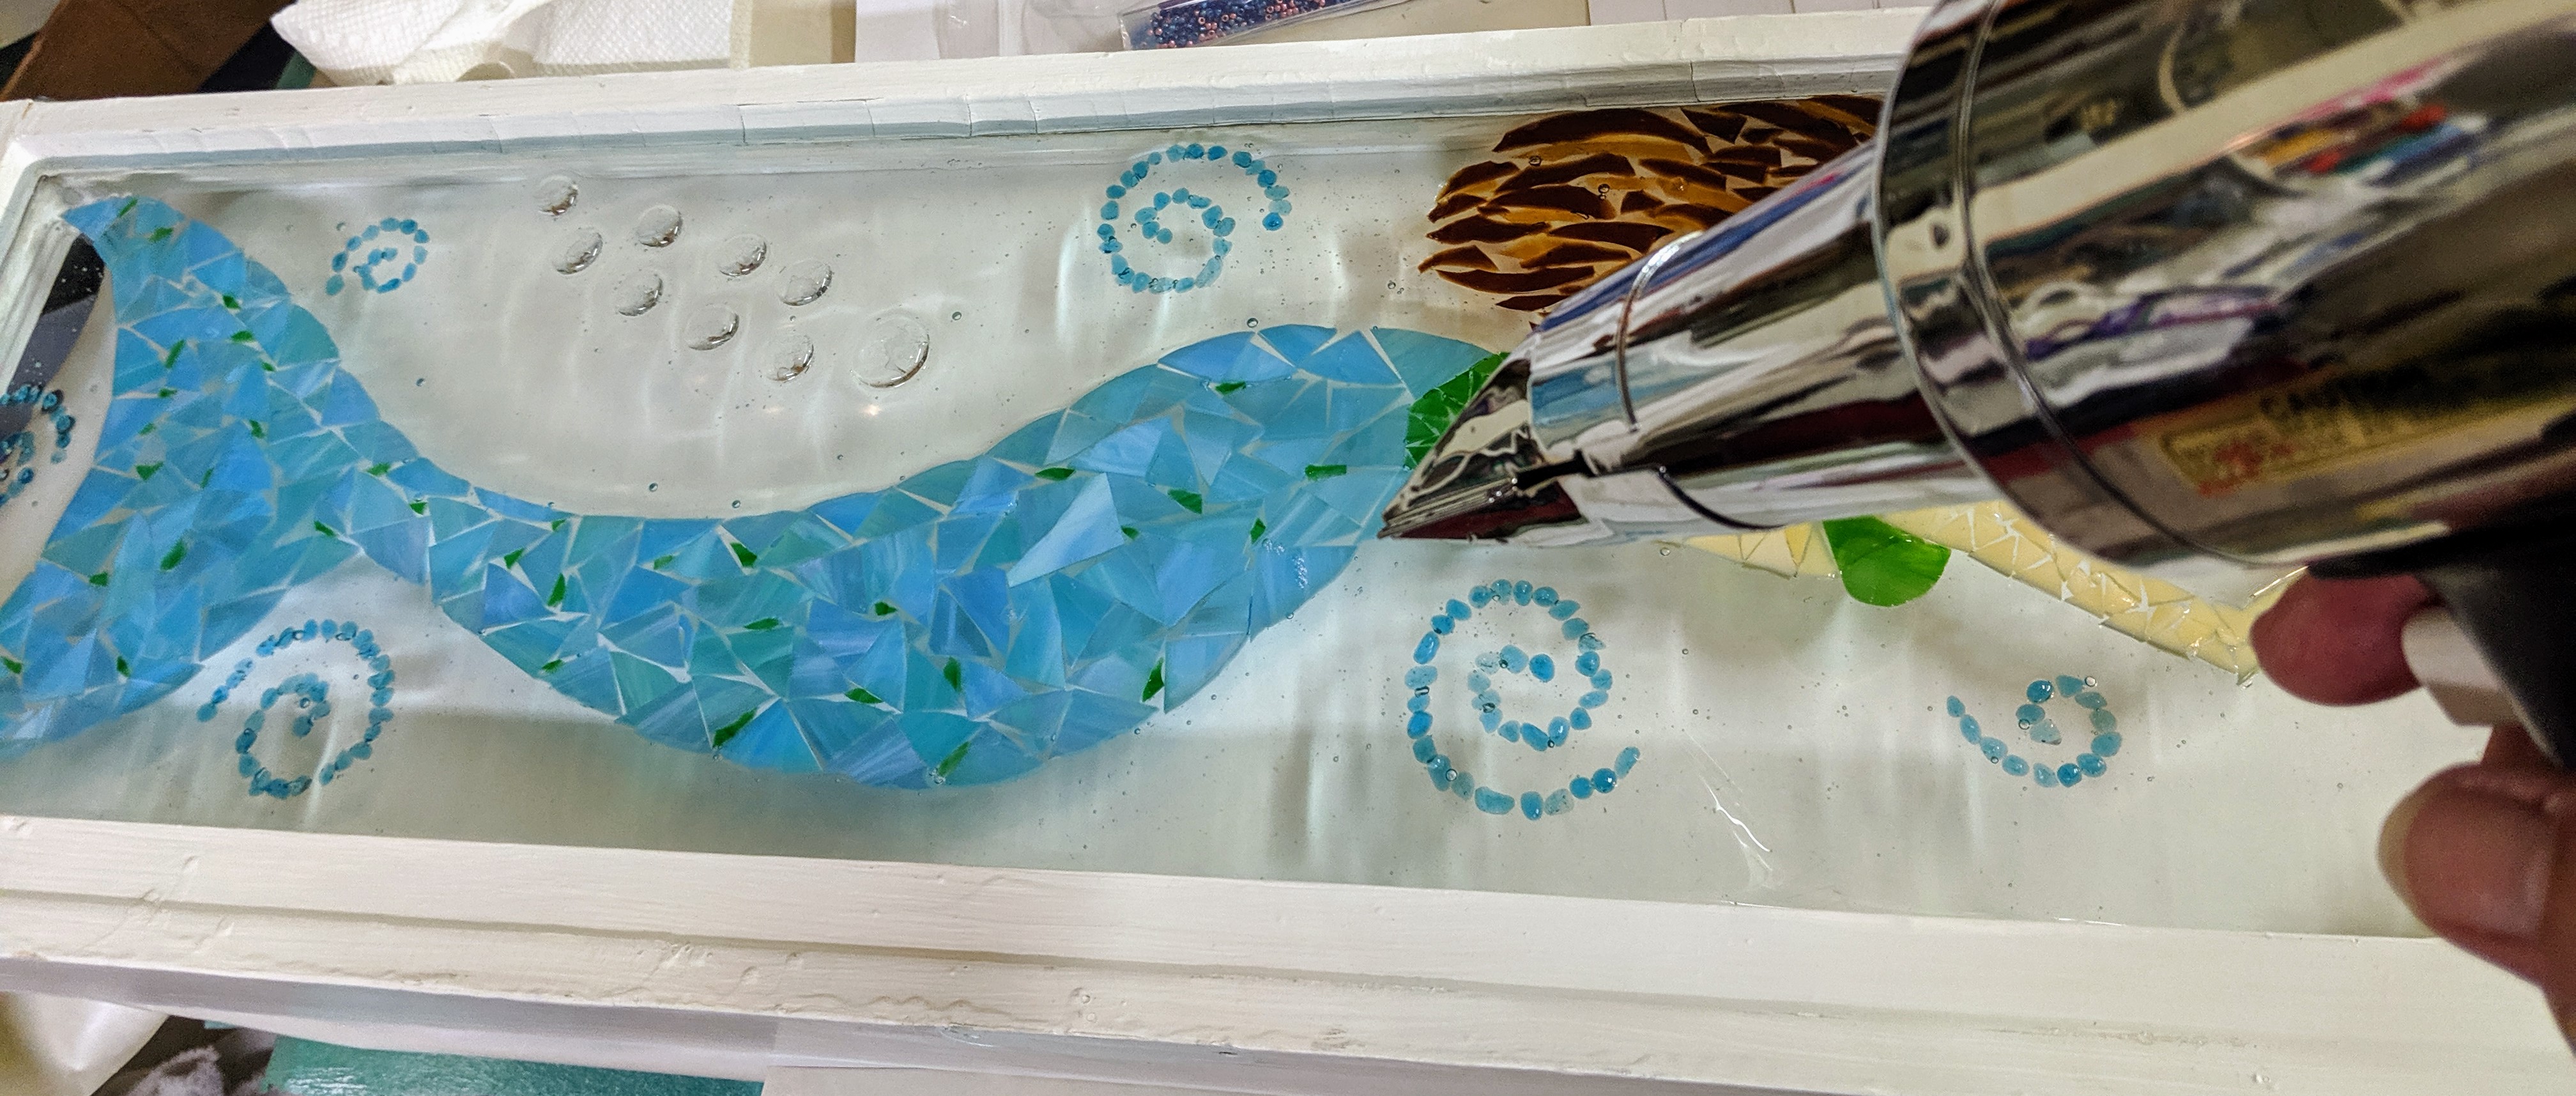
After that, I just keep an eye on the whole piece while the resin and the decorations settle down. I added a bit more of the decoration materials and touched up some spots that seemed to need a little more resin after shifting. It’s also important to check on the piece over the first hour of curing time to ensure you can remove any bubbles that form – sometimes they can be large and will detract from the look I am trying to achieve. They can be removed with the heat gun or sometimes a craft stick. Below are some up close detail photos of the window.