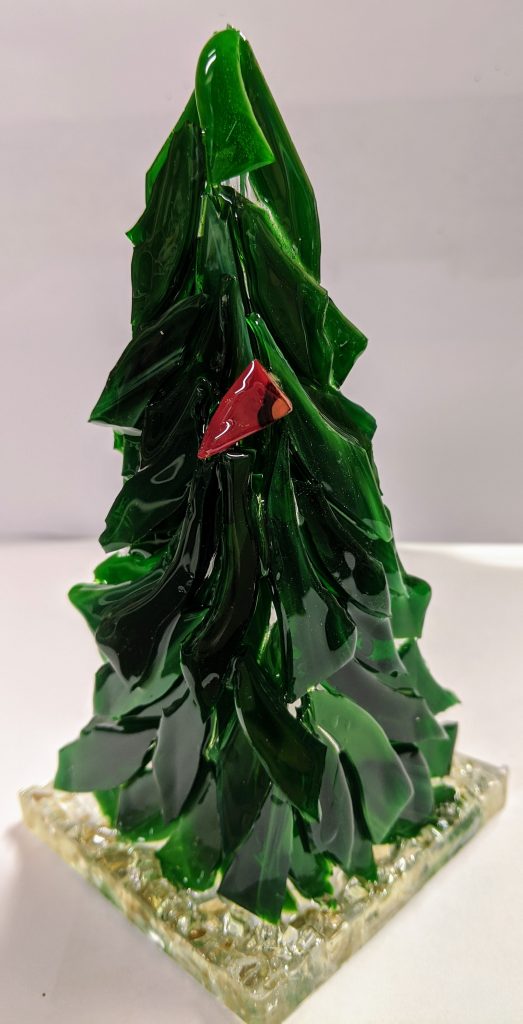
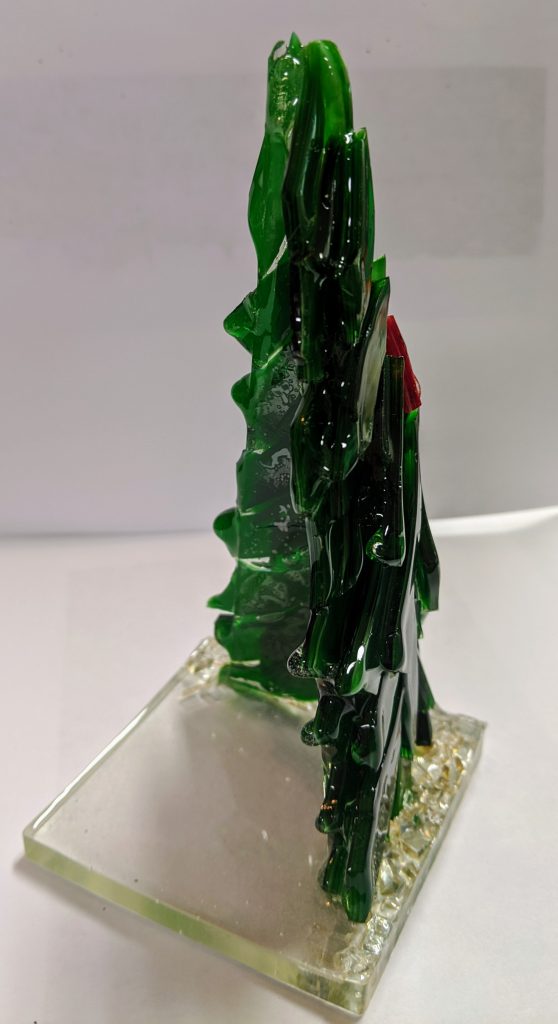
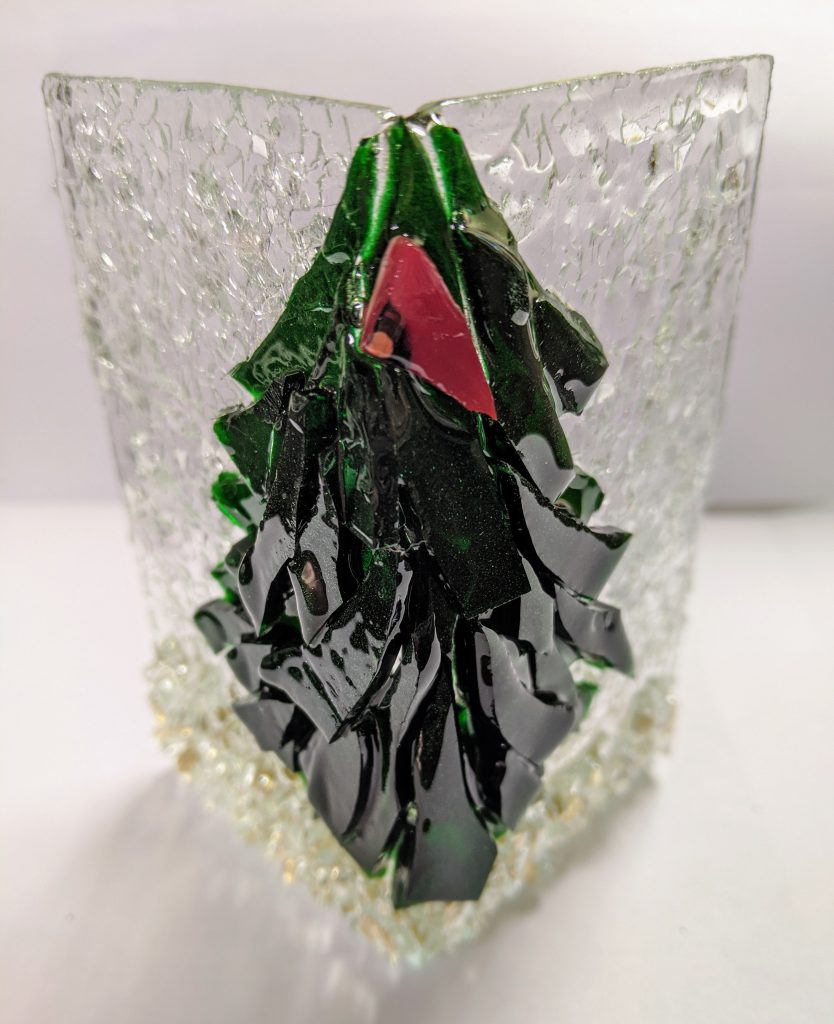
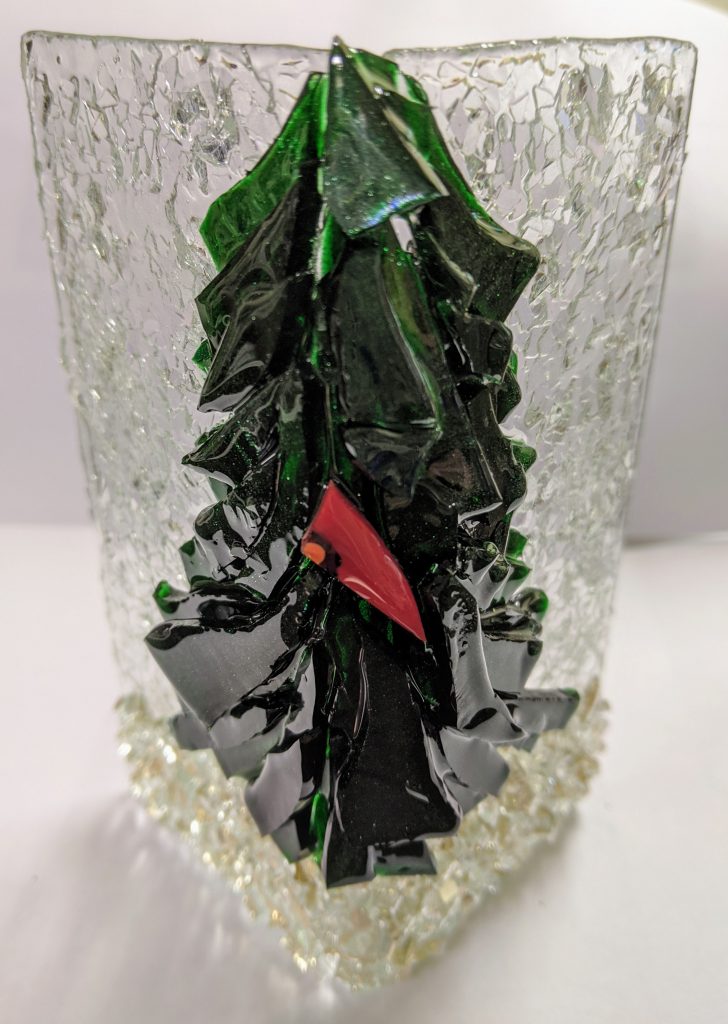
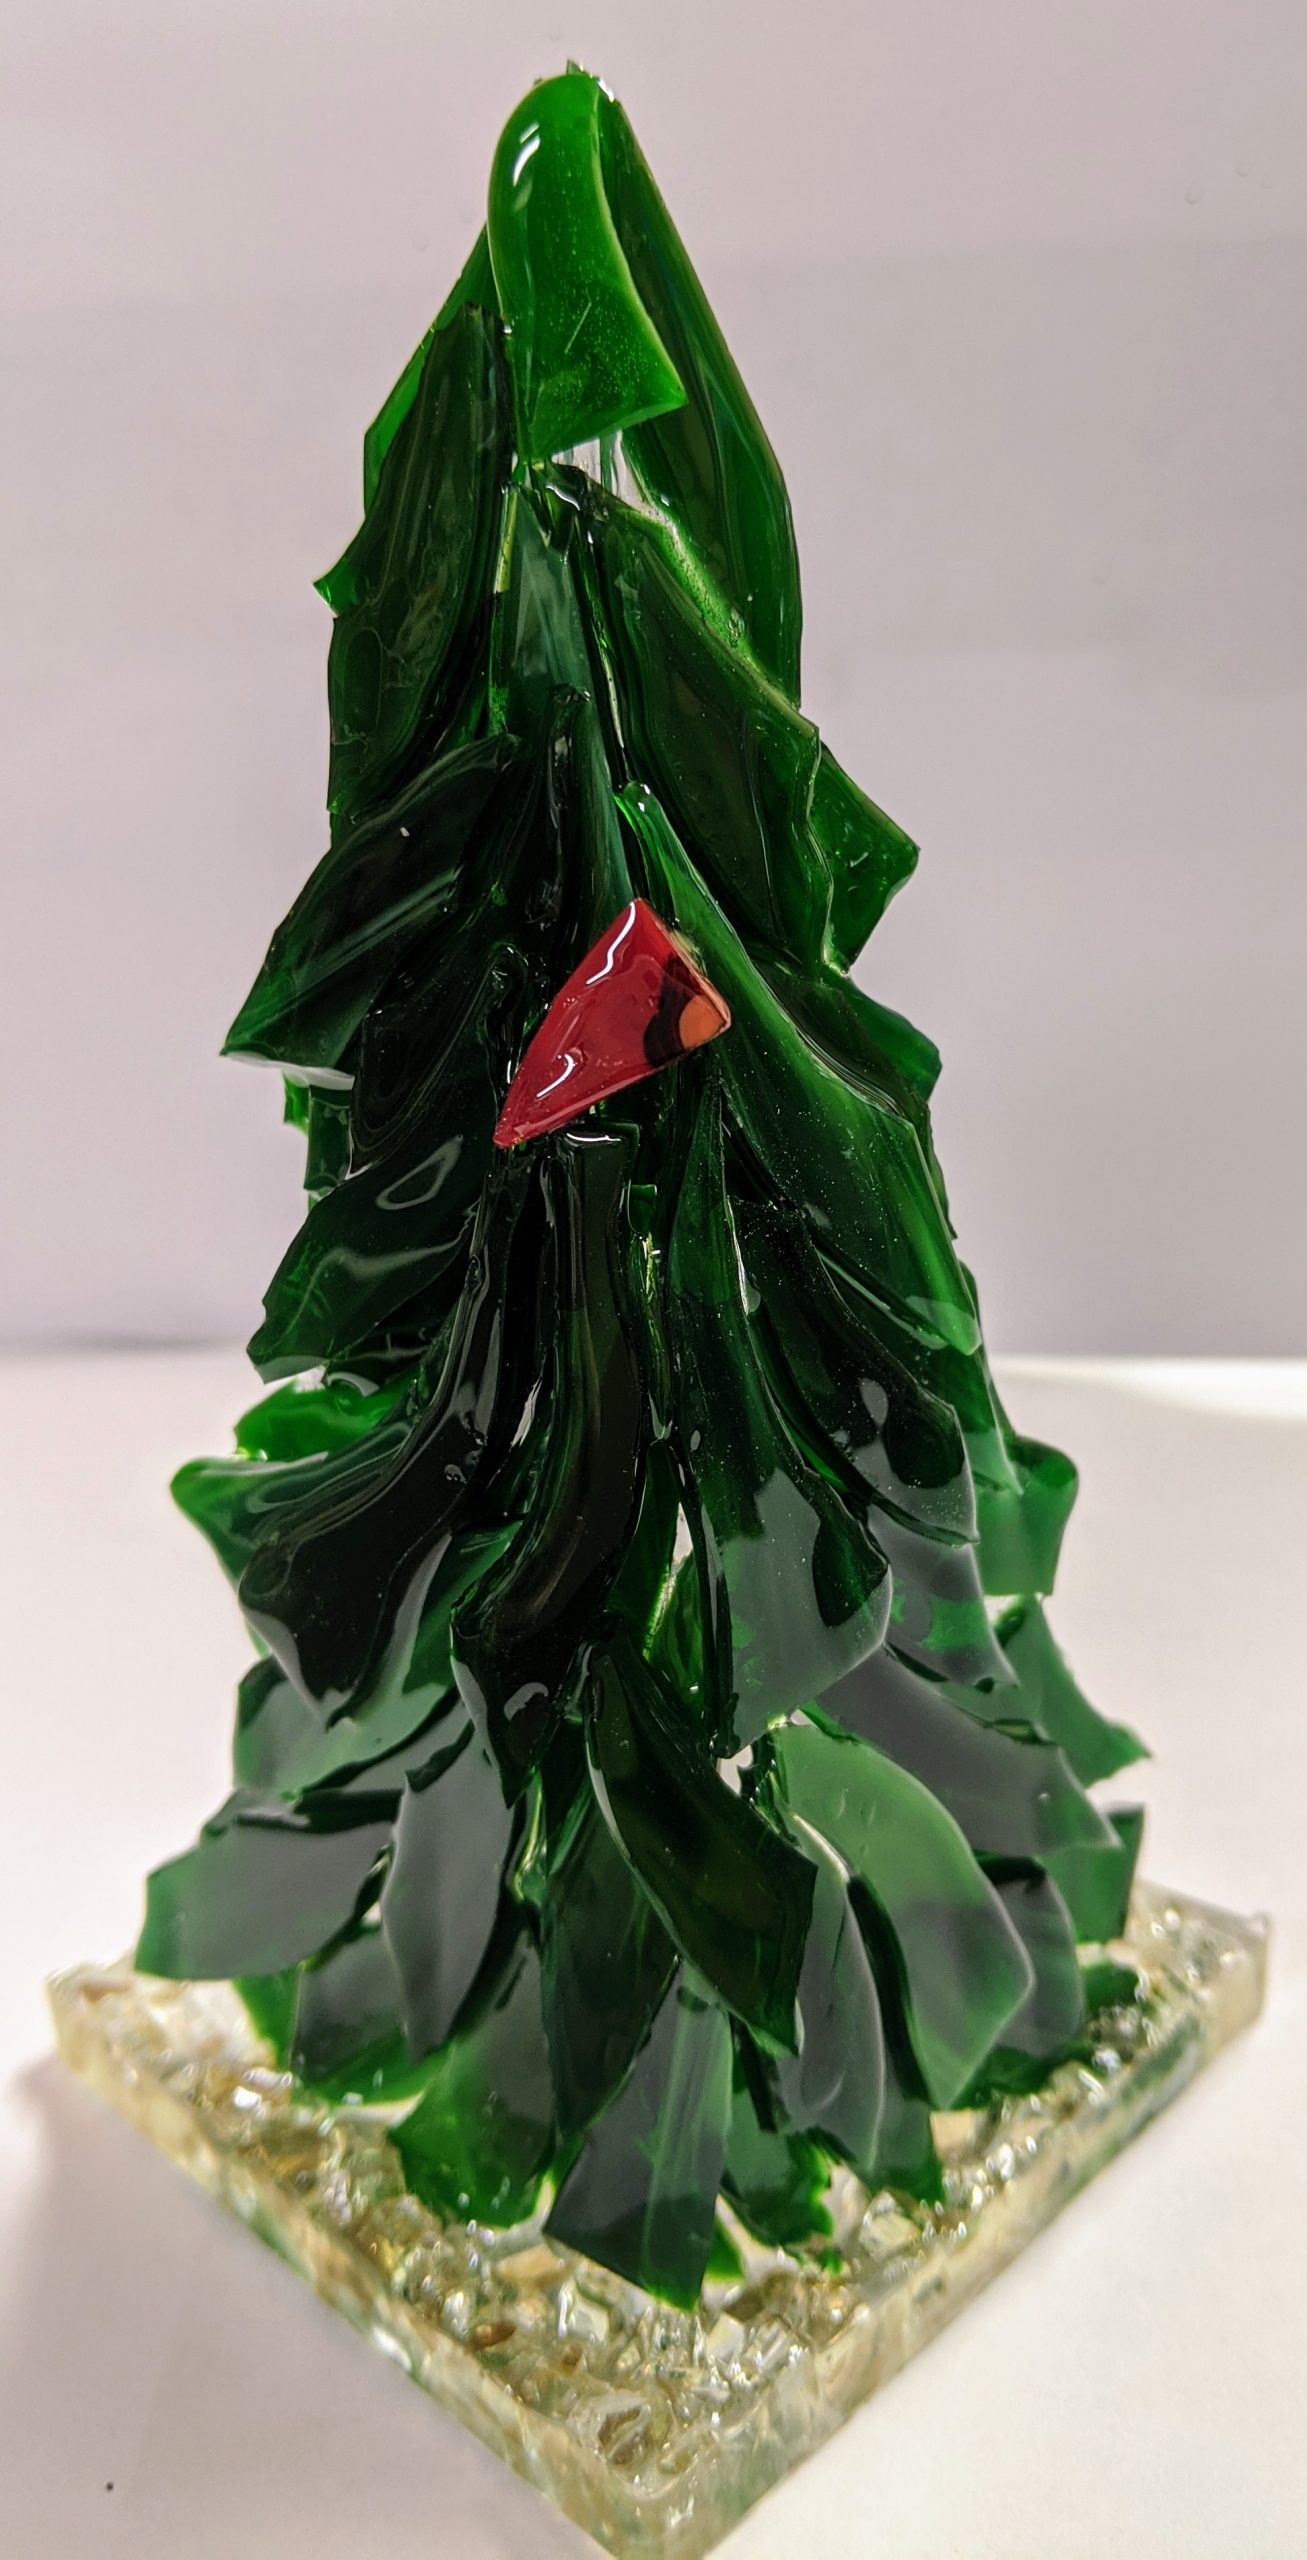
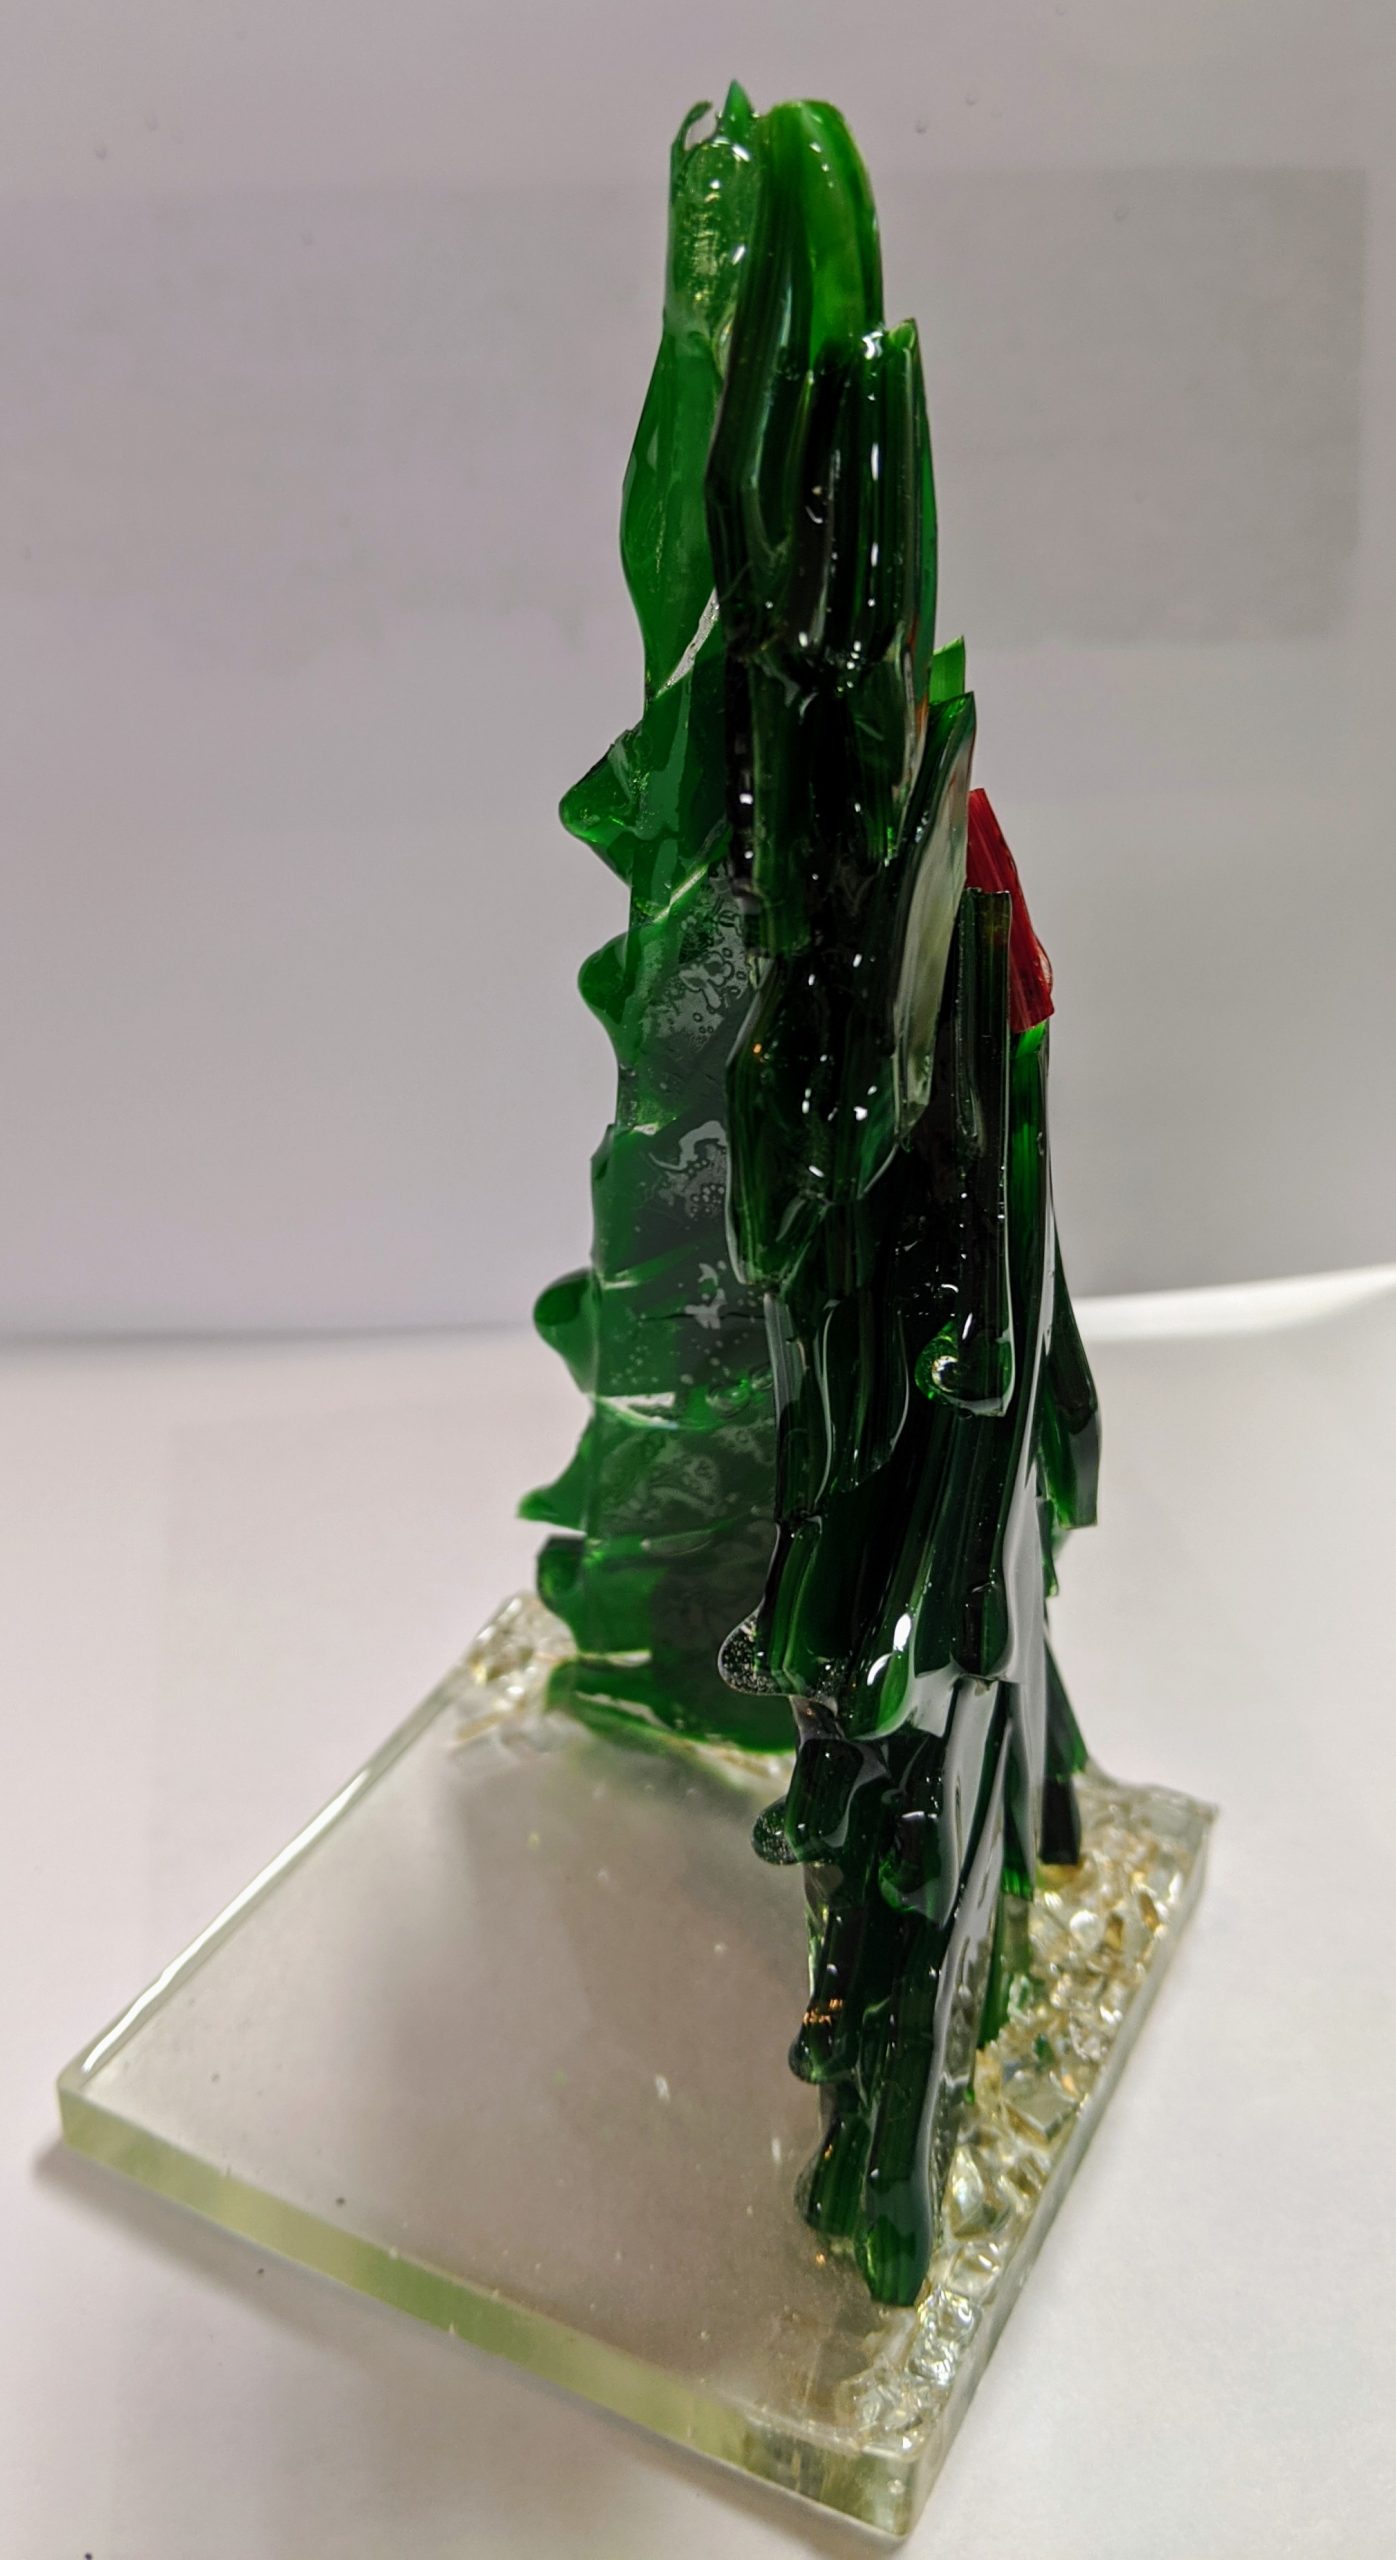
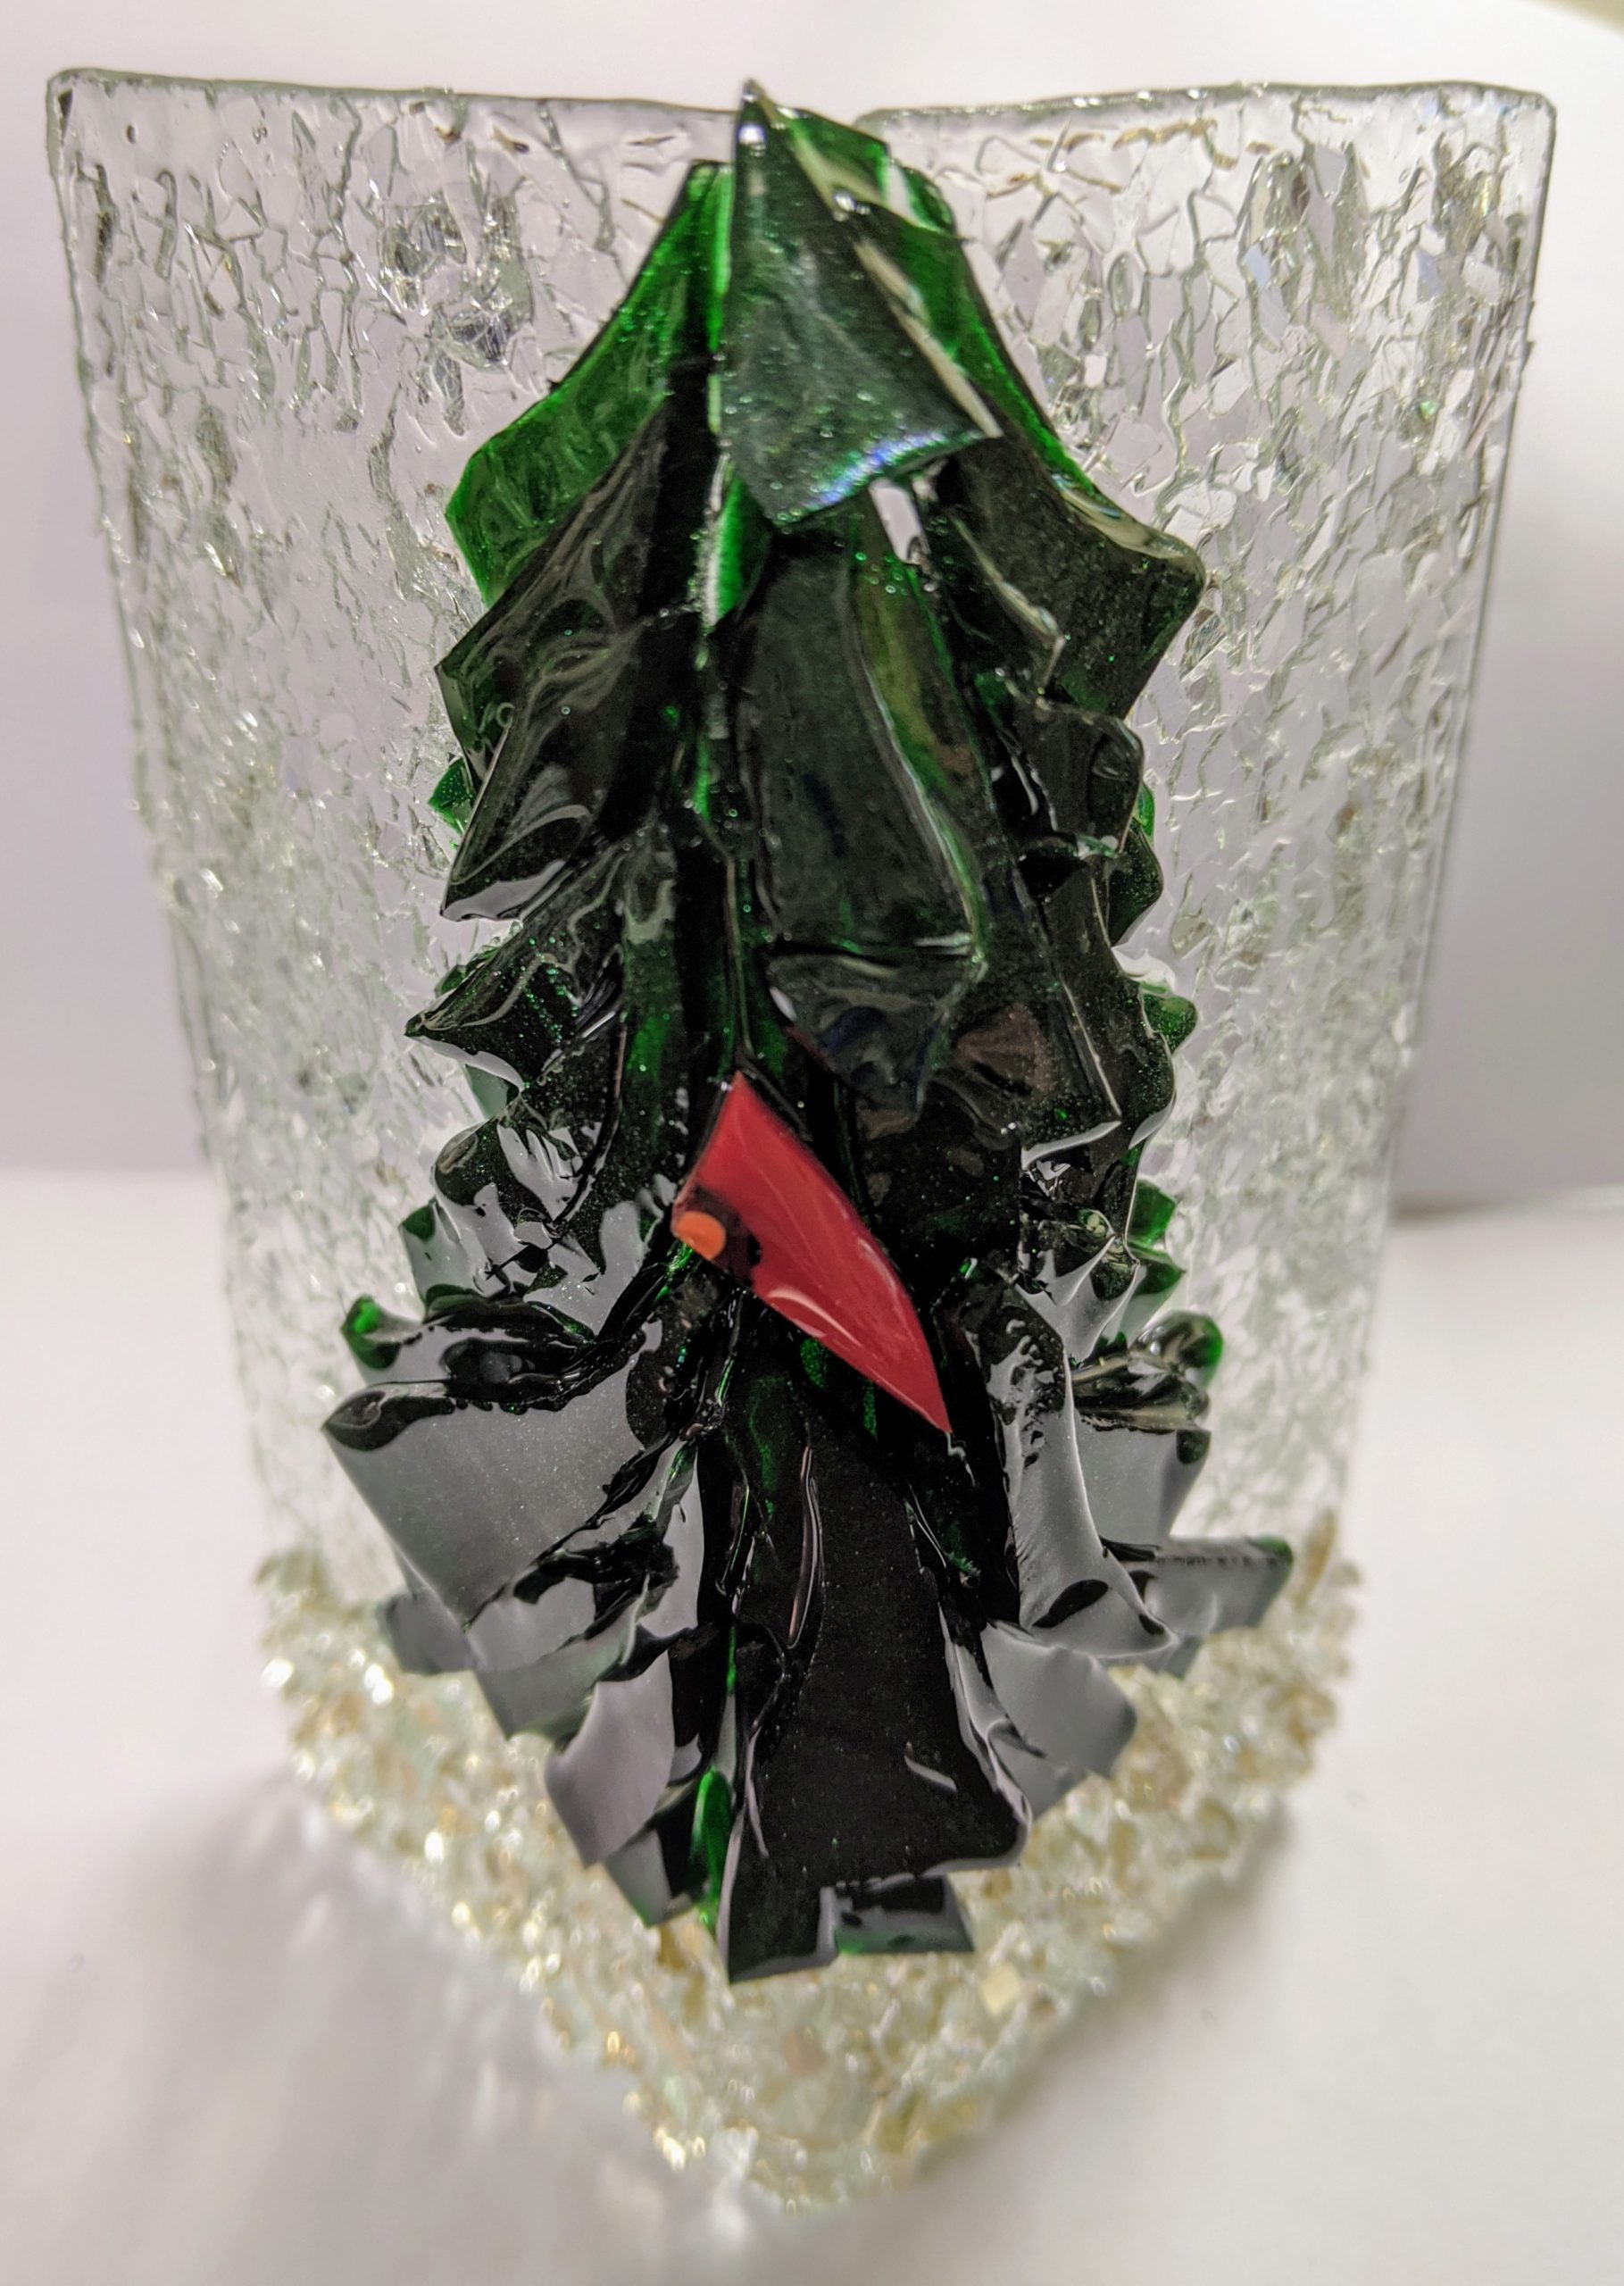
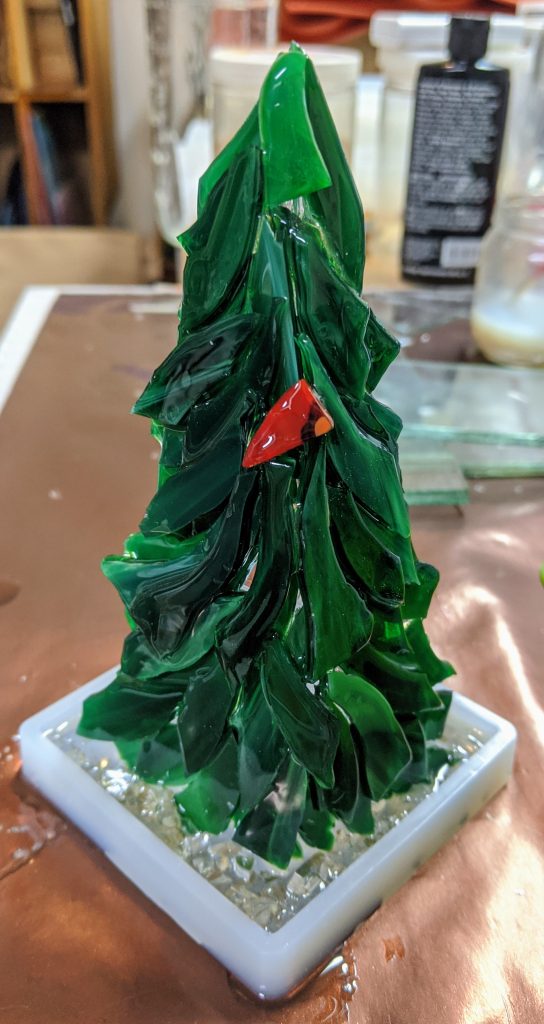
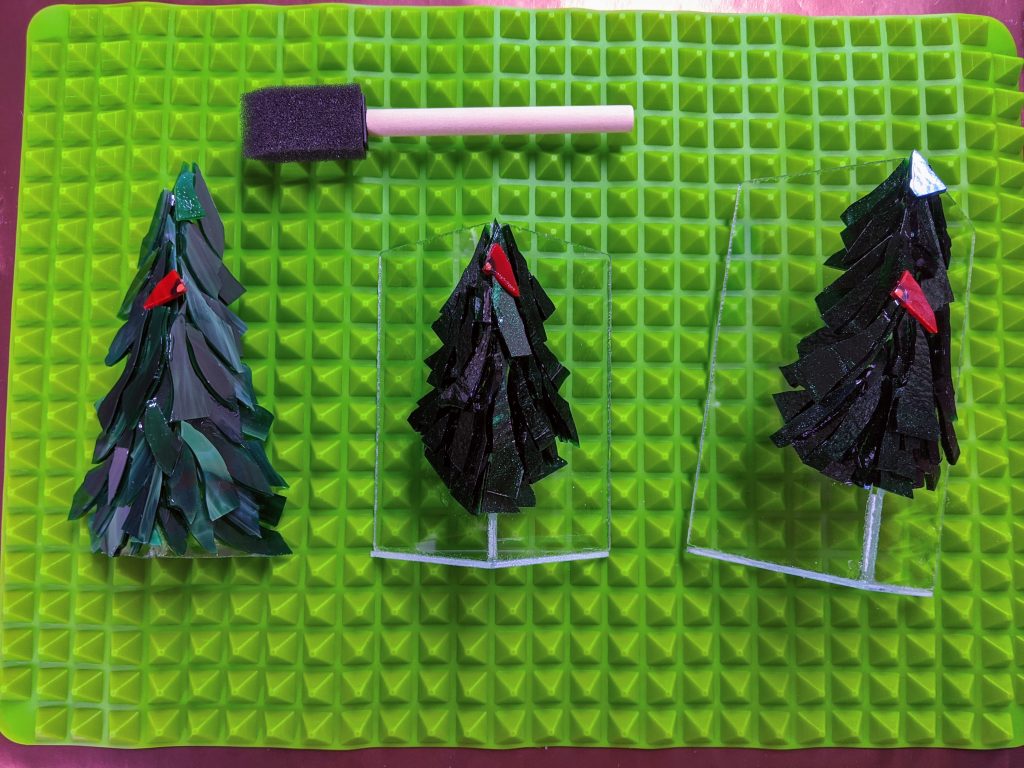
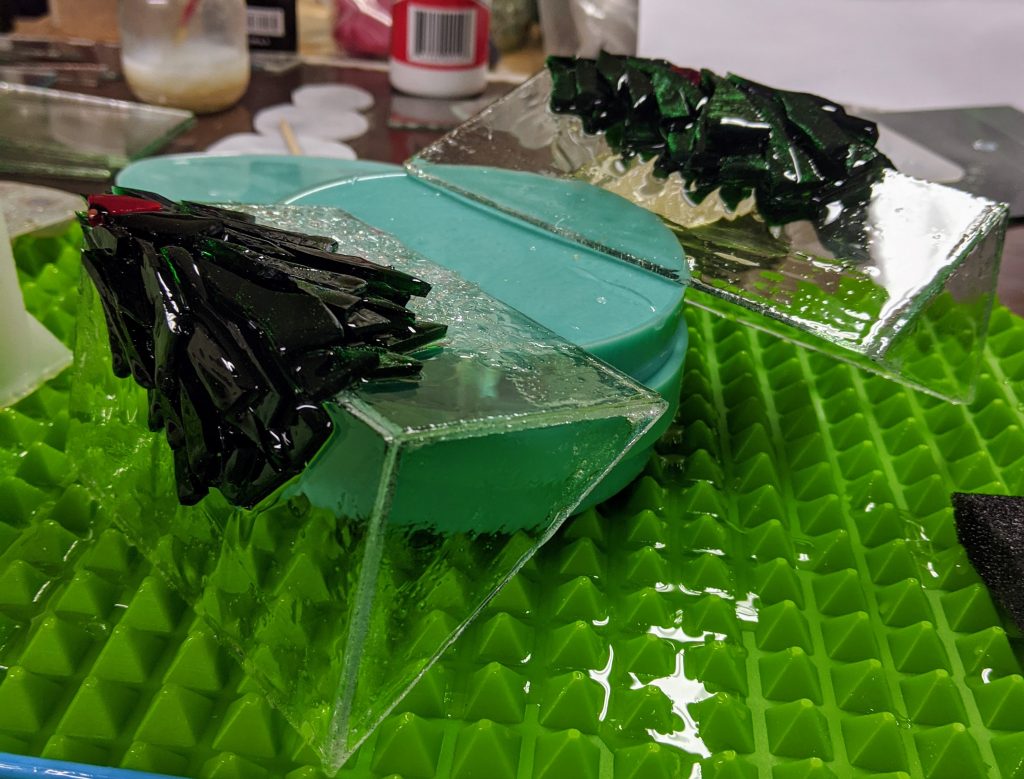
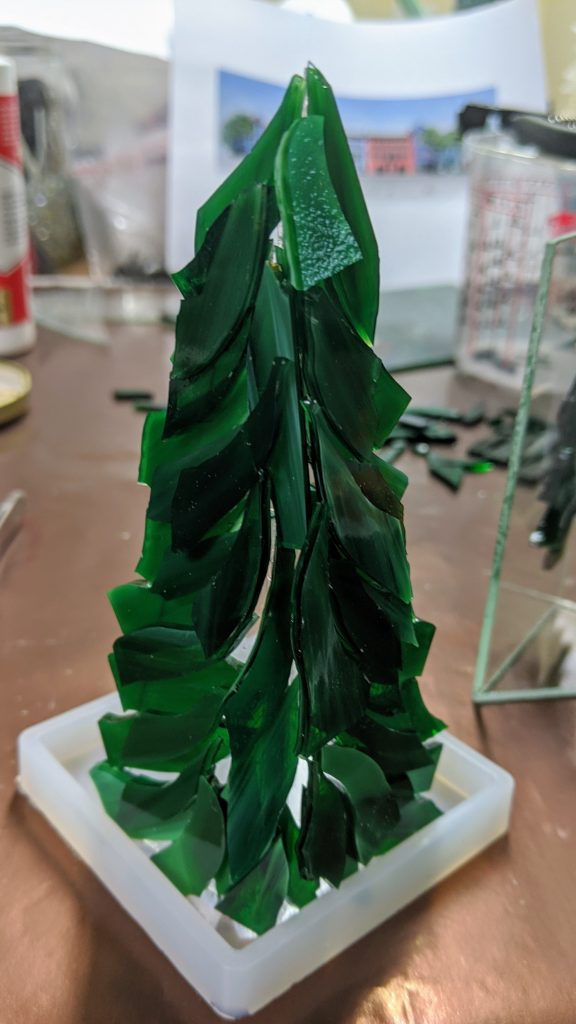
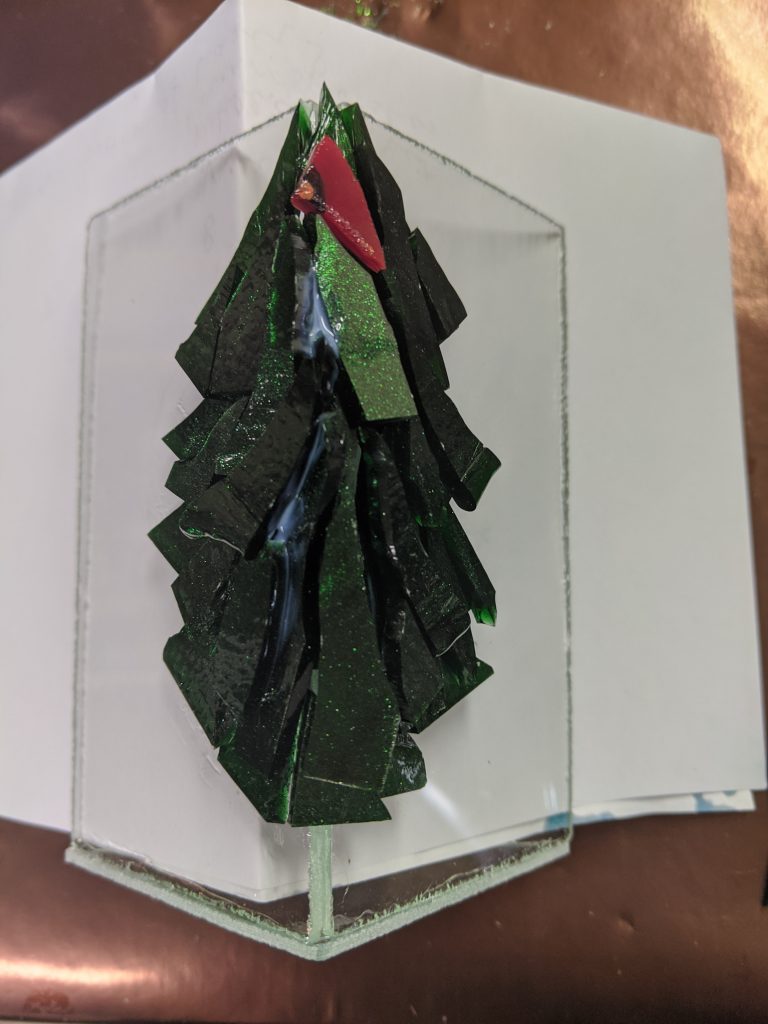
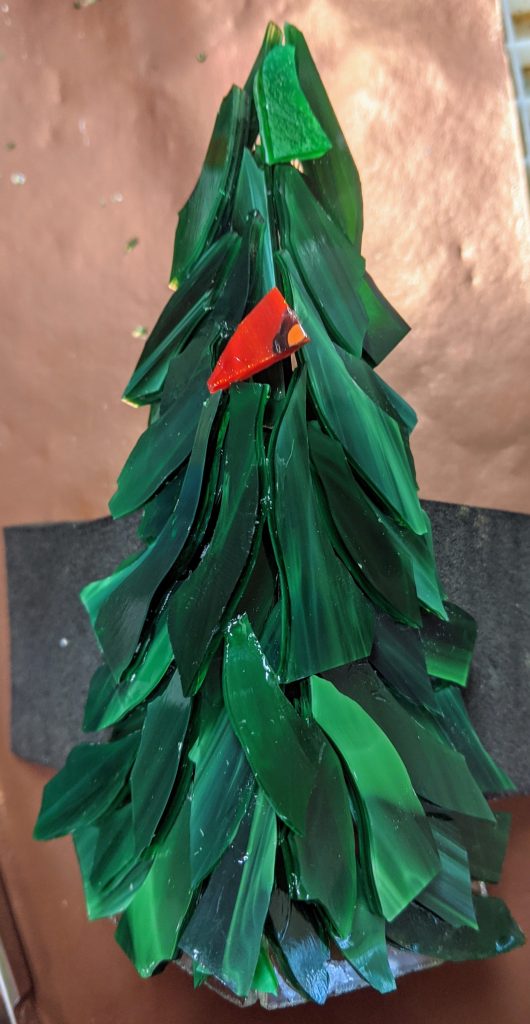
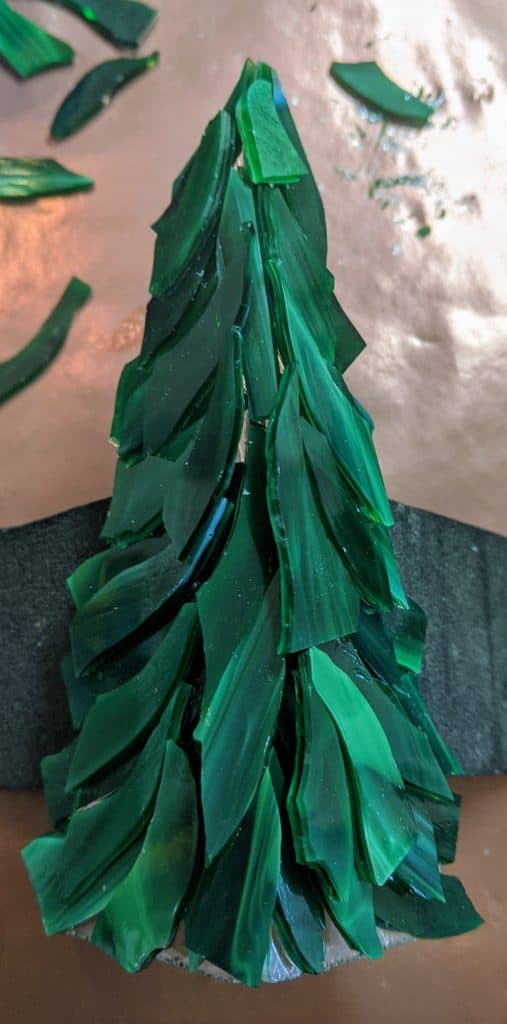
I finished all three tree candle holders today – here are snapshots of the finished products. Overall, I like the tree that’s standalone (not on a rectangular base) the best. I had a hard time keeping the resin tidy looking on the rectangular glass pieces with multiple stages of pouring.
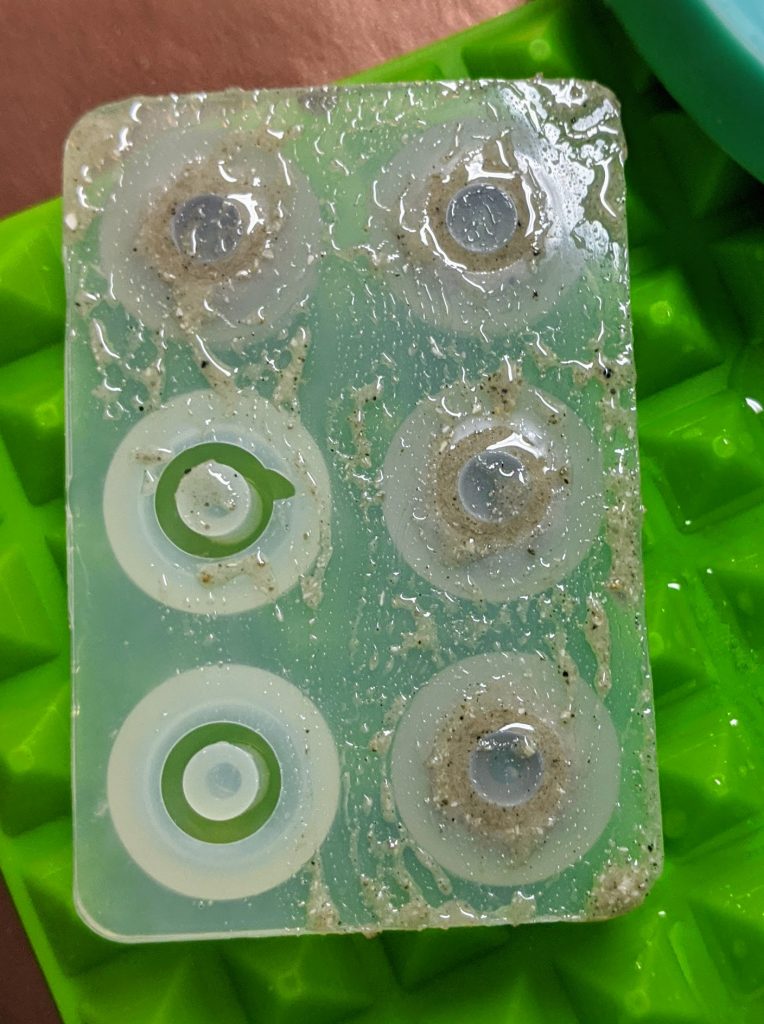
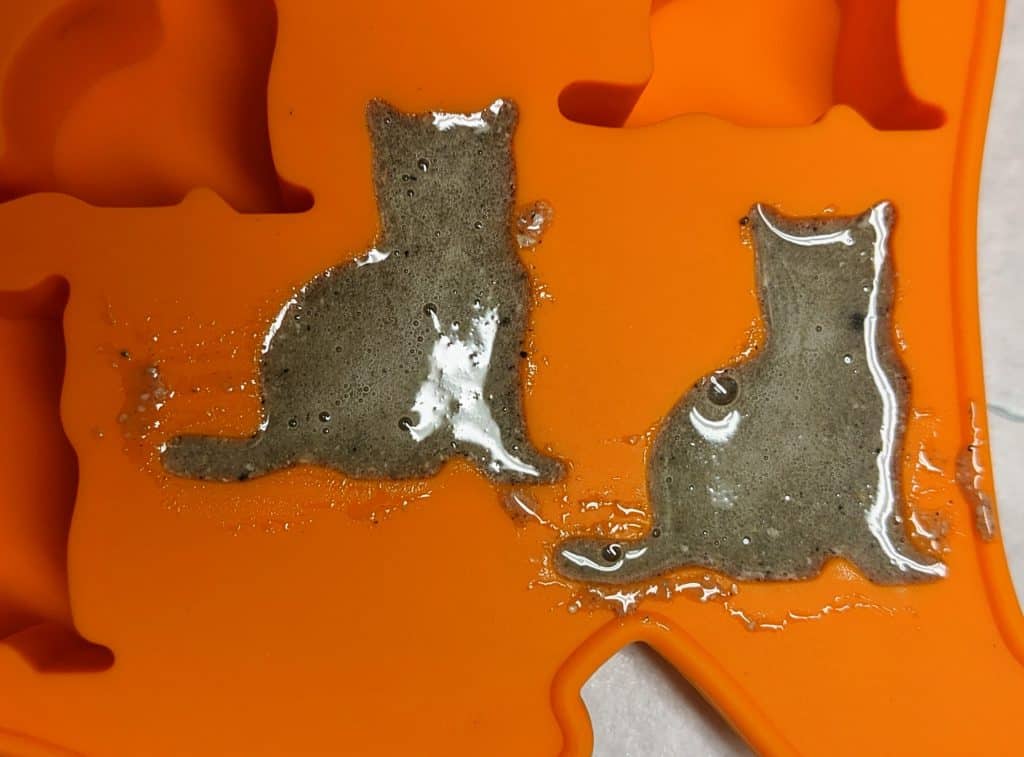
Today I was able to complete what I think is the last step in the 3D tree experiment. For the standalone tree, that was to add and decorate a base. For the two rectangular trees, it was to decorate the unfinished half. I also was able to pop the memory beads and kitty shaped mementos I made with our cat Neo’s ashes out of their molds.
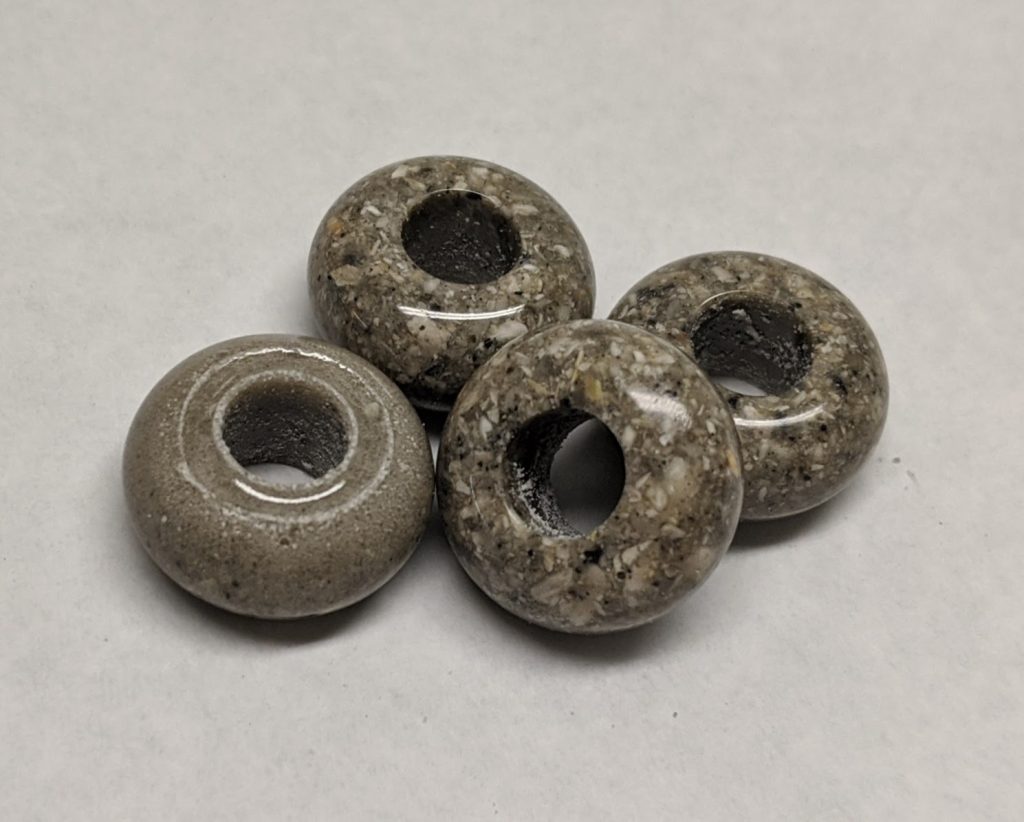
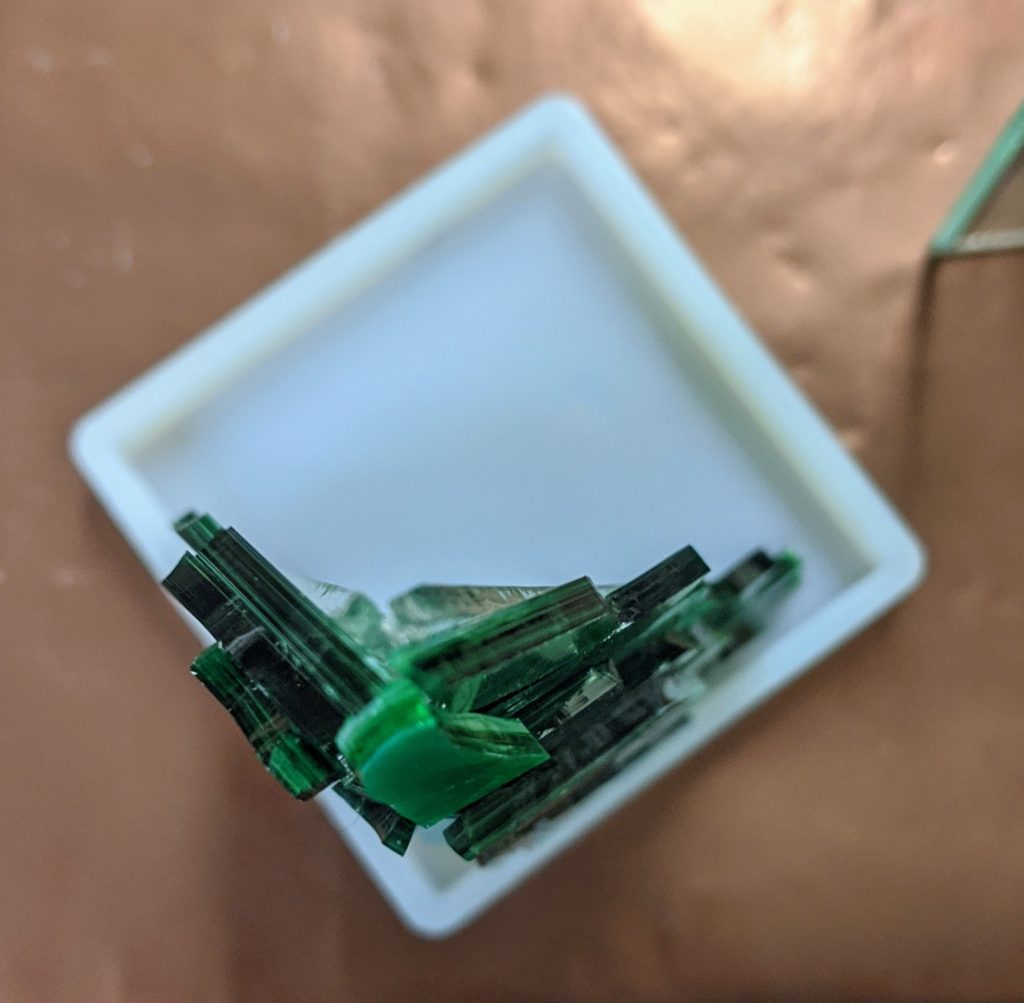
Memory beads (ash)
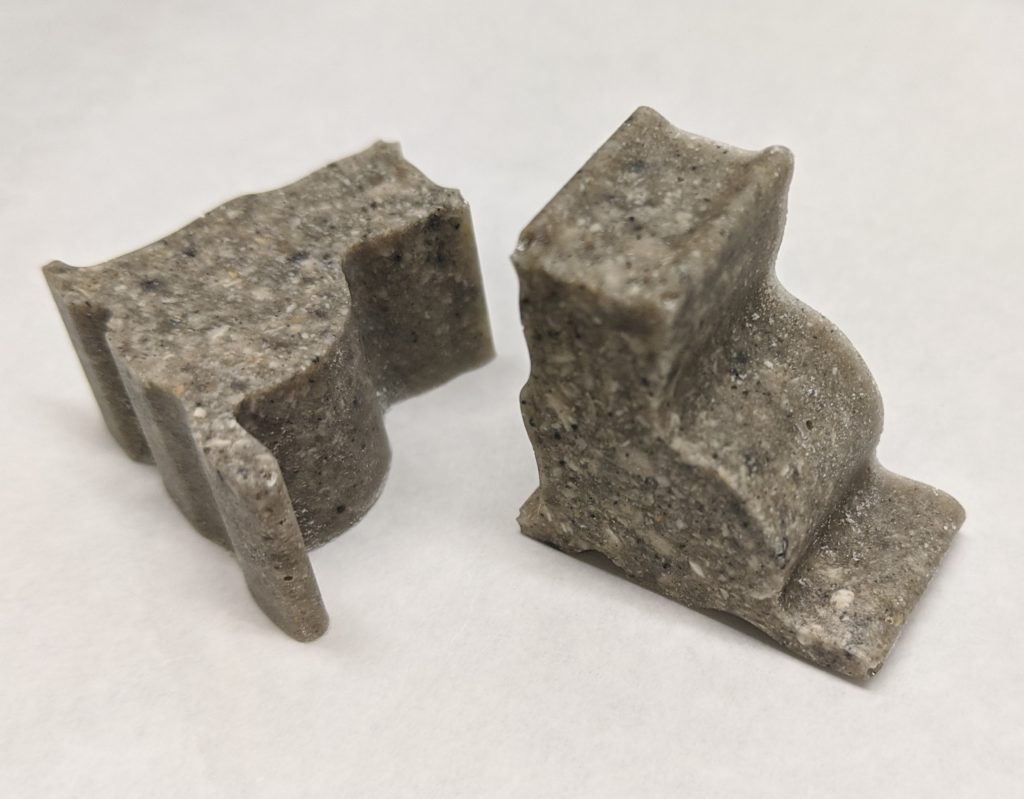
Cat shaped mementos in ash
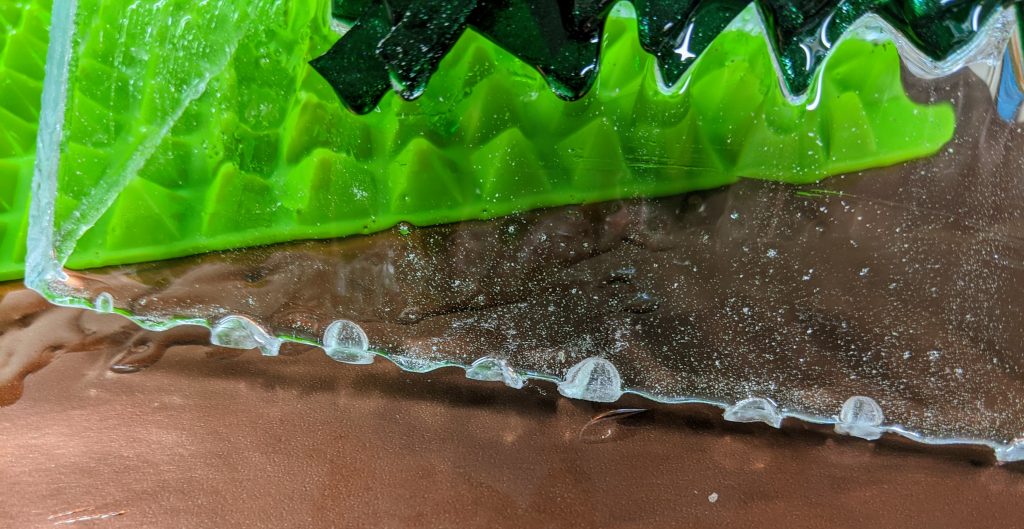
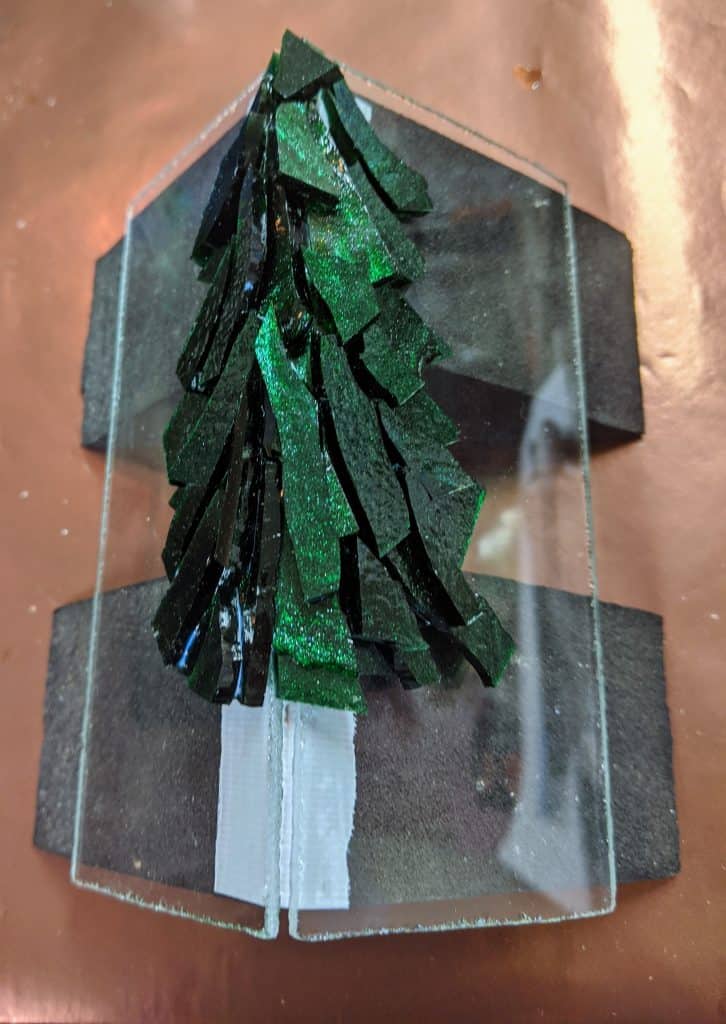
The rectangular trees had quite a bit of drips on the unfinished edge, despite my efforts to prevent them. I was able to remove them with a razor blade.
Lots of drips
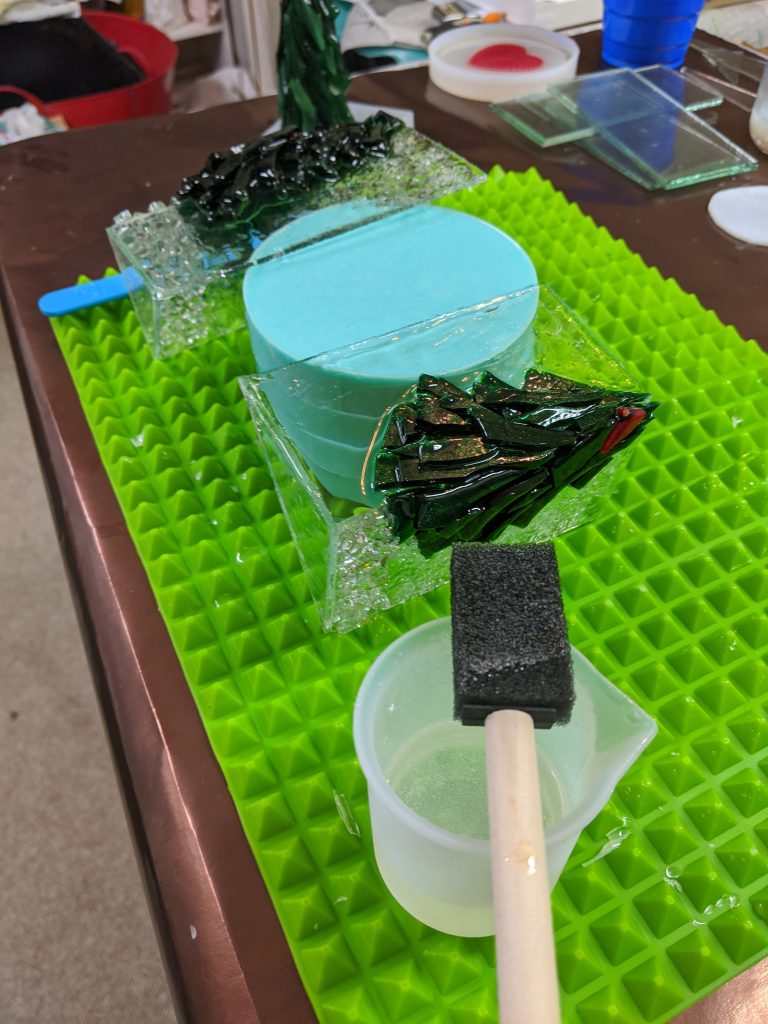
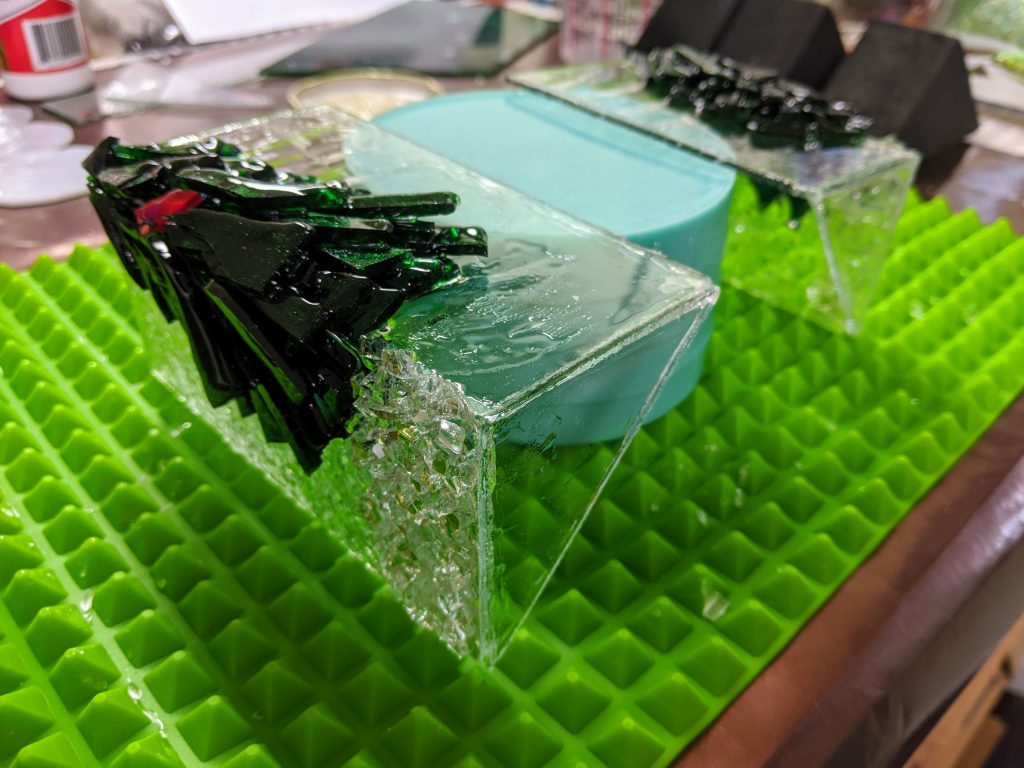
Once I cleaned up the edges a bit, I laid them out on the work surface, ready to coat with a thin covering of resin.
Applying the resin using a sponge stickClose up view
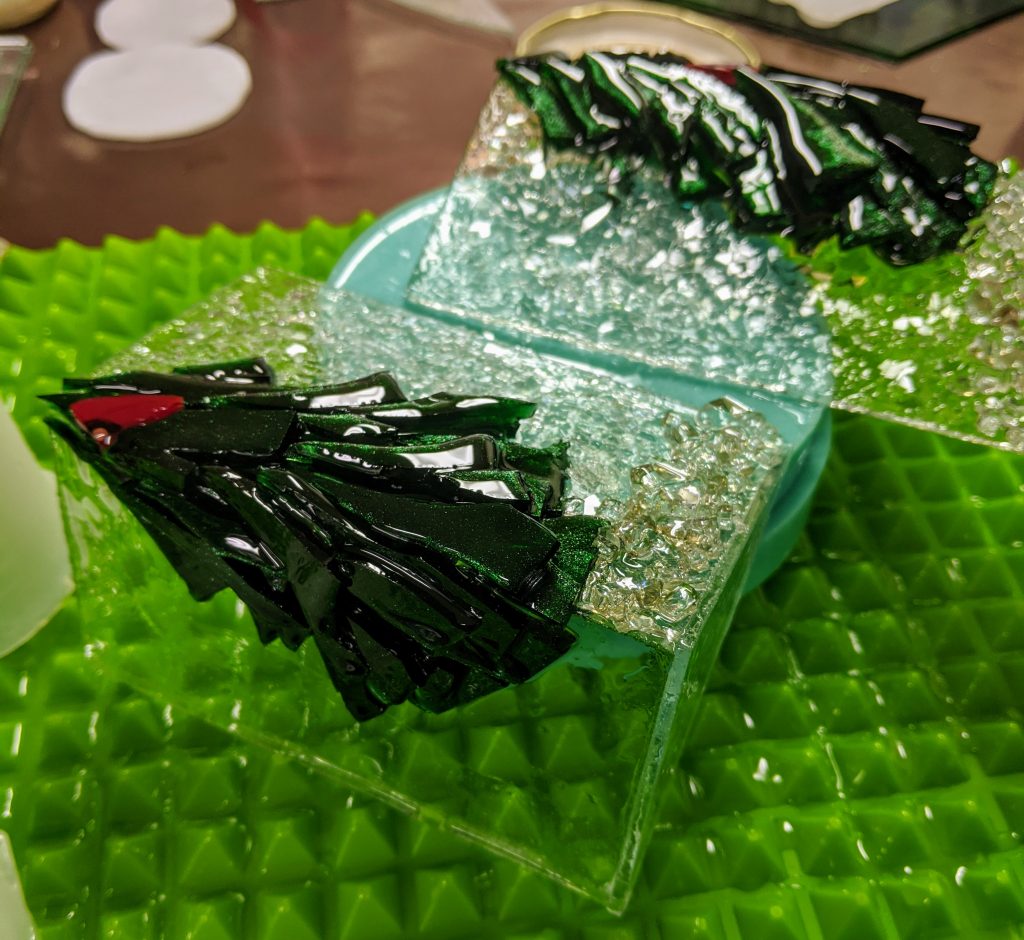
Once the resin was in place, I sprinkled the glass chips / chunks onto it.
Glass decorations in placeFront view
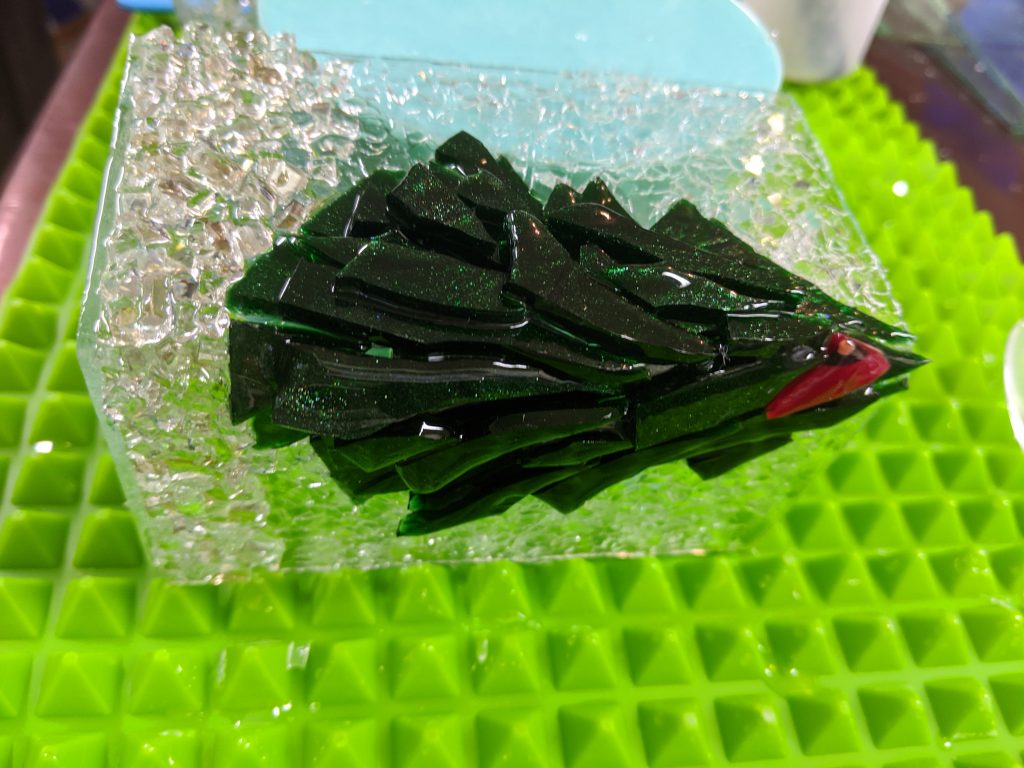
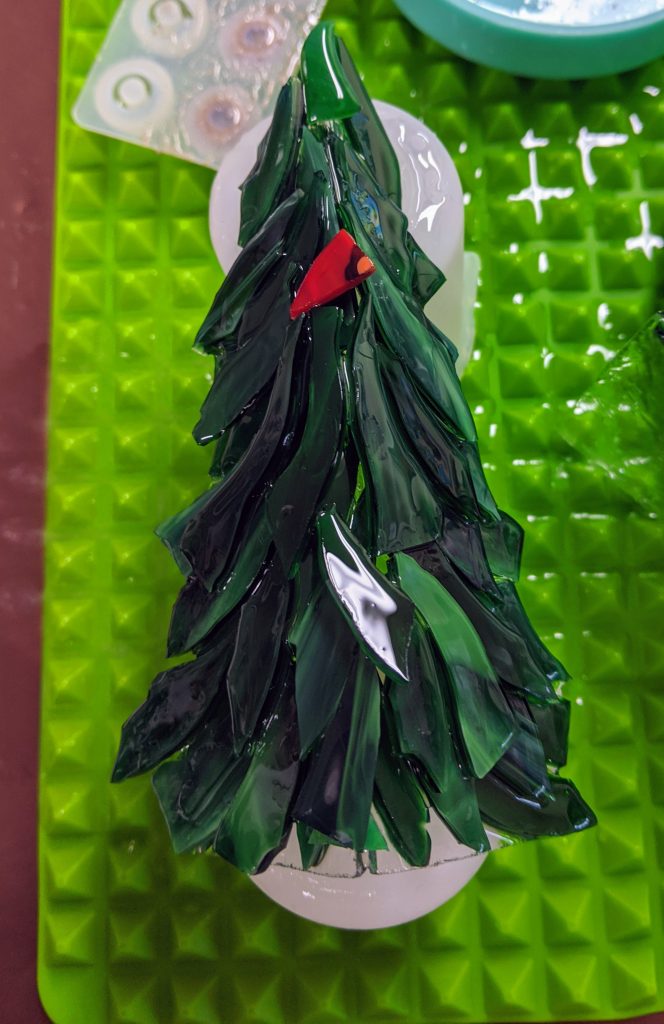
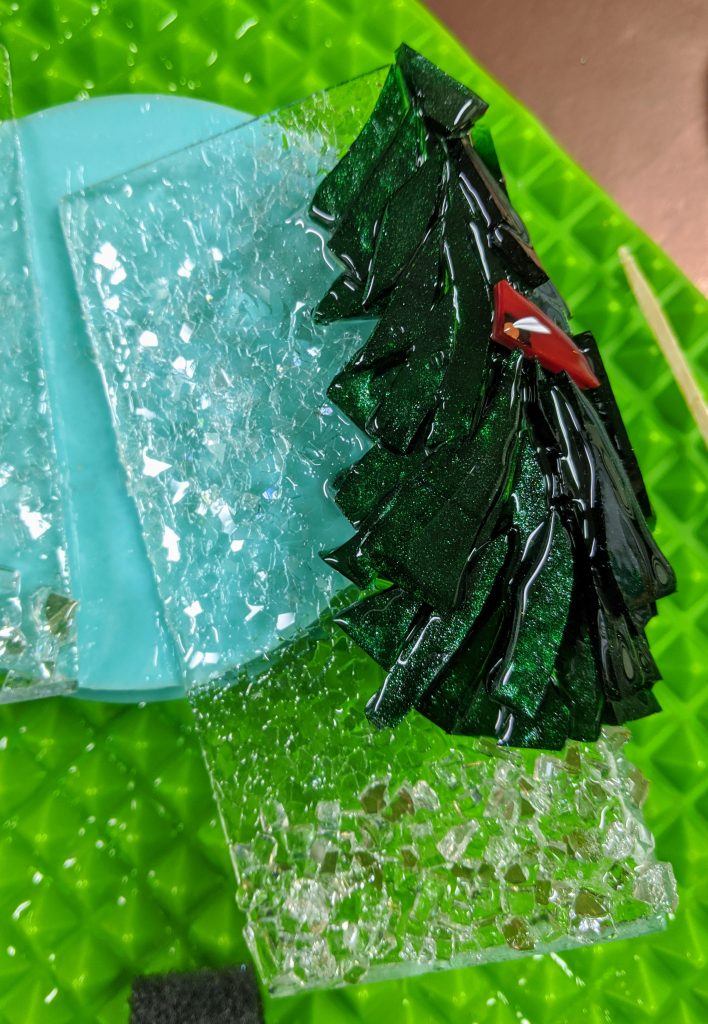
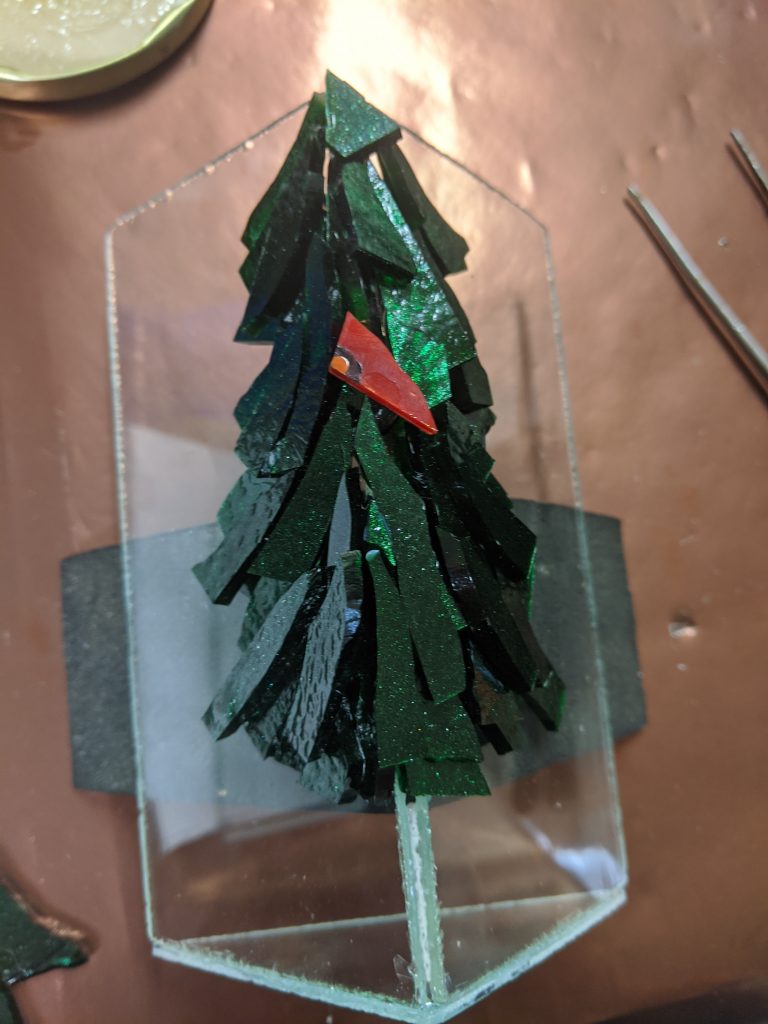
Next I turned my attention to the standalone tree, which needed a base of resin poured and decorated.
Resin poured and glass chunk “snow” in place inside the mold
Tomorrow we’ll see how they look! I think if I do more of these I will use colored glass for the backer that matches the tree glass instead of the clear, at least behind the tree itself. It’s hard to cover all of the possible gaps between the branches otherwise. So far I like the look of the standalone tree best, but it also has sharper edges.
I spent the past few days mulling over how best to pour the resin on these projects, and came to the conclusion that it would have to be in stages. Today is the first stage, which is an experiment. My plan is to coat the trees with a thin coat of resin and possibly decorate one side of each of the rectangular trees. The second stage will be (for the rectangular trees) to pour another coat on just the undecorated side and decorate. The second stage for the stand alone tree will be to pour and decorate the base that will serve as the candle stand as well as provide stability.
Projects are laid out on a silicone baking mat.
It’s cold out today and my work area is only 60 degrees F. My resin likes it to be a minimum of 70 degrees, so I used my heat gun to warm each part of the 2 part resin prior to mixing it.
80 ml of resin is mixed and ready
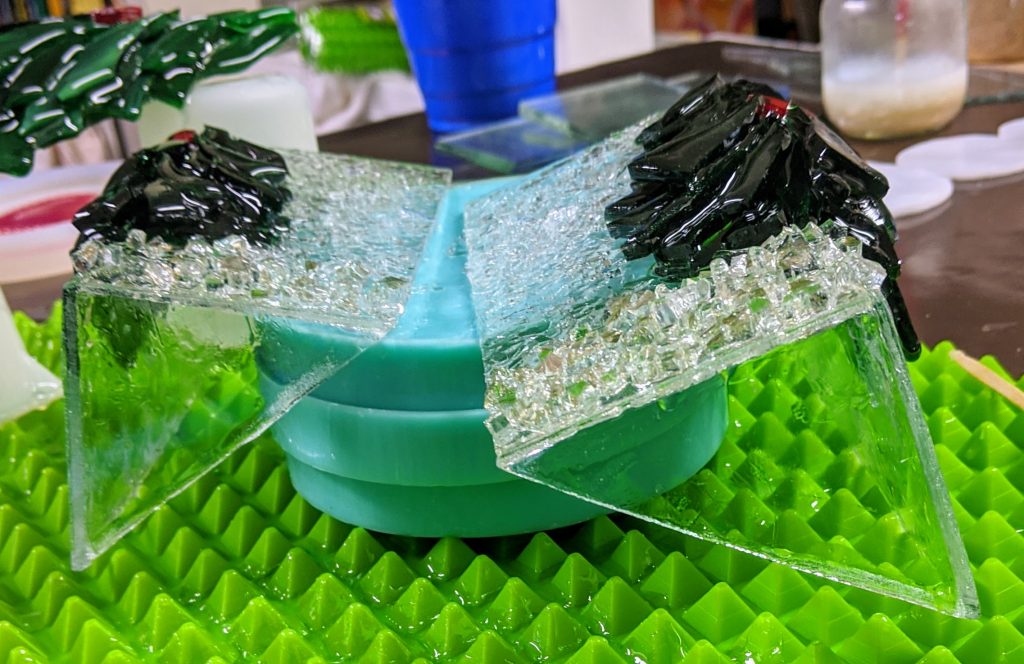
I ended up elevating this one higher off the mat on top of a couple of silicone measuring containers to help me manage the drips on the edges.
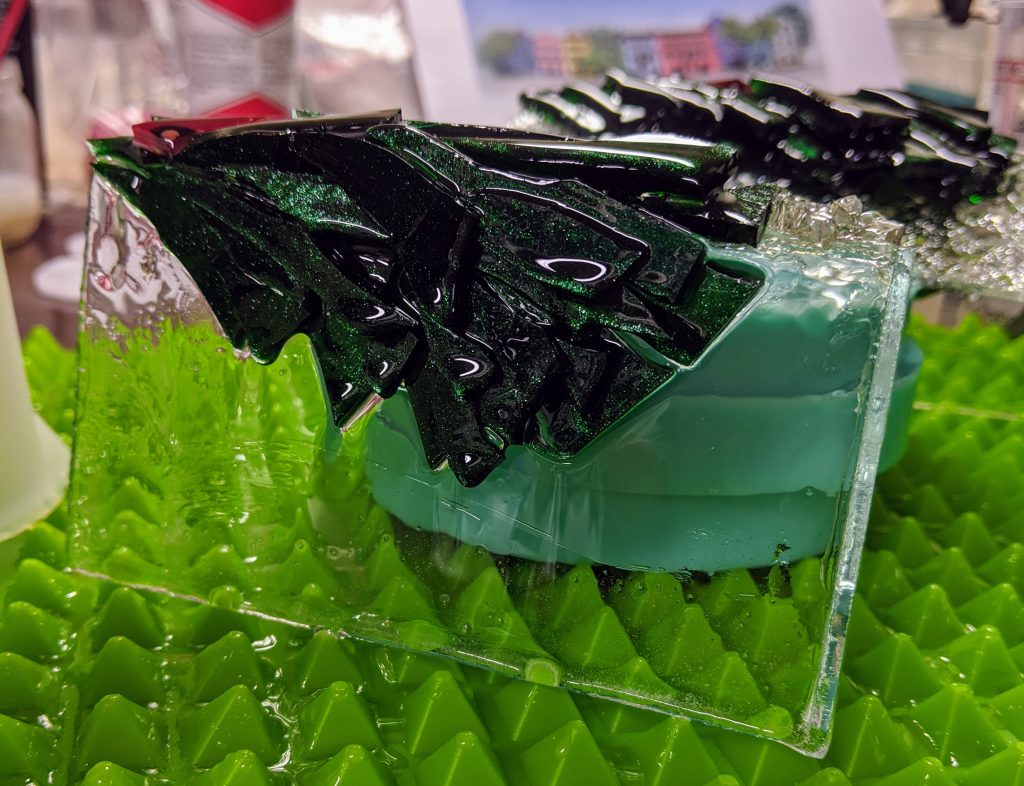
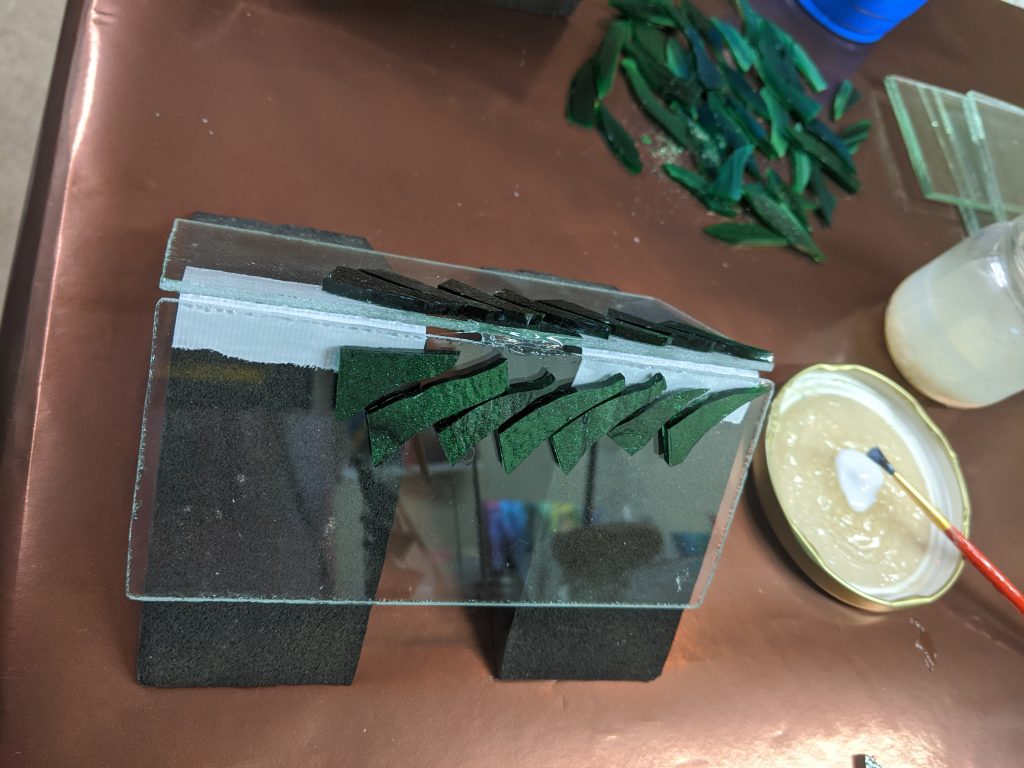
First coat is drizzled onto the tree.After the initial coat of resin, I repositioned these two in order to decorate one side.
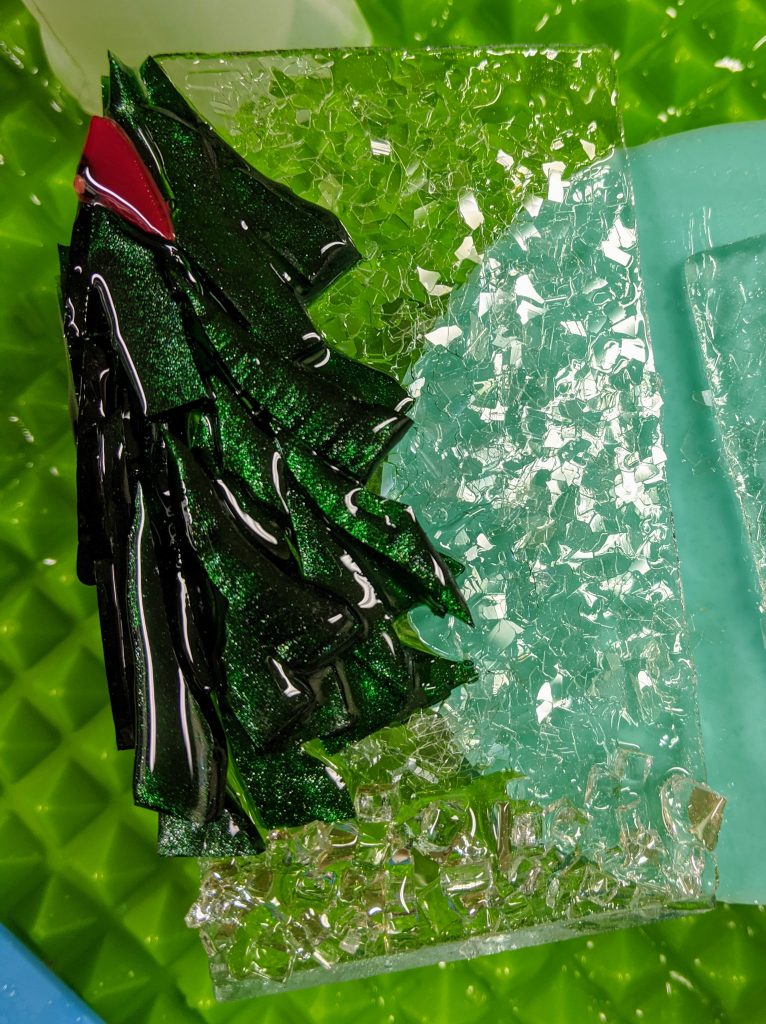
I continued trying to touch up bare spots and wipe off drips with my sponge on a stick. I repositioned these two and sprinkled the glass chips / chunks I am using to decorate the background and base of the tree. Above you can see the glass chips in place on the left hand piece.
Finished with one side for each rectangular tree.
Close up of the left hand piece
Close up of the right hand piece
View from the bottom edge – propped up to keep the glass chips from drifting.
Side view
I had enough resin left over to make some memory beads for our beloved cat, Neo, who passed away in November. I’m also trying some cat shaped mementos with his ashes.
Neo’s memory beads
Cat shaped mementos
In addition to scraping the drips, I periodically blew all of the above pieces with my heat gun to remove bubbles and also to warm the resin, as my working area is only 60 degrees F today!
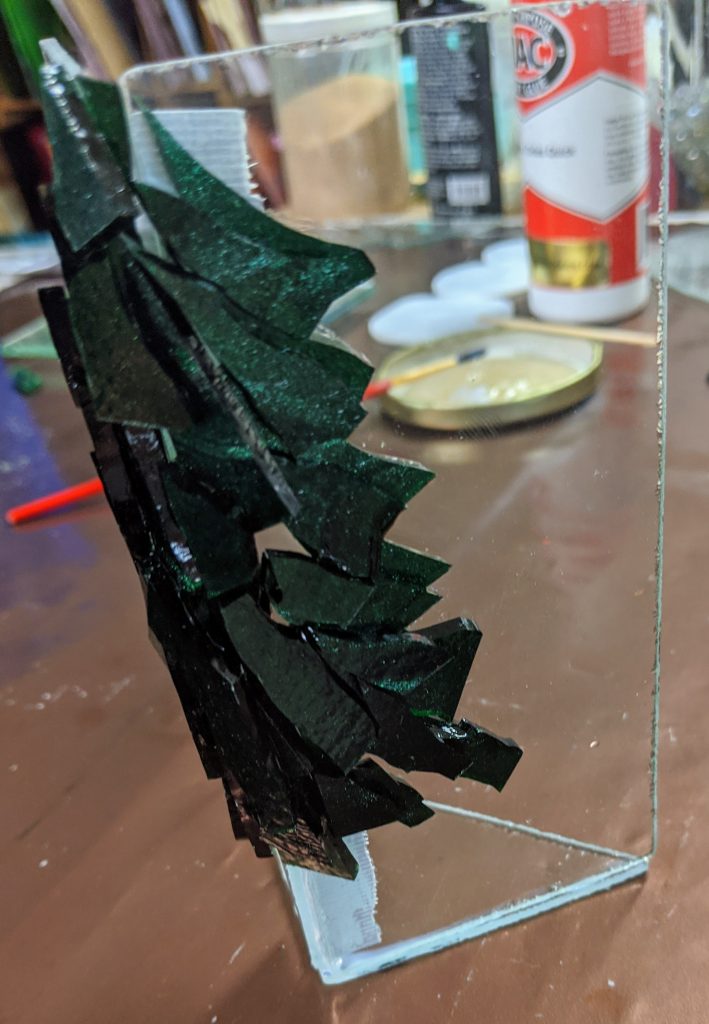
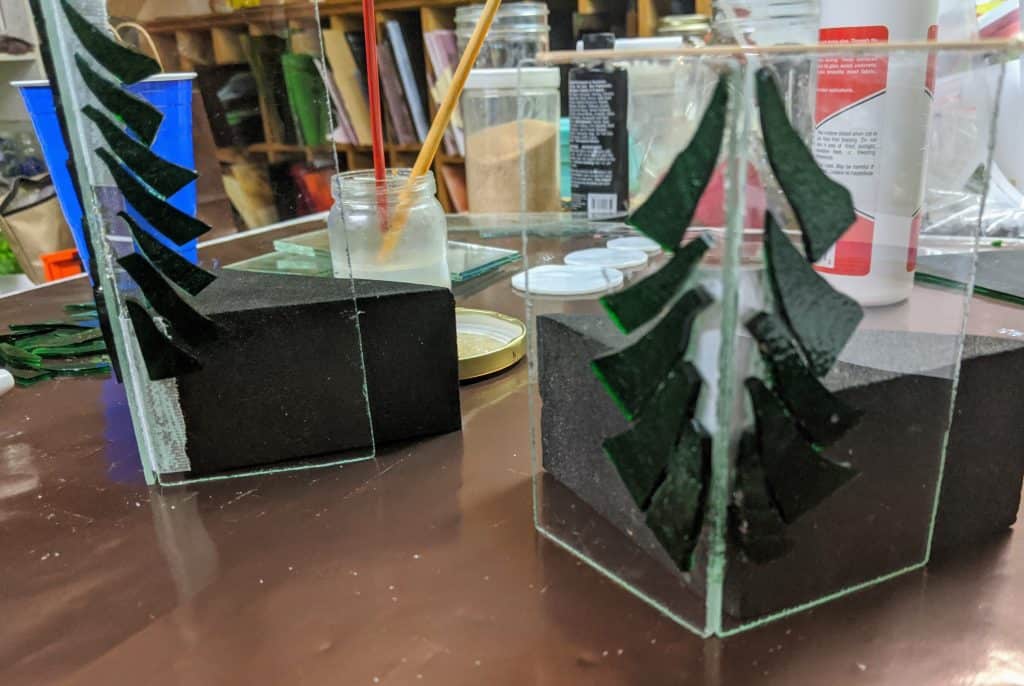
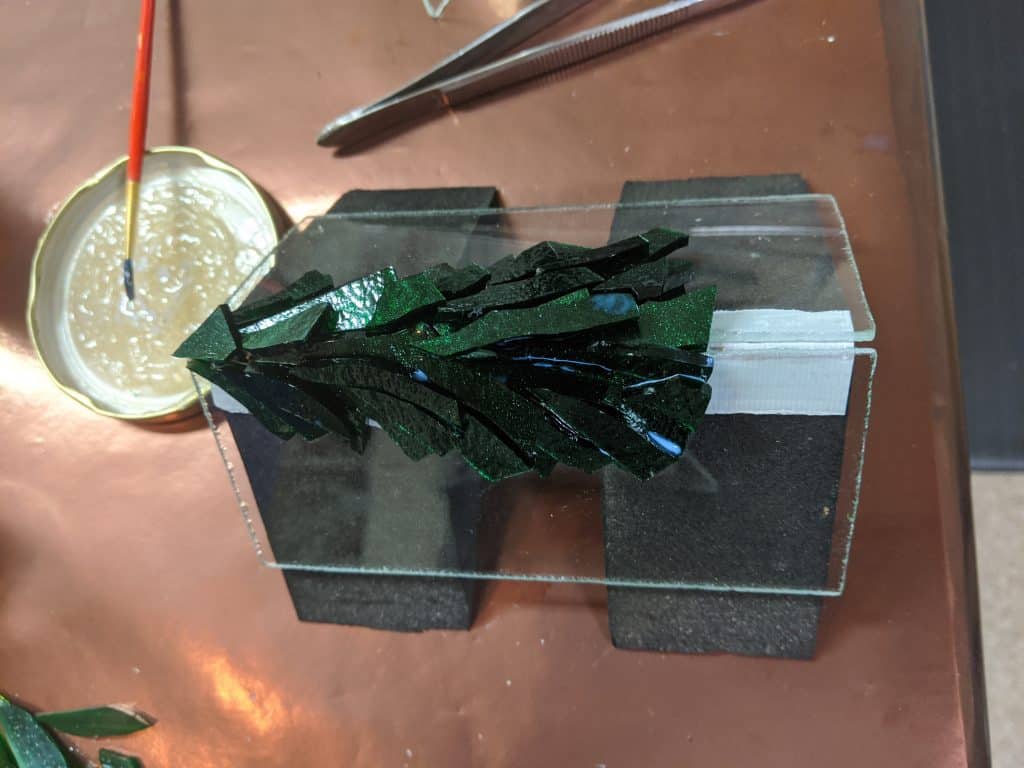
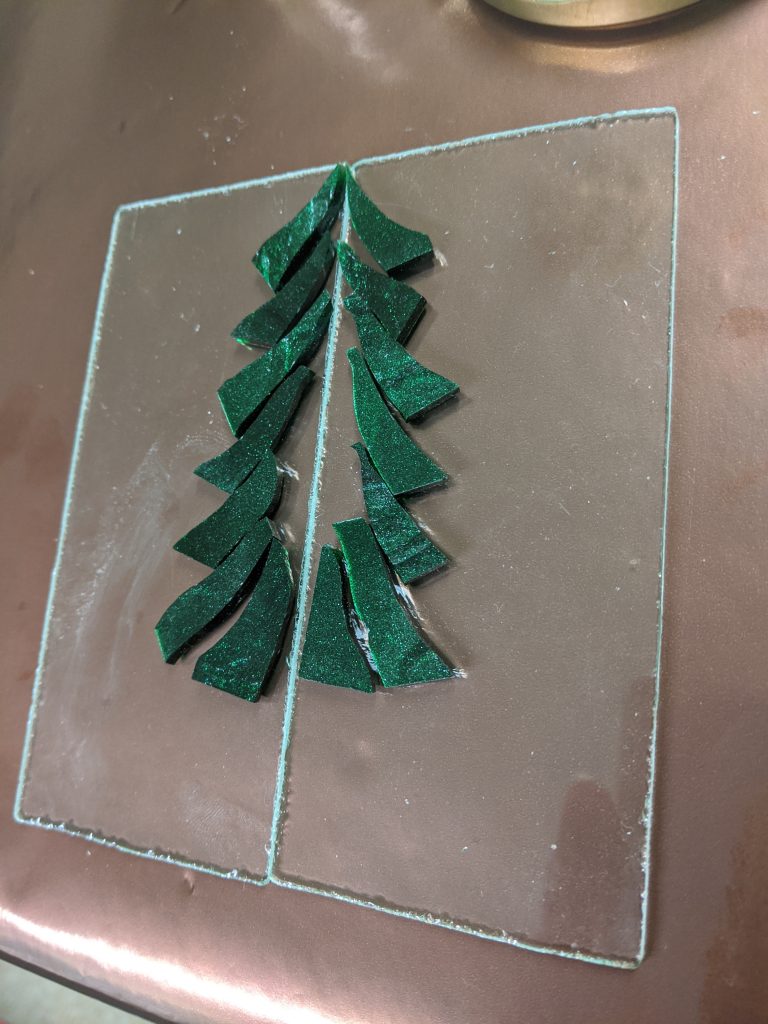
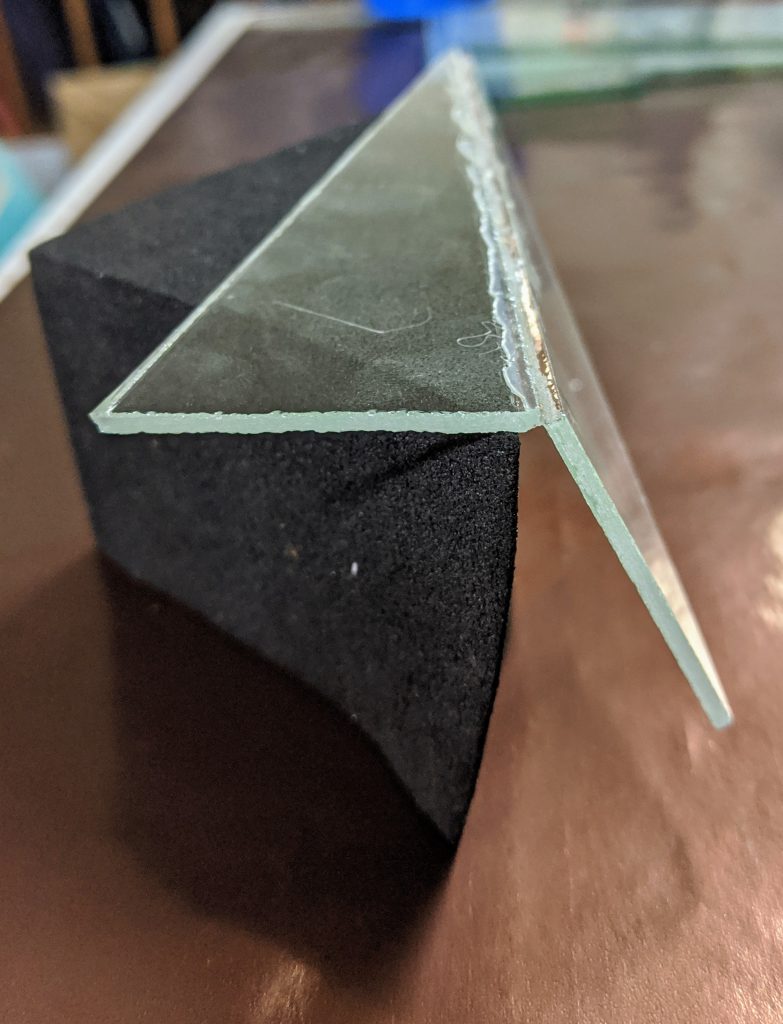
I’ve been adding a few branches / details each day to these 3D tree projects. I can only do a little at a time because the branches shift if I do more than one side at a time (3D). So one thing I am learning is that 3D is slow and you have to be patient. I’m also sort of worried that I’m adding too much – I’ll think I’m done, then I decide to add just one more branch, then I look at it some more and do the same again! Over yesterday and today I also added a glass triangle base to the two rectangular trees and planned a resin base for the triangle tree. I am planning on coating these with resin and decorating the resin with glass chips, but I’ve not quite sorted out the best order to do it in yet. Because they are 3D, I think I will need to coat the trees in stages and then pour the base last. We’ll see how it goes.
Planning the resin base
View from above
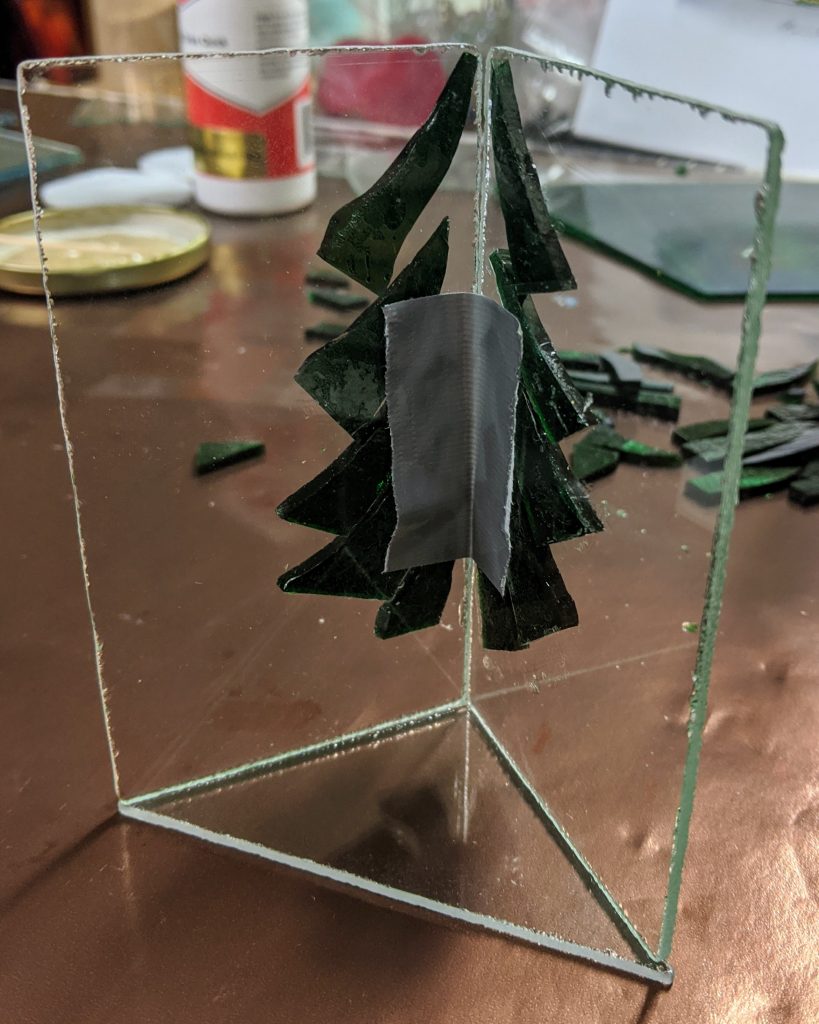
Creating strength in the structure with a triangle base
It’s been a few hectic weeks here, but today I finally got the chance to work on these 3D tree experiments again. I’m trying two different approaches, one is a tree made with two clear glass triangles as the base, the other two will be rectangular. I think they would be good with a tealight candle behind them if they come out as I hope they will.
Two rectangular trees ready to go – held together temporarily with duct tape.
This is mainly an exercise in patience, as I have to glue individual branches in place and make sure they don’t drift while they are drying.
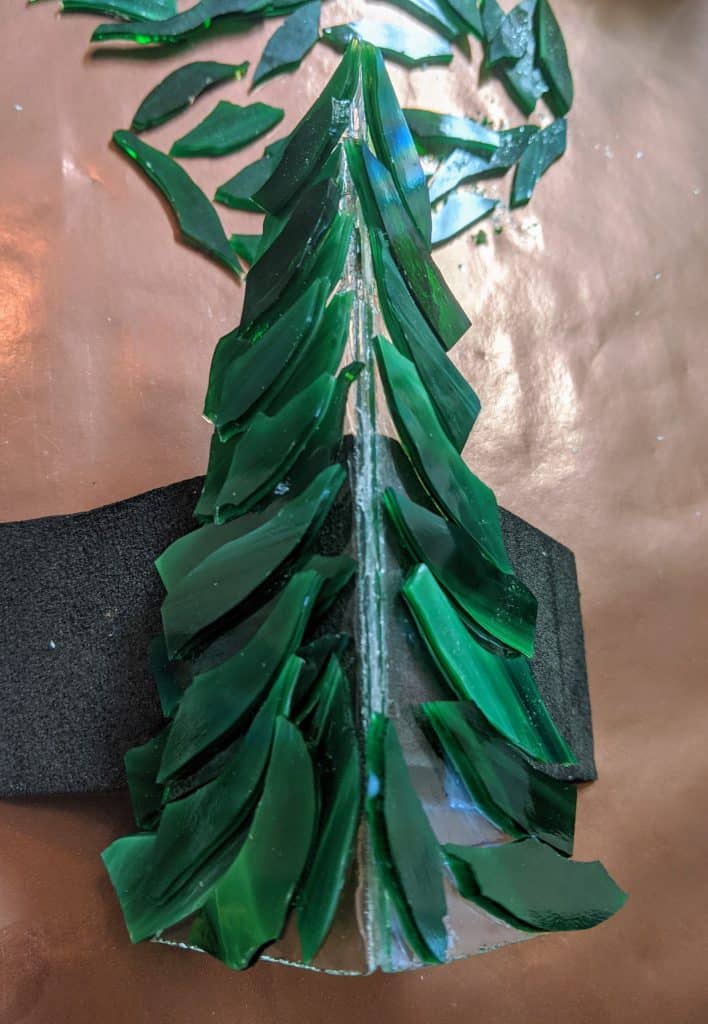
Triangular tree – I used silicone caulk to hold the two base pieces together.I set the base up for adding layers of branches.Gluing layers in place.Turned over for the second side of the tree.Adding layers of branches to each project, alternating to let the glue set.First layer, second side of triangle tree.Side 2 ready for another layer.Another layer in place and drying.Rectangular tree with three layers.
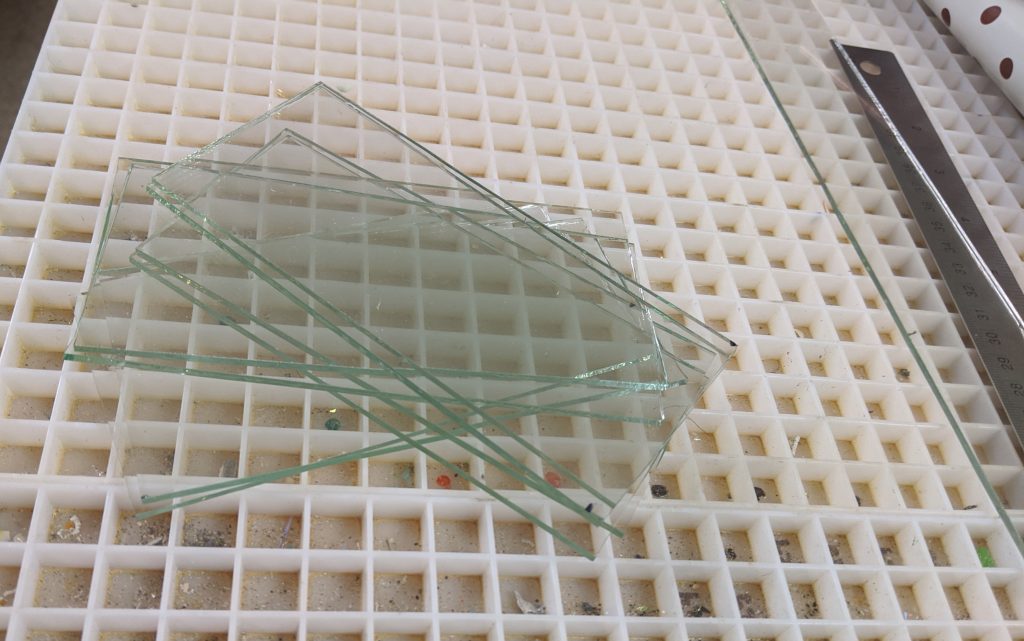
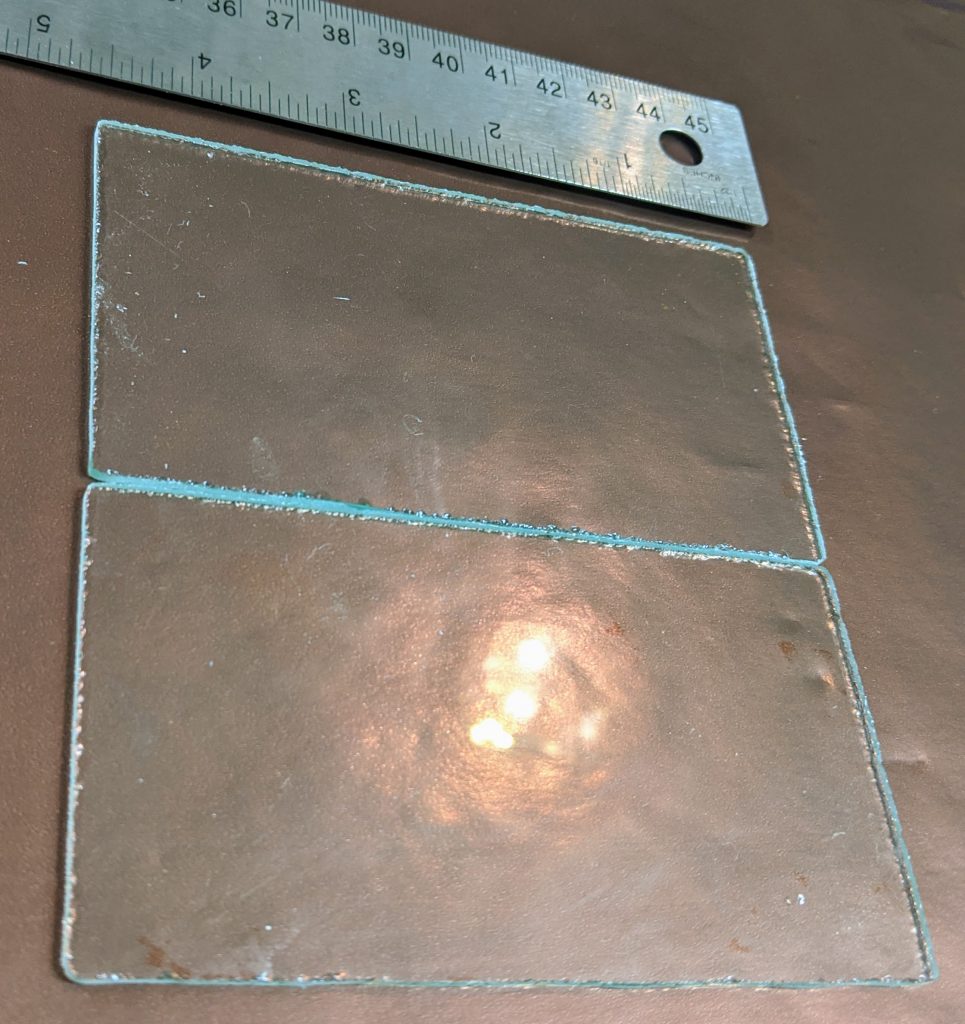
In the rush to prep for holiday sales, I got into “production” mode. Now I’m easing back into “creative” mode and revisiting some experiments I’ve been thinking about trying for a while. A few months ago, I was toying with the idea of making some small 3D trees that could be set in front of a candle. I cut some triangles from some of my old window glass and adhered them together, but didn’t feel like they were heading in the direction for success, so I set them aside. Today I decided to revisit that idea and also an idea of a two sided right angle tree on rectangles of recycled window glass. First, I cut the rectangles for the base / backer glass to about the same size.
Rectangles cut from recycled window glass.
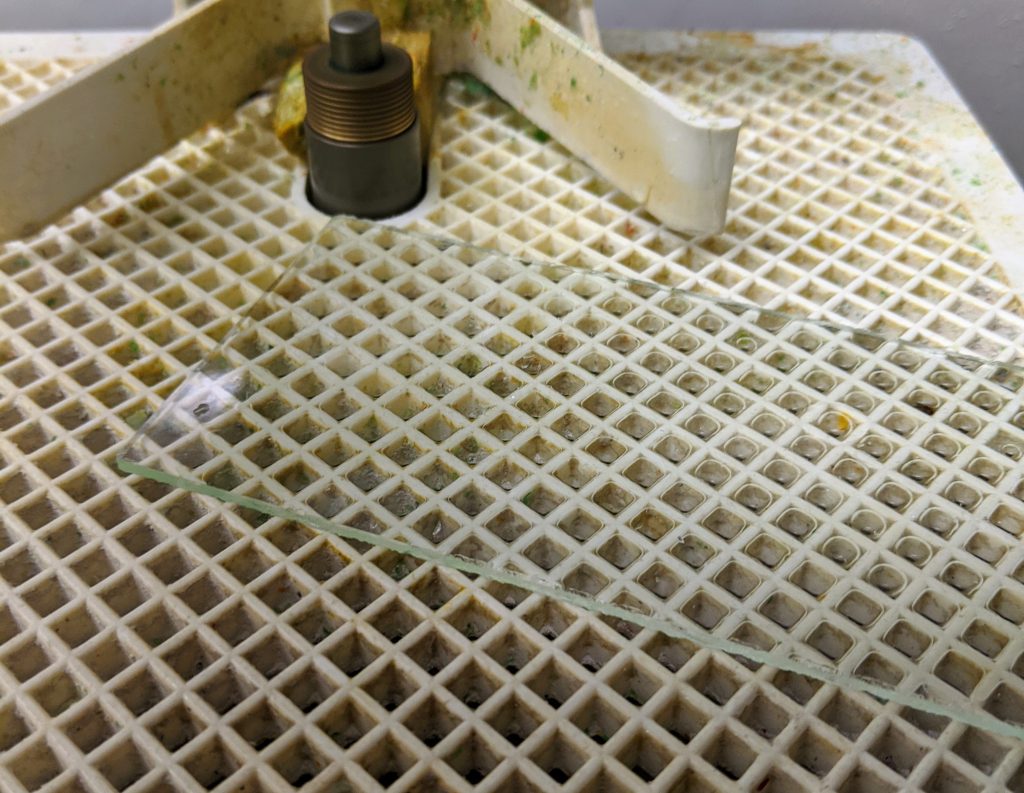
I let the glass dictate the size of the project, so all of these items will be slightly different sizes. After cutting, I ground the edges of the glass so it won’t be sharp.
Wet grinding the edges of the glass.
After I ground and dried the glass, I laid the pieces side by side to make sure they matched, as these will eventually be connected at a right angle for stability, and to make a space for a candle.
Making sure my pair of rectangles match.
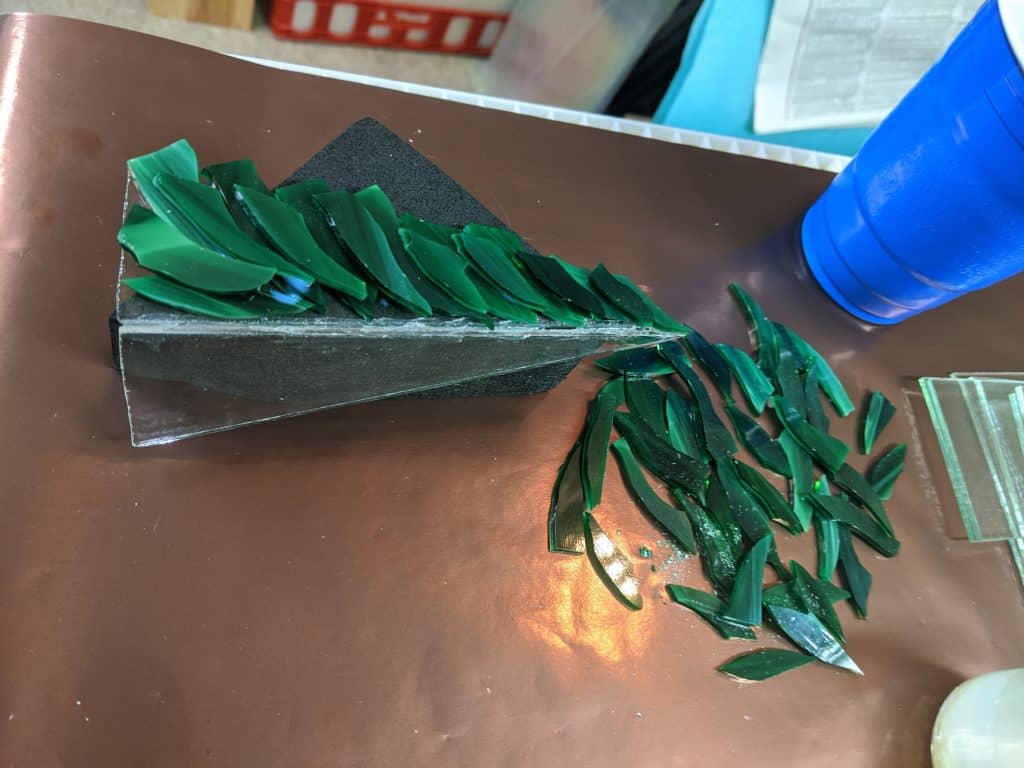
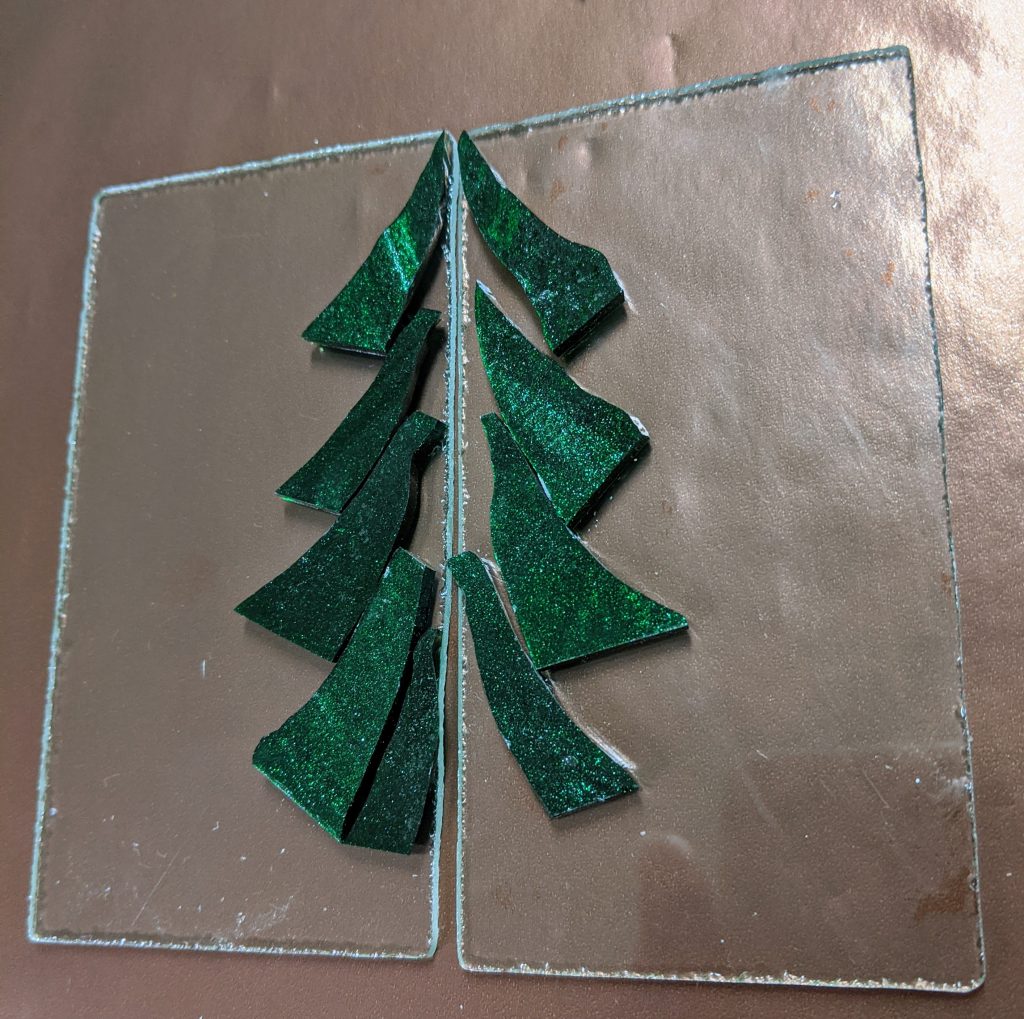
Next I took some green glass that I cut into branch-y shapes and started laying it out on the two rectangles. I made two sets of these.
Laying out branches for the tree.
After I was satisfied with the layout of the first layer, I glued the pieces to the recycled backer glass with Mac glue. I apply the glue on the backs of the pieces with a small paint brush. The Mac glue can be watered down and still hold well.
Gluing branches.
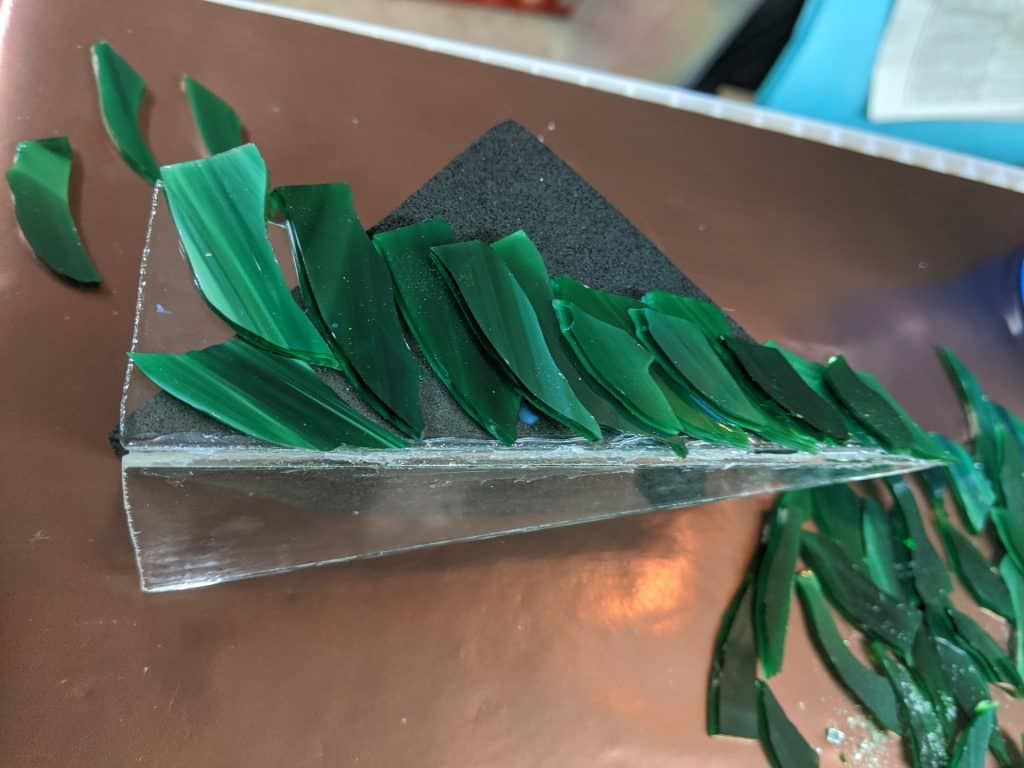
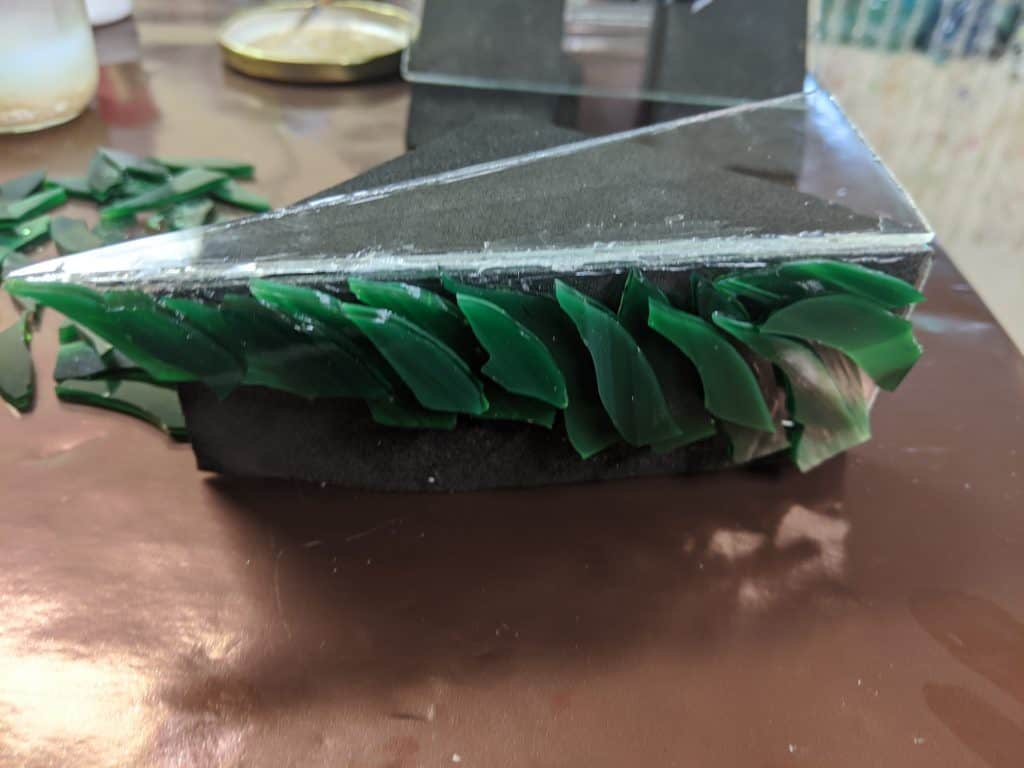
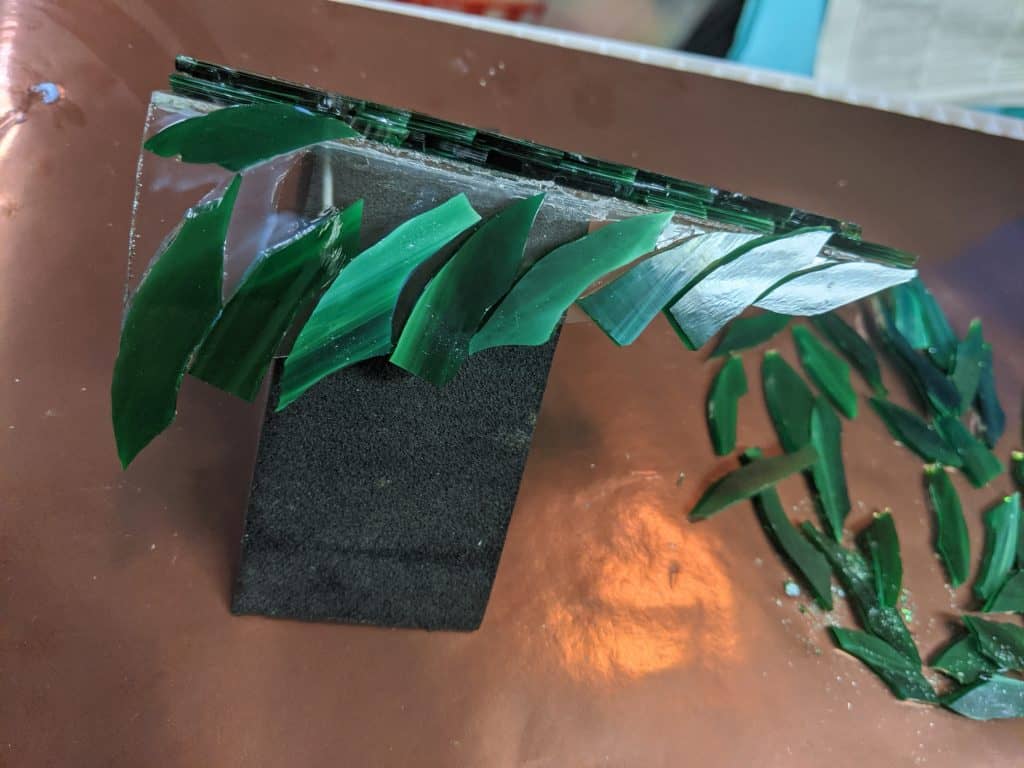
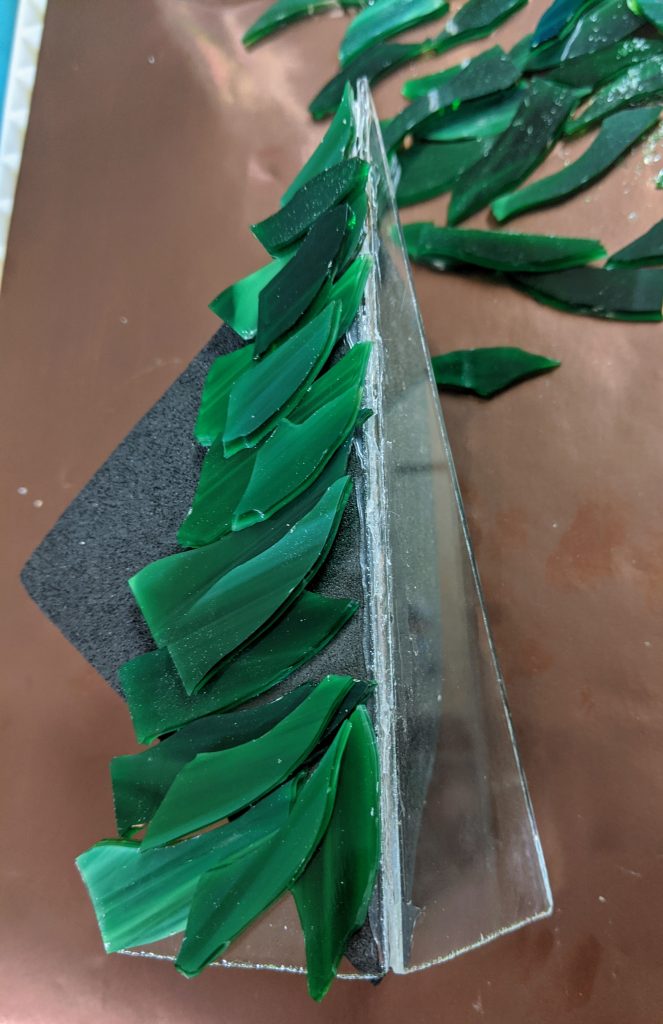
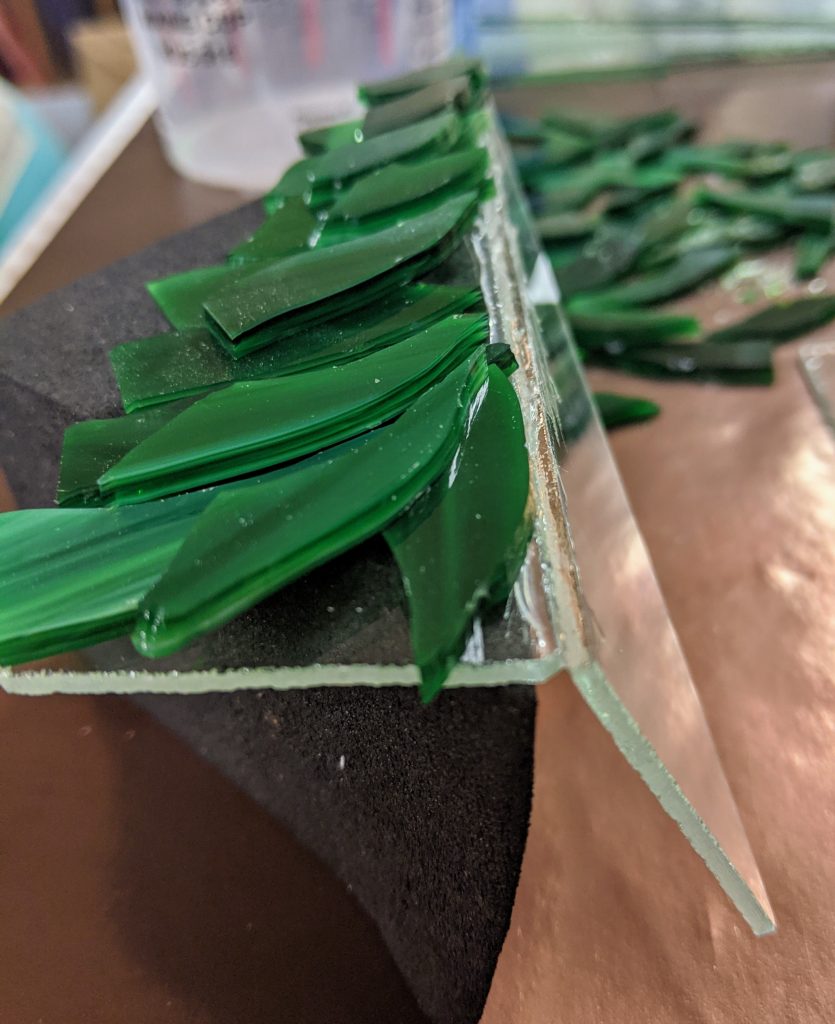
There is a lot of glass dust on the glass pieces, so I will definitely need to clean them before I apply the resin layers later on in the process. While the glue dried on the first trees, I grabbed my mock up triangle tree and set it on a foam base so one side would be level / flat.
Triangle tree base.Another view so you can see the angle of the two triangles.
Next I started experimenting with layouts for the branches for the first side of the tree. I haven’t glued any of these down yet, though. I will wait for another day to do that step.
Branches laid out on one half of the triangle.Branches laid out on one half of the triangle.
I’m not sure how it will go pouring the resin on this because I already connected the two triangles, but this is an experiment, so I will figure it out as I go. For the rectangles, I will try pouring each half, then adding the final layer of branches to cover the seam between the two pieces of recycled base / backer glass. That will likely require two layers of resin, as well.