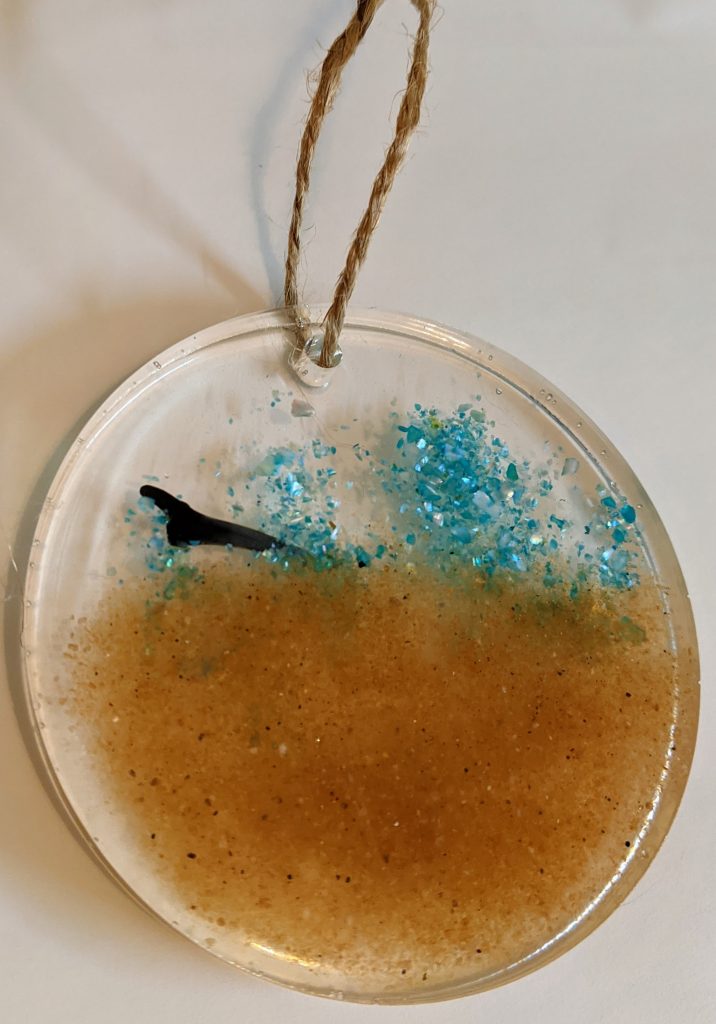
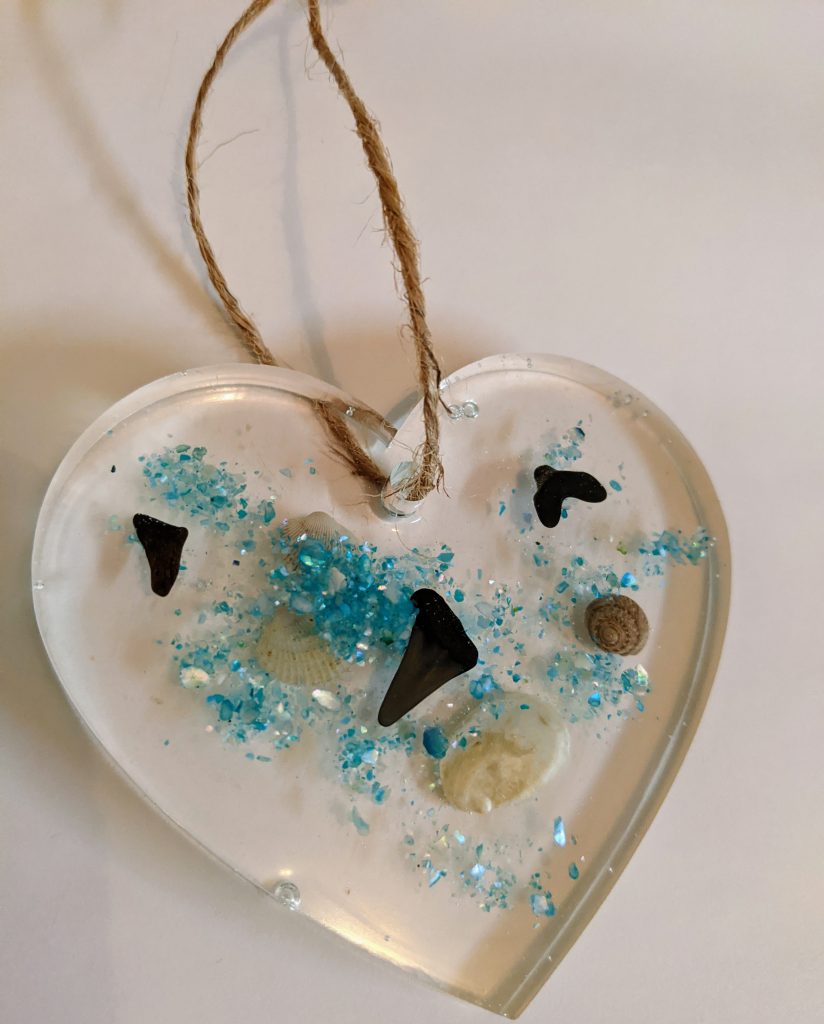
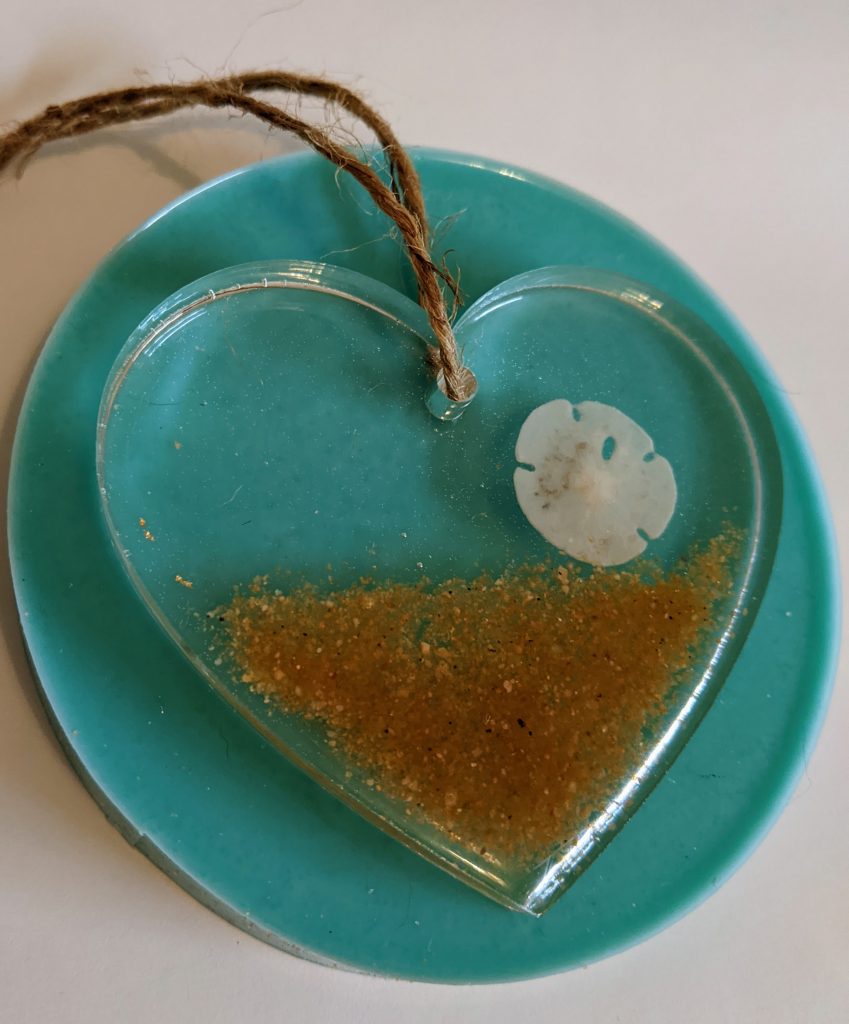
Here are some snapshots of my latest batch of winter themed pieces / suncatchers / ornaments. This week’s beach-themed ornaments are still a work in progress; hopefully I will be able to finish them over the weekend.
Glass of Sherry
Here are some snapshots of my latest batch of winter themed pieces / suncatchers / ornaments. This week’s beach-themed ornaments are still a work in progress; hopefully I will be able to finish them over the weekend.
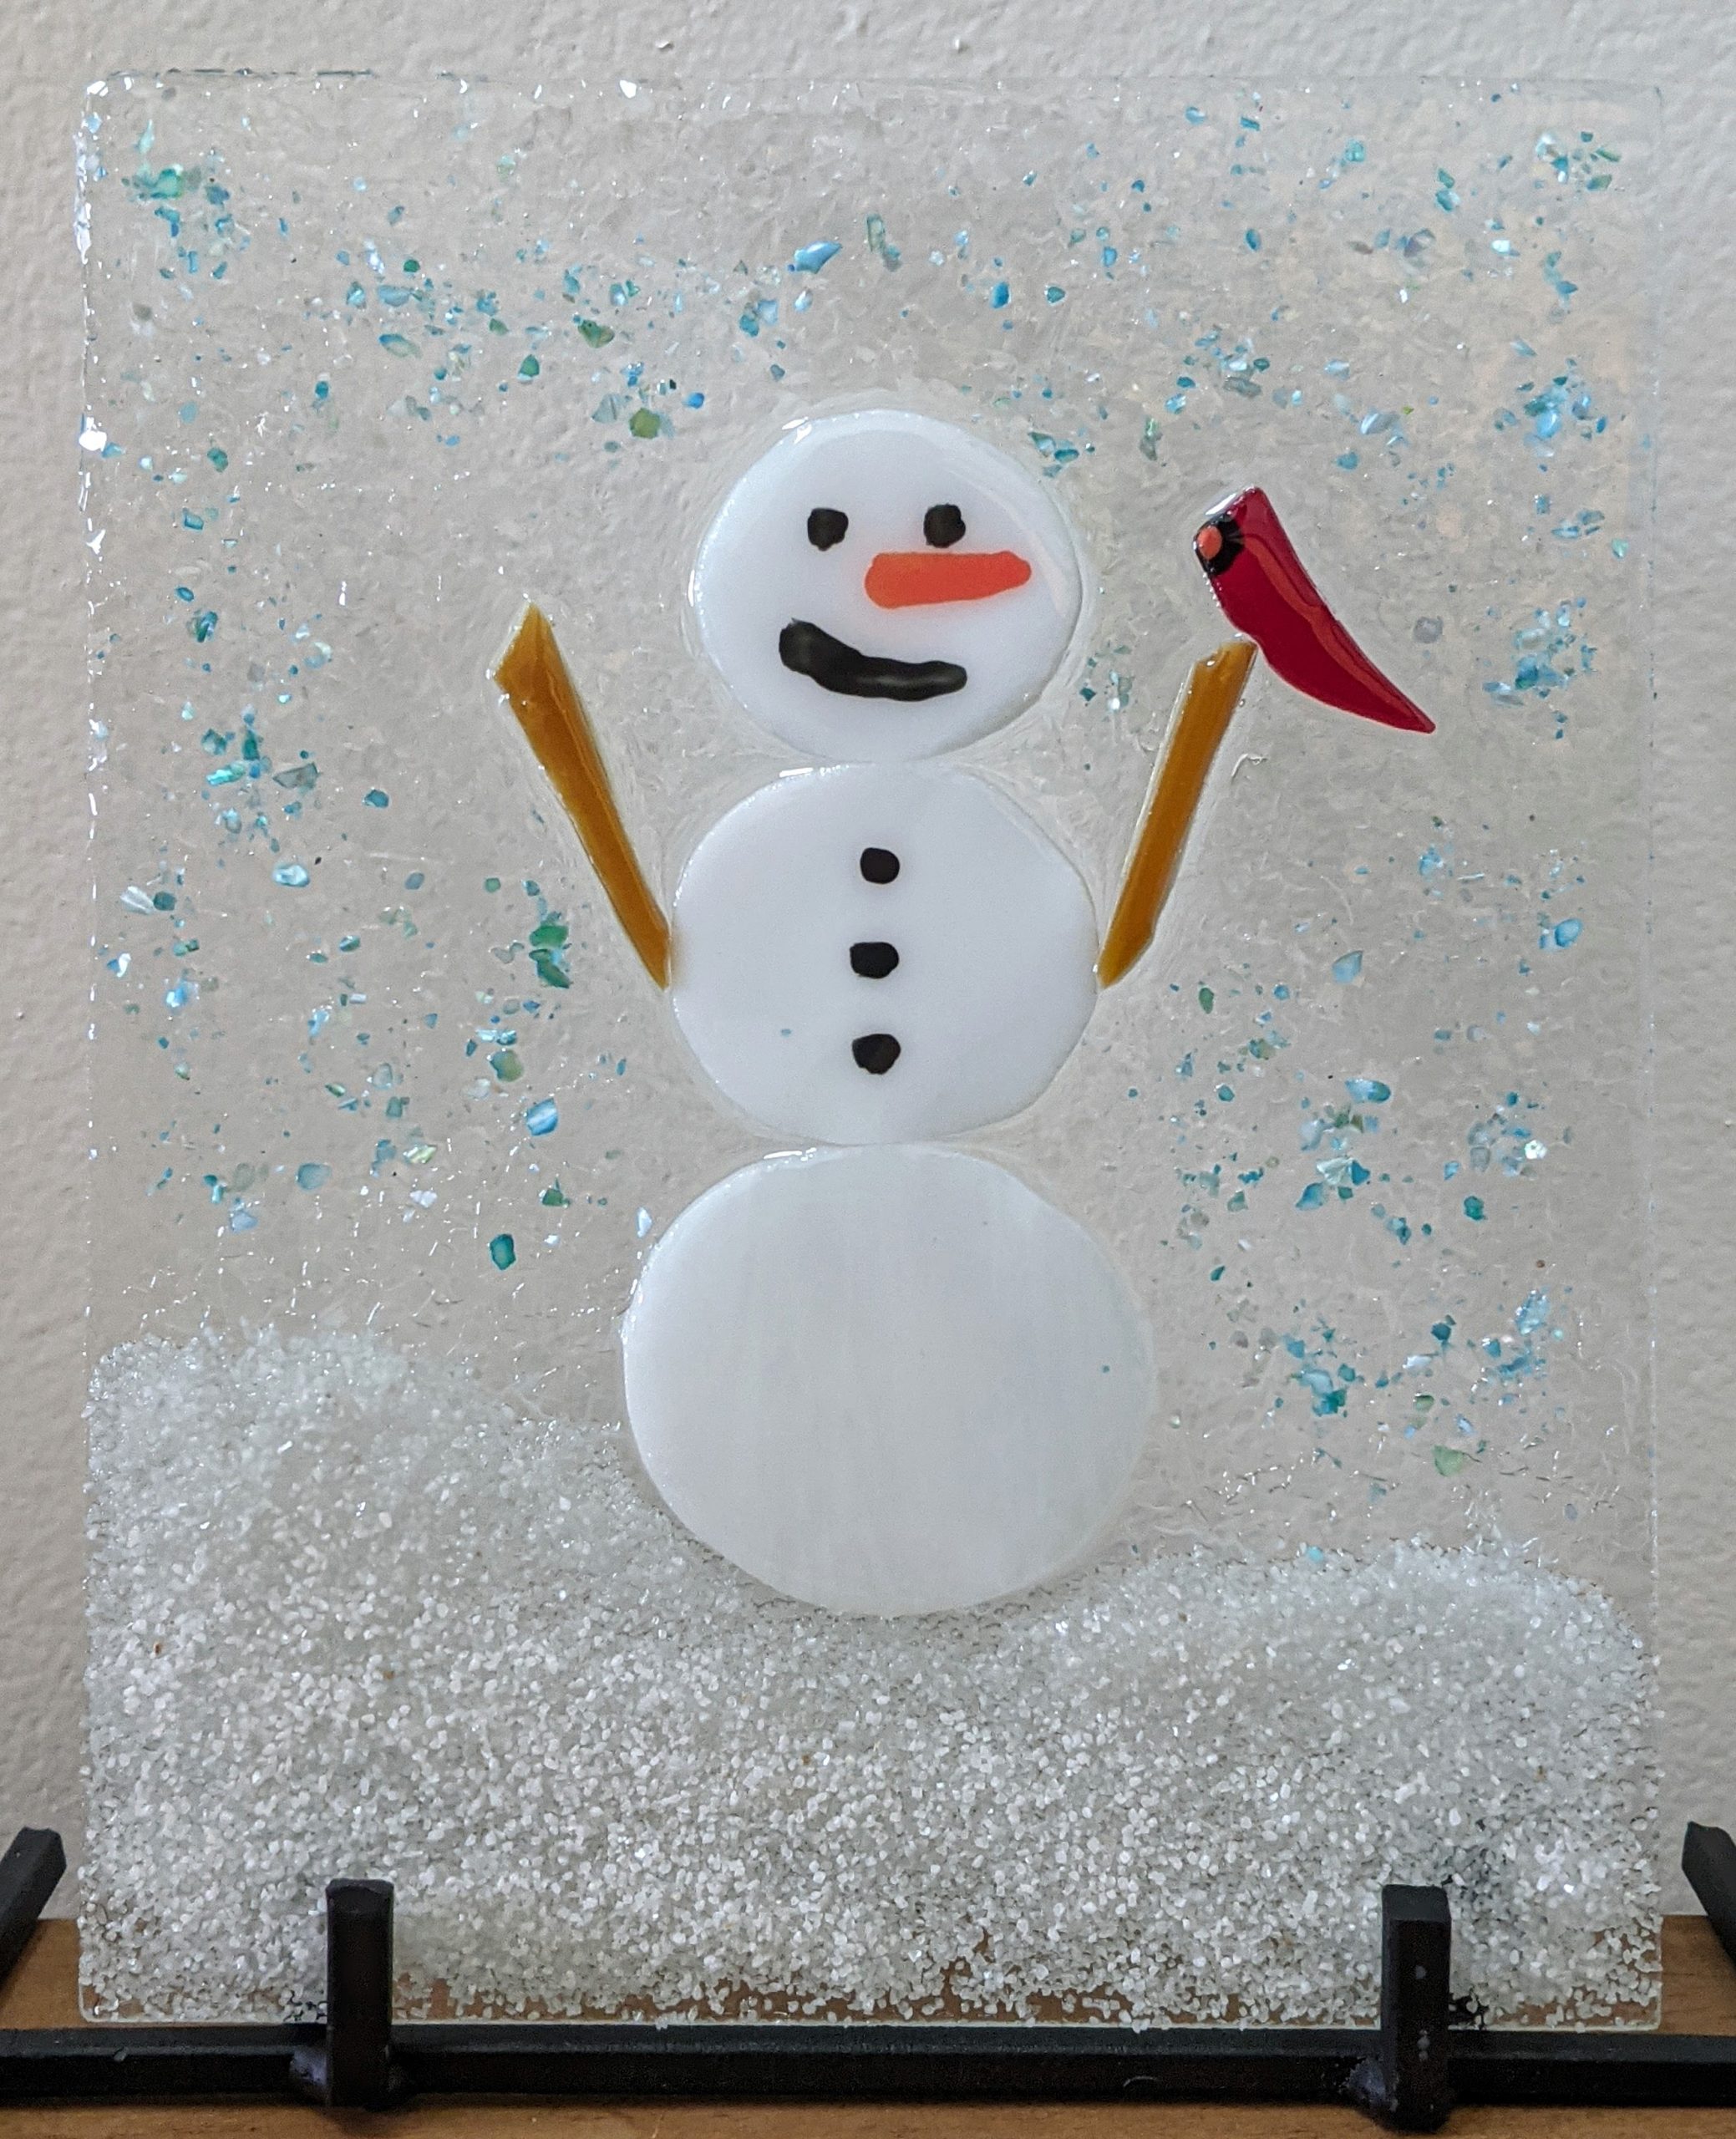
Yesterday I poured / decorated the resin for the winter scene and snowman, as well as added a second resin layer to four molded ornaments. Hopefully I will be able to get finished pictures of them this evening!
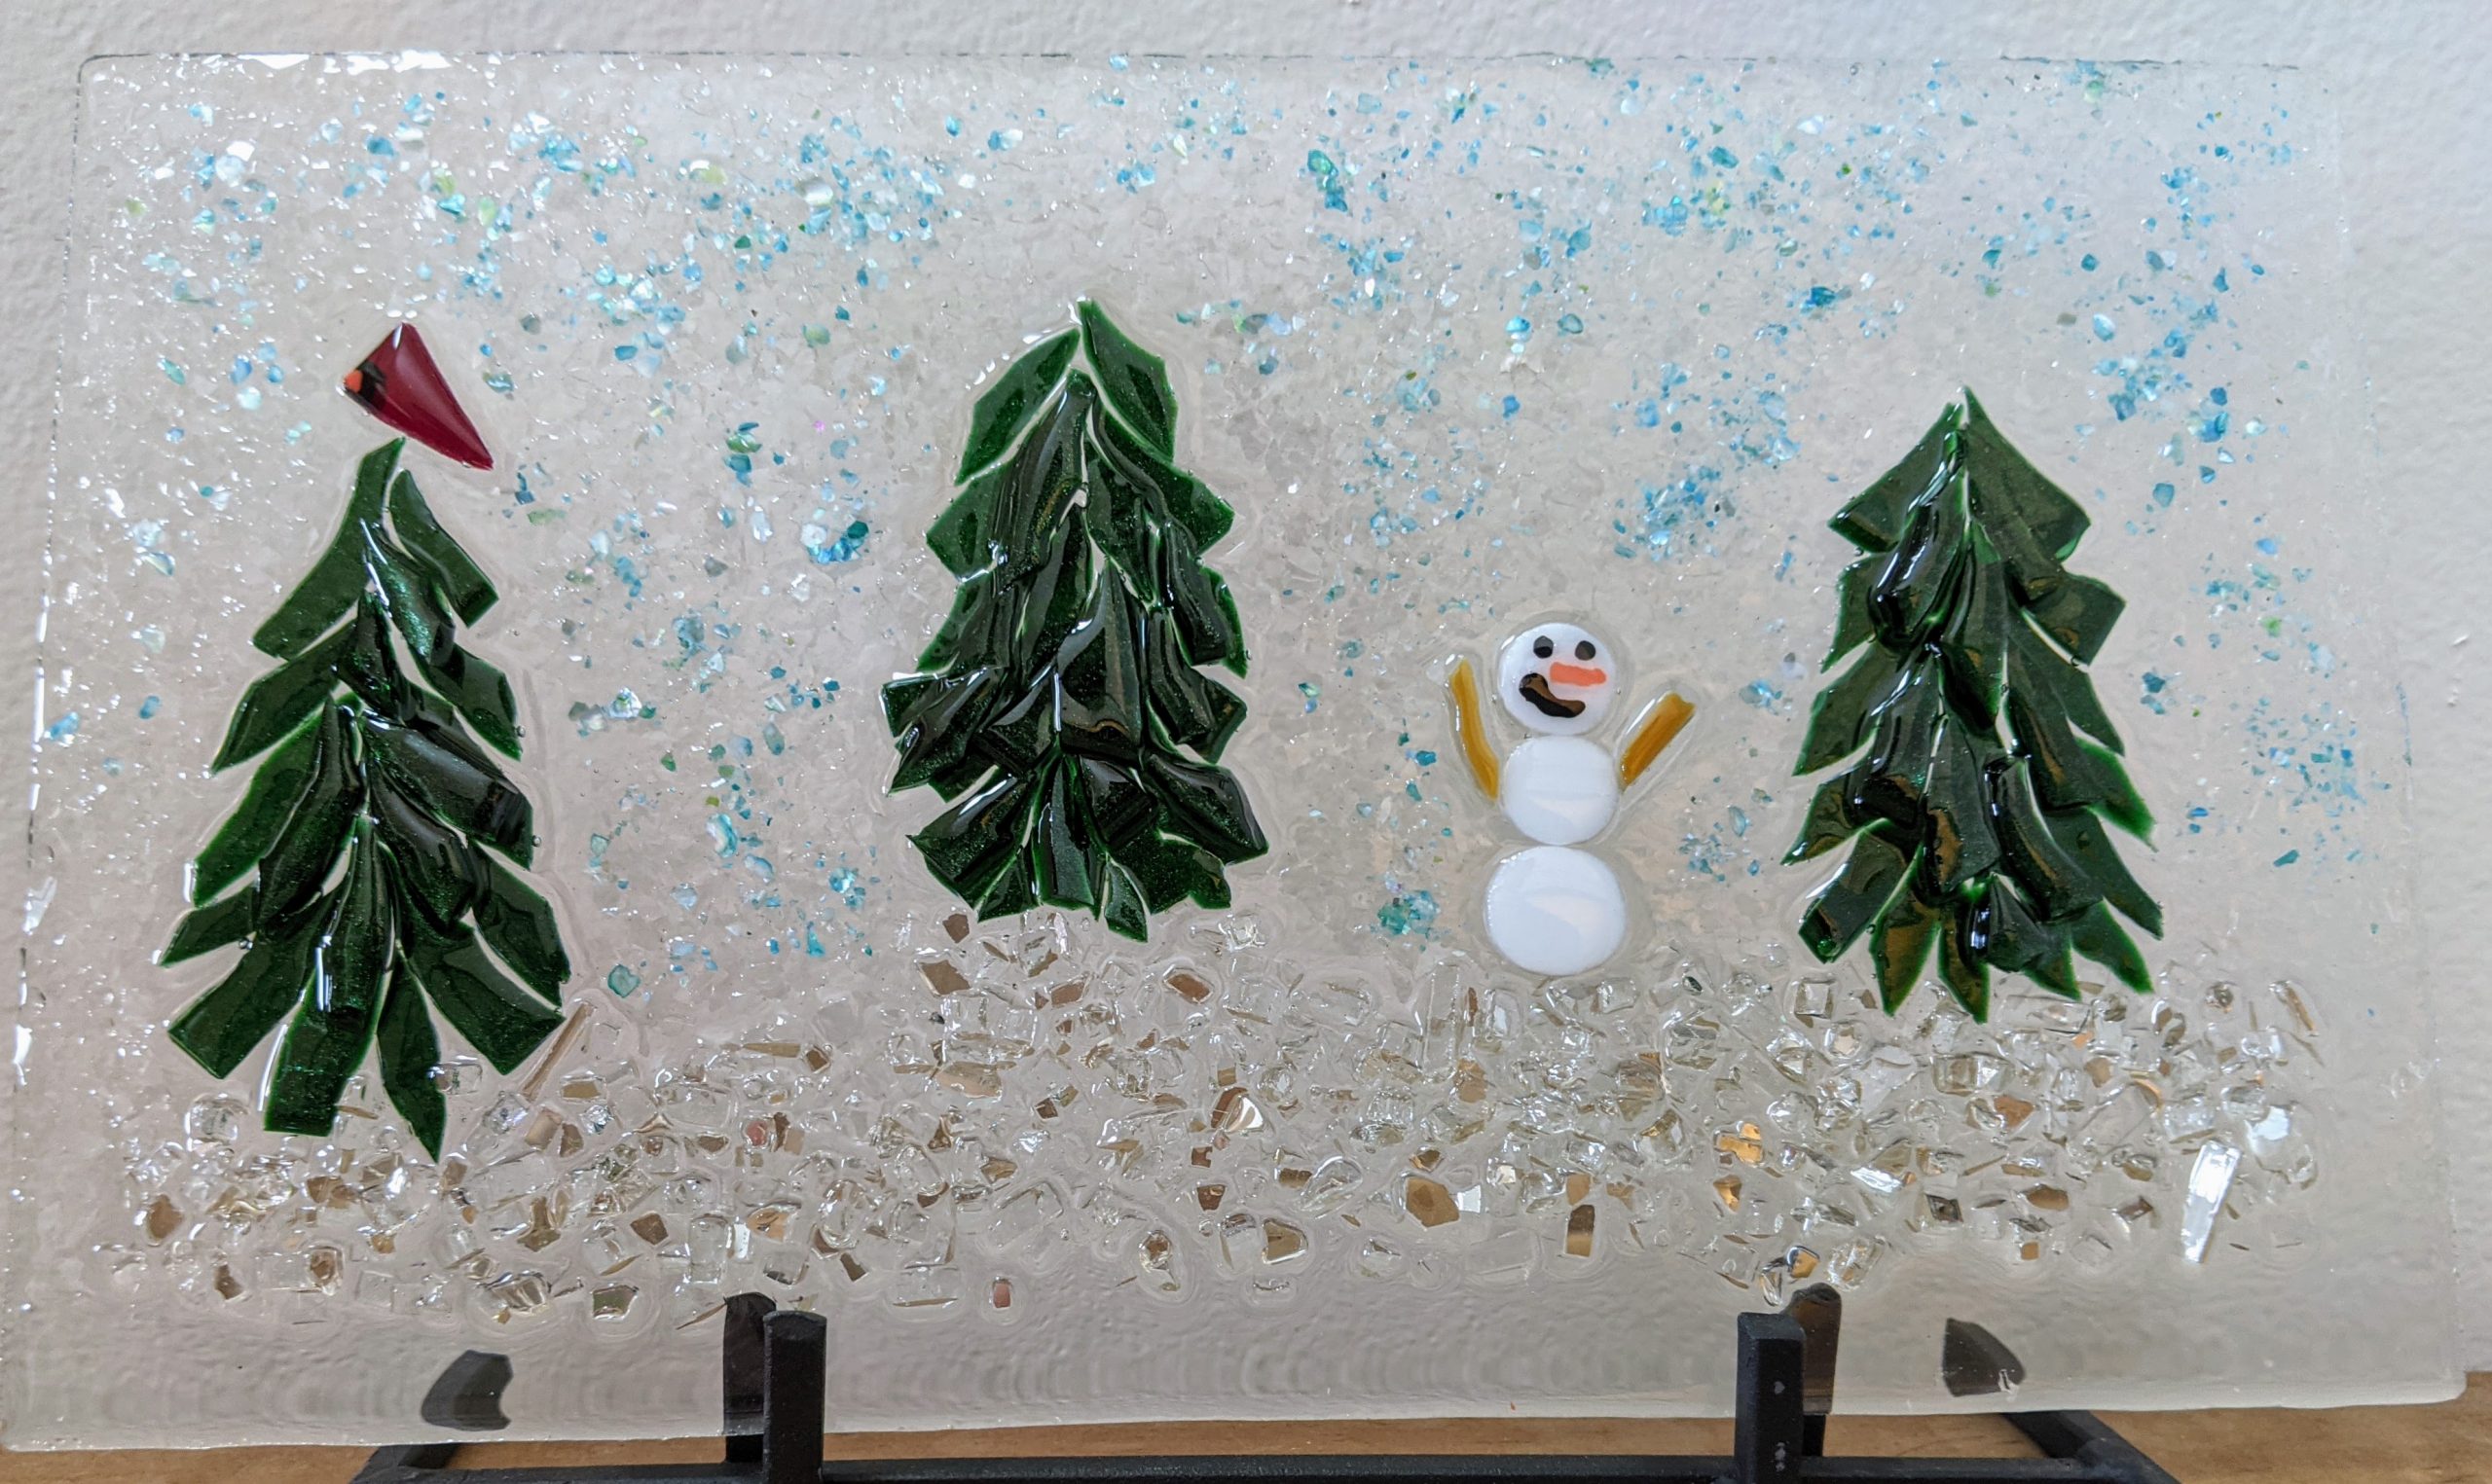
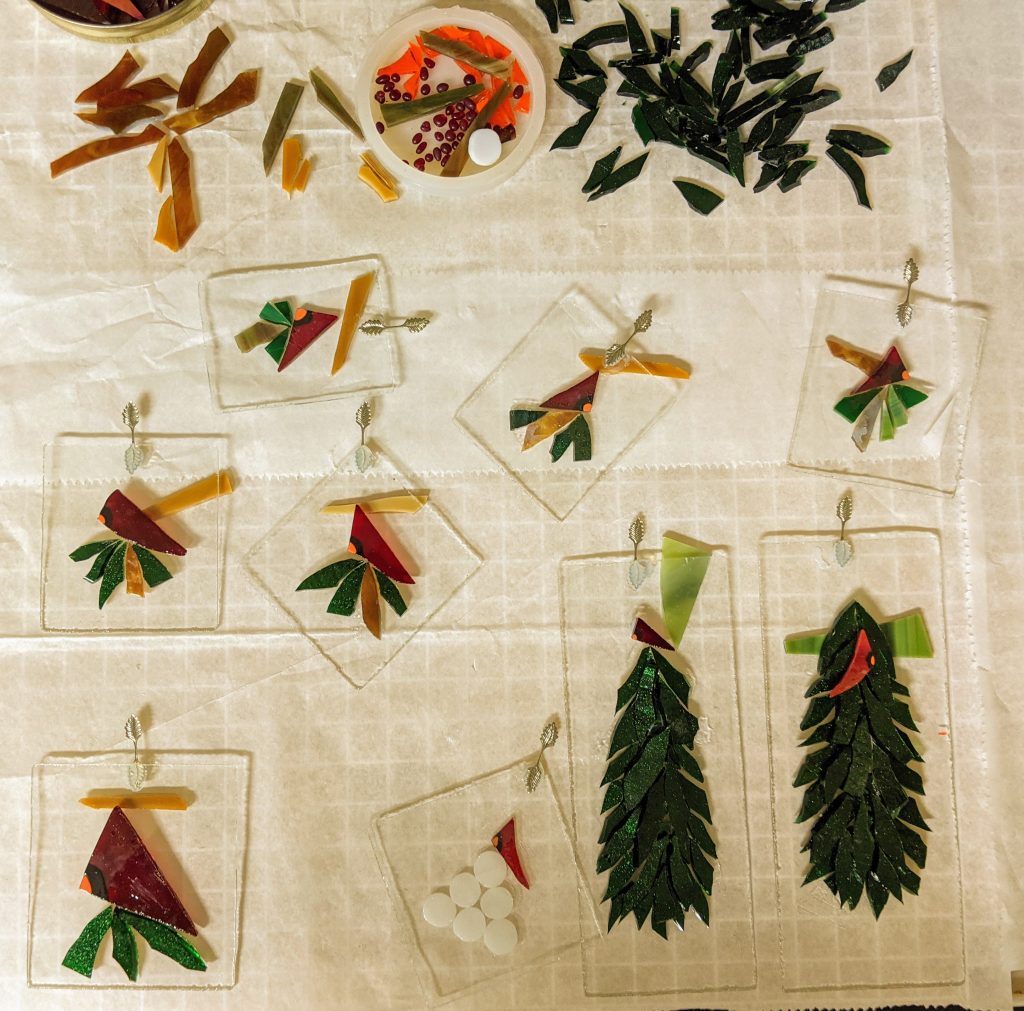
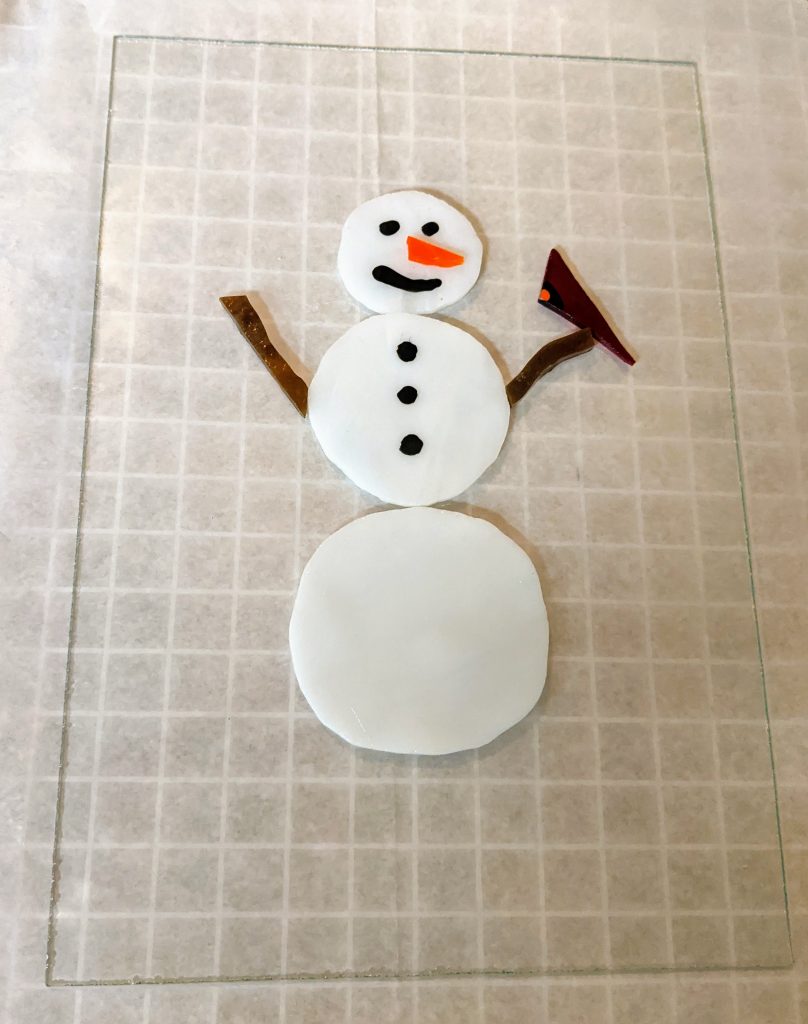
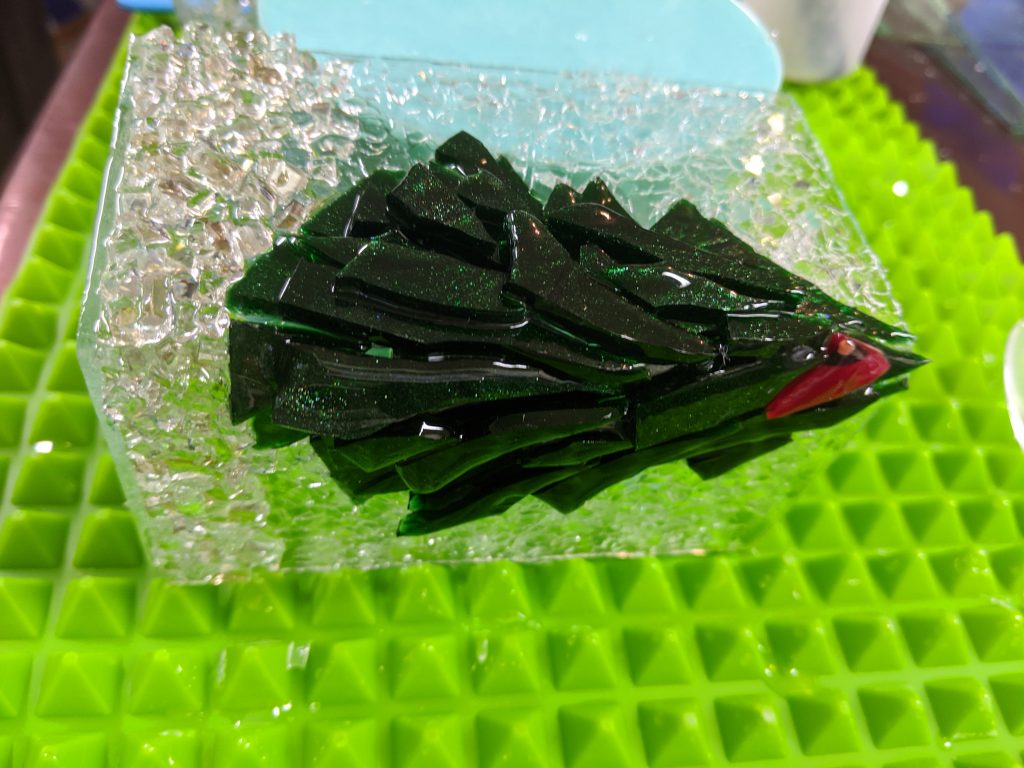
Today I laid out some designs and glued them in place. These will have a lot more detail once the resin is poured and decorated. I like to use “glass chunk snow” under the trees and glass chips / mica accents for sparkle.

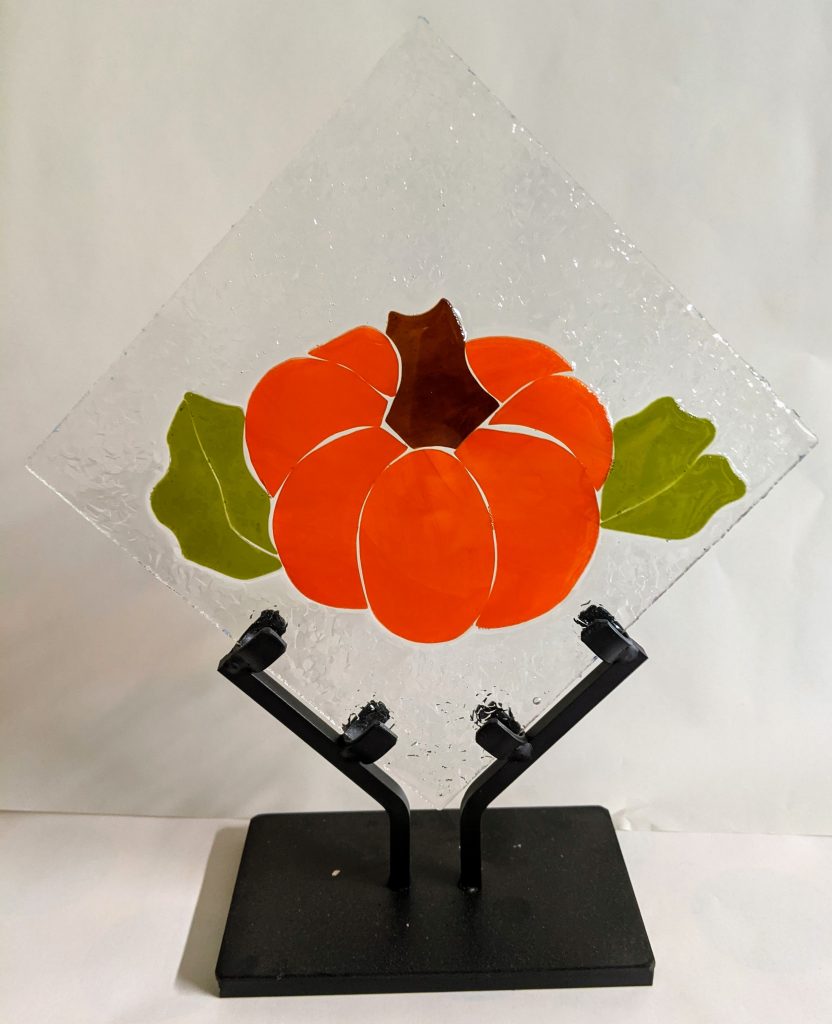
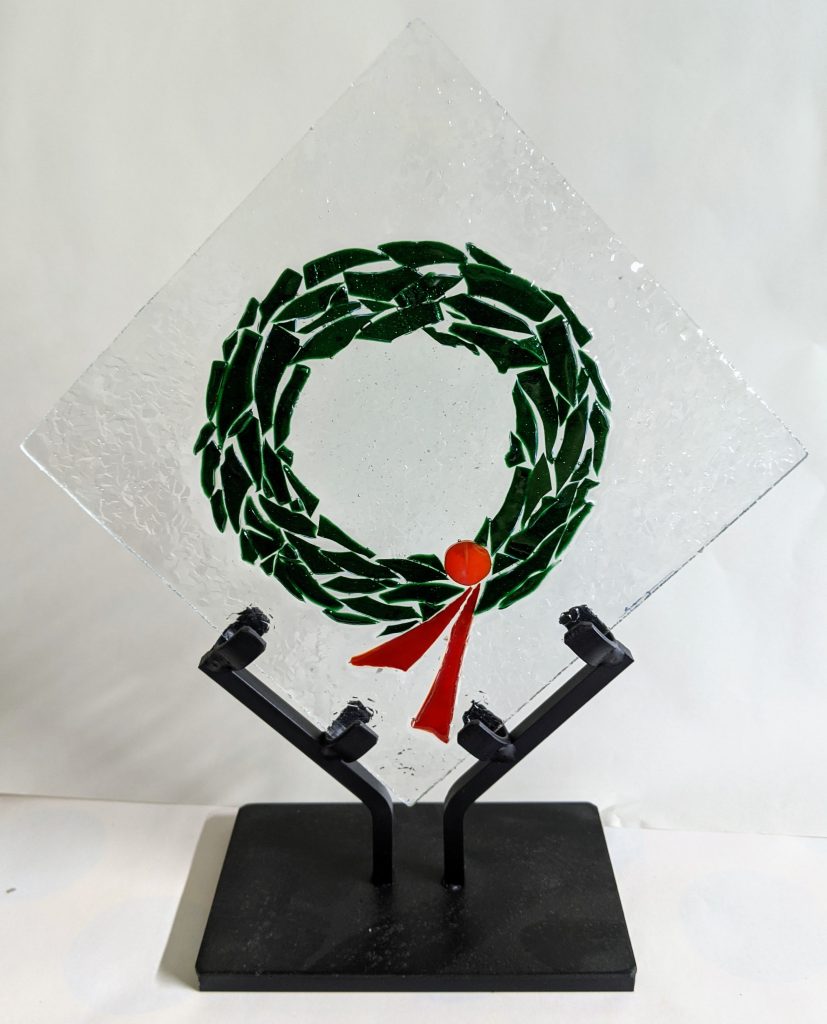
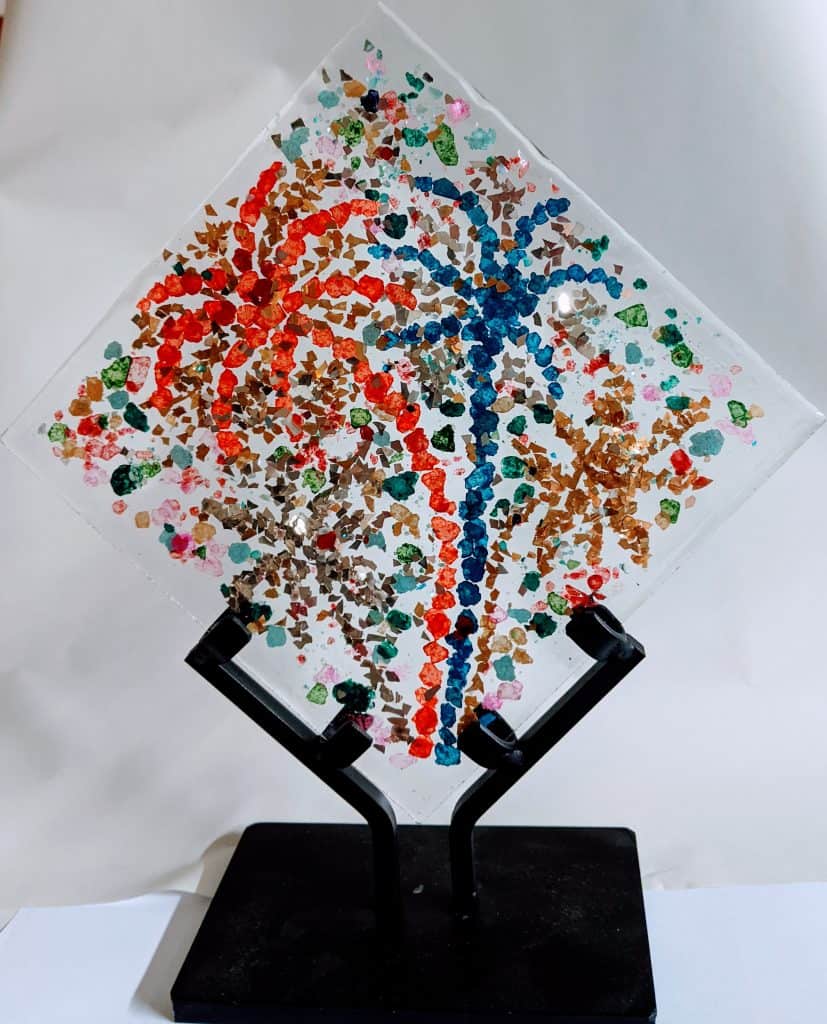
Wrapped up my “8 Seasons” set project today. I’m pretty happy with how they turned out. Eight panels (each approximately 6″ square). Two for each season (Spring, Summer, Autumn and Winter). These will be sold with the display stand as a set for $400.
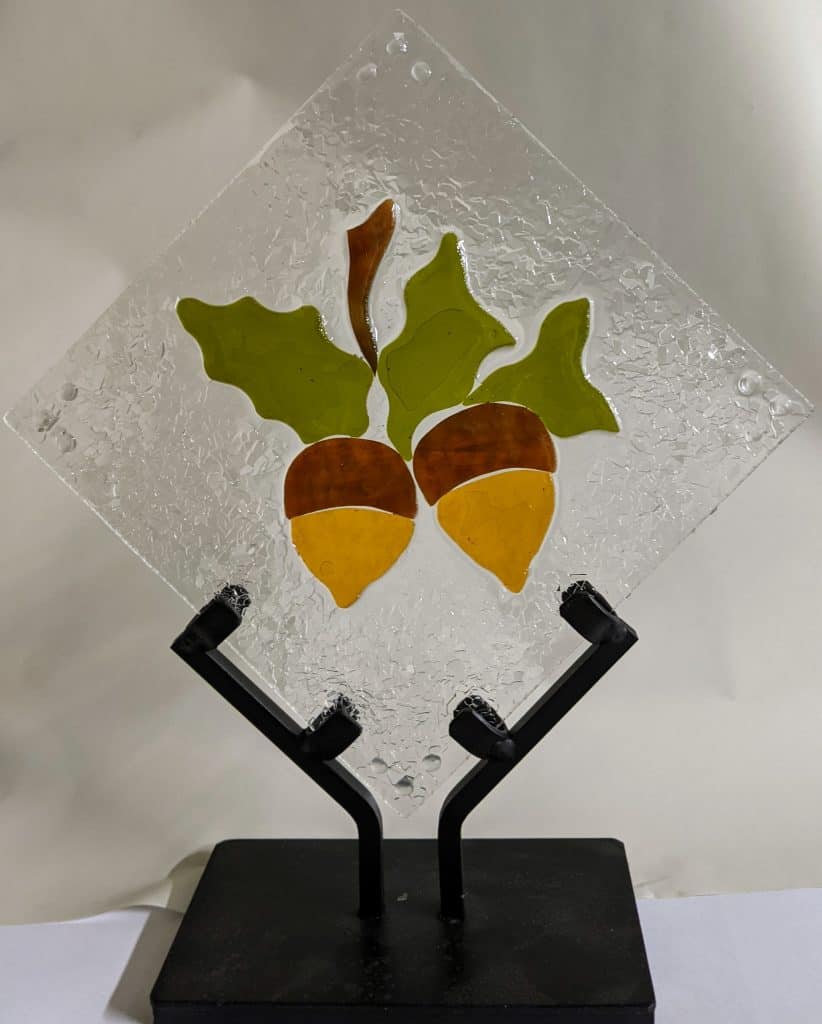
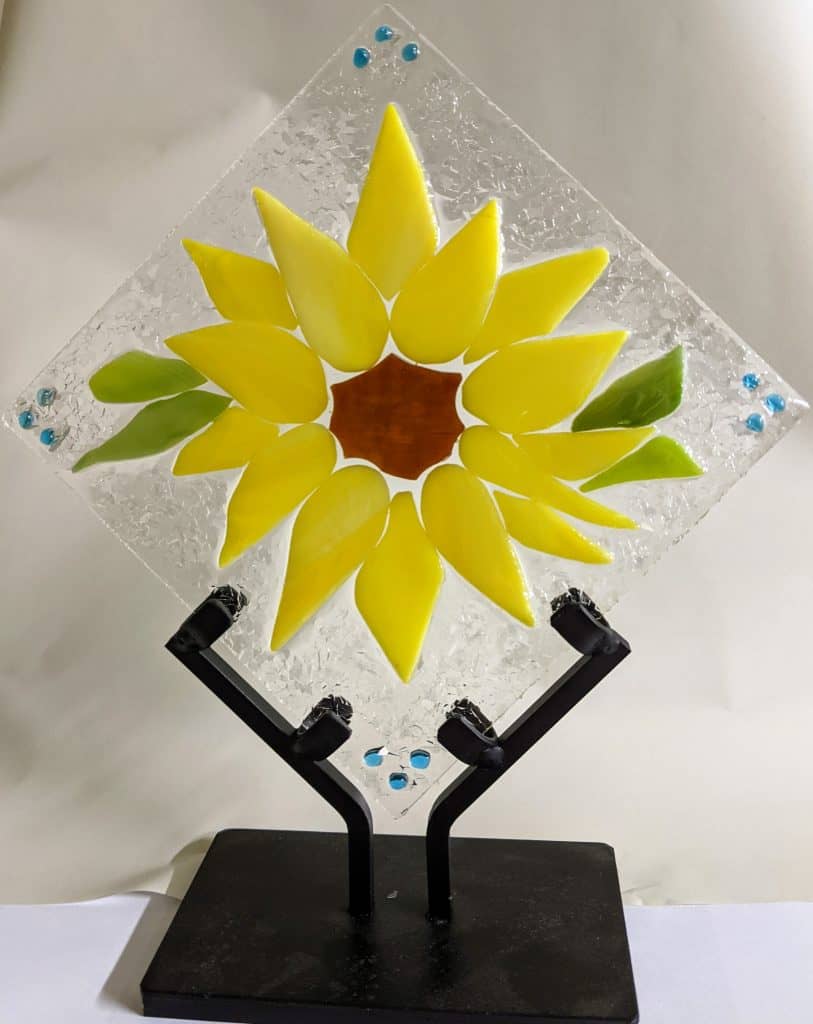
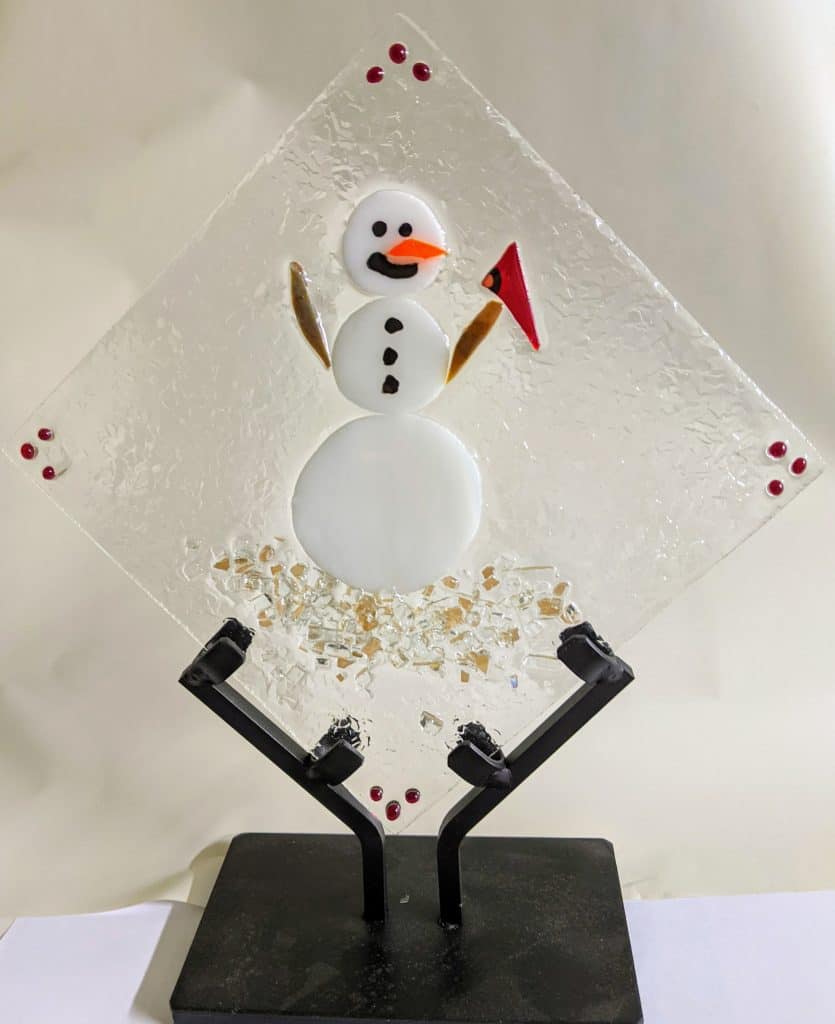
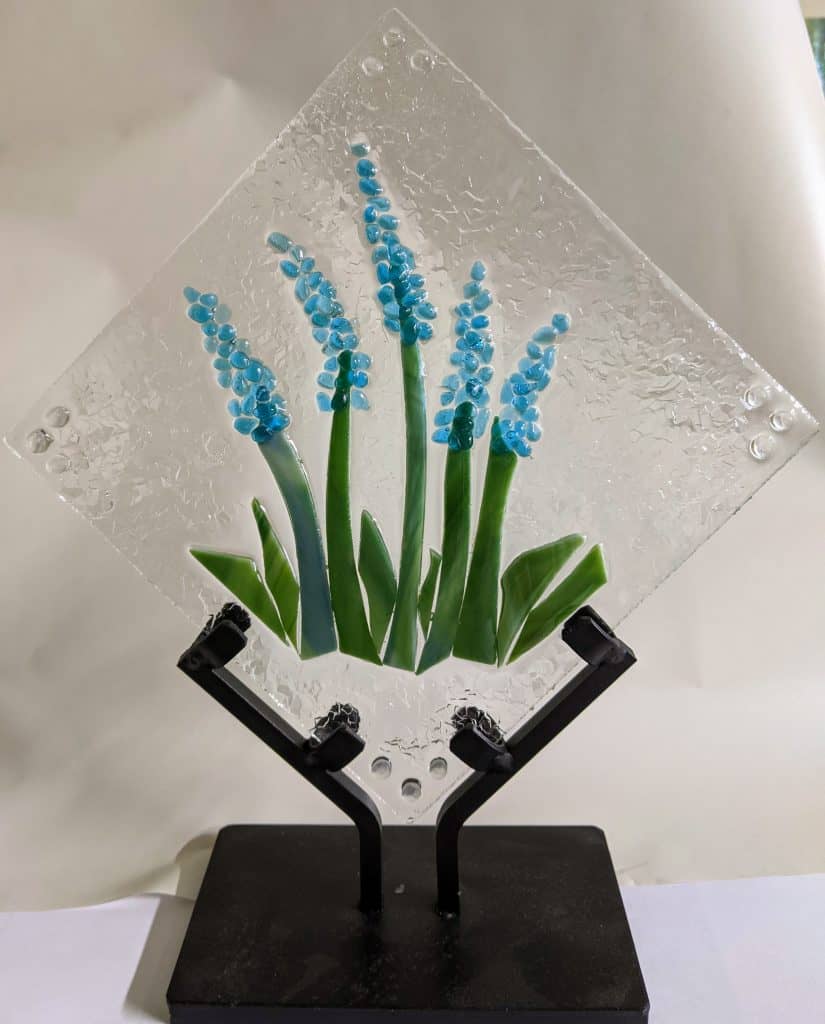

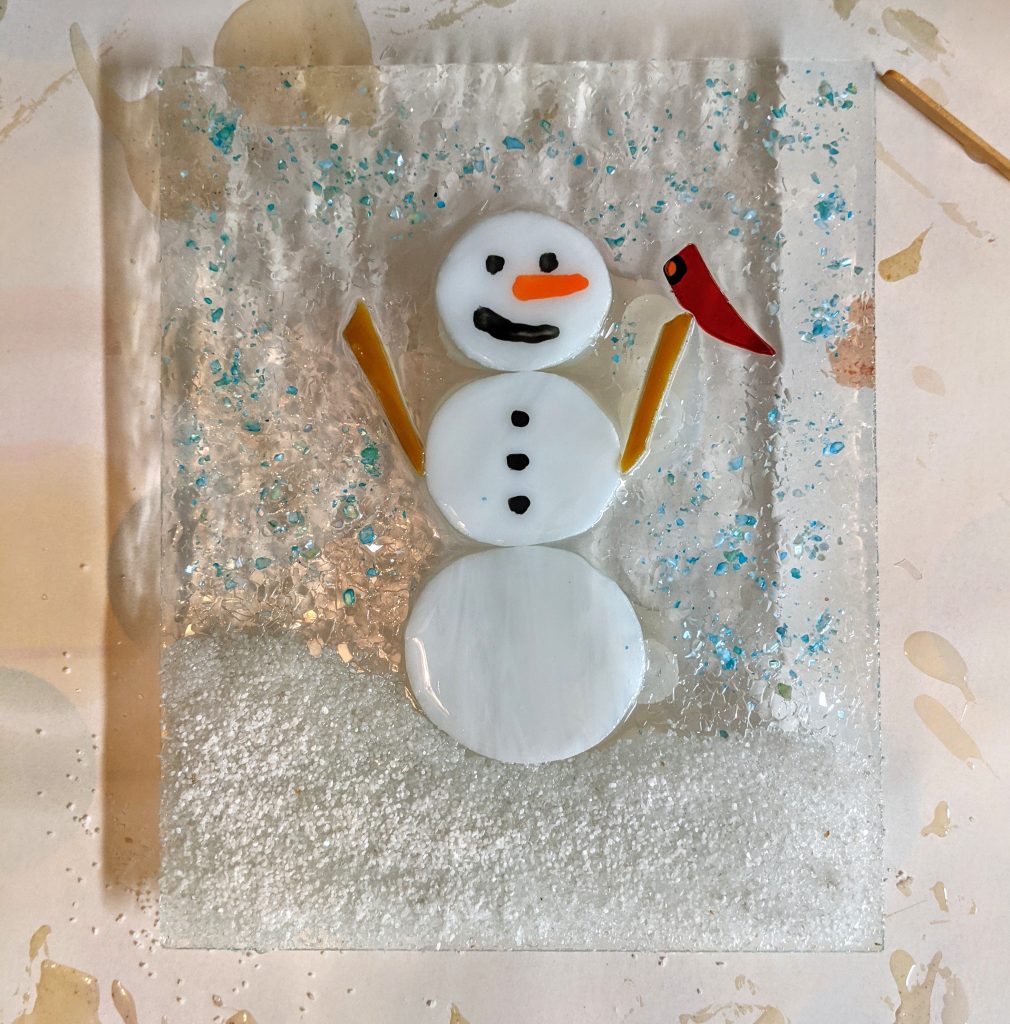
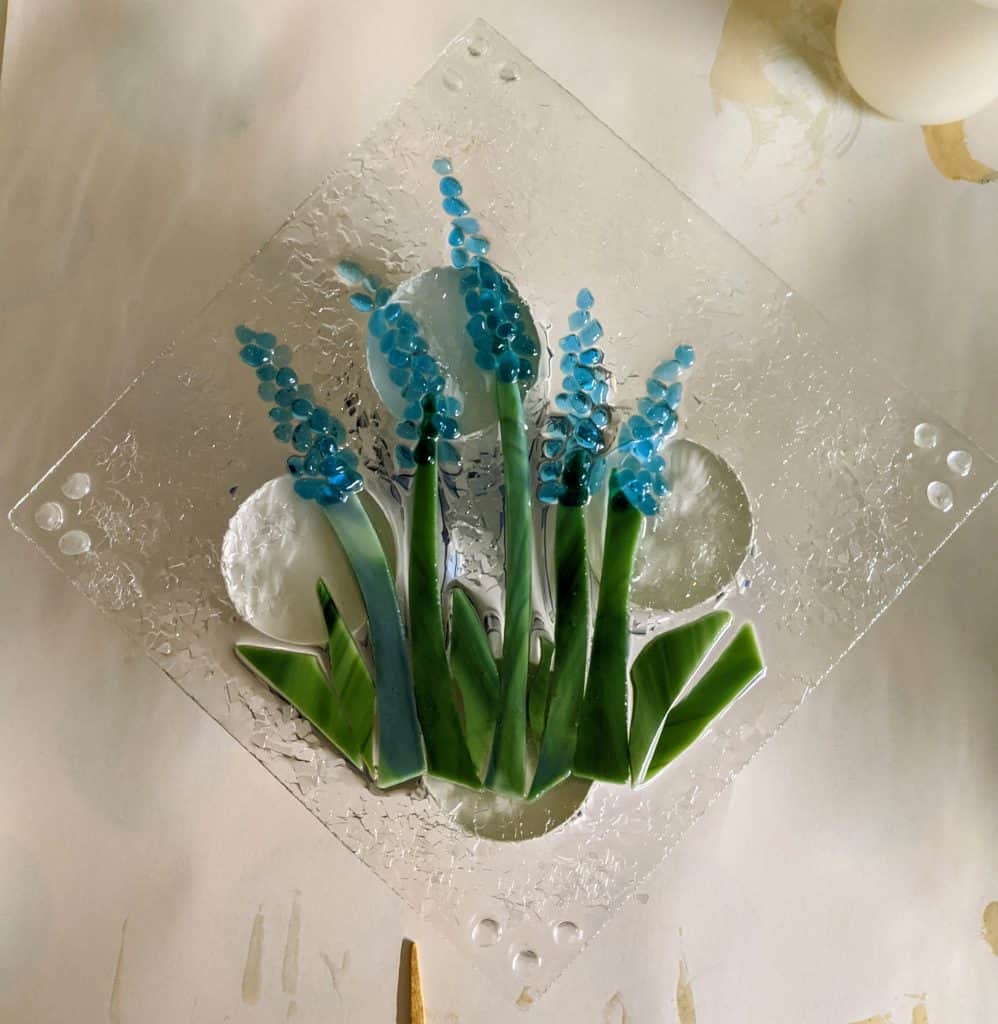
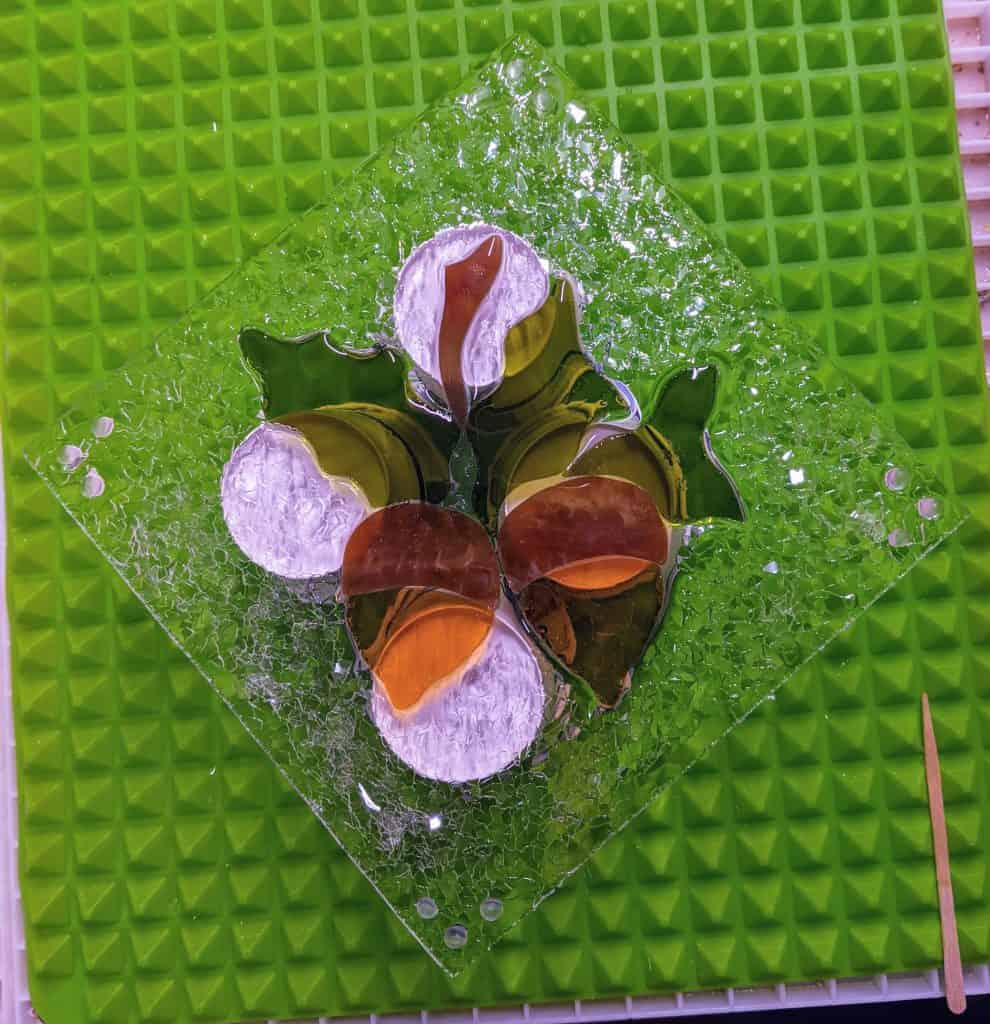
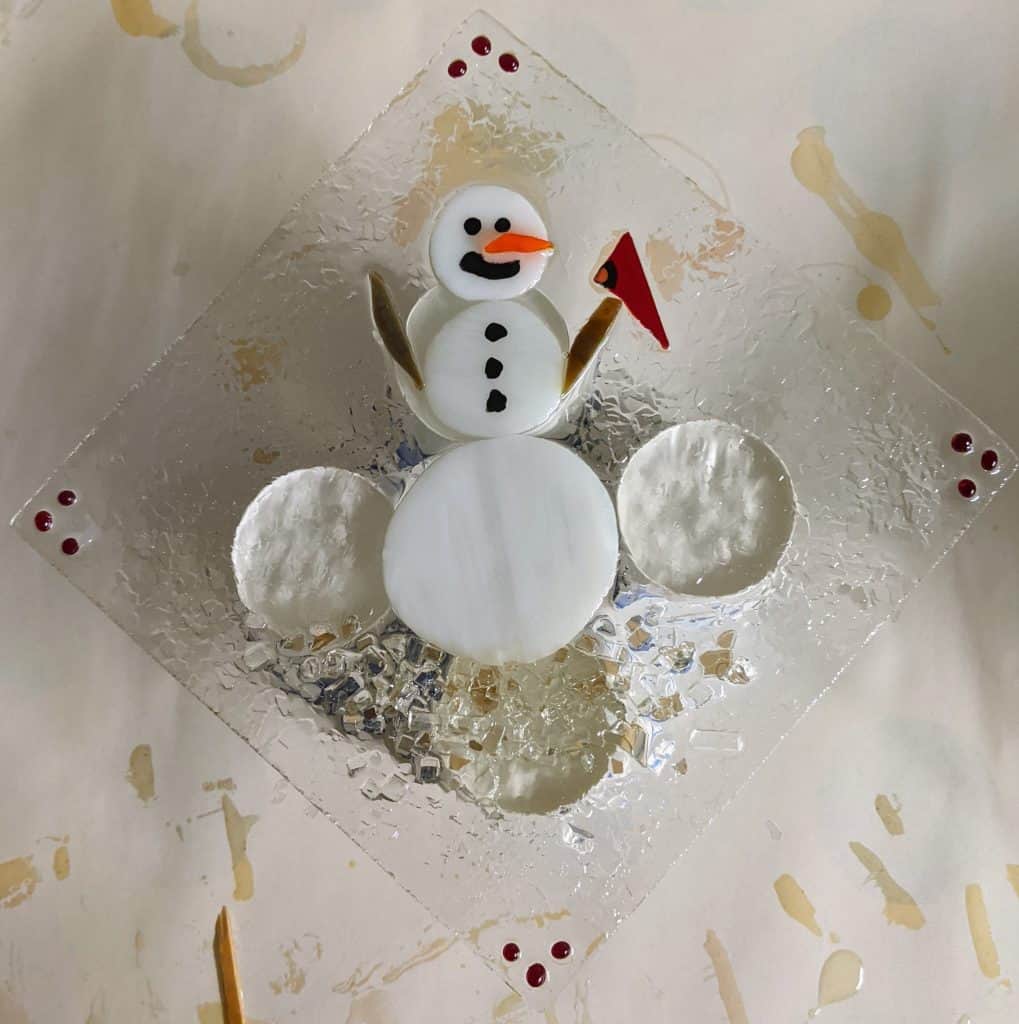
Today I was able to pour the resin on the Sunflower, Spring Flowers (Delphinium / Grape Hyacinth inspired), Acorns and Snowman panels. I forgot to use the masking tape on the undersides, so there was a lot of tending to the drips to take care of for these. Looking forward to seeing how the turn out in the next day or two!

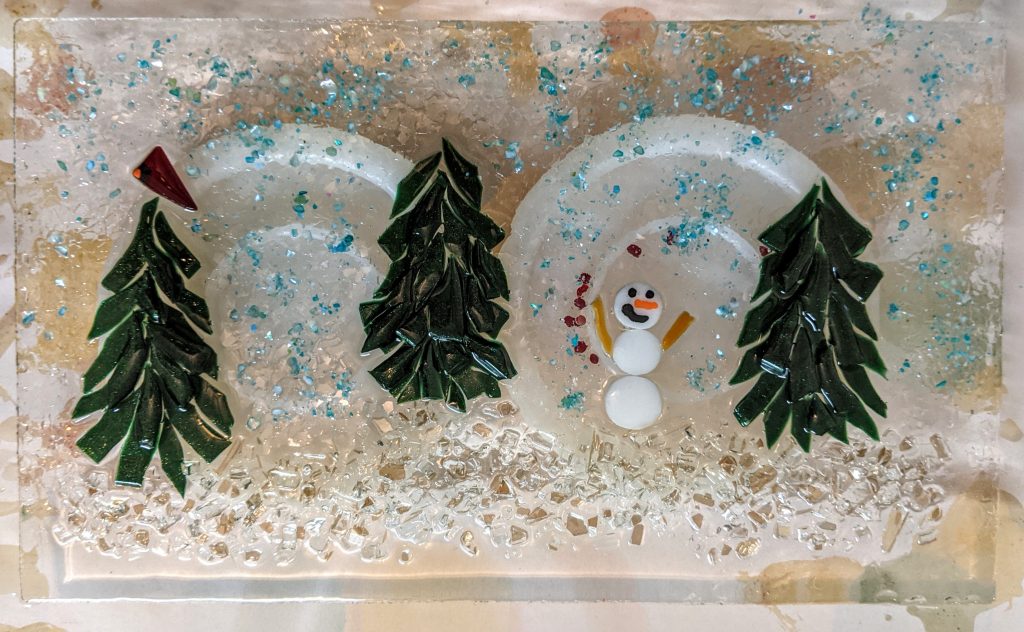
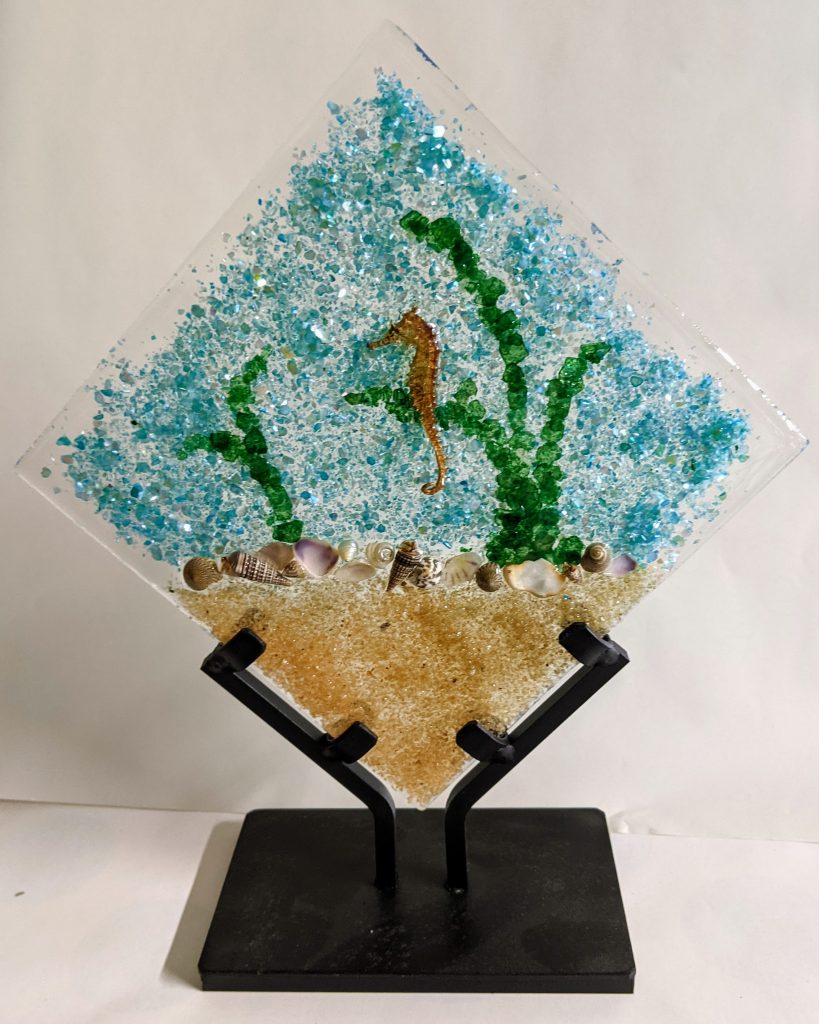
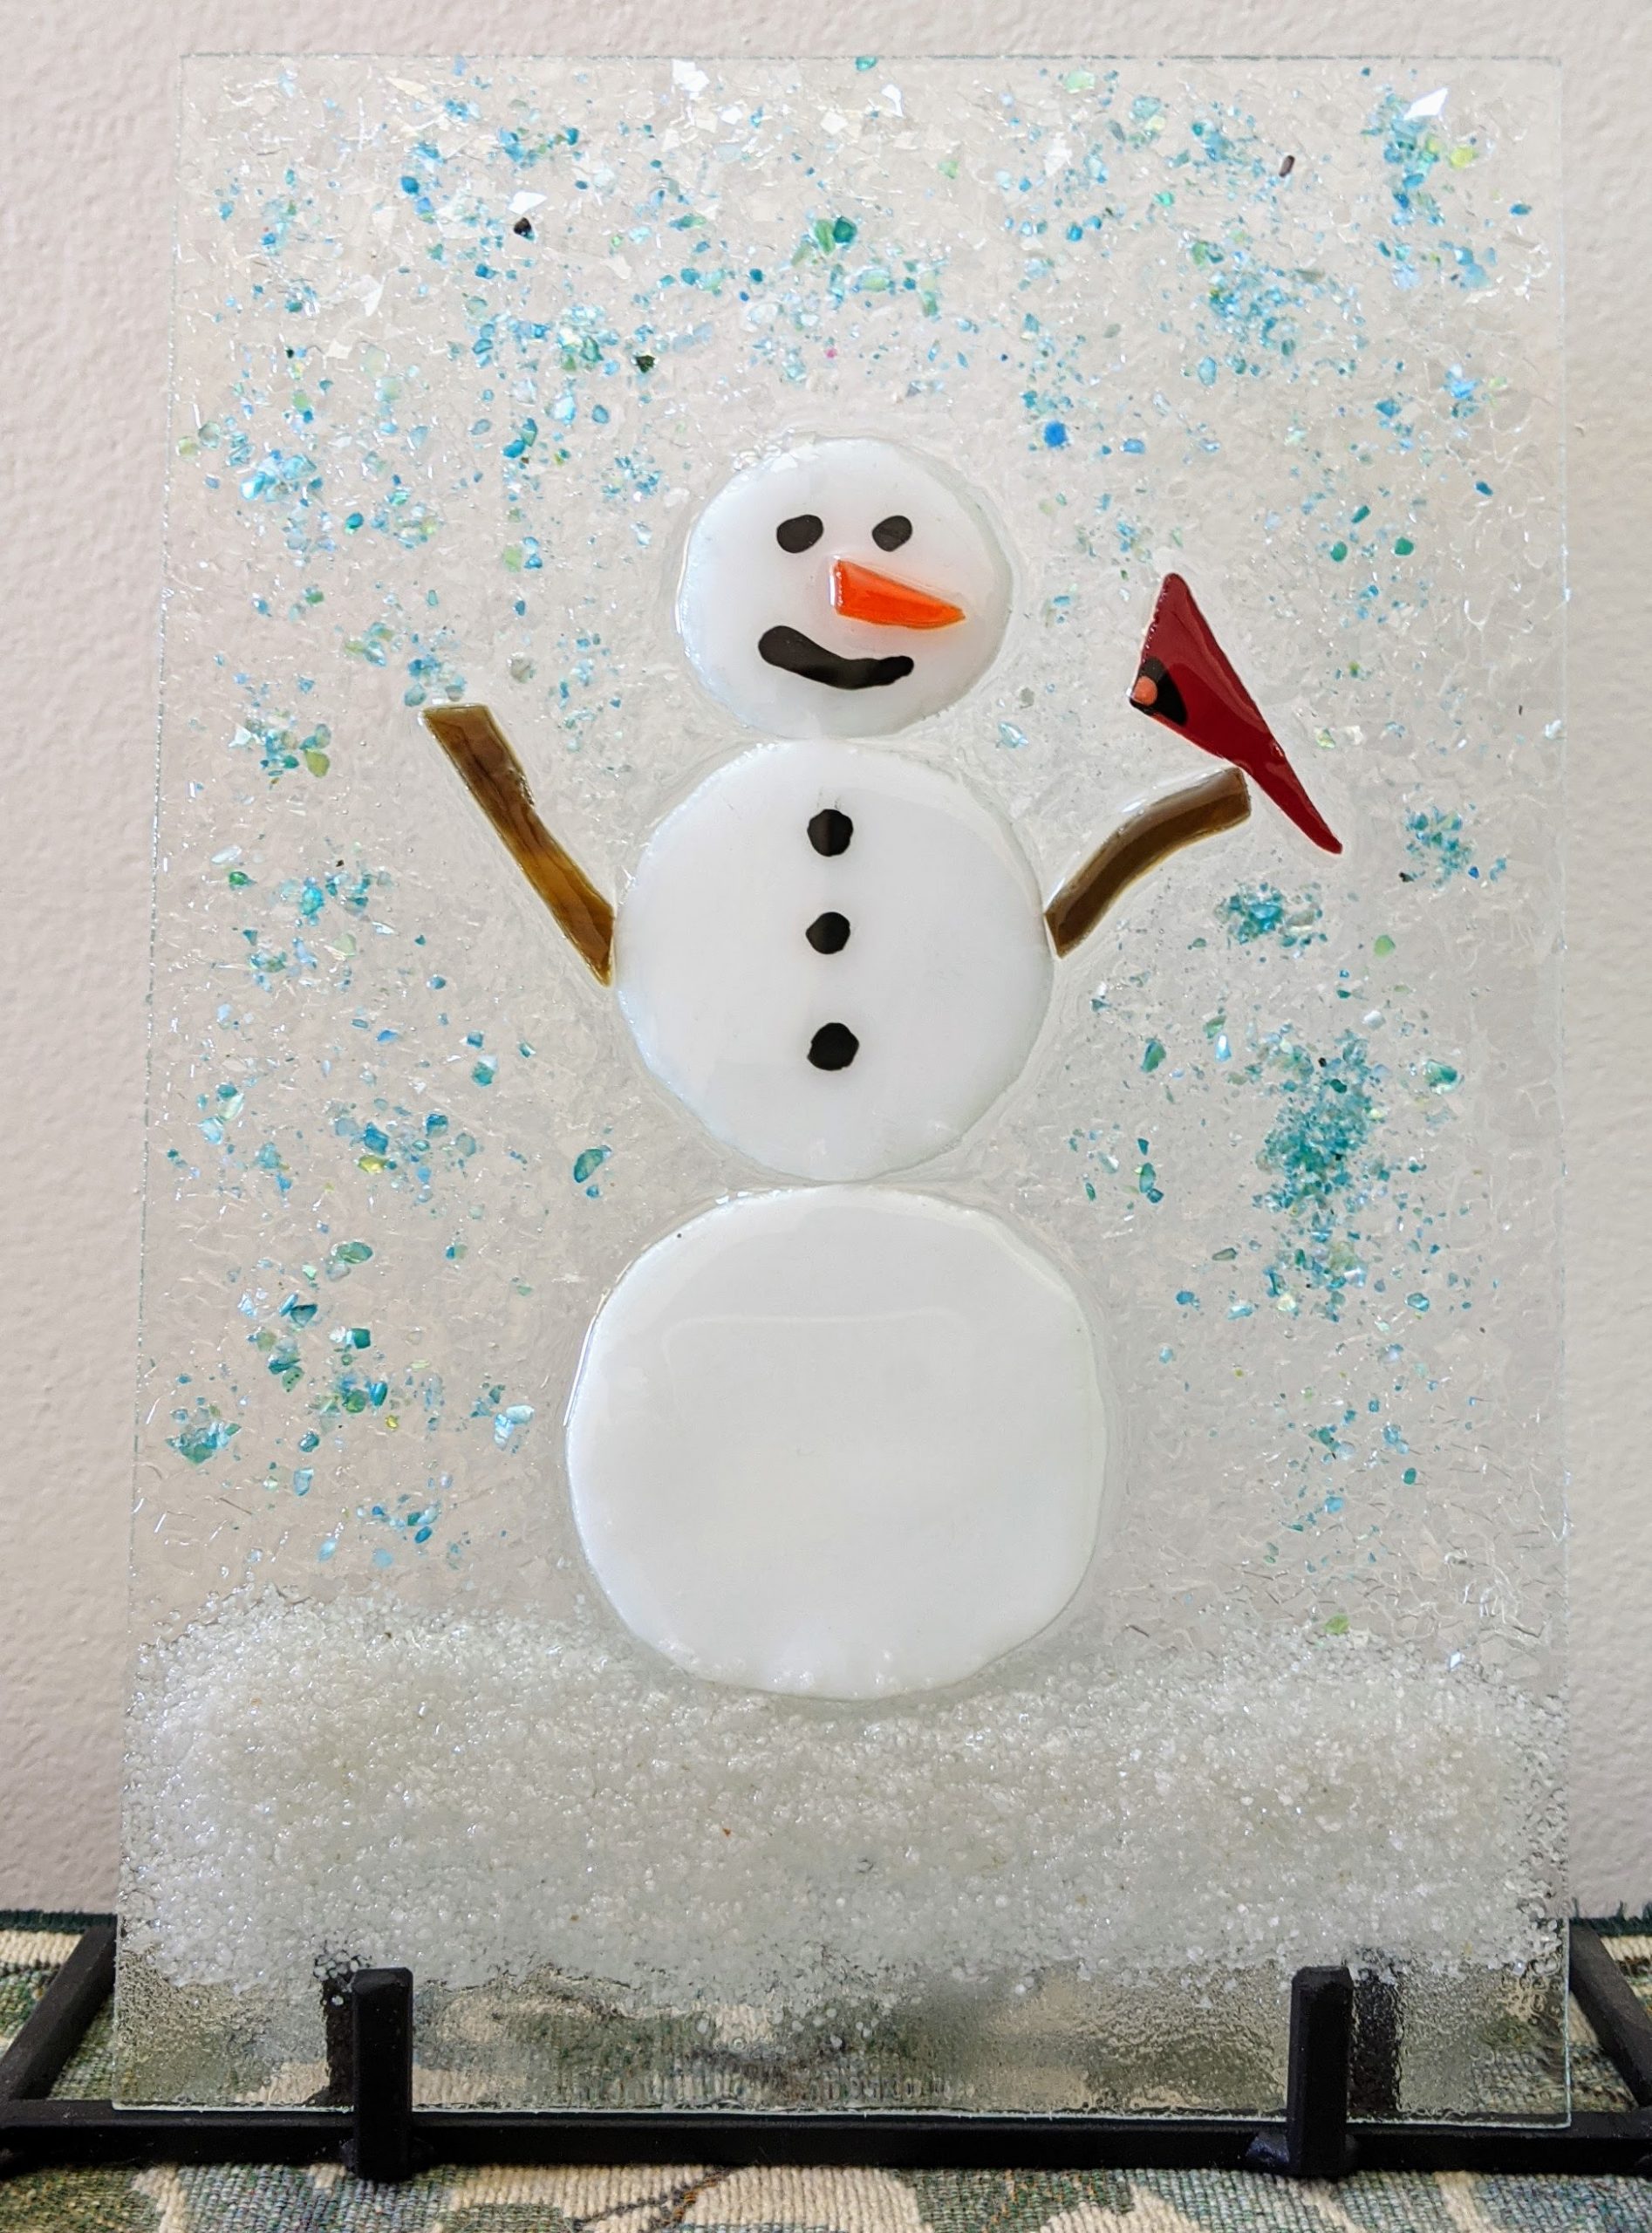
I finished this guy yesterday and he cured overnight. Measures approximately 6.5″ w x 9.5″ tall, stained glass on recycled window glass coated with resin and decorated with glass chips, ground stone, glass glitter and blue shell accents.
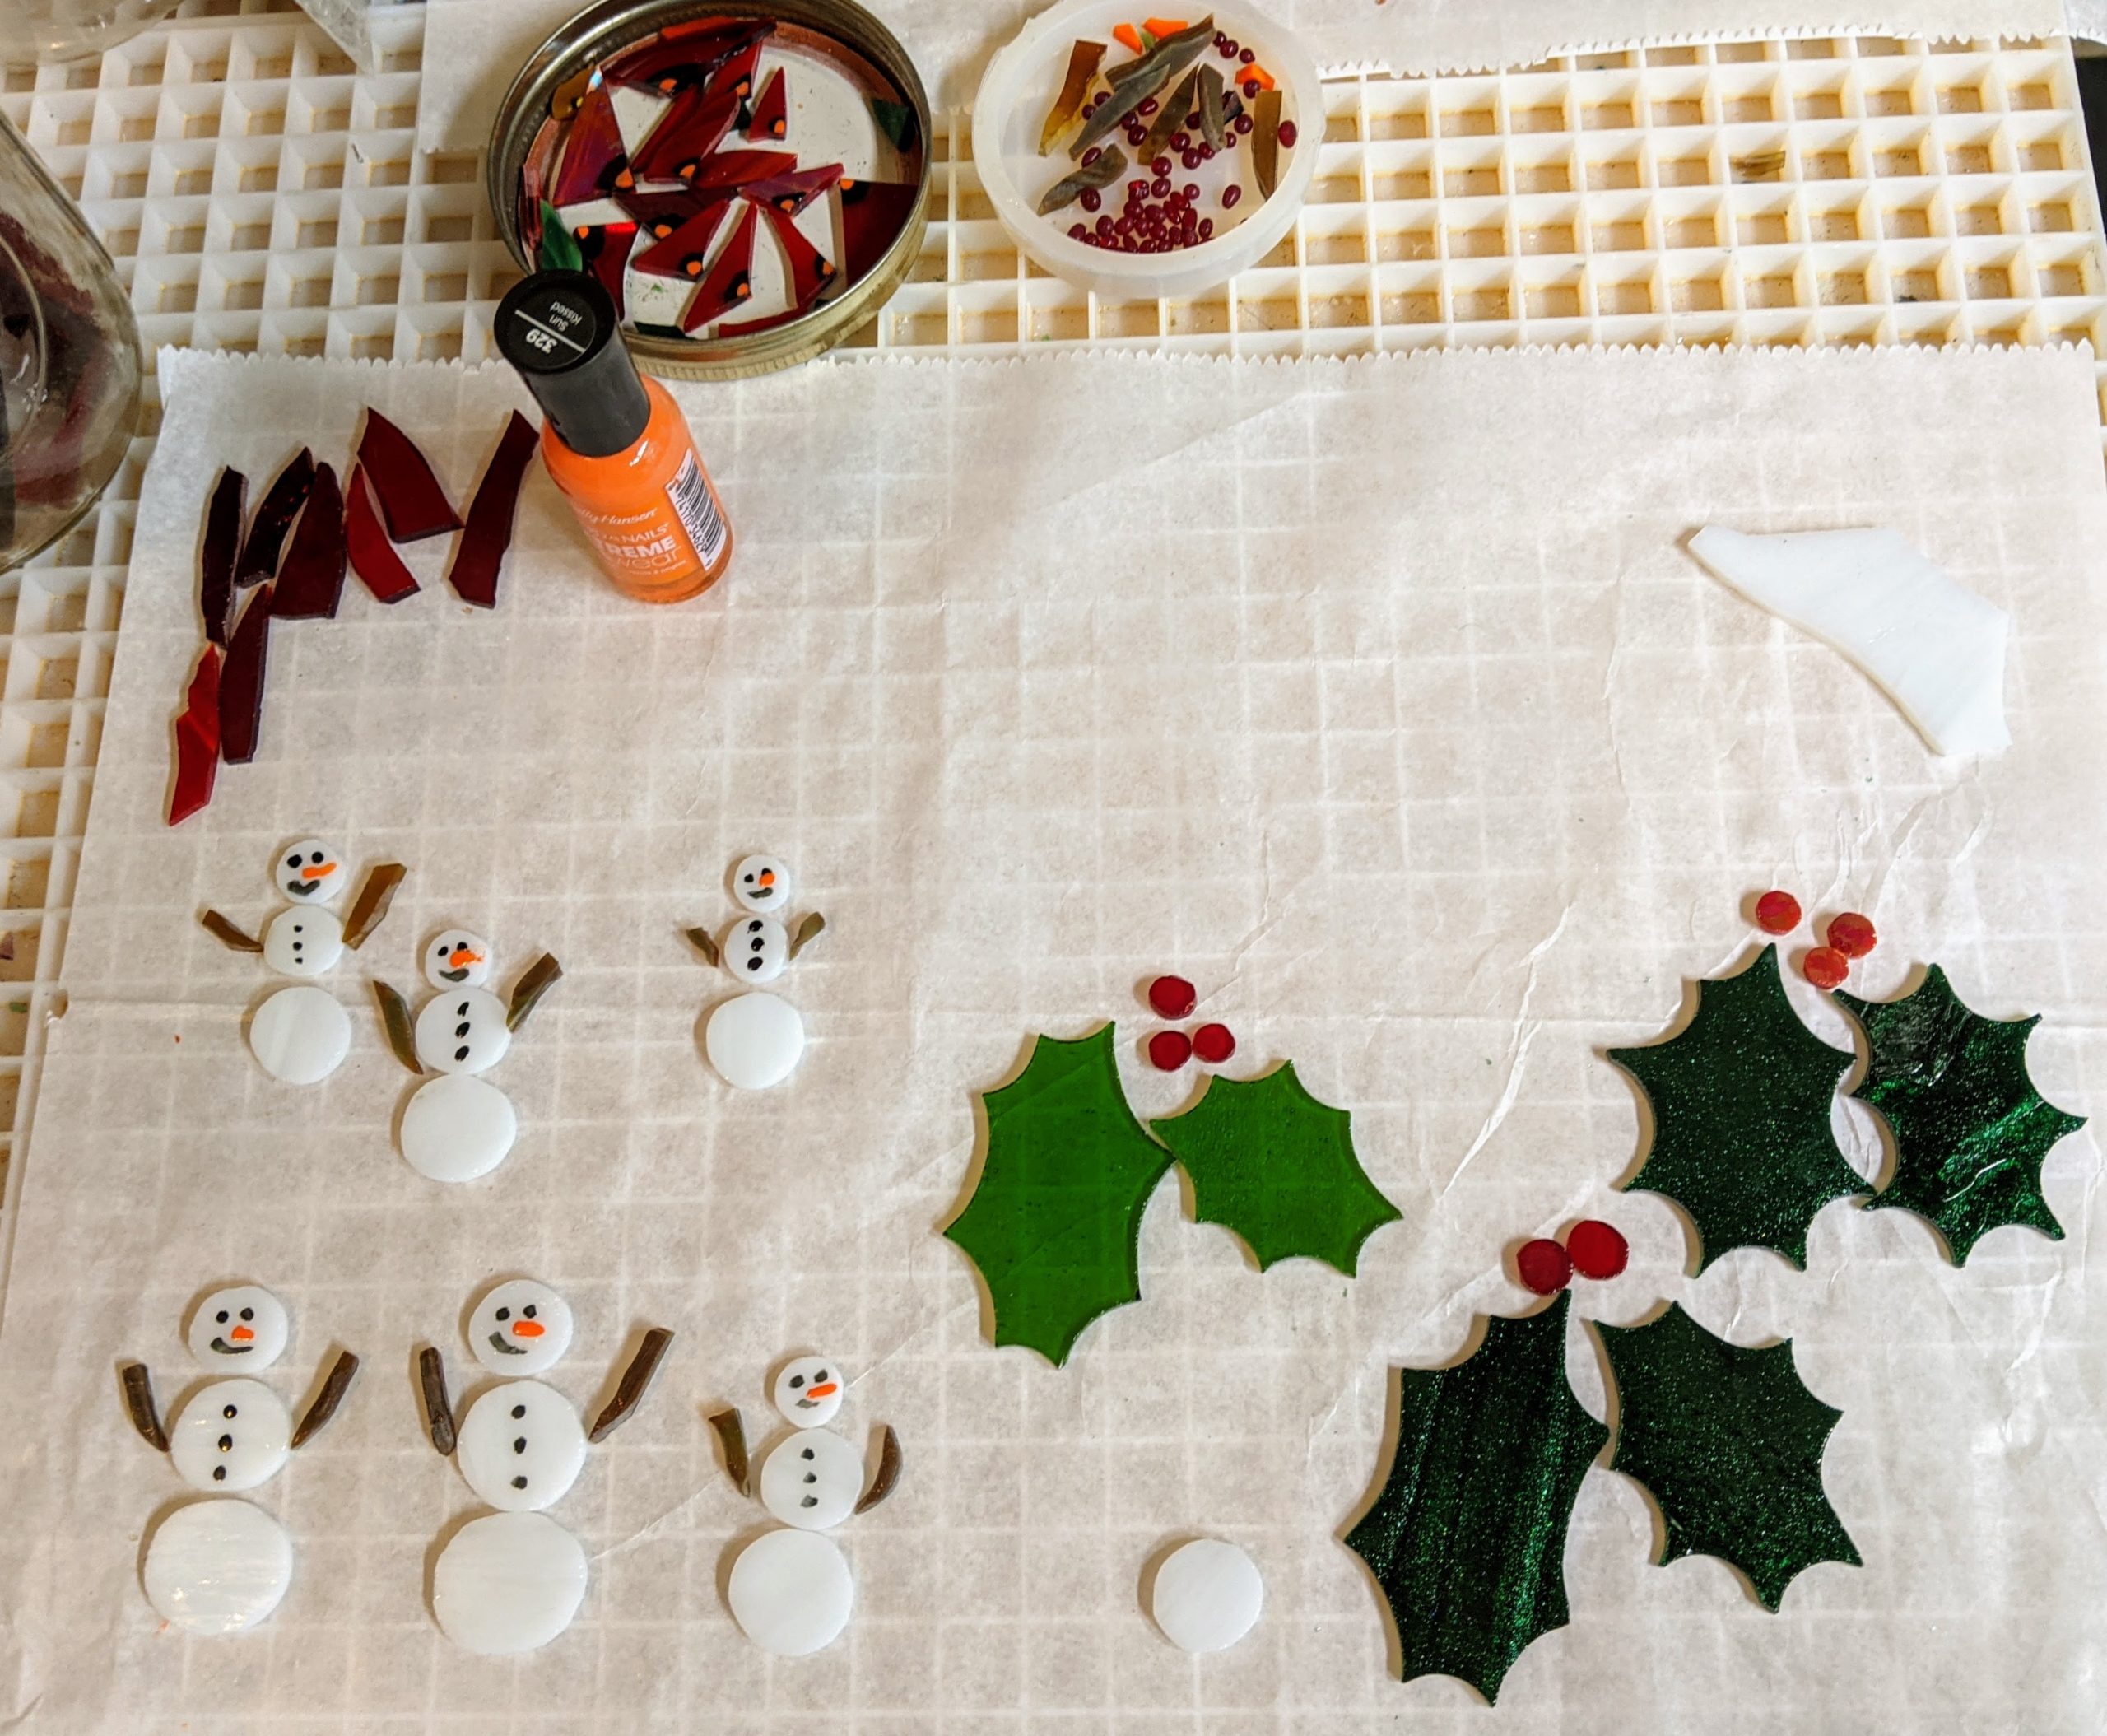
Today I poured the second layer of resin on several small projects and then spent some time making several small snowmen. I am experimenting with some abstract red and green coasters too, though my son says his favorite is the holly leaf suncatcher. My current favorites are the little snowmen. This is as close as you can get to making snowmen here in Charleston, SC. It’s 80 degrees outside and it’s well into November!

To make the “snowballs” for their bodies, I use glass nippers to rough out a generally round shape, then I use my glass grinder to smooth the edges. My fingers are pretty sore after making so many snowmen in one day! After the “snowballs” are ready, I paint on their faces (on the tiny ones). I use glass for the detail on the faces of the larger snowmen. Since these tiny ones are destined to be in two sided ornaments, I painted both sides of their faces / buttons and the little birds that will perch on their stick arms.
I also cut some backer glass and glued the pieces of this “big” snowman in place. I will pour the resin and decorate it another day, after the mosaic adhesive has had a chance to fully cure. This piece will be table top sized as it’s slightly smaller than a standard sheet of paper.
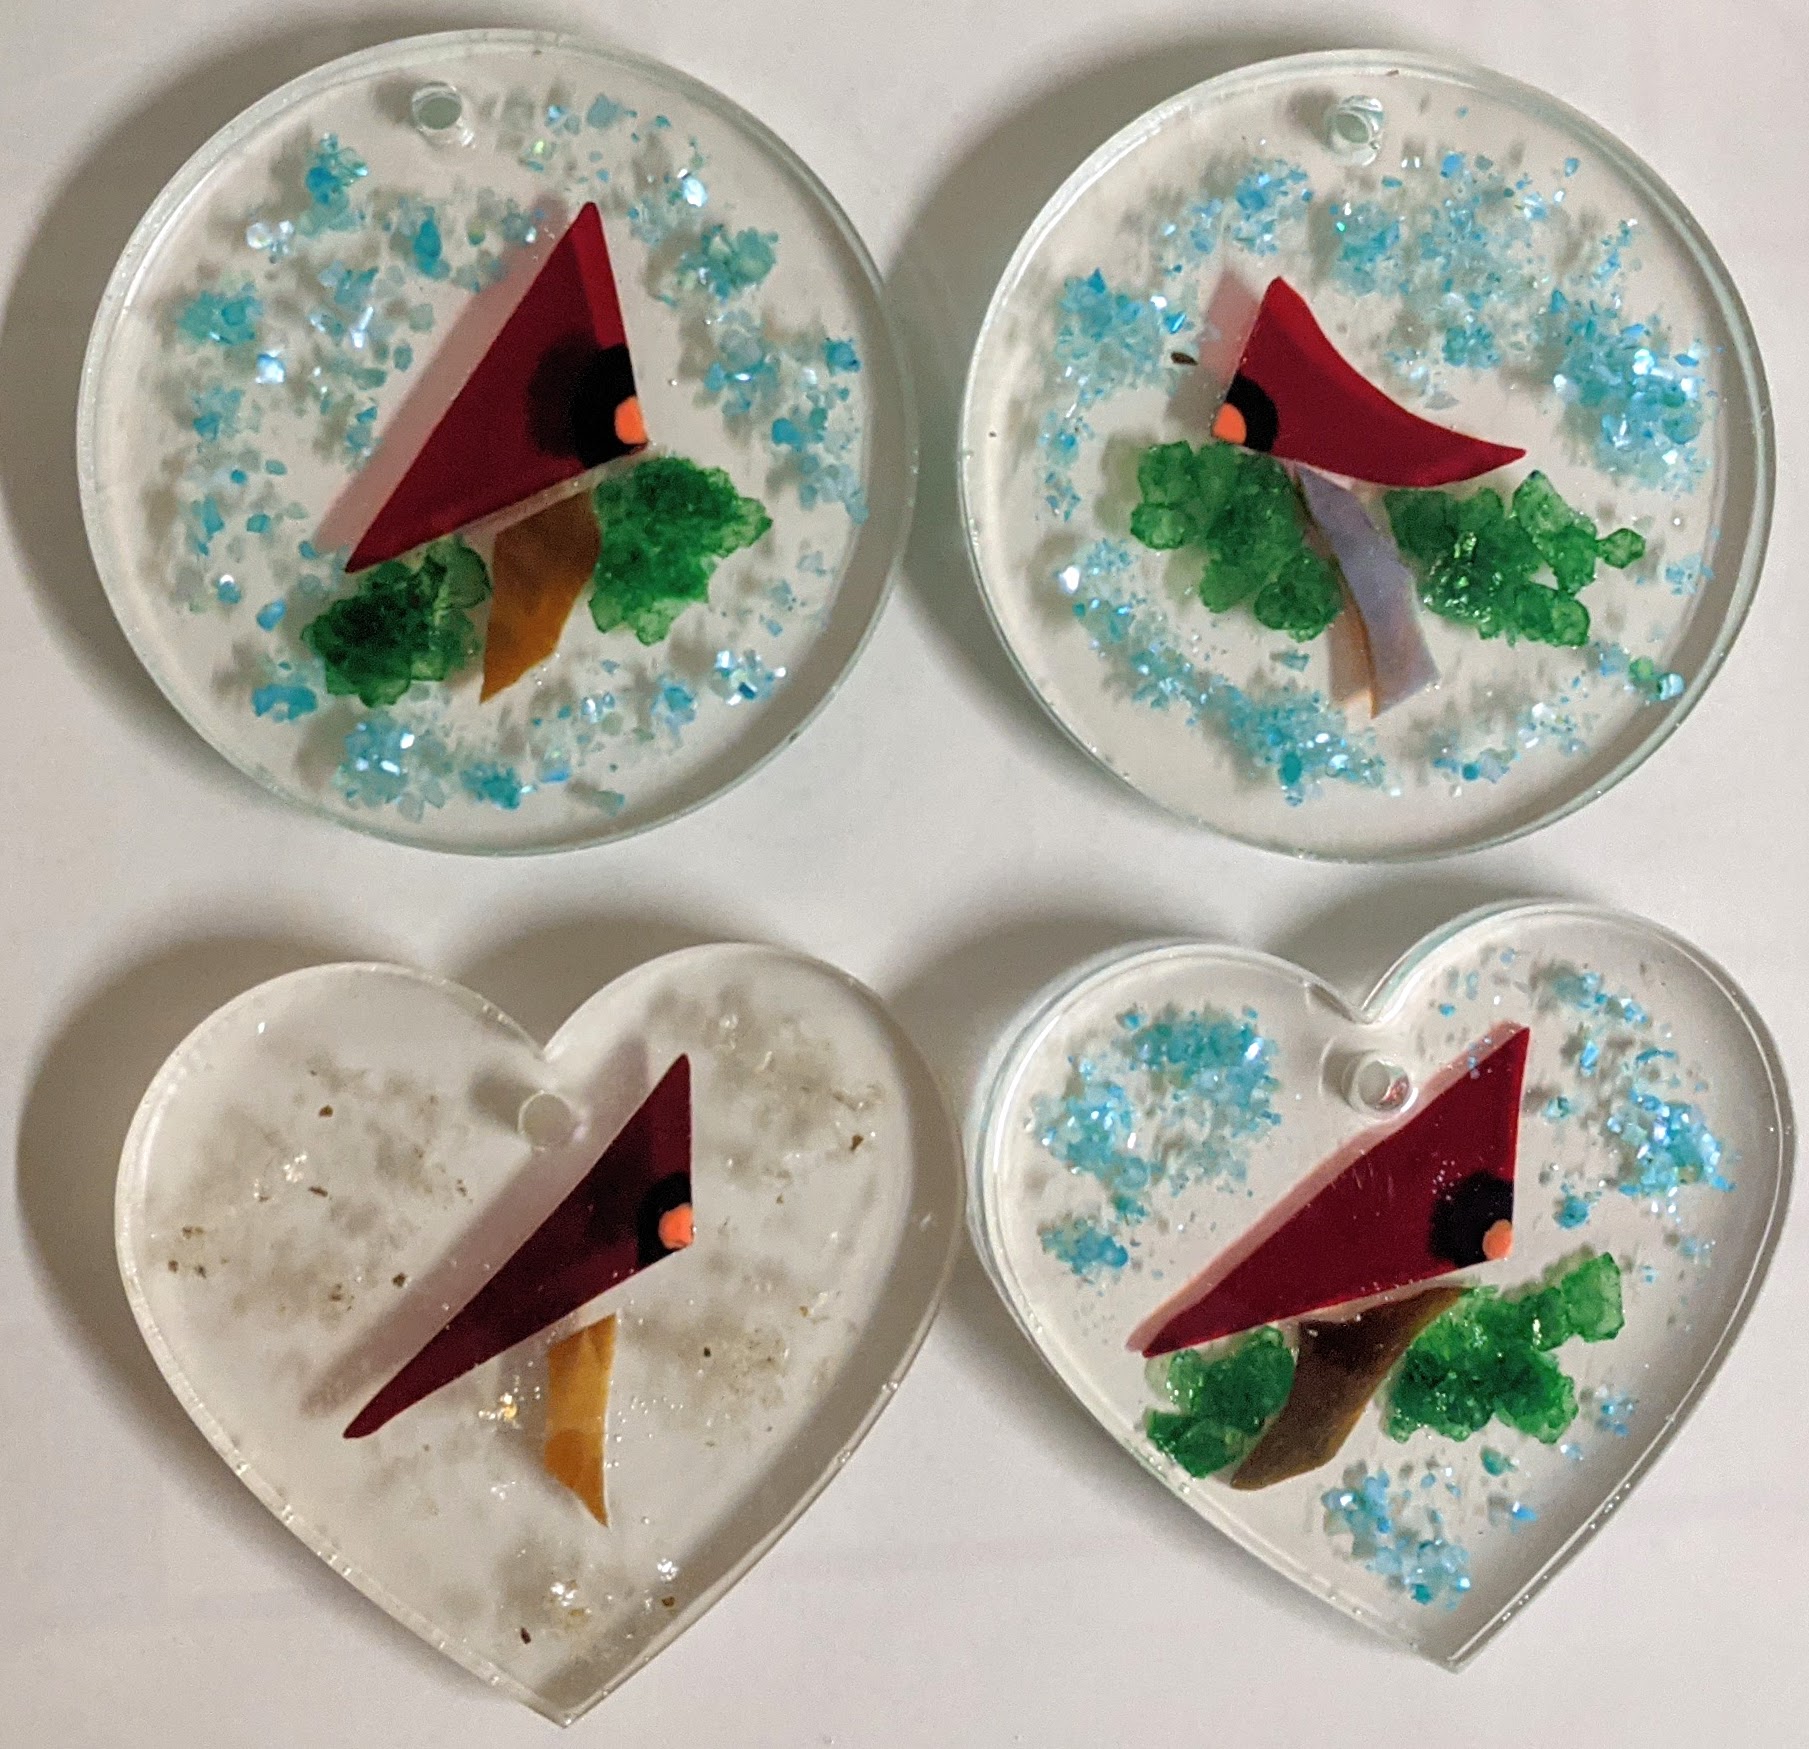
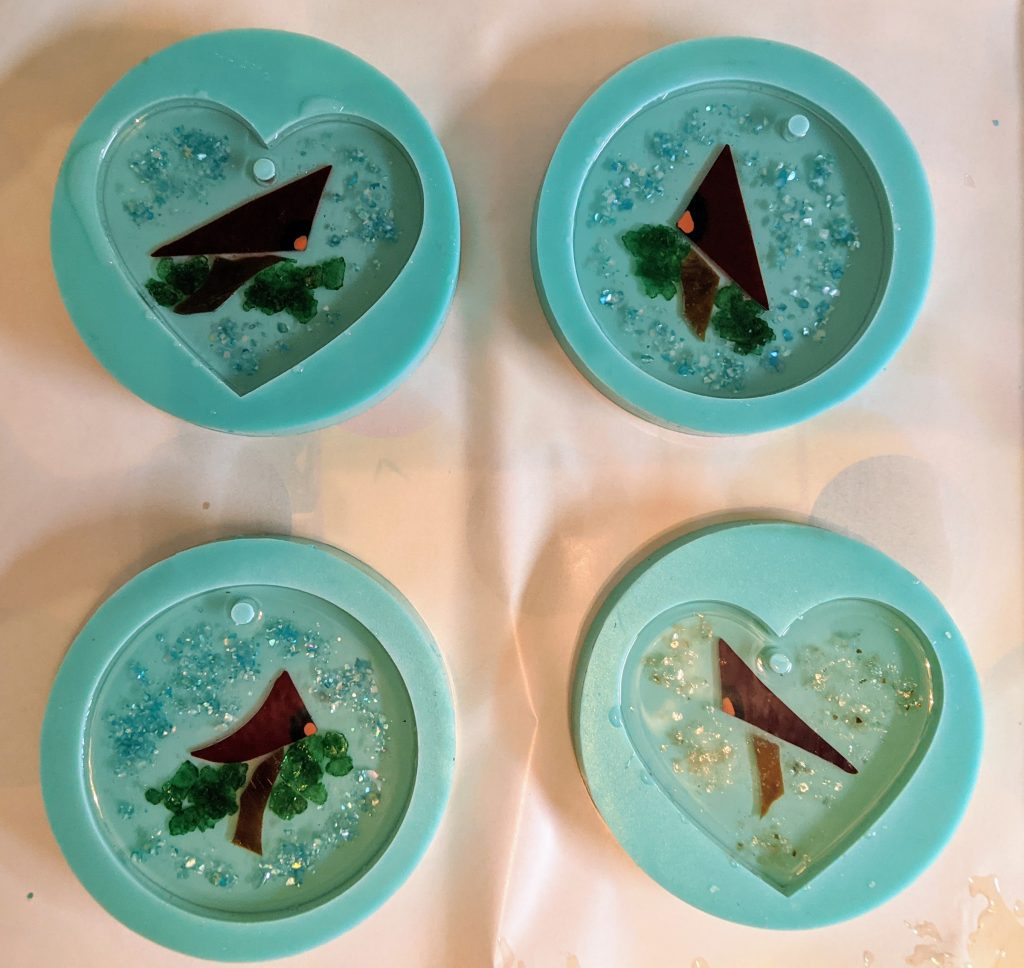
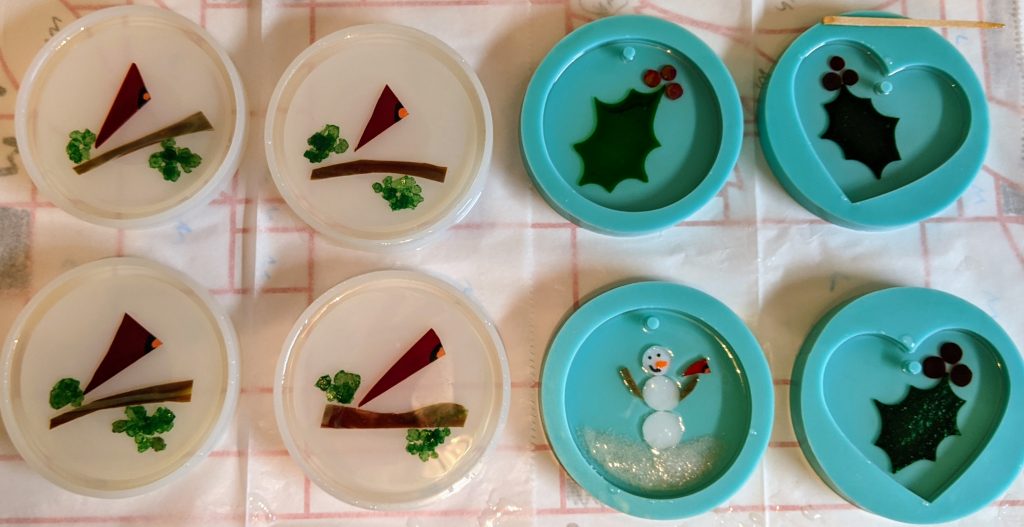
Poured the second layer of resin on four Cardinal coasters (one needs a third layer as I ran out of resin) and the first layer on some new holiday suncatchers / ornaments!
Also took some better photos of the past few weeks worth of ornaments, though I’m no photographer with my phone, ha!

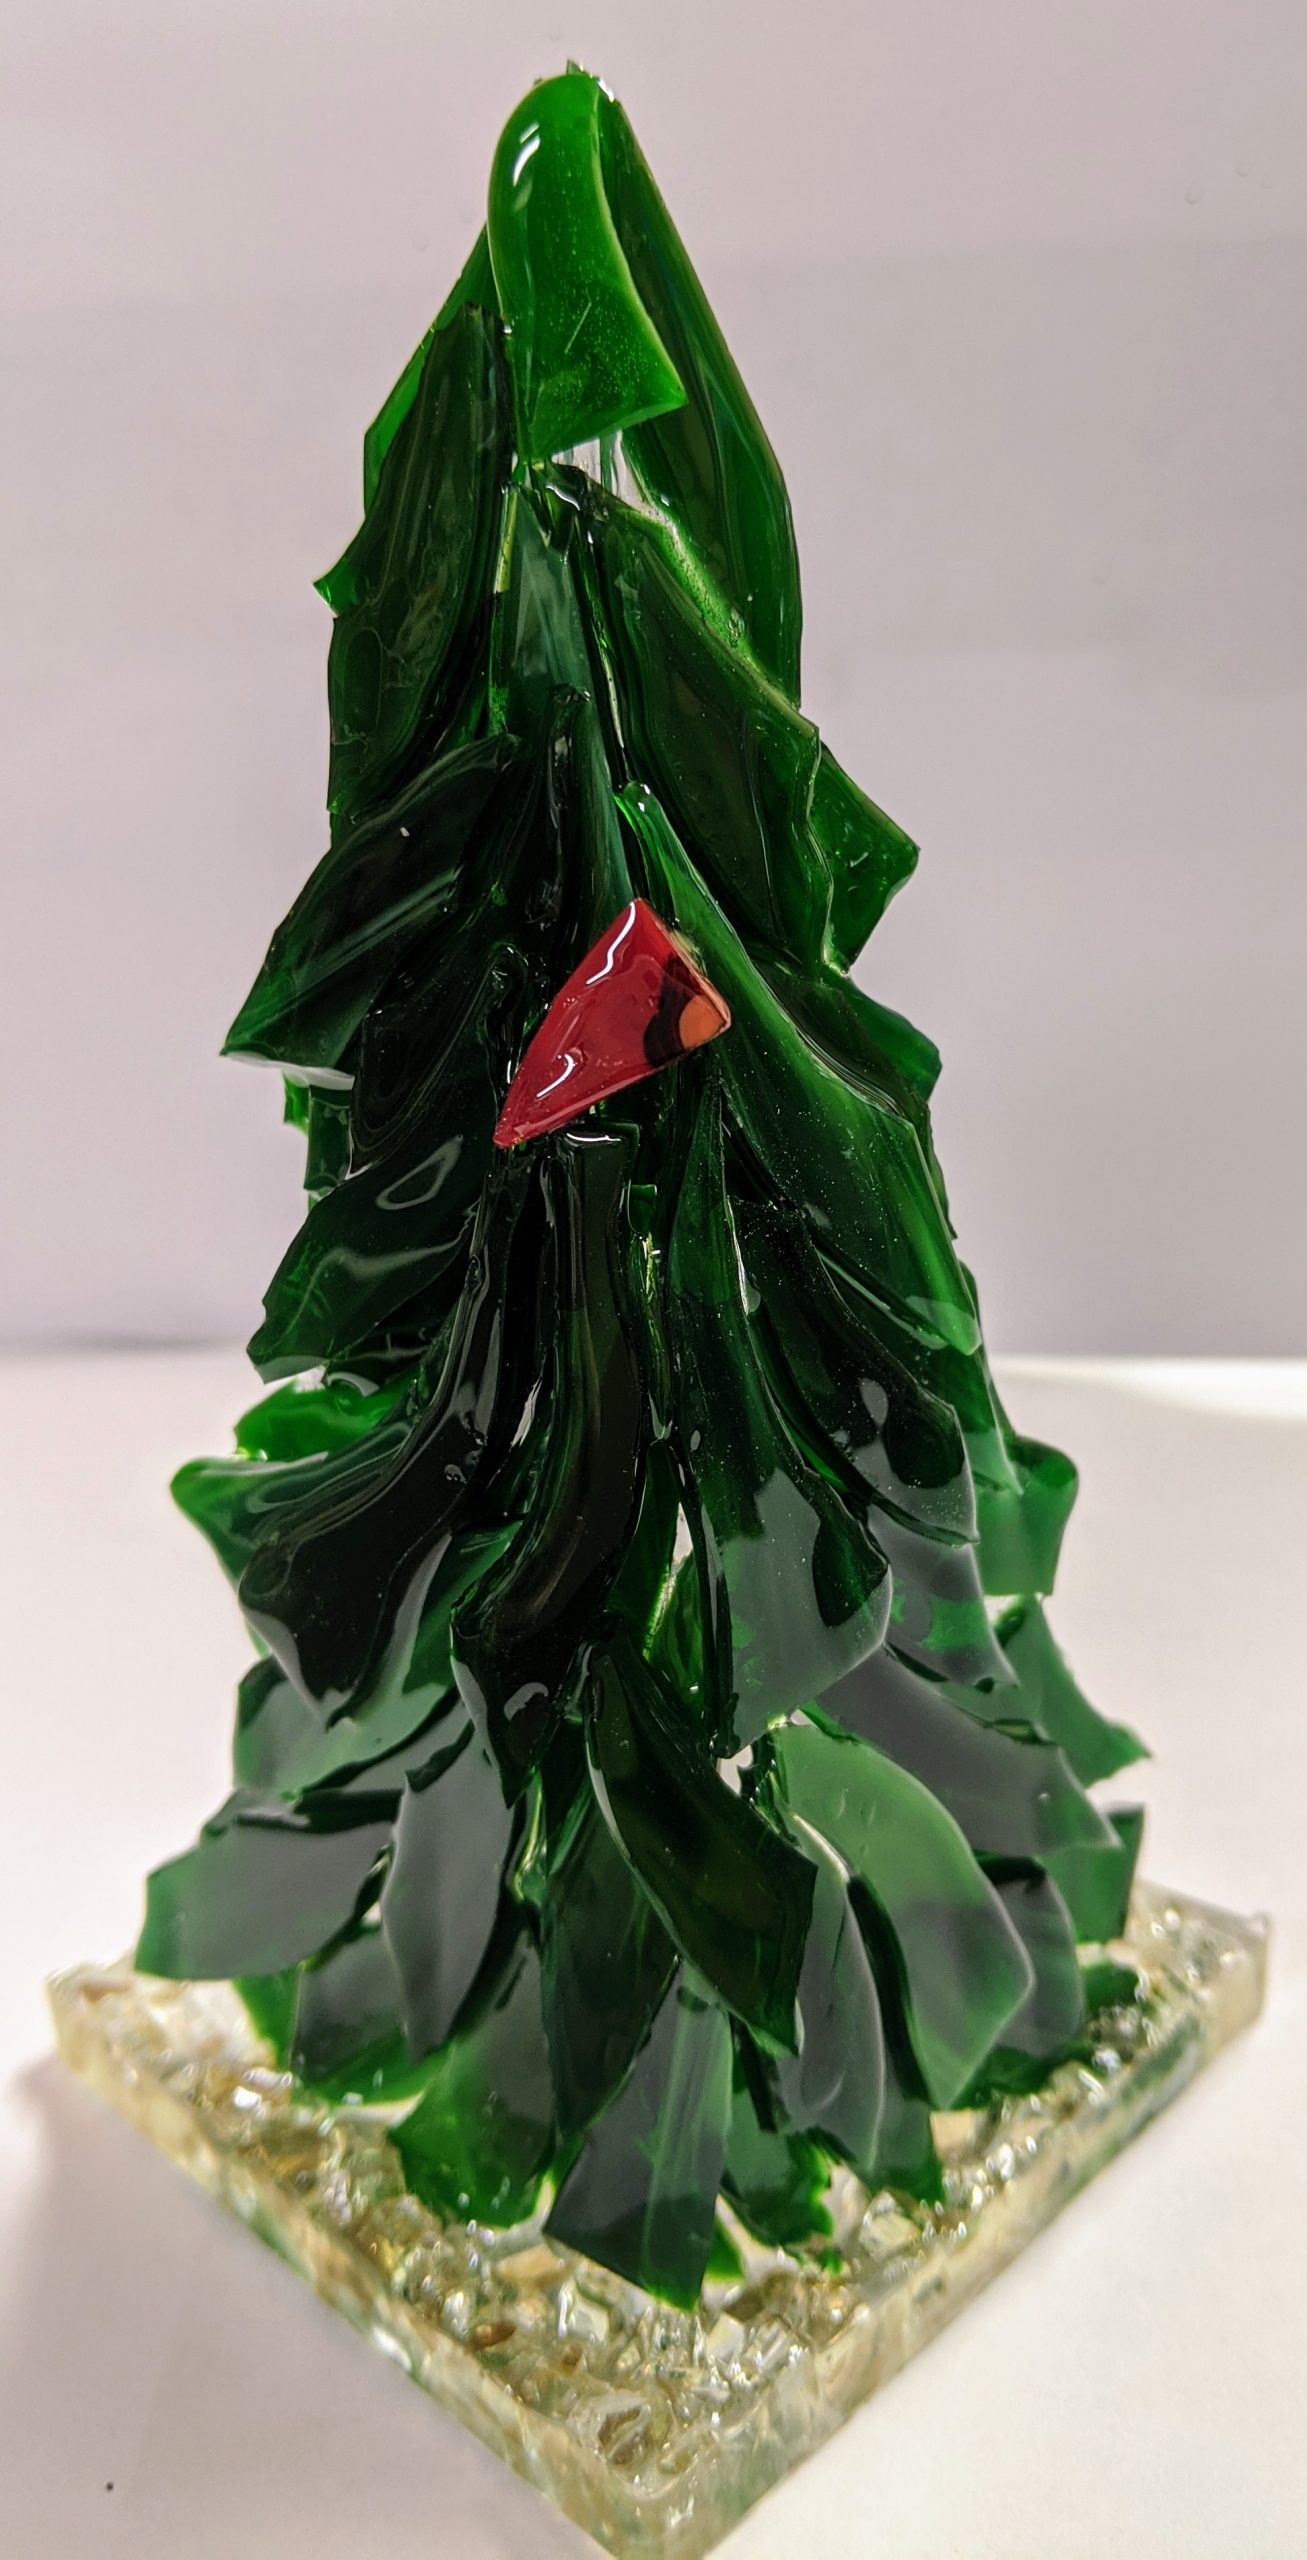
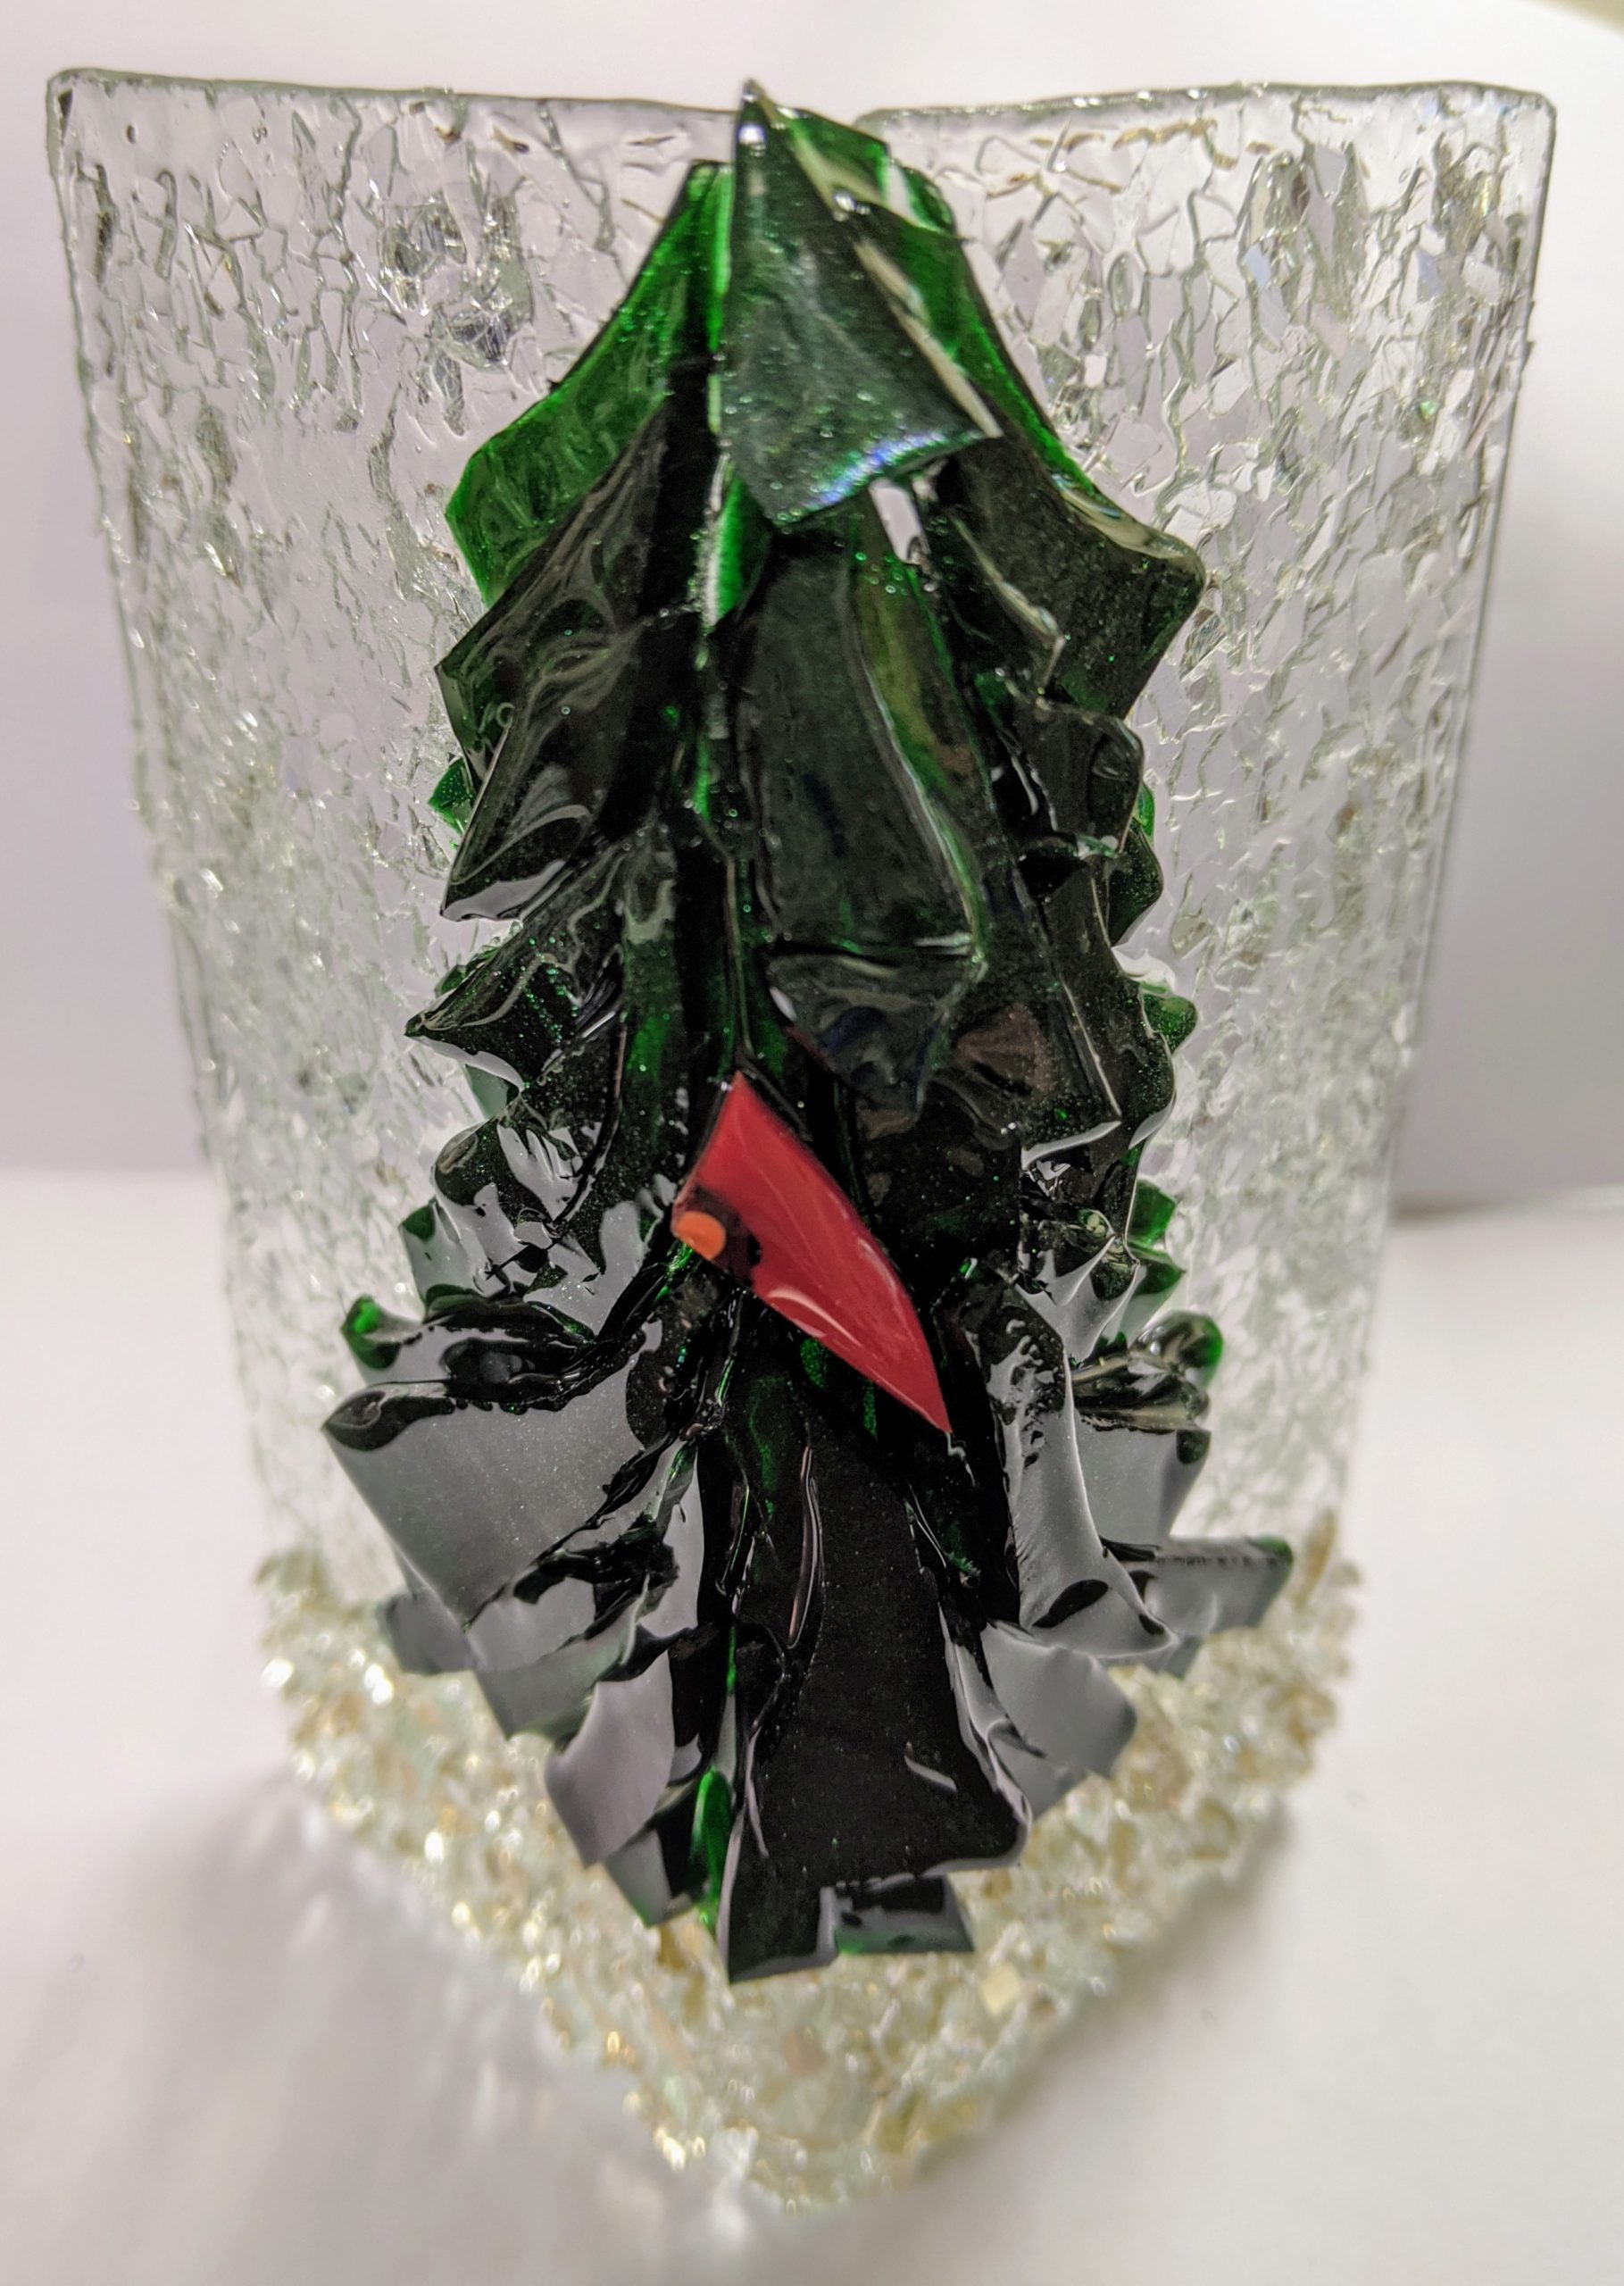
I finished all three tree candle holders today – here are snapshots of the finished products. Overall, I like the tree that’s standalone (not on a rectangular base) the best. I had a hard time keeping the resin tidy looking on the rectangular glass pieces with multiple stages of pouring.
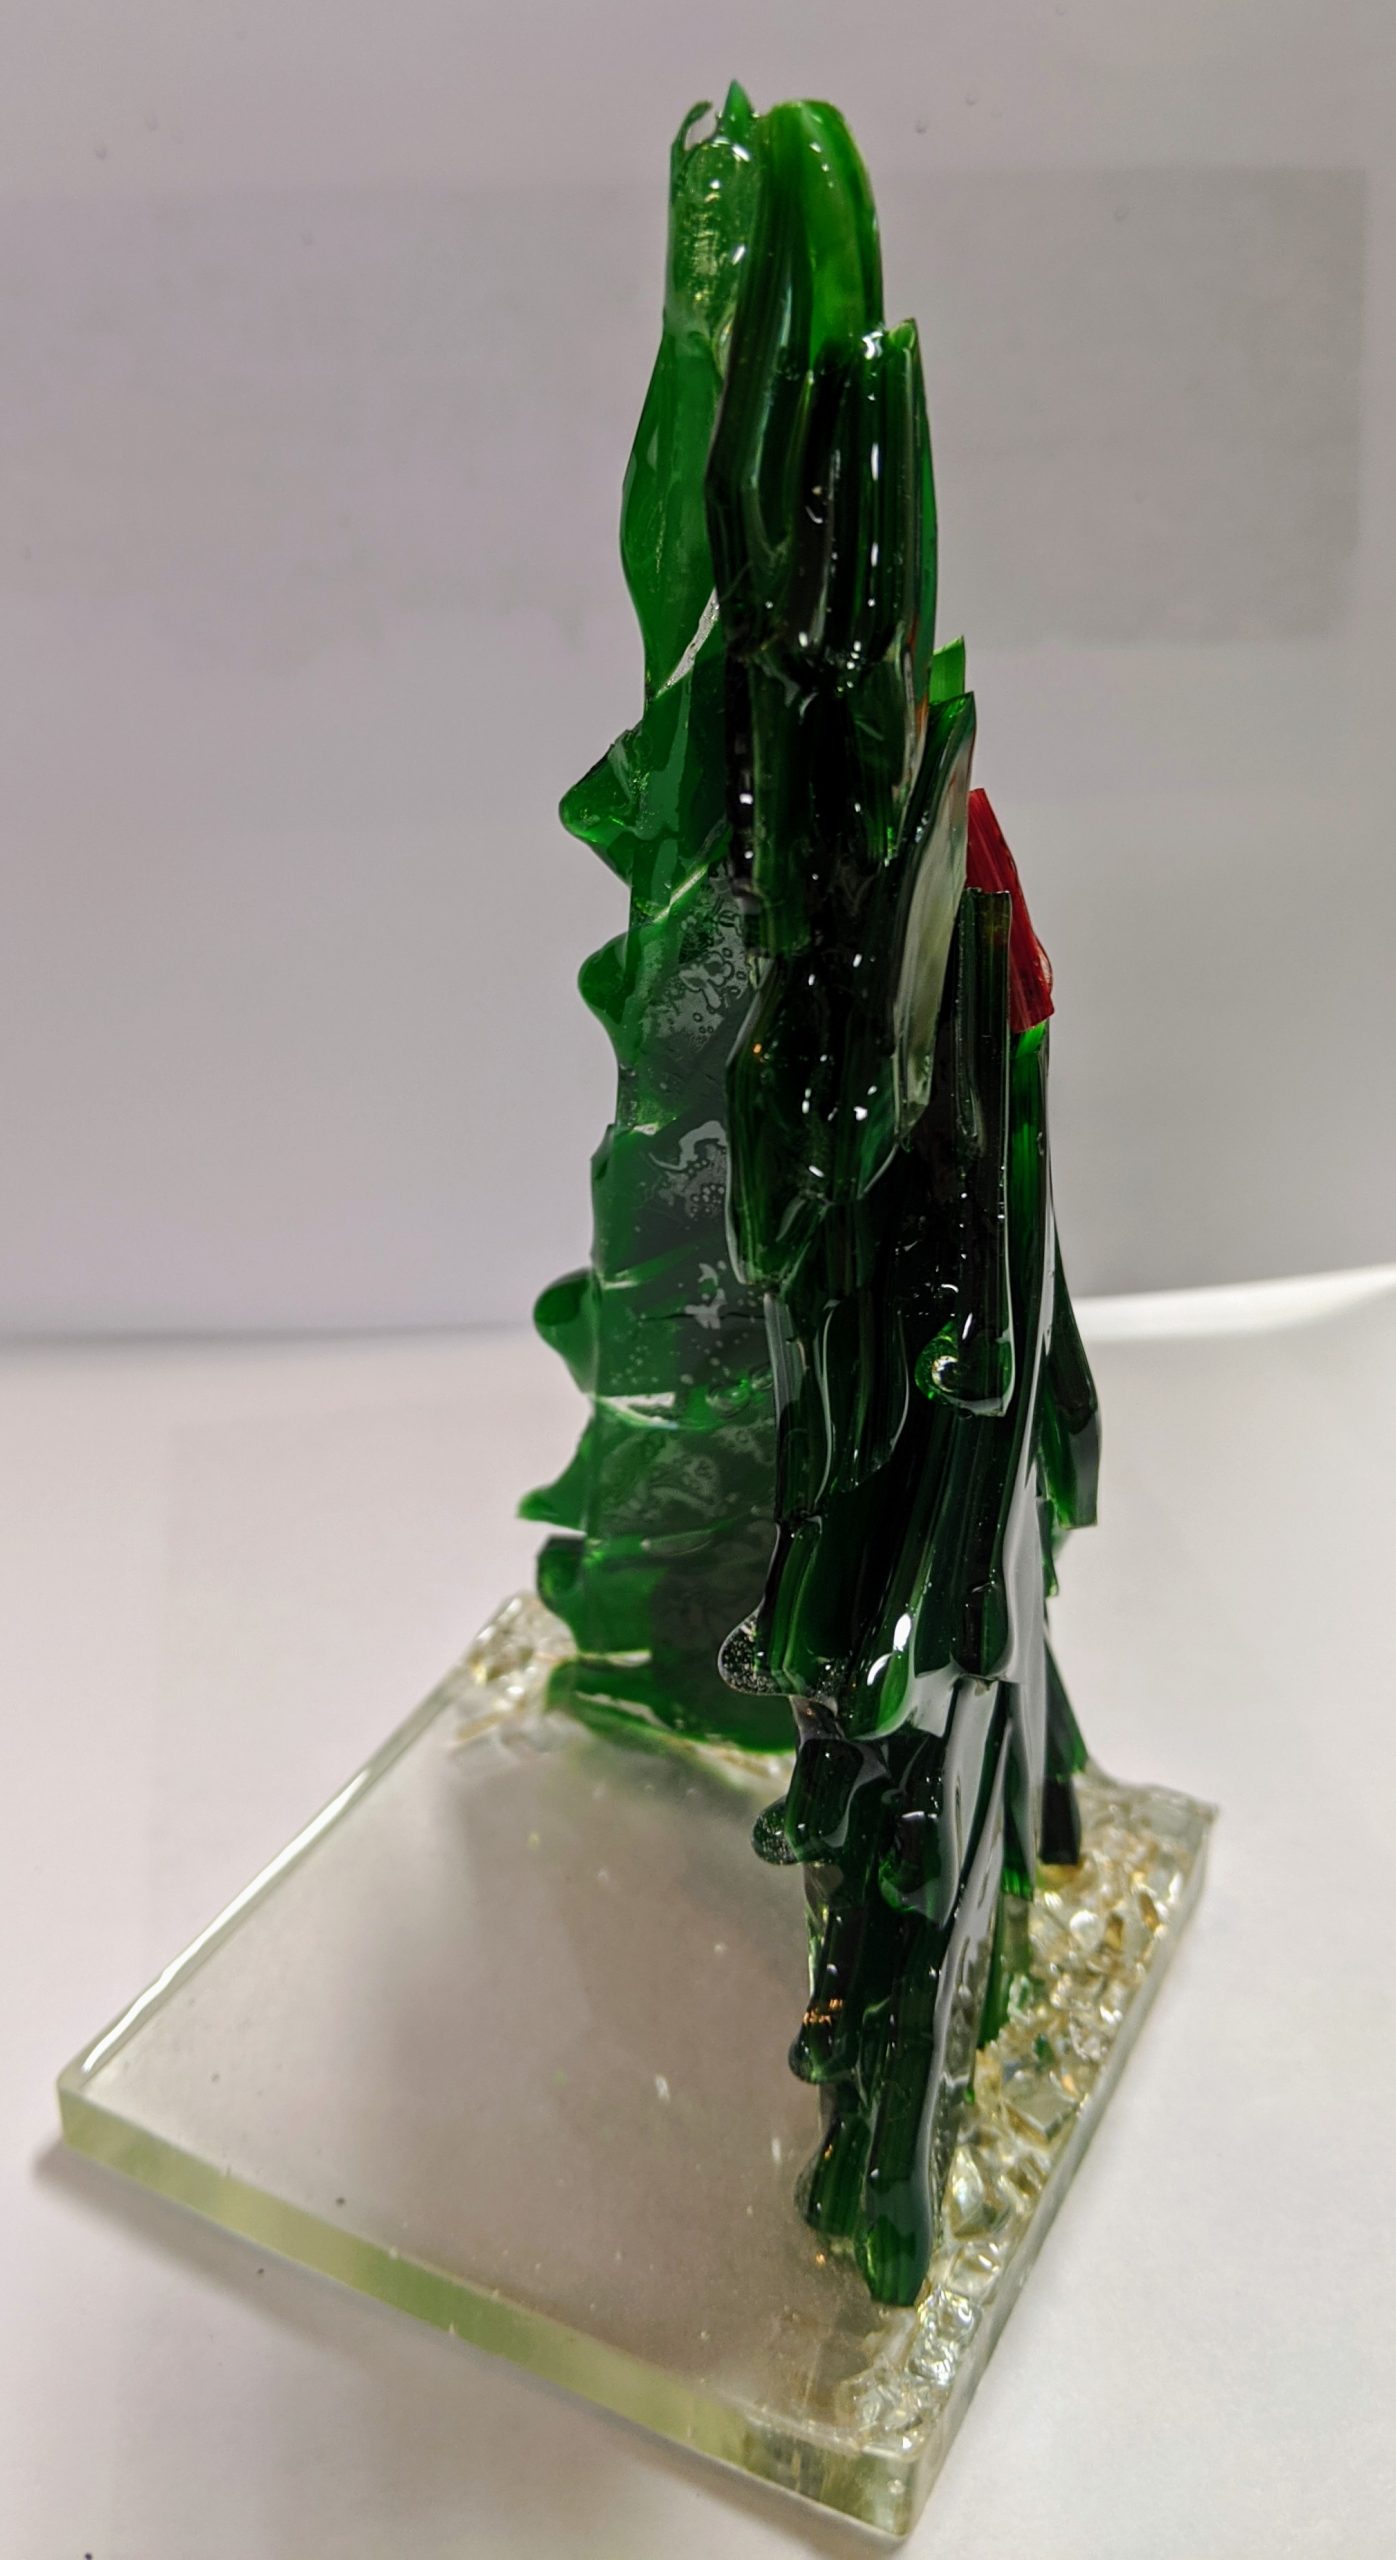
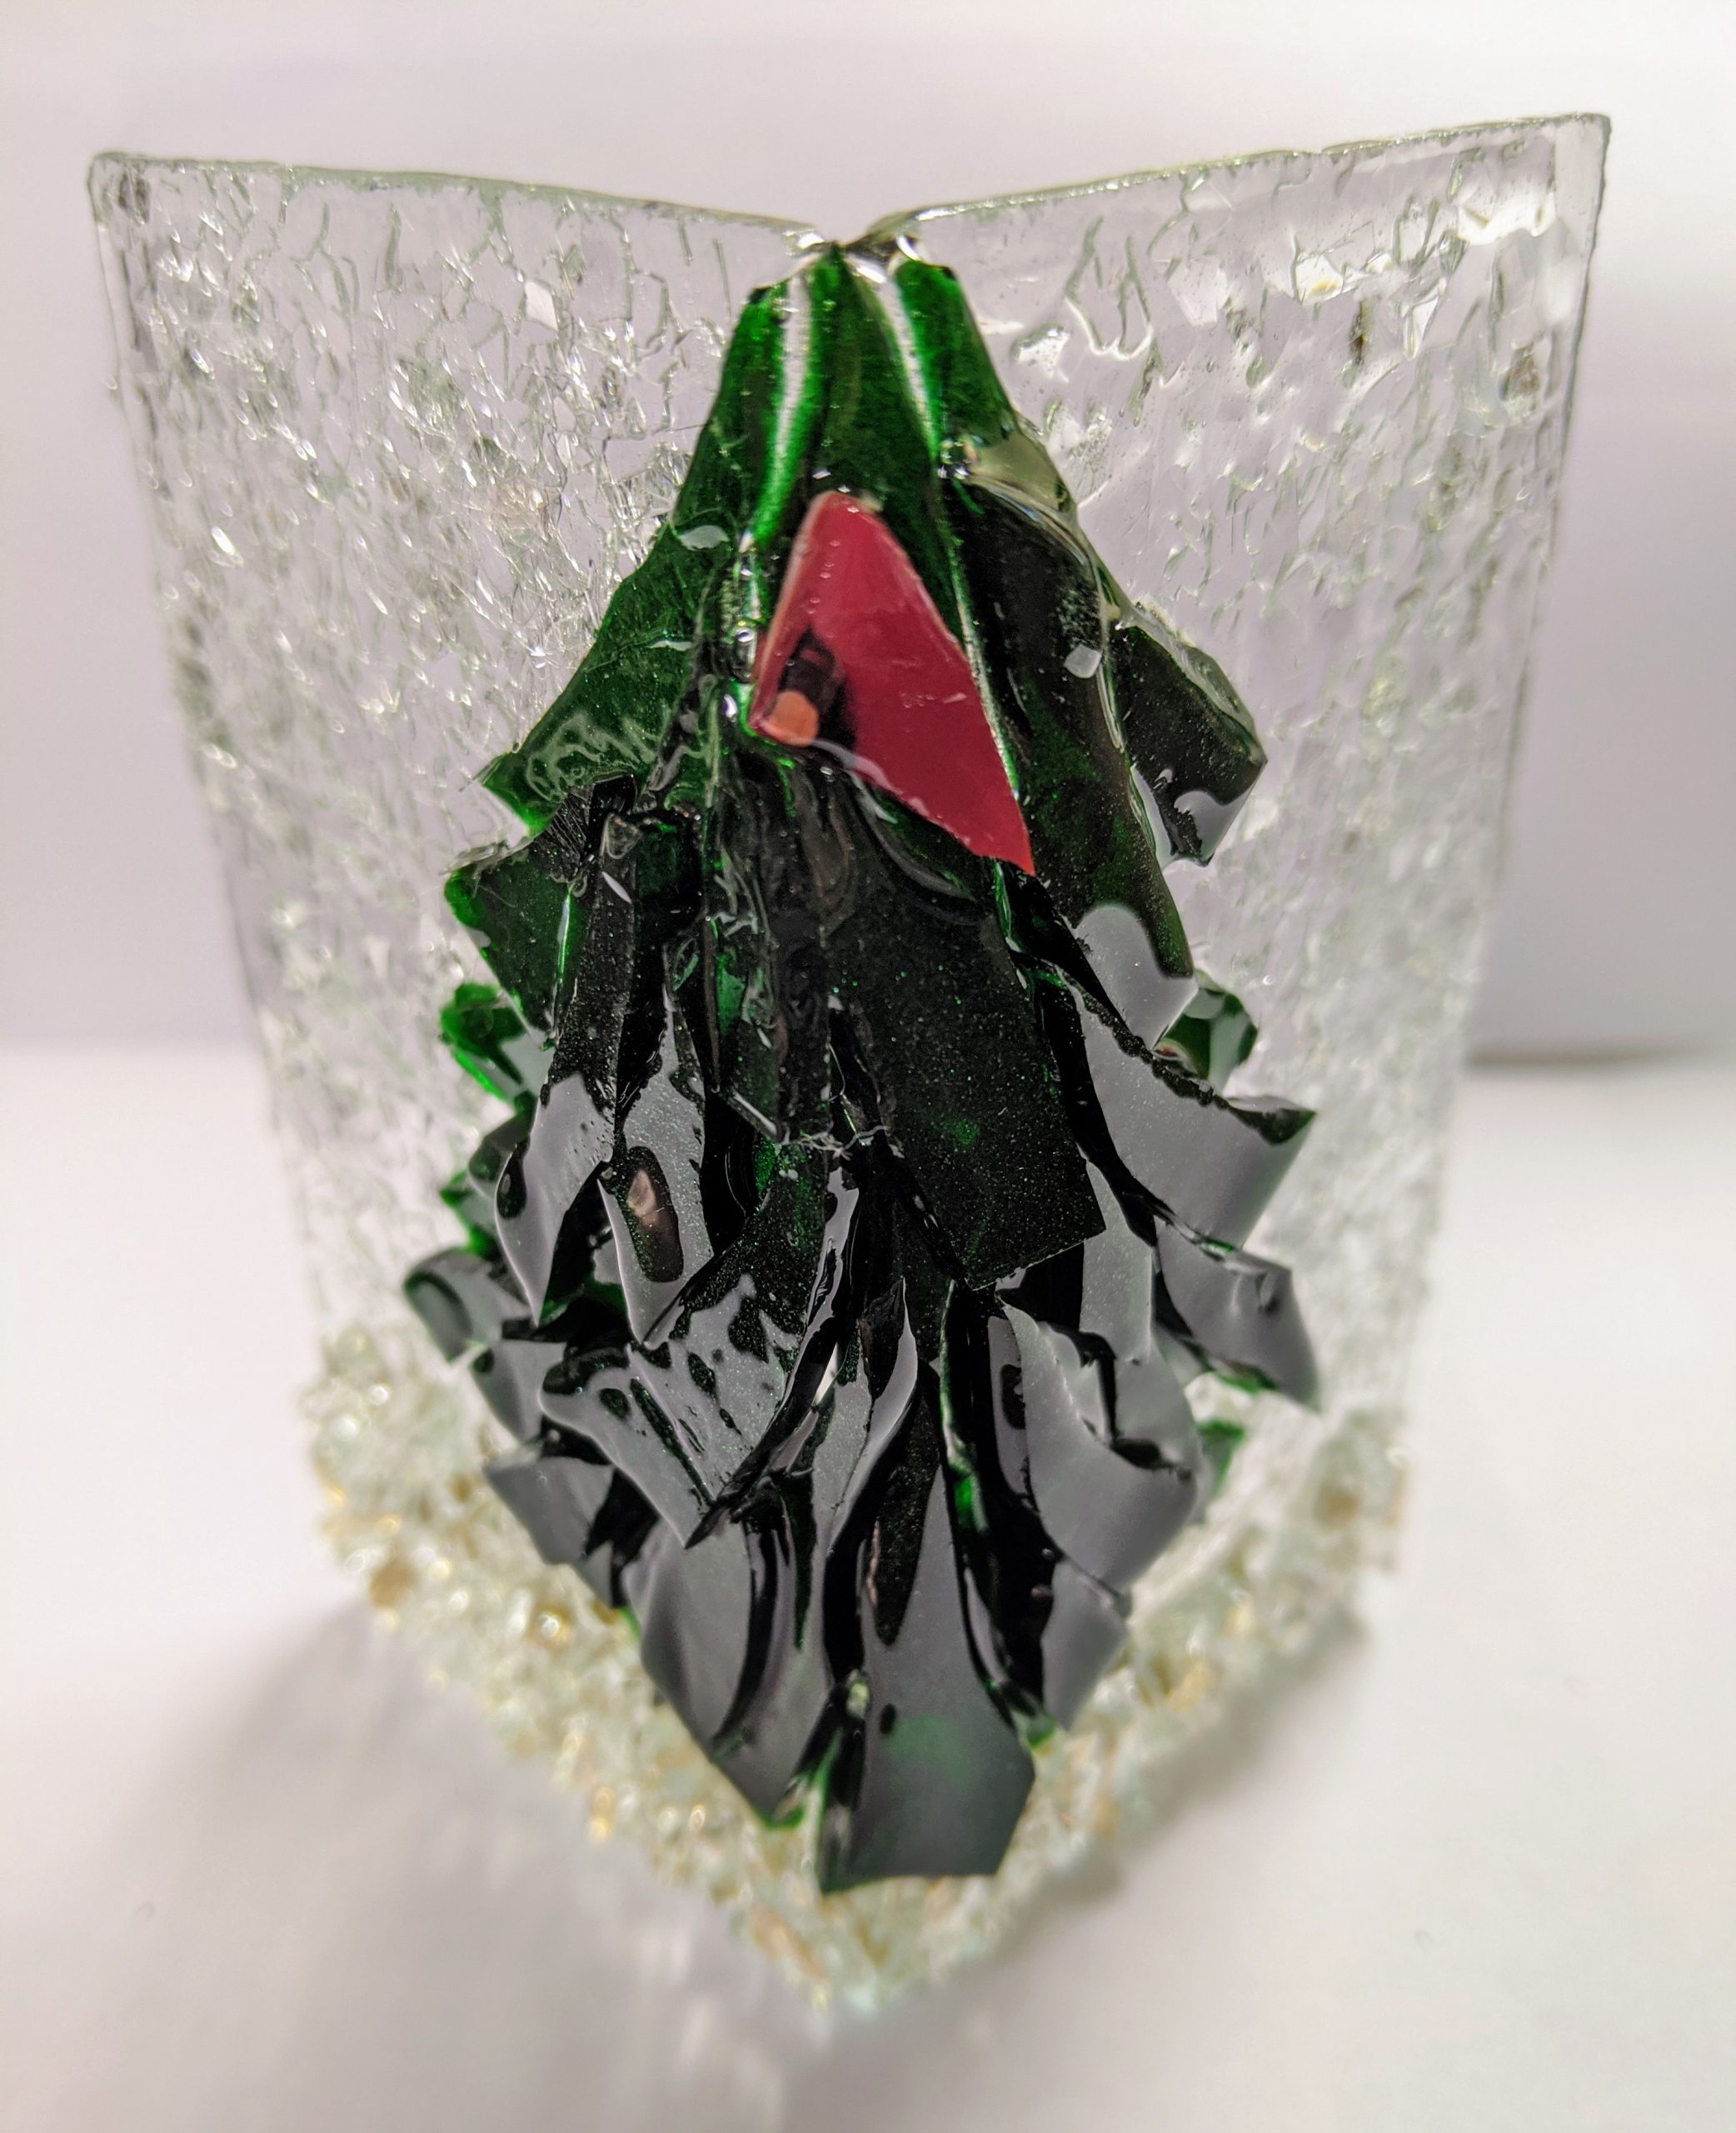
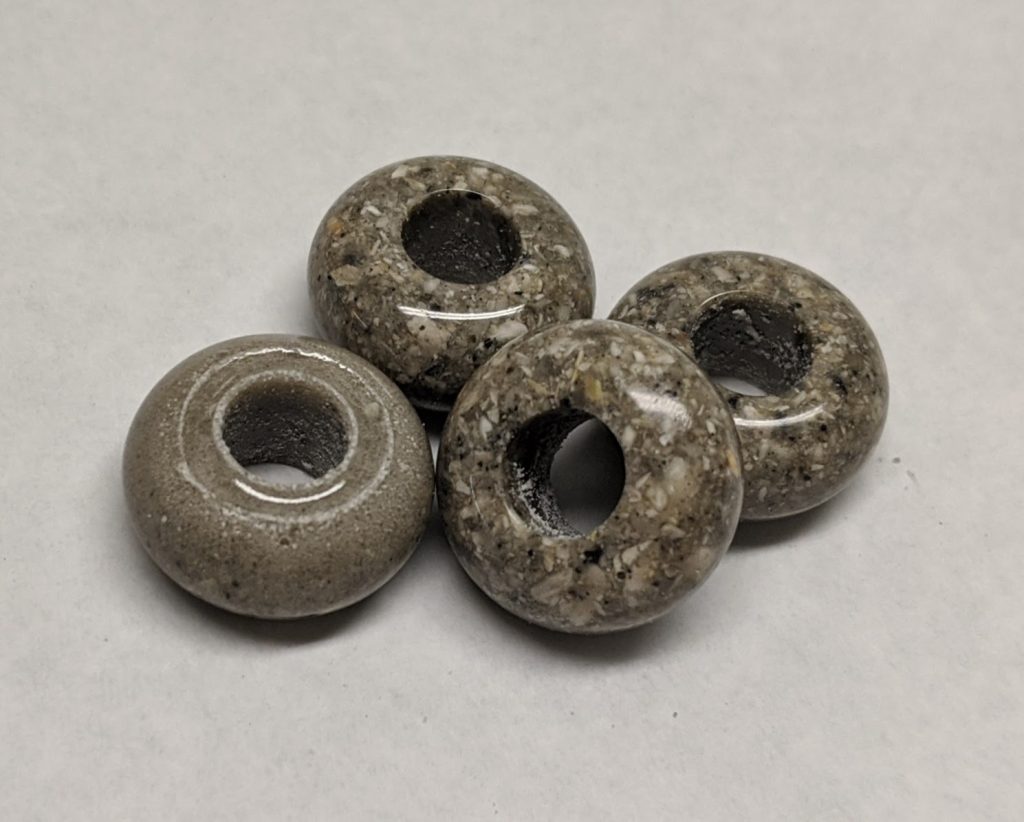
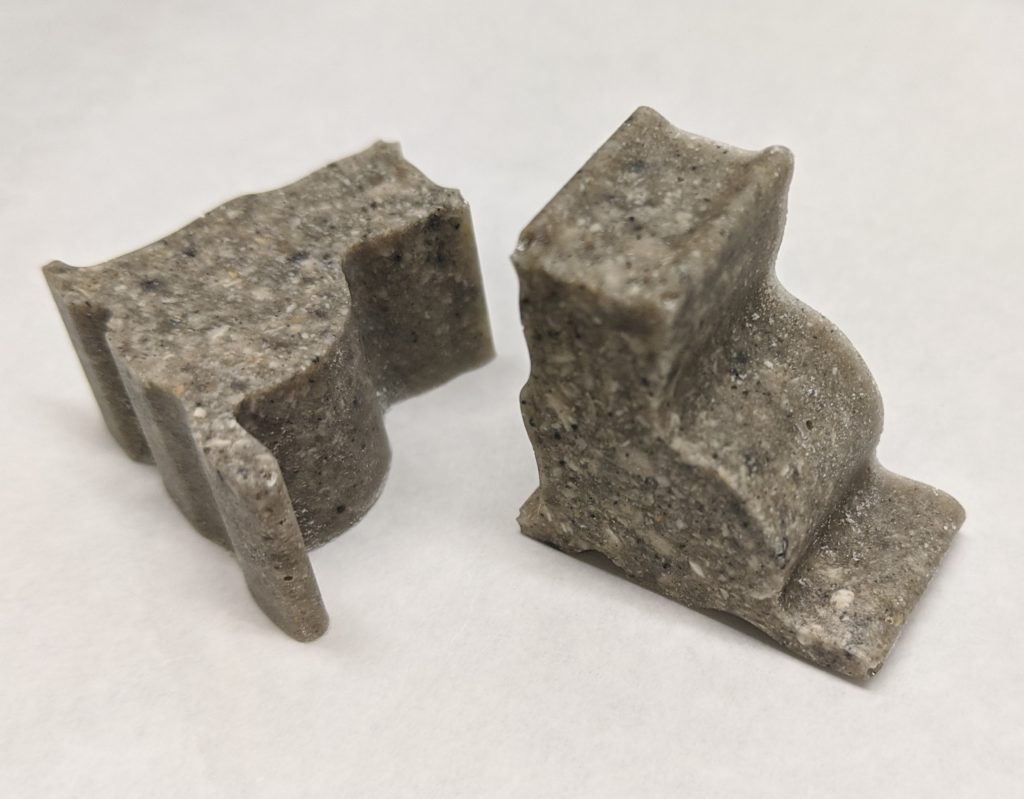
Today I was able to complete what I think is the last step in the 3D tree experiment. For the standalone tree, that was to add and decorate a base. For the two rectangular trees, it was to decorate the unfinished half. I also was able to pop the memory beads and kitty shaped mementos I made with our cat Neo’s ashes out of their molds.
The rectangular trees had quite a bit of drips on the unfinished edge, despite my efforts to prevent them. I was able to remove them with a razor blade.
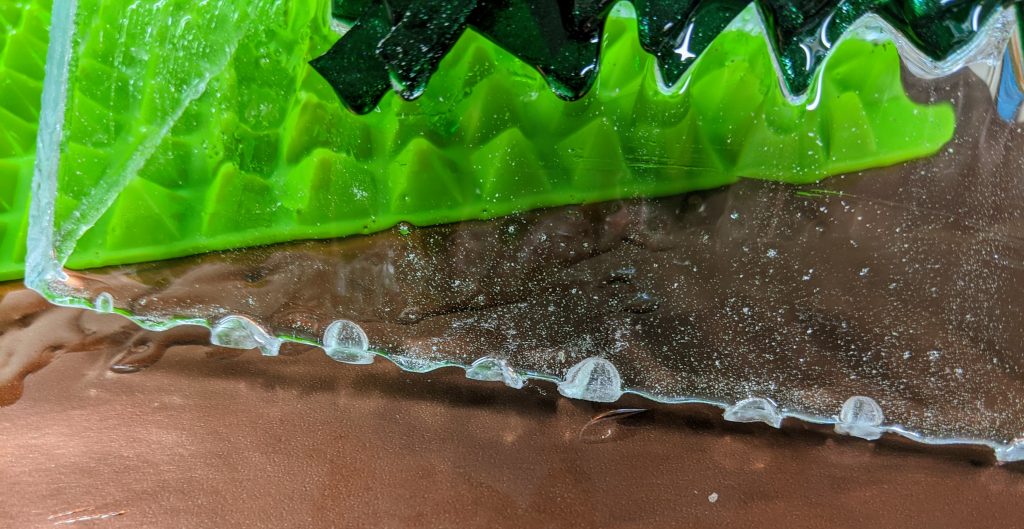
Once I cleaned up the edges a bit, I laid them out on the work surface, ready to coat with a thin covering of resin.
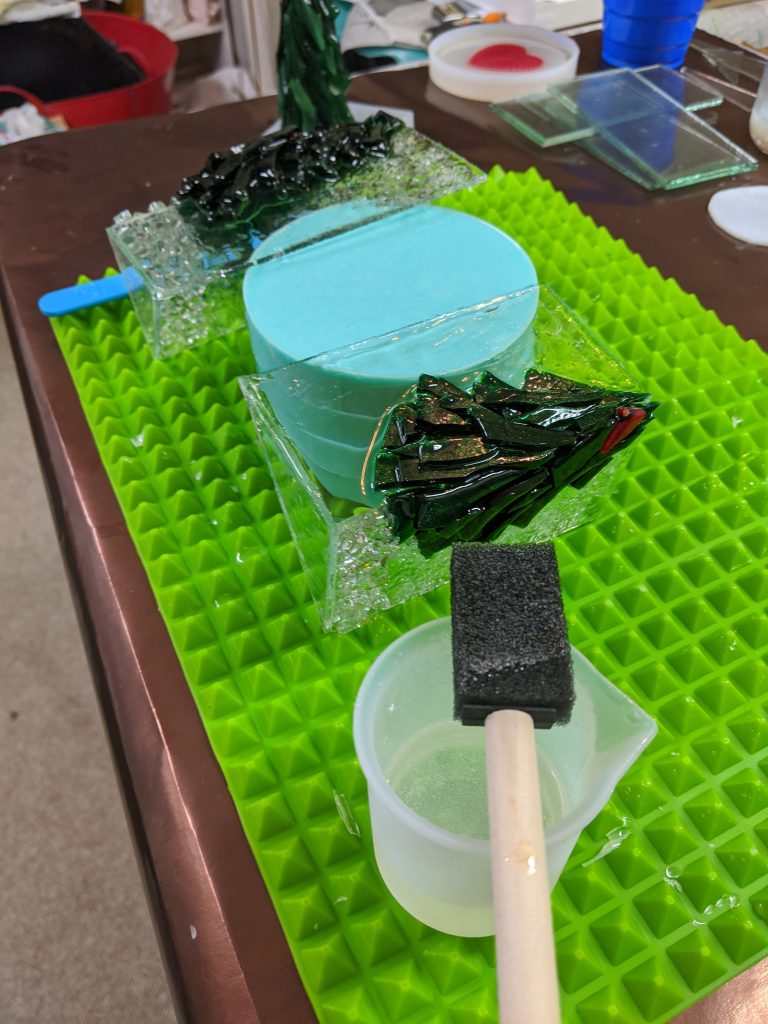
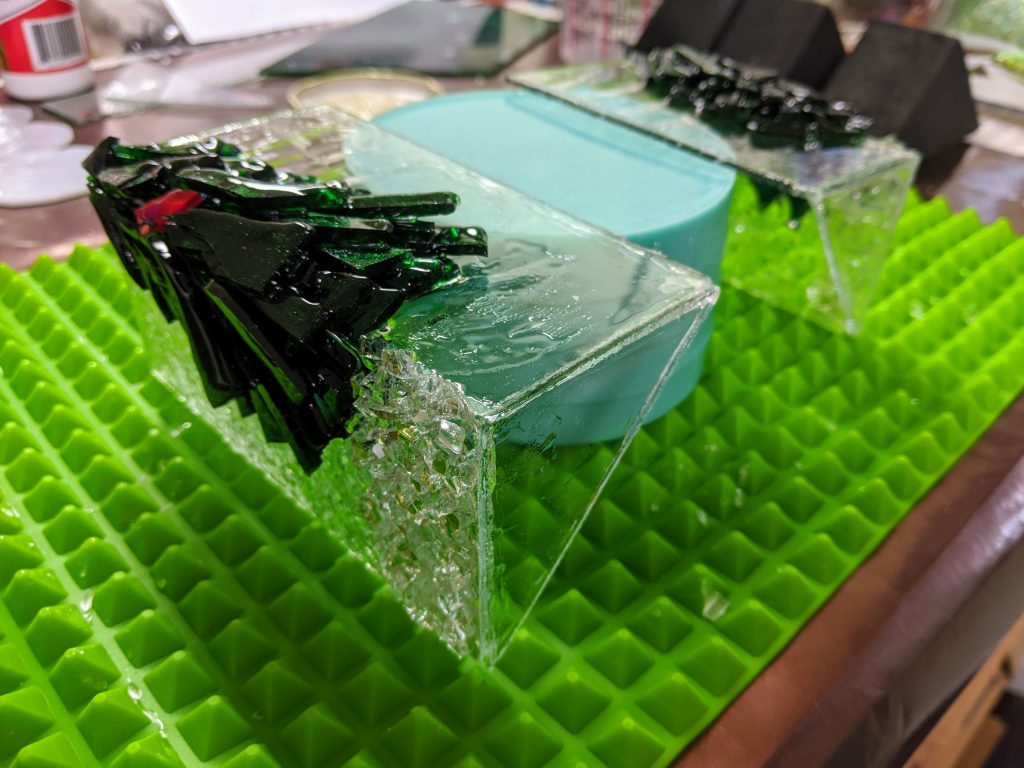
Once the resin was in place, I sprinkled the glass chips / chunks onto it.

Next I turned my attention to the standalone tree, which needed a base of resin poured and decorated.
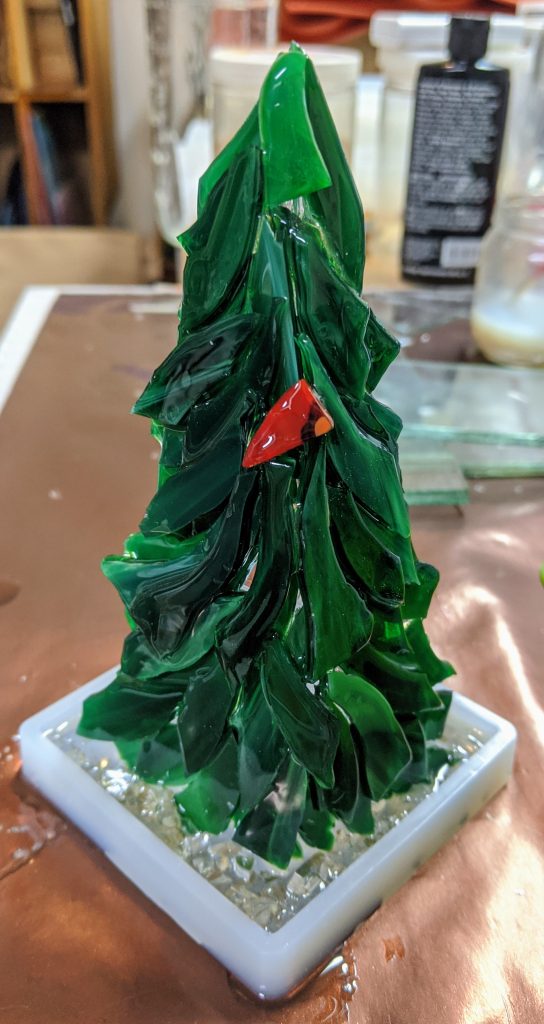
Tomorrow we’ll see how they look! I think if I do more of these I will use colored glass for the backer that matches the tree glass instead of the clear, at least behind the tree itself. It’s hard to cover all of the possible gaps between the branches otherwise. So far I like the look of the standalone tree best, but it also has sharper edges.