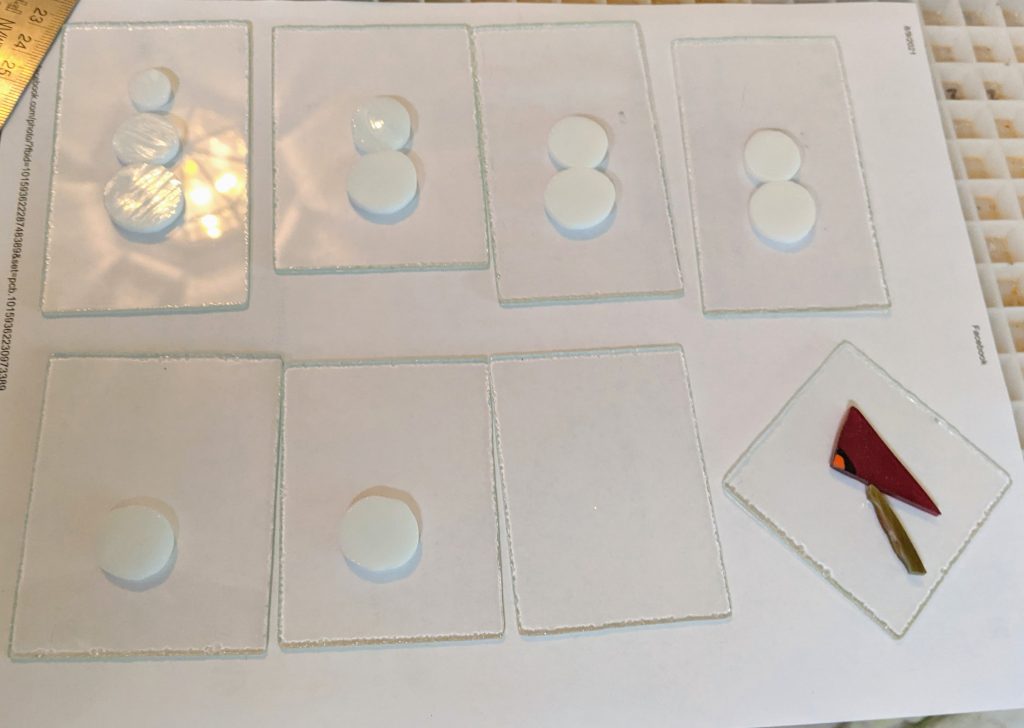
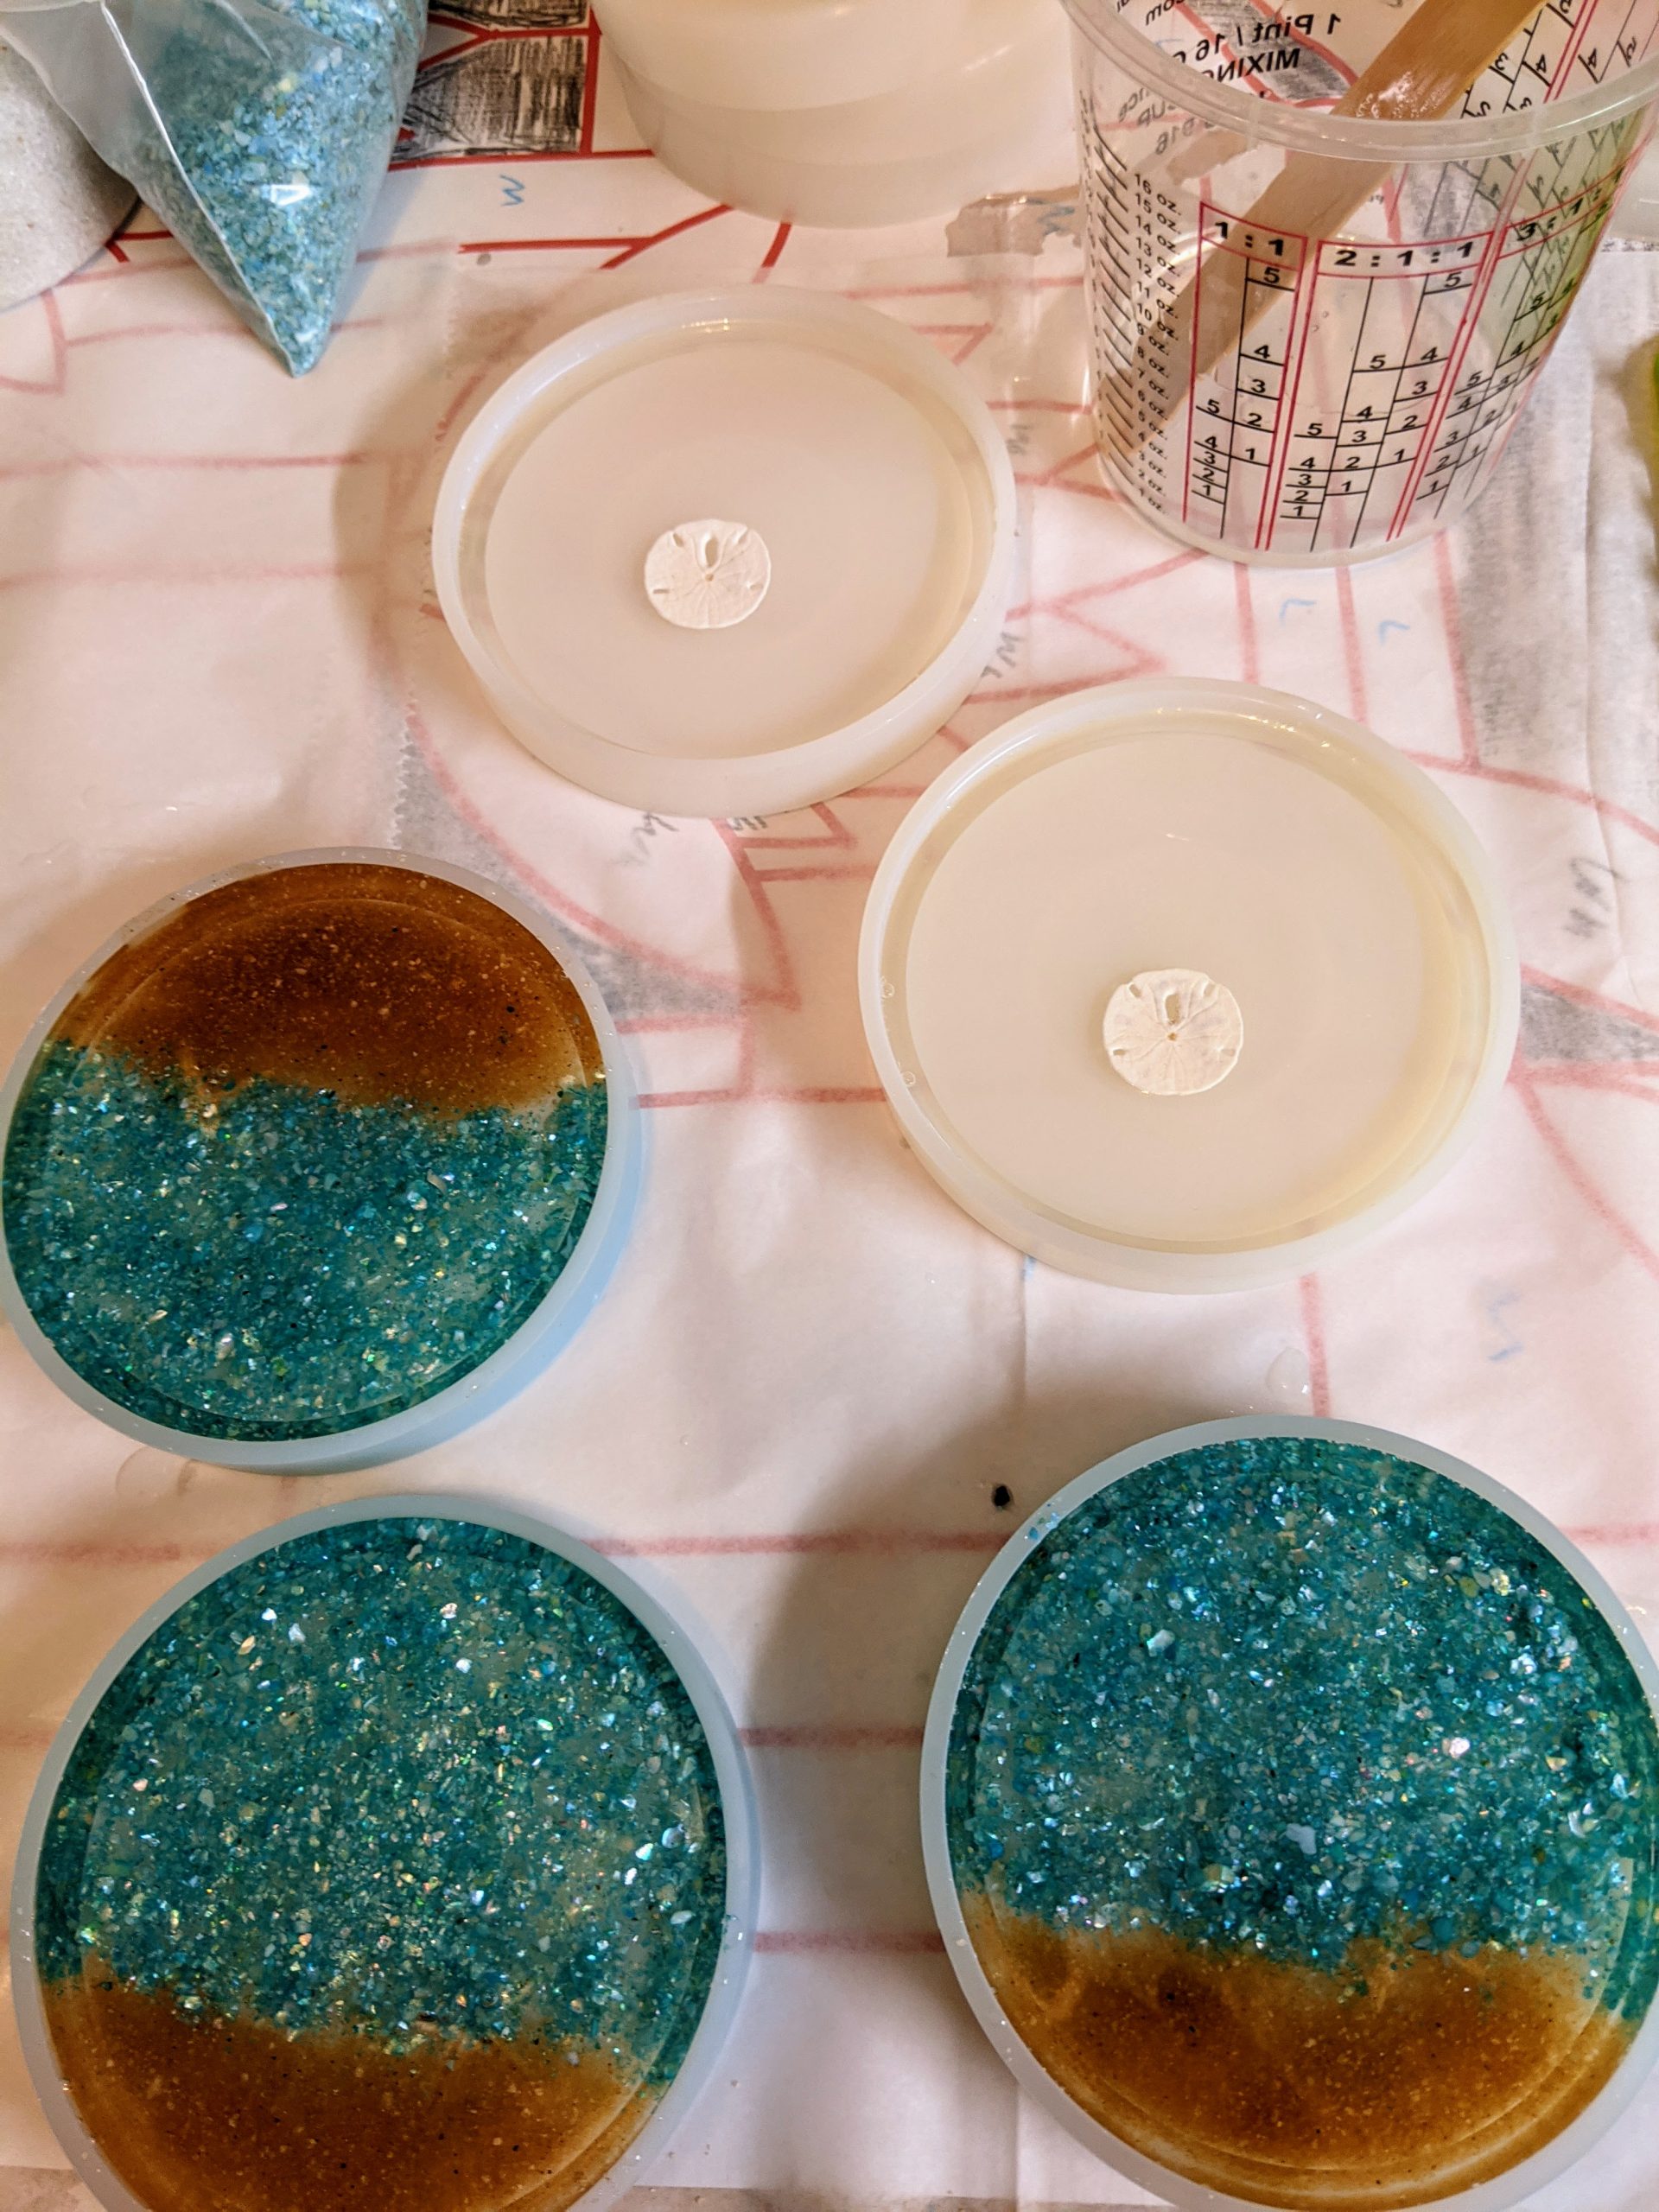
I’m still busier than usual at work, so my weekends are my best time for crafting. Today I finished cutting out and gluing the glass for a little winter scene and a small snowman panel (not pictured), as well as laid out the “beach” for some starfish and sand dollar ornaments.
Laying out the pieces / gluing in place.Everything glued – waiting for the glue to dry.Gluing the sand for the “beach” on some ornaments.
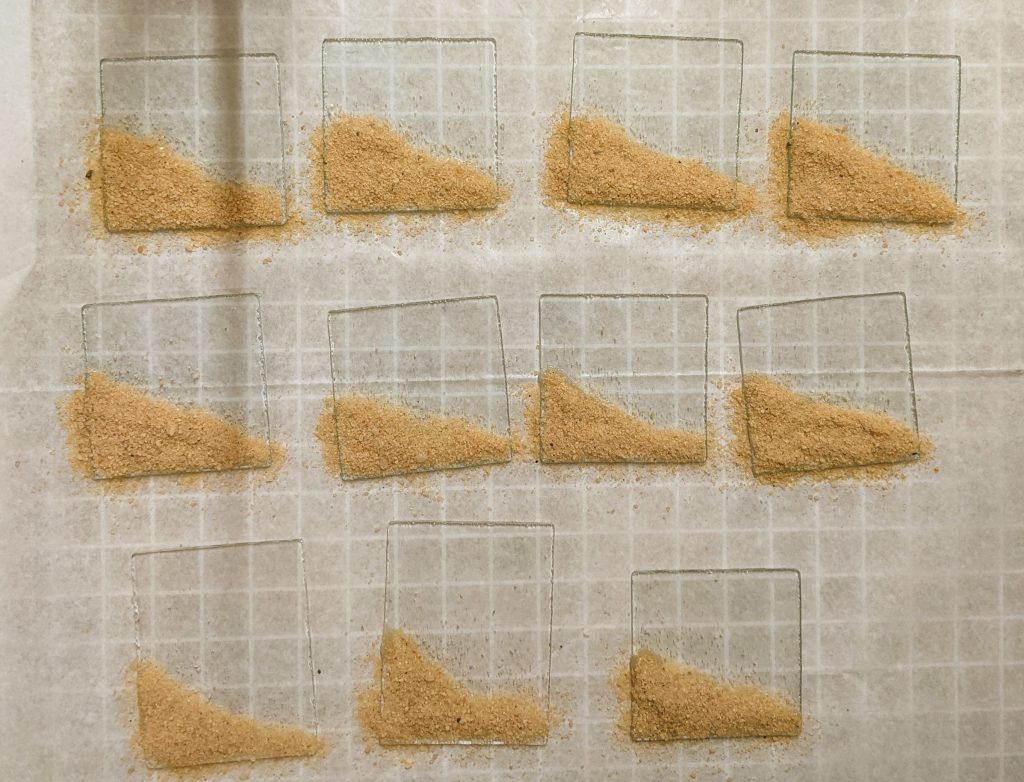
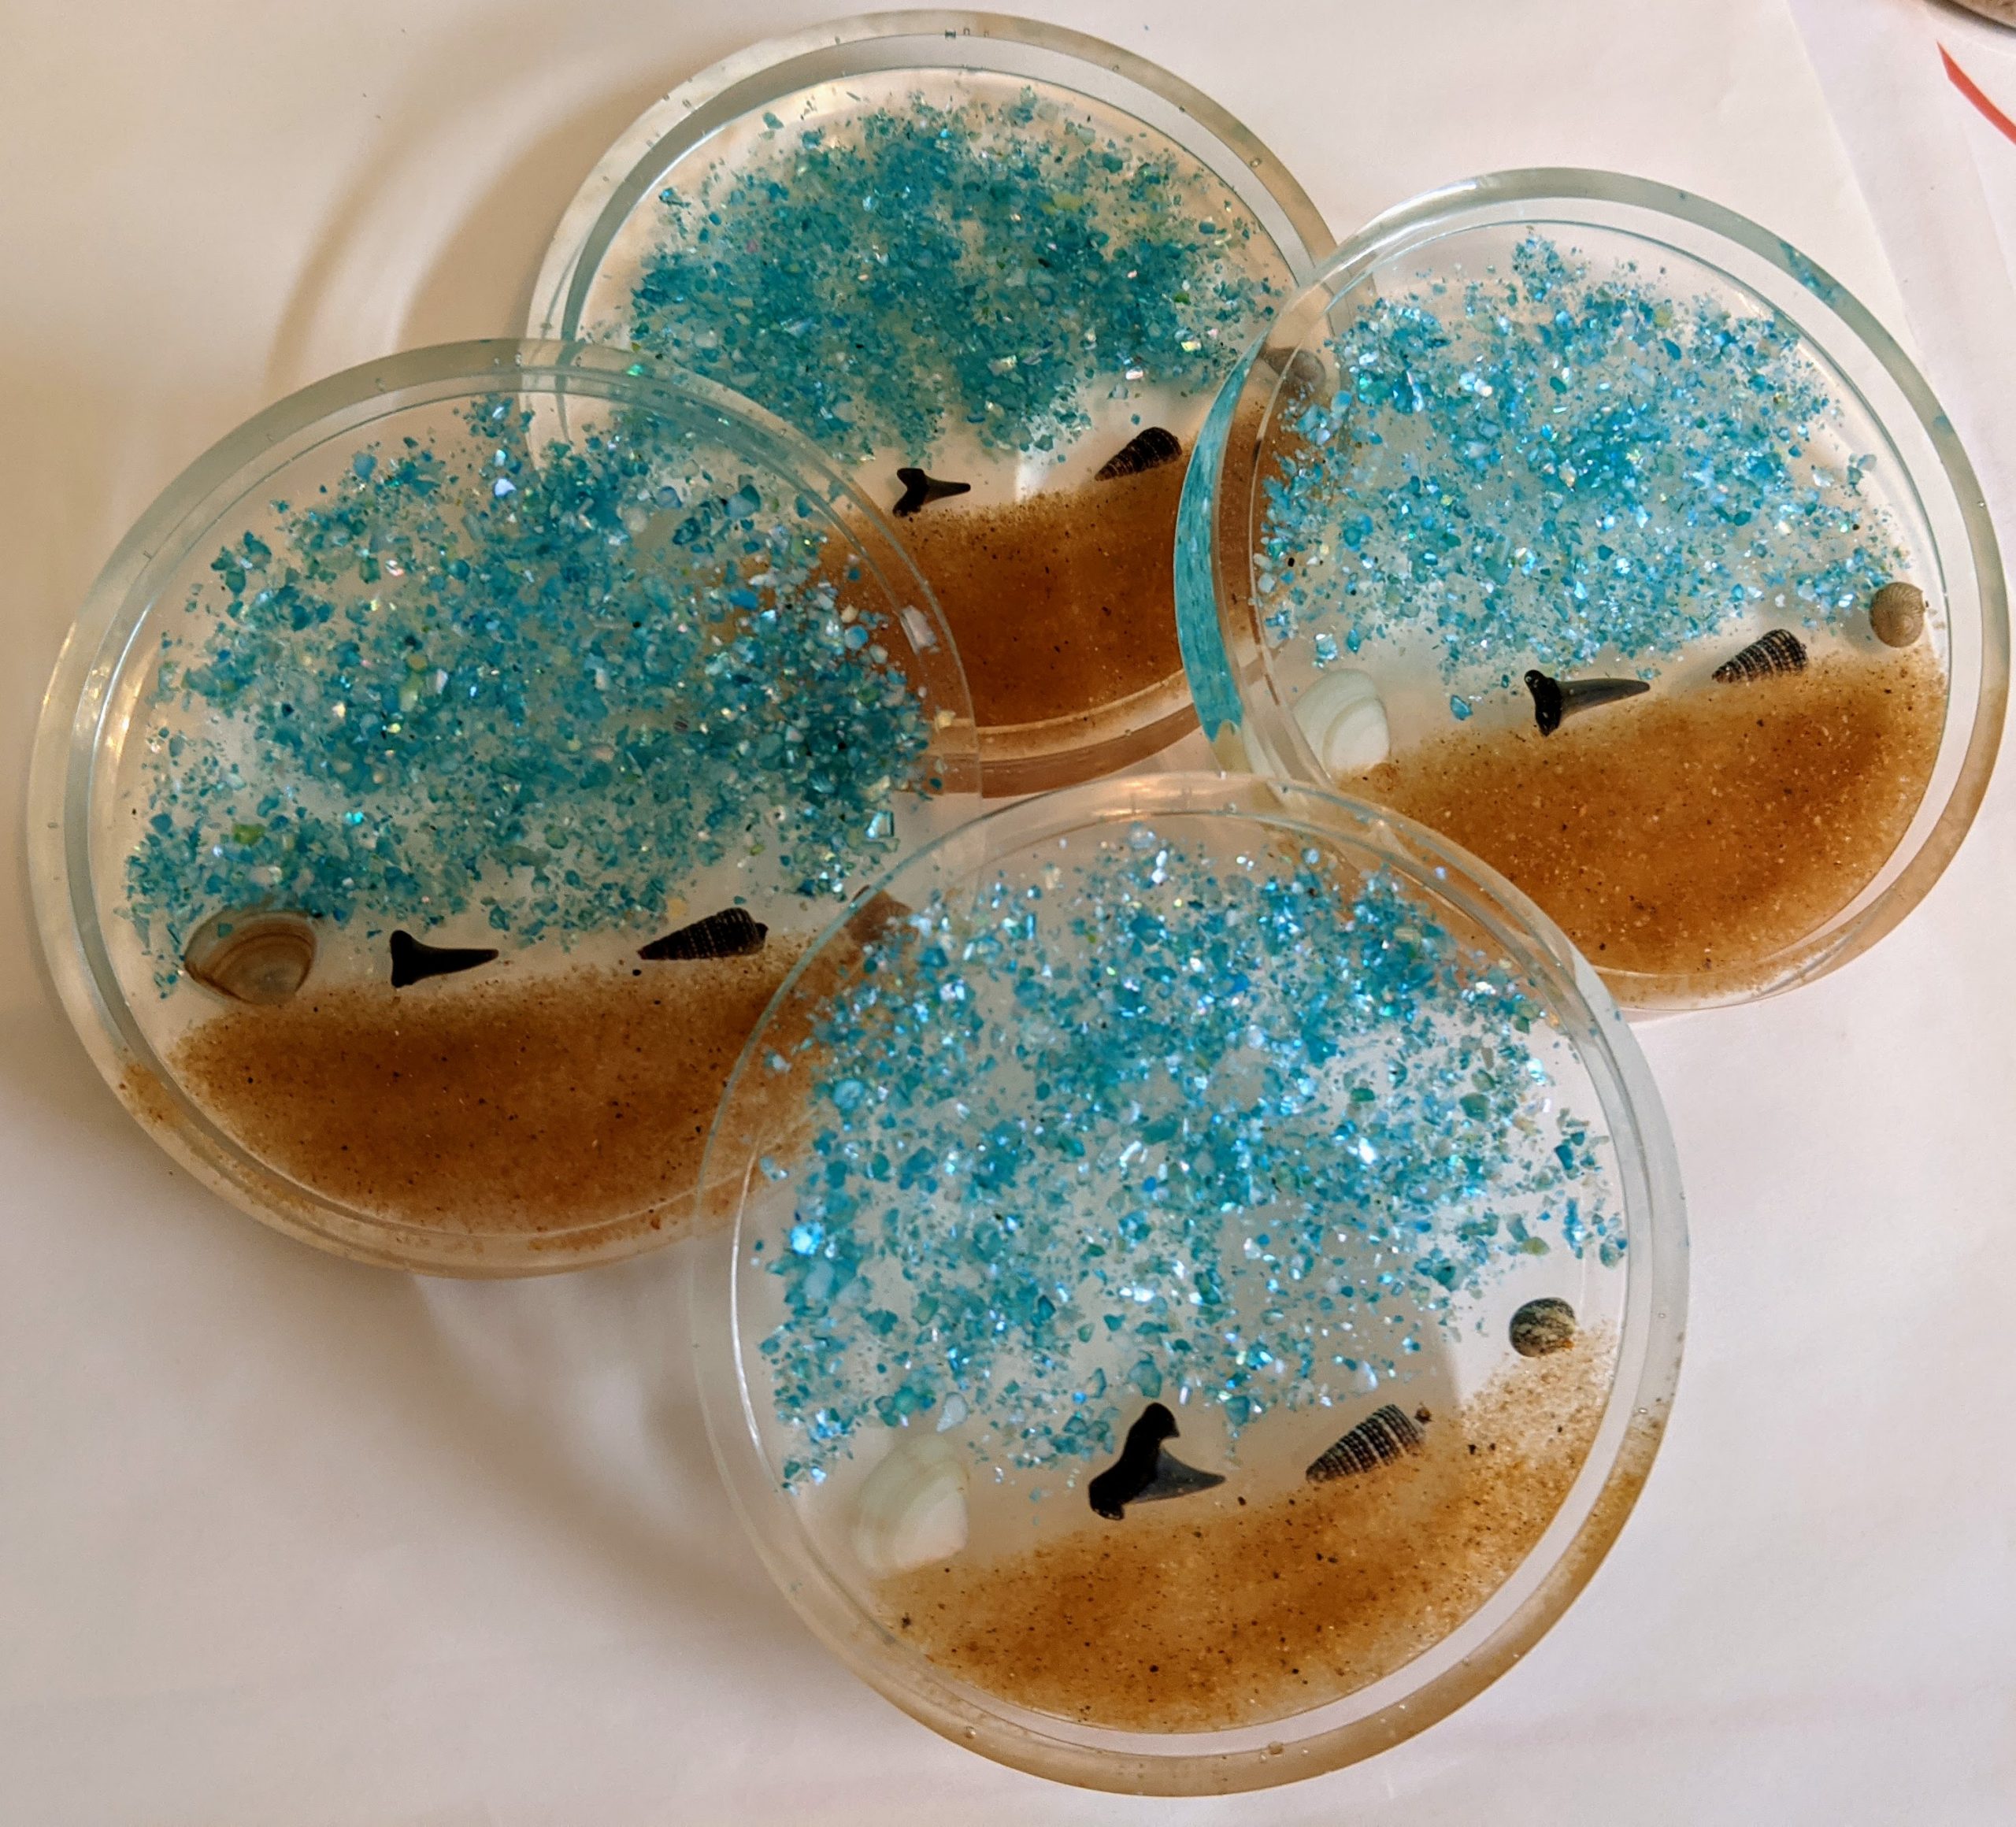
Of course, I had to cut the backer glass and sand the edges for all of these before decorating could begin. Hopefully the sand will stick well and I won’t have to add another layer before I can pour the resin, but I have a feeling I’ll need a bit more sand once the glue cures. I plan to make these into mini starfish & sand dollar ornaments / suncatchers.
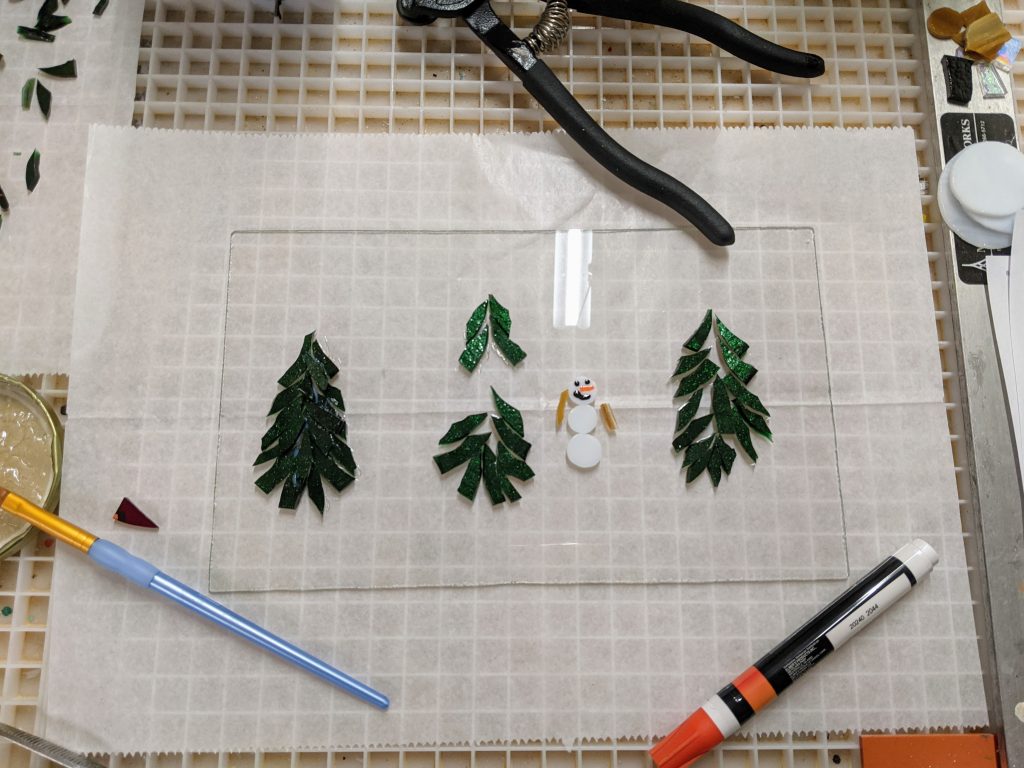
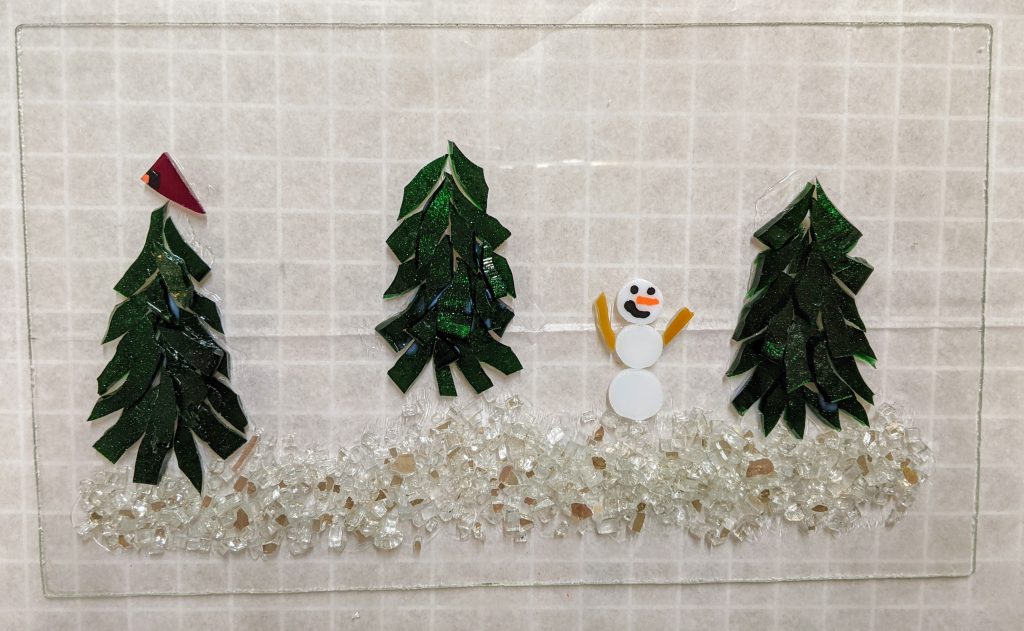
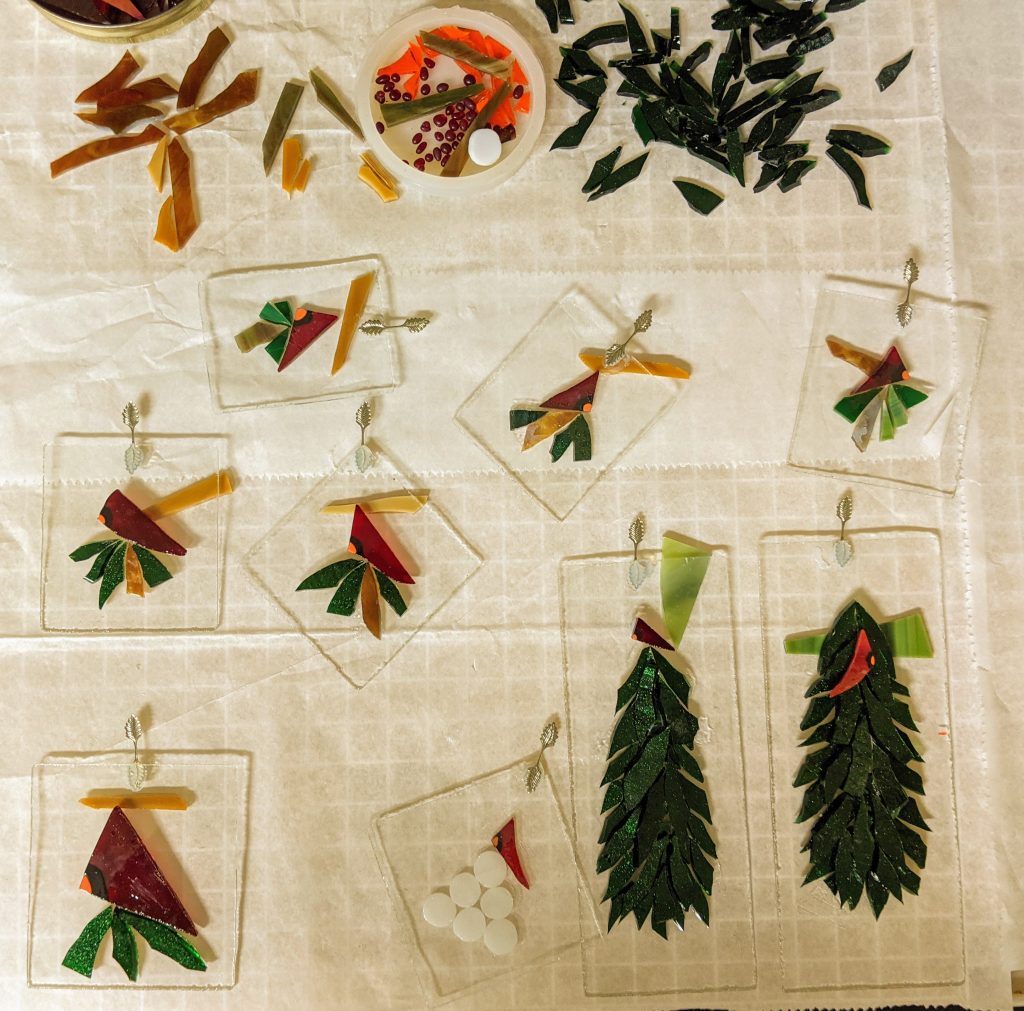
Today I laid out some designs and glued them in place. These will have a lot more detail once the resin is poured and decorated. I like to use “glass chunk snow” under the trees and glass chips / mica accents for sparkle.
Laying out the pieces for the ornamentsGlued in place and propped up for drying
The other morning I glued the metal hooks / receivers that will be used to hang the ornaments with MAC glue. I like to glue them even though the resin coating will hold them in place. The next step will be coating them with resin and decorating the resin with glass chips and mica.
Glue drying on ornaments
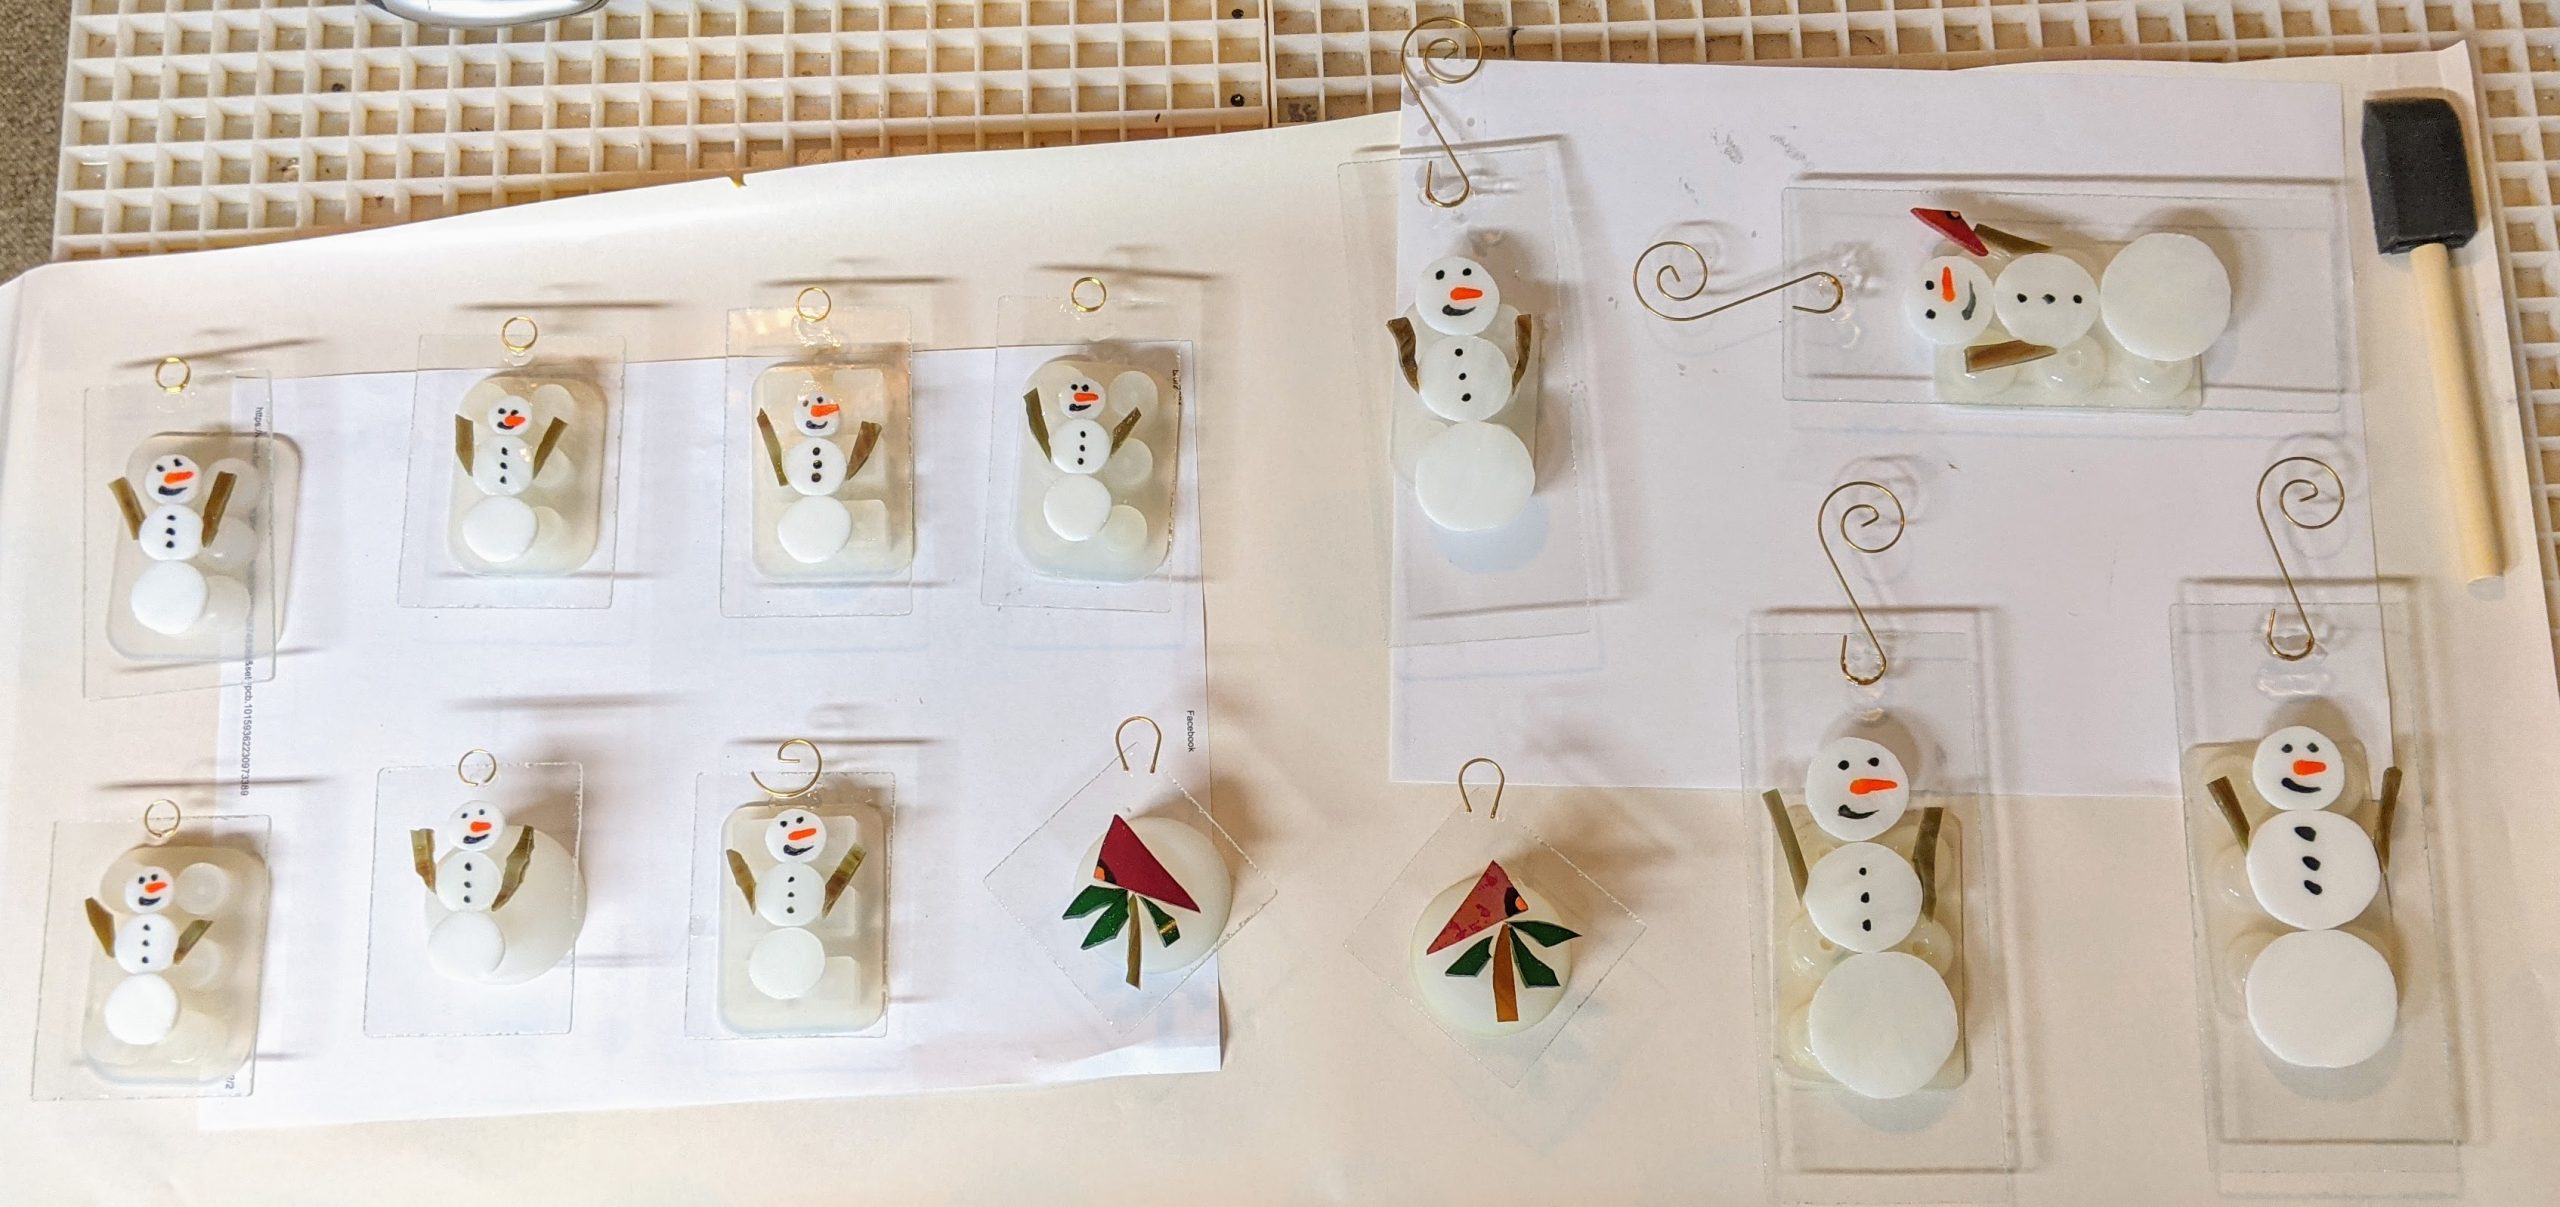
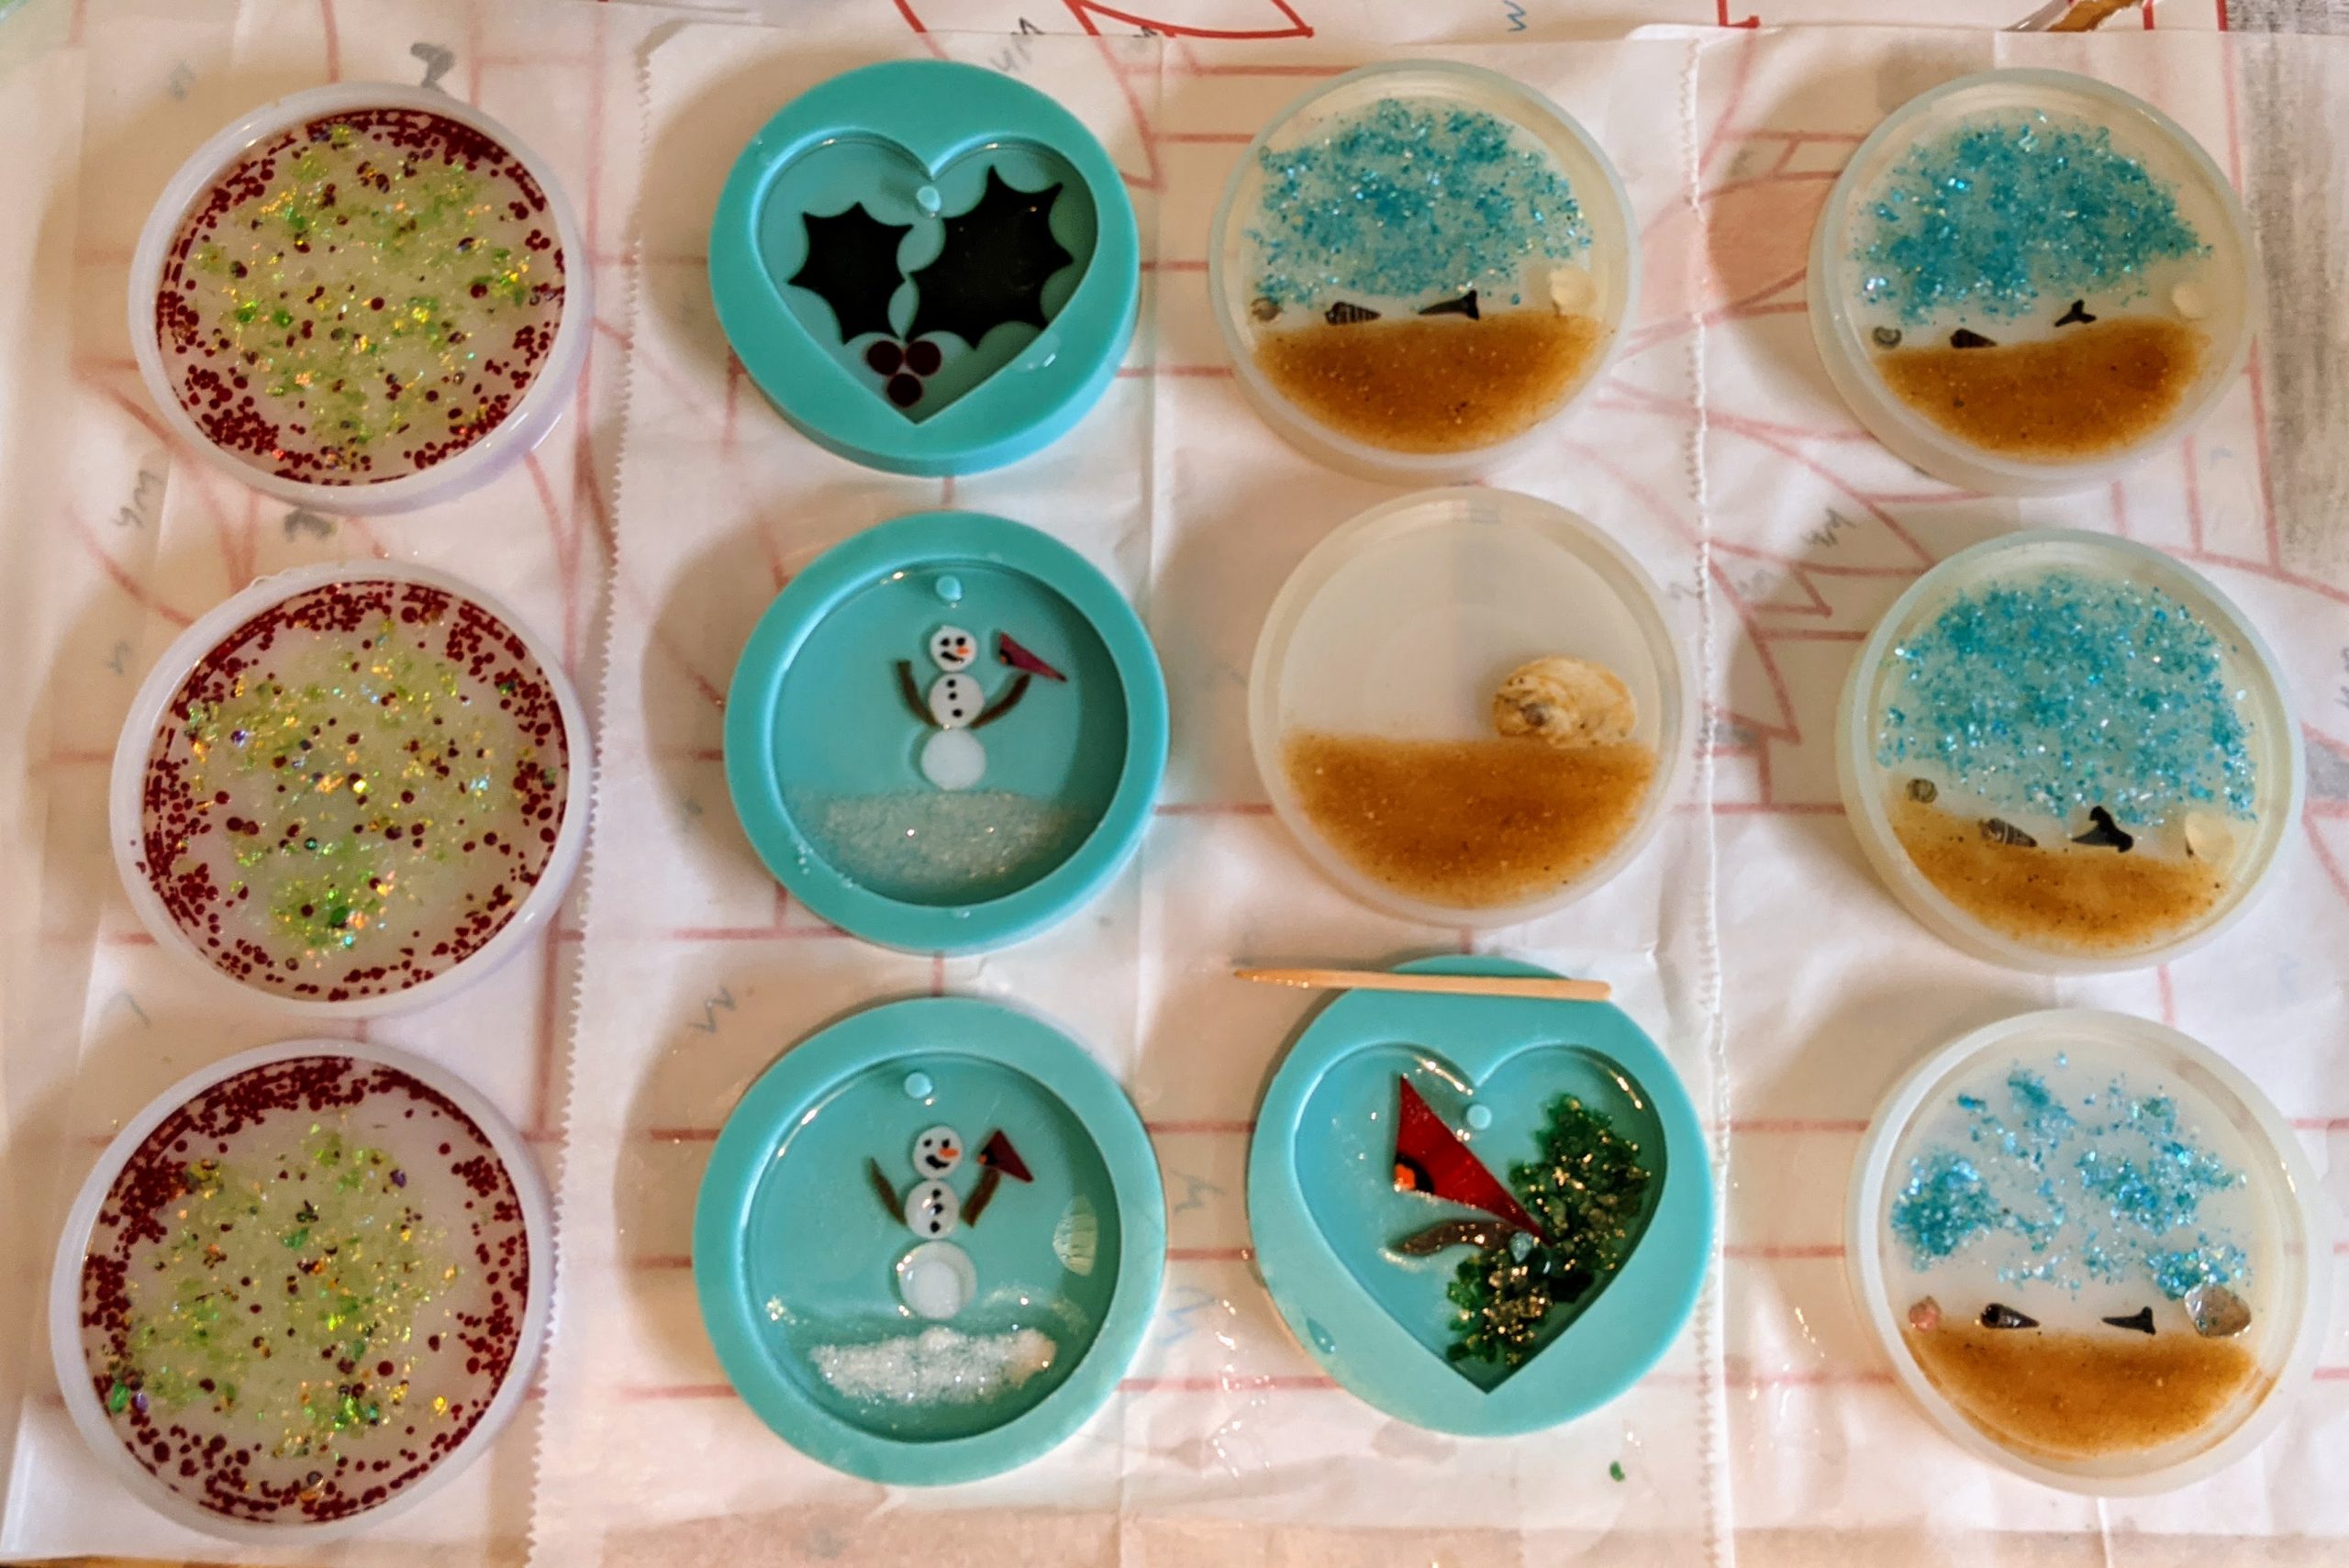
Before I can pour the resin, I have to elevate each ornament on something that the resin won’t adhere to. I usually use silicone cups or molds. They all need to have a bit of space between them so I can scrape drips off with a wooden craft stick while the resin settles. First I pour the resin and spread it around with a sponge on a stick to make sure everything is coated. Then I use a heat gun to remove bubbles in the resin. Once that is done, I can sprinkle glass chips and other decorations in the resin. Unfortunately, once I mix the resin I’m in a big sticky mess that doesn’t lend itself well to taking photos / video. I need to get my husband to help with that one of these days.
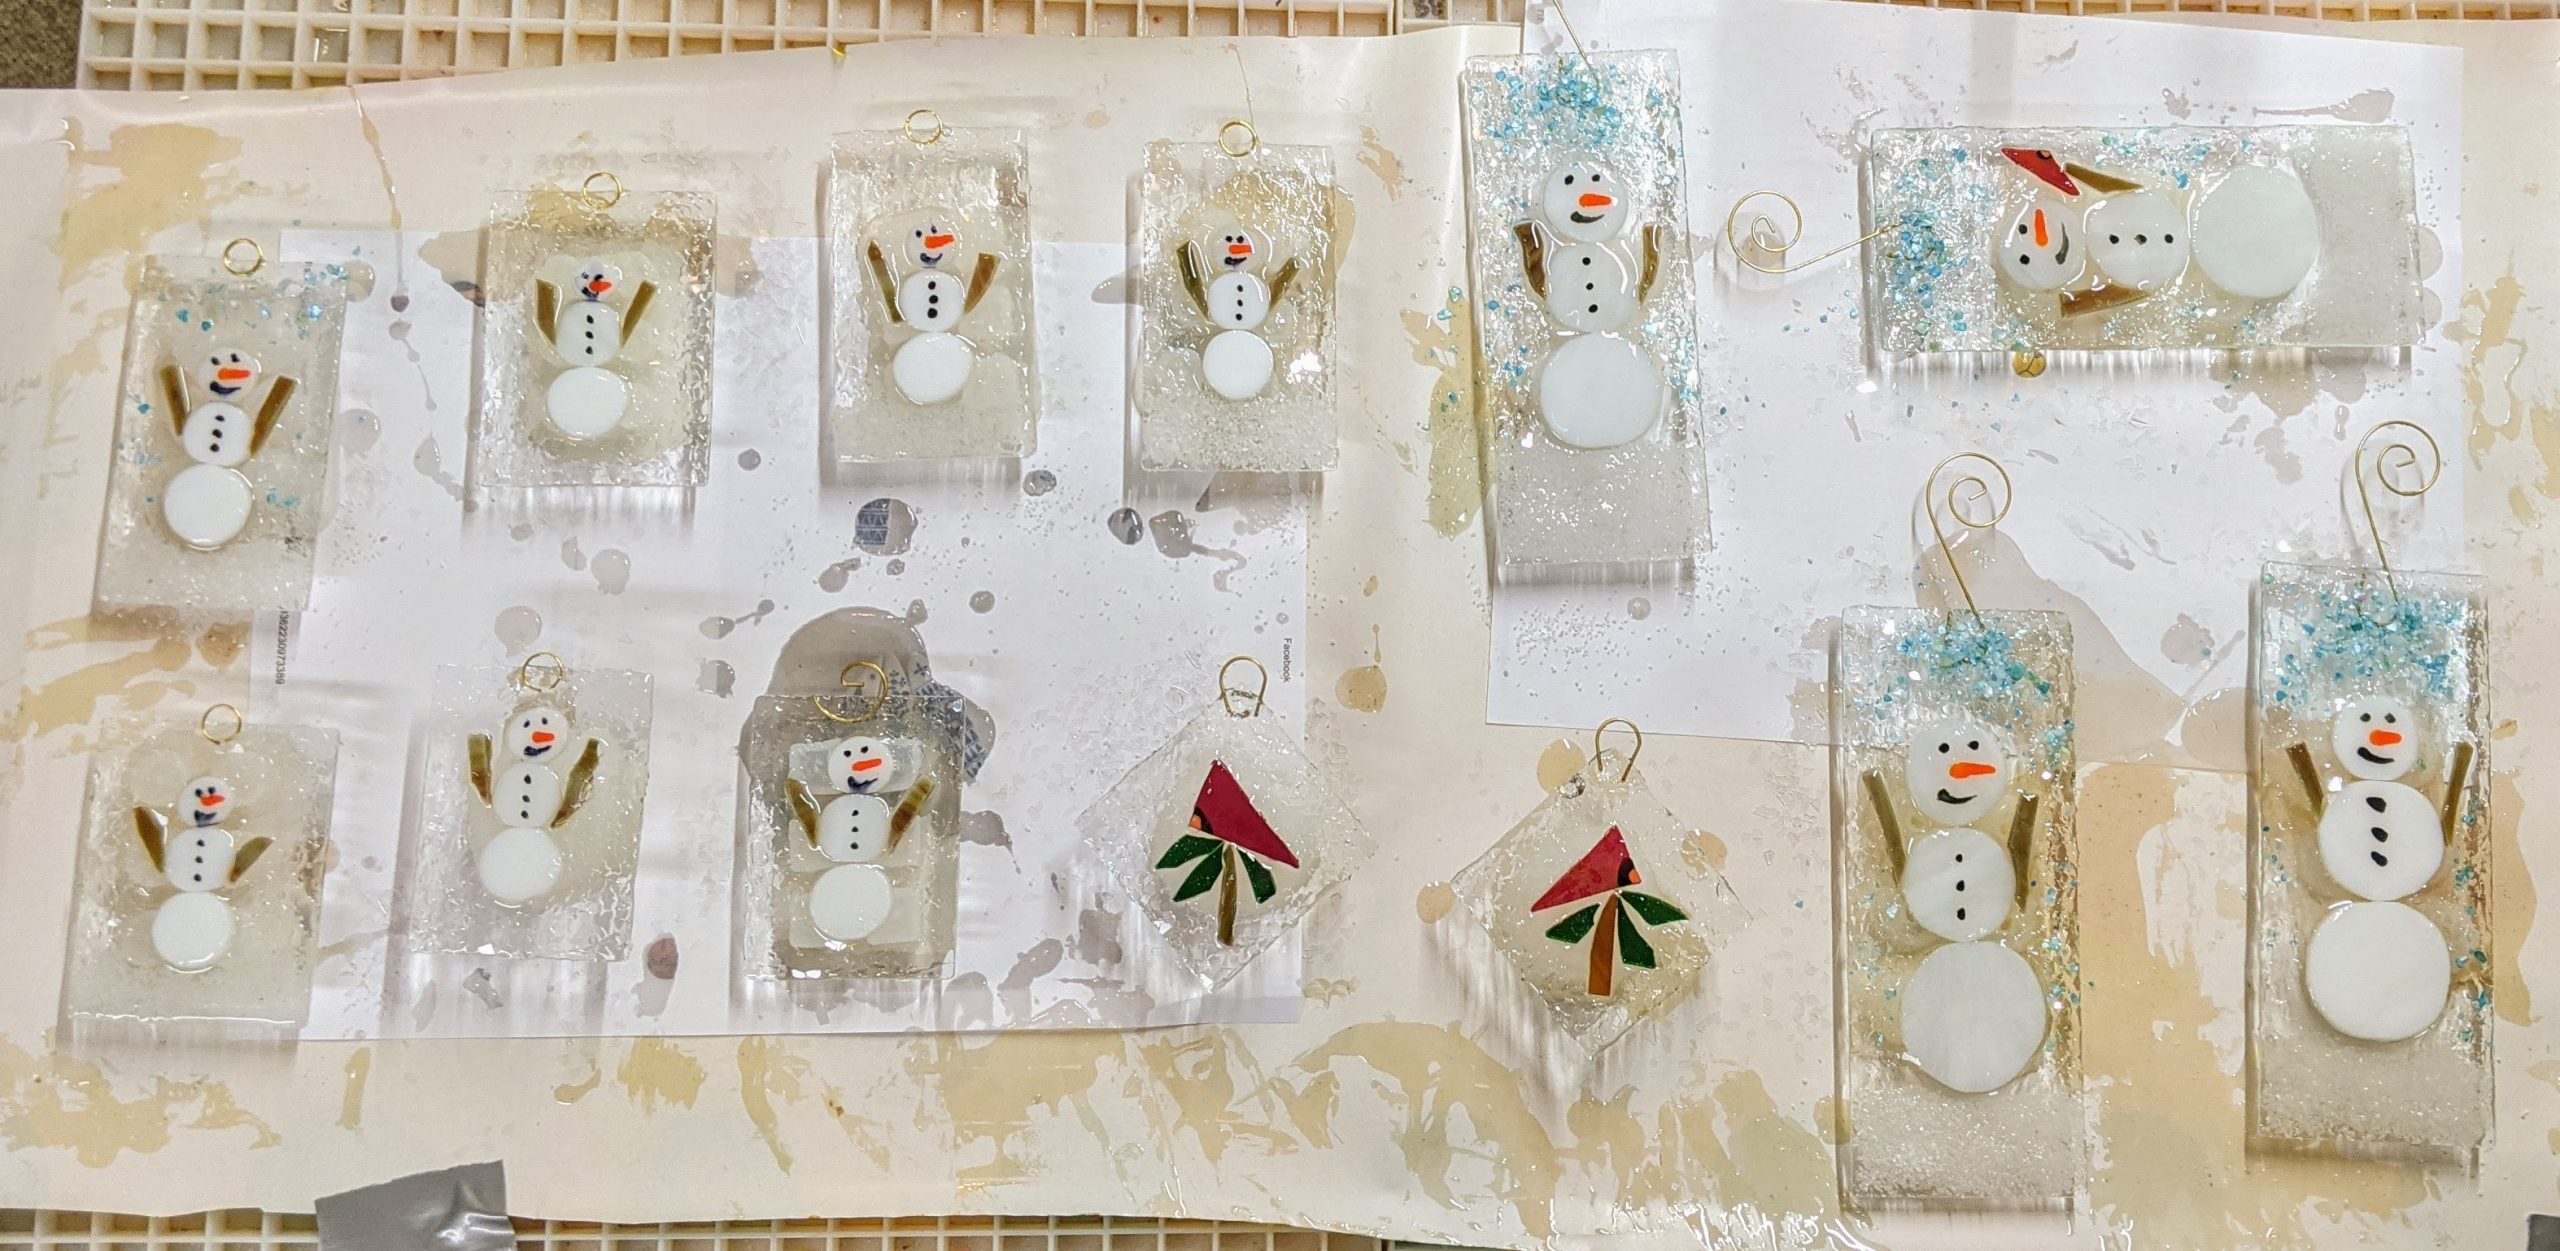
Ornaments elevated and spaced out.Resin poured and decorated, curing.
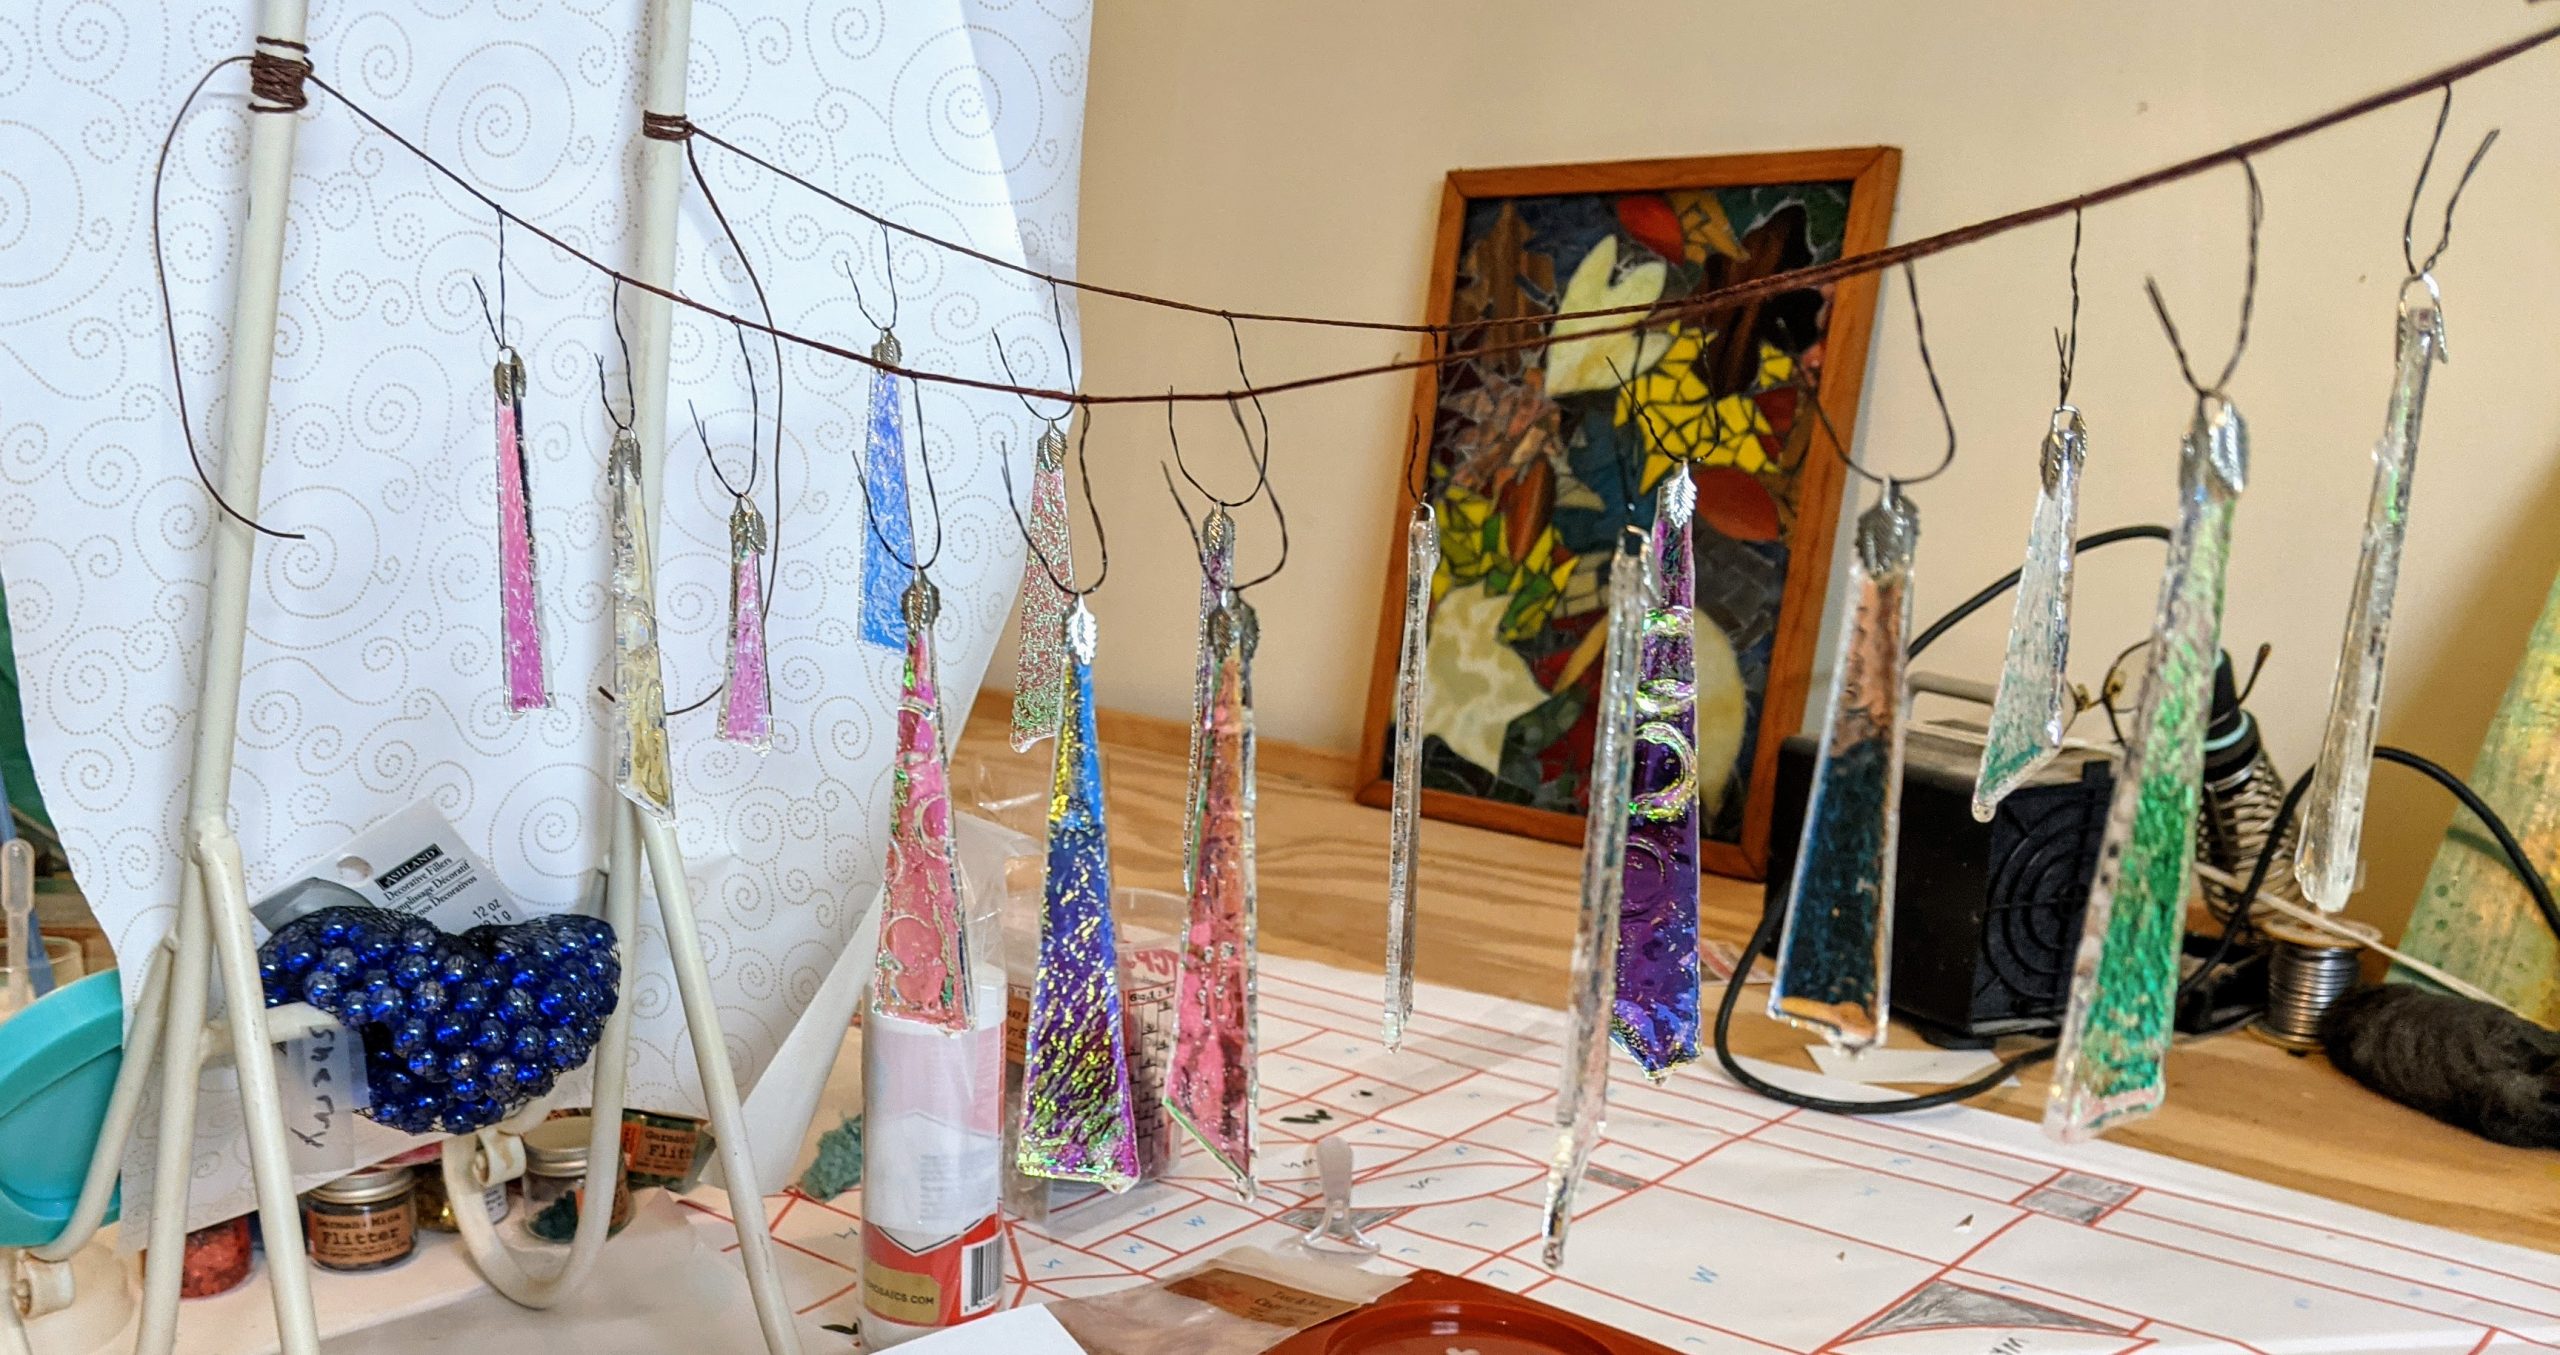
Some of the smaller snowmen’s mouths drifted a bit after covered with resin. It’s always a new challenge, sigh. I also dipped the “Dichro-cicles” and hung them on my little laundry line. We’ll see how they come out.
I needed to make some more projects before mixing the next batch of resin (don’t want to waste the resin), so I spent today cutting out parts for snowmen and cardinals and prepping them for the resin.
Cutting glass
Grinding glass
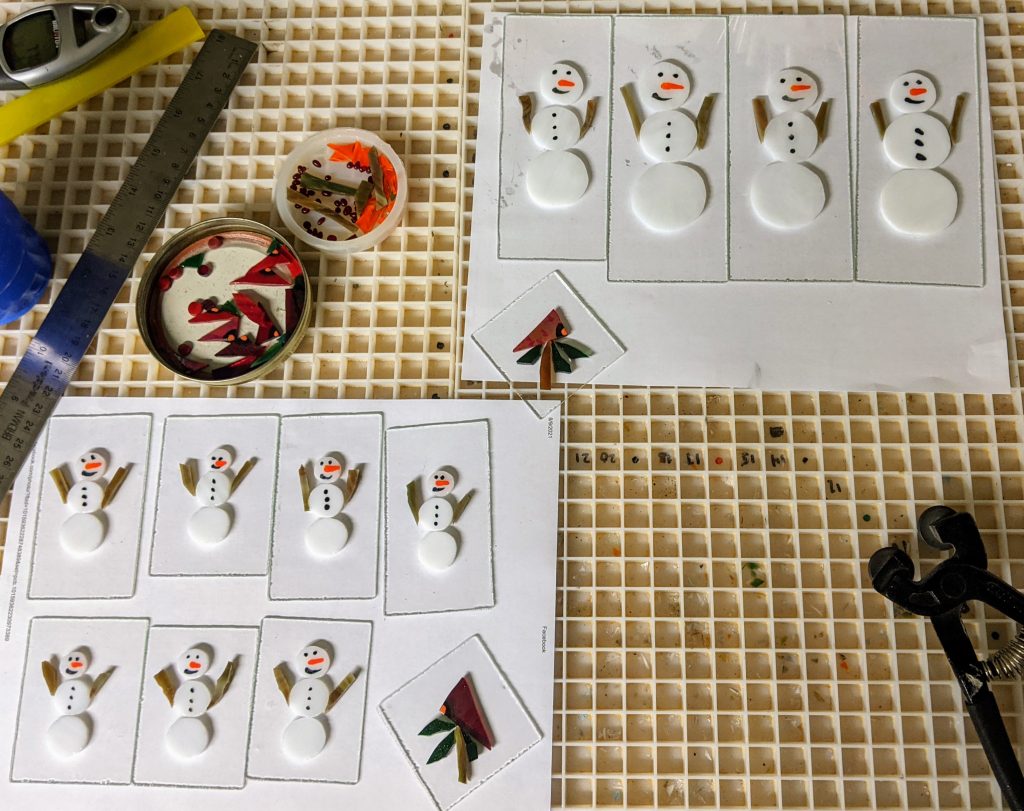
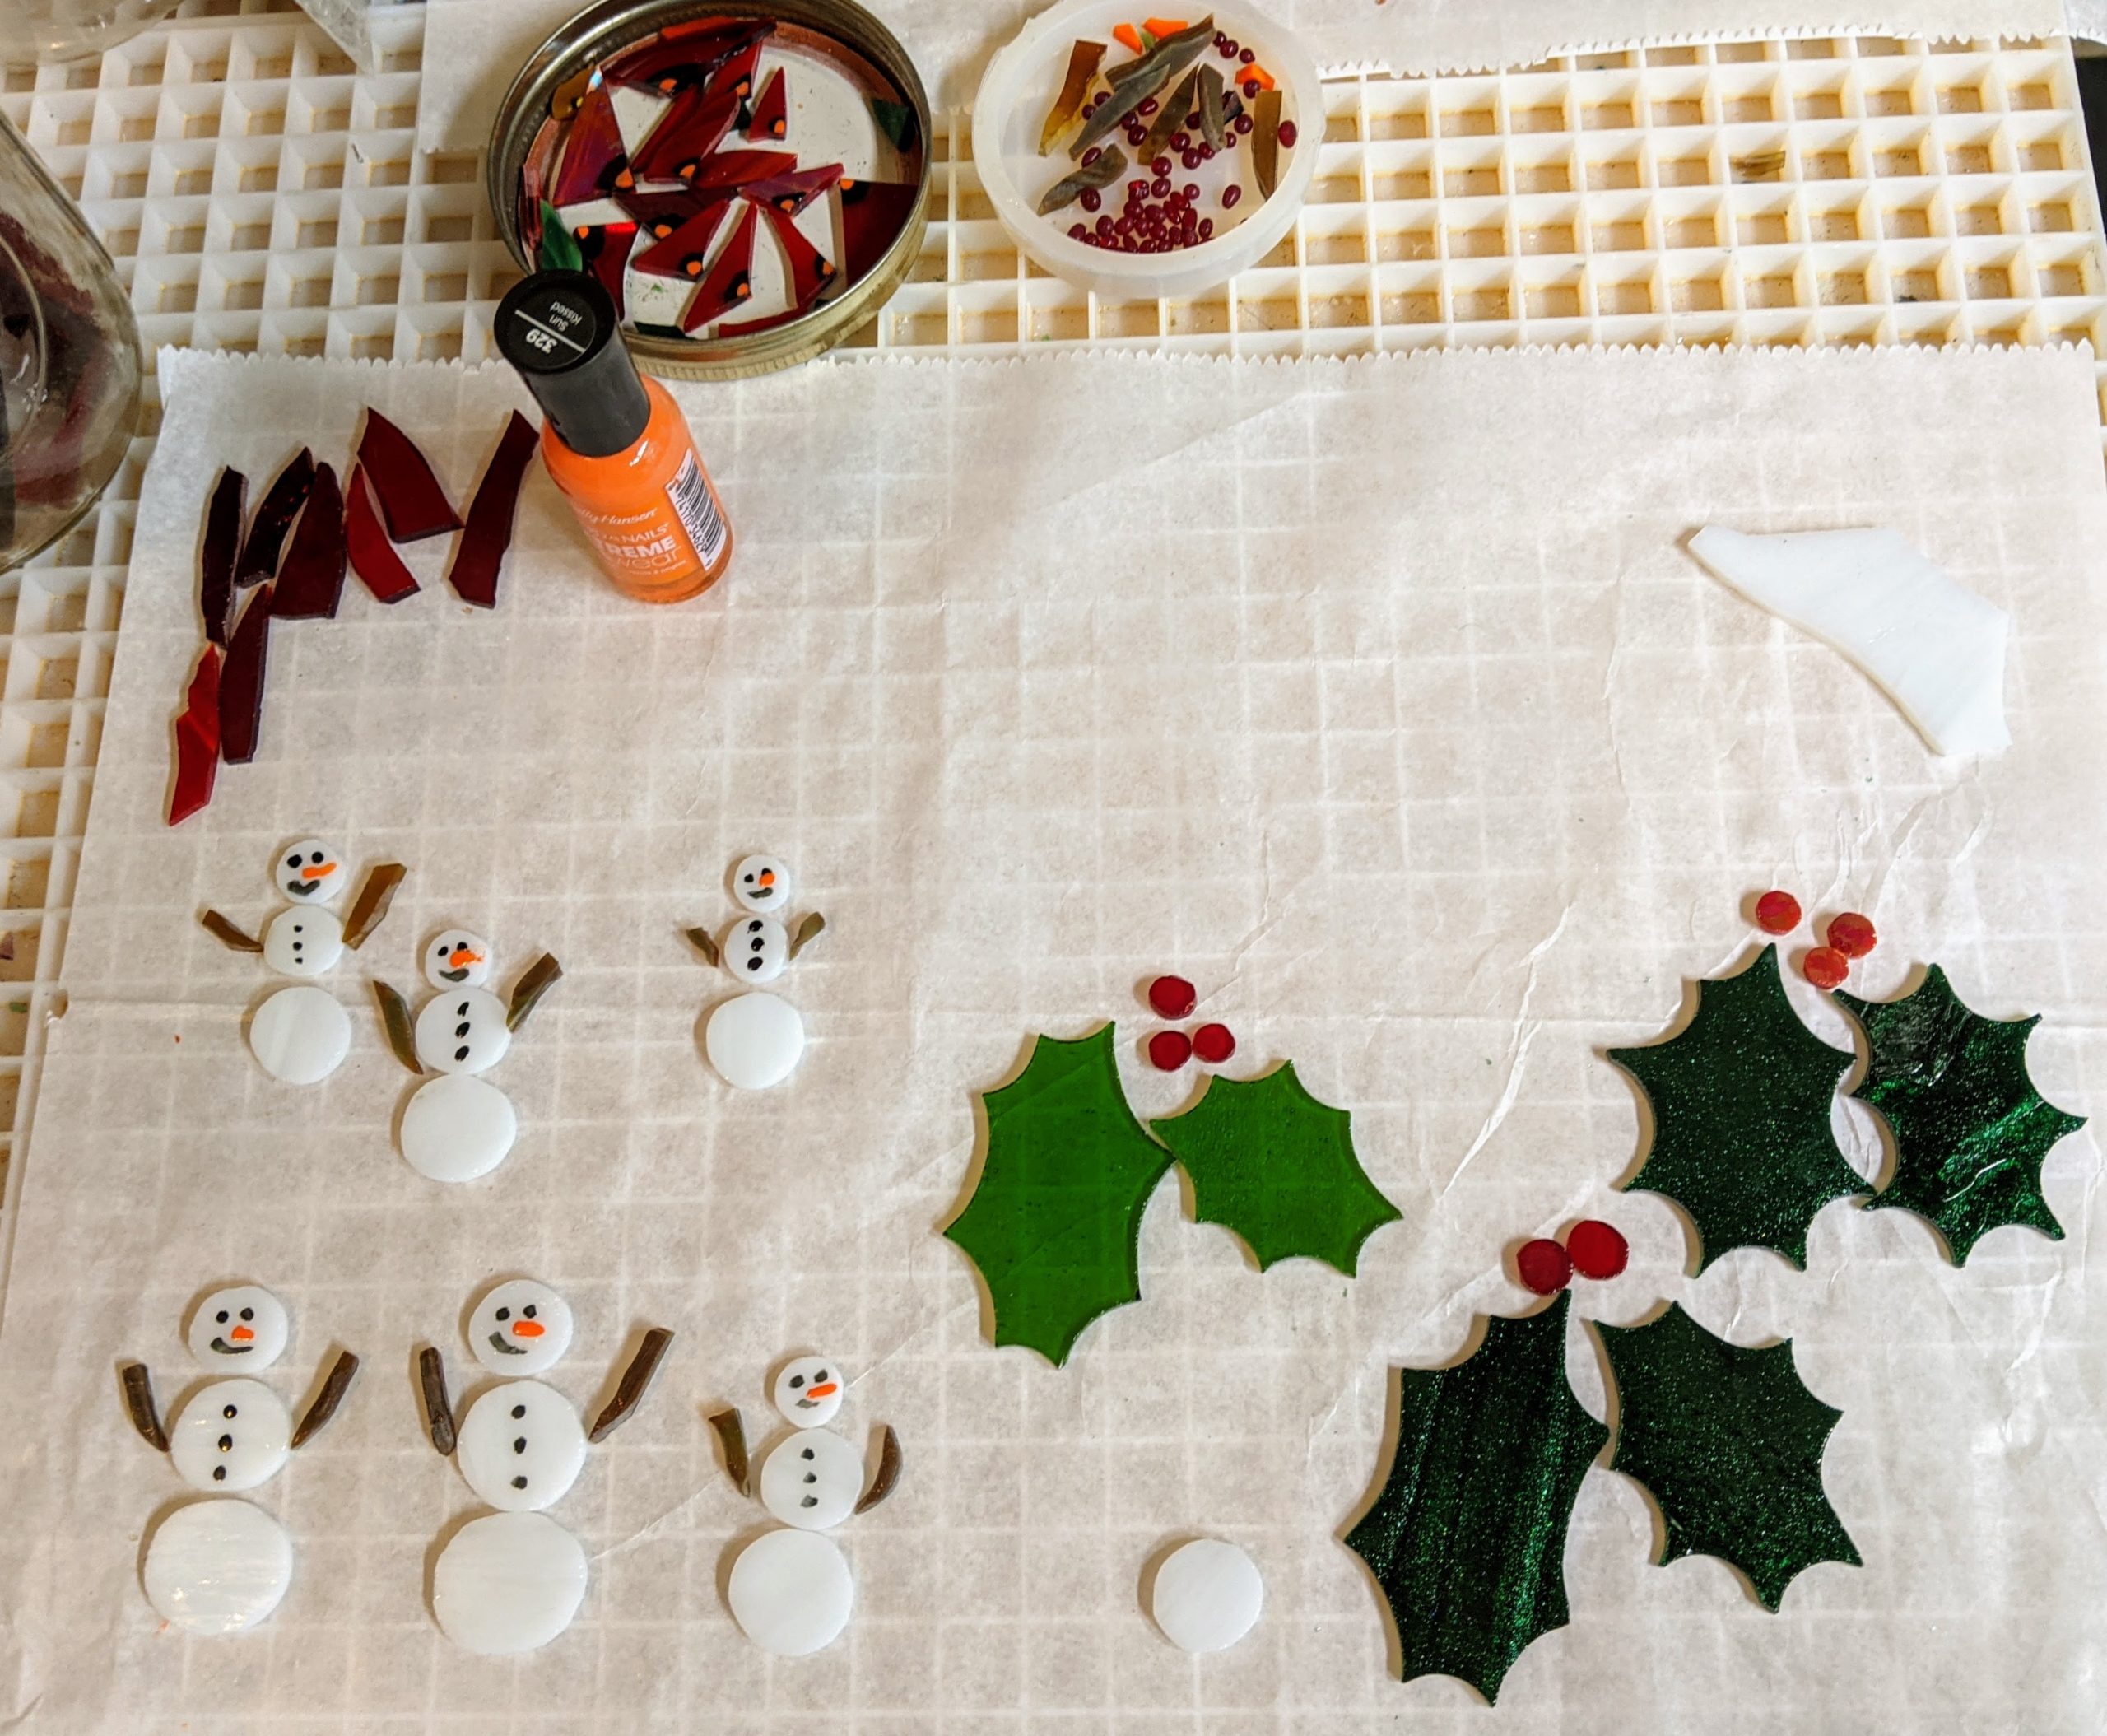
Laying out the snowmen
More ornaments being laid out
Cutting / grinding / laying out the glass
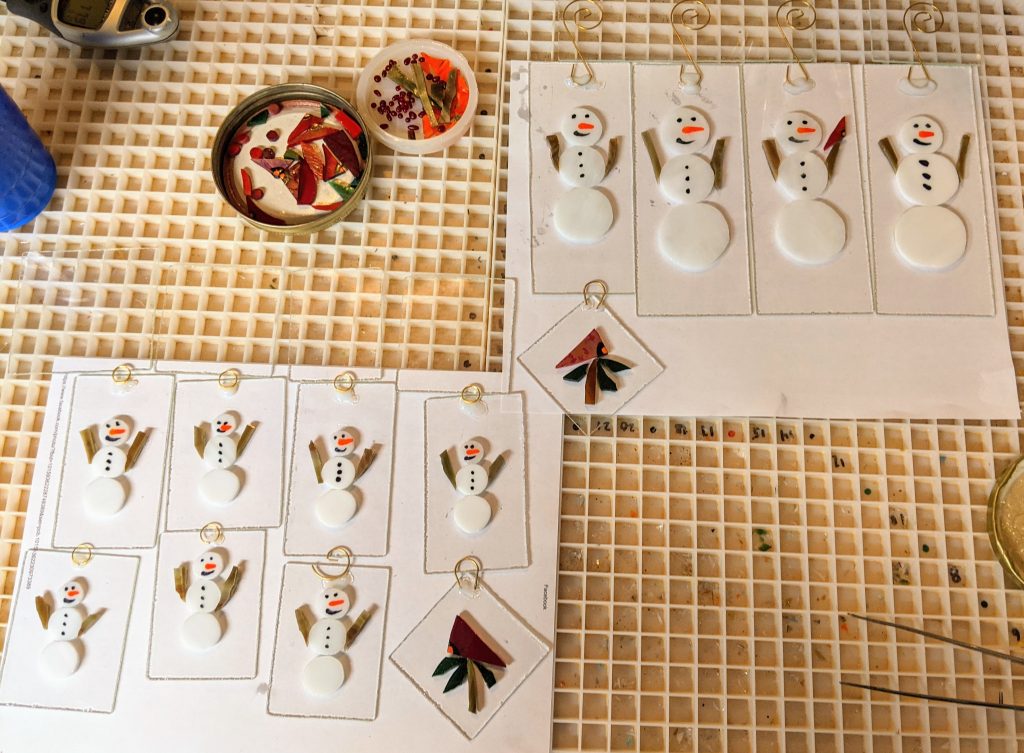
After I lay out all the parts, I decorate the snowmen with nail polish for their faces and coal buttons (I did this previously for the cardinals I’m using). Once the glue dries, they can be coated with resin and decorated. Sometimes I use glass for the noses on the snowmen when they are larger, but these are smaller ornaments.
Decorated and ready for the resin
Once the decorations dry, I can glue the glass pieces to the clear backer glass. After they dry overnight, they should be ready for the resin coating.
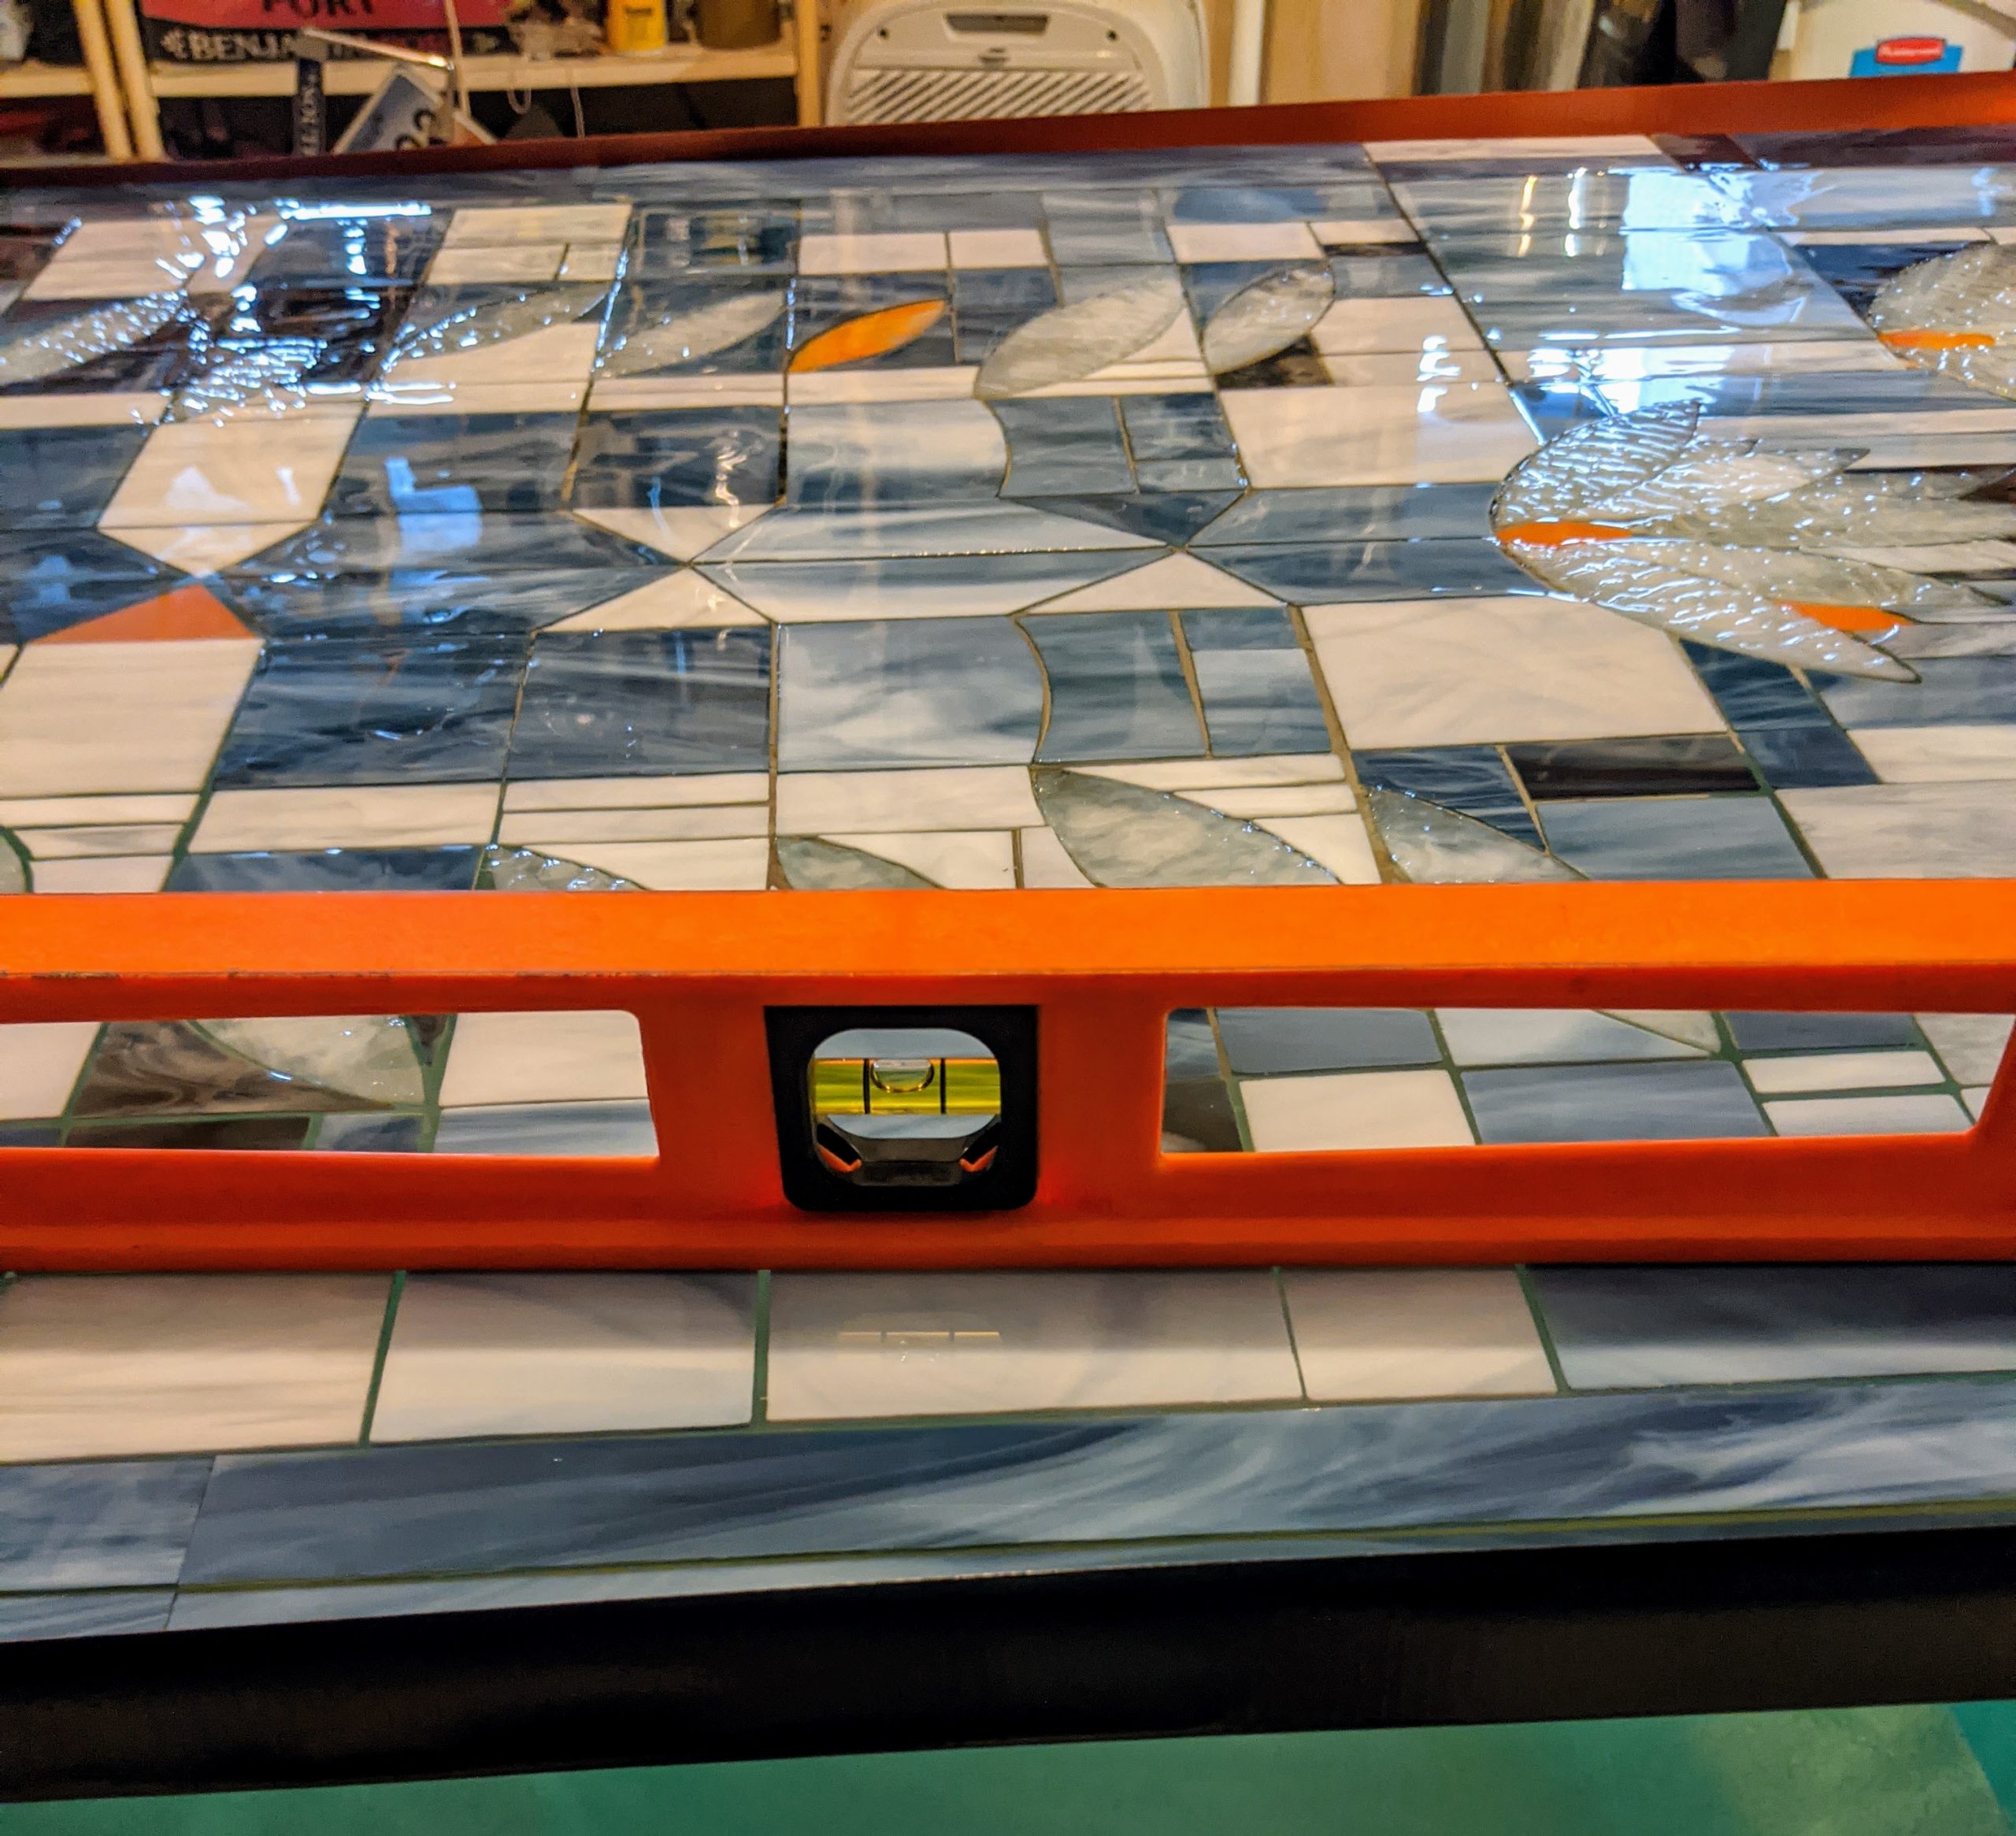
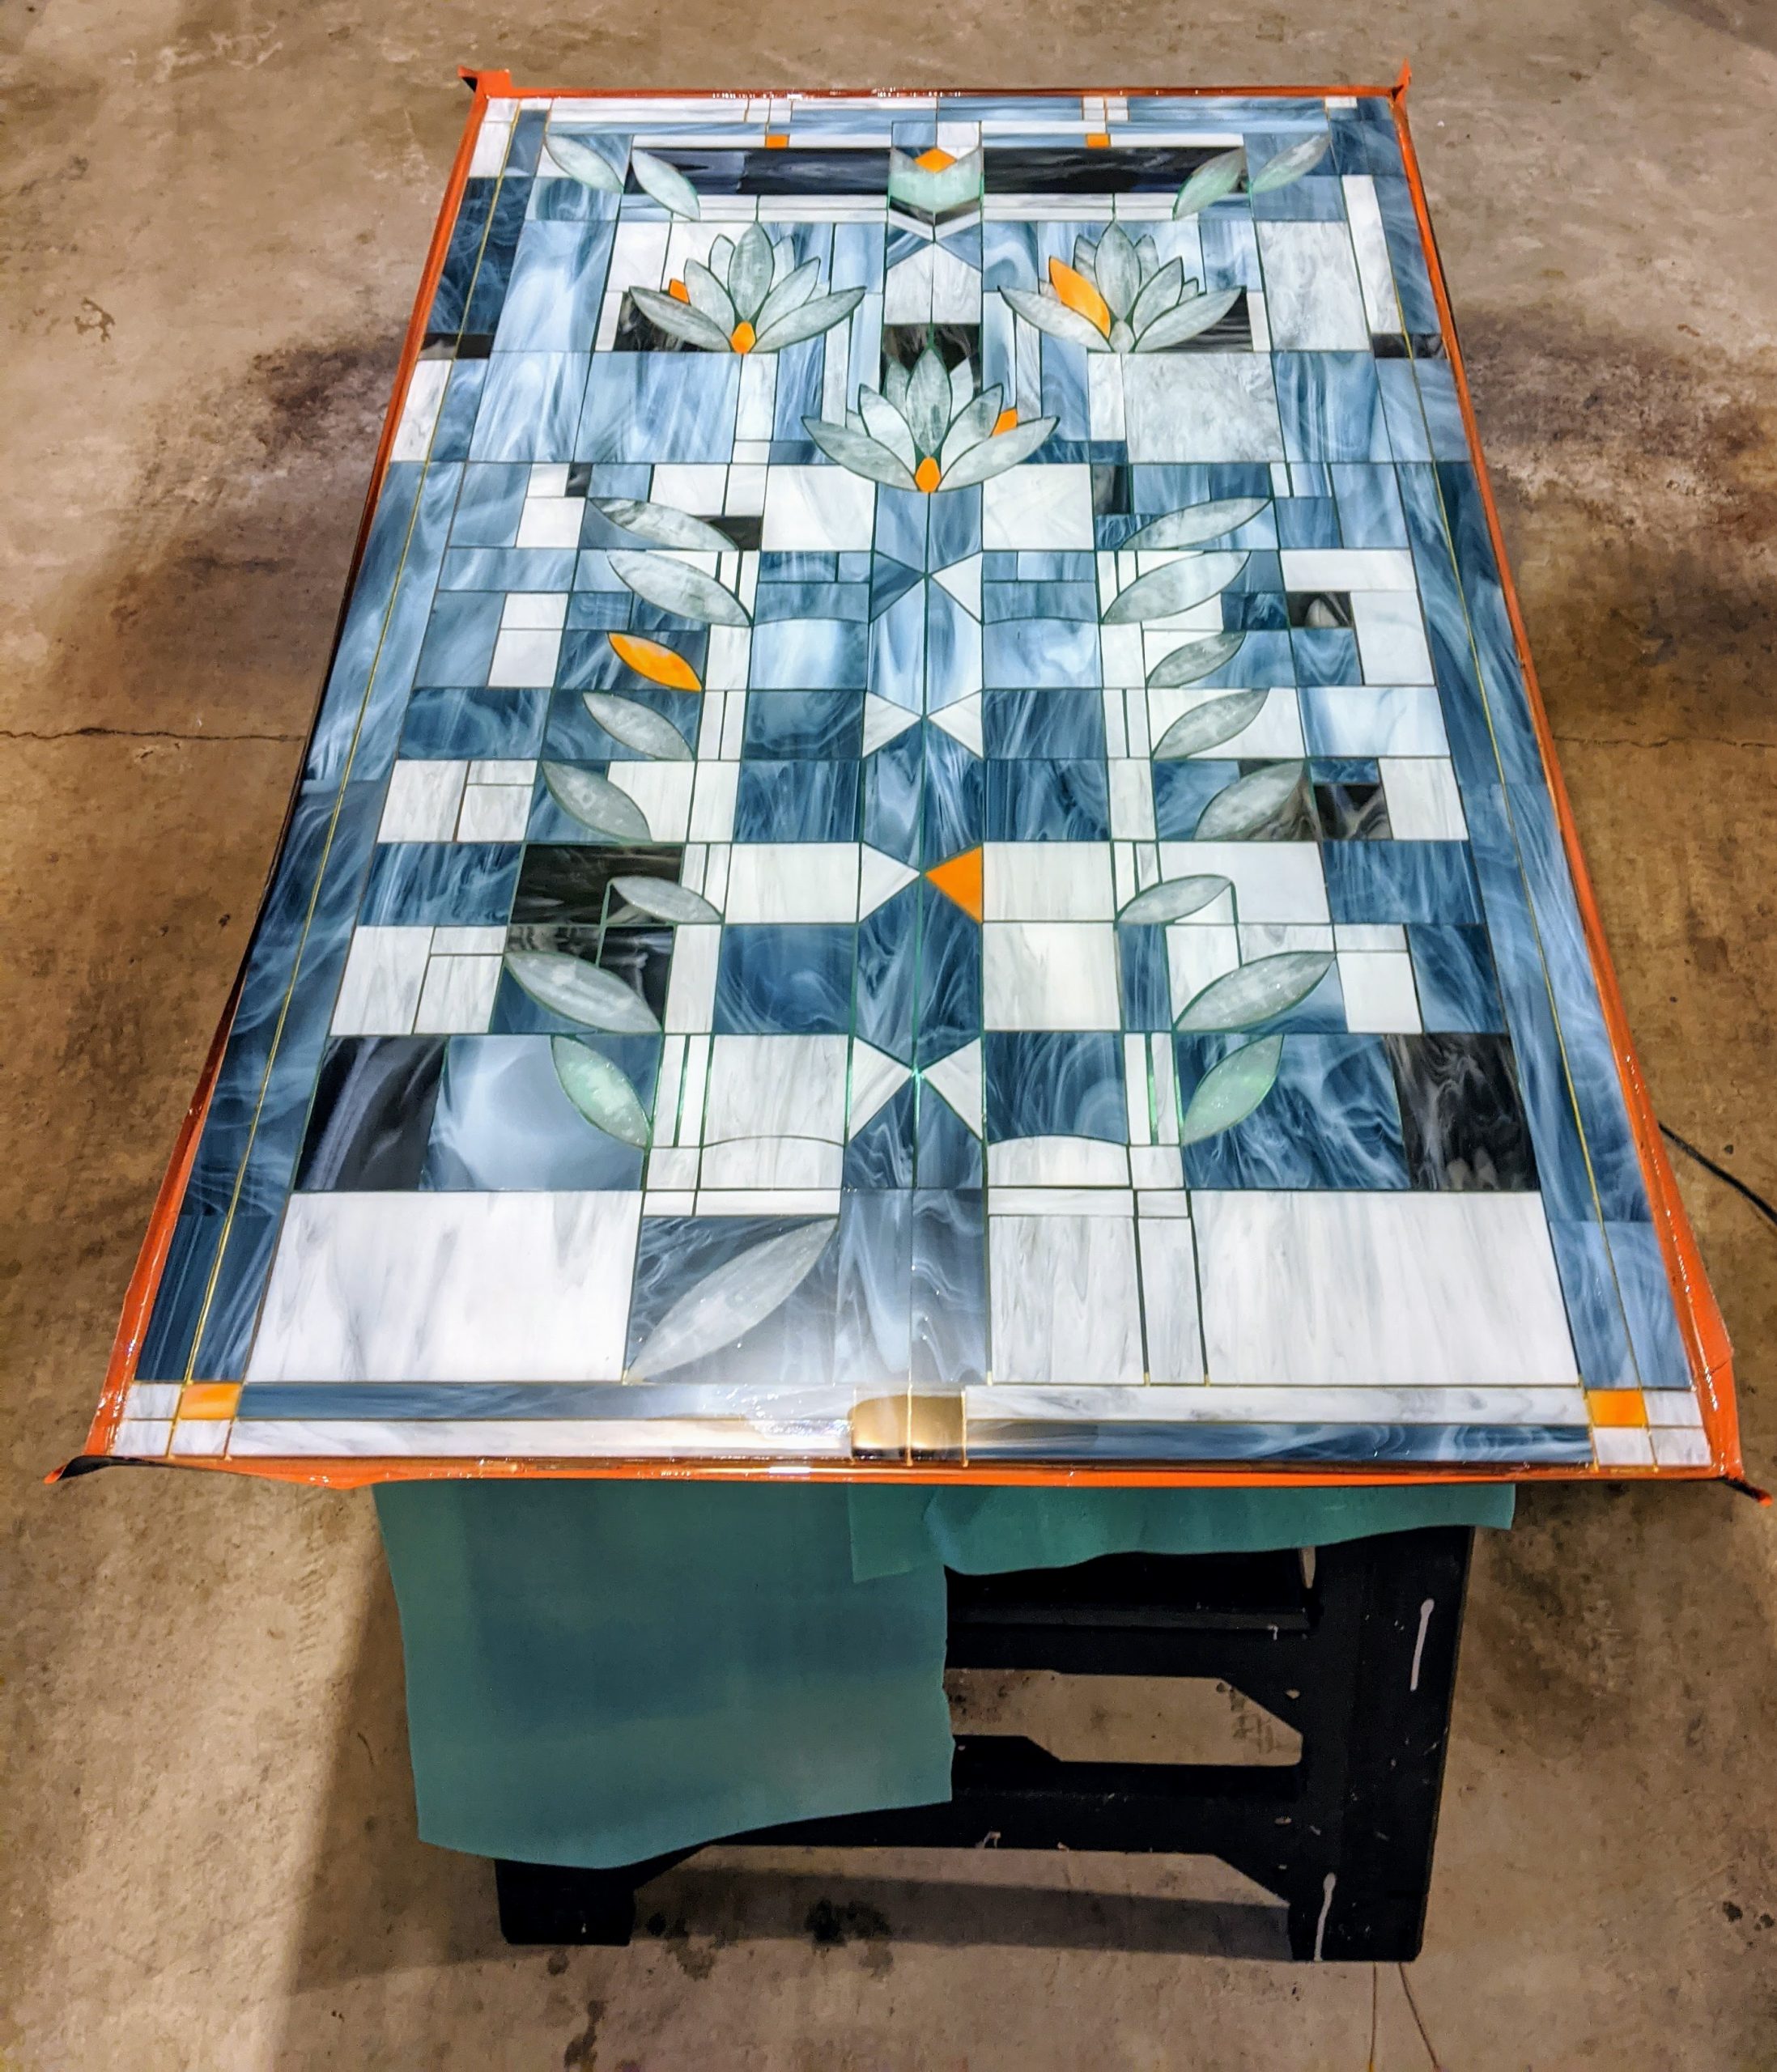
Yesterday the friends who will be the recipients of the big Frank Lloyd Wright window came over and we decided to do another layer of resin. I decided that I really needed to move it to the garage for the final layer so I could access all sides of the window, despite the space being more prone to dust / humidity. Luckily it is an unseasonably warm day and the temperature in the garage was 75, which is perfect for my resin (Envirotex Lite).
Making sure it is level
Layer 4 in the process of curing
Adding a final layer of resin.
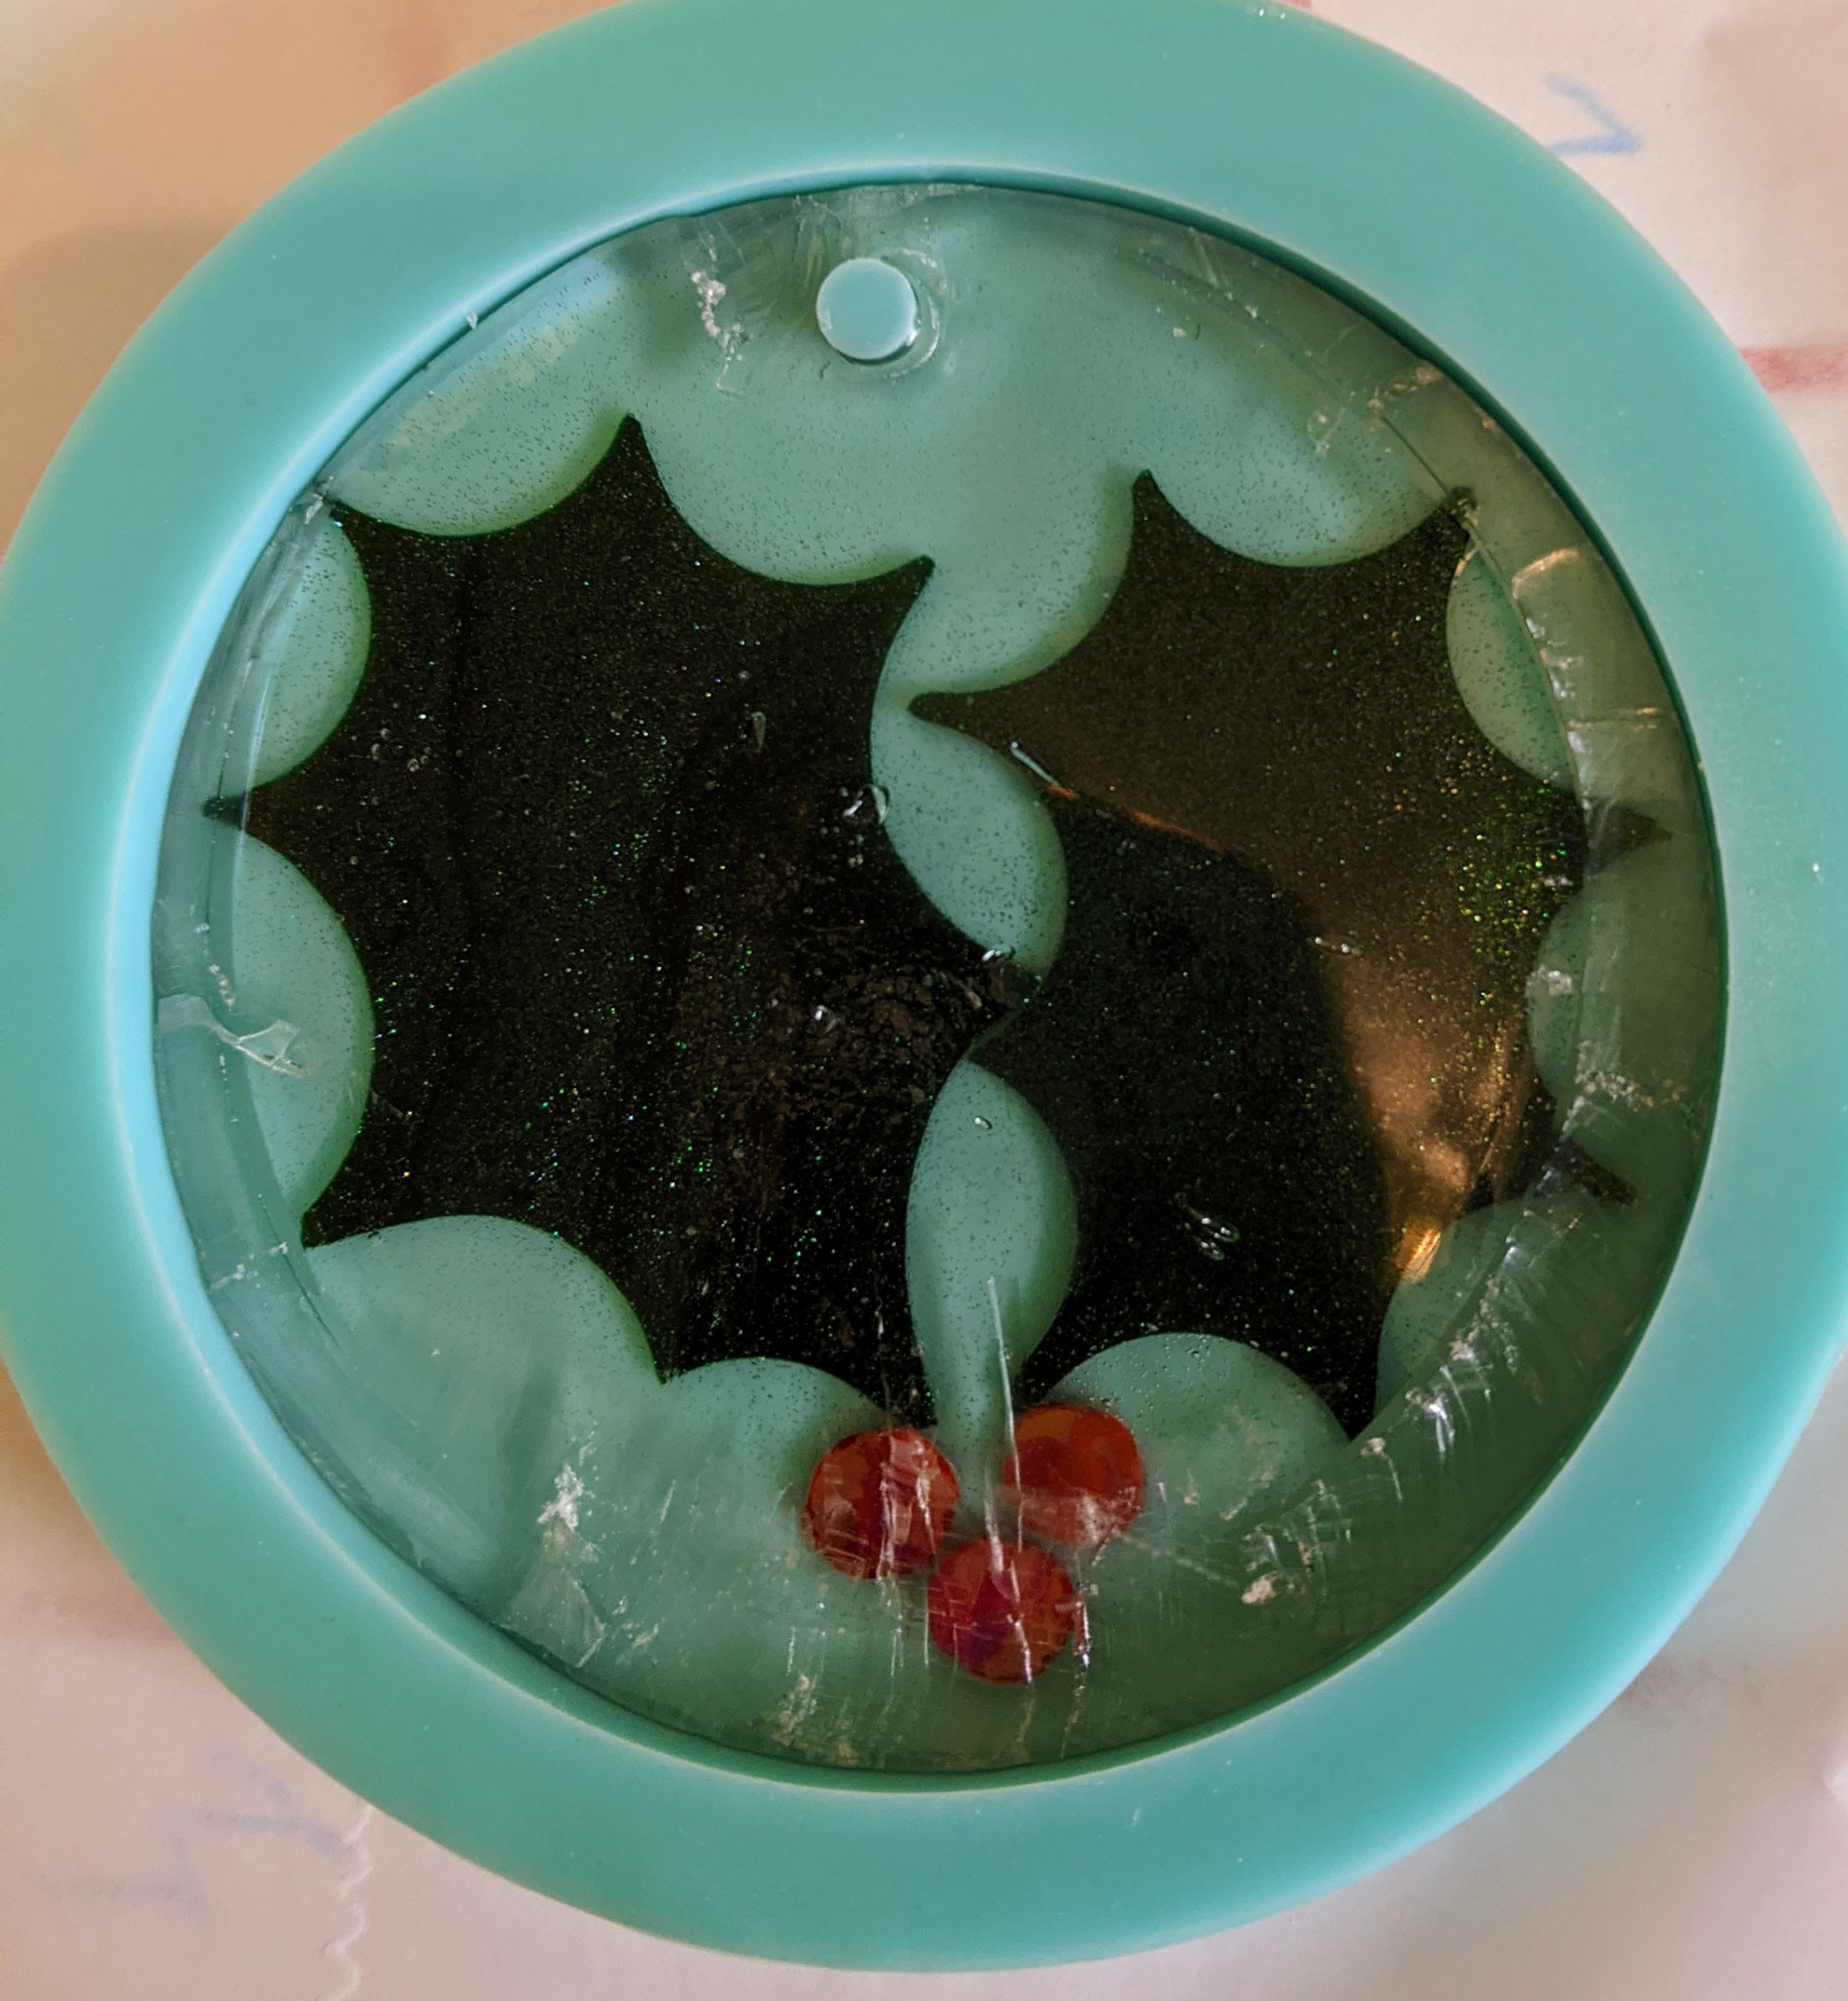
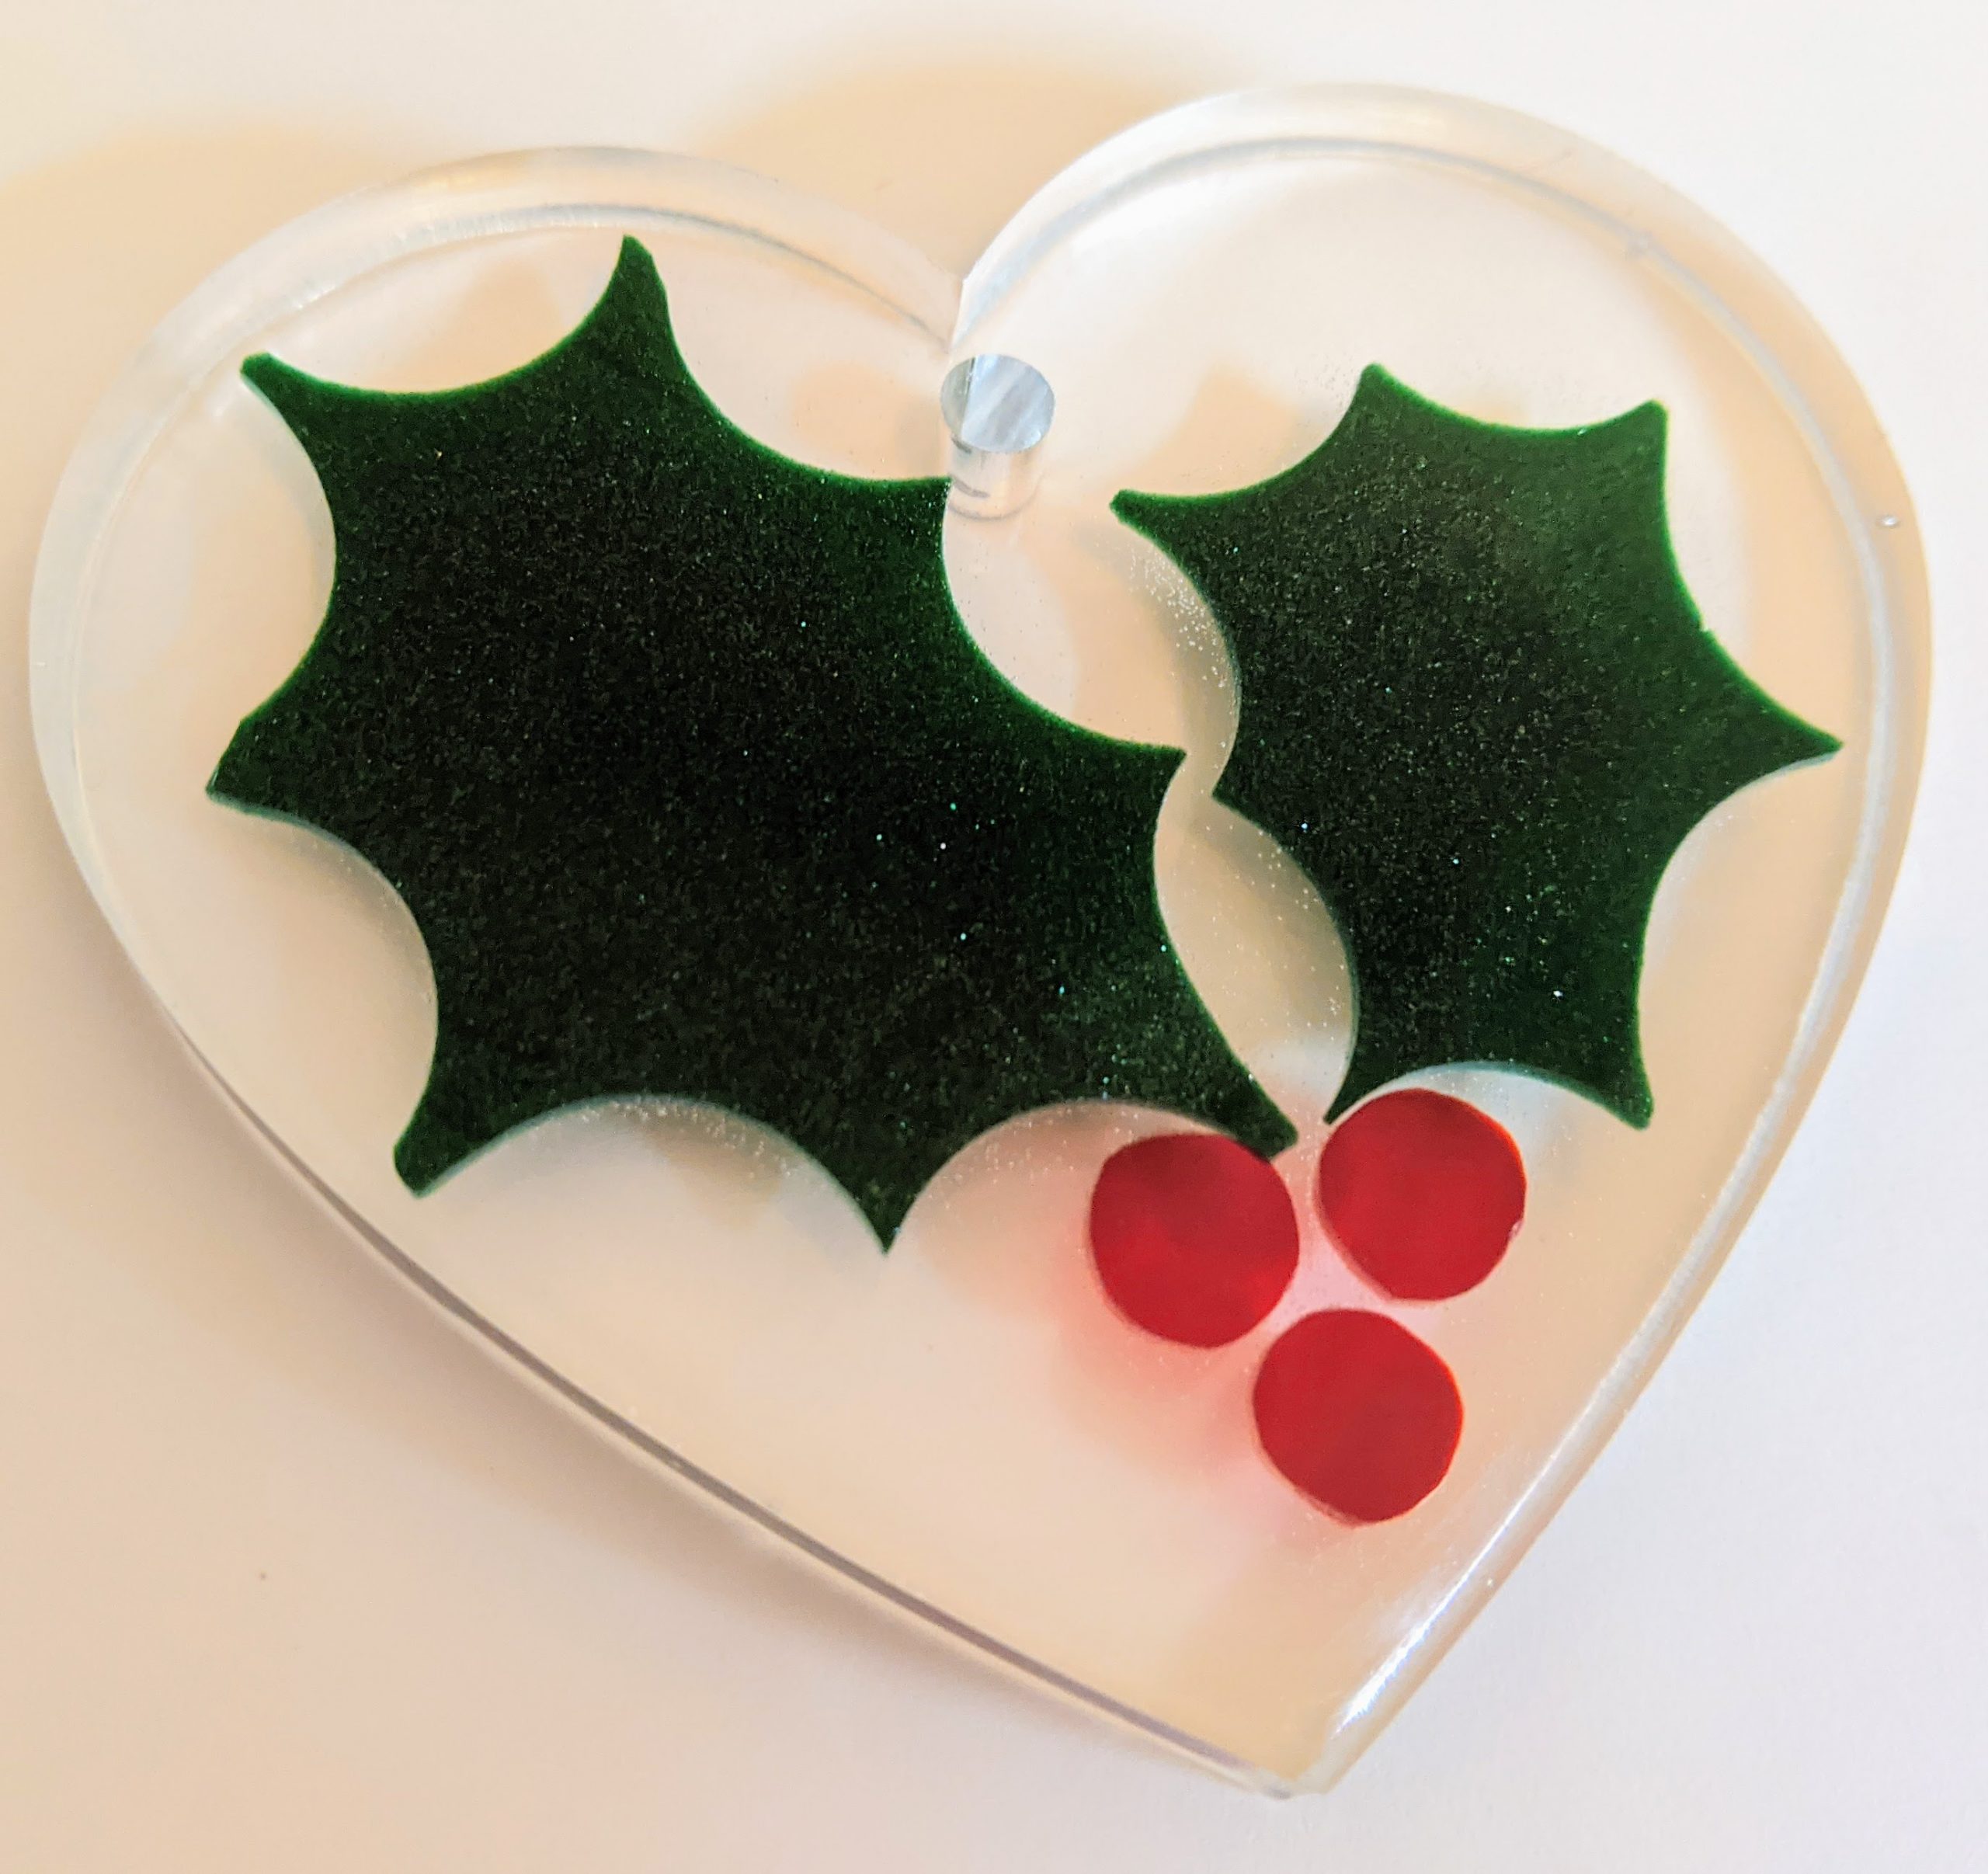
This took a bit of planning as I had to mix up a lot more resin than usual and keep my family out of the garage (next to impossible today for some reason). However, after pouring, spreading and using my heat gun to clear the resin, everything looks good so far. Hopefully we can move it into the mud room later in the evening so the temperature remains a bit more consistent while it continues to cure overnight. In the meantime, I had a few smaller projects in the works I wanted to continue / start. Unfortunately this included repairs on a holly suncatcher I made yesterday. I had covered it with some wax paper to keep dust out while it cured and the paper made contact with the resin and made a giant mess. I had to carve some lumps off of the suncatcher today when it was cured enough, reinsert it into the mold and sort of “top it off” with another layer of resin. We’ll see how good it looks tomorrow (hopefully). I don’t think it will look as good as it would have had it not needed the repair, but I can likely keep it to use at home.
After chipping off the bumps and reinserting in the mold, prior to repair layer of resin
Coasters of the day
Suncatchers / Ornaments
Today’s small projects
So all in all, I poured a second layer on three beachy coasters, first layer on two more beachy coasters, repair layer on the holly suncatcher / ornament and the first layers on three snowman ornaments.
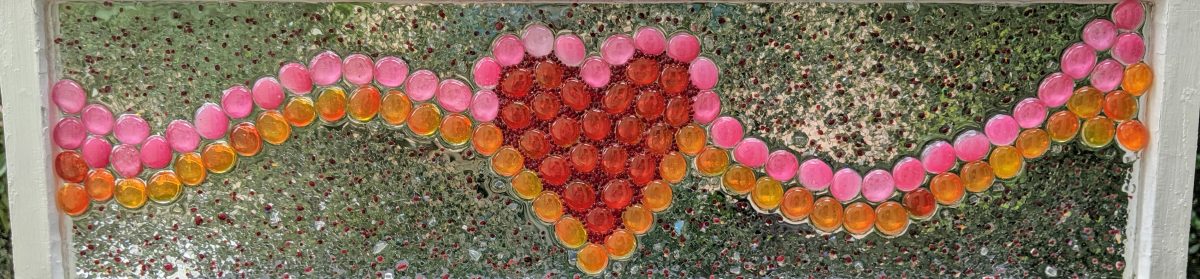
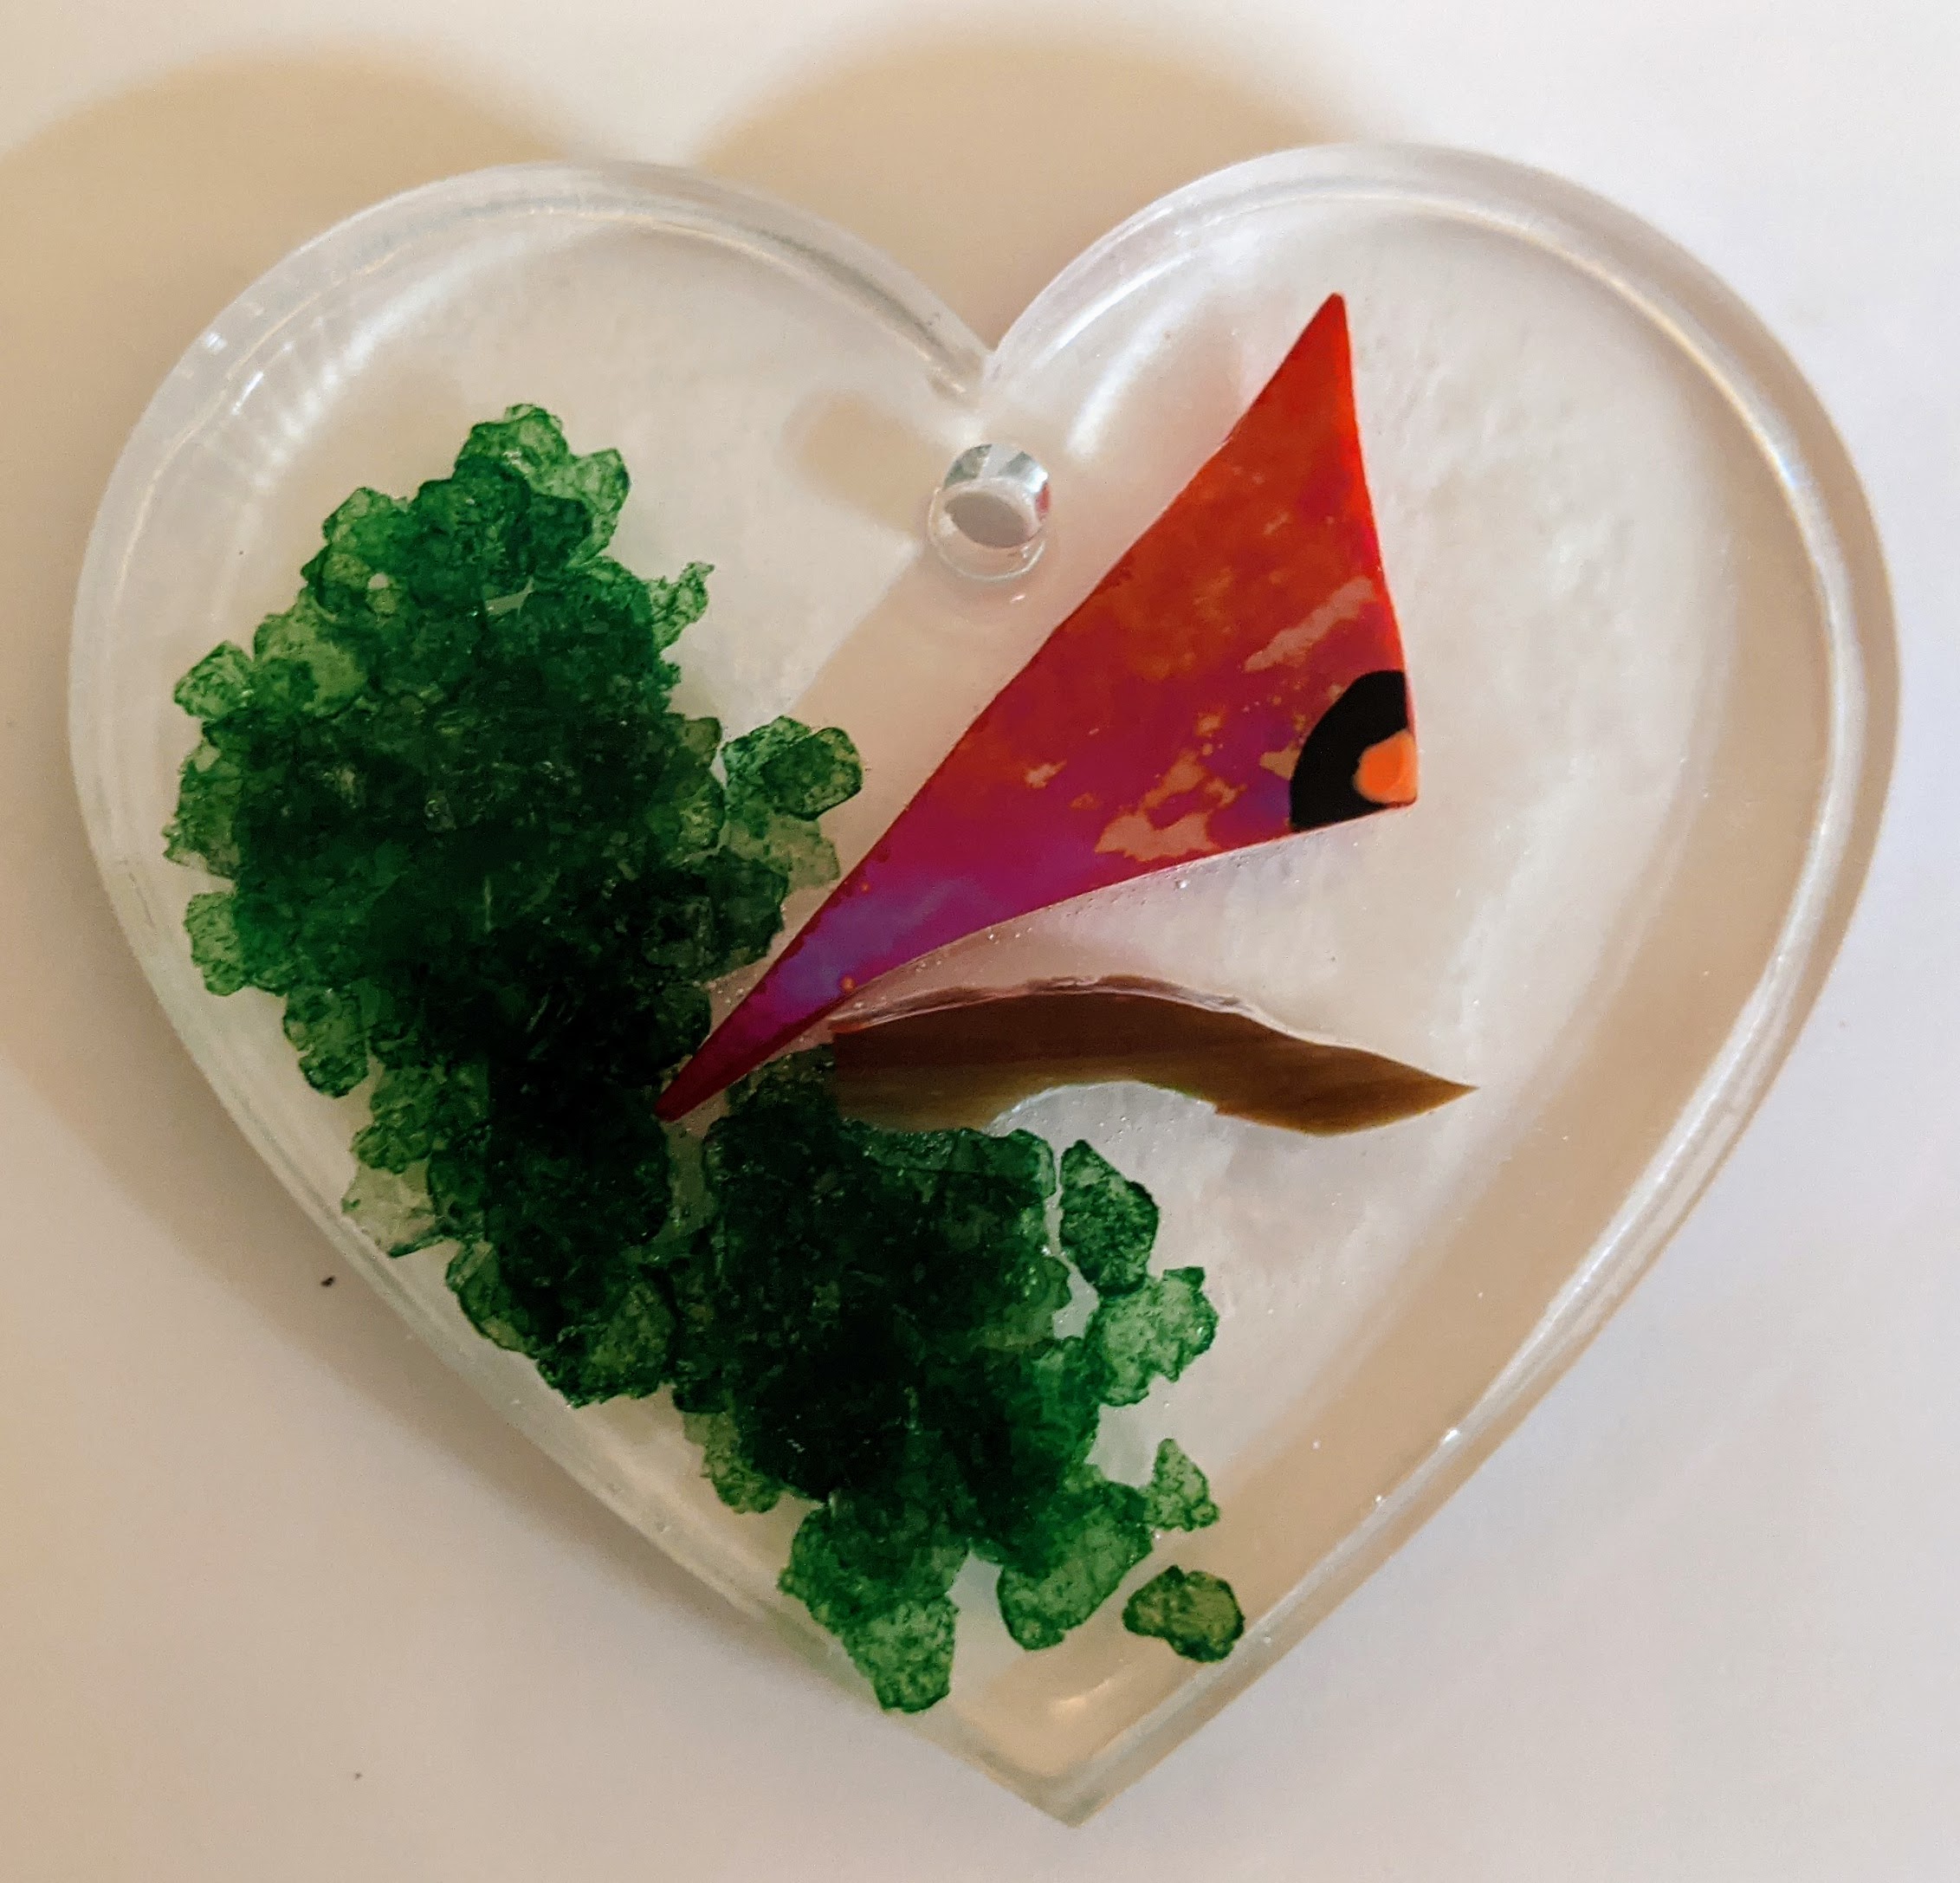
I finished this guy yesterday and he cured overnight. Measures approximately 6.5″ w x 9.5″ tall, stained glass on recycled window glass coated with resin and decorated with glass chips, ground stone, glass glitter and blue shell accents.
I’m on roll with the holiday ornaments. I only have four molds, though, so I can only make four every other day, and that’s if I actually don’t skip any days, which I do. So it’s not a high output production, but it is a labor of love. 🙂
Today’s projects
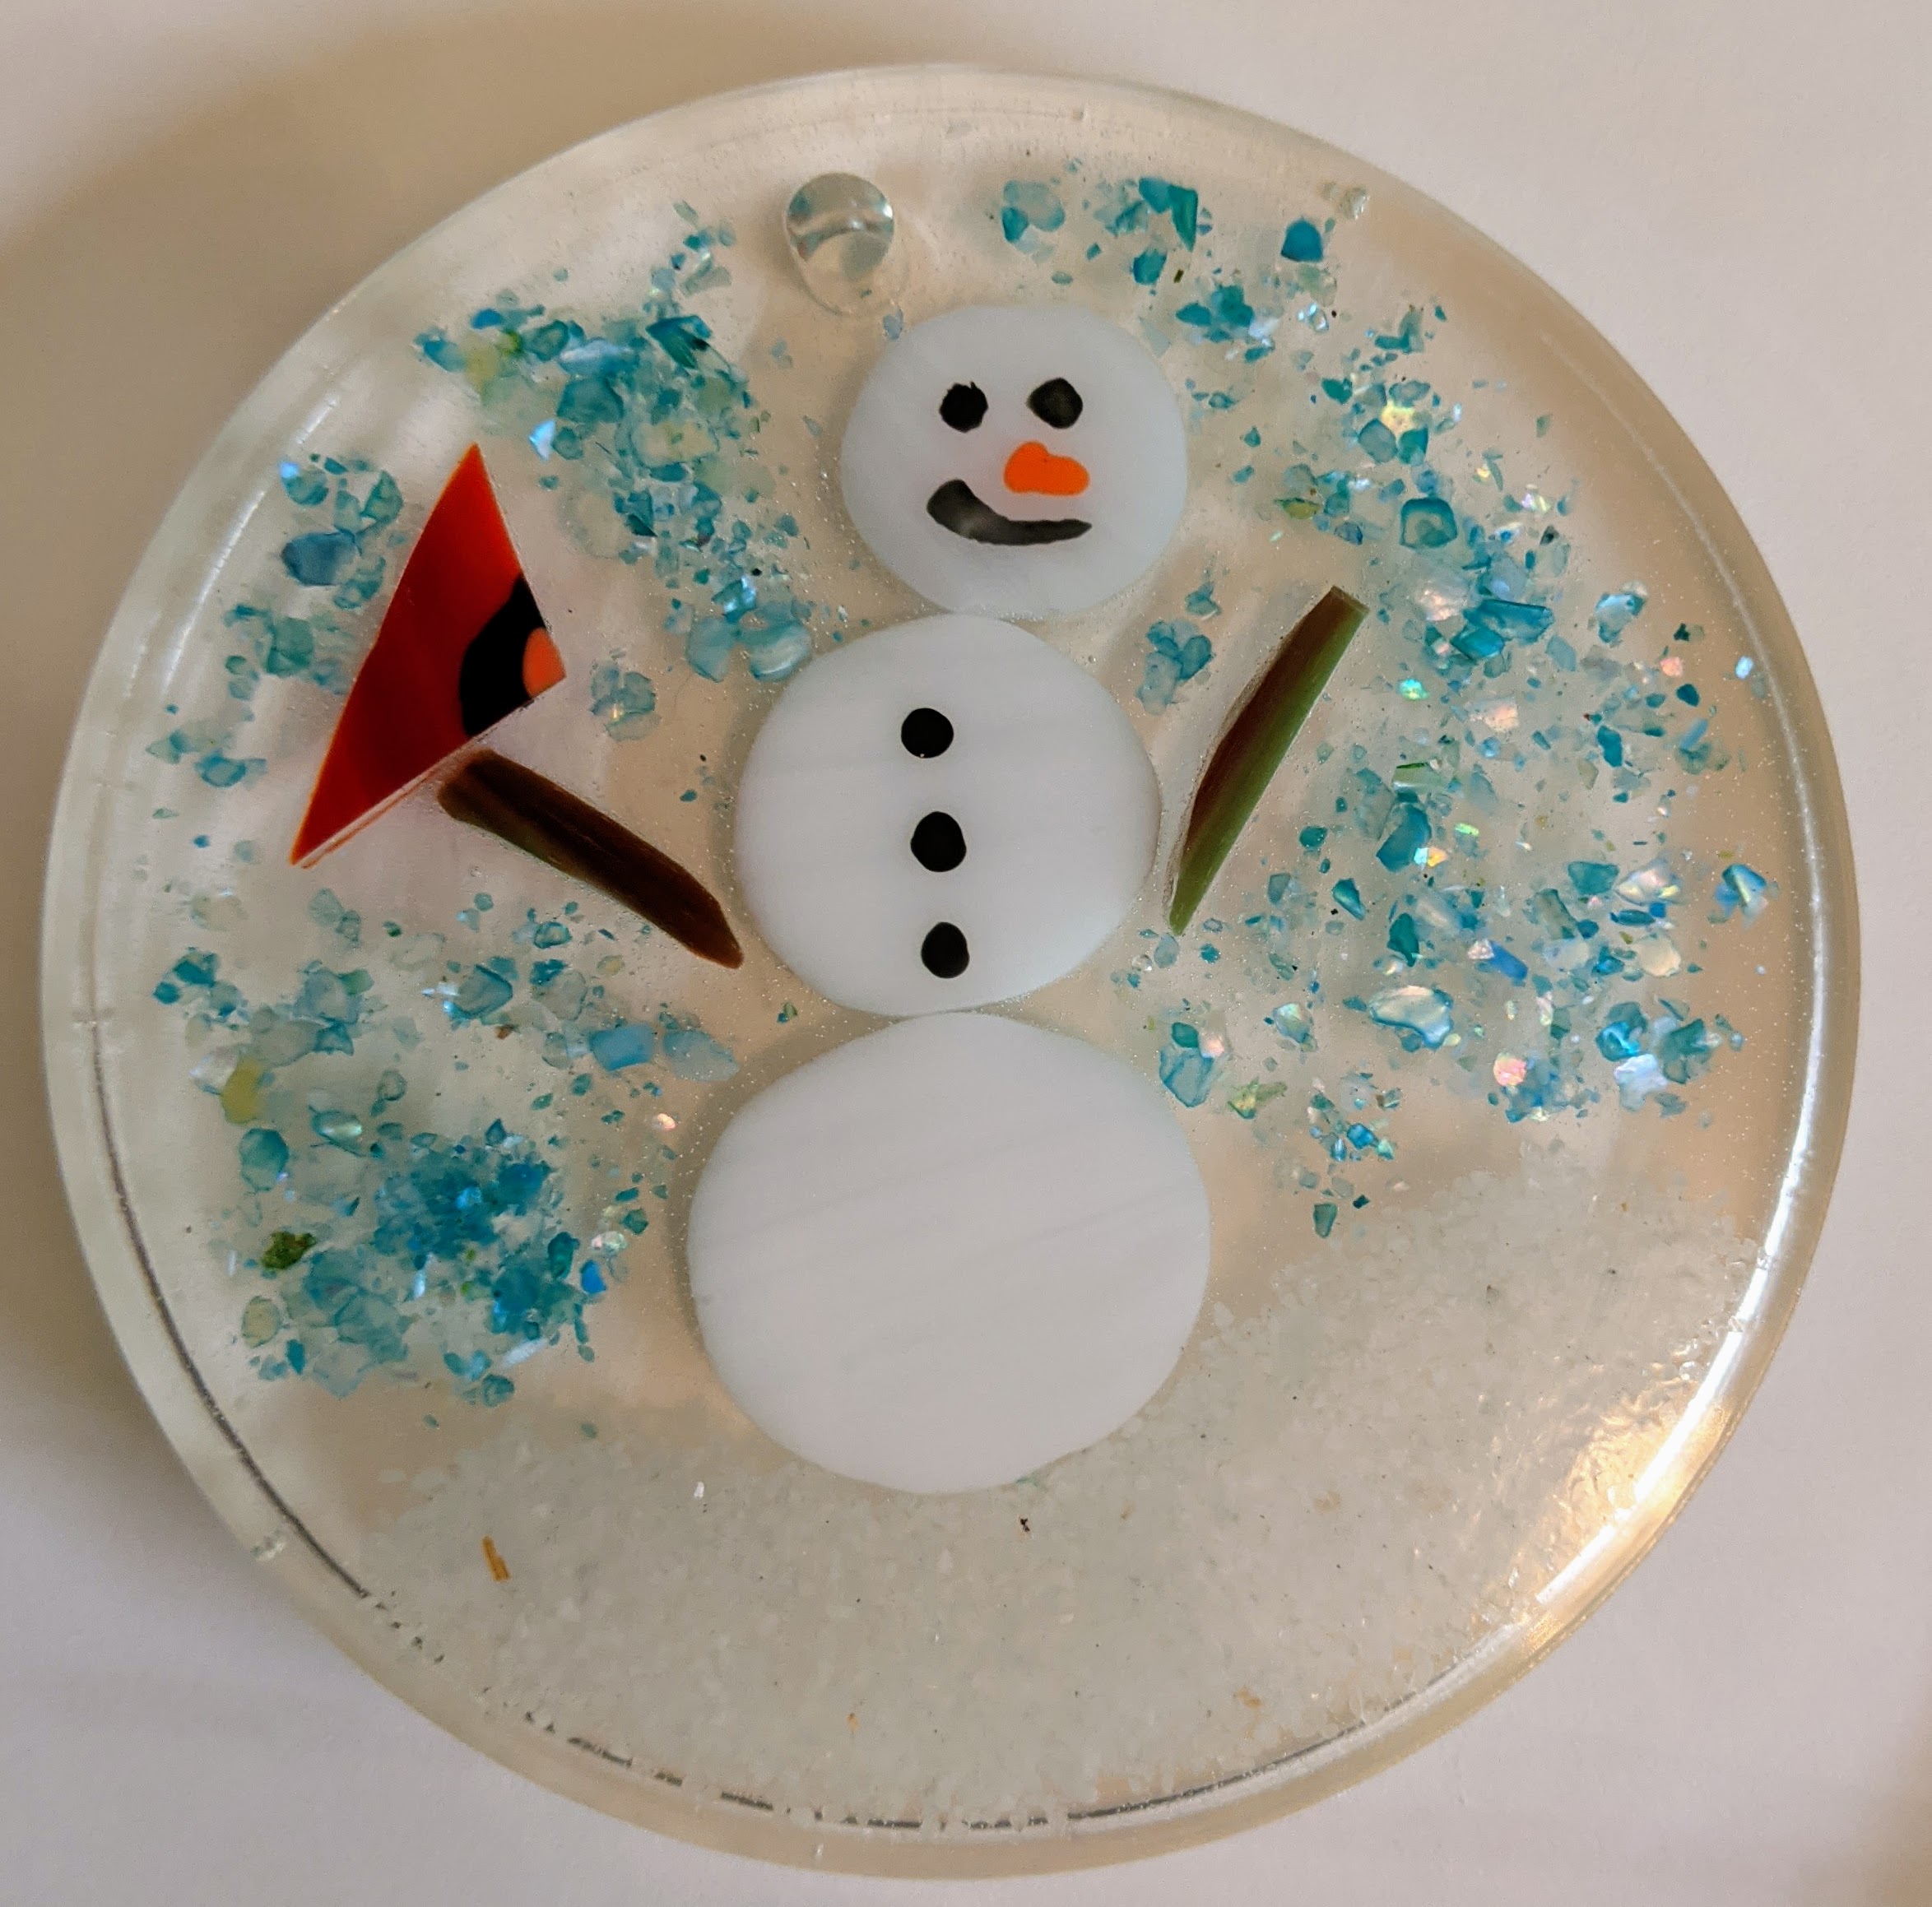
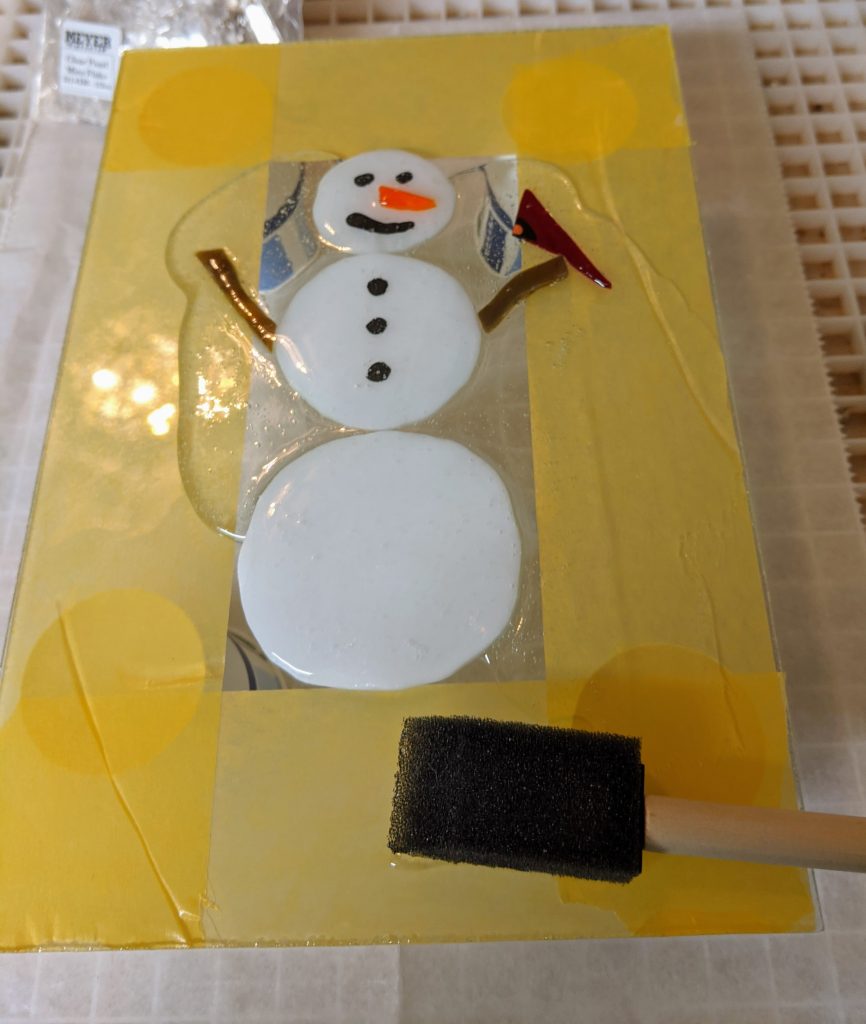
I poured the second layer on the fourth “Holiday Confetti” coaster and the first layer on the other five pieces. In addition, I poured the resin and decorated a small (though big compared to the other items) Snowman panel.
Pouring and spreading the resin
The yellow on the glass is actually painters tape I applied to the underside of the glass to make cleanup a bit easier. I pour a small amount of resin over all of the stained glass, then spread a thin layer over the rest of the backer glass so I have a substrate for my decorations to adhere to. In this case, I used crushed stone for snow, clear glass chips and blue shell chips for sparkle and interest. I dusted a bit of fine glass glitter over the snowbank and bottom area as well, but I’m finding that the glitter doesn’t seem to show up very well / as I would hope.
Resin curing with decorations embedded
I also popped out some finished products from yesterday’s time spent creating.
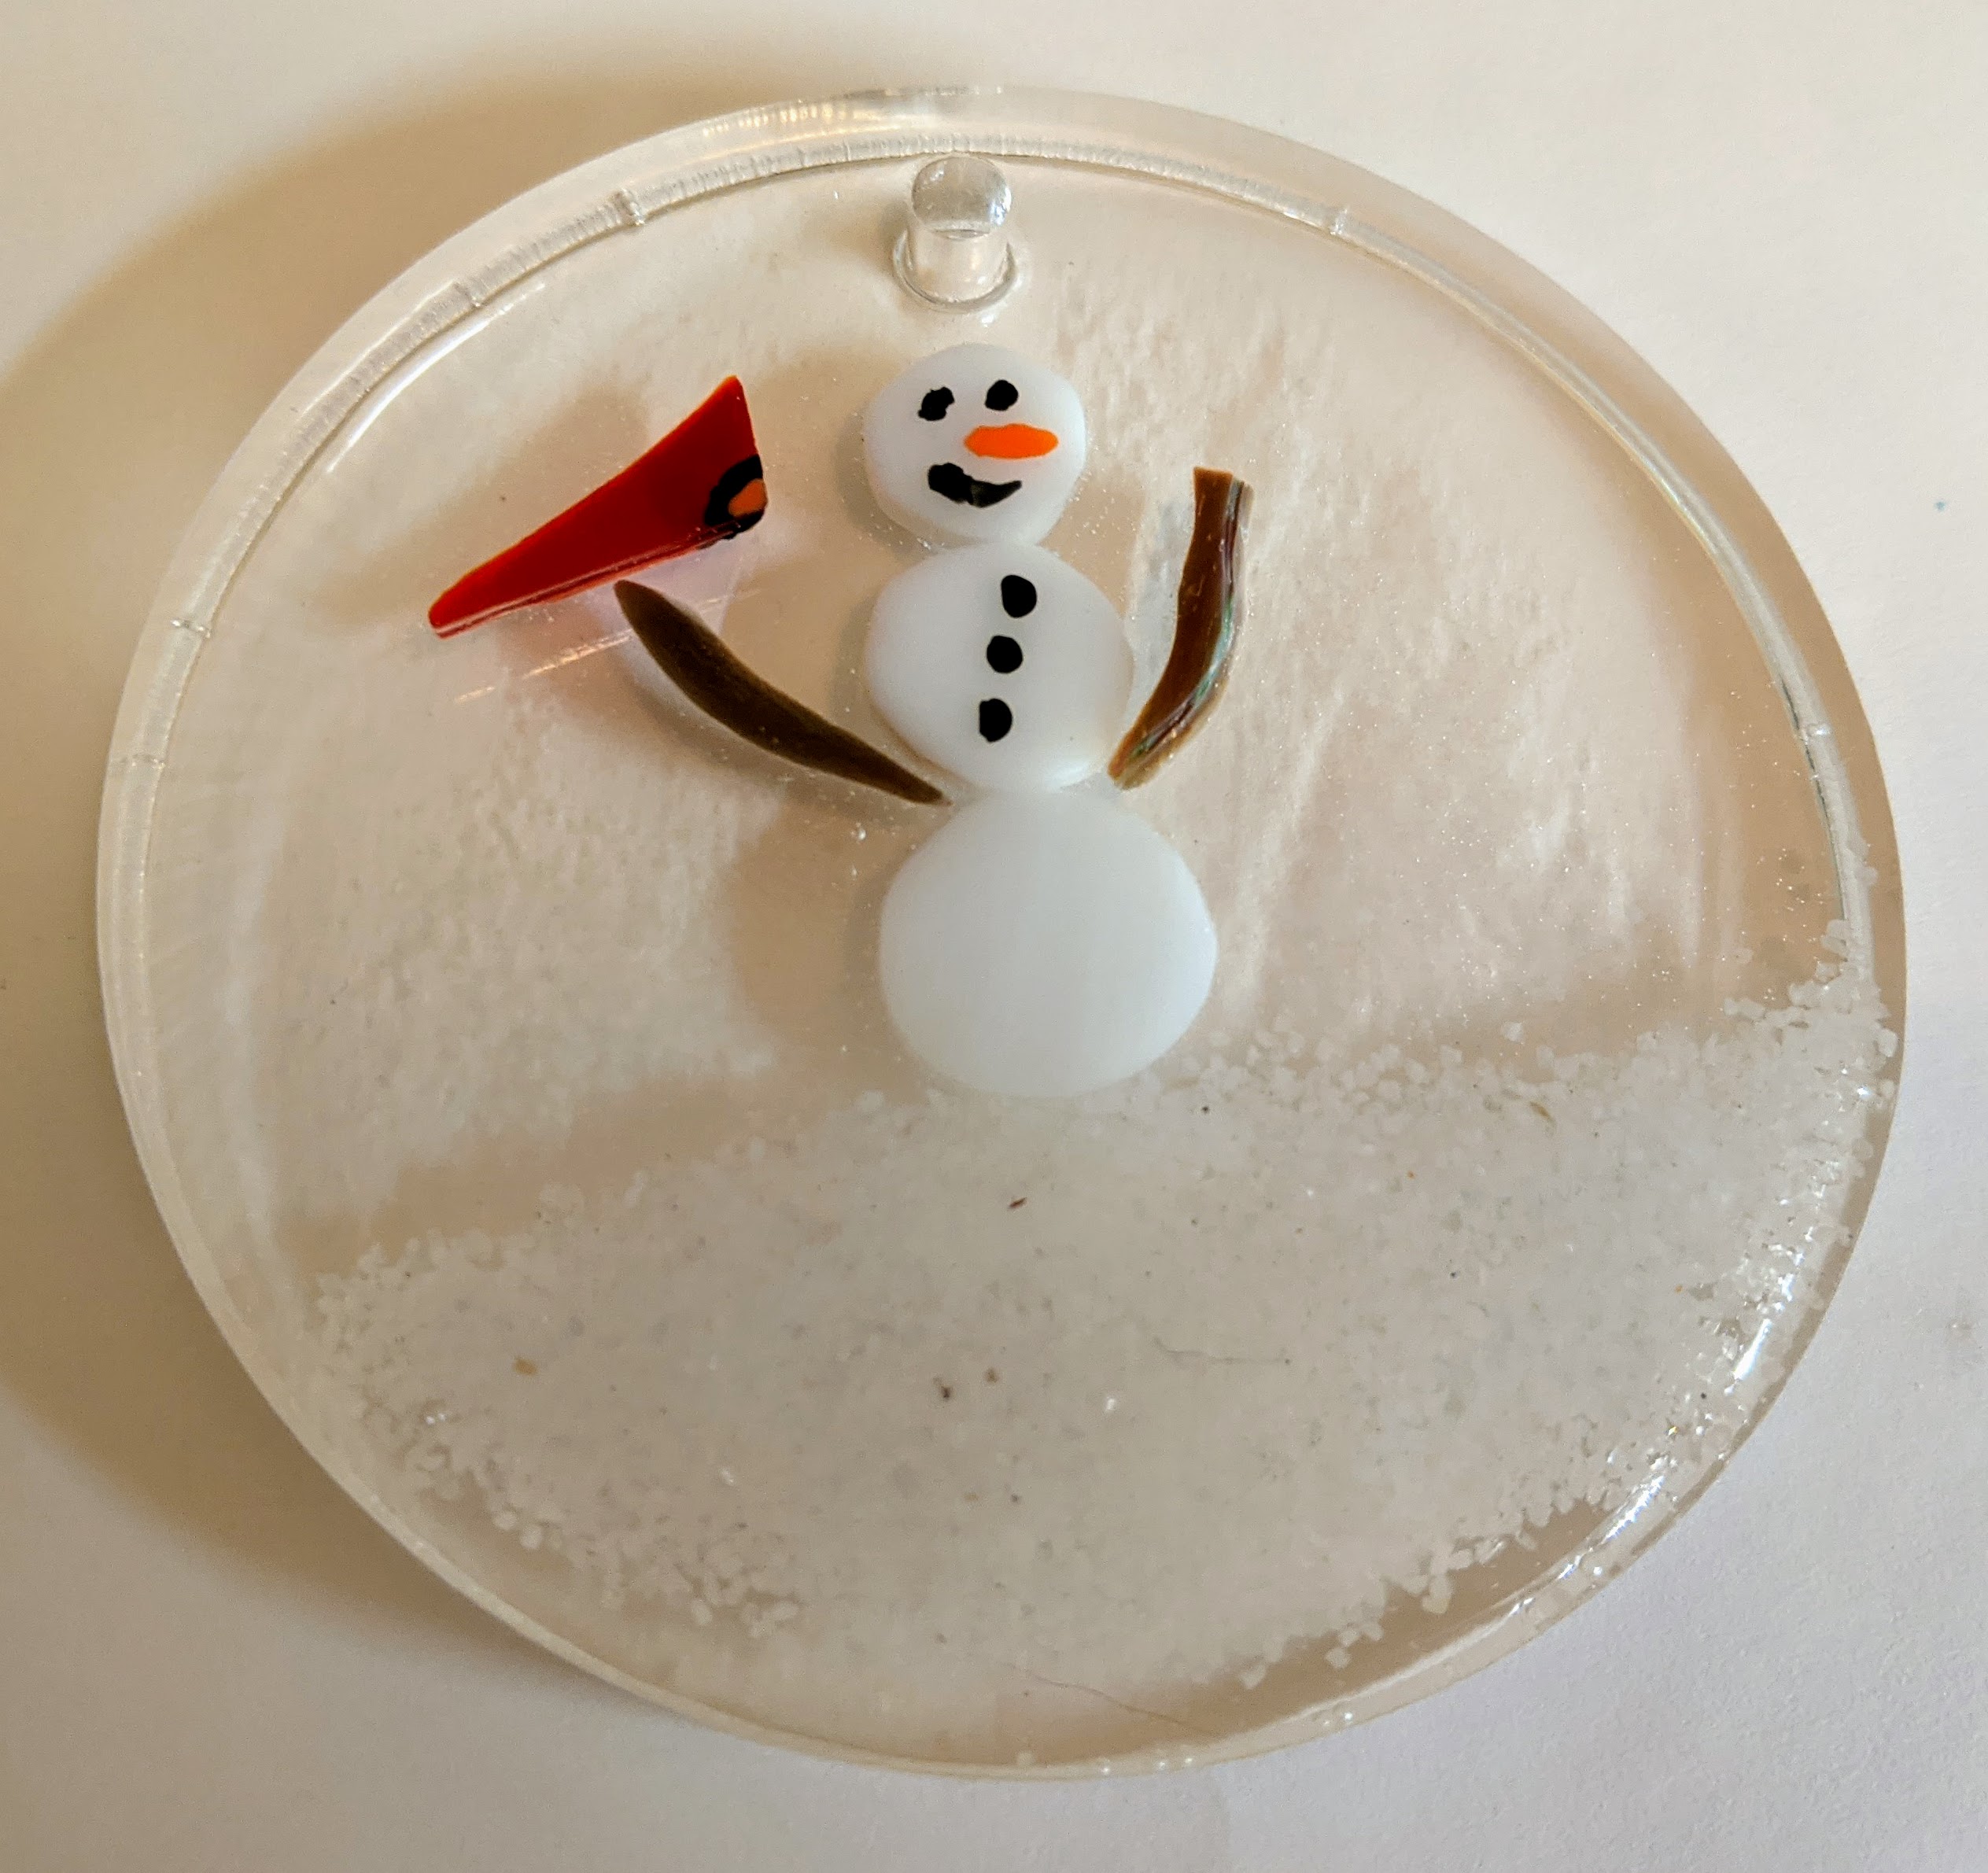
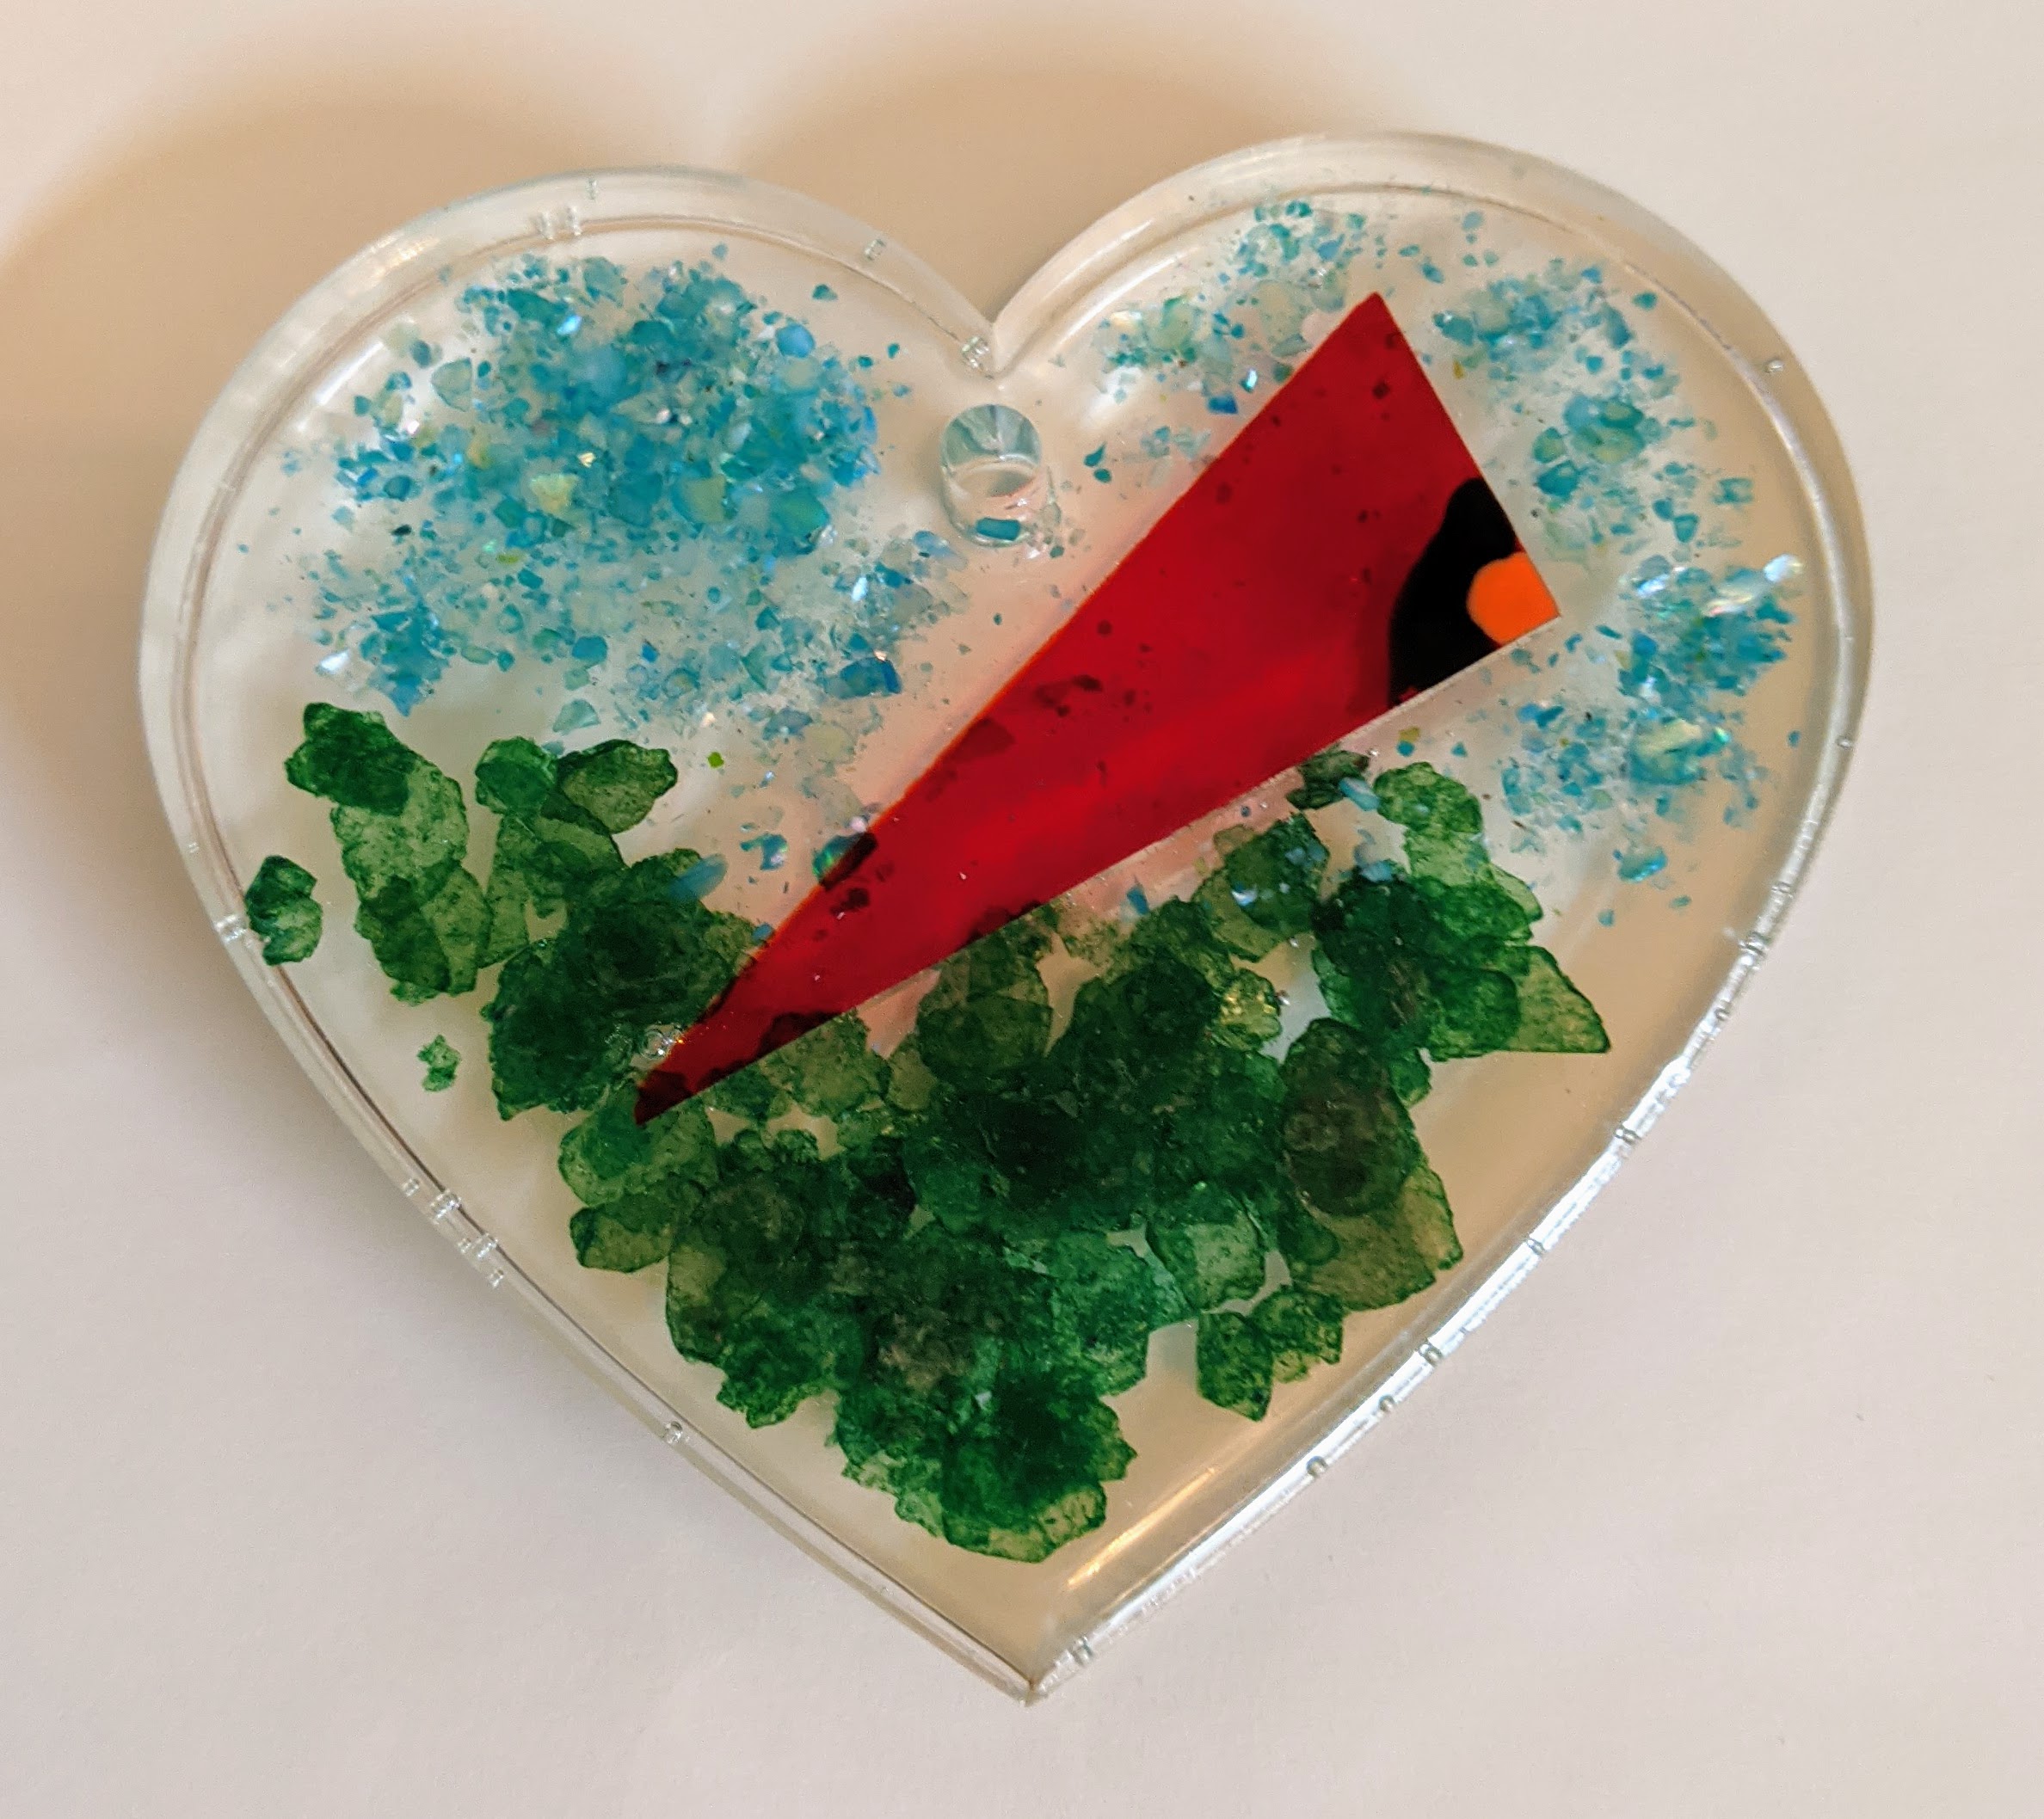
Cardinal Suncatcher / Ornament
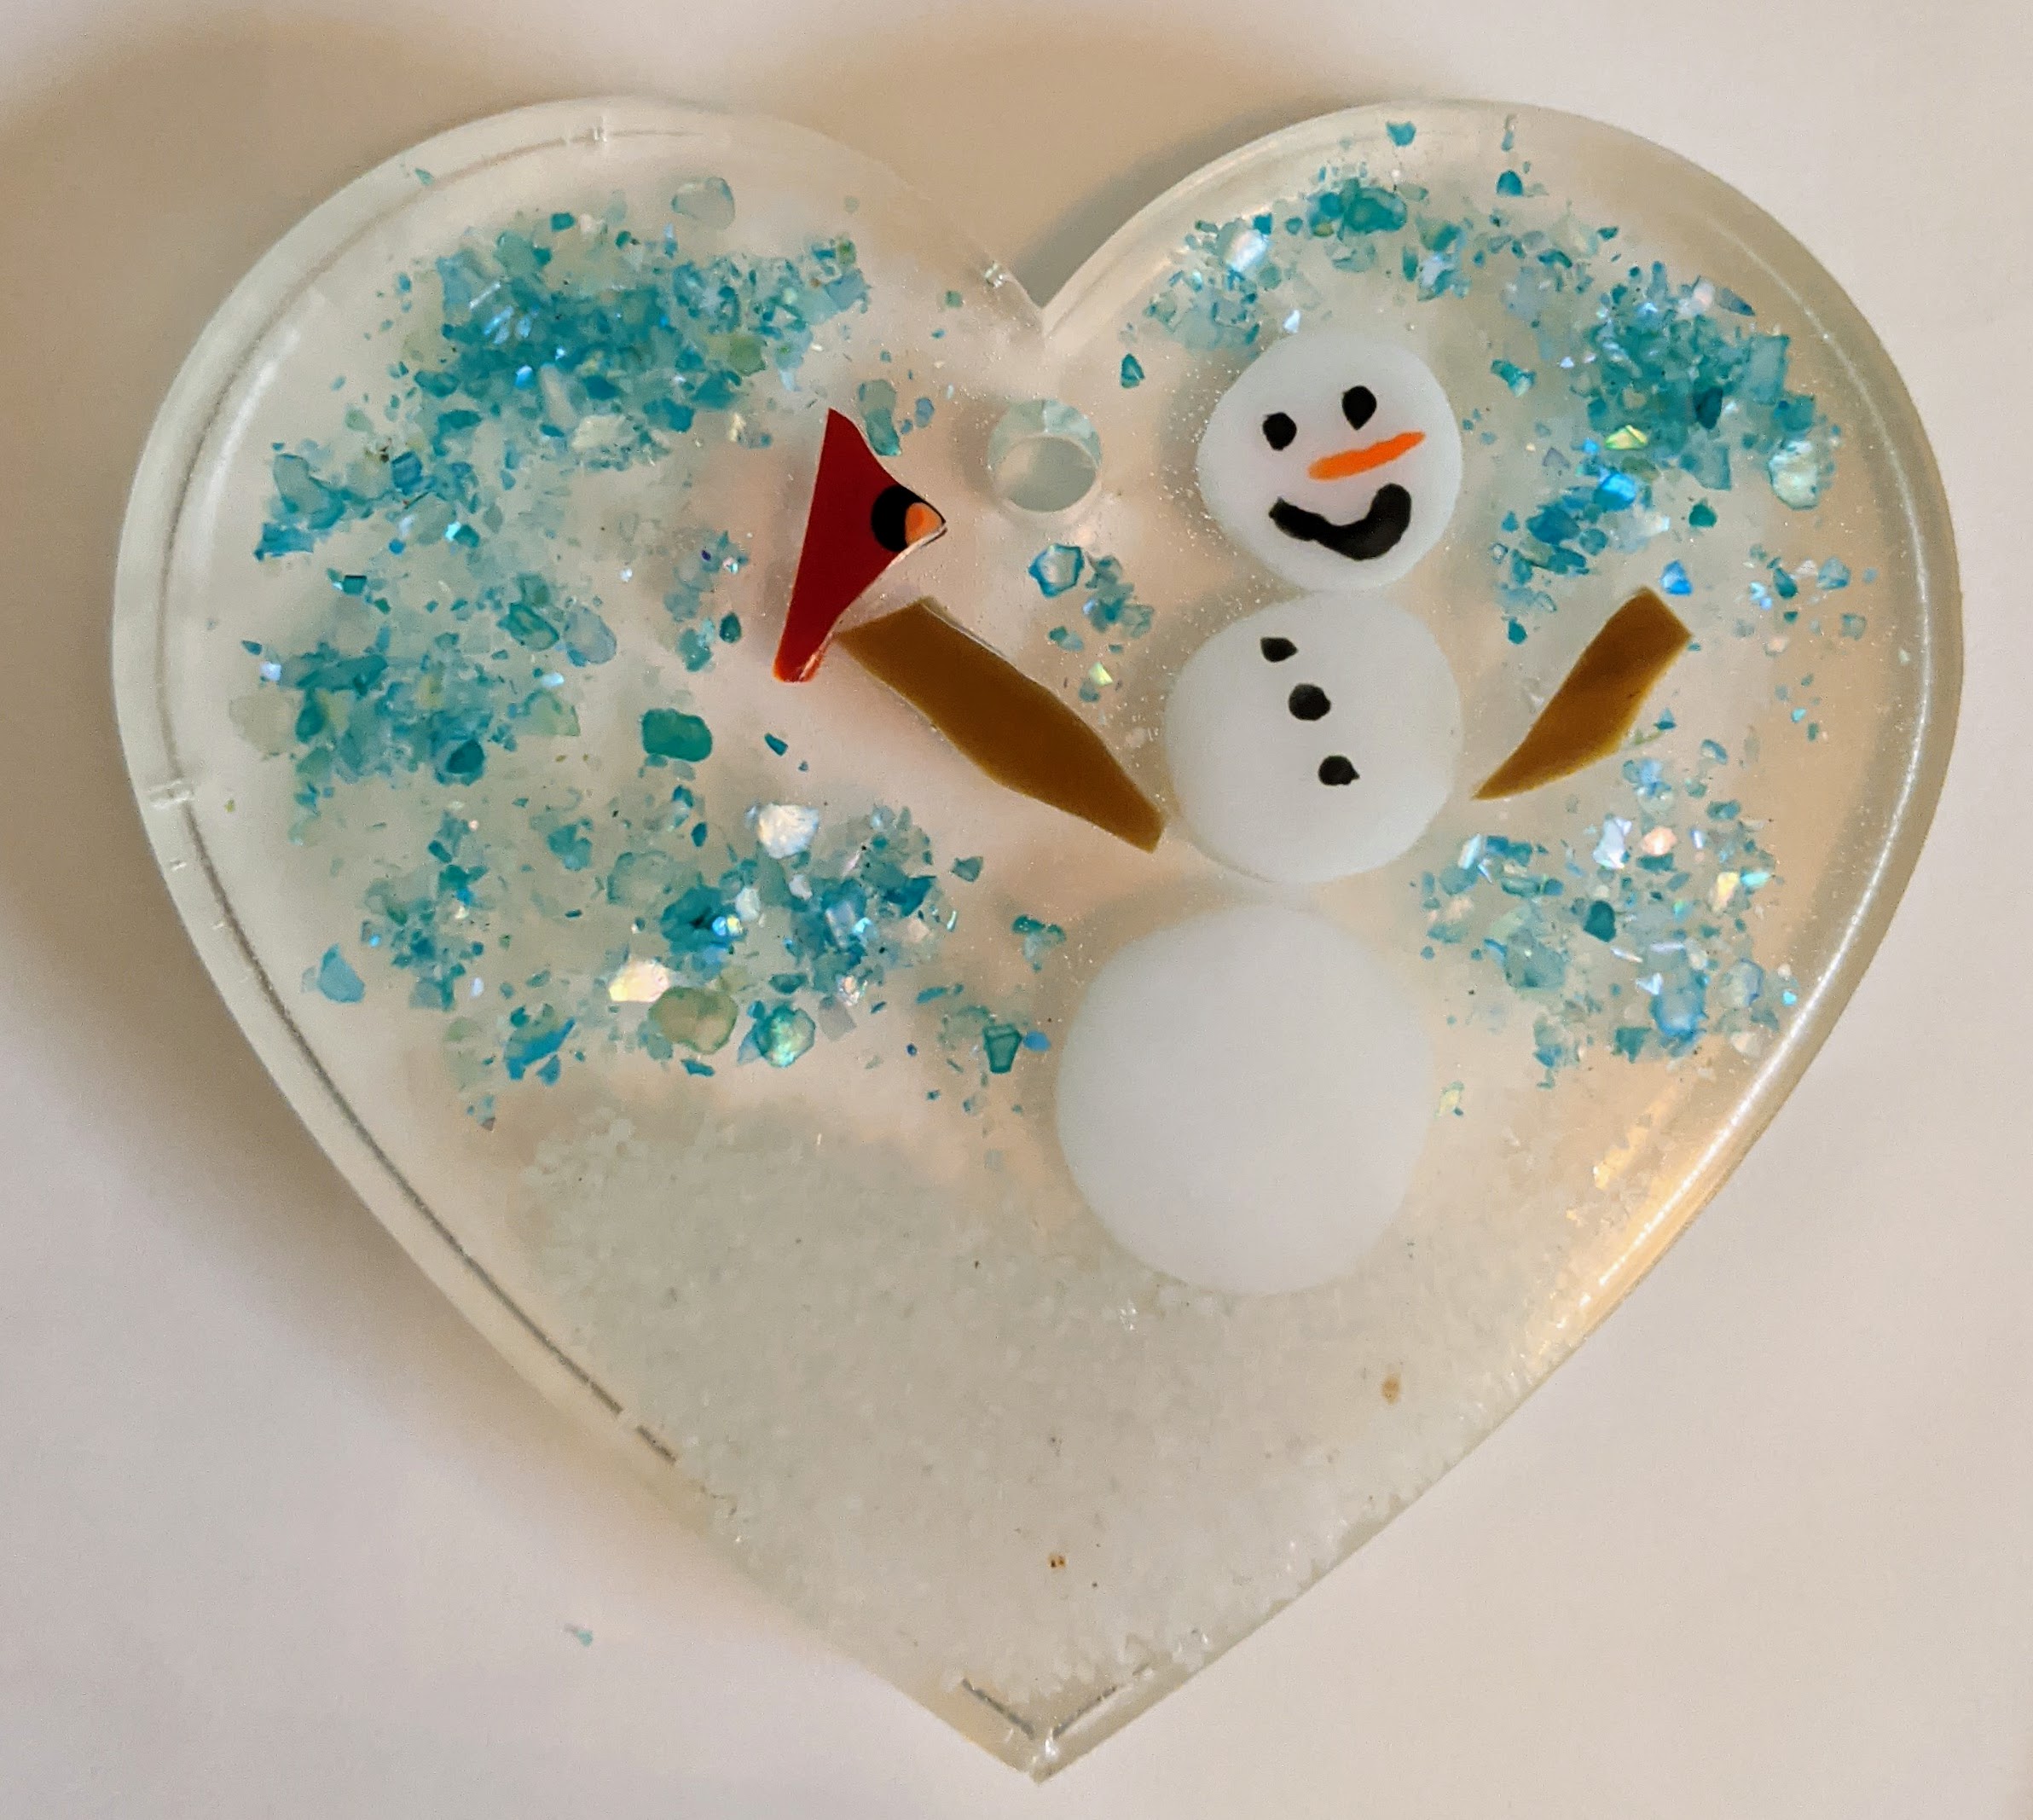
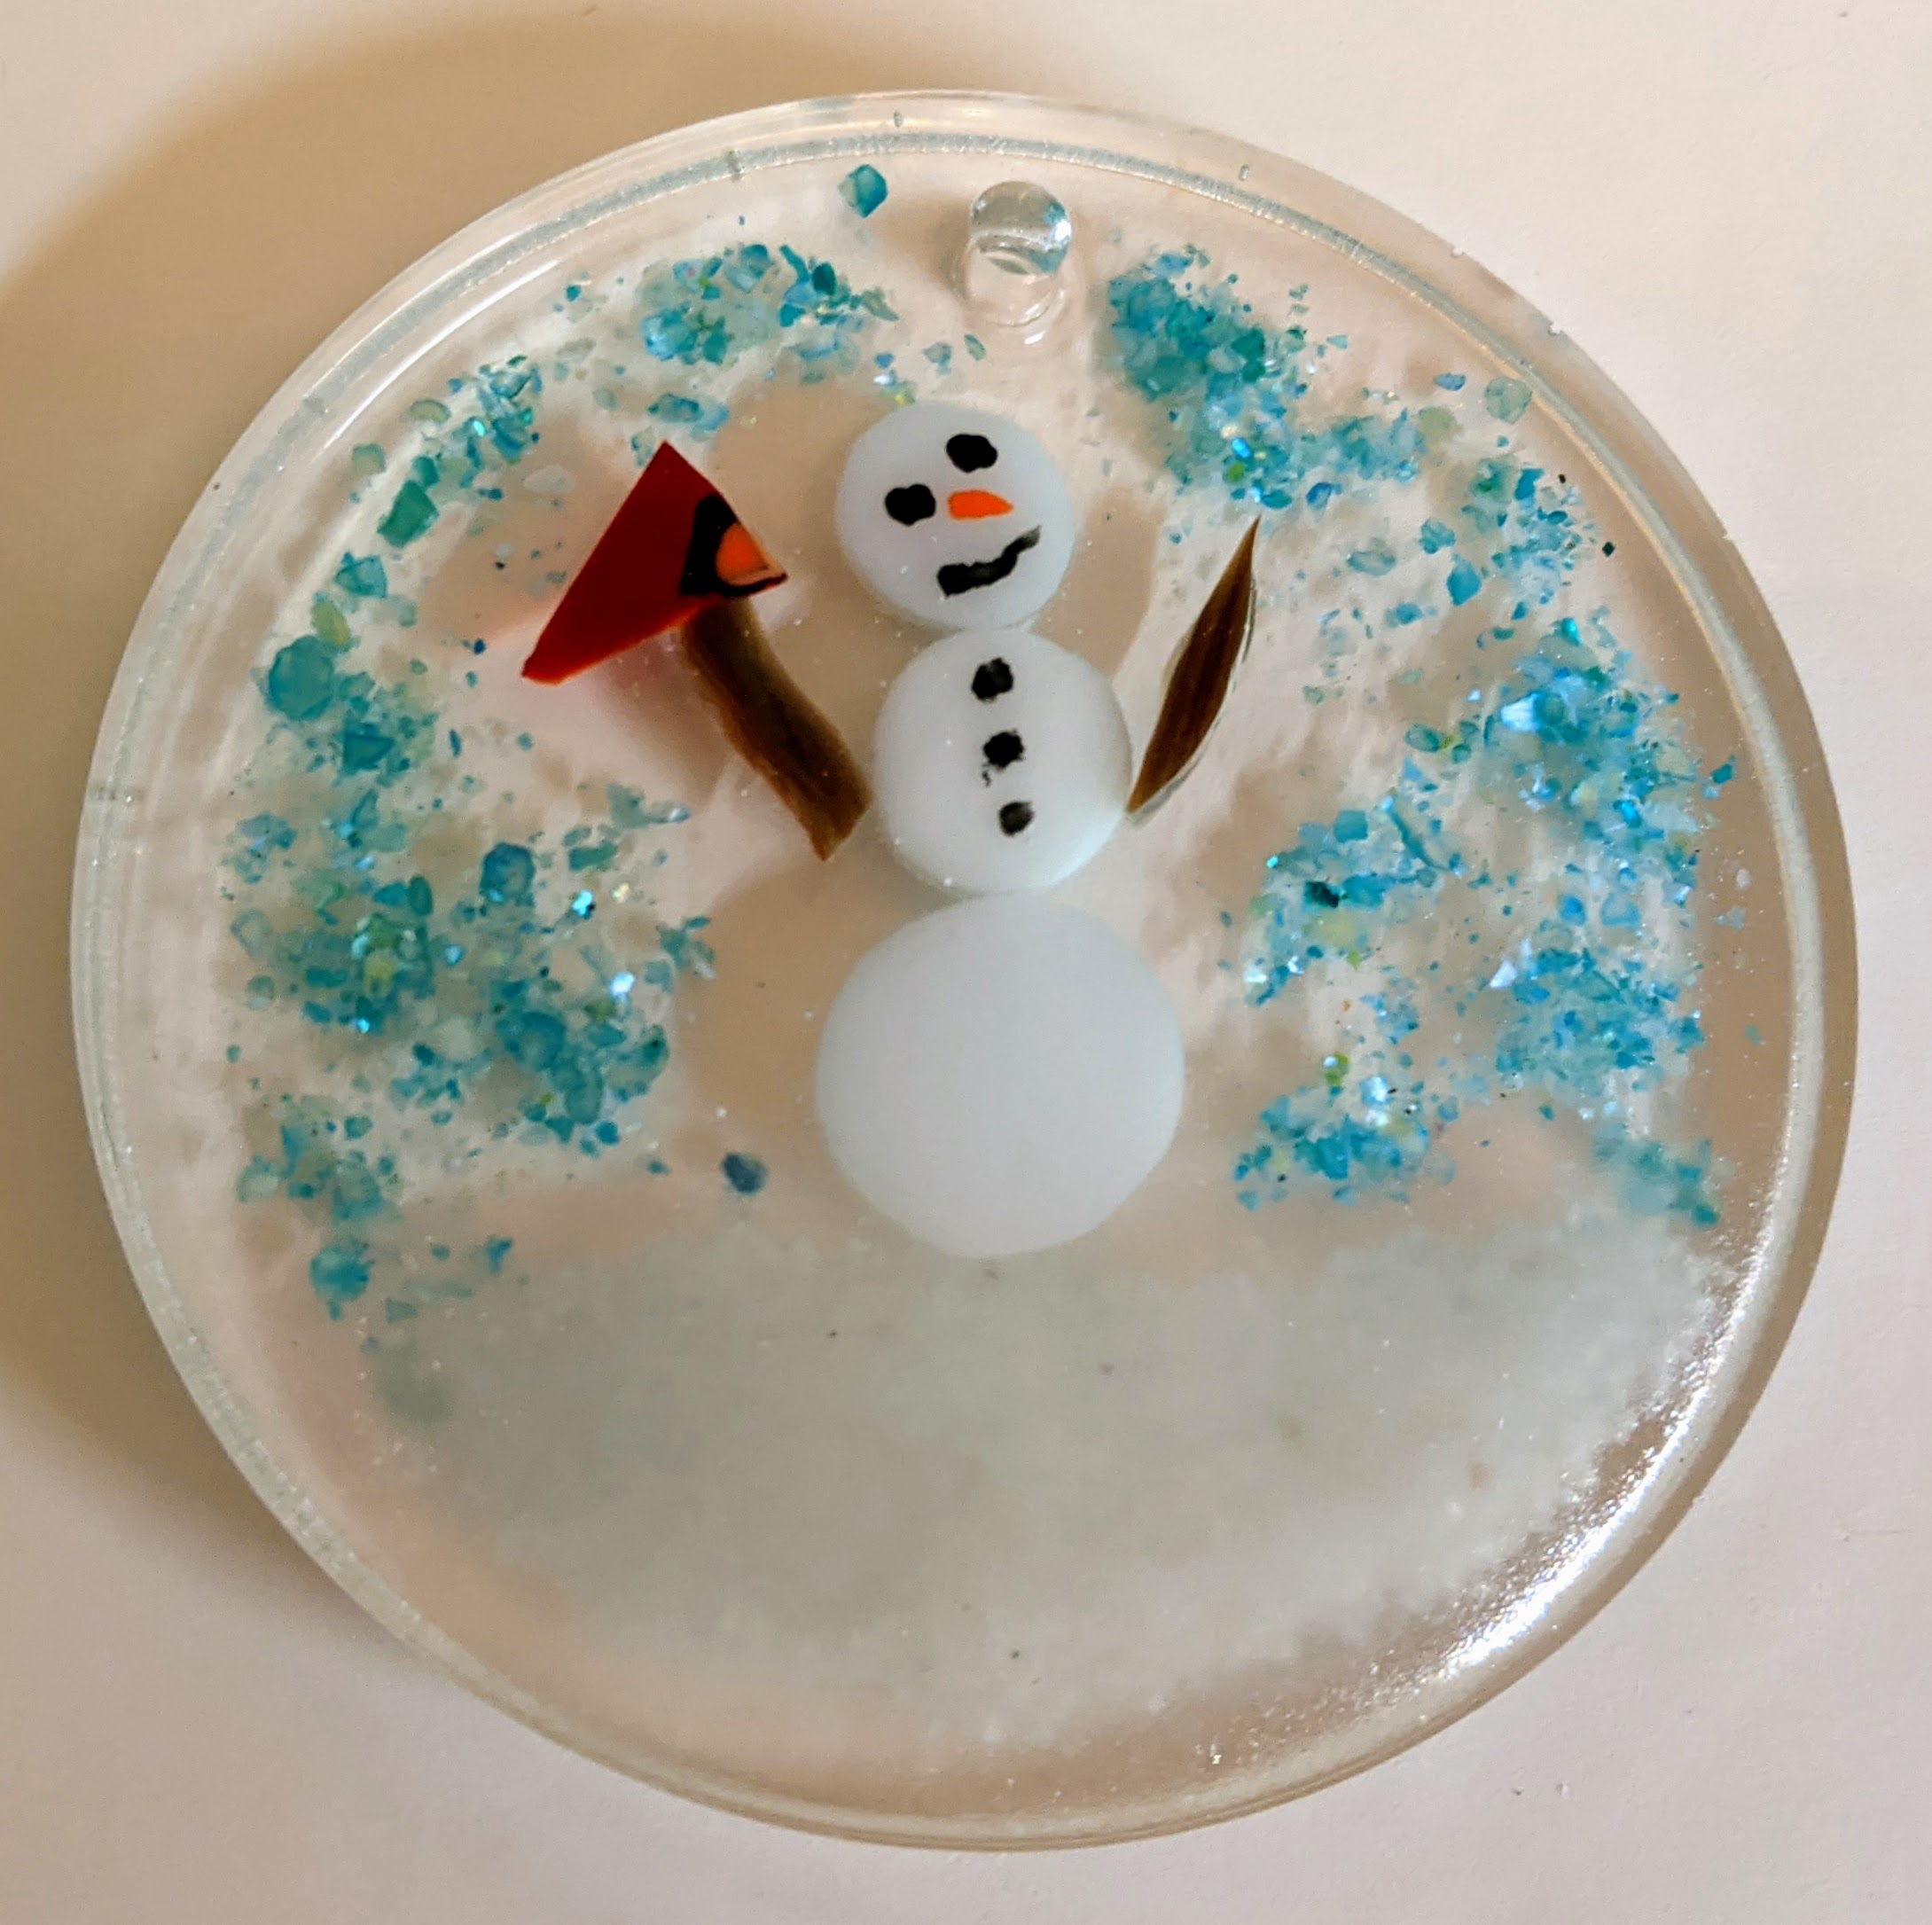
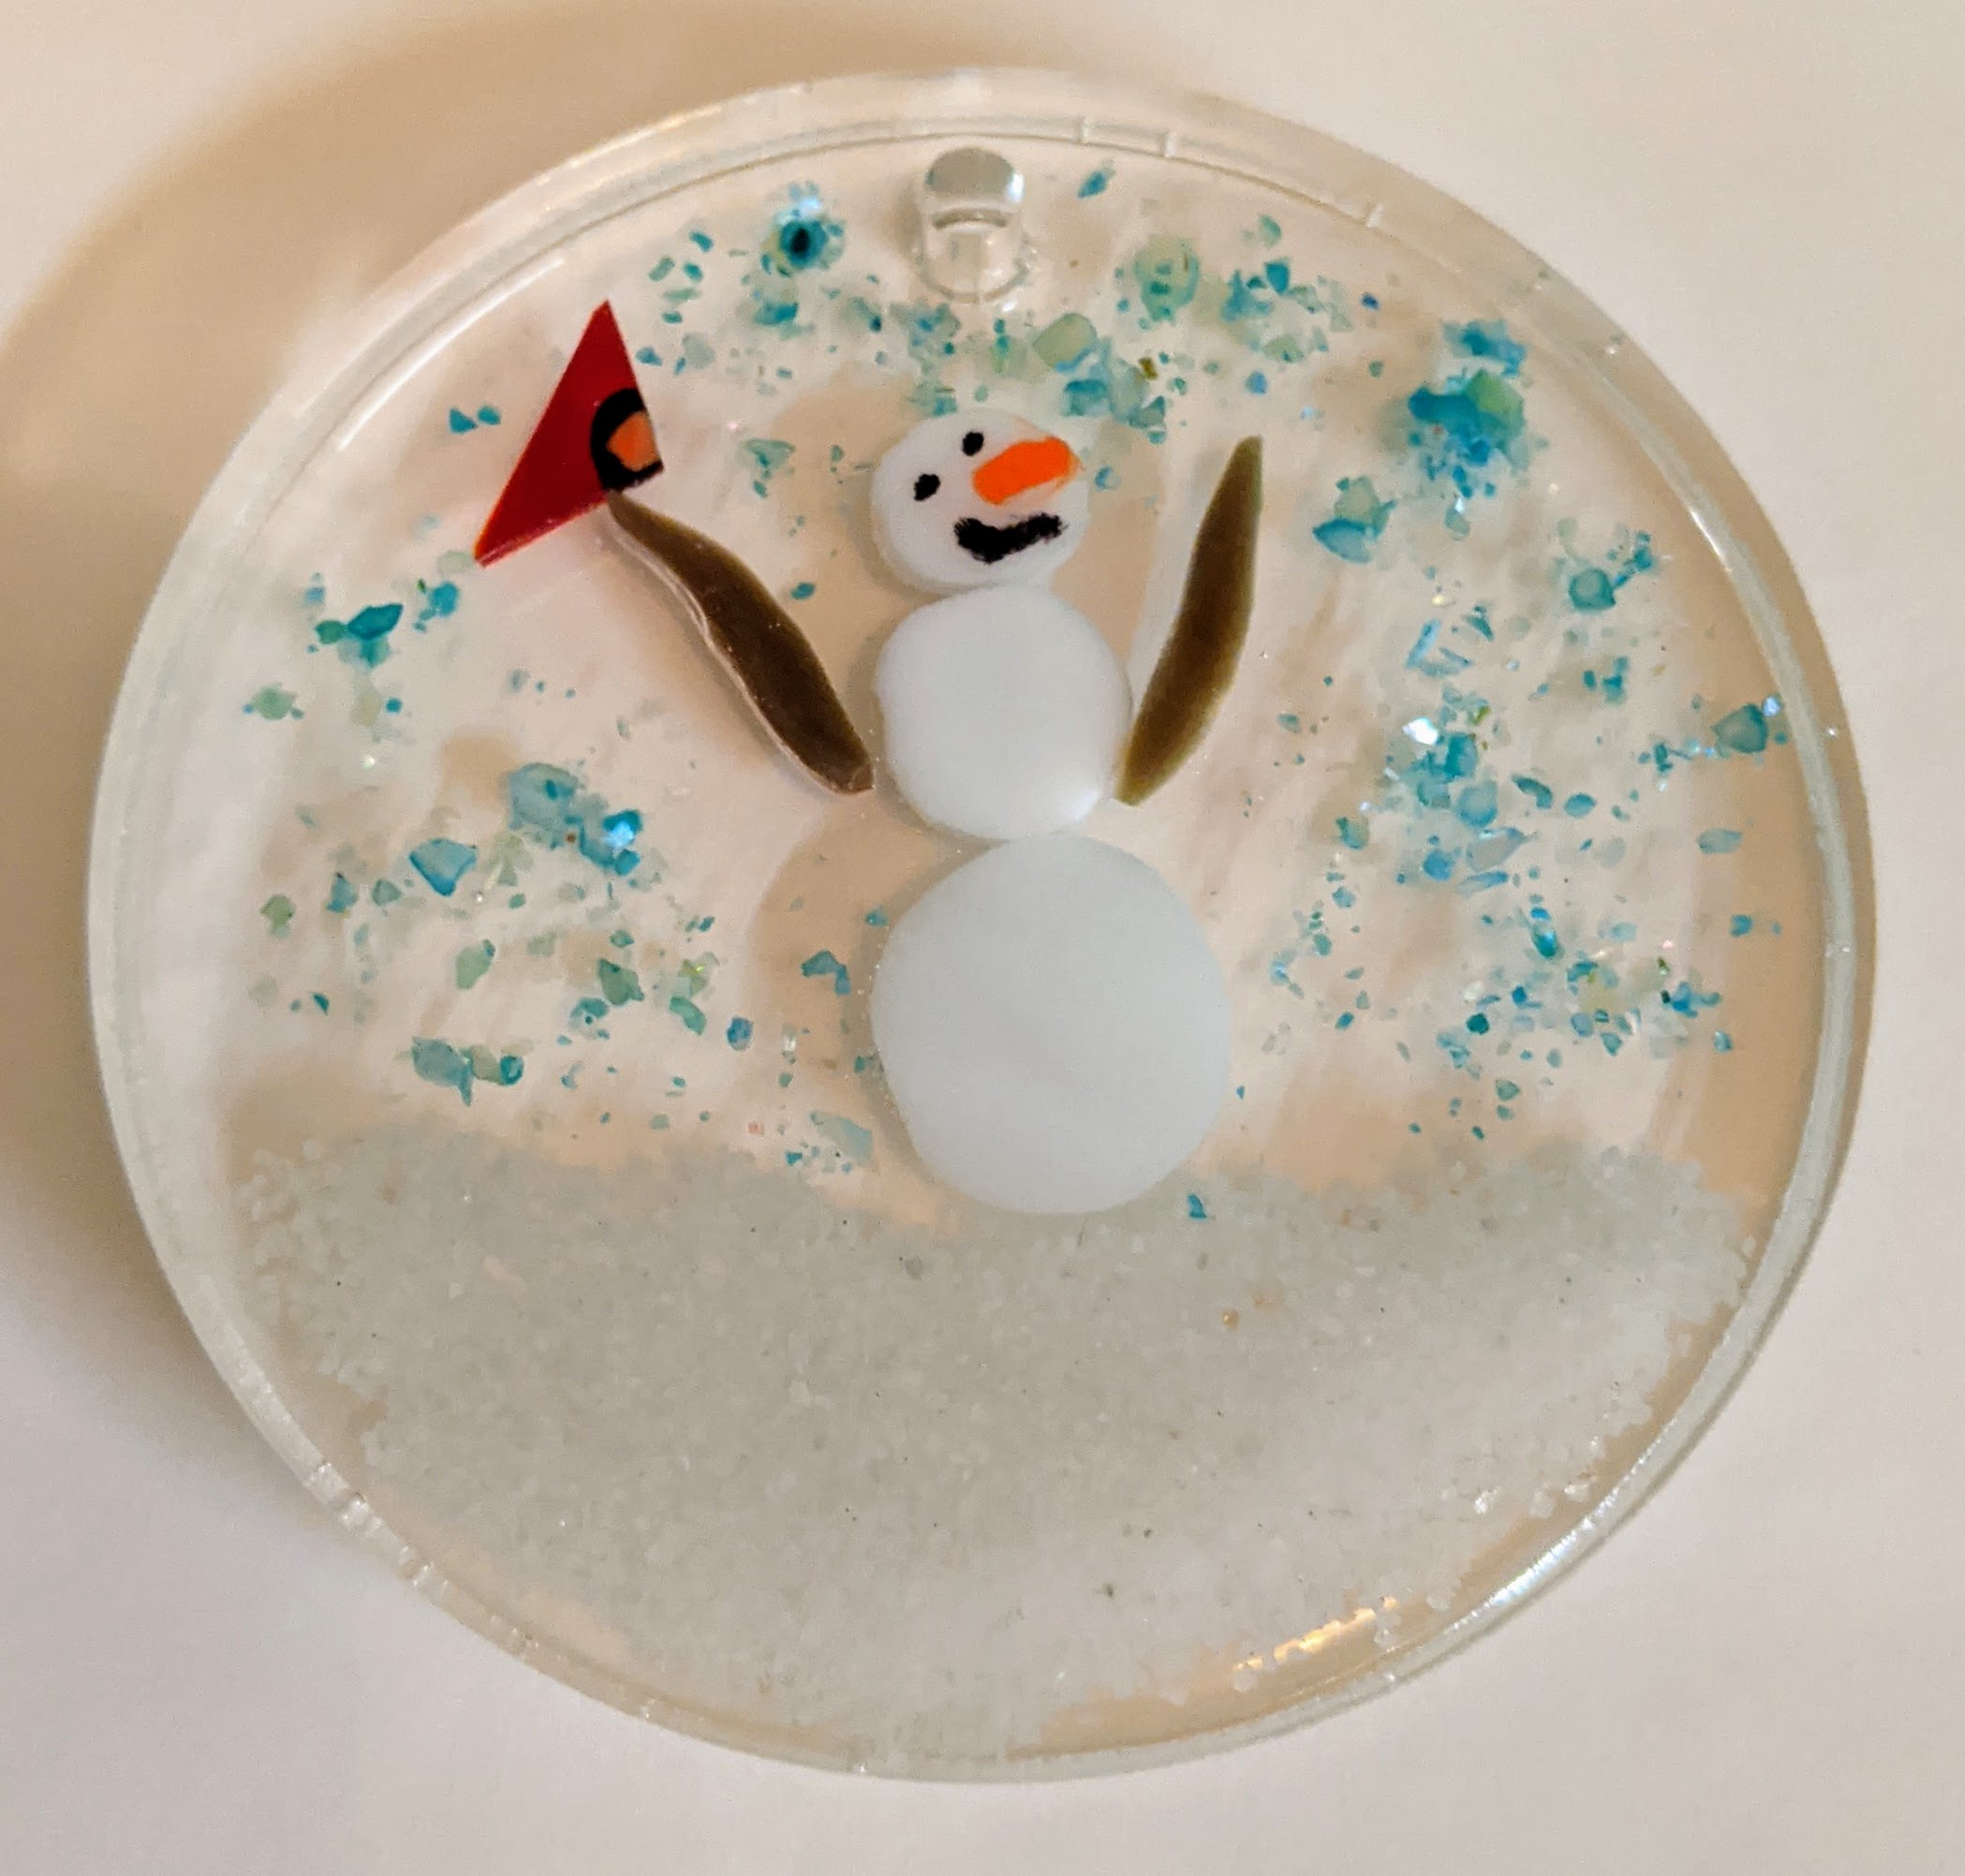
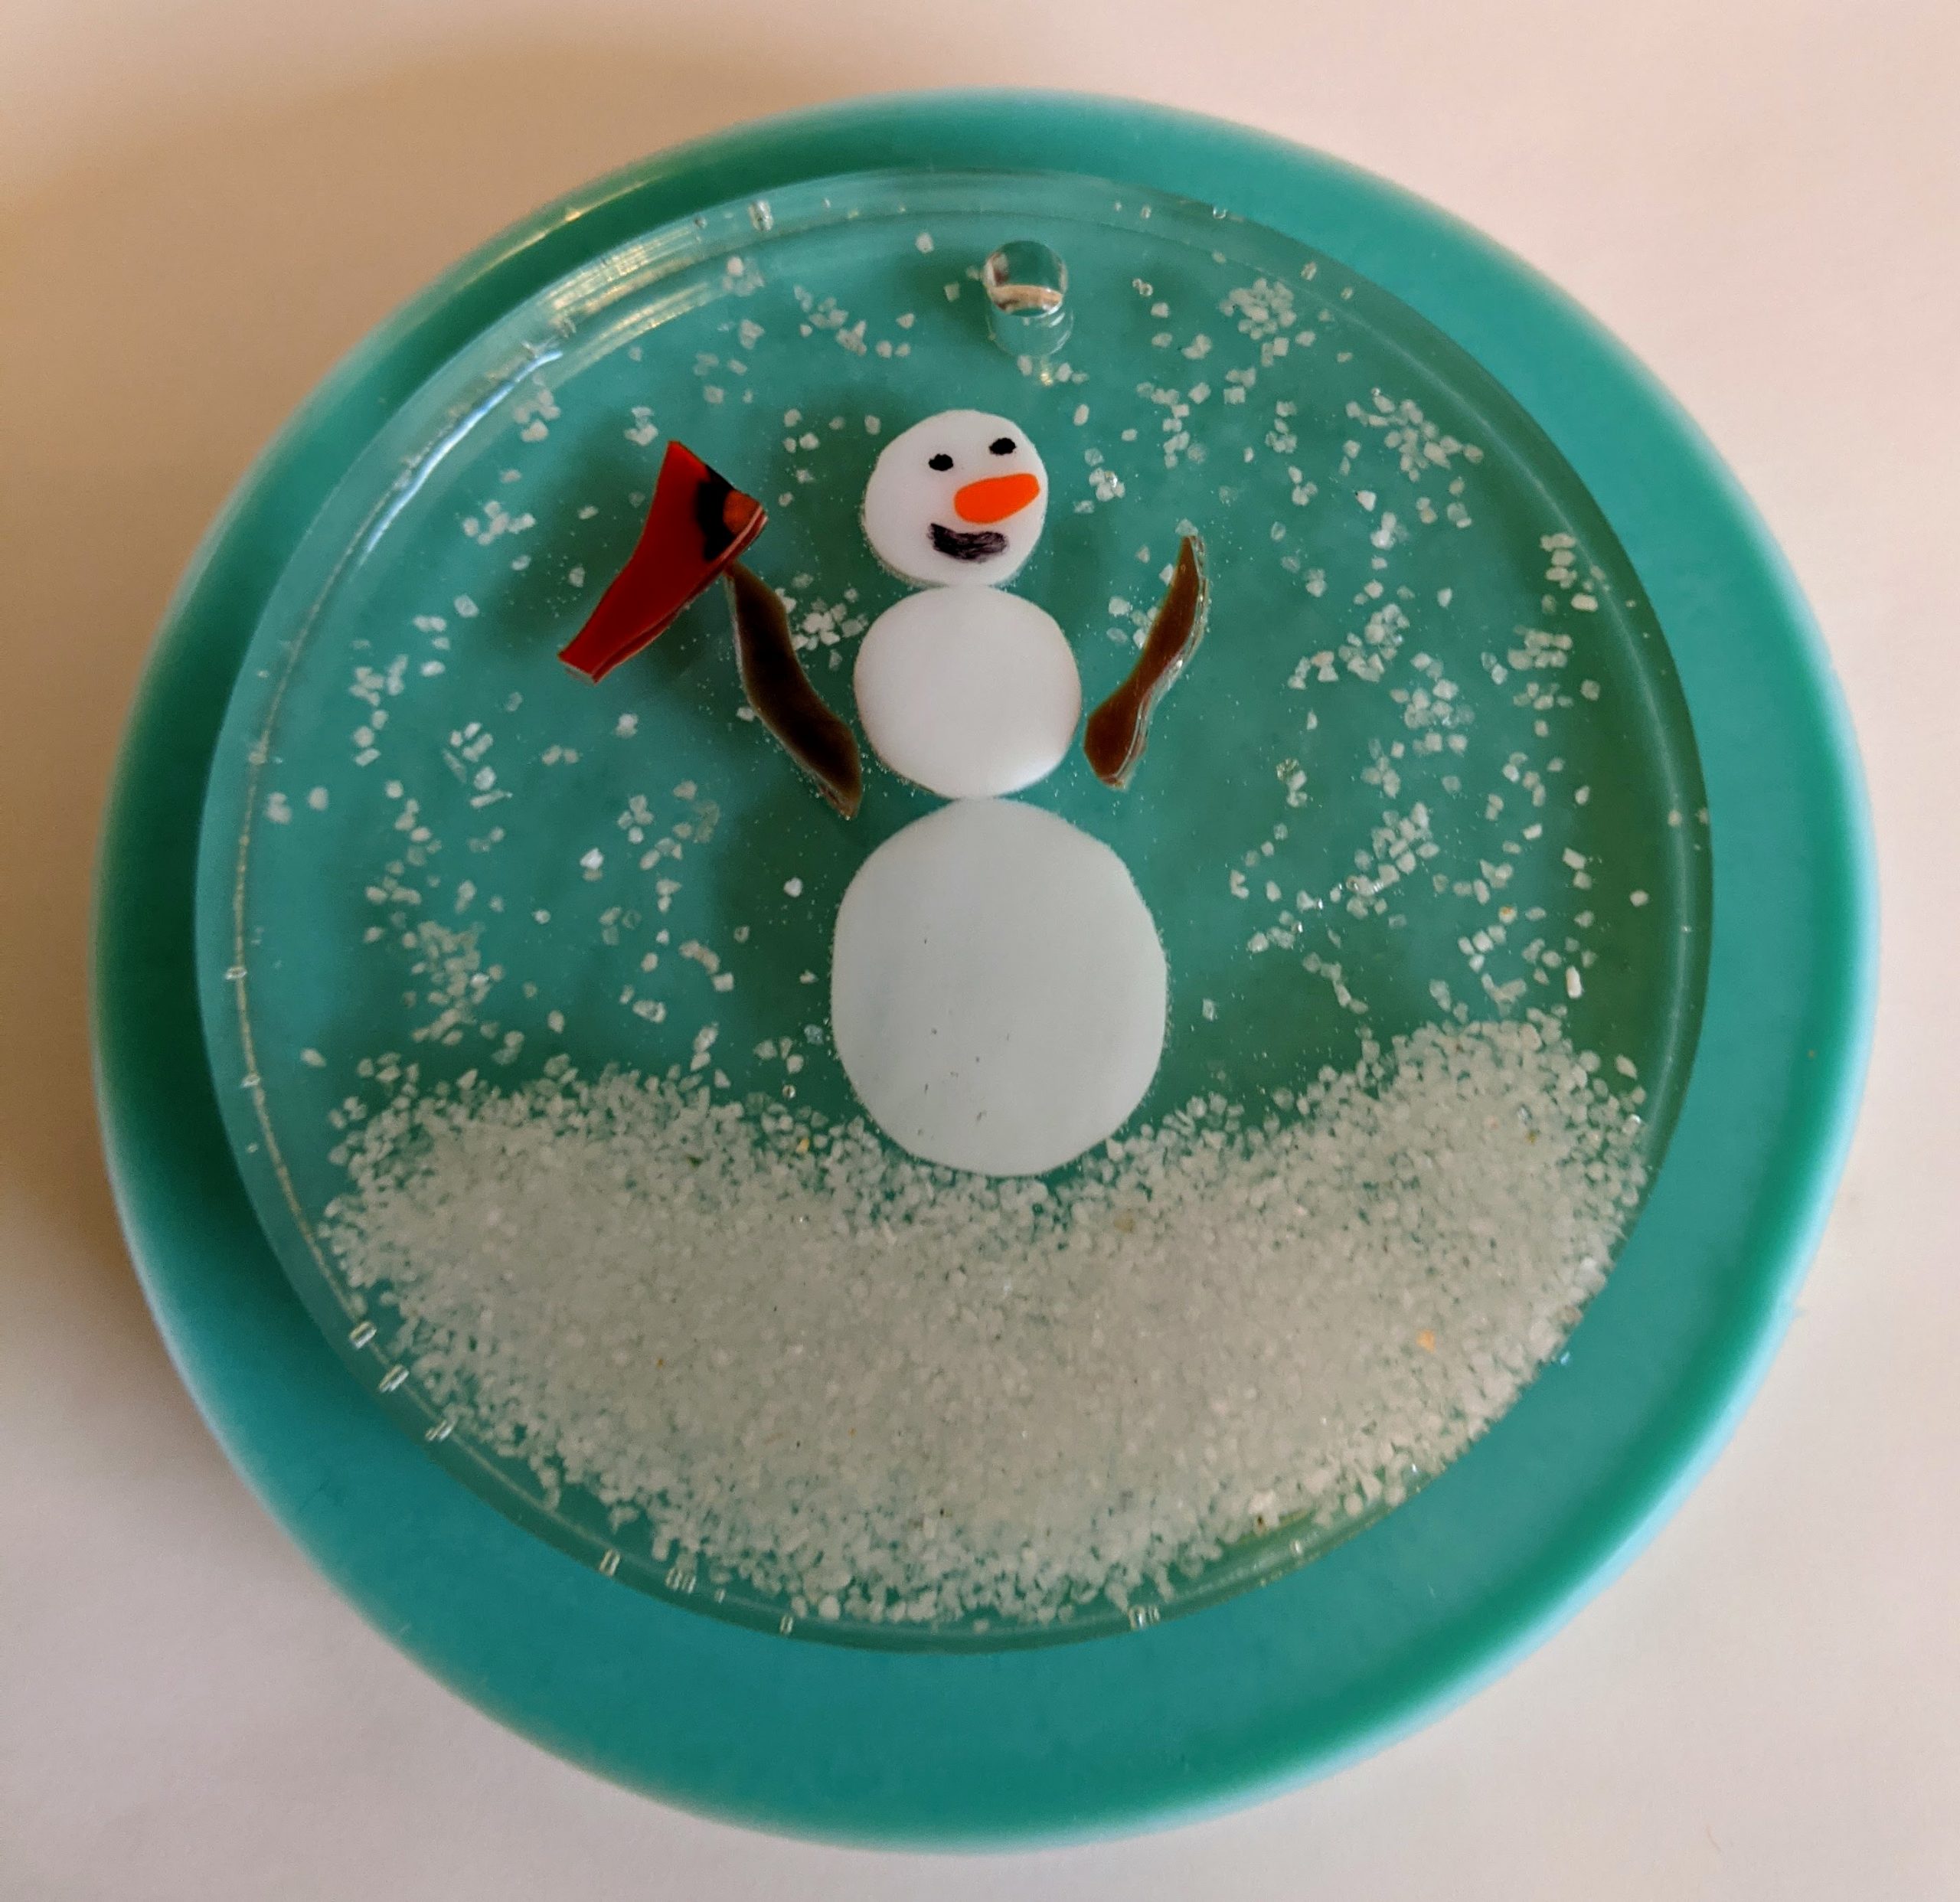
Snowman Suncatcher / Ornament
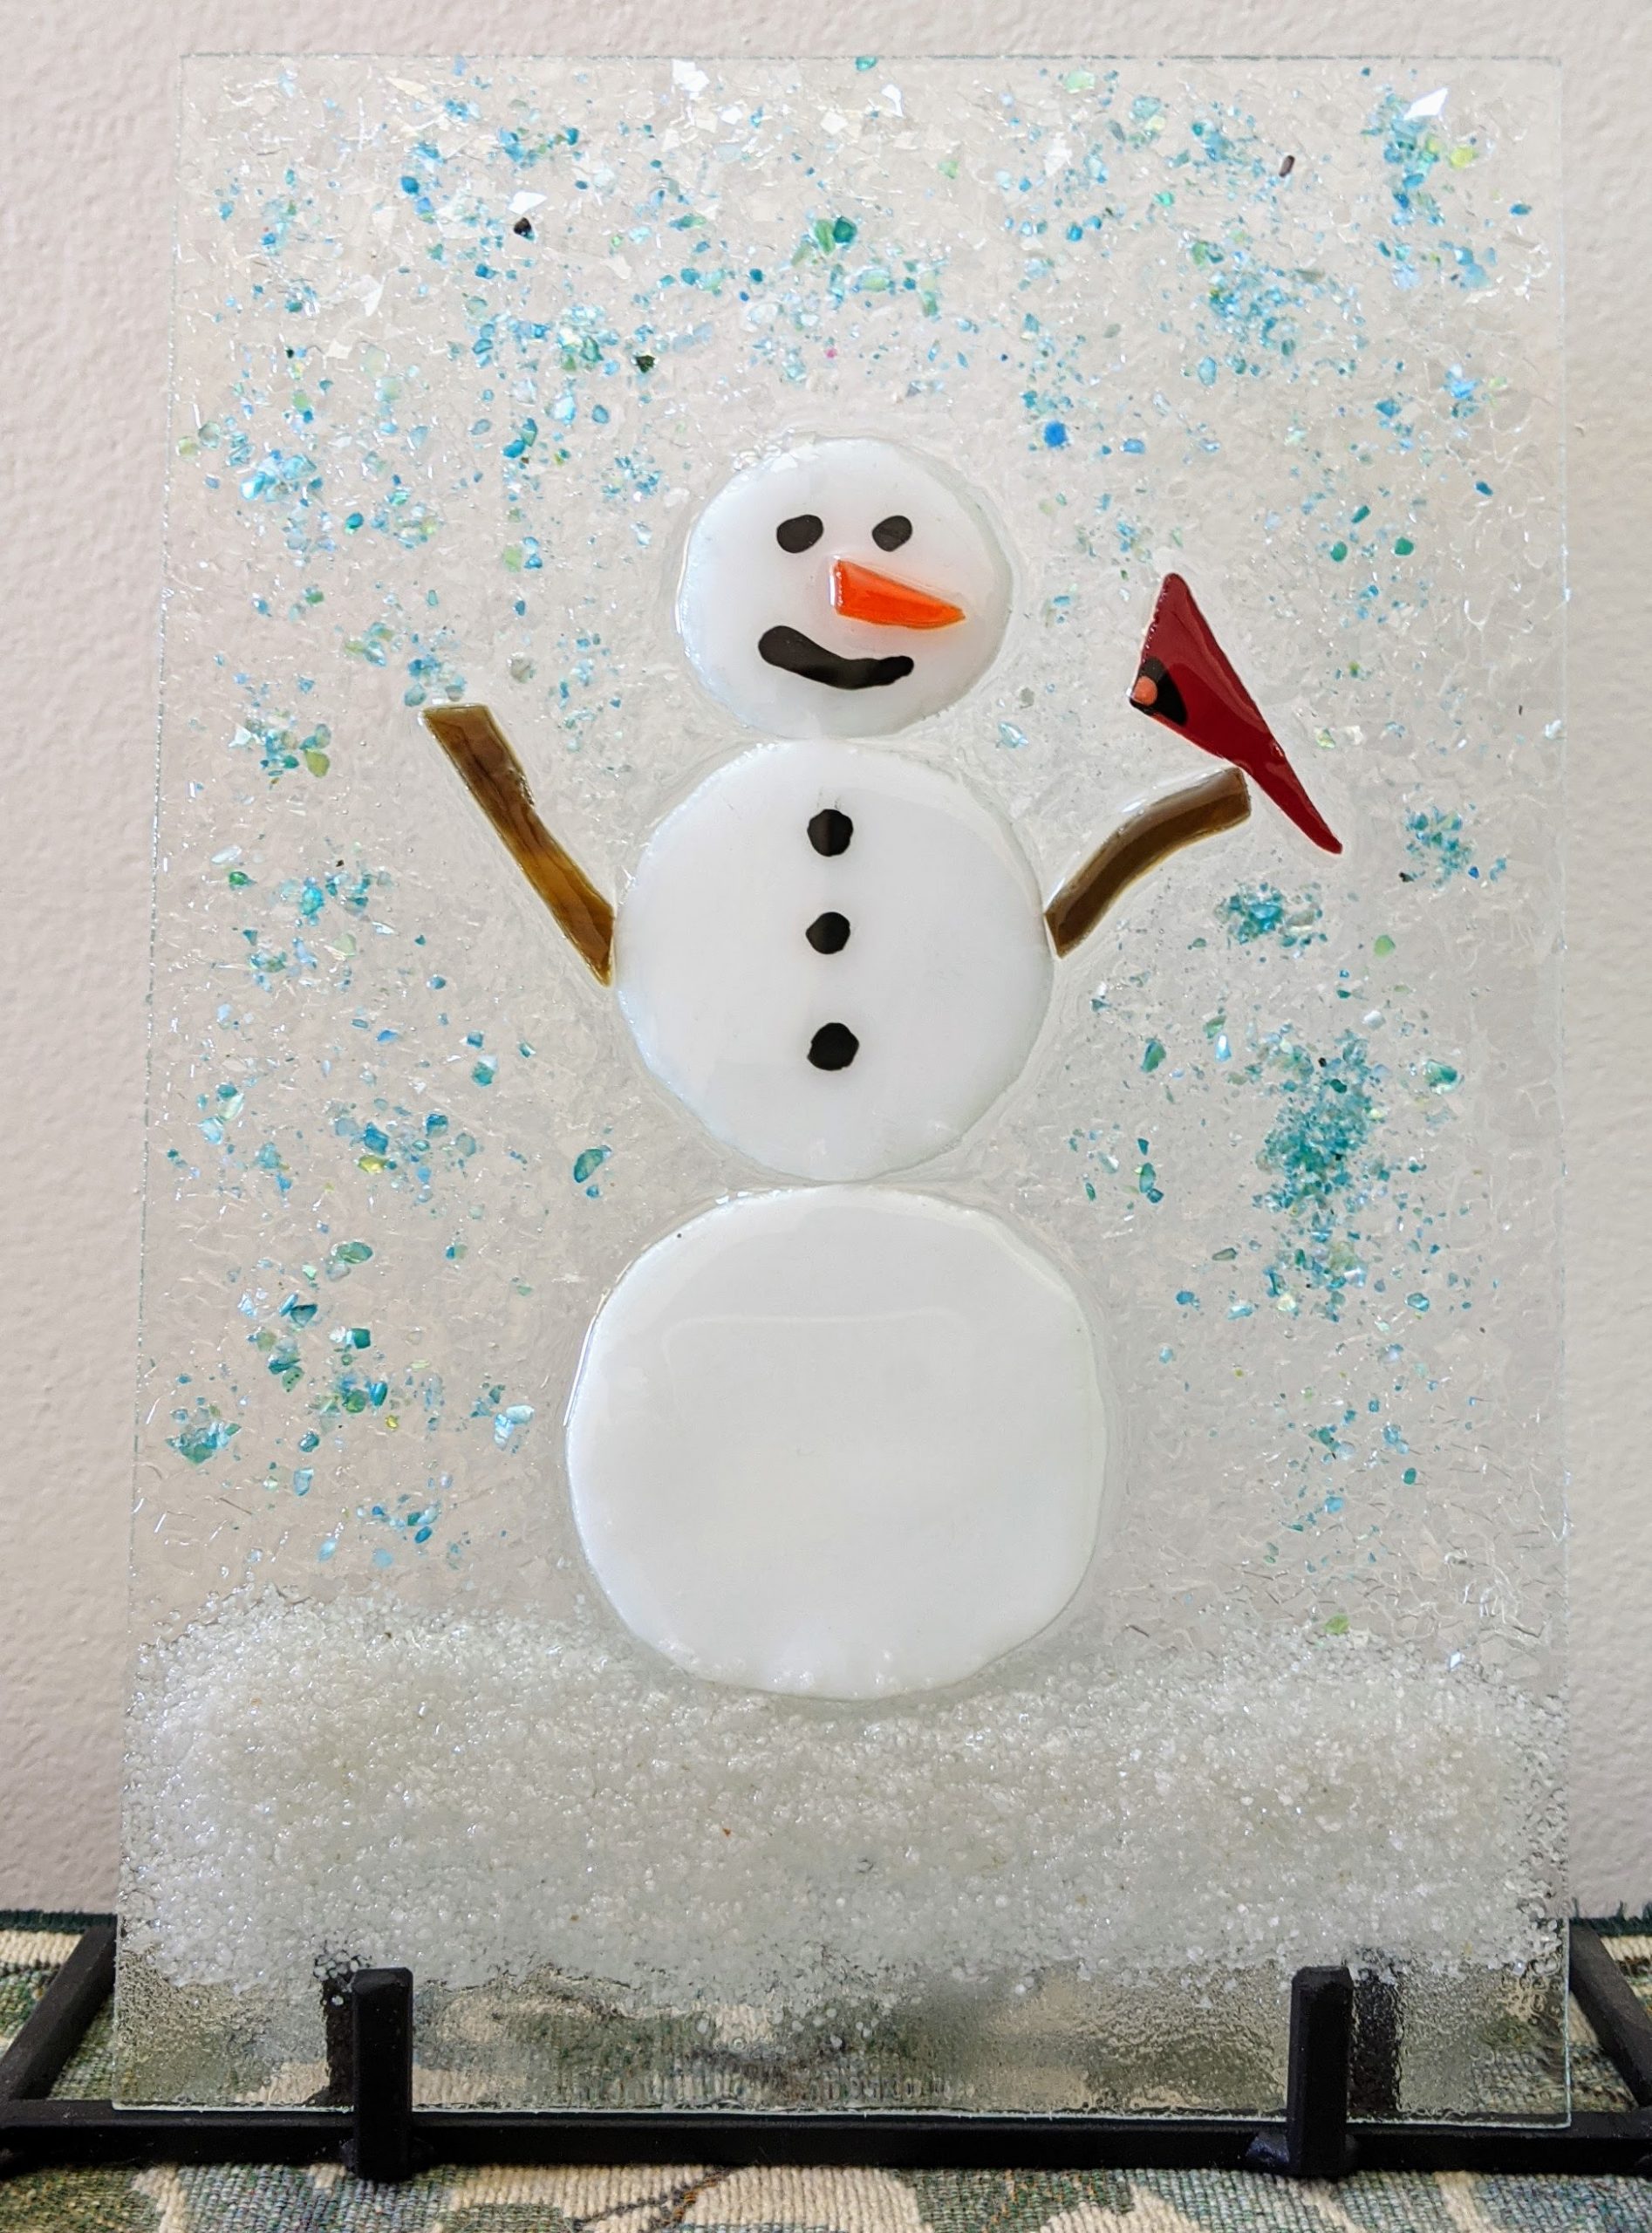
Snowman with blue sky
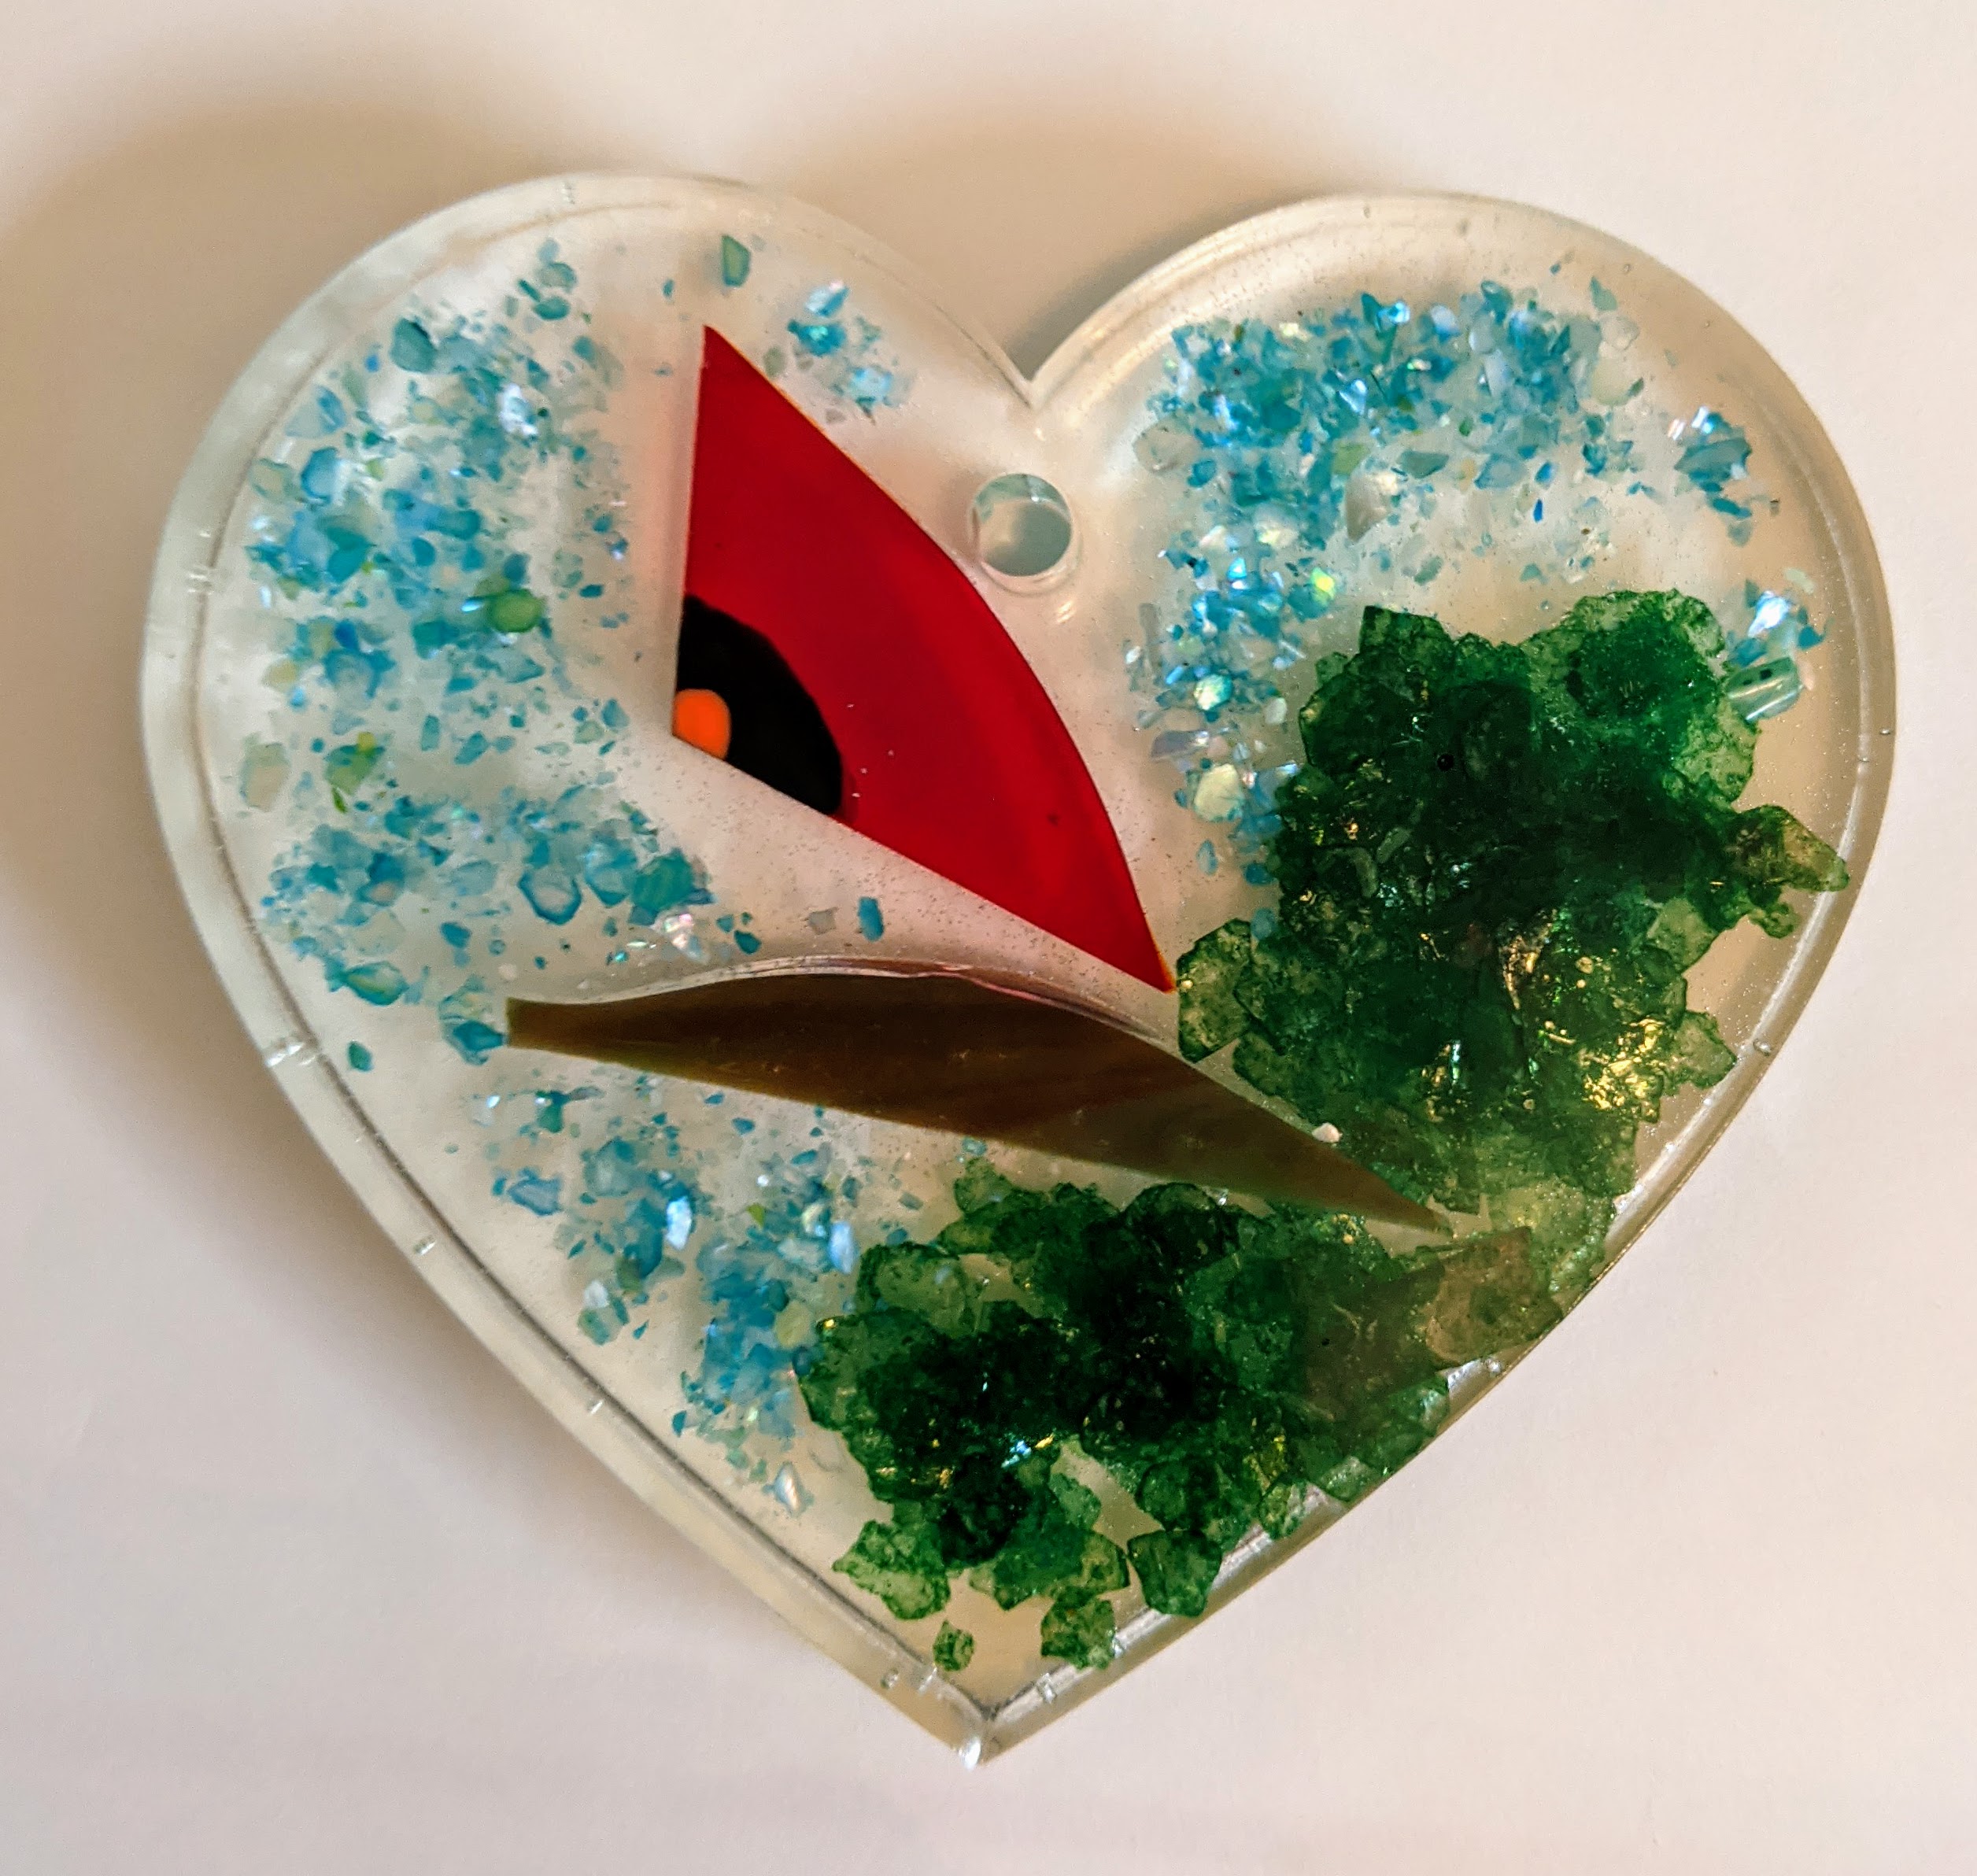
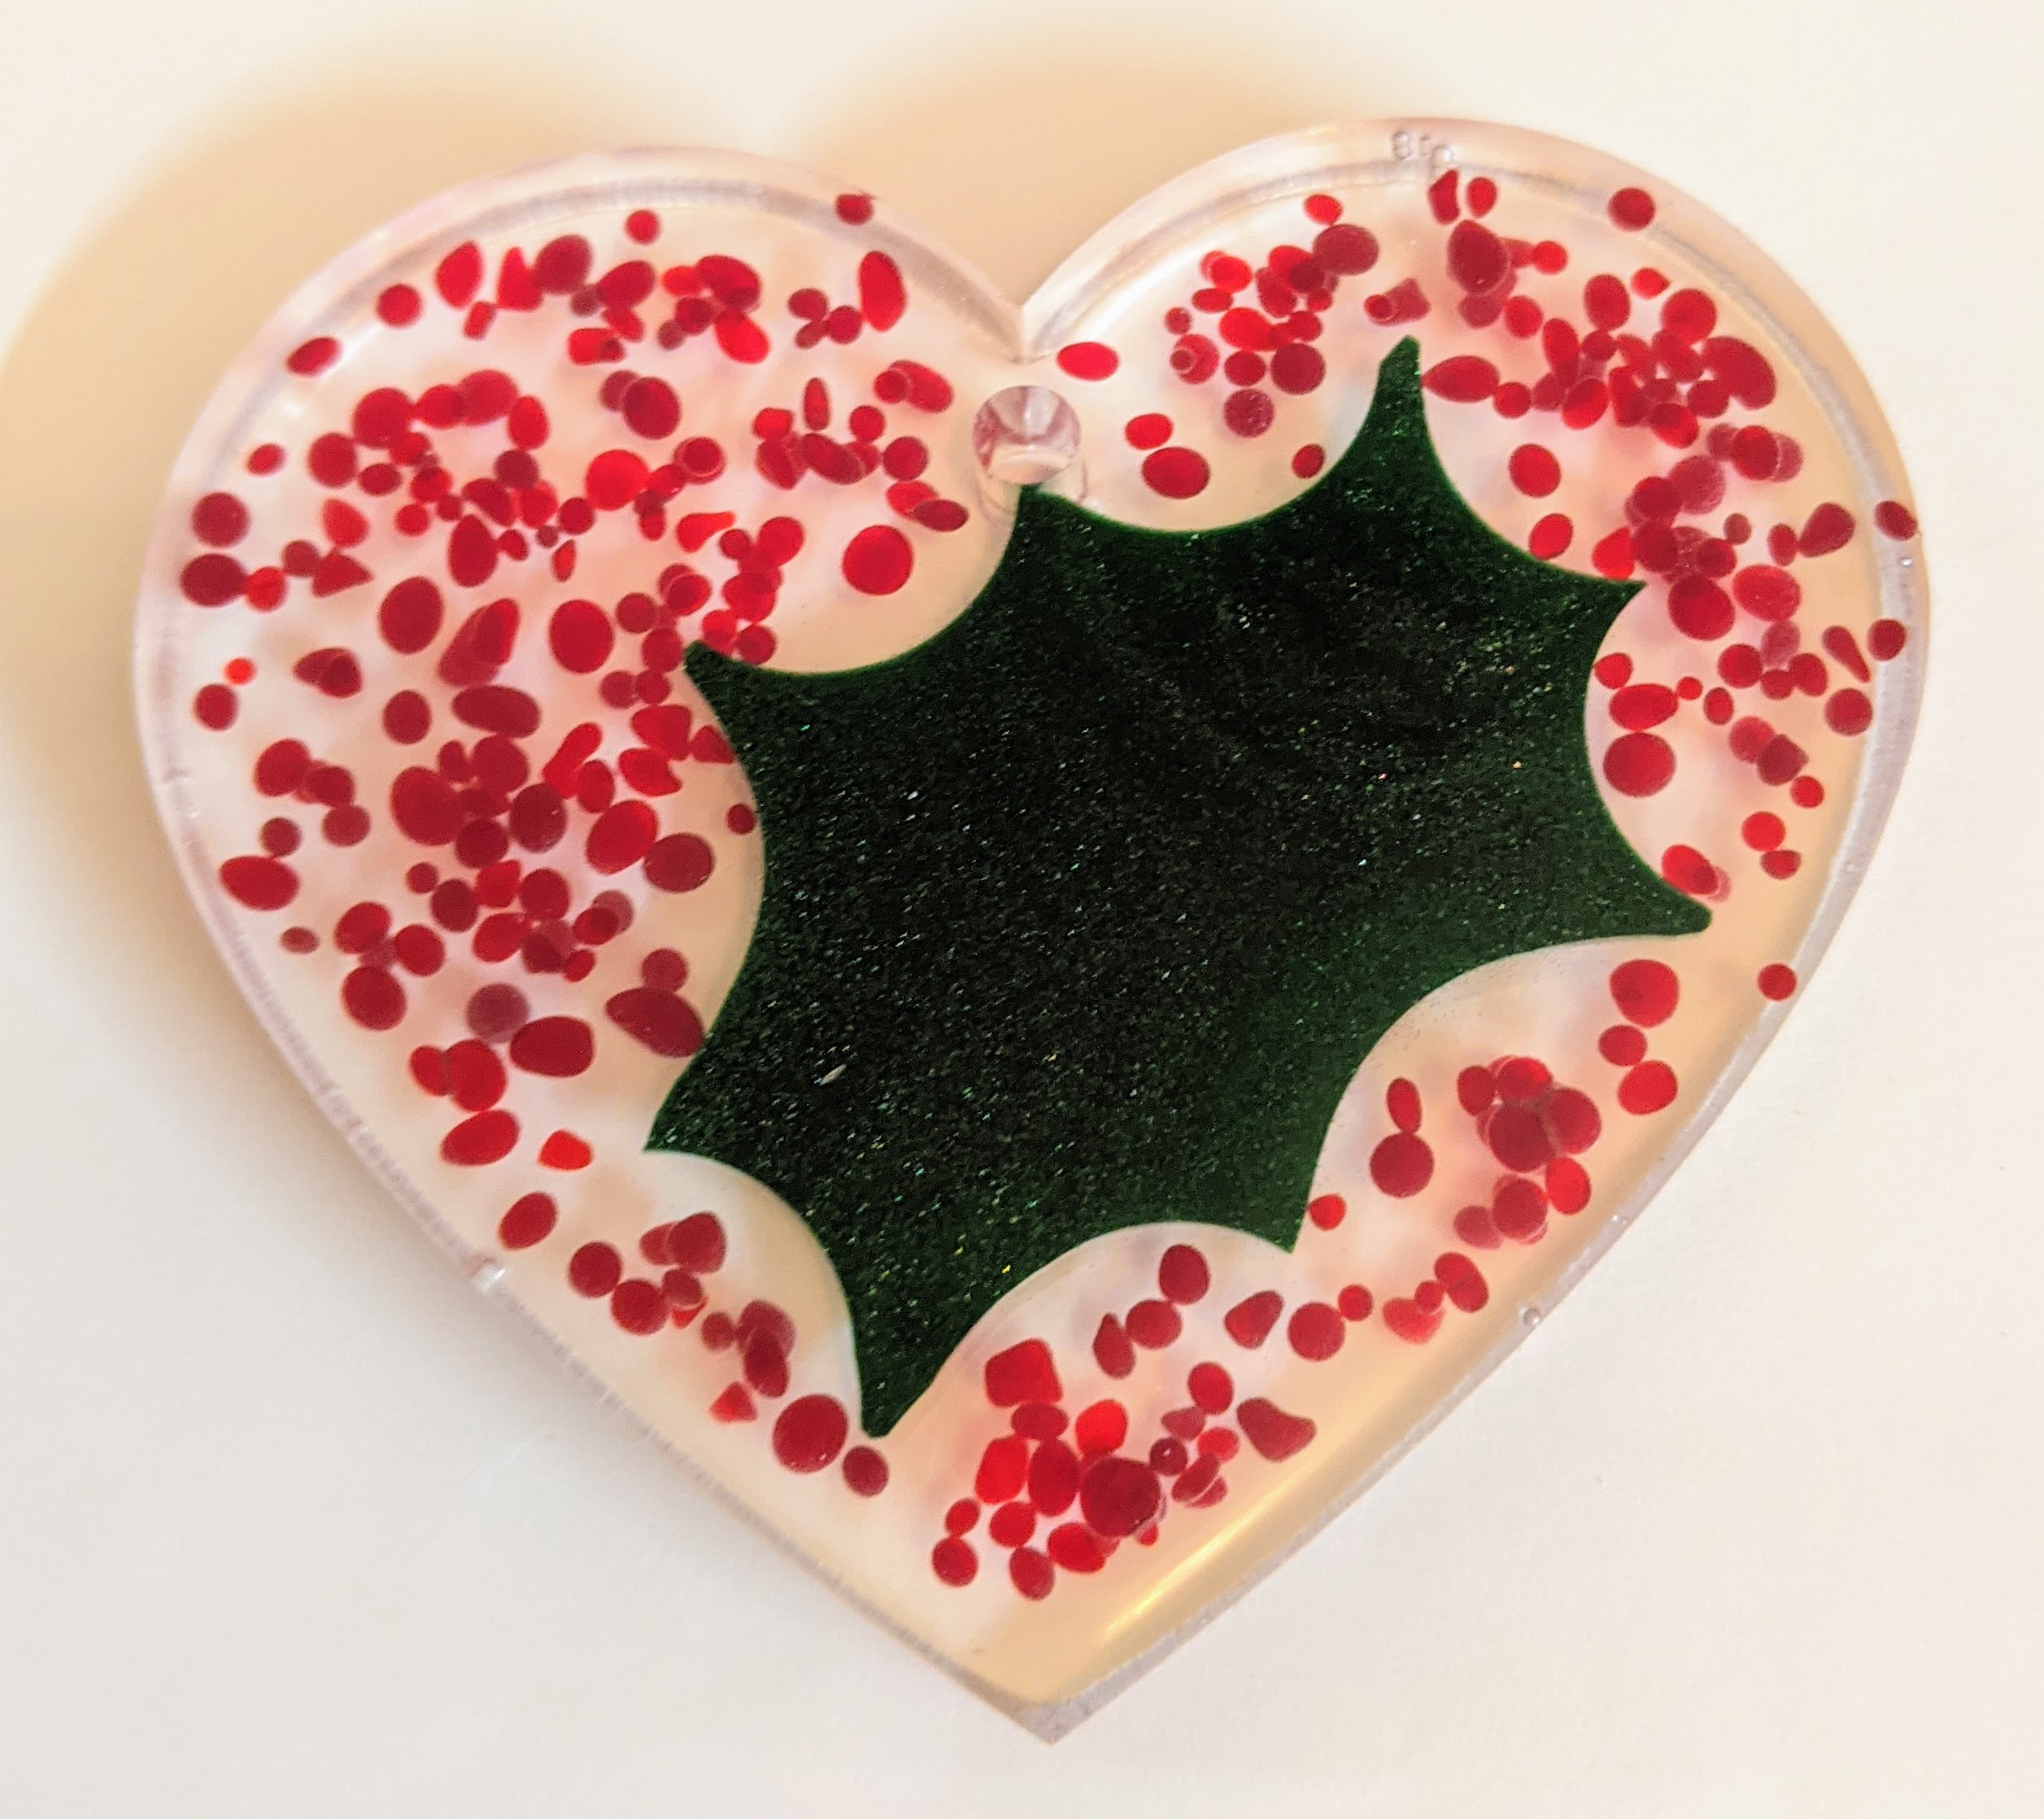
Holly Suncatcher / Ornament
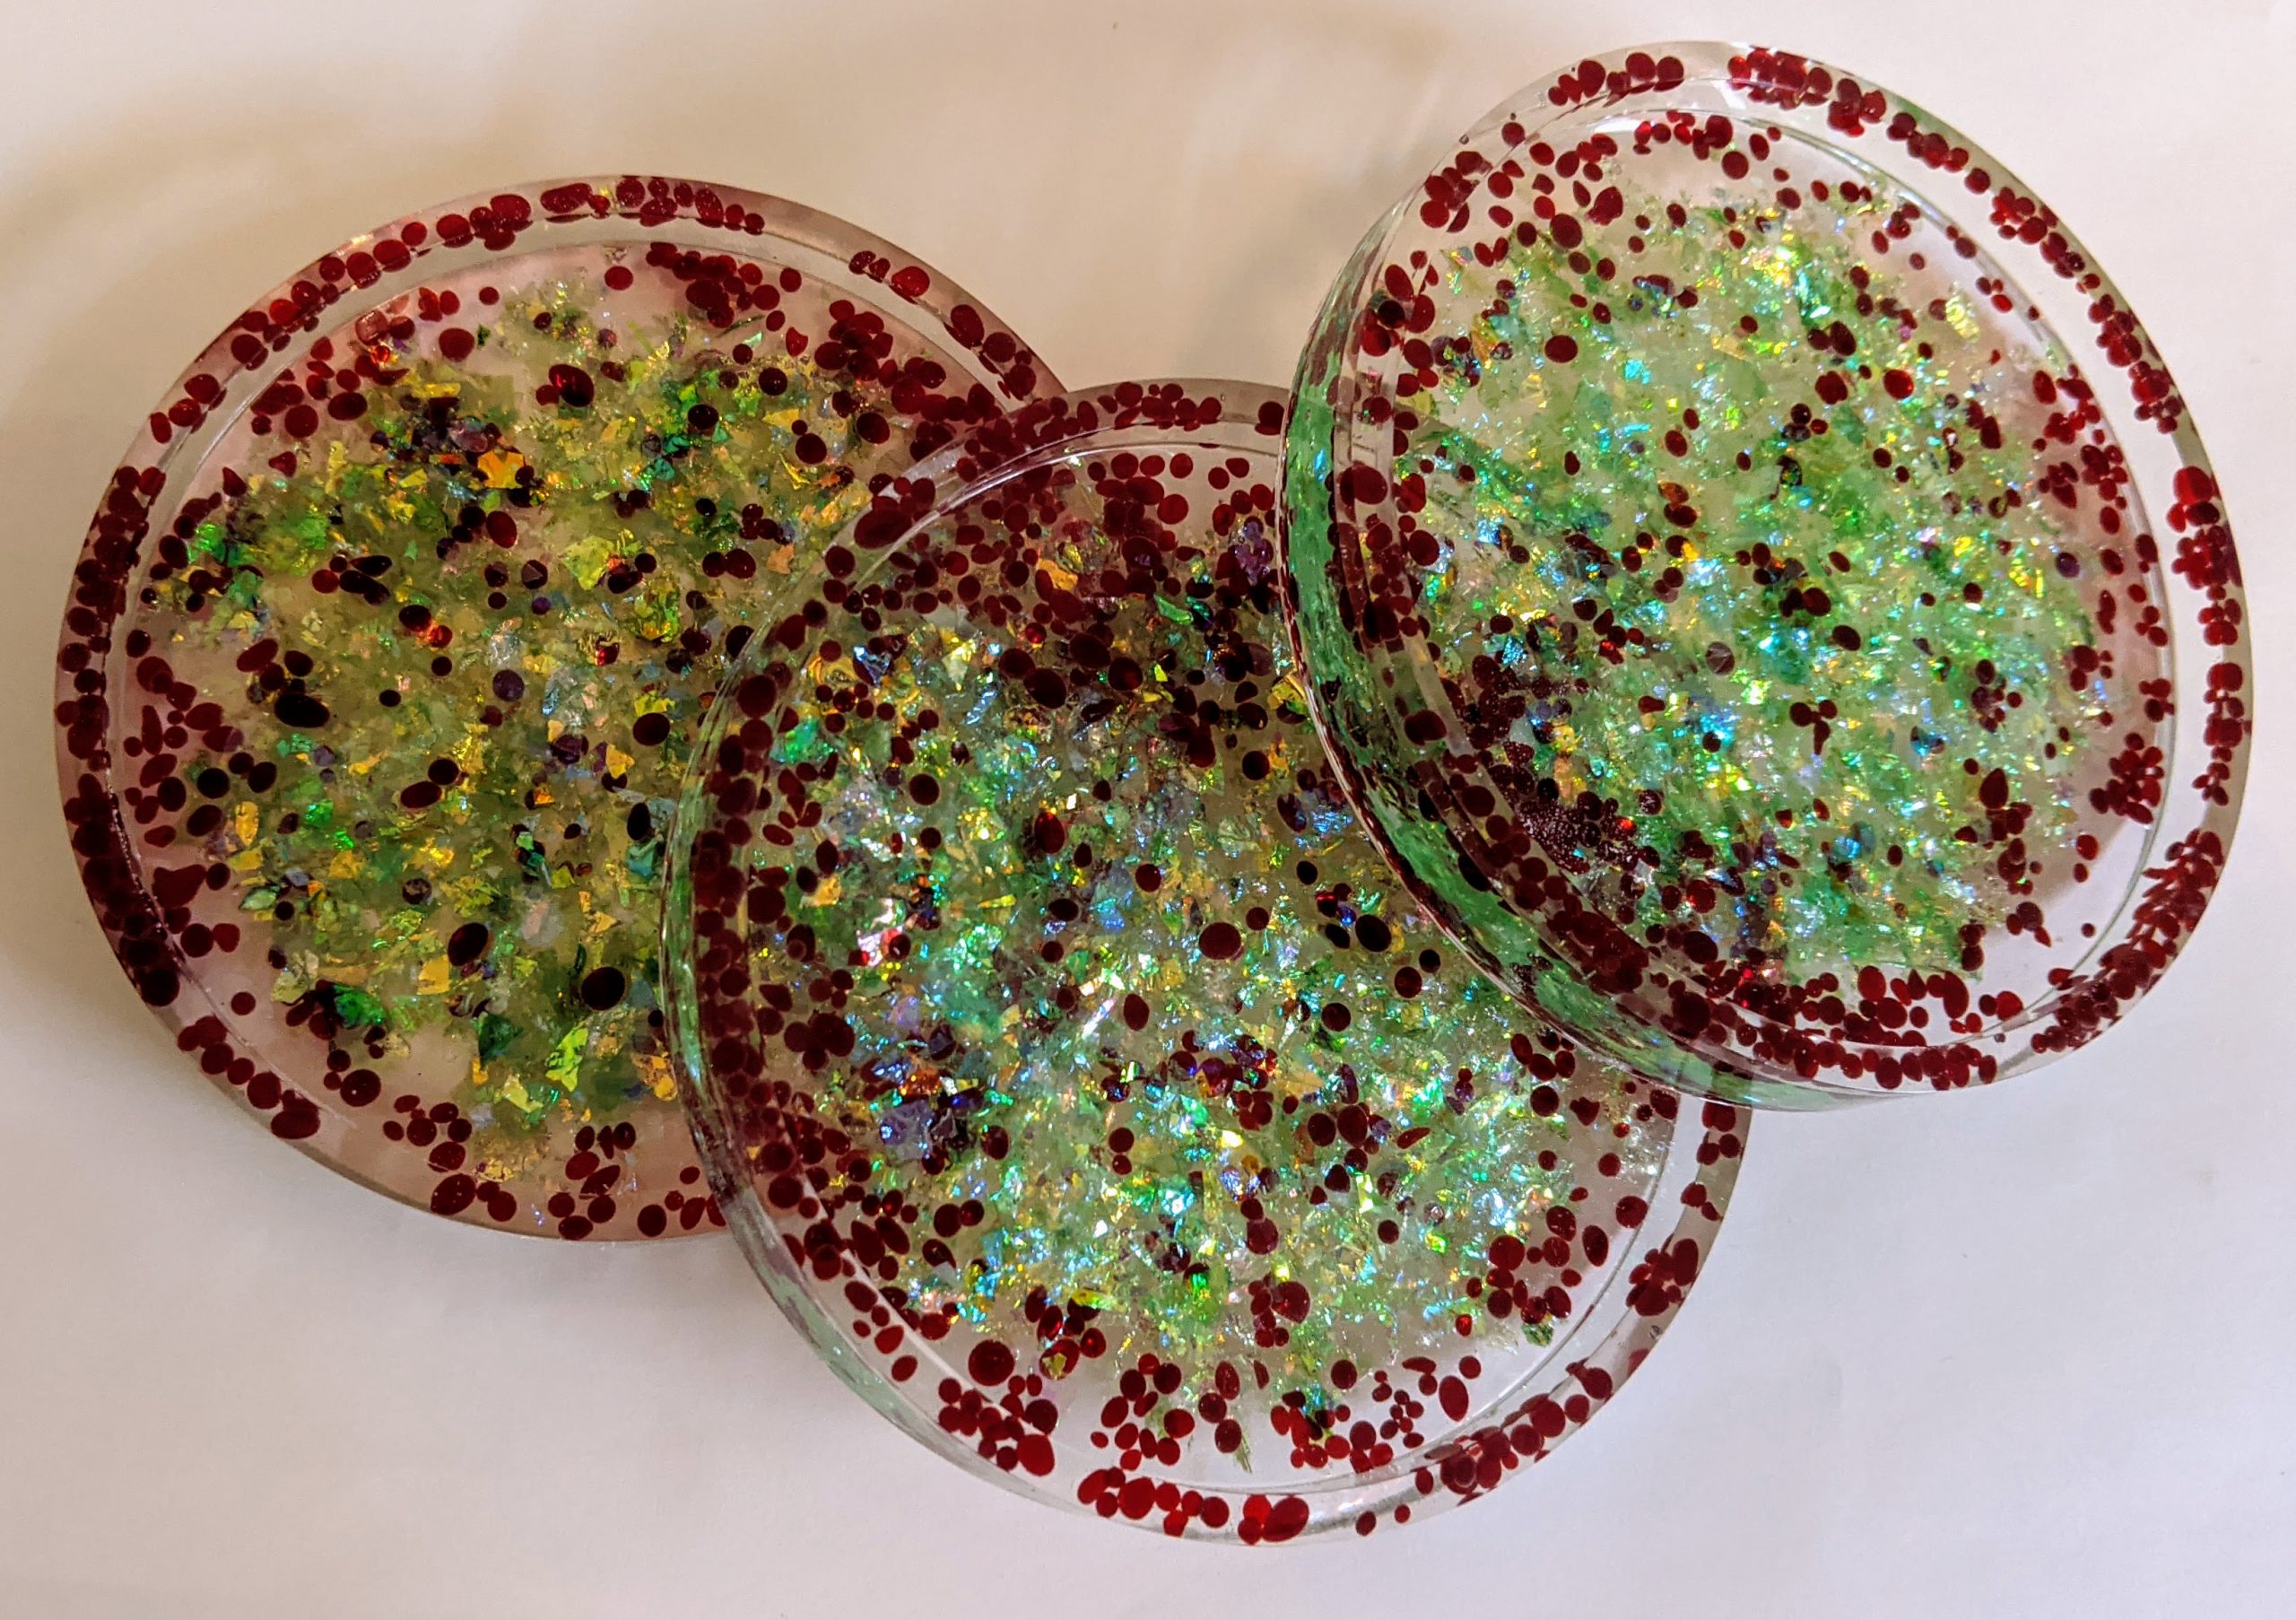
Holiday Confetti Coasters
Beachy Coasters
I used some of the fine glass glitter in the Cardinal and Snowman suncatchers / ornaments above and it didn’t turn out as I had hoped. The glitter is sort of cloudy instead of sparkly. It still looks ok, just not the way I expected it to look. It might be better on the surface of my non-mold resin projects, so I will keep experimenting.
Today I poured the second layer of resin on several small projects and then spent some time making several small snowmen. I am experimenting with some abstract red and green coasters too, though my son says his favorite is the holly leaf suncatcher. My current favorites are the little snowmen. This is as close as you can get to making snowmen here in Charleston, SC. It’s 80 degrees outside and it’s well into November!
Resin curing!
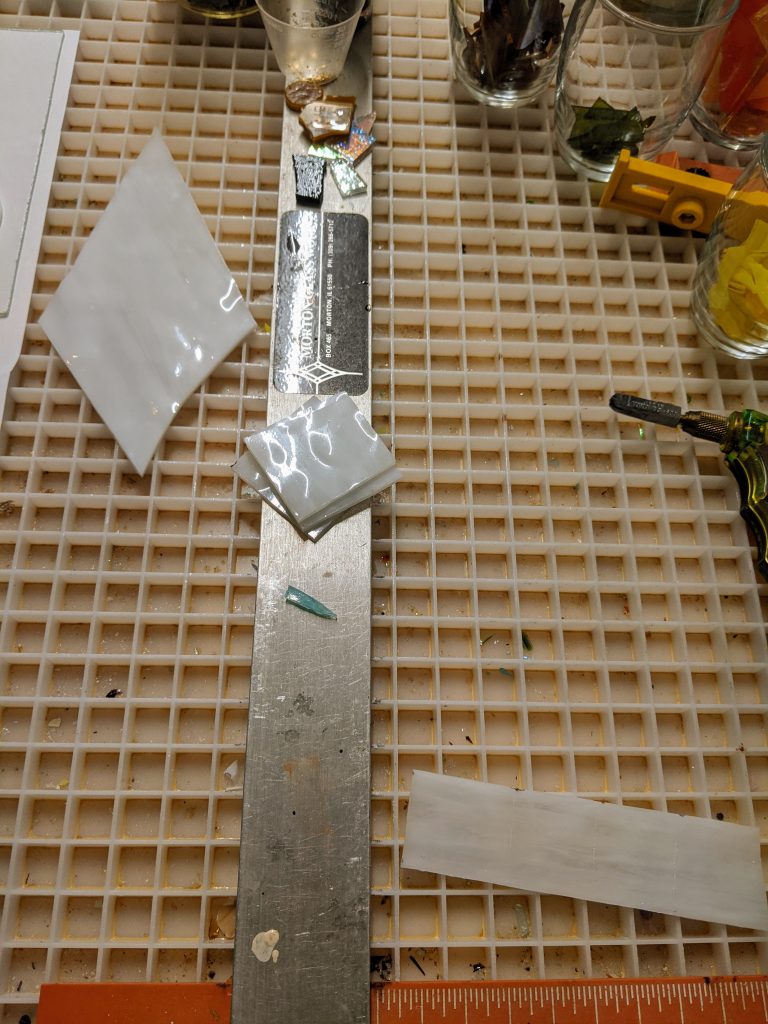
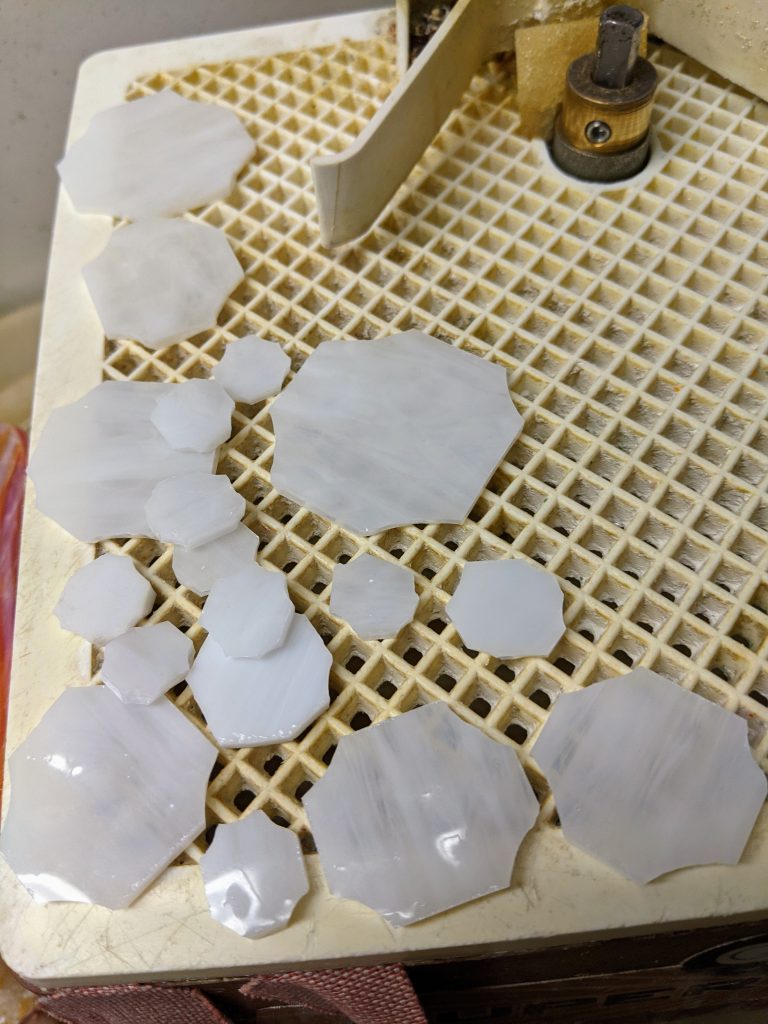
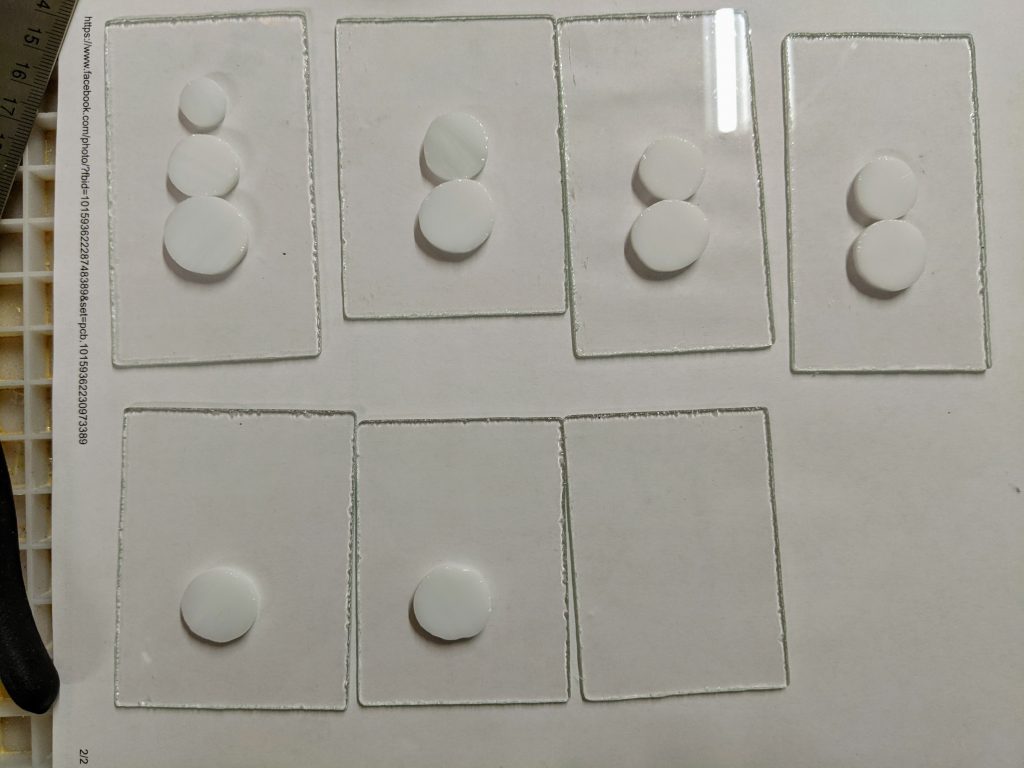
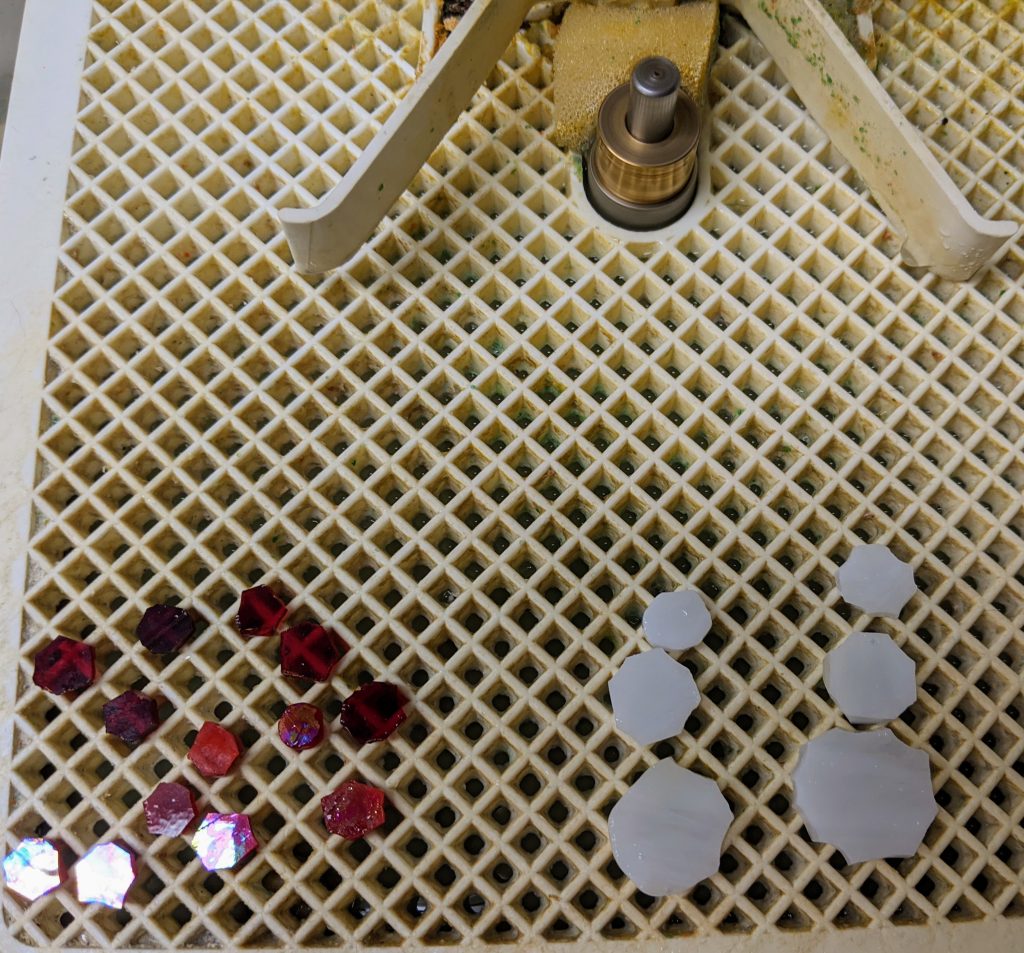
To make the “snowballs” for their bodies, I use glass nippers to rough out a generally round shape, then I use my glass grinder to smooth the edges. My fingers are pretty sore after making so many snowmen in one day! After the “snowballs” are ready, I paint on their faces (on the tiny ones). I use glass for the detail on the faces of the larger snowmen. Since these tiny ones are destined to be in two sided ornaments, I painted both sides of their faces / buttons and the little birds that will perch on their stick arms.
Lots of snowmen!One “big” snowman
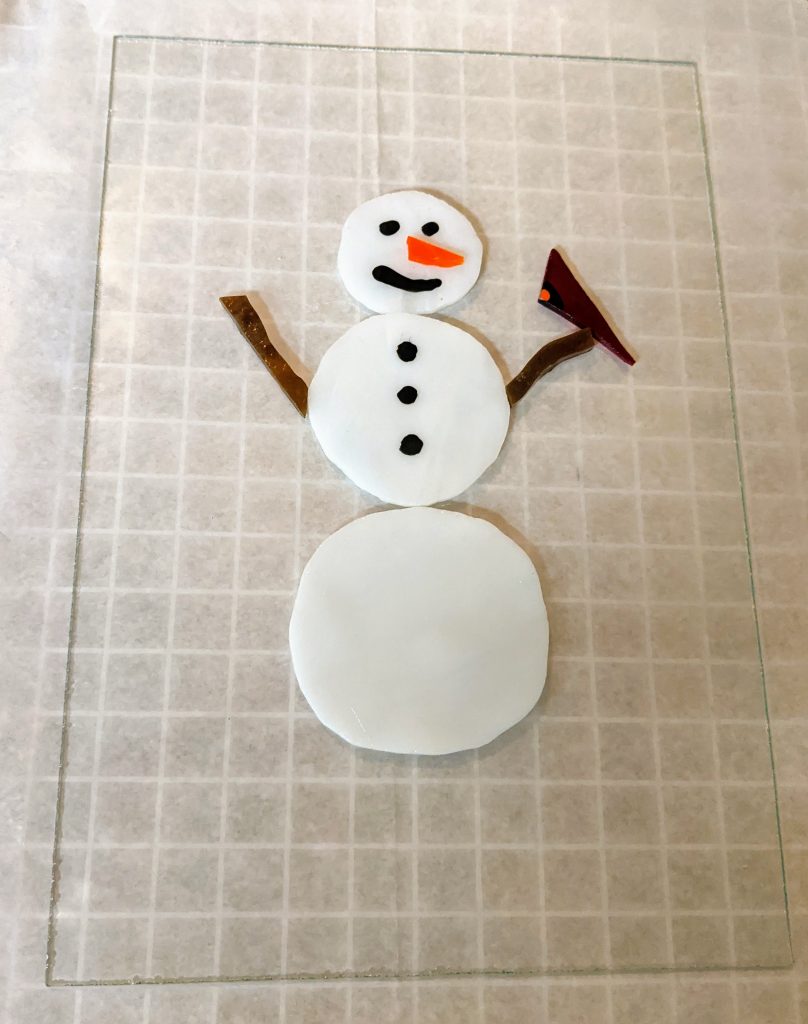
I also cut some backer glass and glued the pieces of this “big” snowman in place. I will pour the resin and decorate it another day, after the mosaic adhesive has had a chance to fully cure. This piece will be table top sized as it’s slightly smaller than a standard sheet of paper.
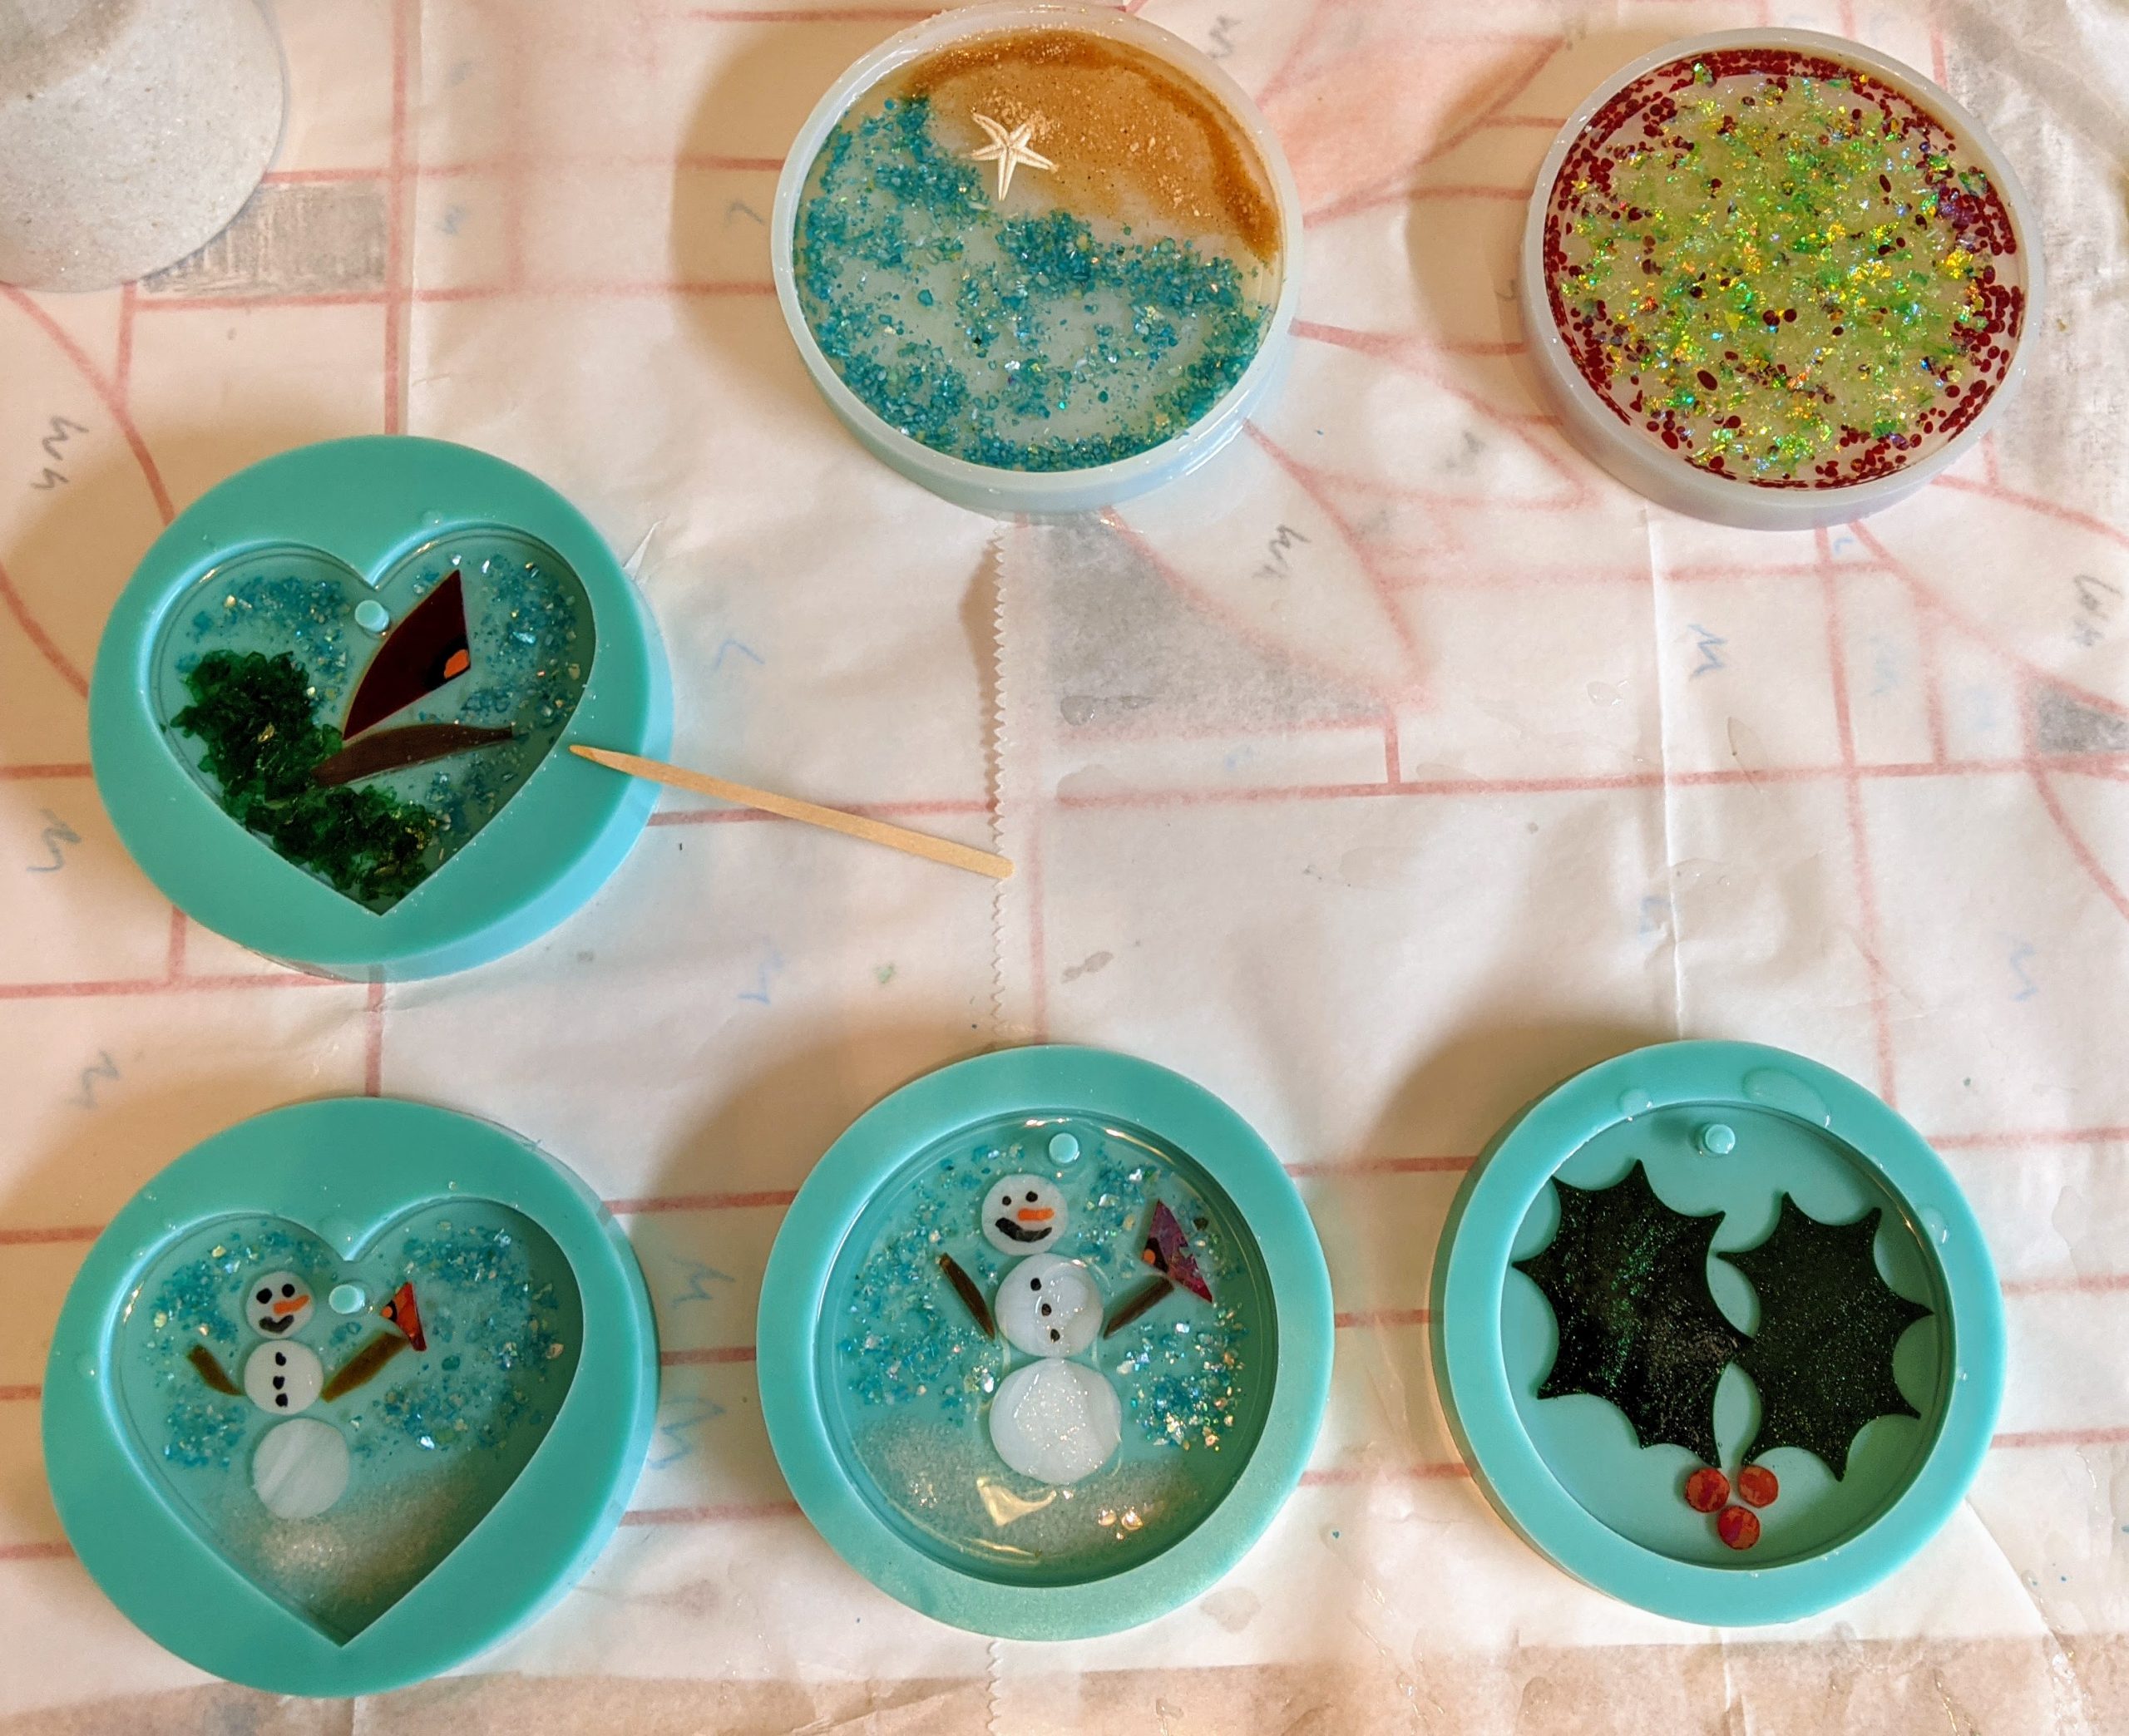
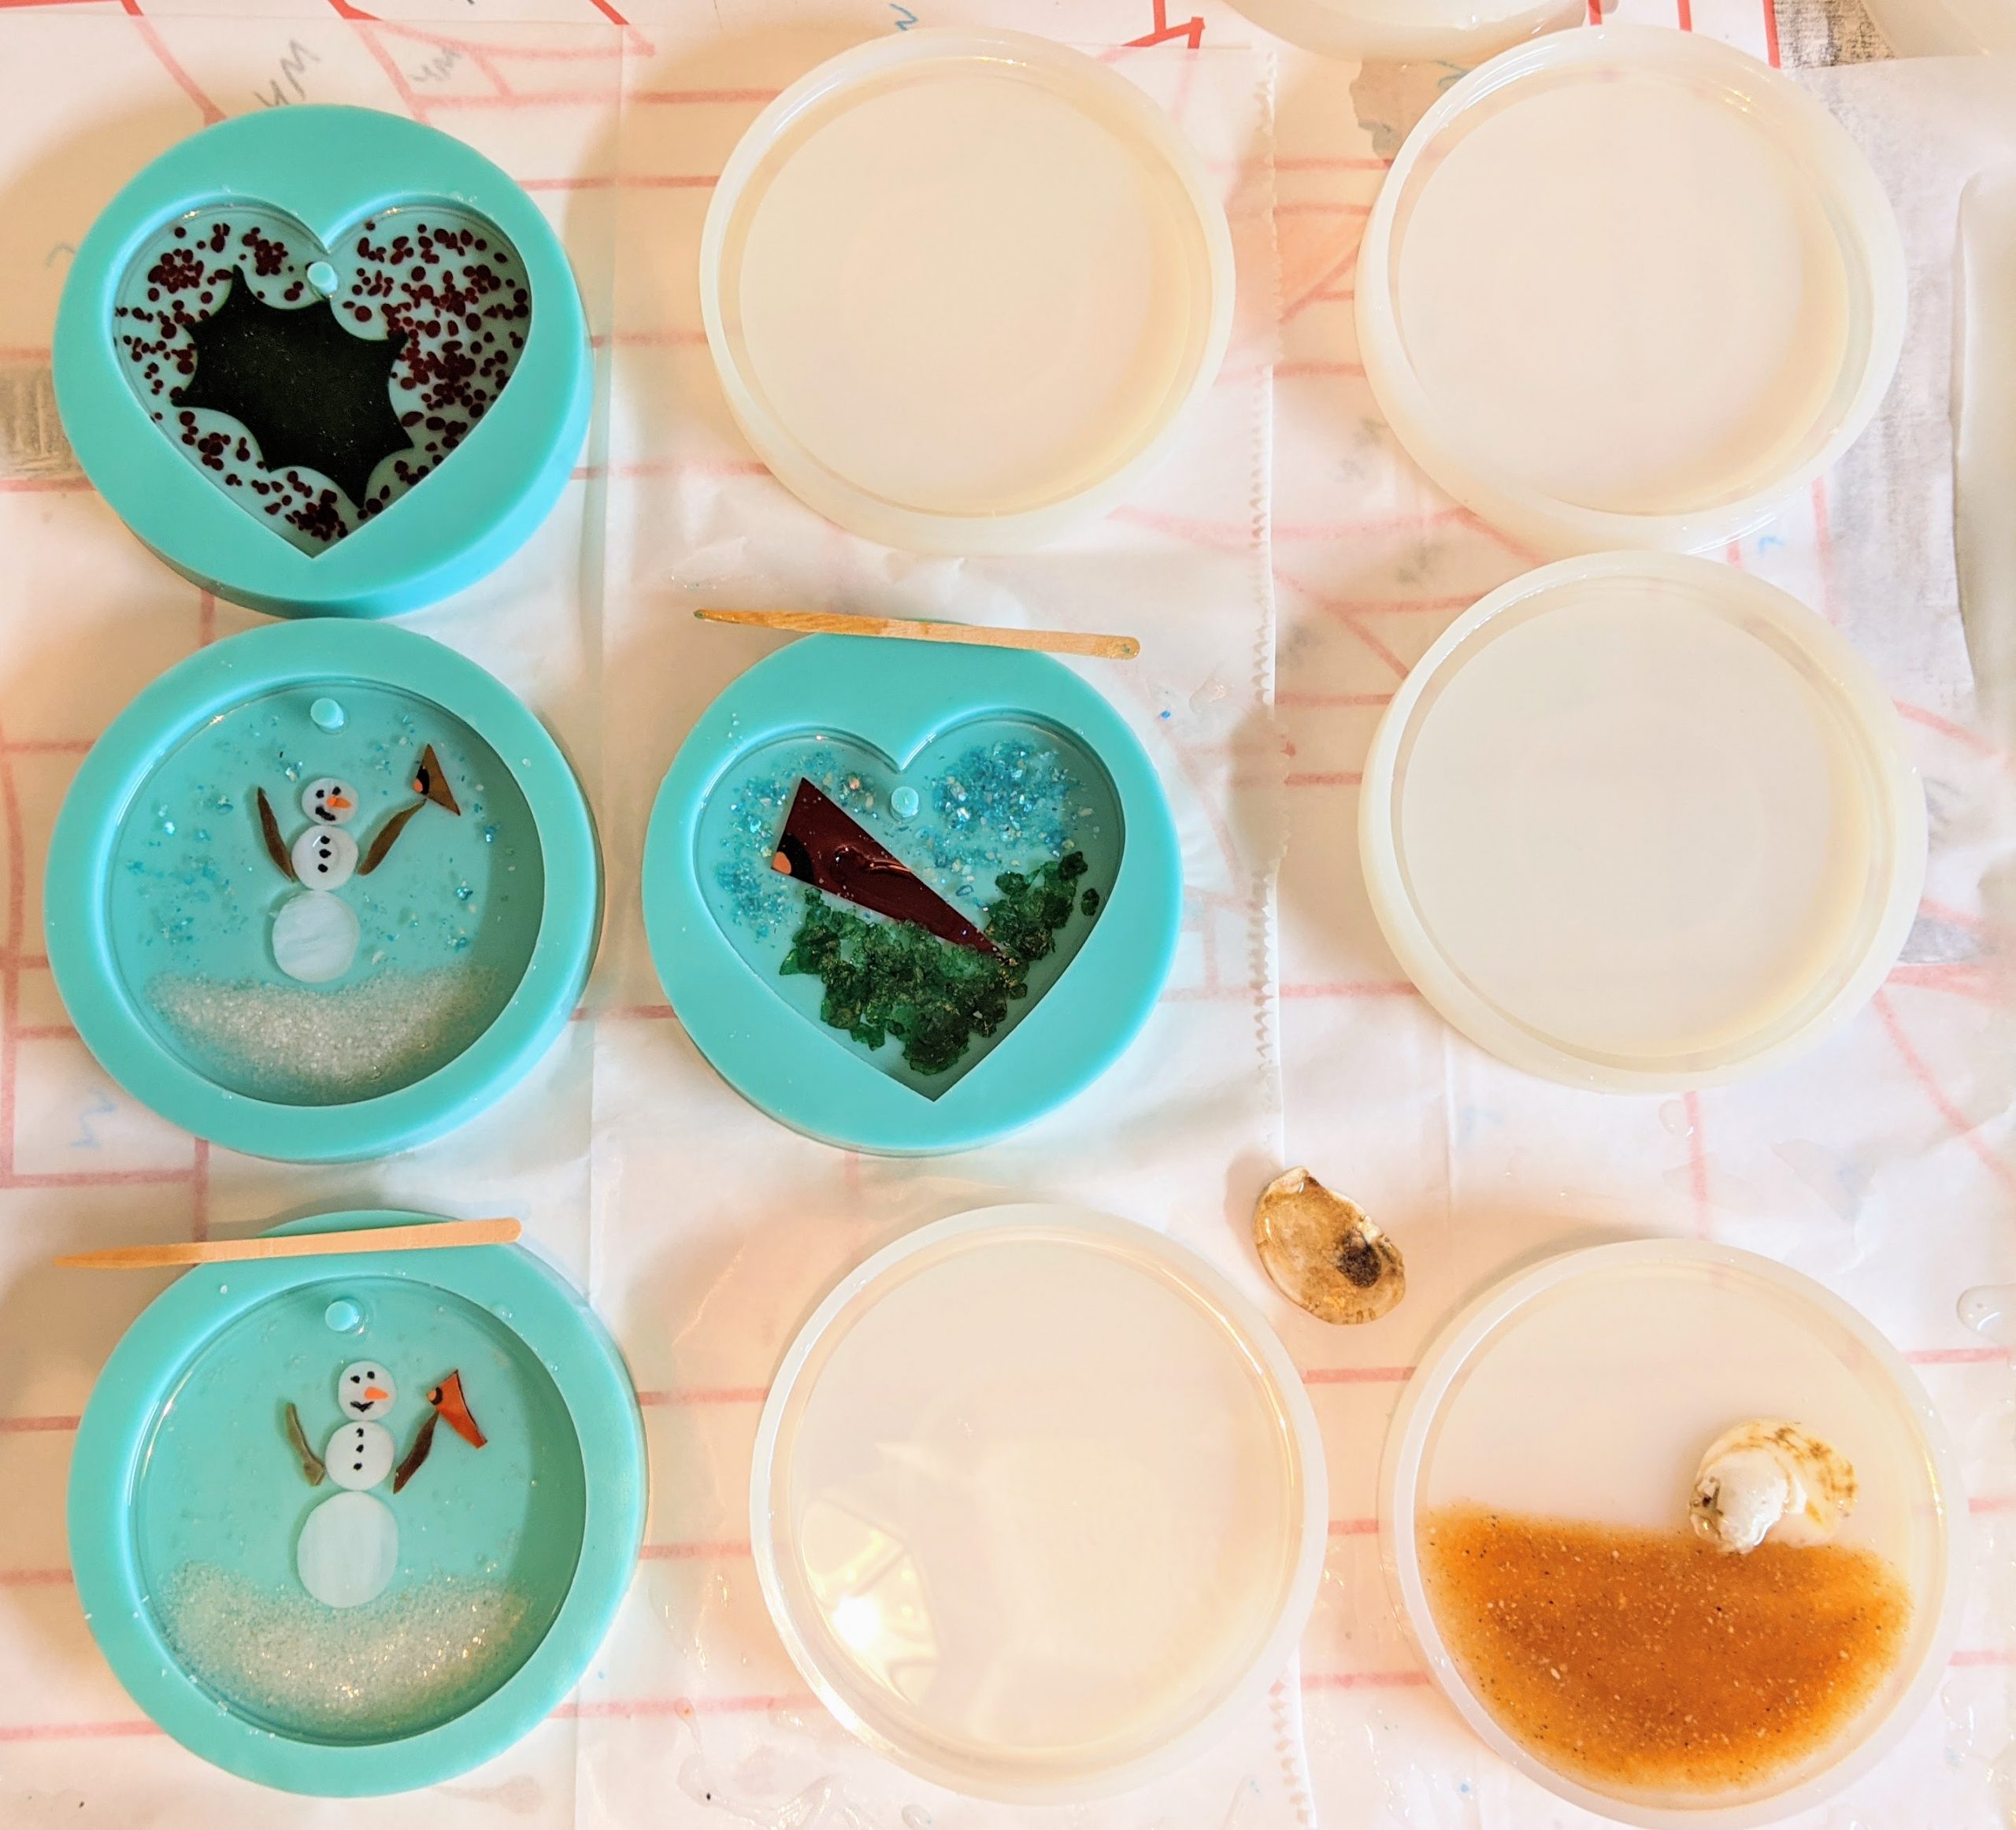
Today’s little ‘cheer-full’ projects! Second or third layers poured on the beachy coasters, first layer on all the others. I got some new colors of mica and other types of flitter / glitter from meyer-imports this week and I can’t wait to try them all out!
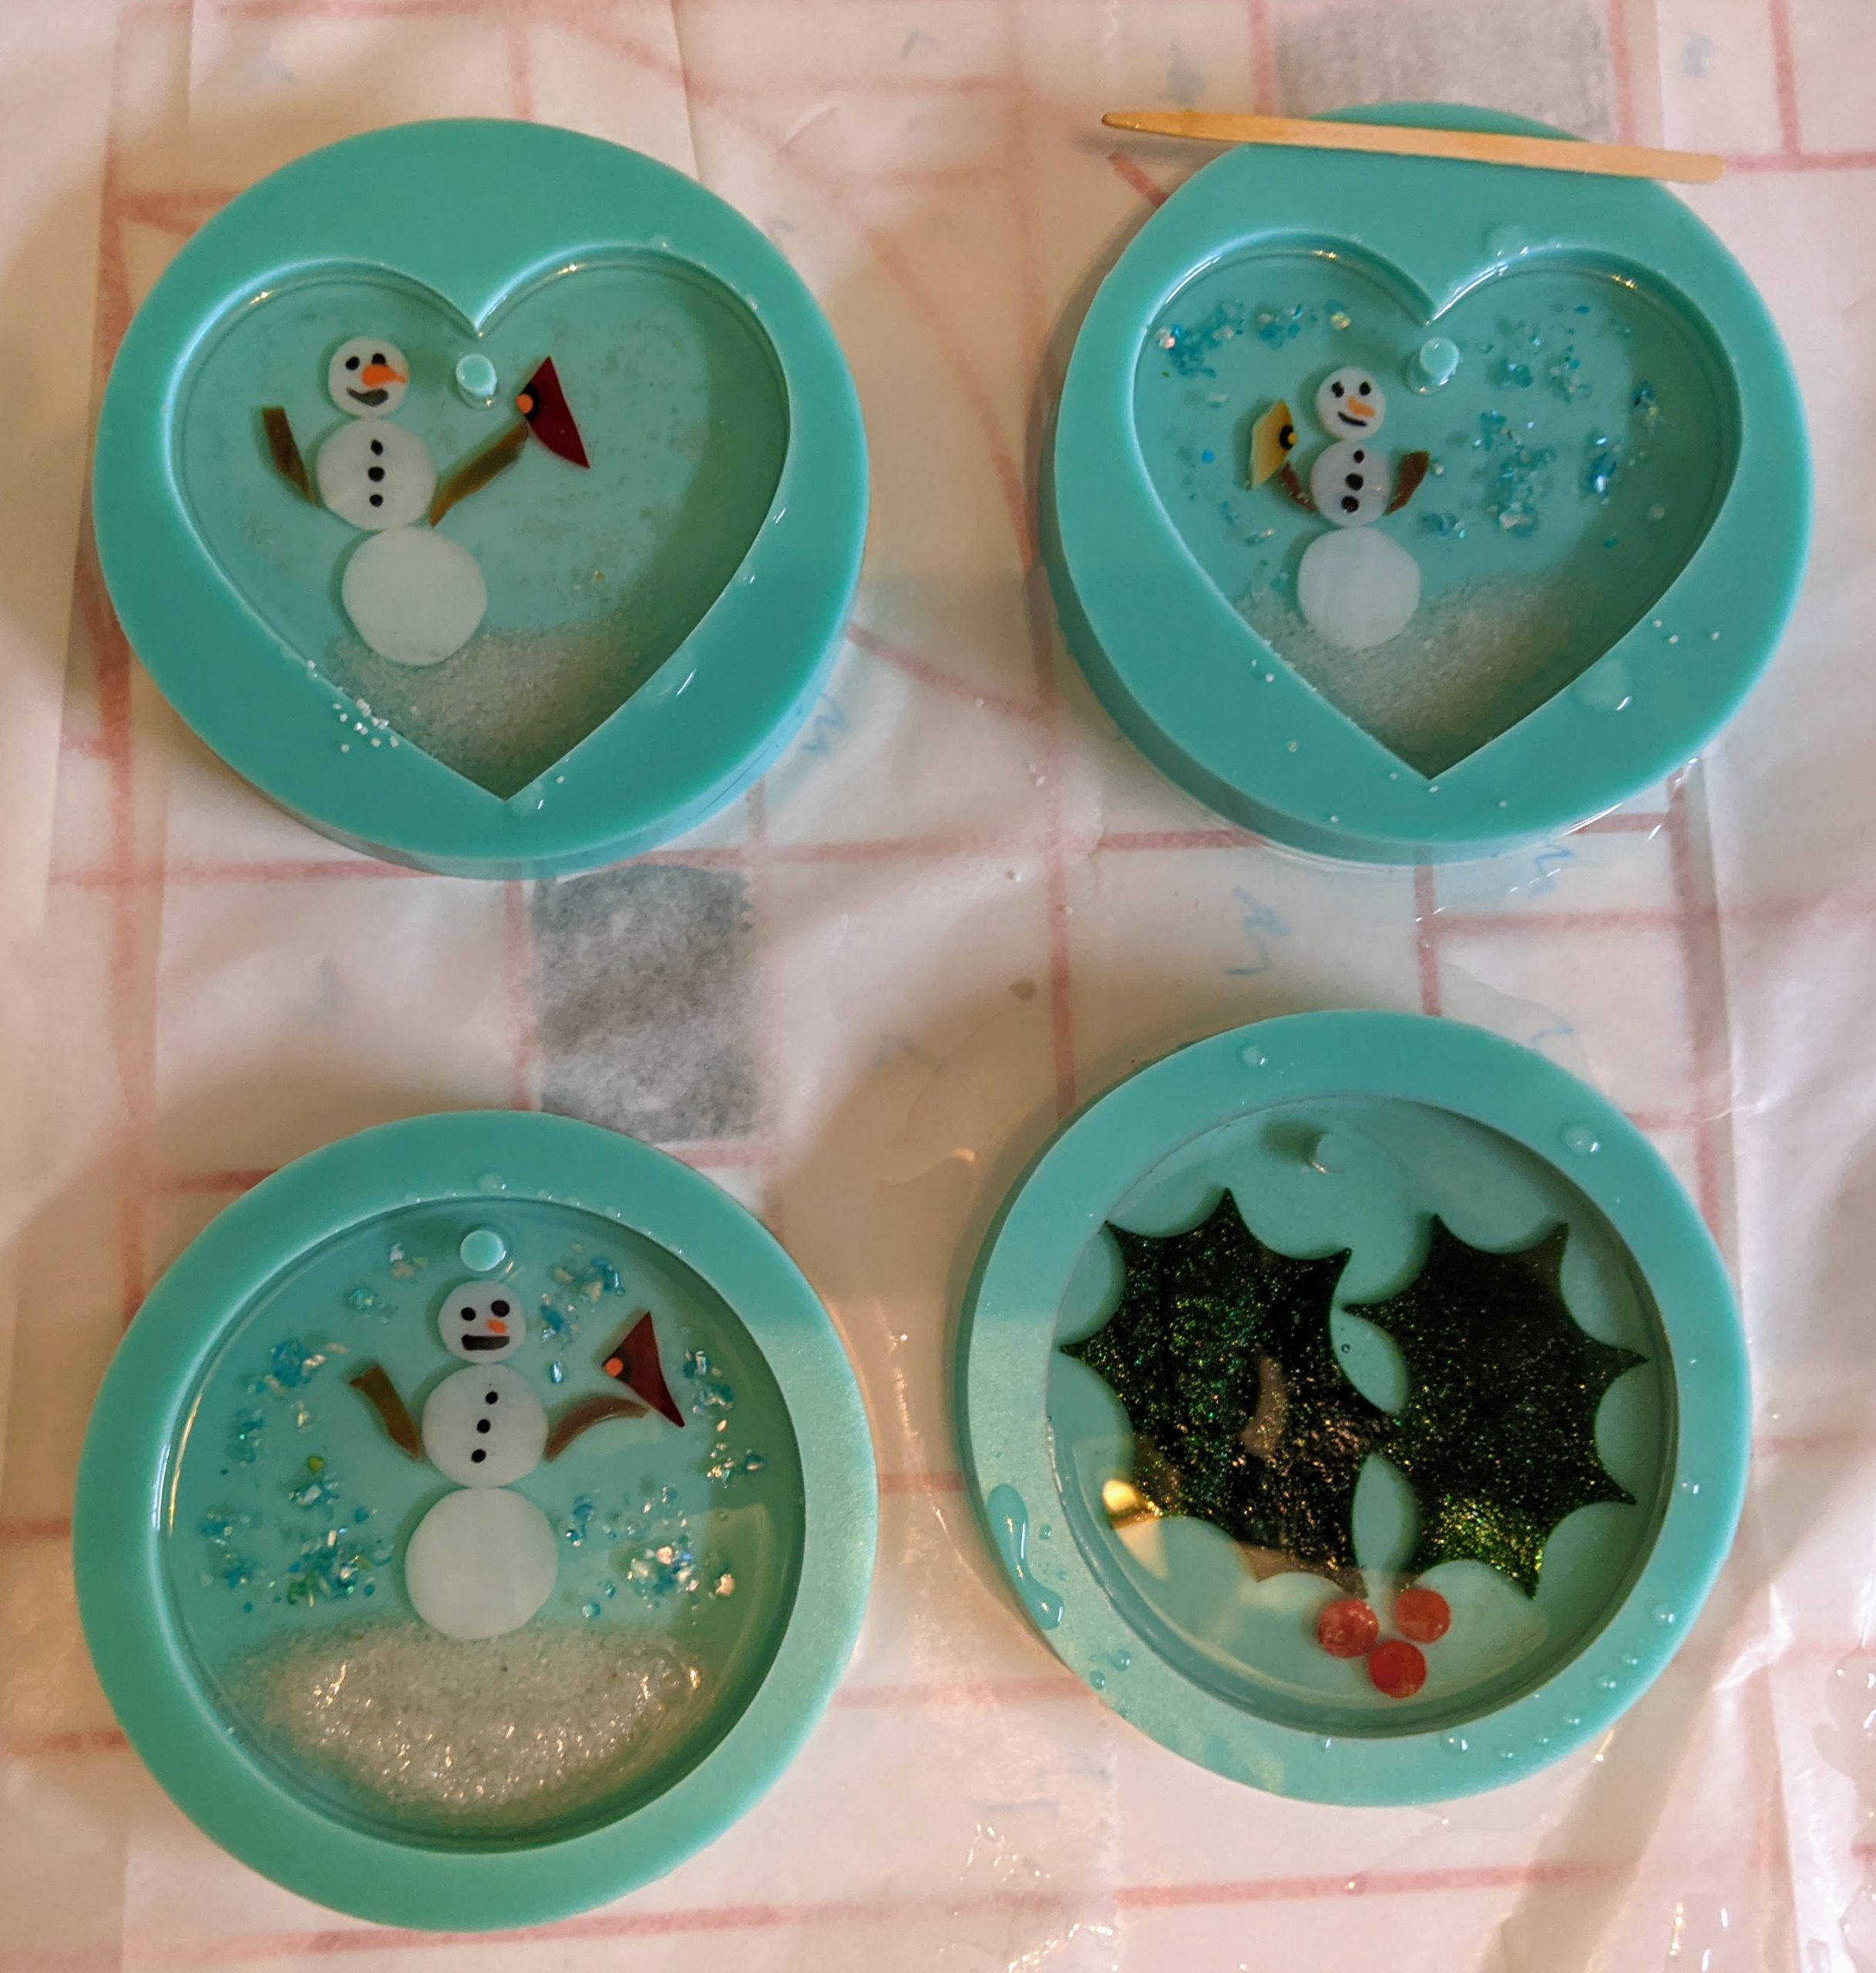
White molds are coasters, aqua molds are suncatchers / ornaments