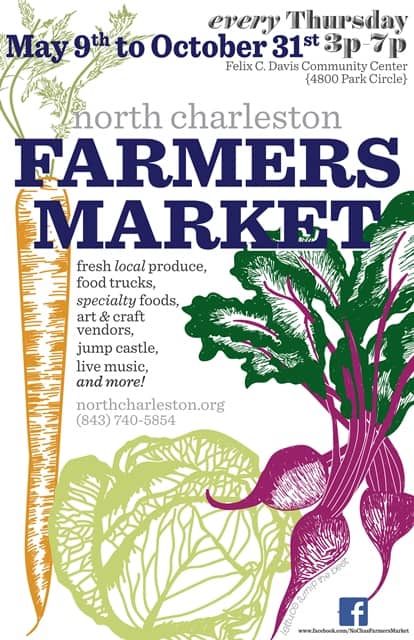
I will have a space at the N. Charleston Farmer’s Market in Park Circle every Thursday from 3-7 pm during September and October (including Halloween!!). Mark your calendar and plan to come out for a fun time!
Glass of Sherry
I will have a space at the N. Charleston Farmer’s Market in Park Circle every Thursday from 3-7 pm during September and October (including Halloween!!). Mark your calendar and plan to come out for a fun time!
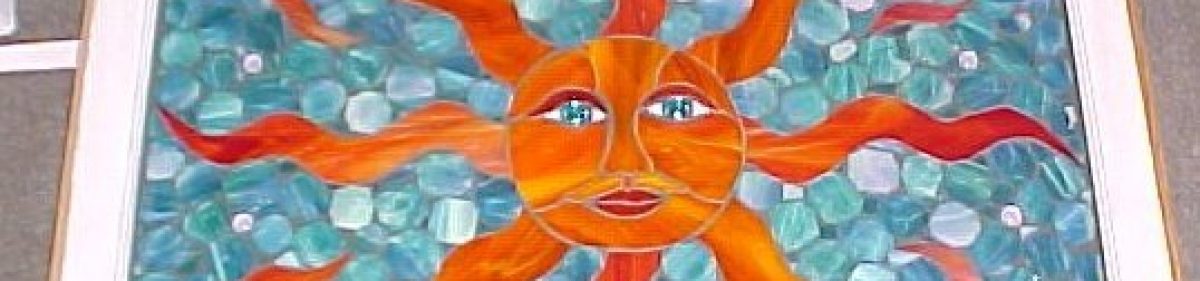
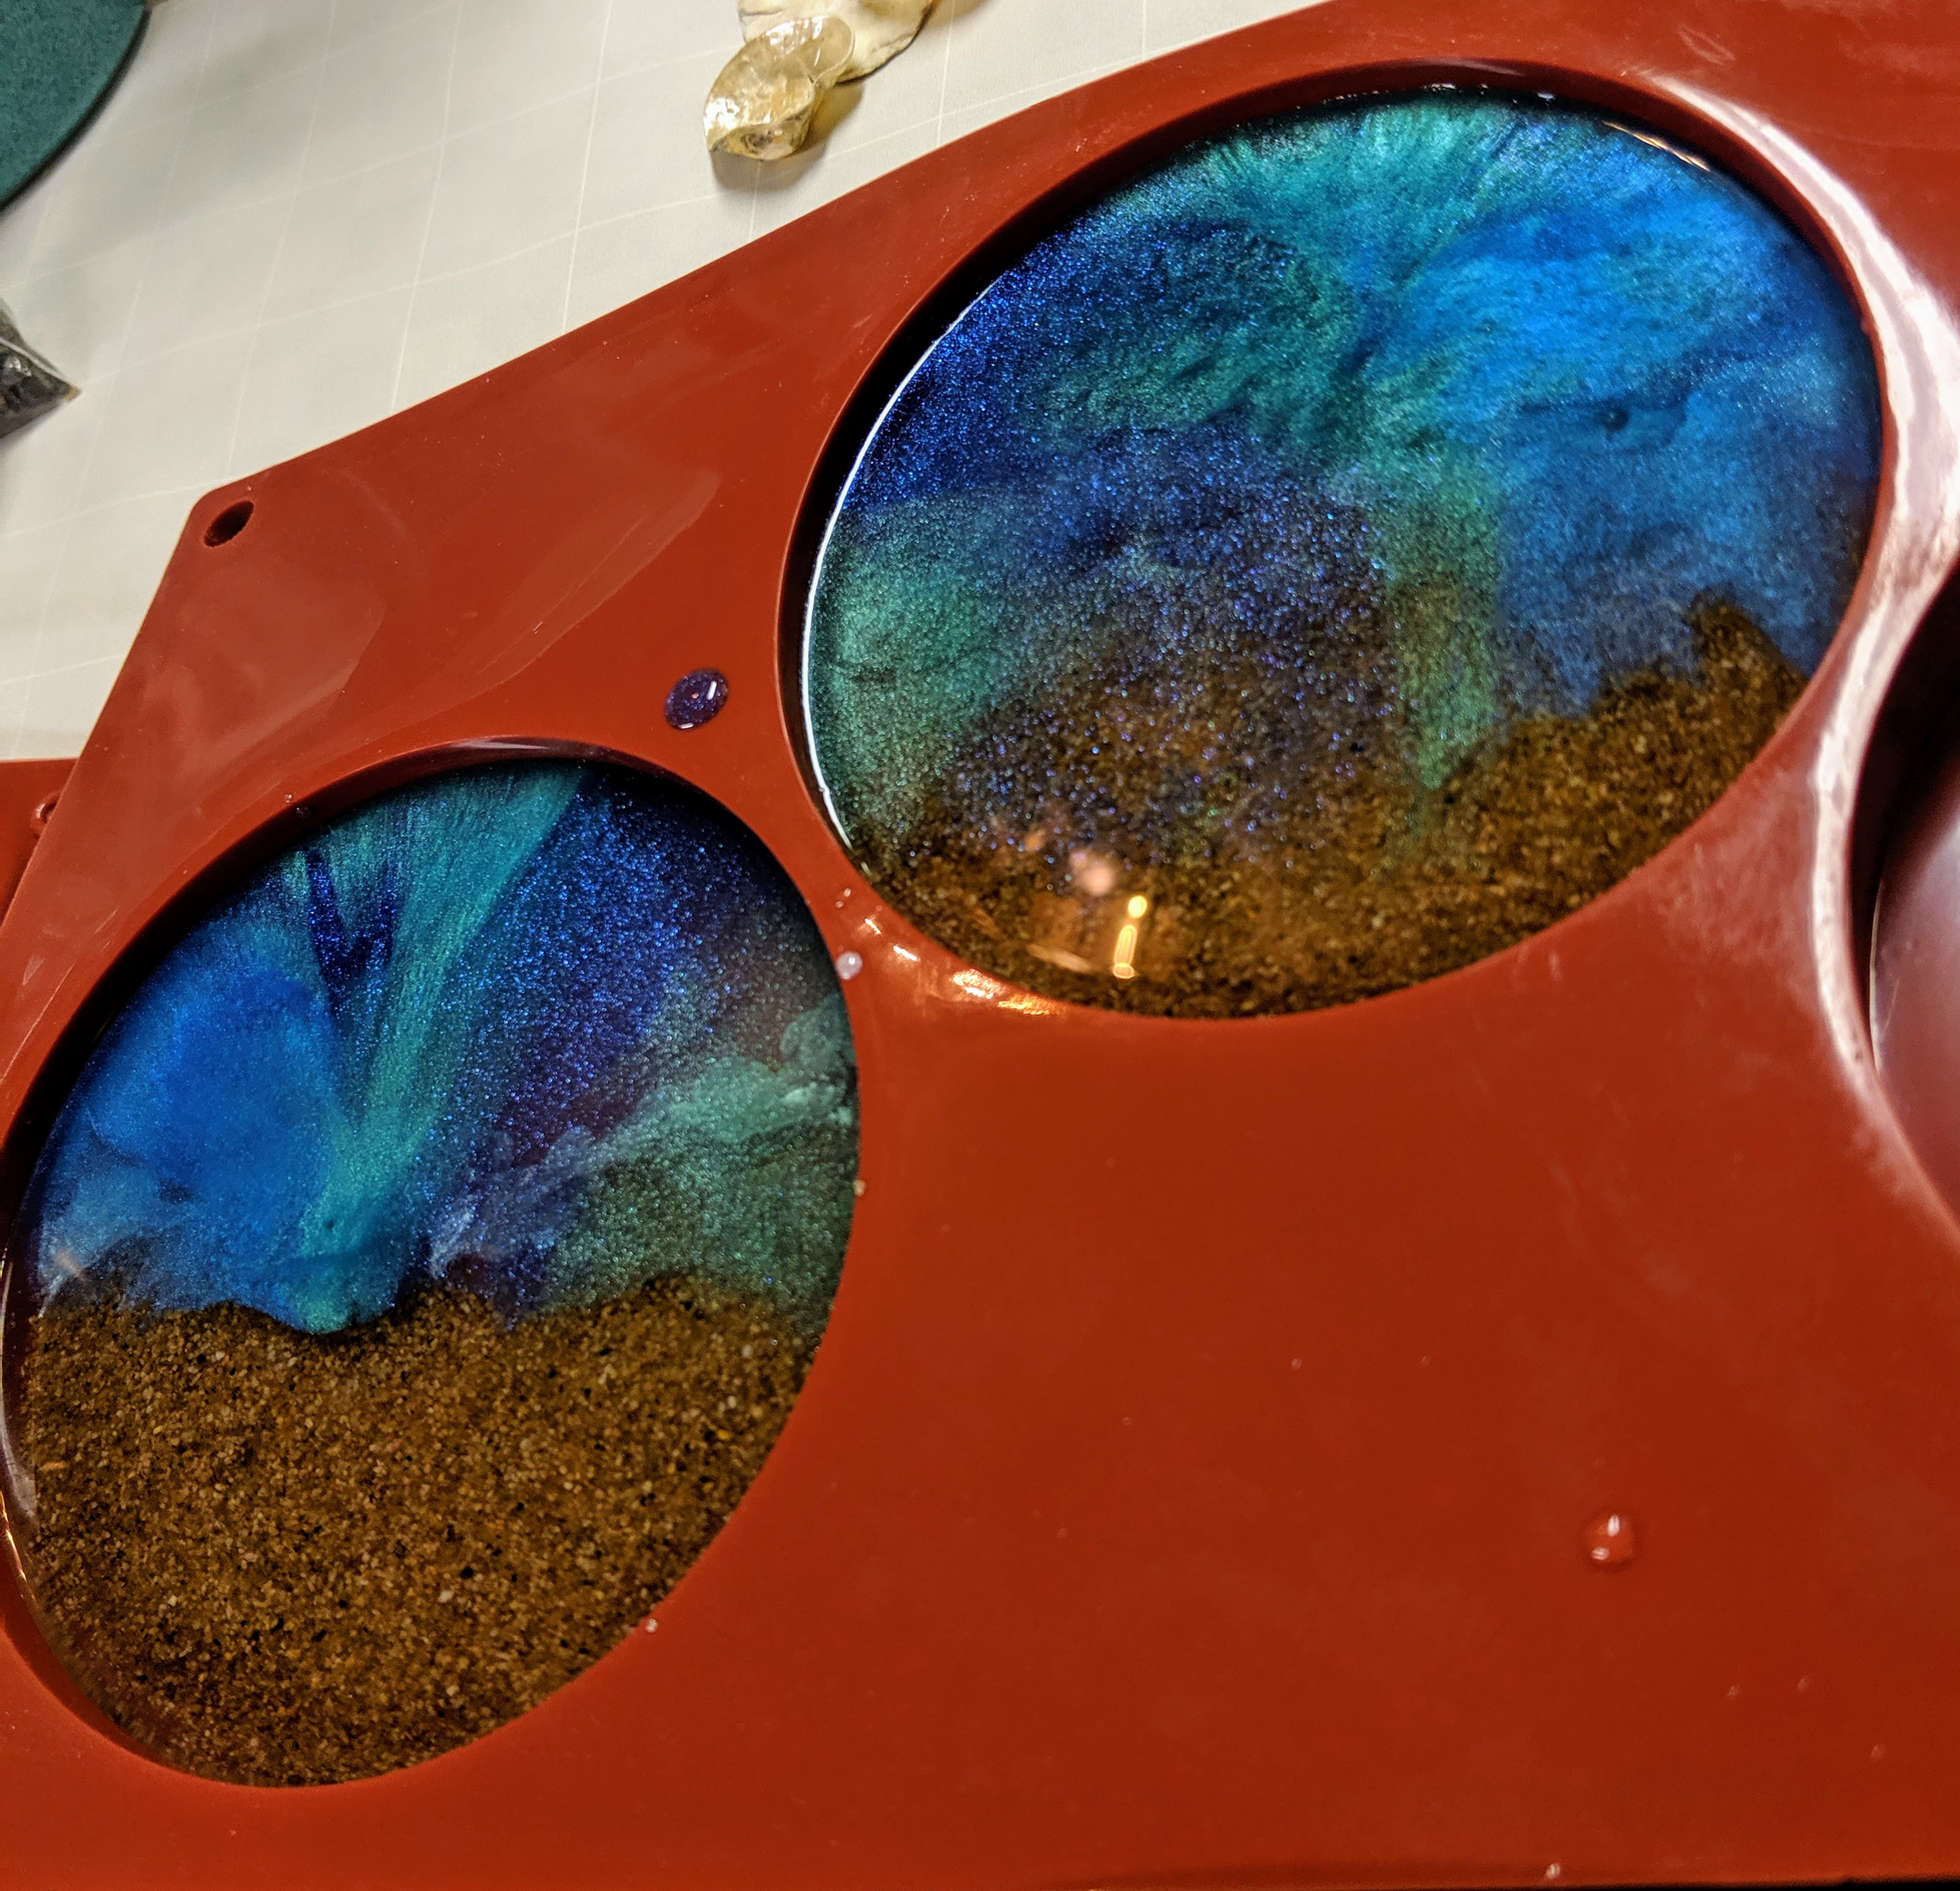
Today I was able to see how my second attempt at pigmented coasters with bubbles turned out. Overall, they are OK, but not quite to where I want them to be. I also put the last coat of paint on the window frame I’m going to use for my next mosaic project, which I’m thinking about using for a sun theme, or perhaps an aquarium.
The white pigment spread out more than I wanted, so they aren’t defining the edge of the waves as much as I had hoped. I think if I let the resin gel a bit more before I put the bubbles layer in place, then let the bubbles gel before pouring the blue pigmented resin for the water, that will give me more control. I will try that next.
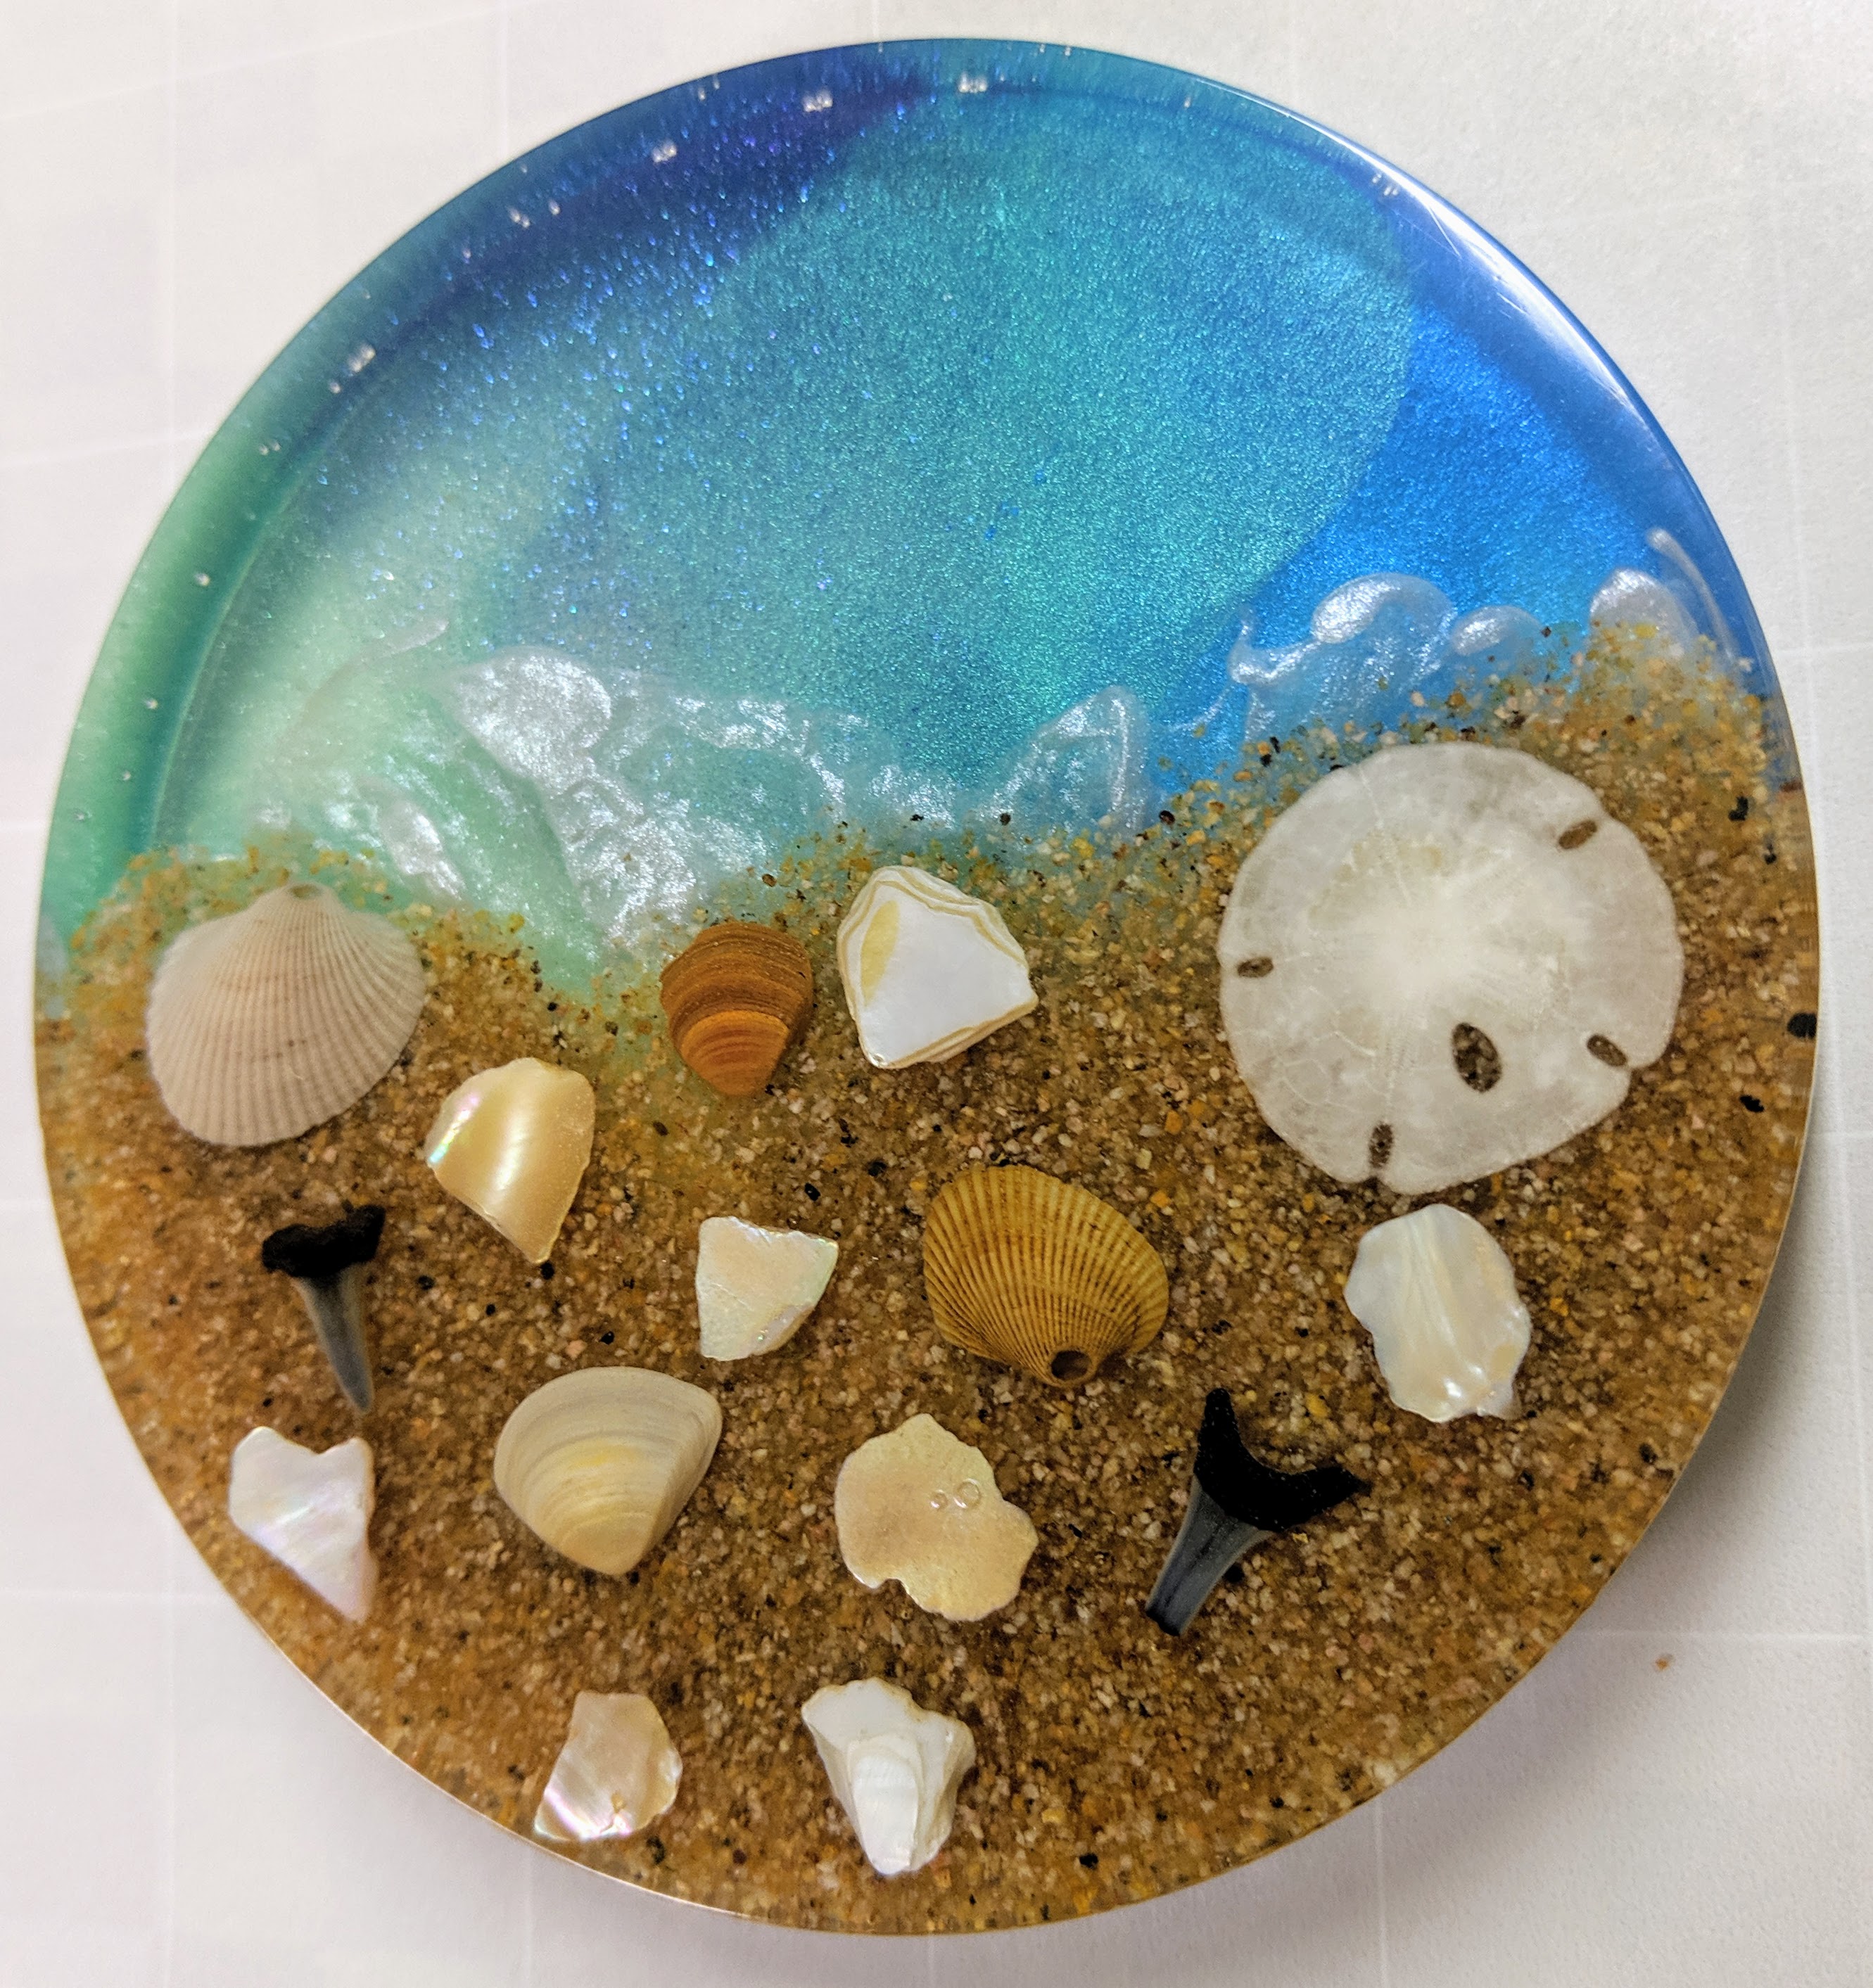
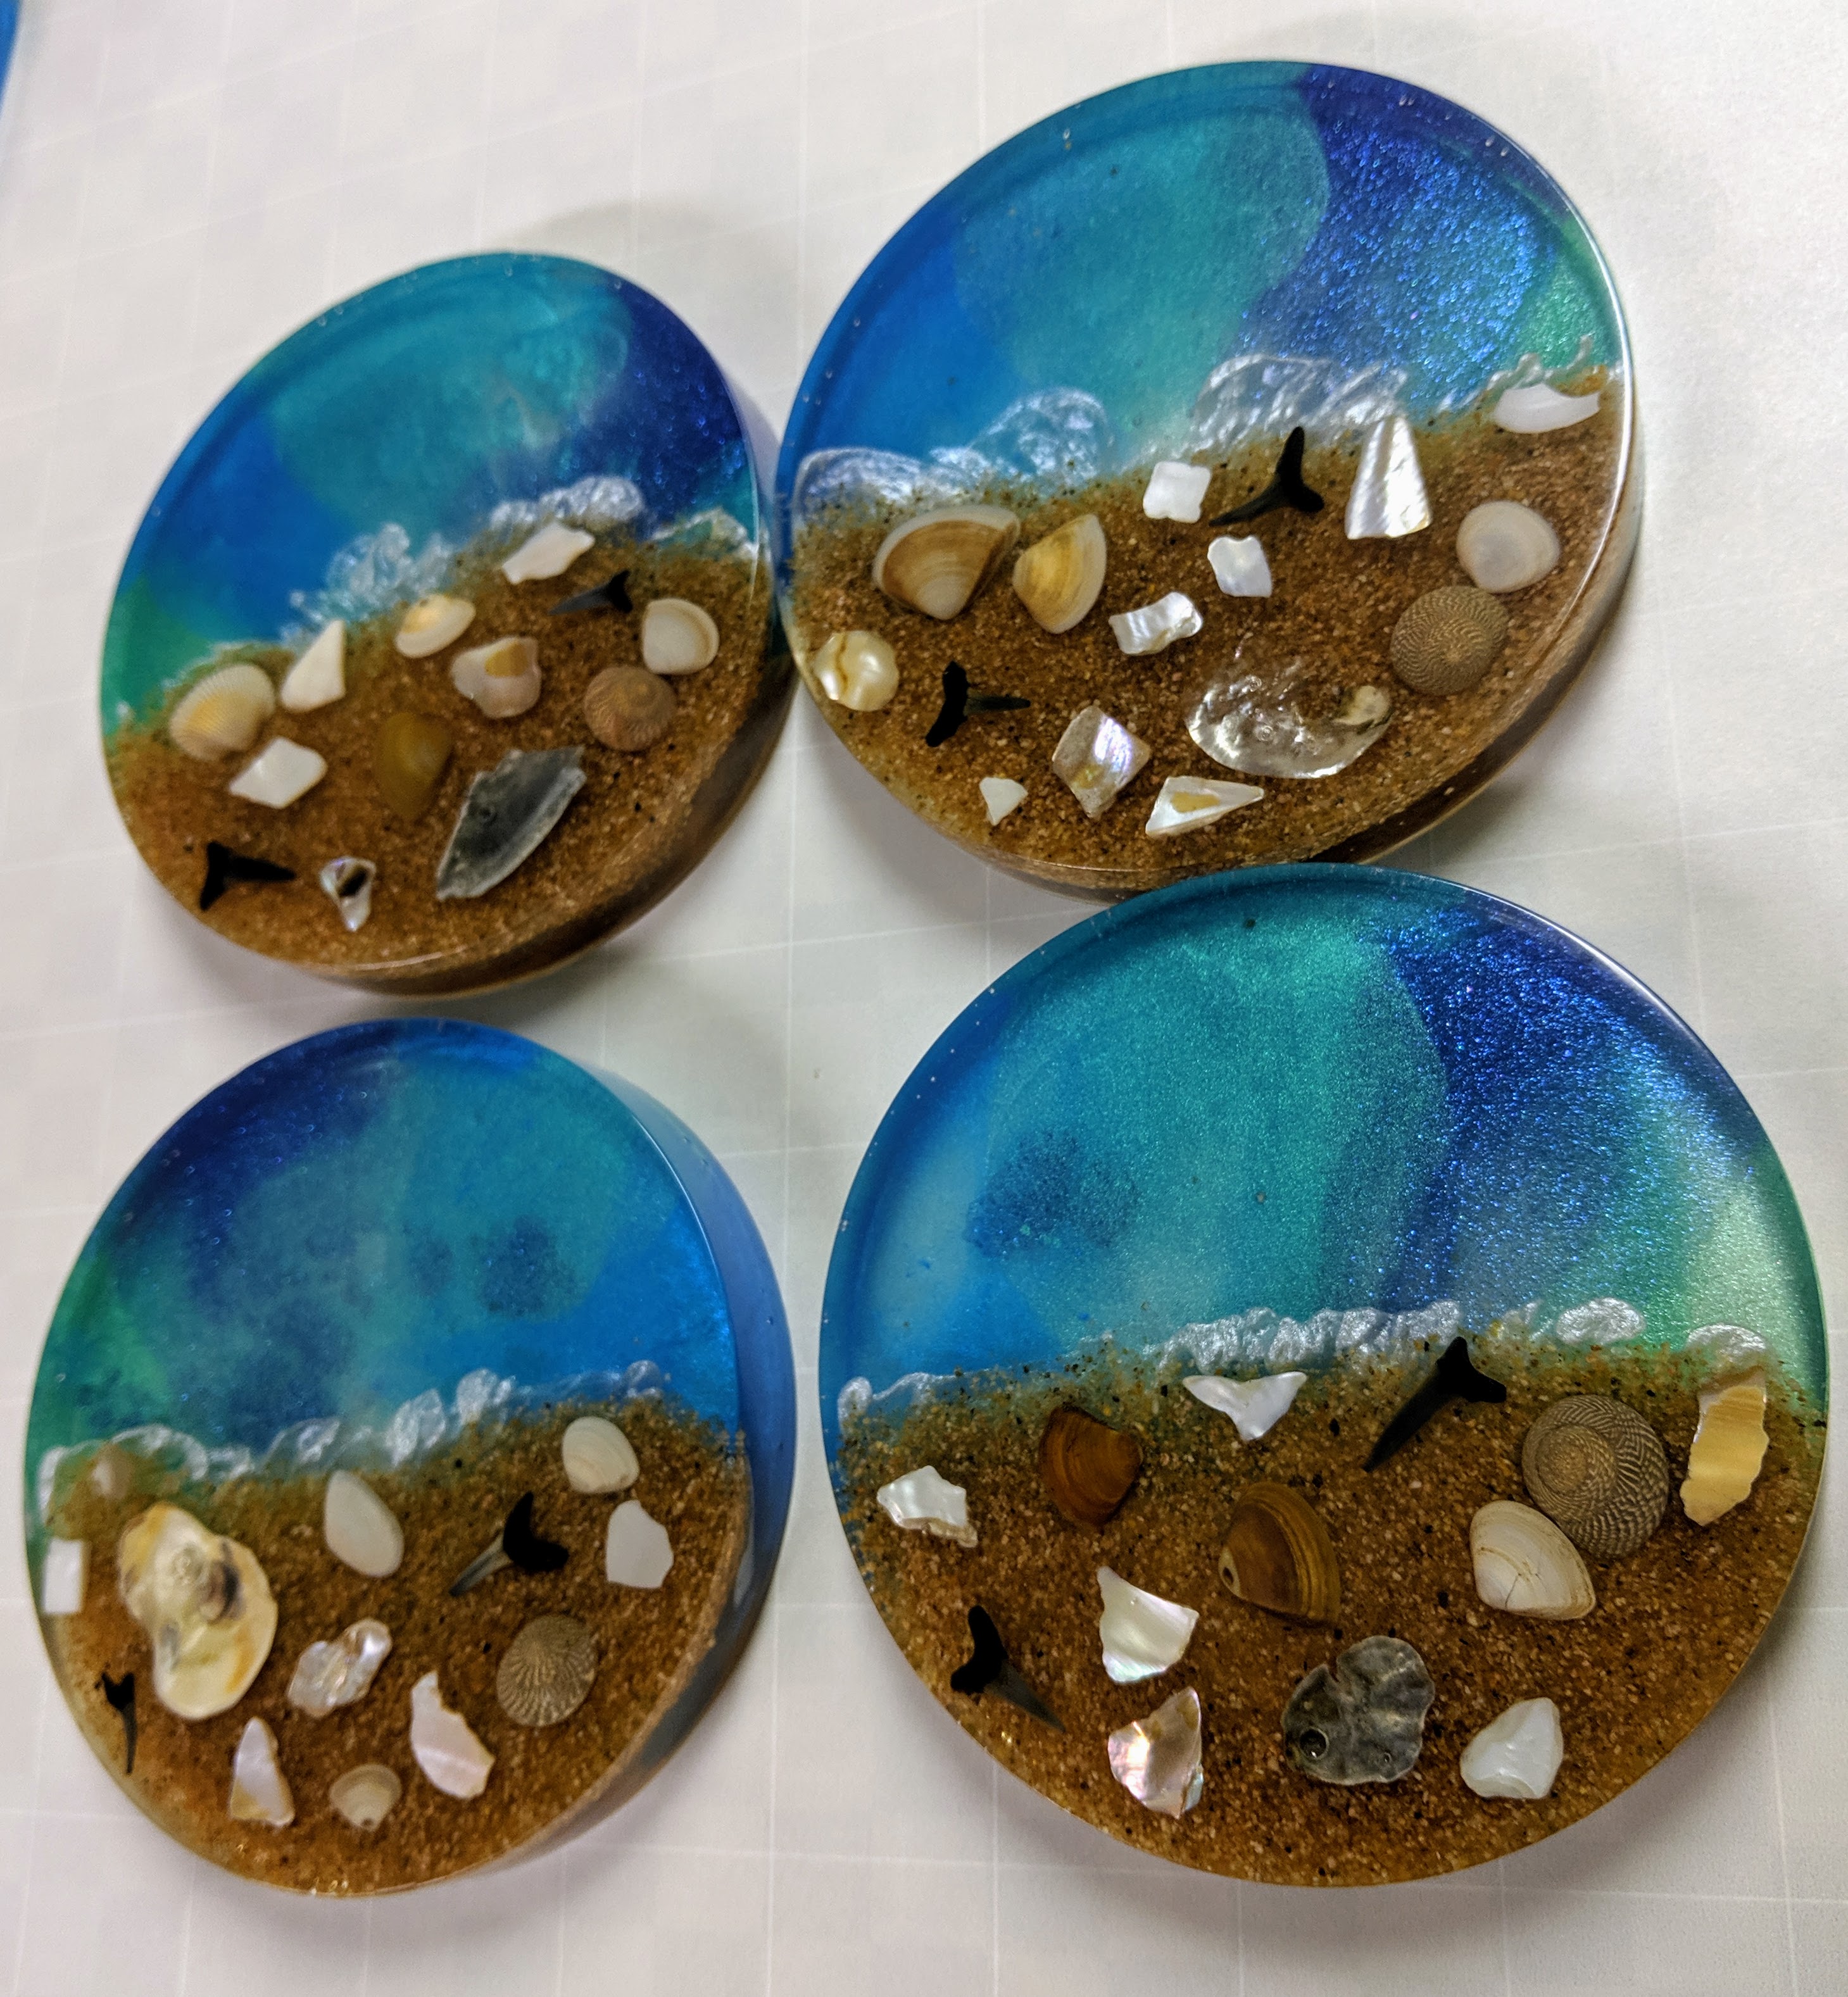
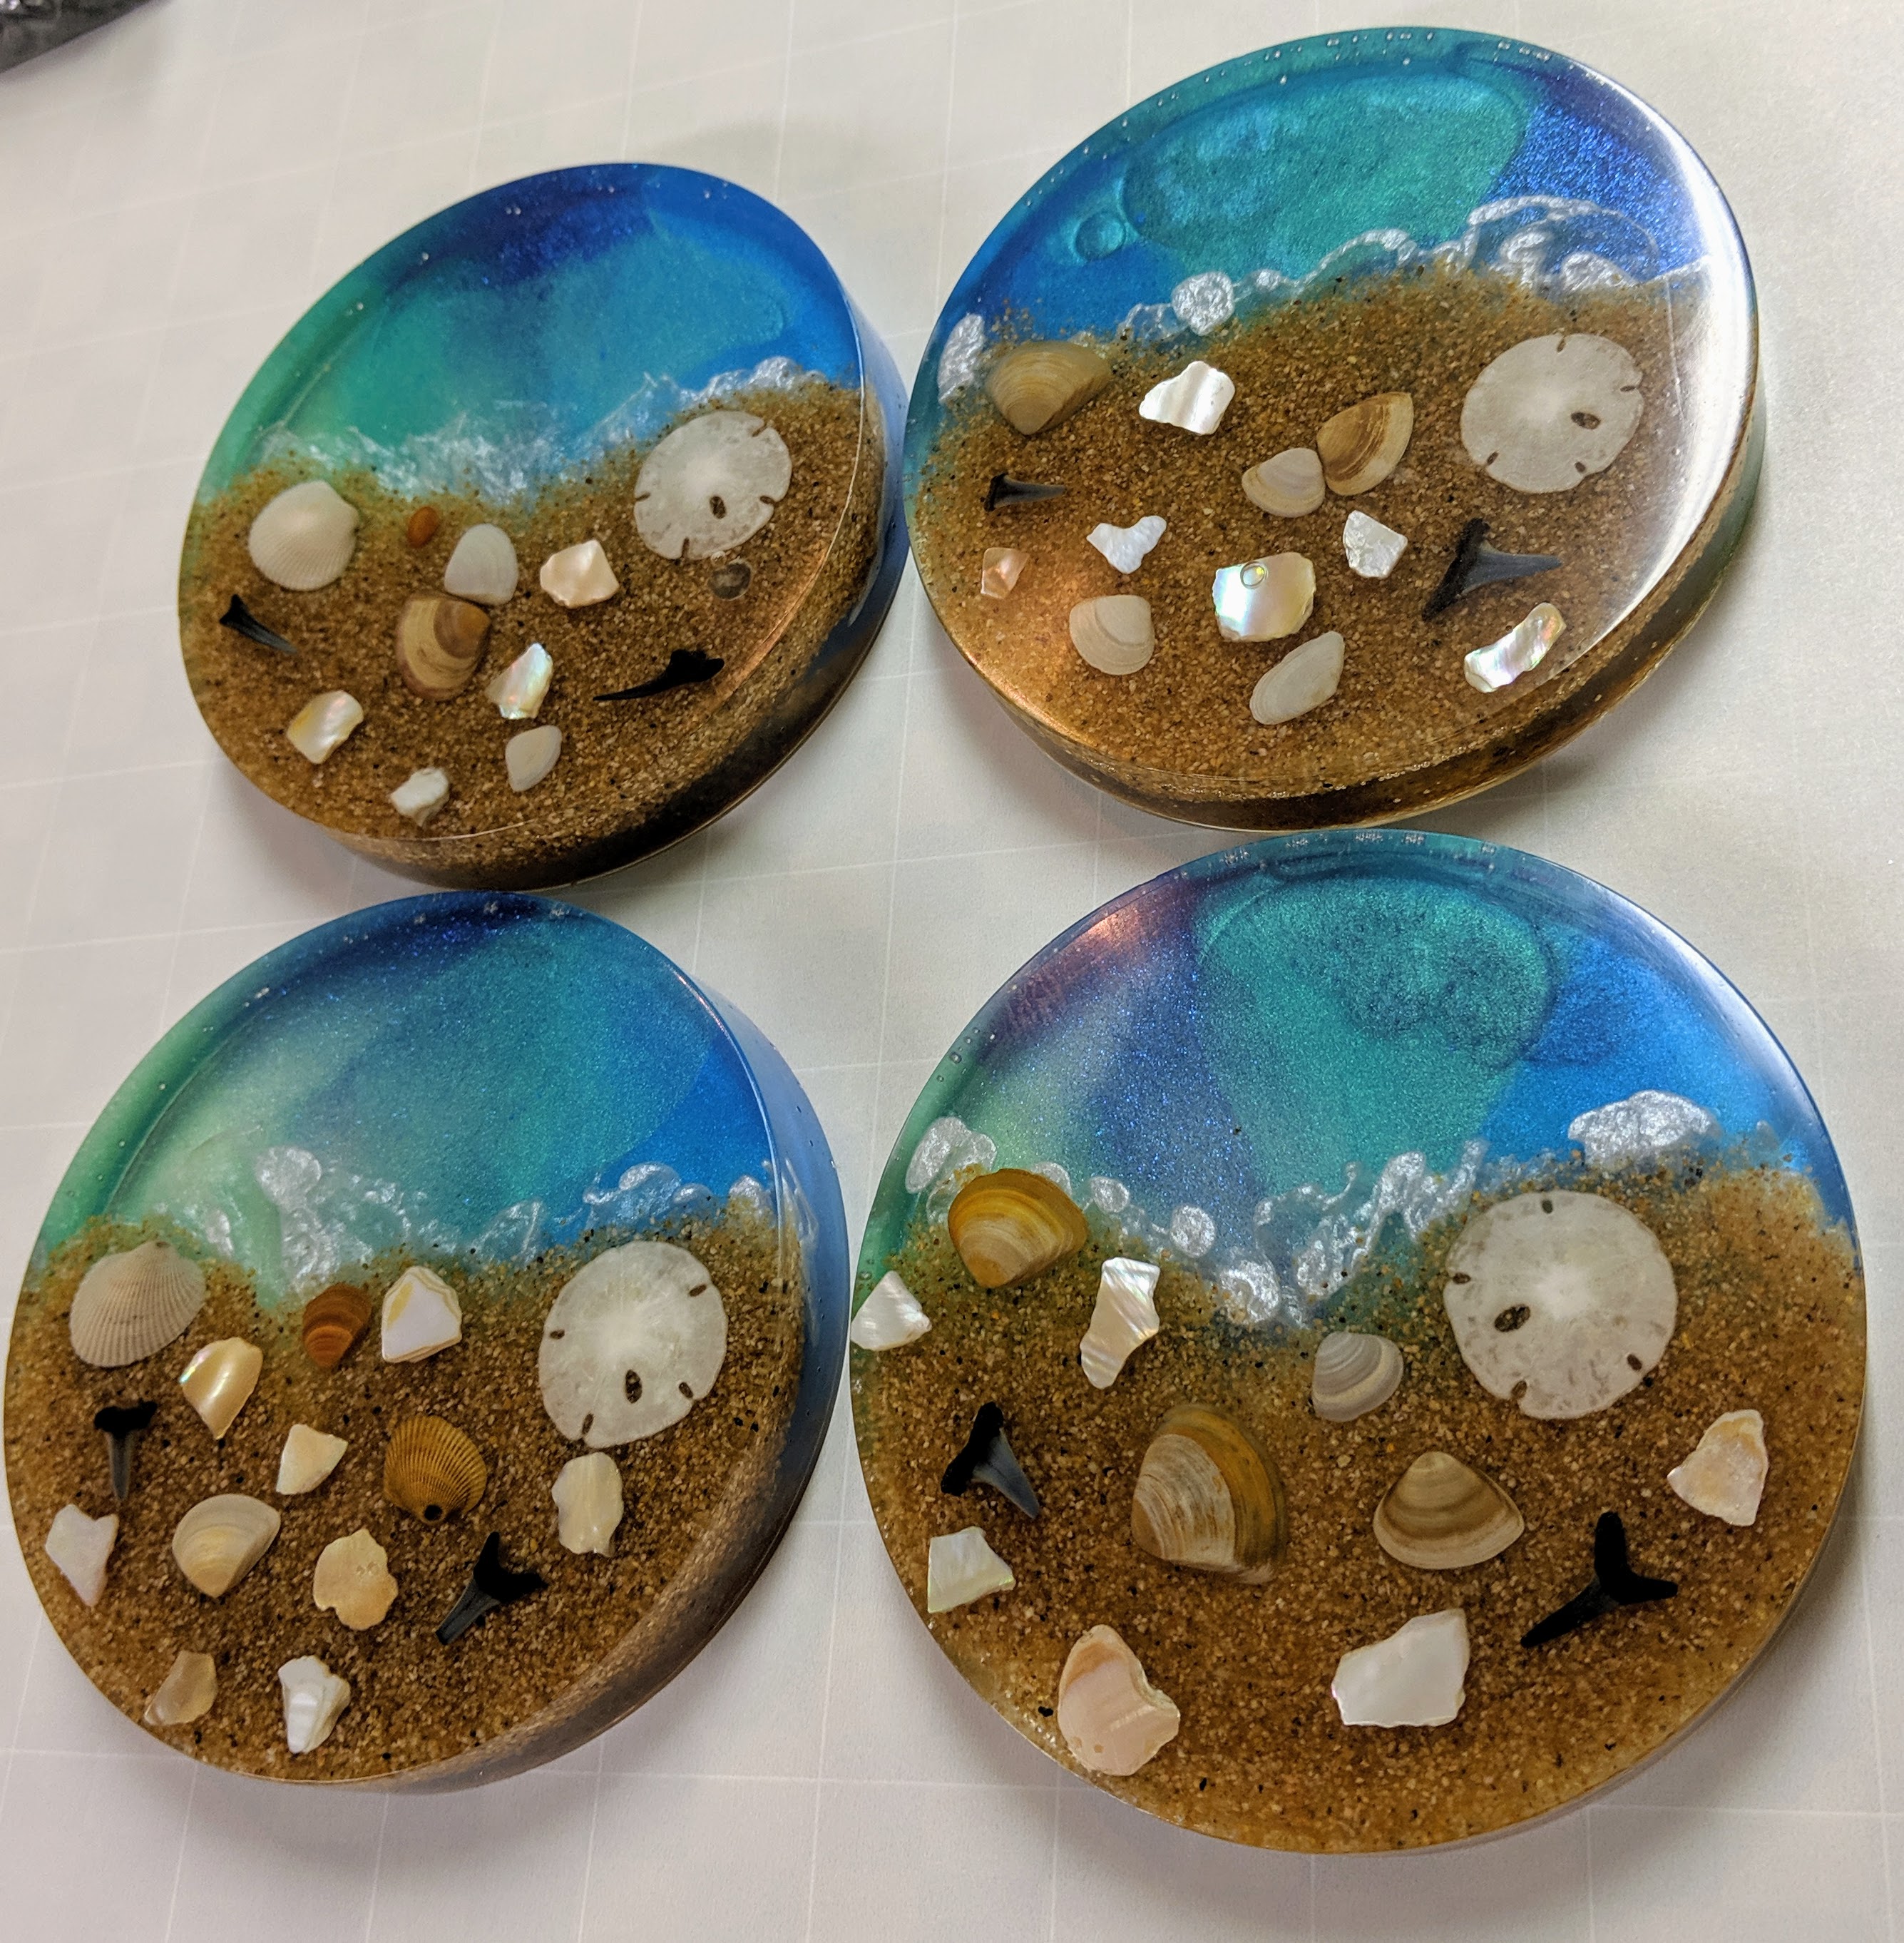
I took an informal “bubbles or no bubbles” poll amongst my friends to see whether they preferred the beach coasters with the bit of white pigment (for bubbles) between the water and the beach. Bubbles won, so it motivated me to continue working on my technique for pouring these. I like the bubbles, too, but it can be a challenge to get the bubbles in the right spot. Yesterday I poured the first layer of a batch of coasters and put the shells in place in preparation for some practice.
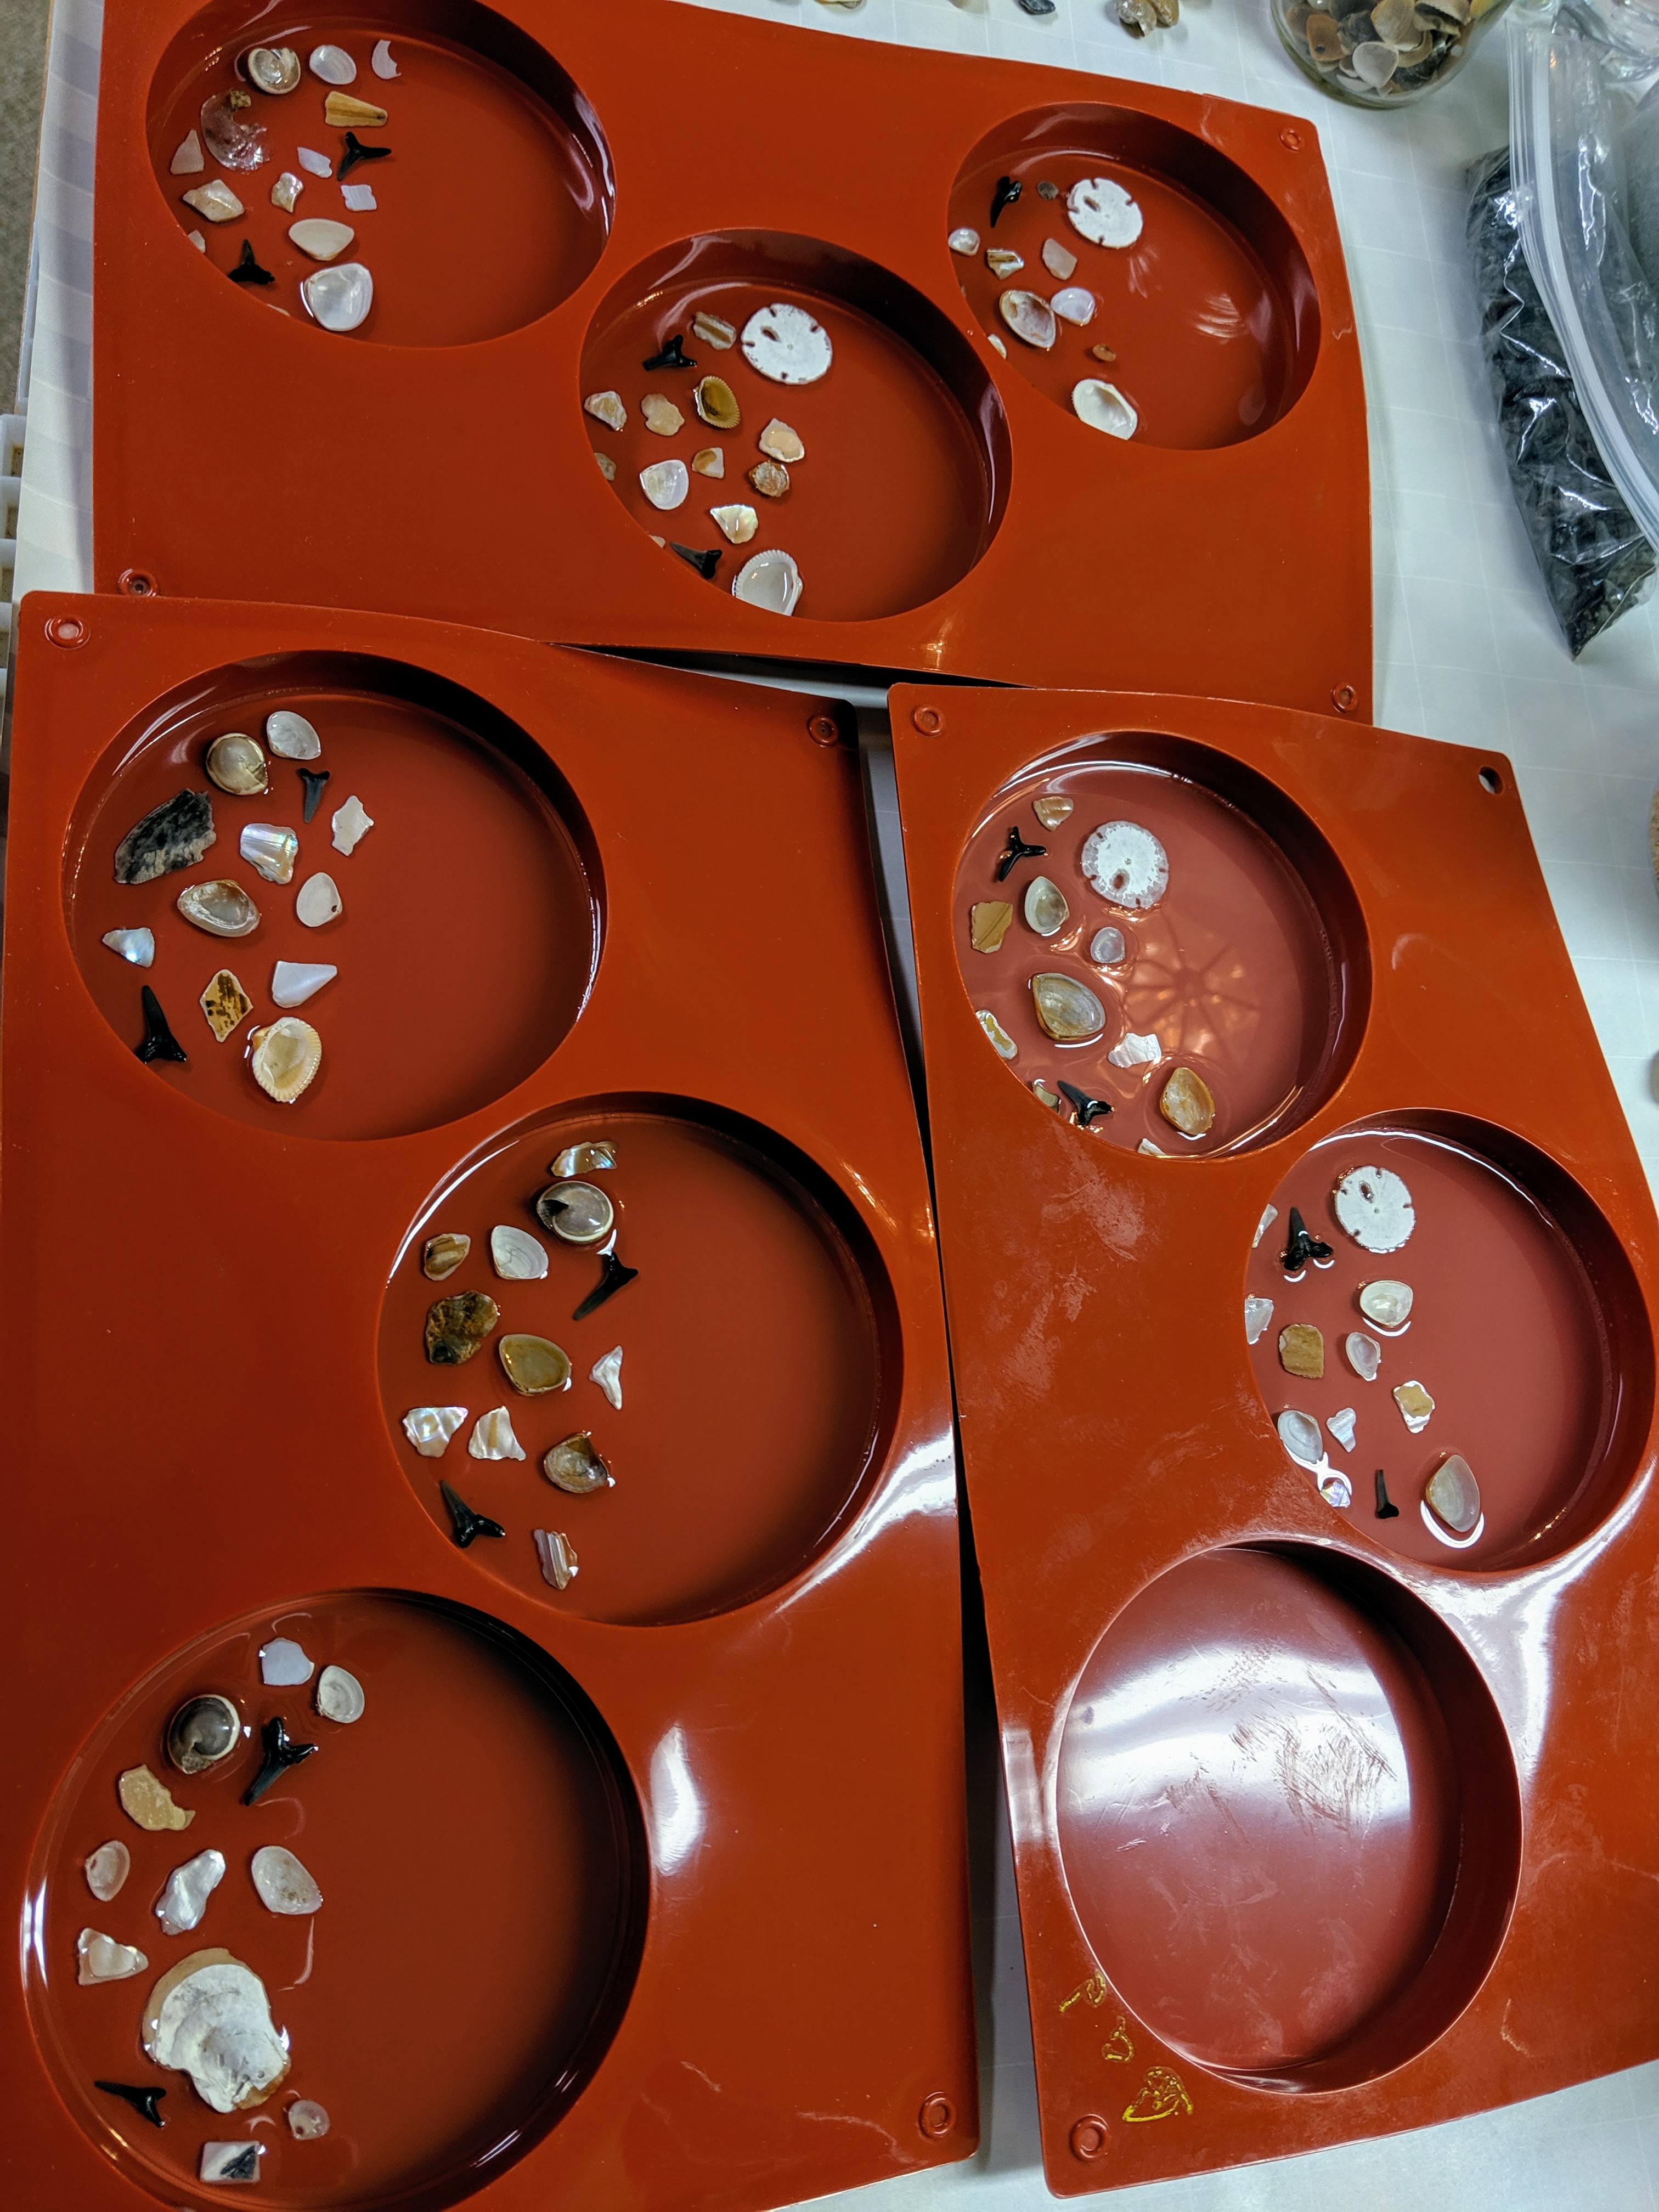
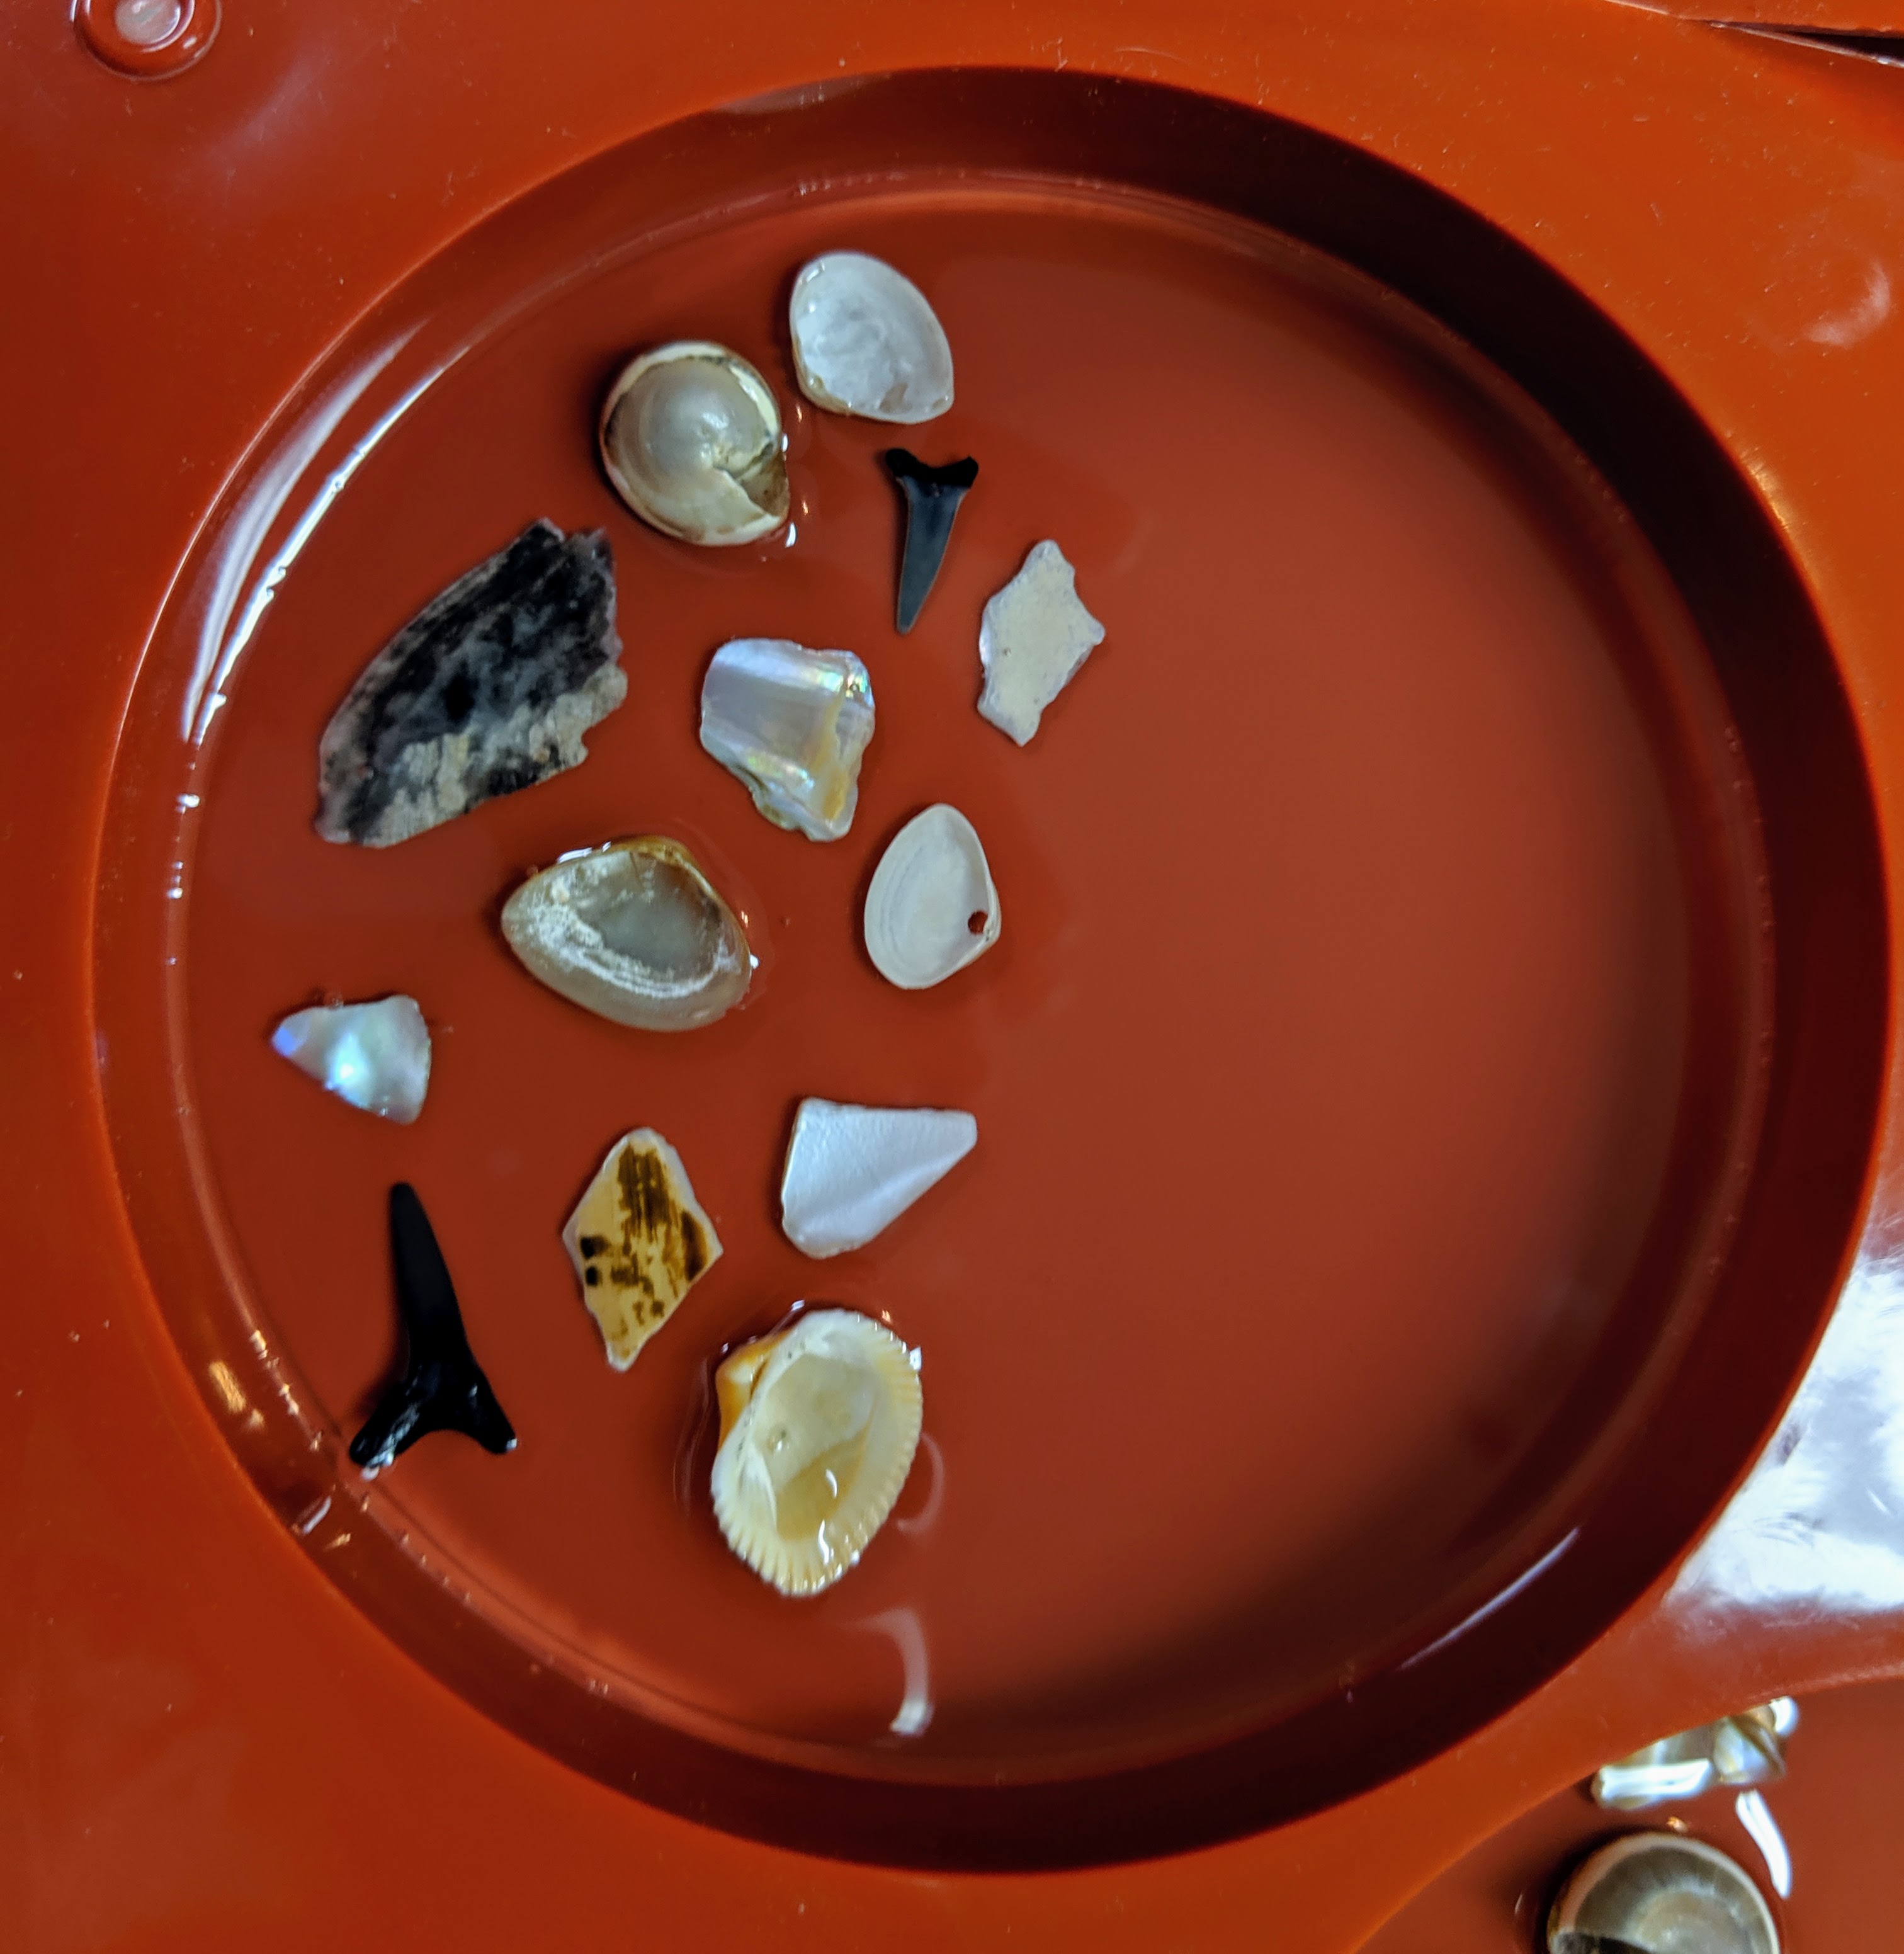
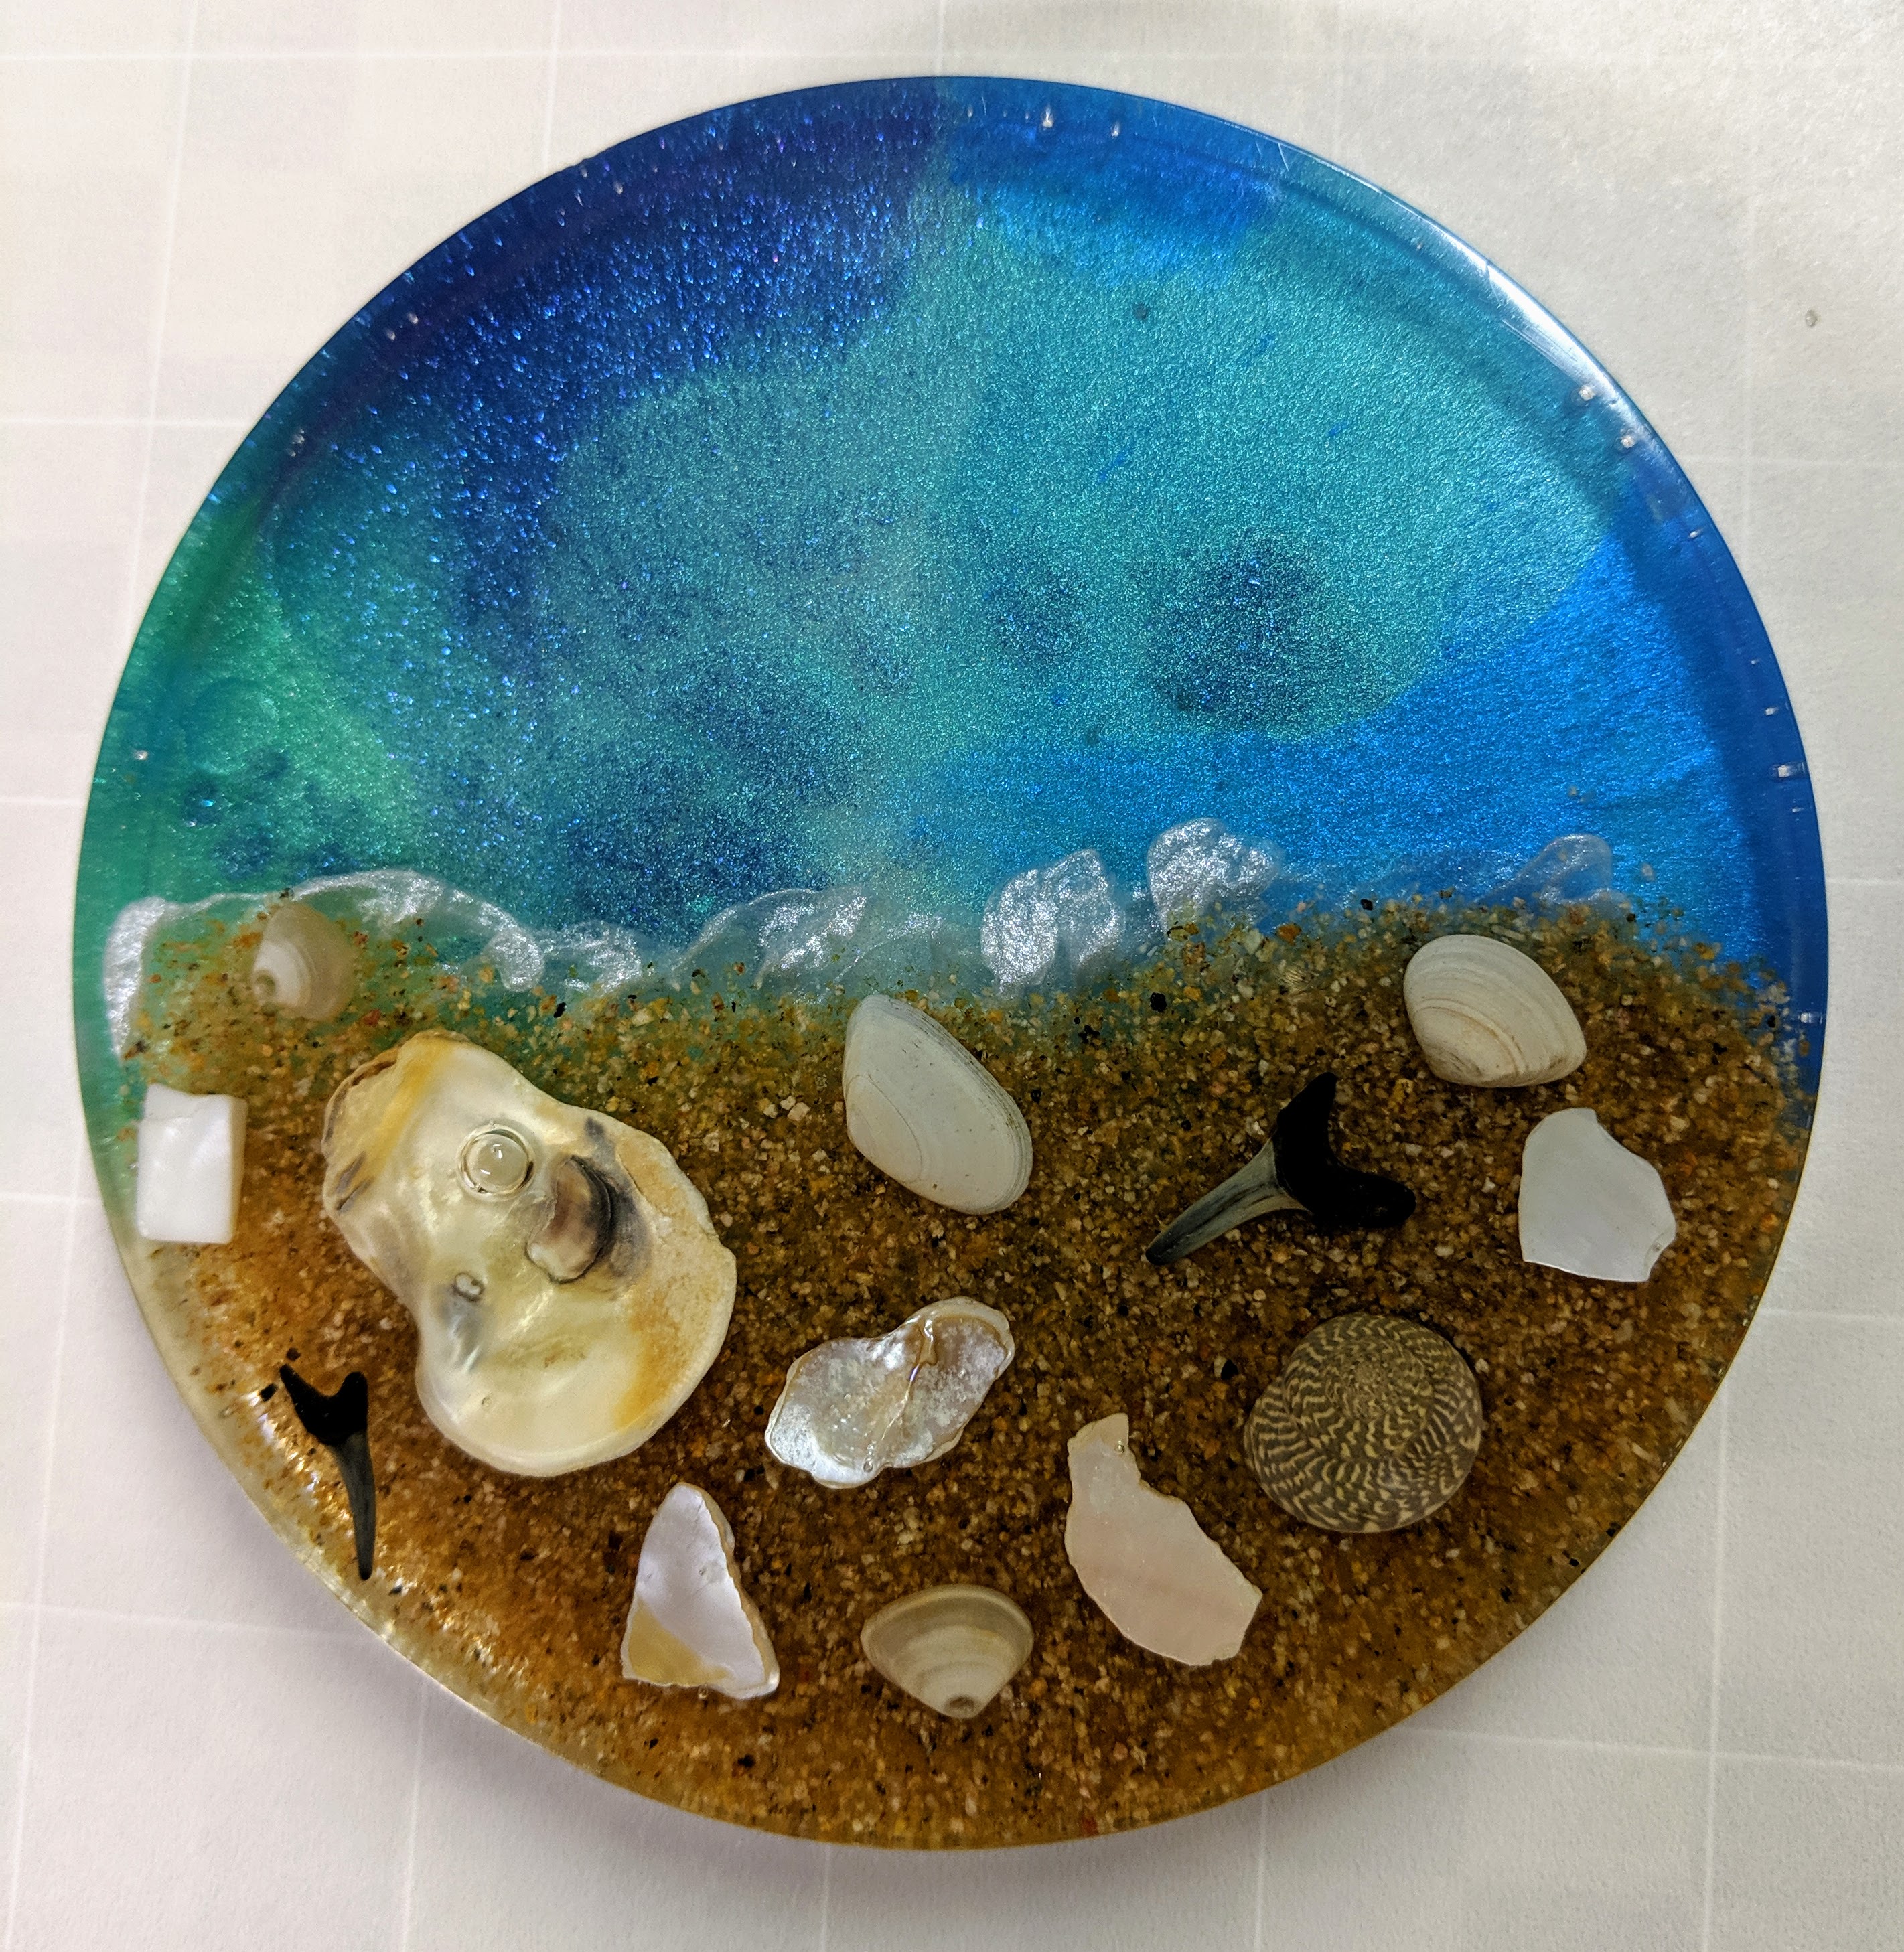
Today I poured a second layer of resin and added the sand for the beach and attempted to add the white pigment for the bubbles. I use a small craft stick to drizzle a line of white pigment along the edge of the beach, then sort of stir the line of pigment with the stick to give it a more bubbly appearance.
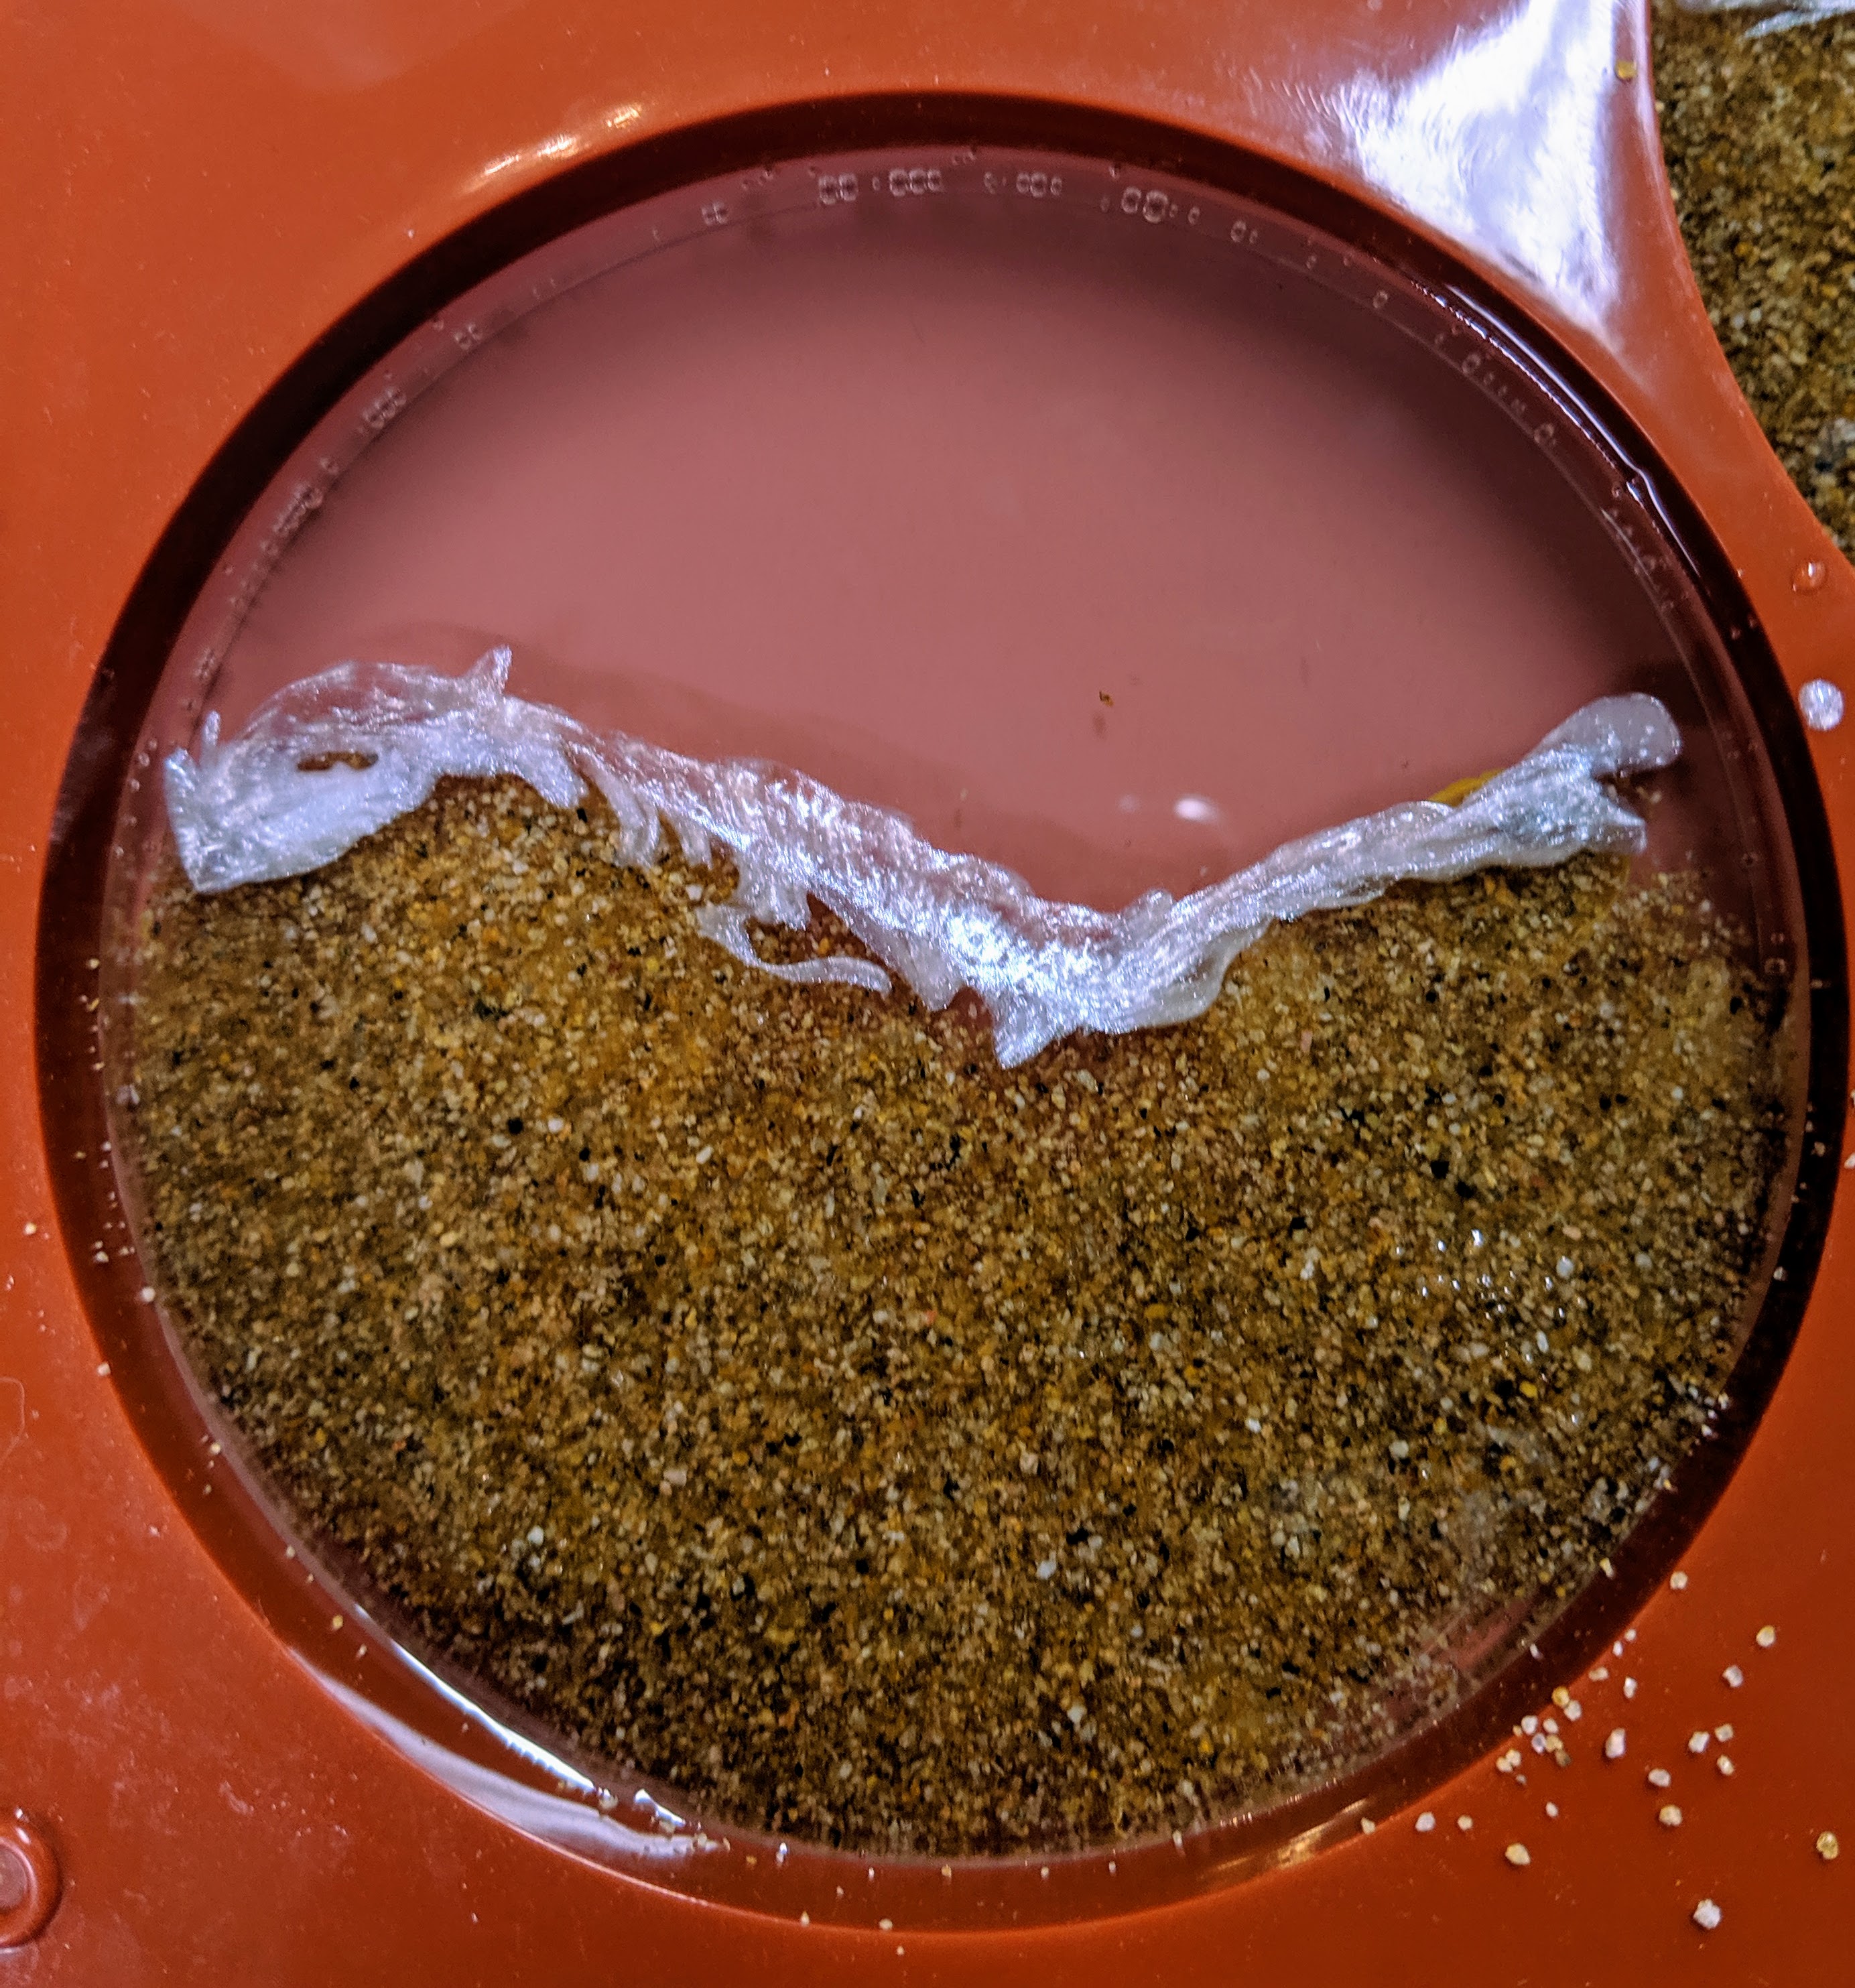
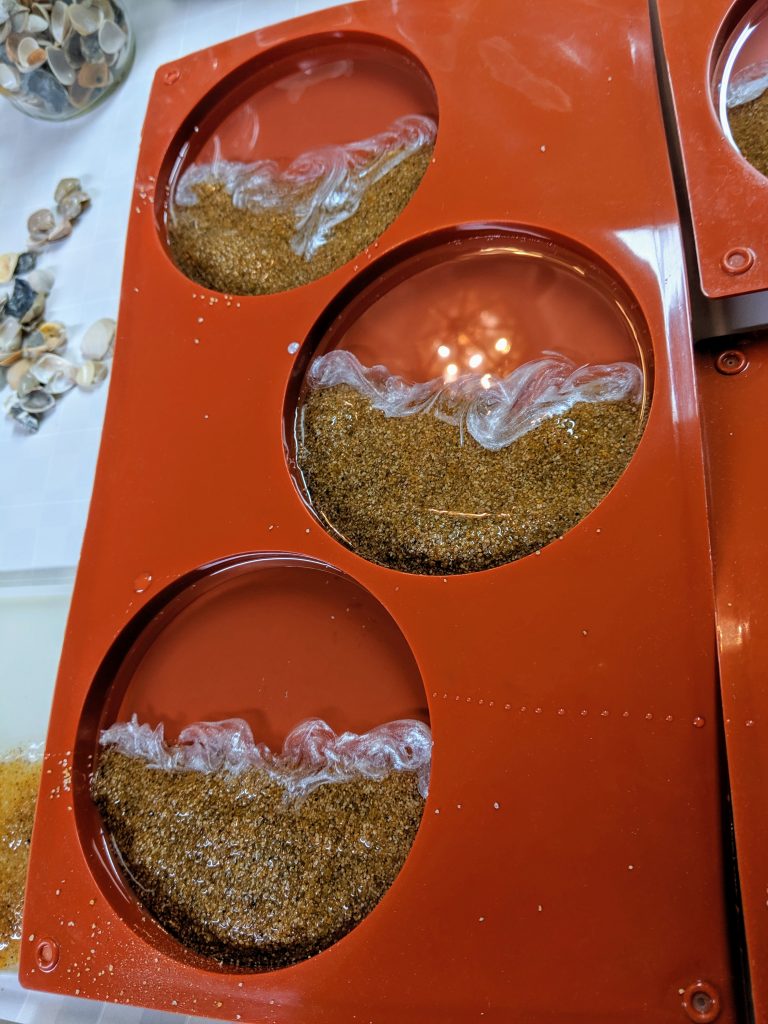
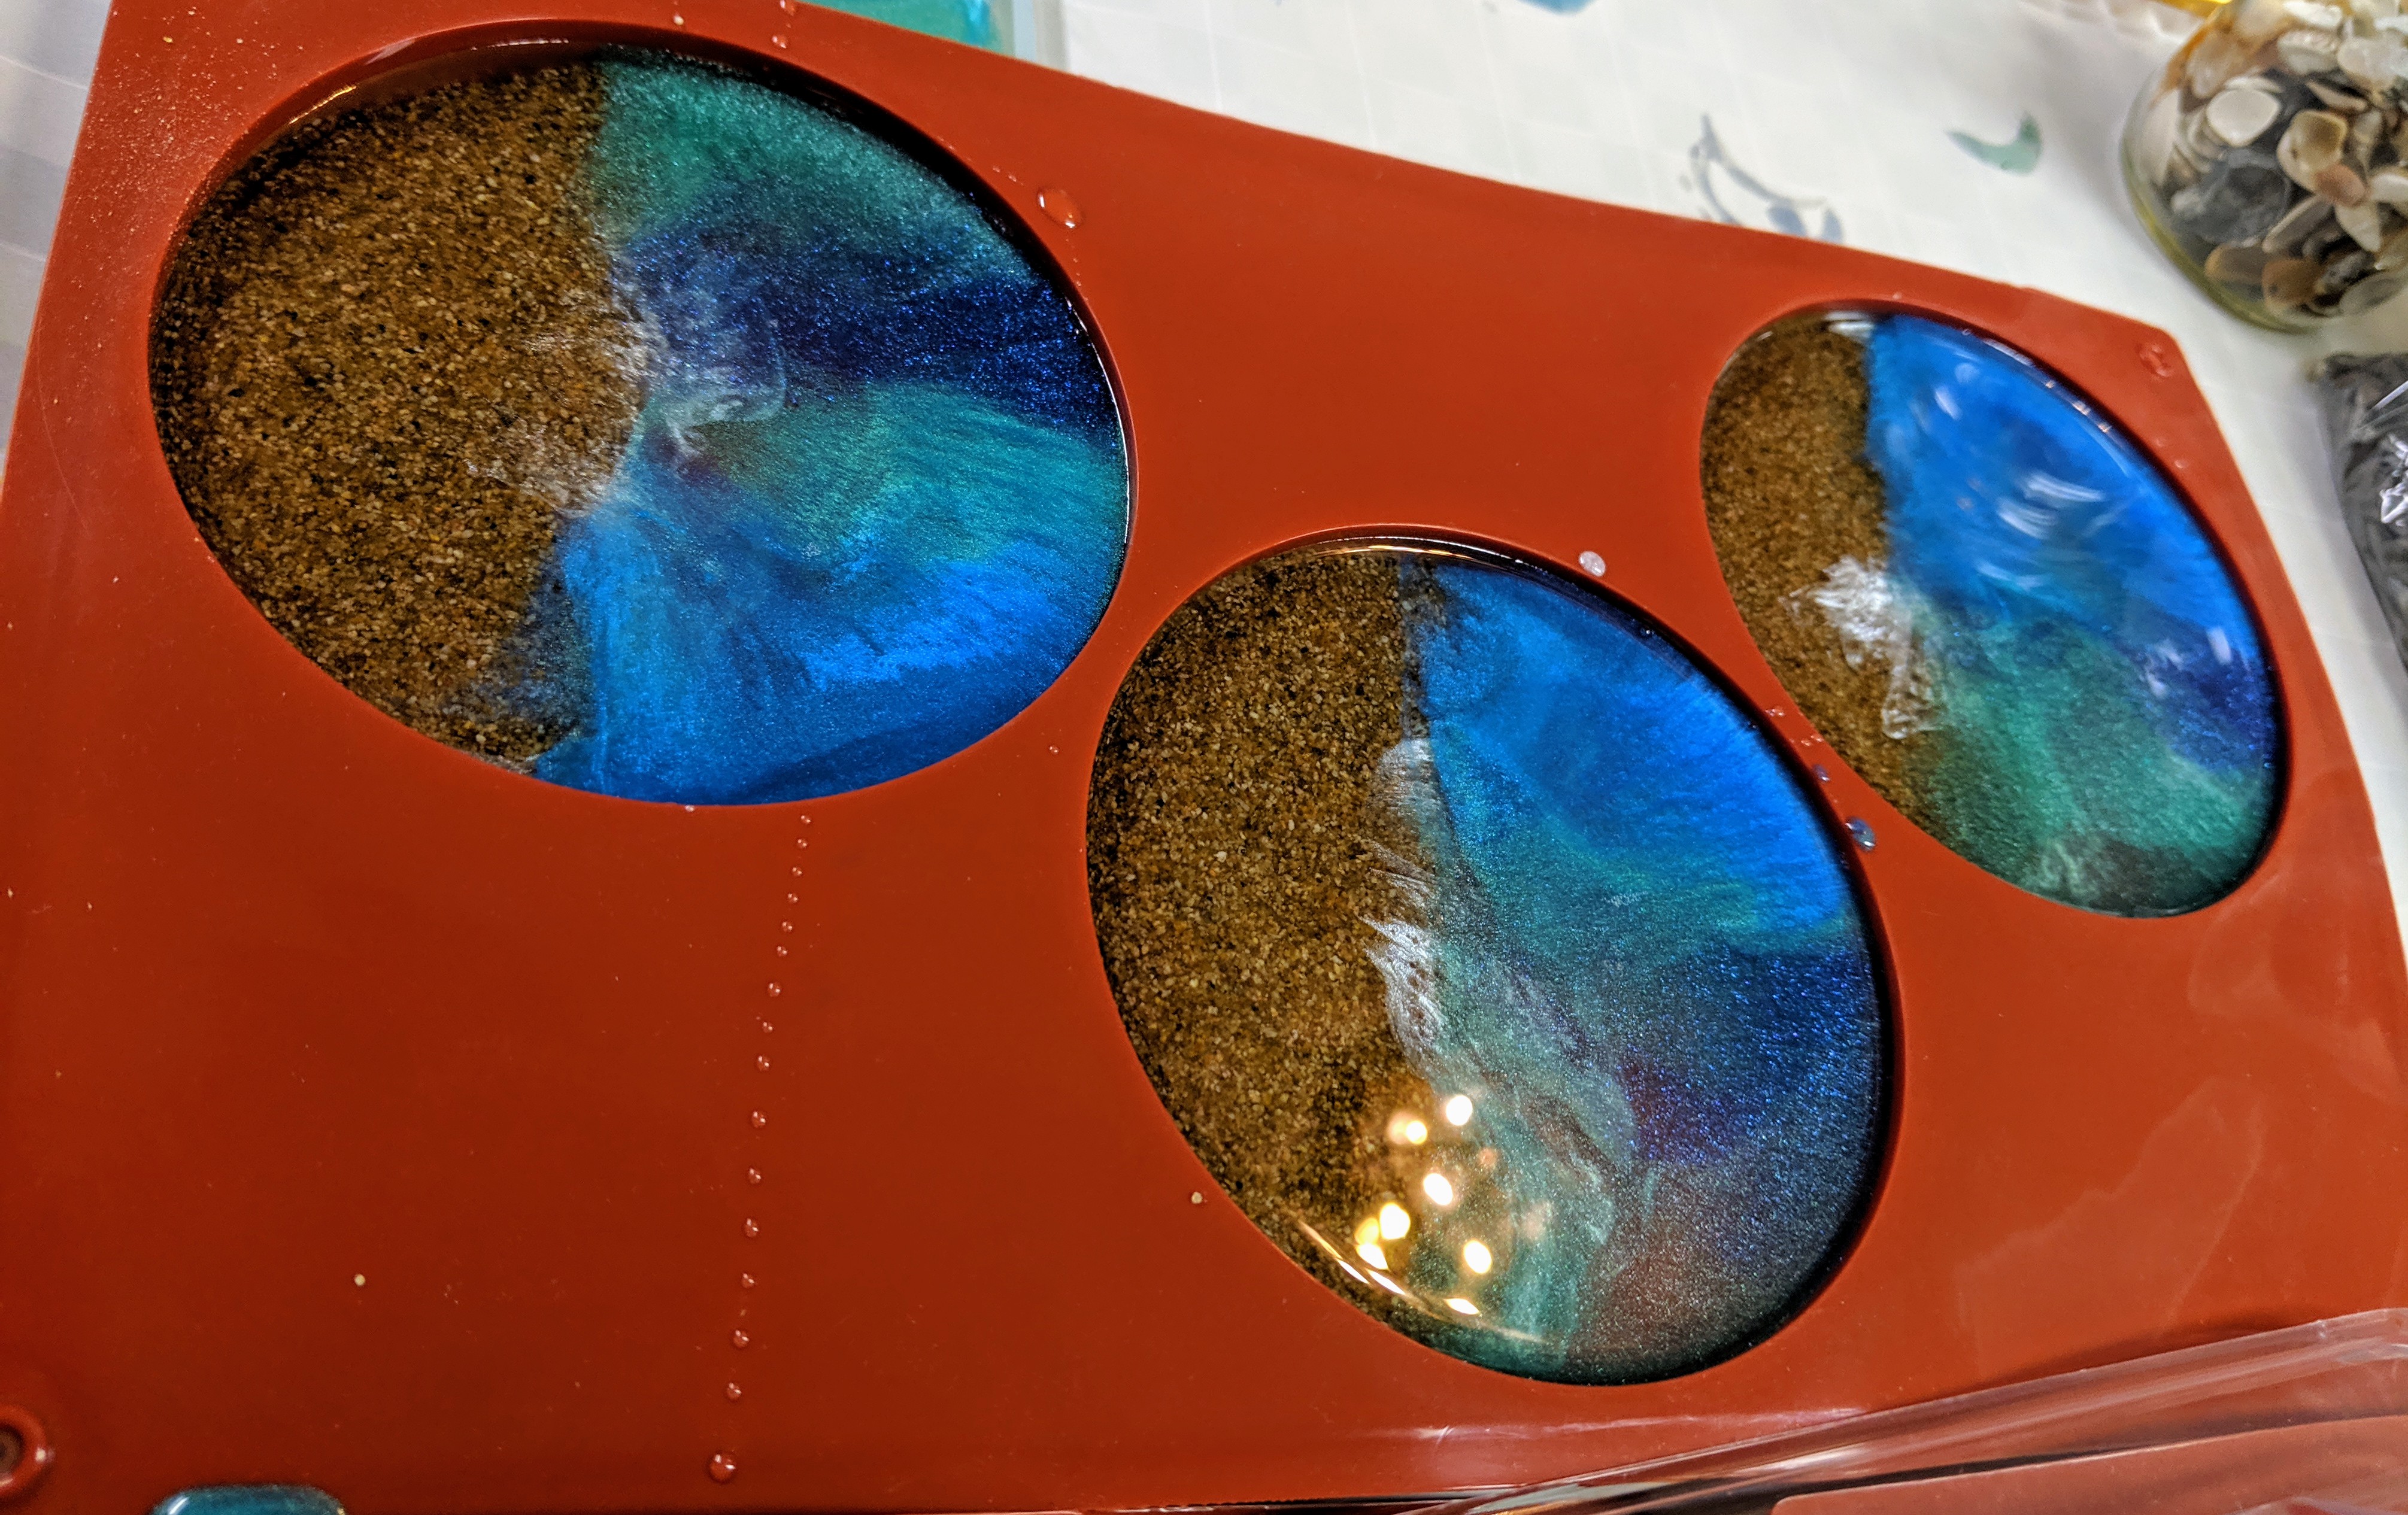
After that, the natural movement of the resin really spread out the white pigment. I’m a little worried that it’s too spread out, but I won’t know until after I let it cure overnight again. After waiting a few hours for this layer to gel, I was ready to add the water layer. I used the below pigments in these.
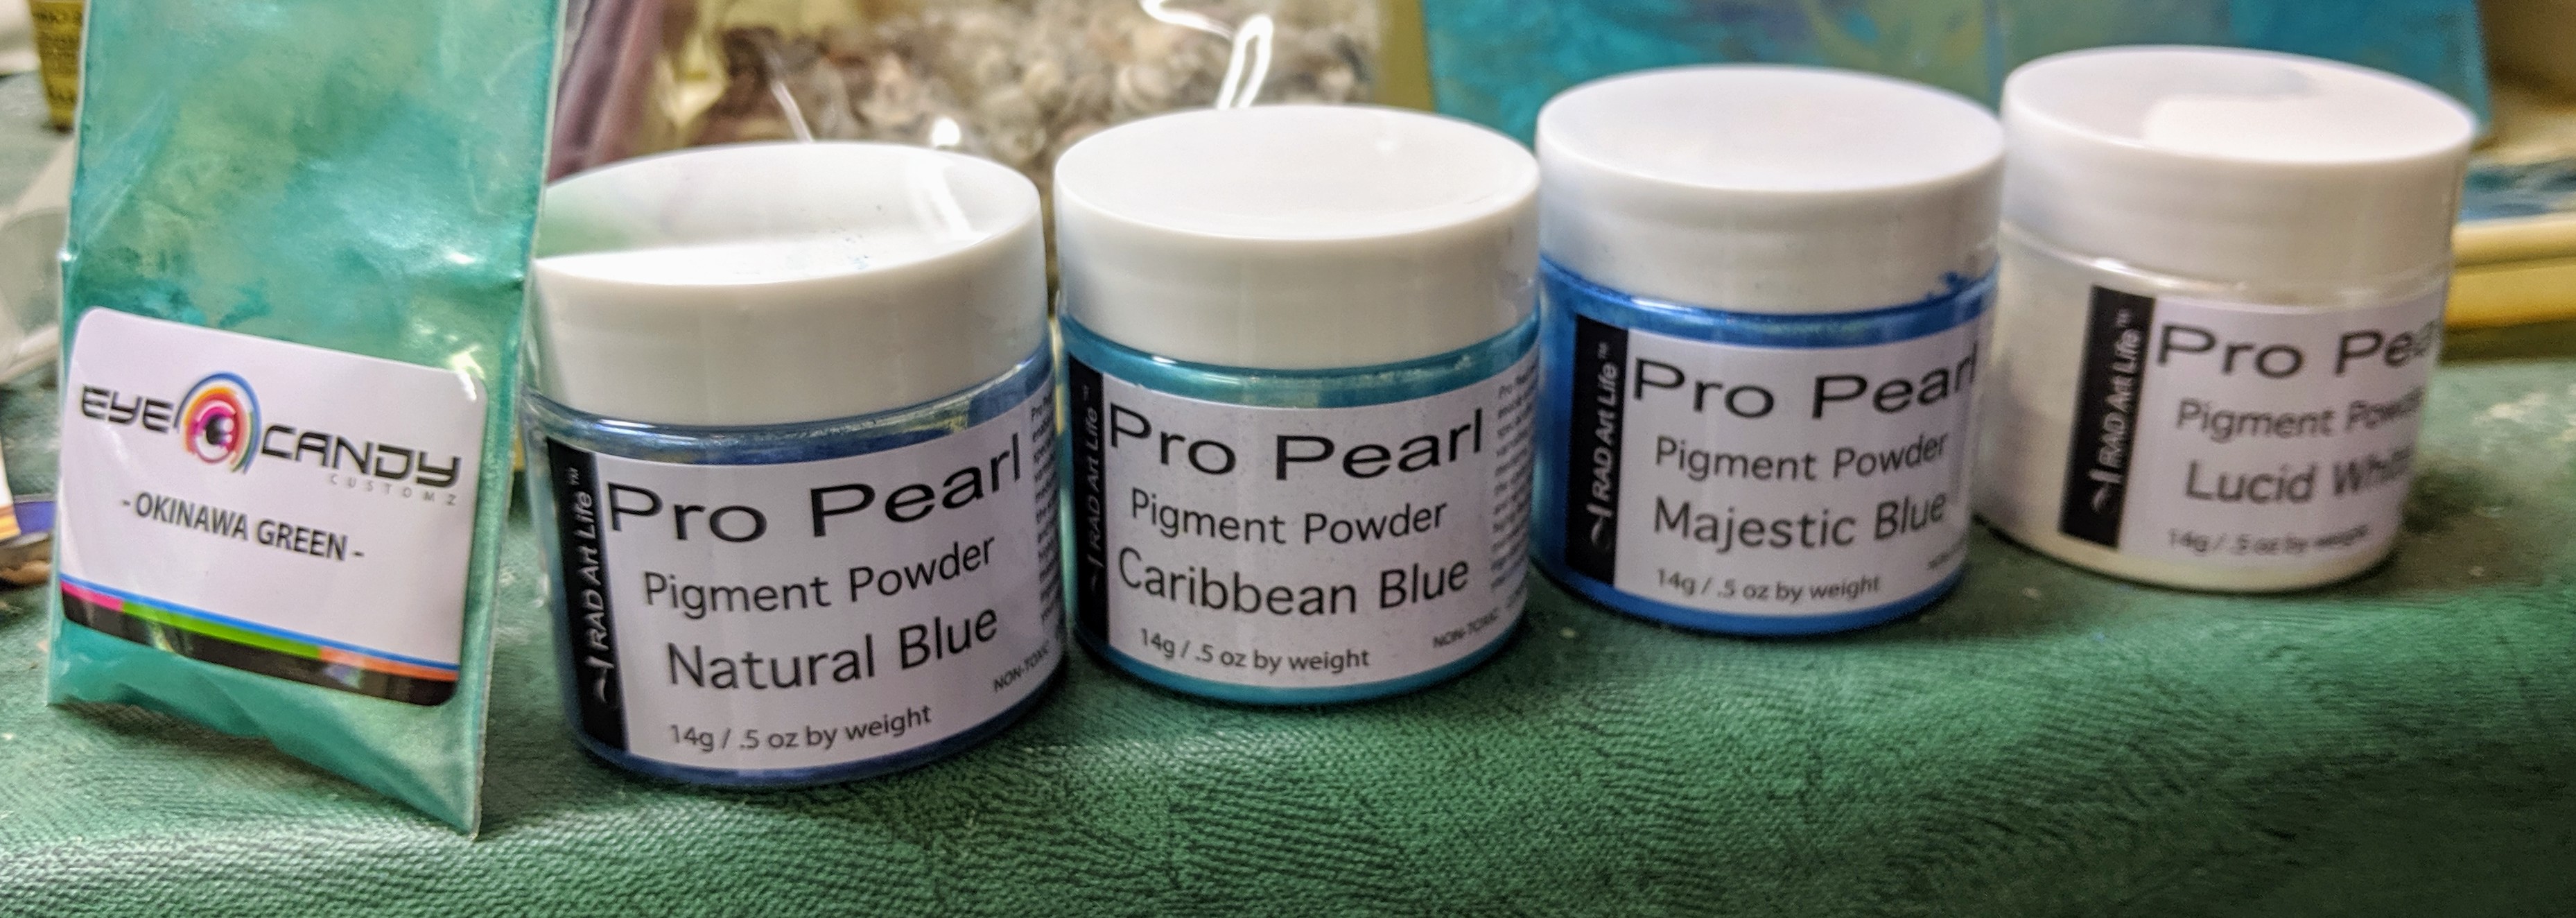
I then mixed the pigments with resin in individual medicine cups and drizzled a bit of each green and blue into the molds. After that, I added some additional clear resin to help even things out and distribute the pigments. Layering like this is causing my coasters to be a bit thicker than I usually make them. I will have to see if I can reduce the amount of resin I’m using so they aren’t so heavy in the future. Now I wait!
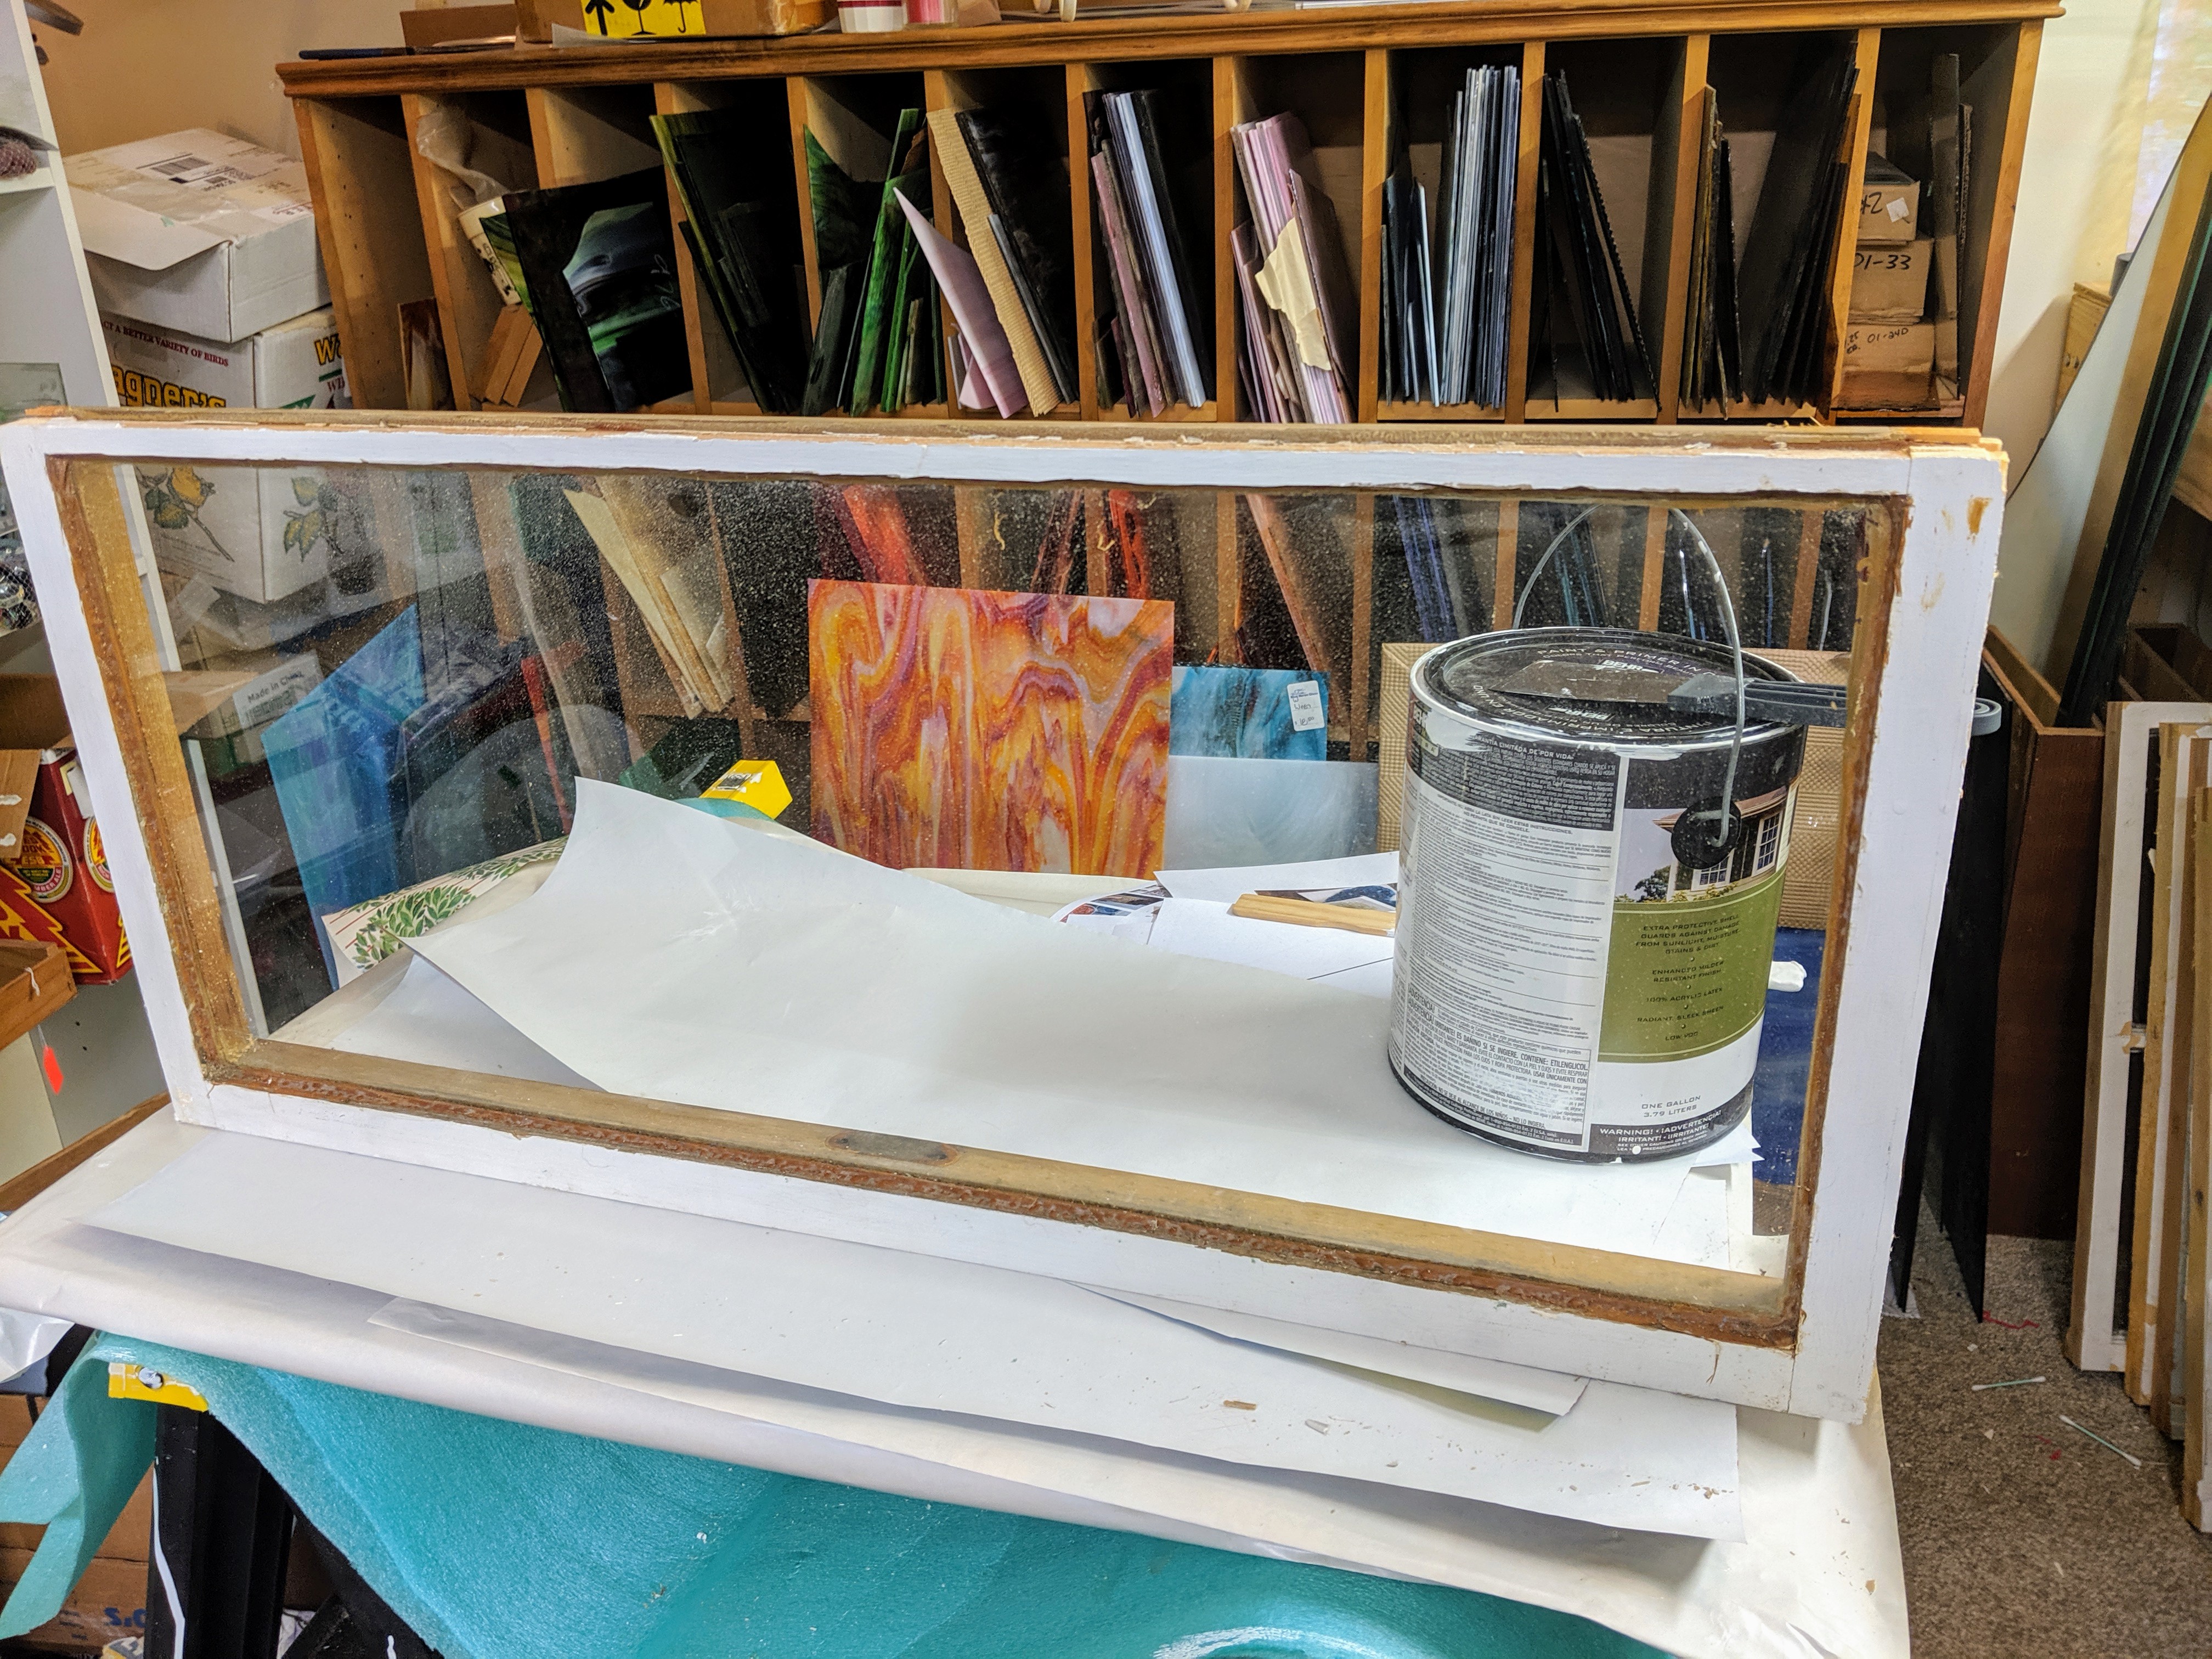
The fun is on hold for a few days while I prep the next old window for the next project. Lately I have been trying to make smaller projects in preparation for having a booth at a Farmer’s Market (which I had to pay $90 for a license and submit an application to the city of N. Charleston for last week – wish me luck as they might not have a space available).
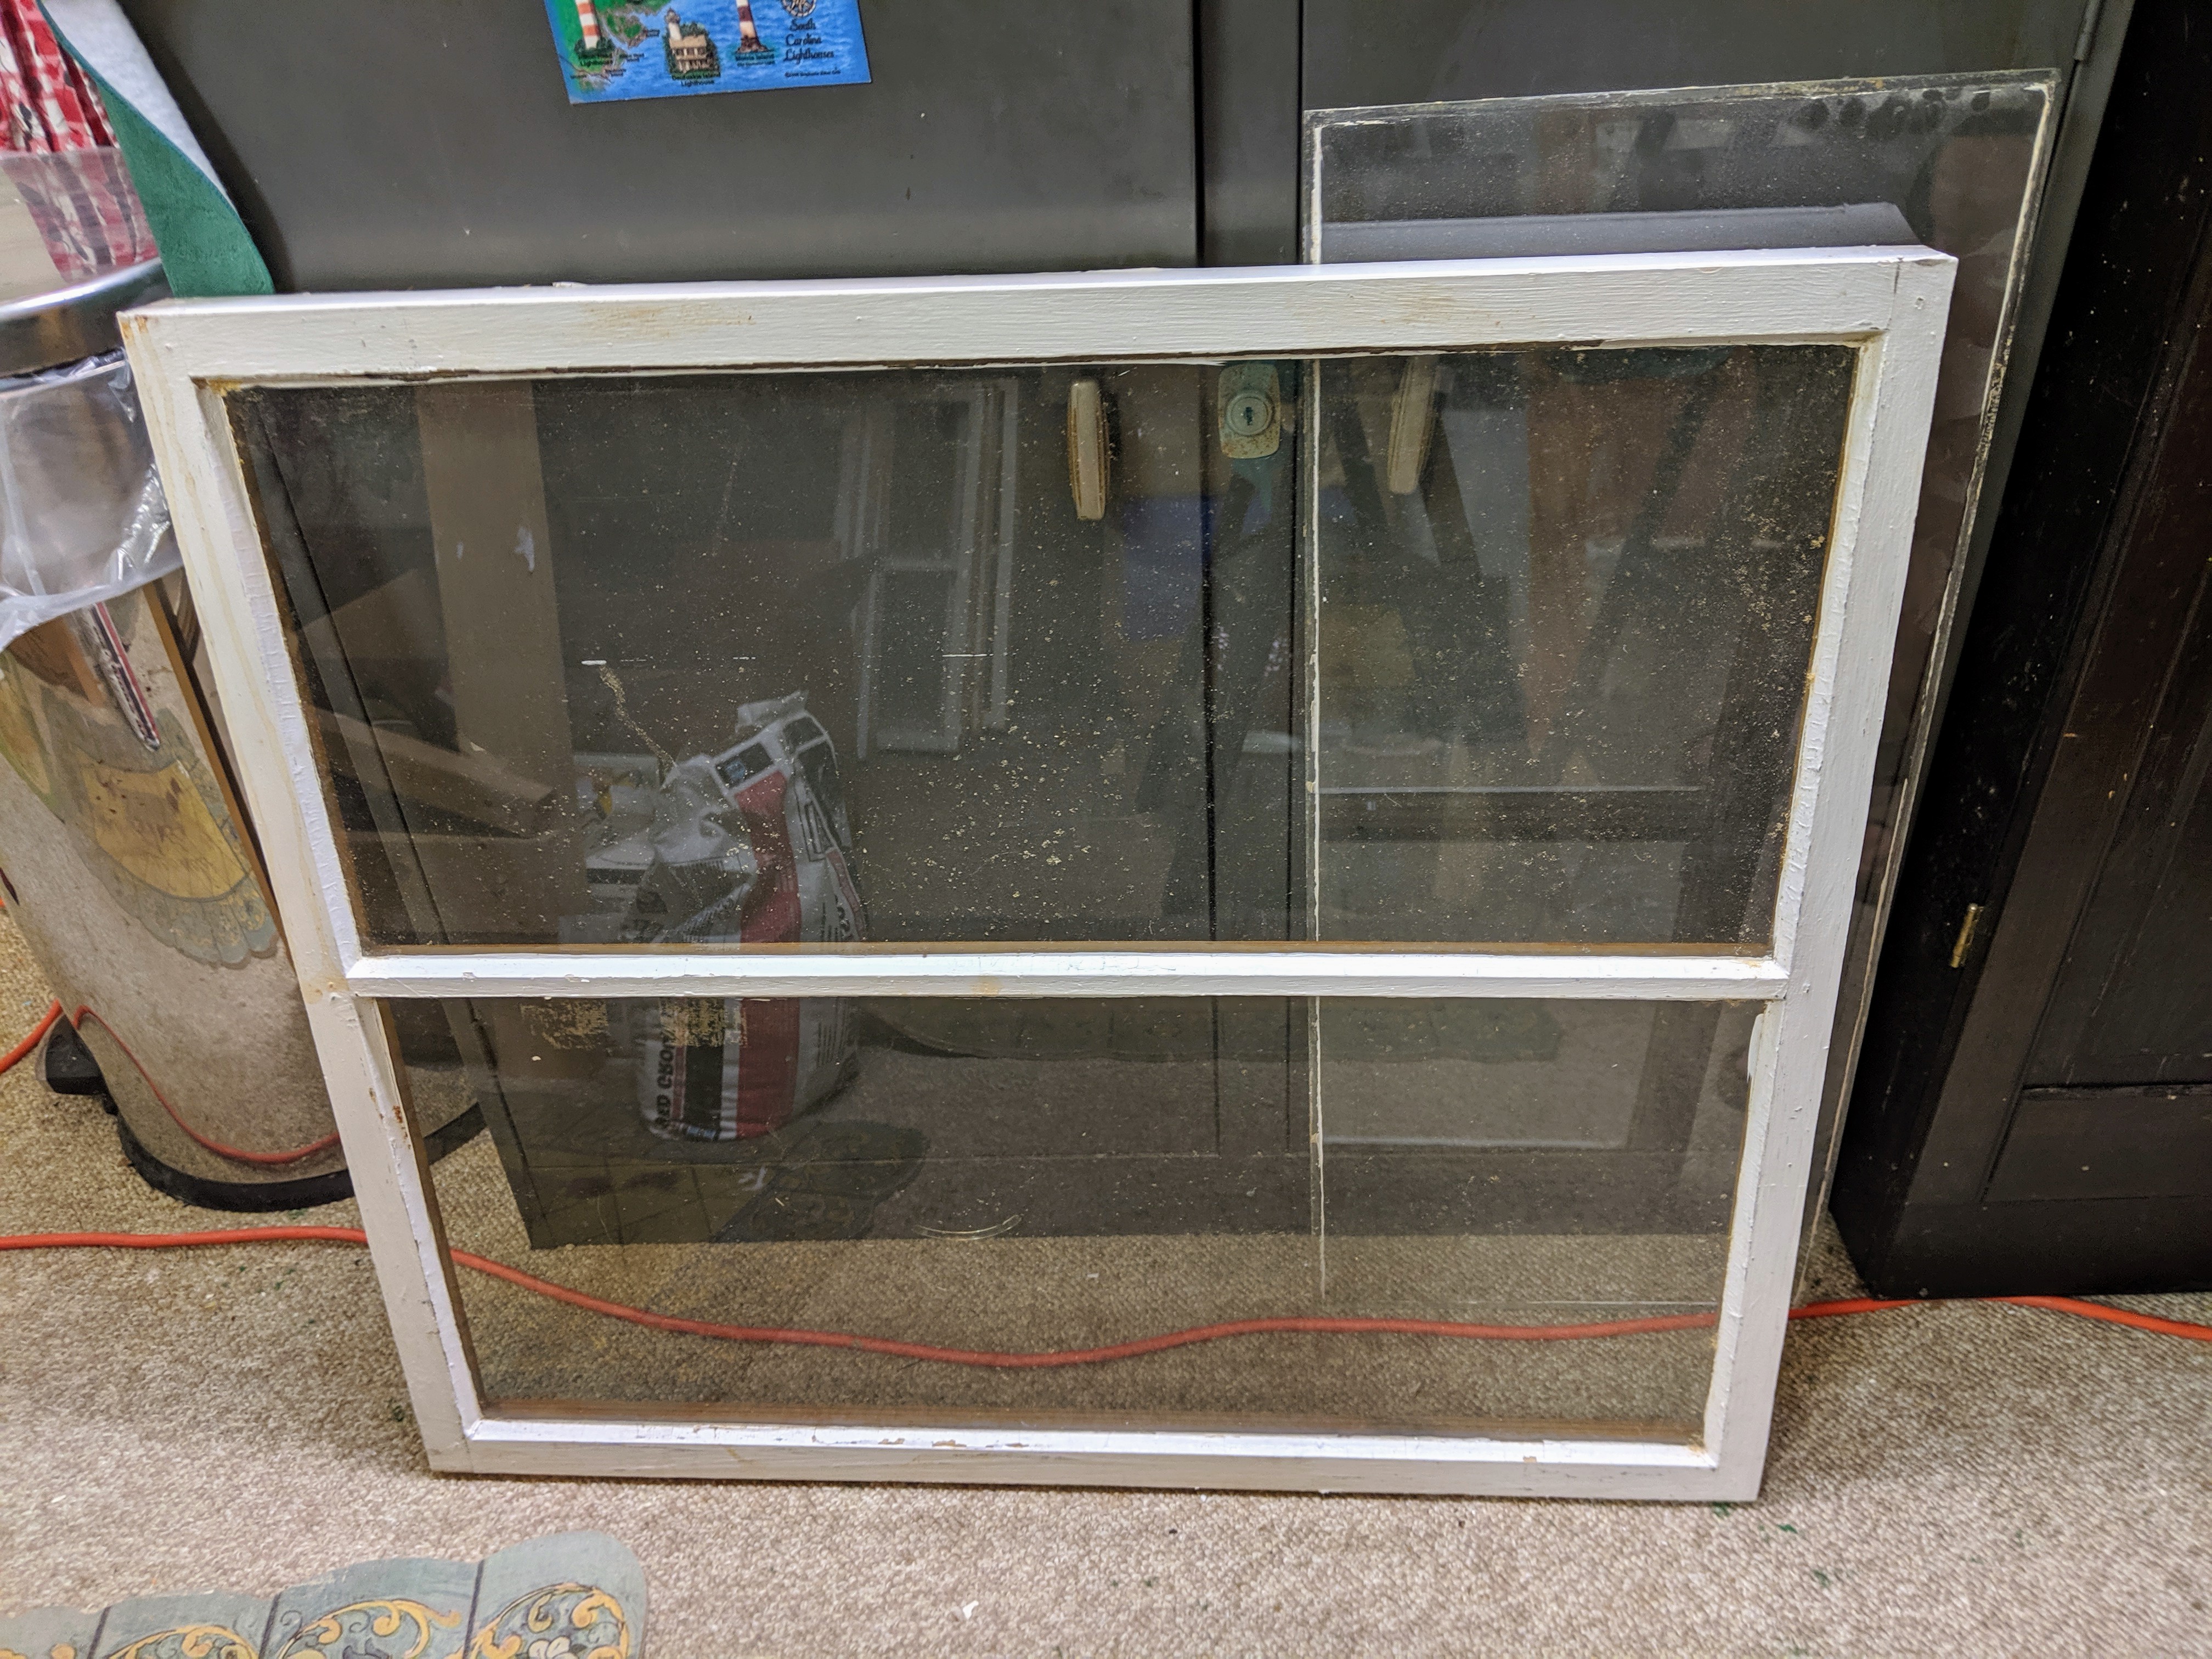
Since most of my old windows are pretty large, I got my husband to help me cut one in half. I then use the bottom half for a framed mosaic and use just the glass from the top half for one or more projects.
First I clean the dust and dirt off of it as best I can, then I use some exterior repair putty to fill in any holes in the wood.
The pane of glass has some glazing and paint stuck around the edges, so I will use a utility knife to clean that off before I can use it.
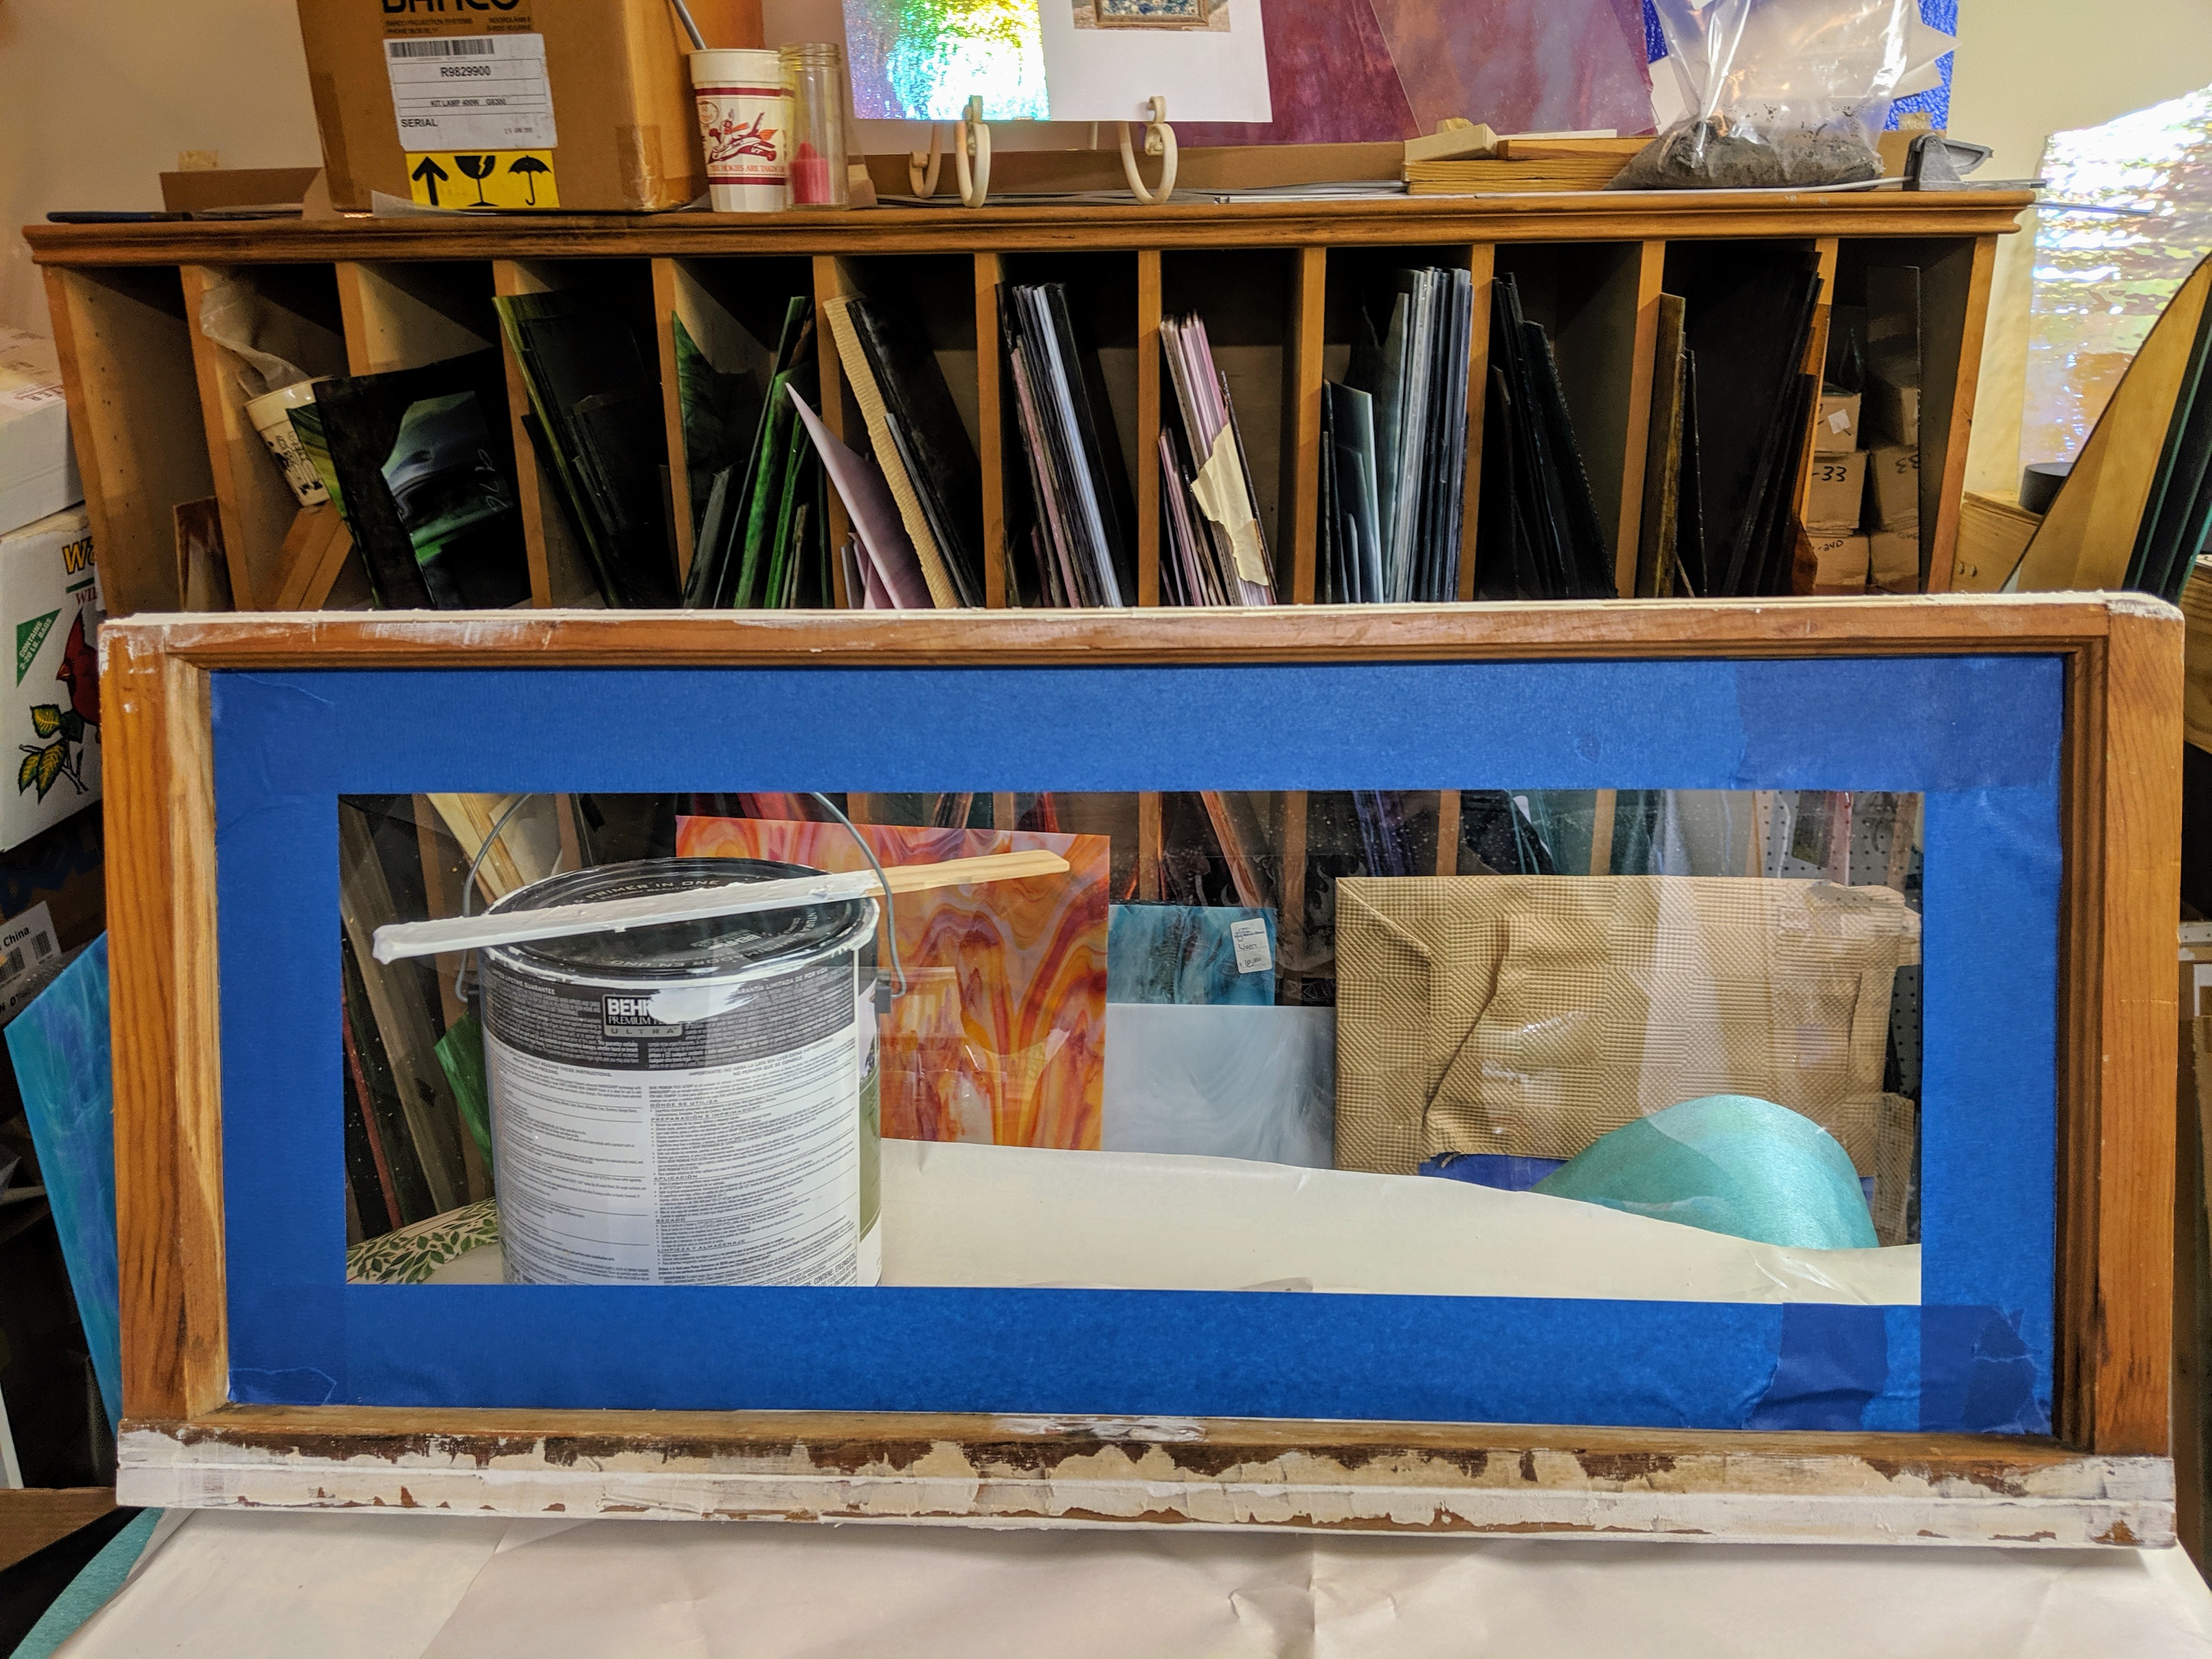
Once the putty is dry, I will paint the whole frame. It won’t look like new because it’s an old window that’s been painted several times, but it will be cleaned up enough to look nice for my next creation. Unfortunately it takes a few days to do the prep work… I’d rather be doing the fun part, but I think taking the time to clean it up makes a big difference in the end result.
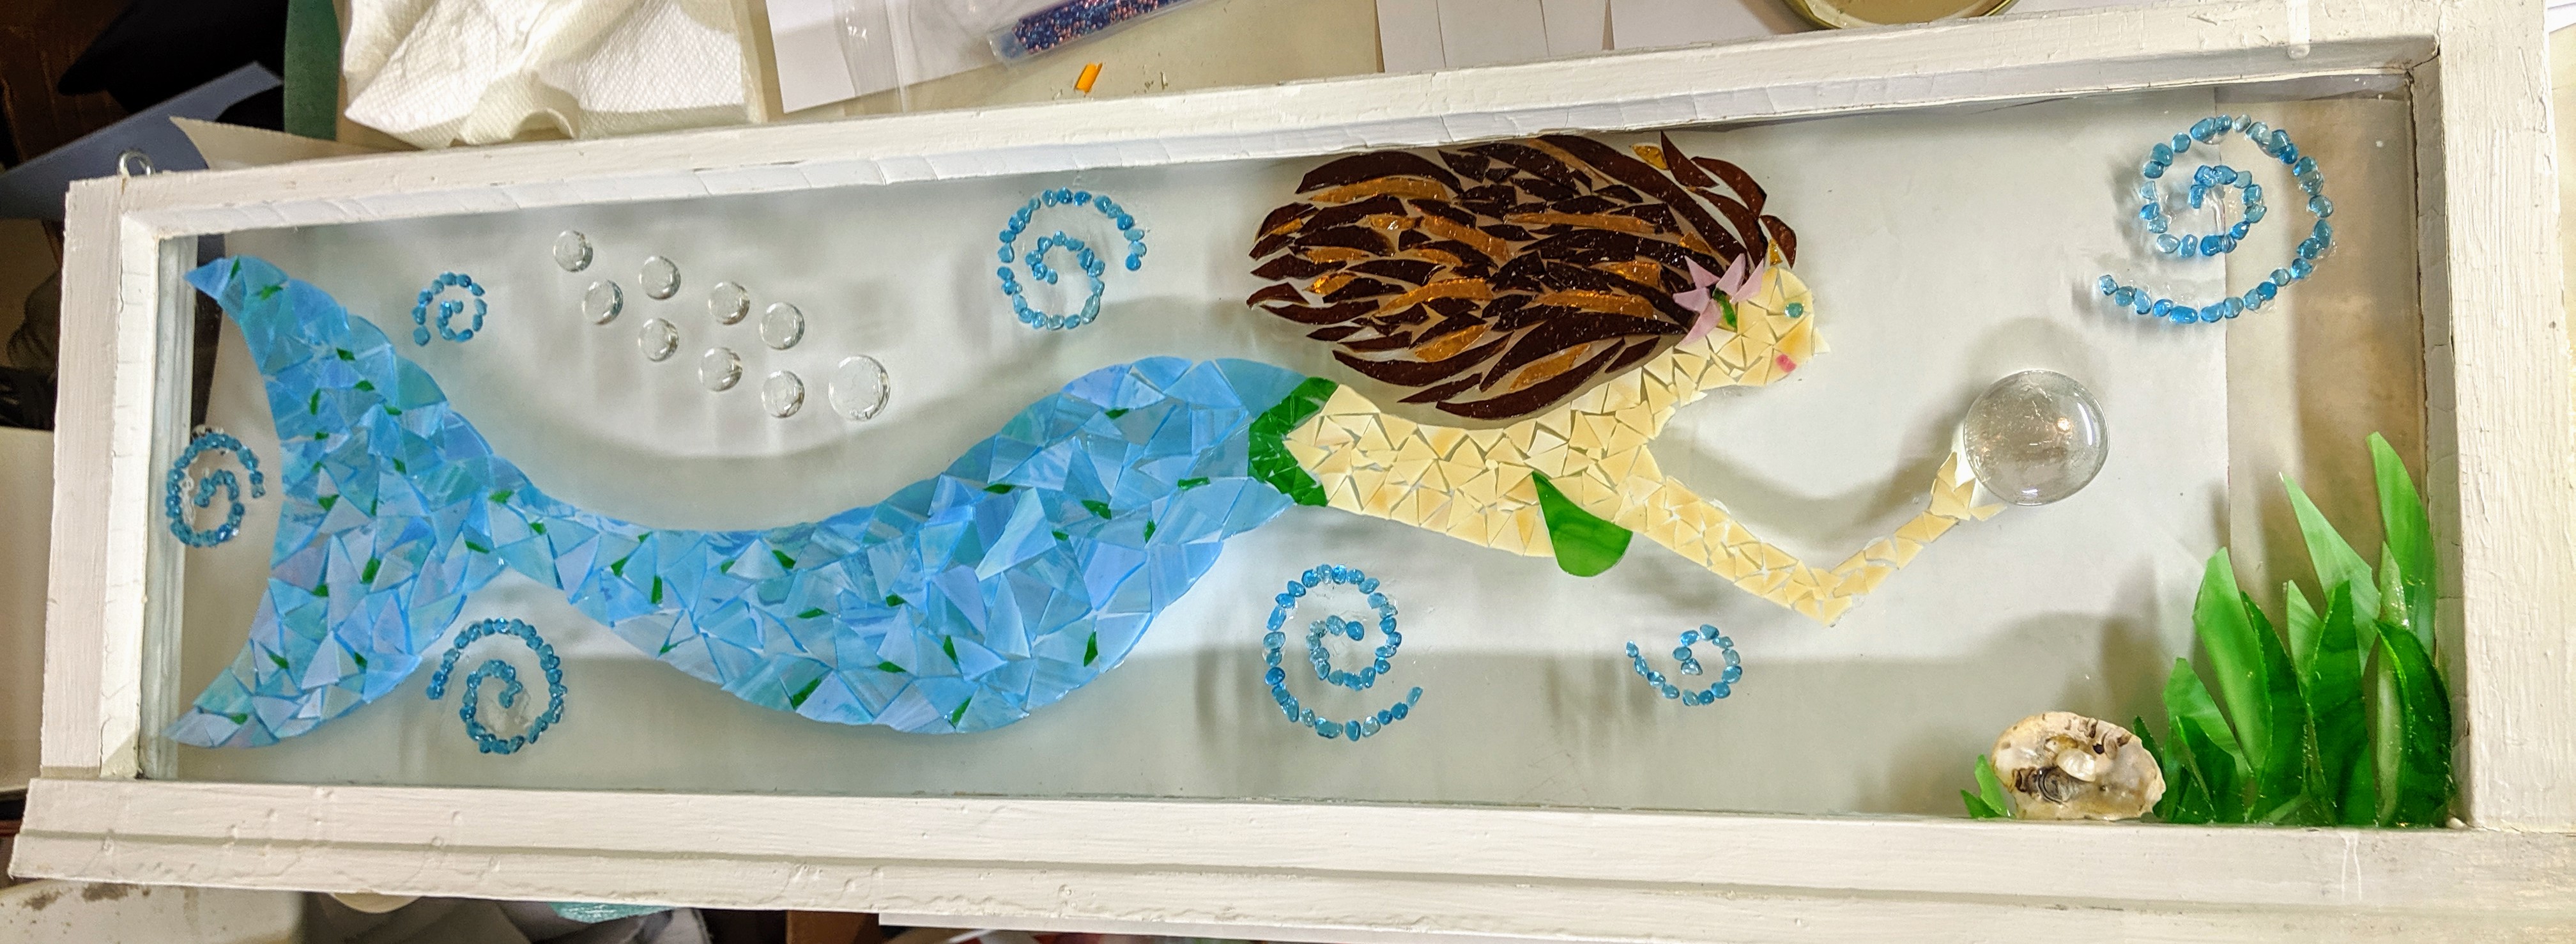
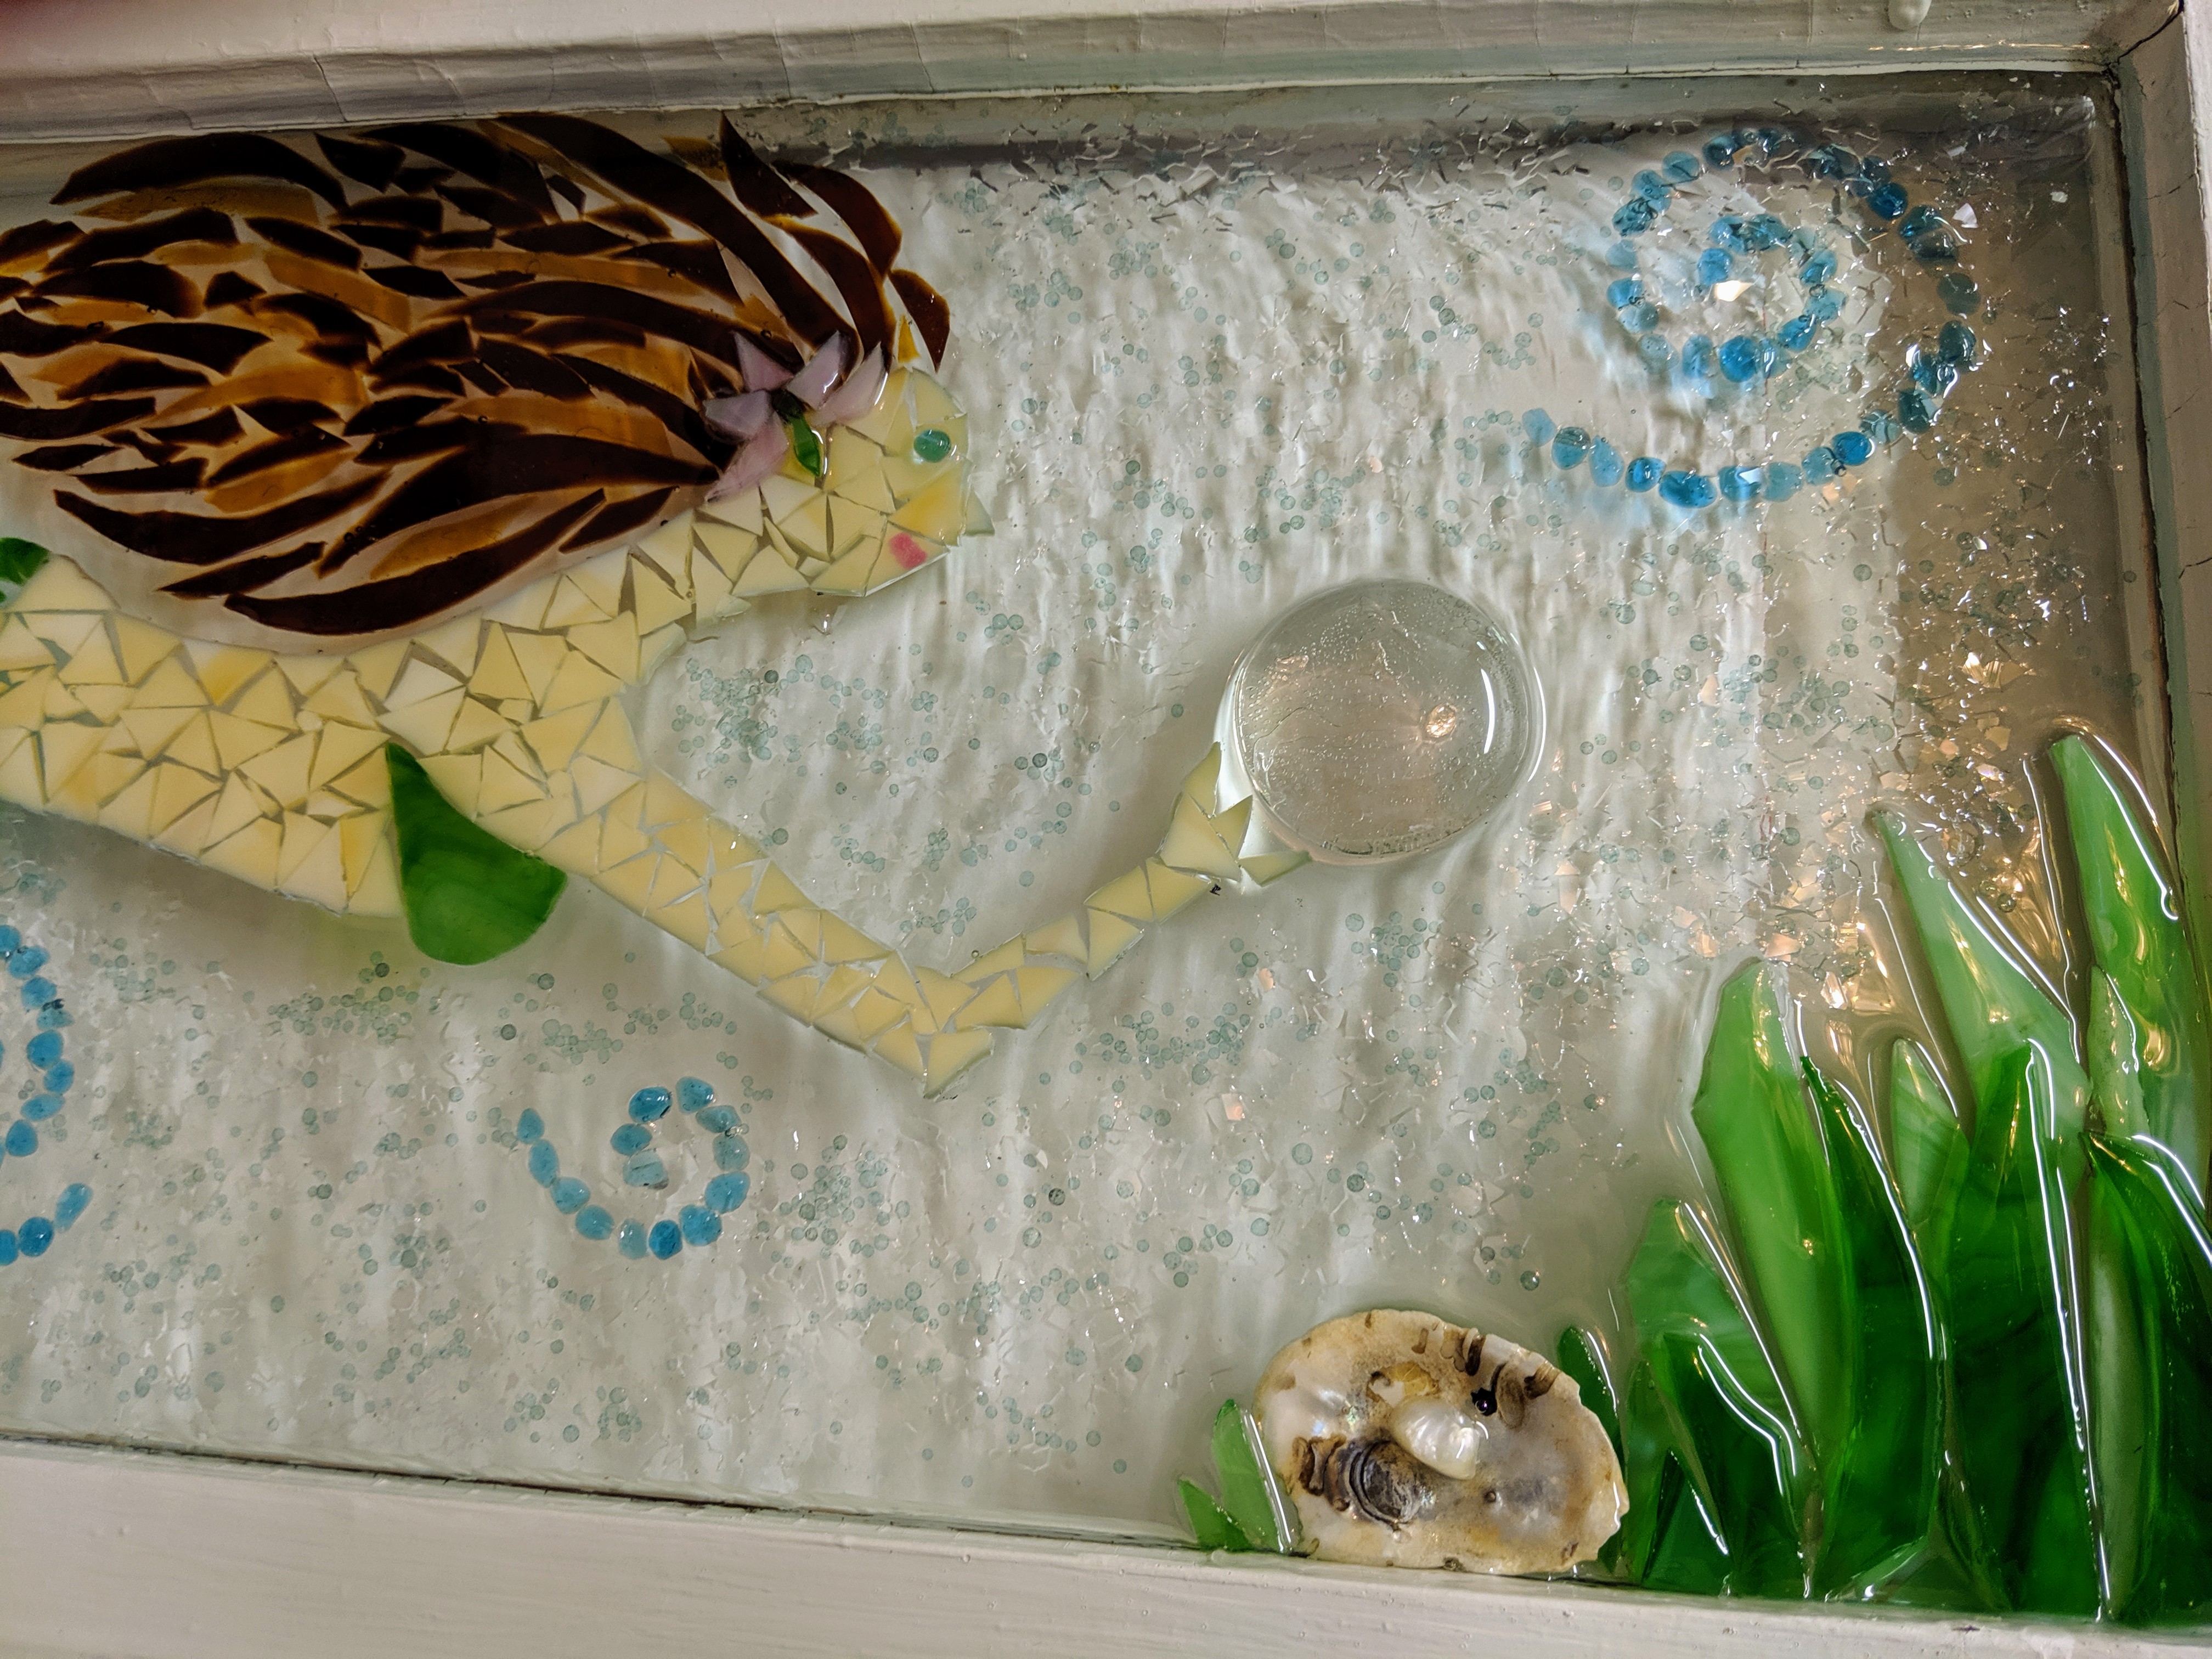
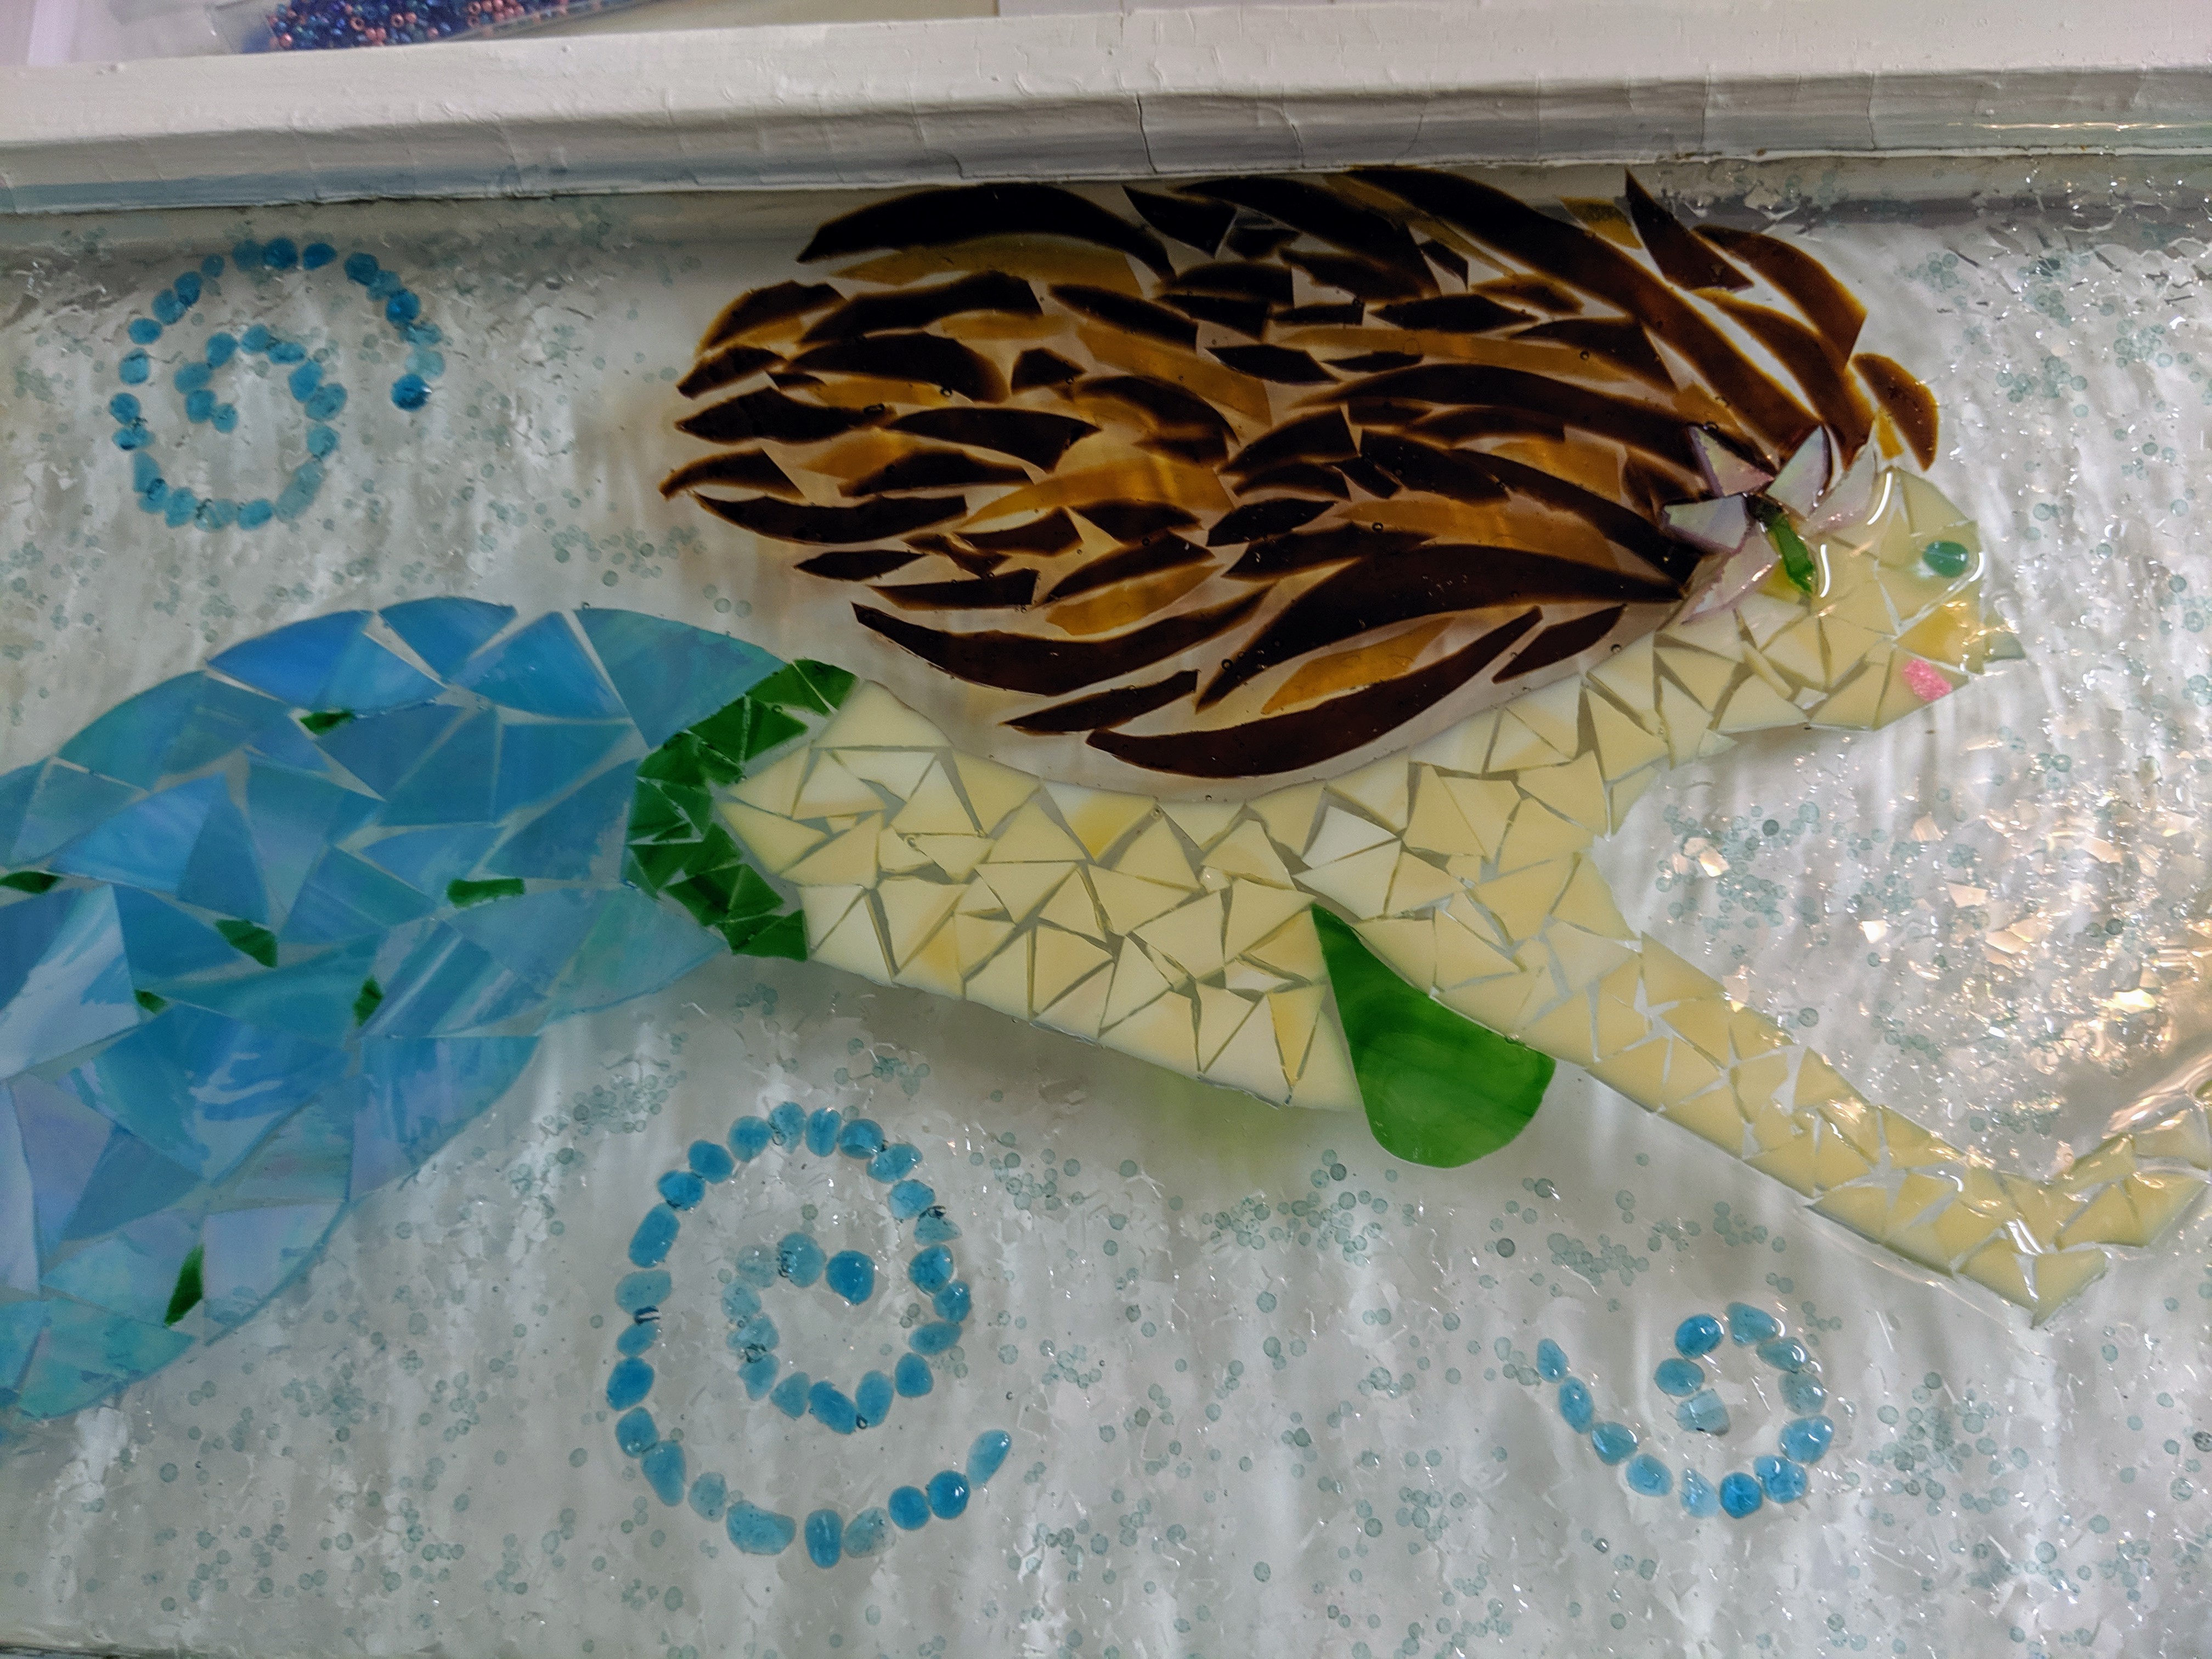
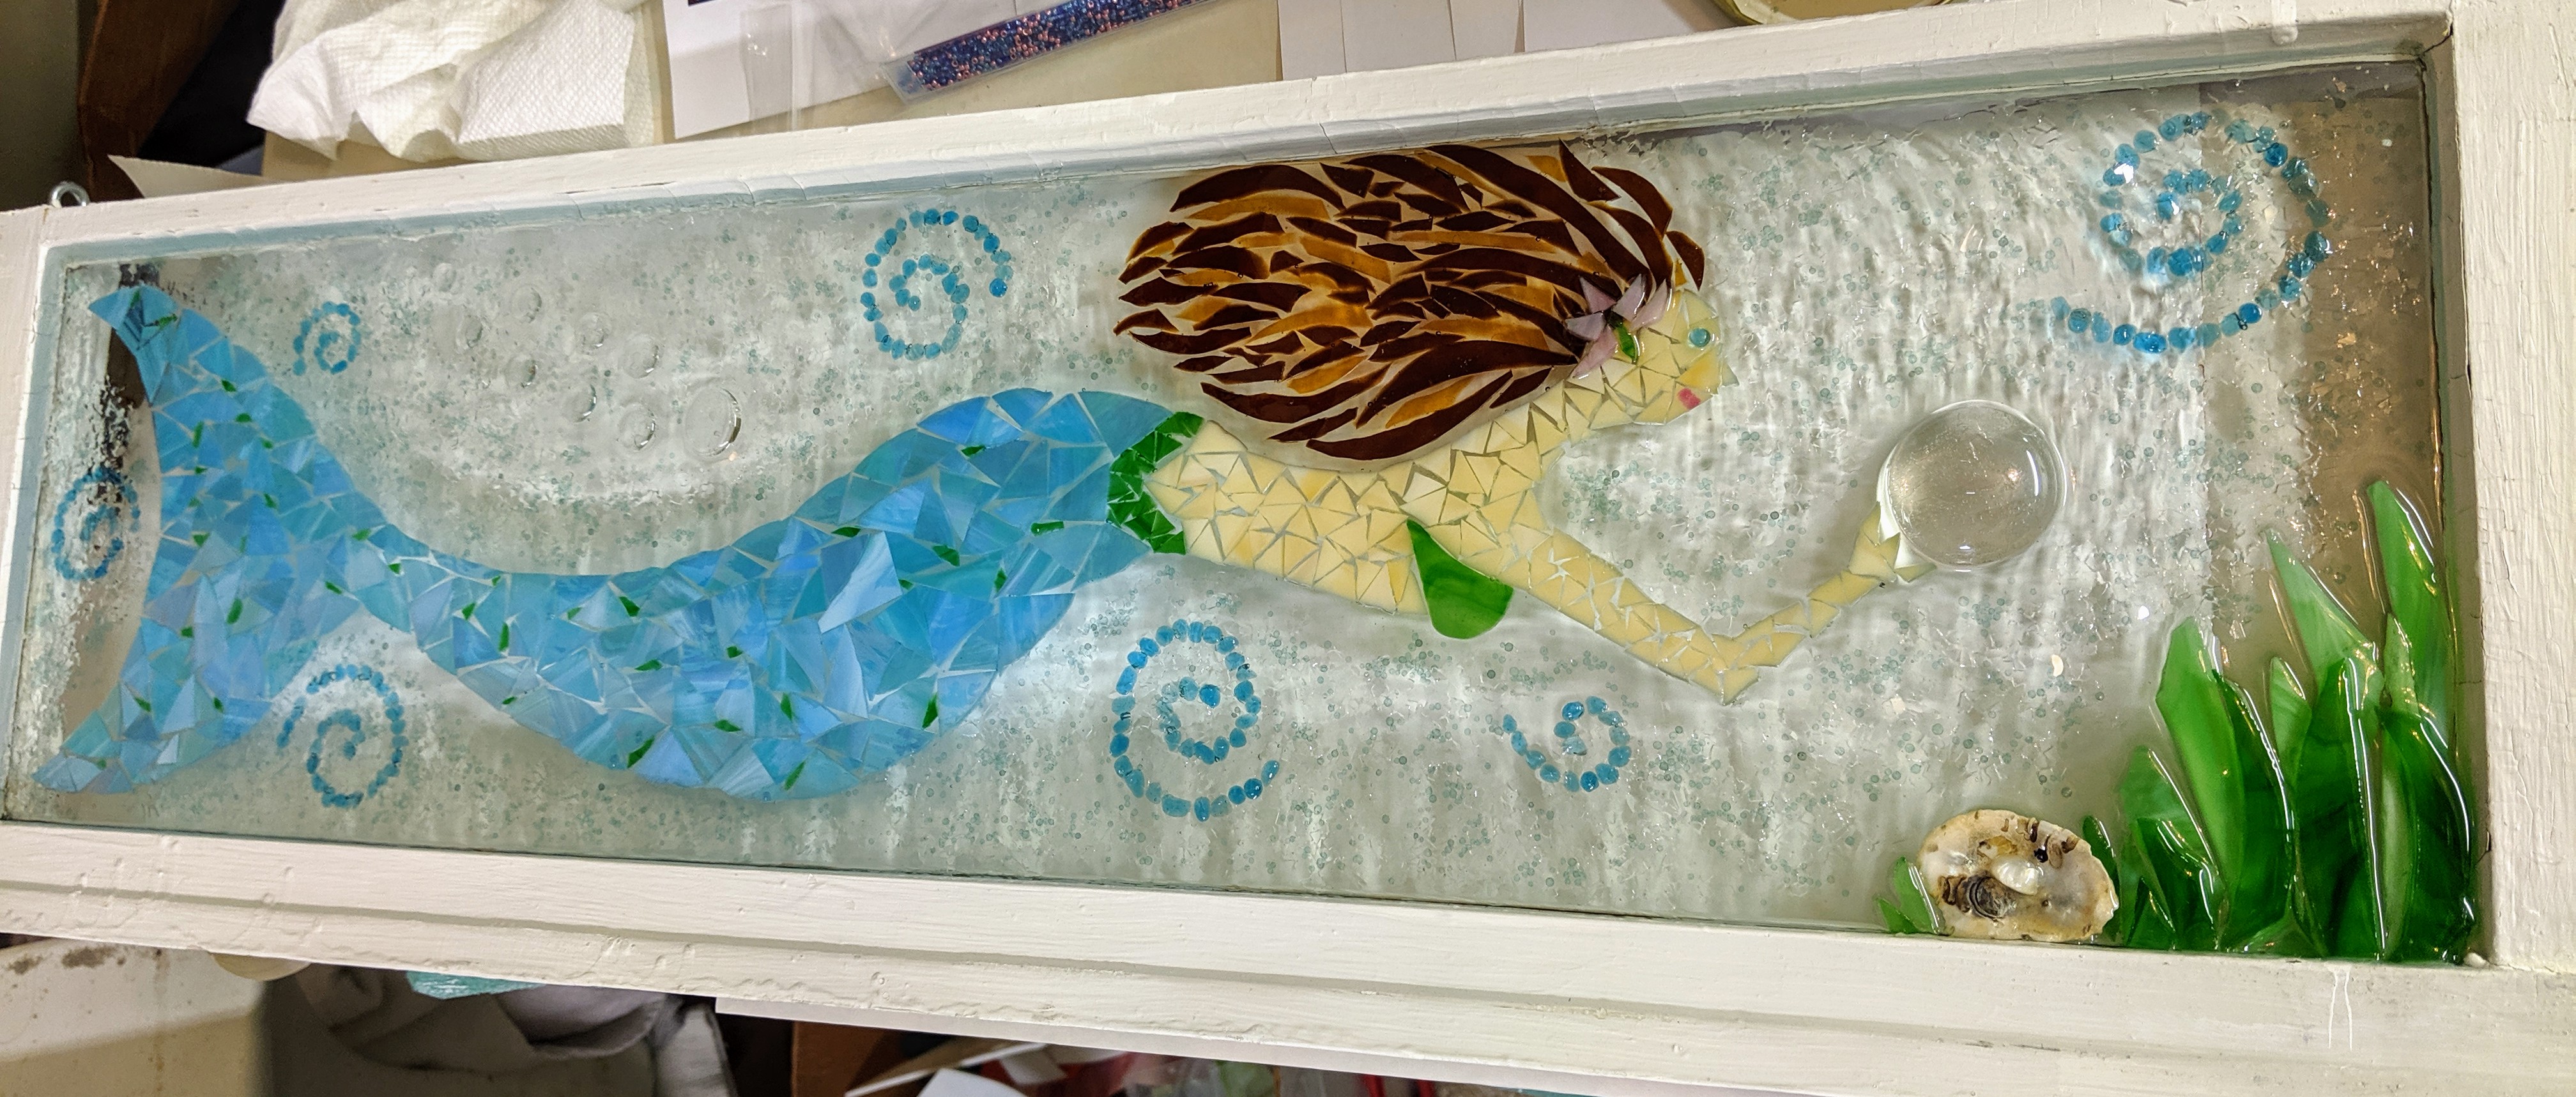
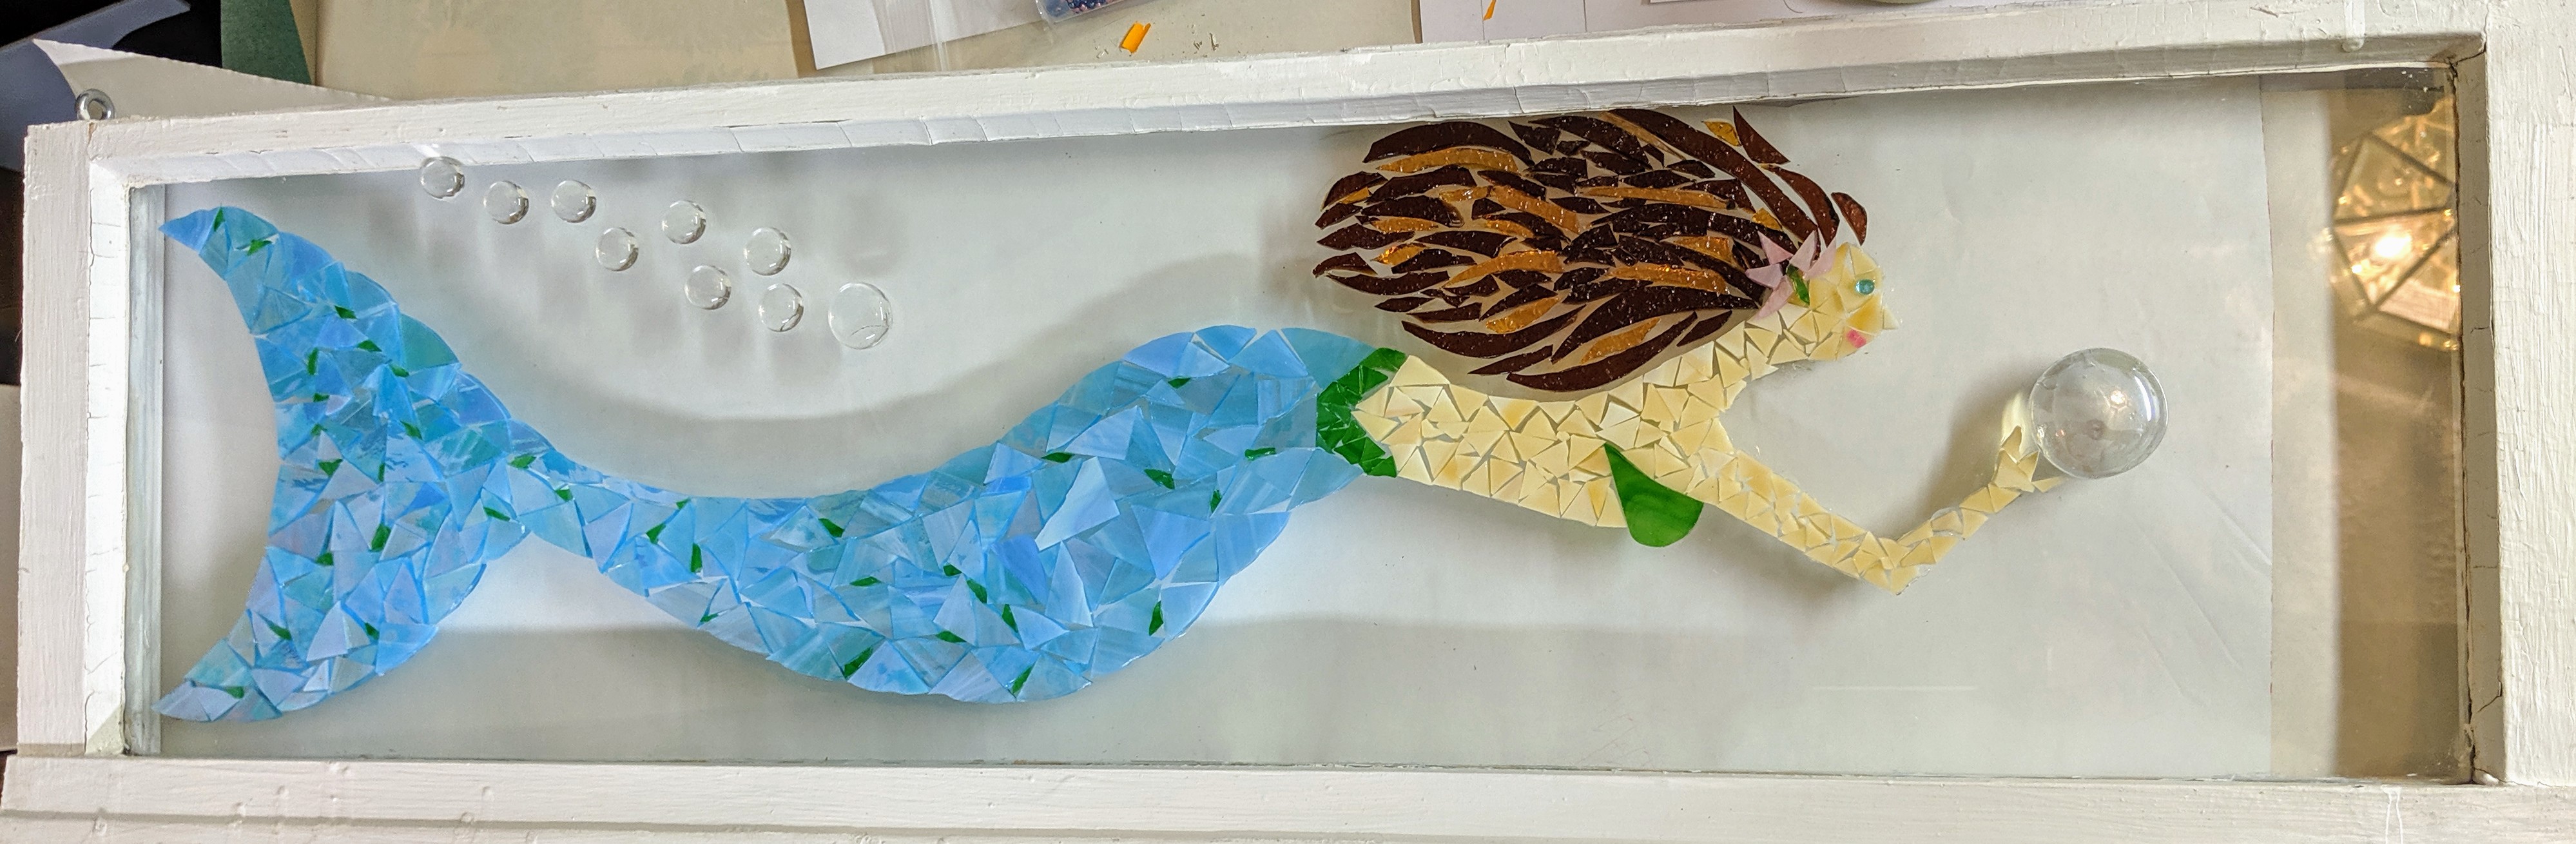
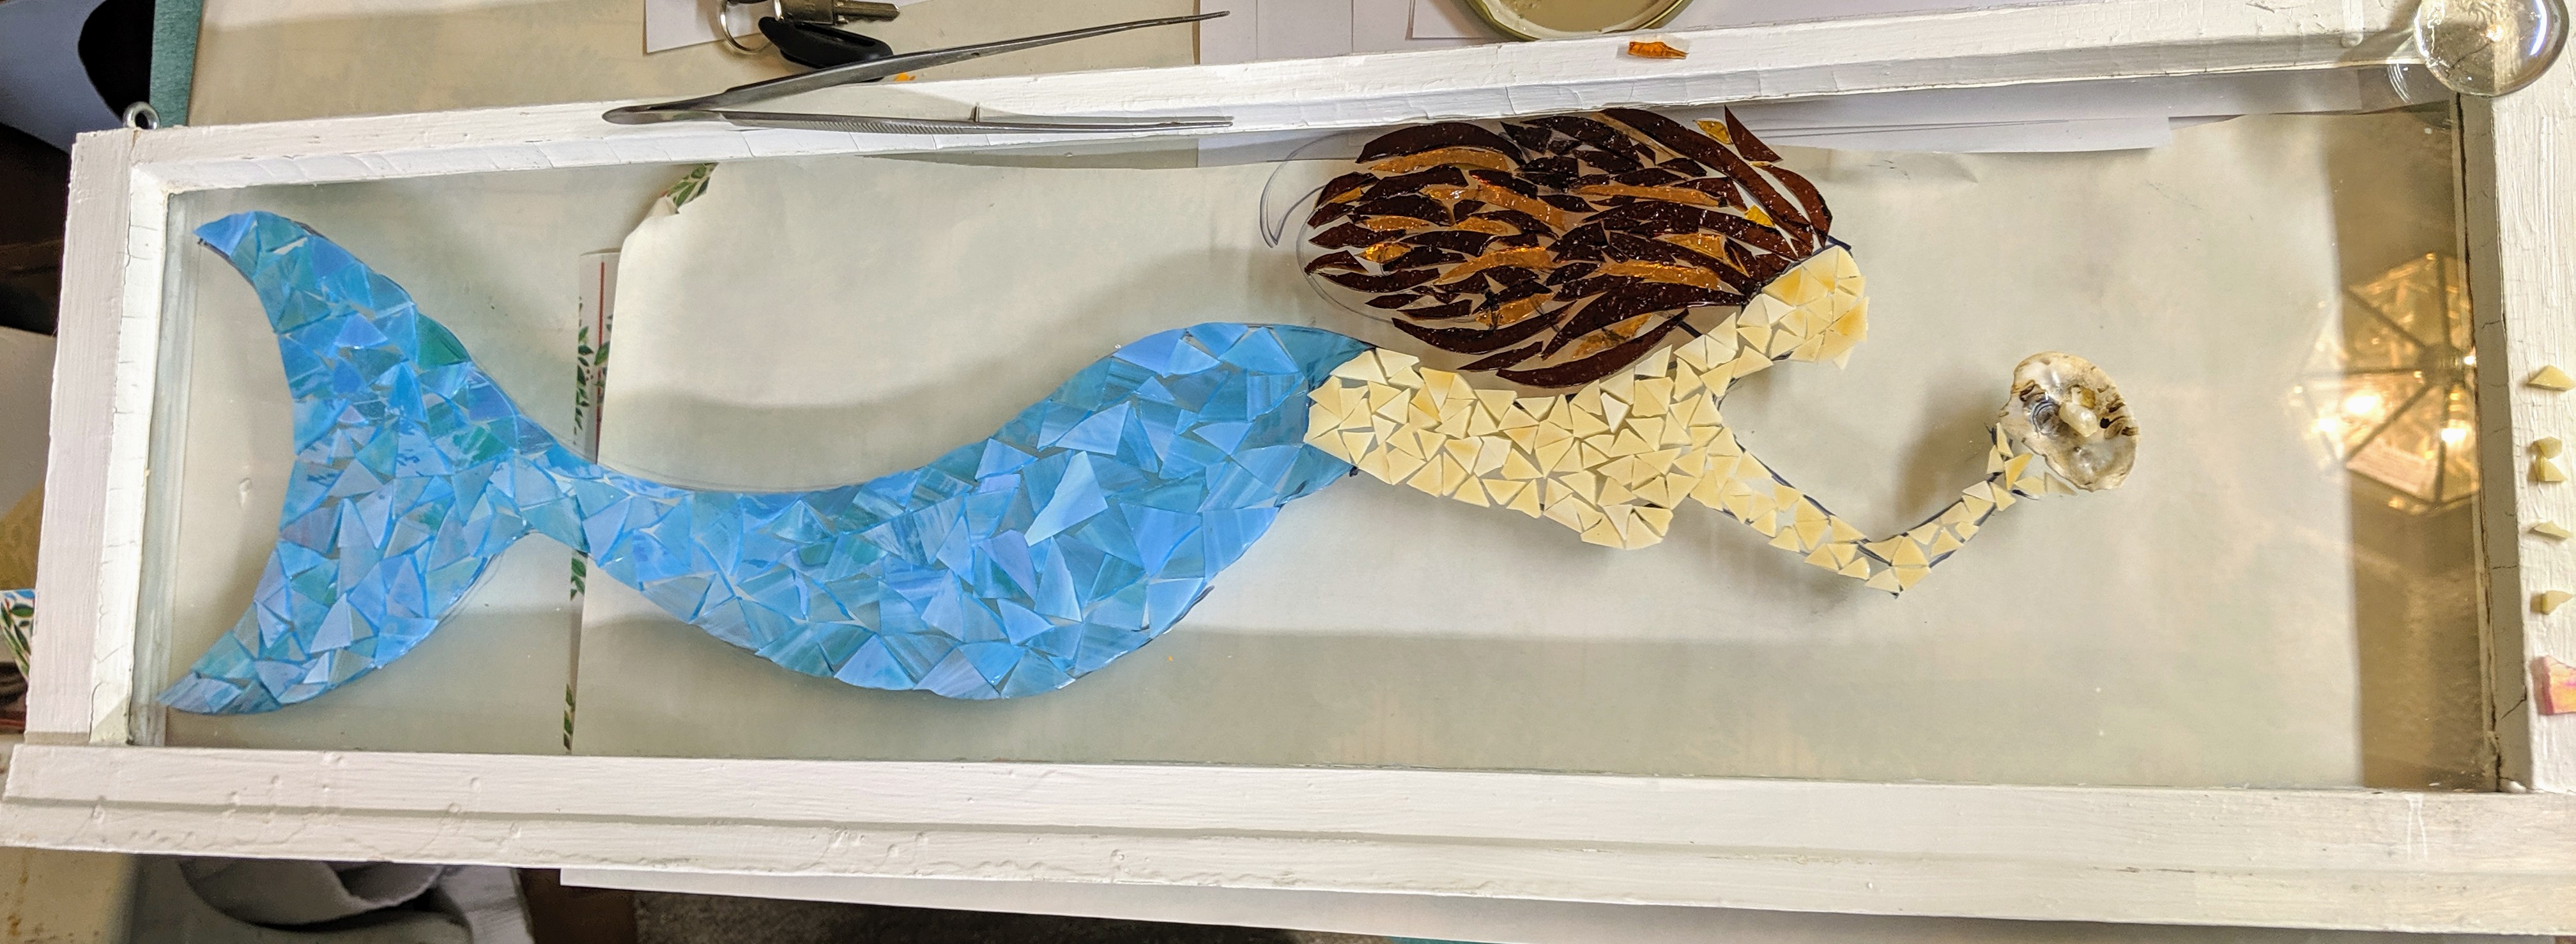
The mermaid mosaic cured enough overnight that I could bring her upstairs to snap a photo in better light. I’m pretty happy with how she turned out.

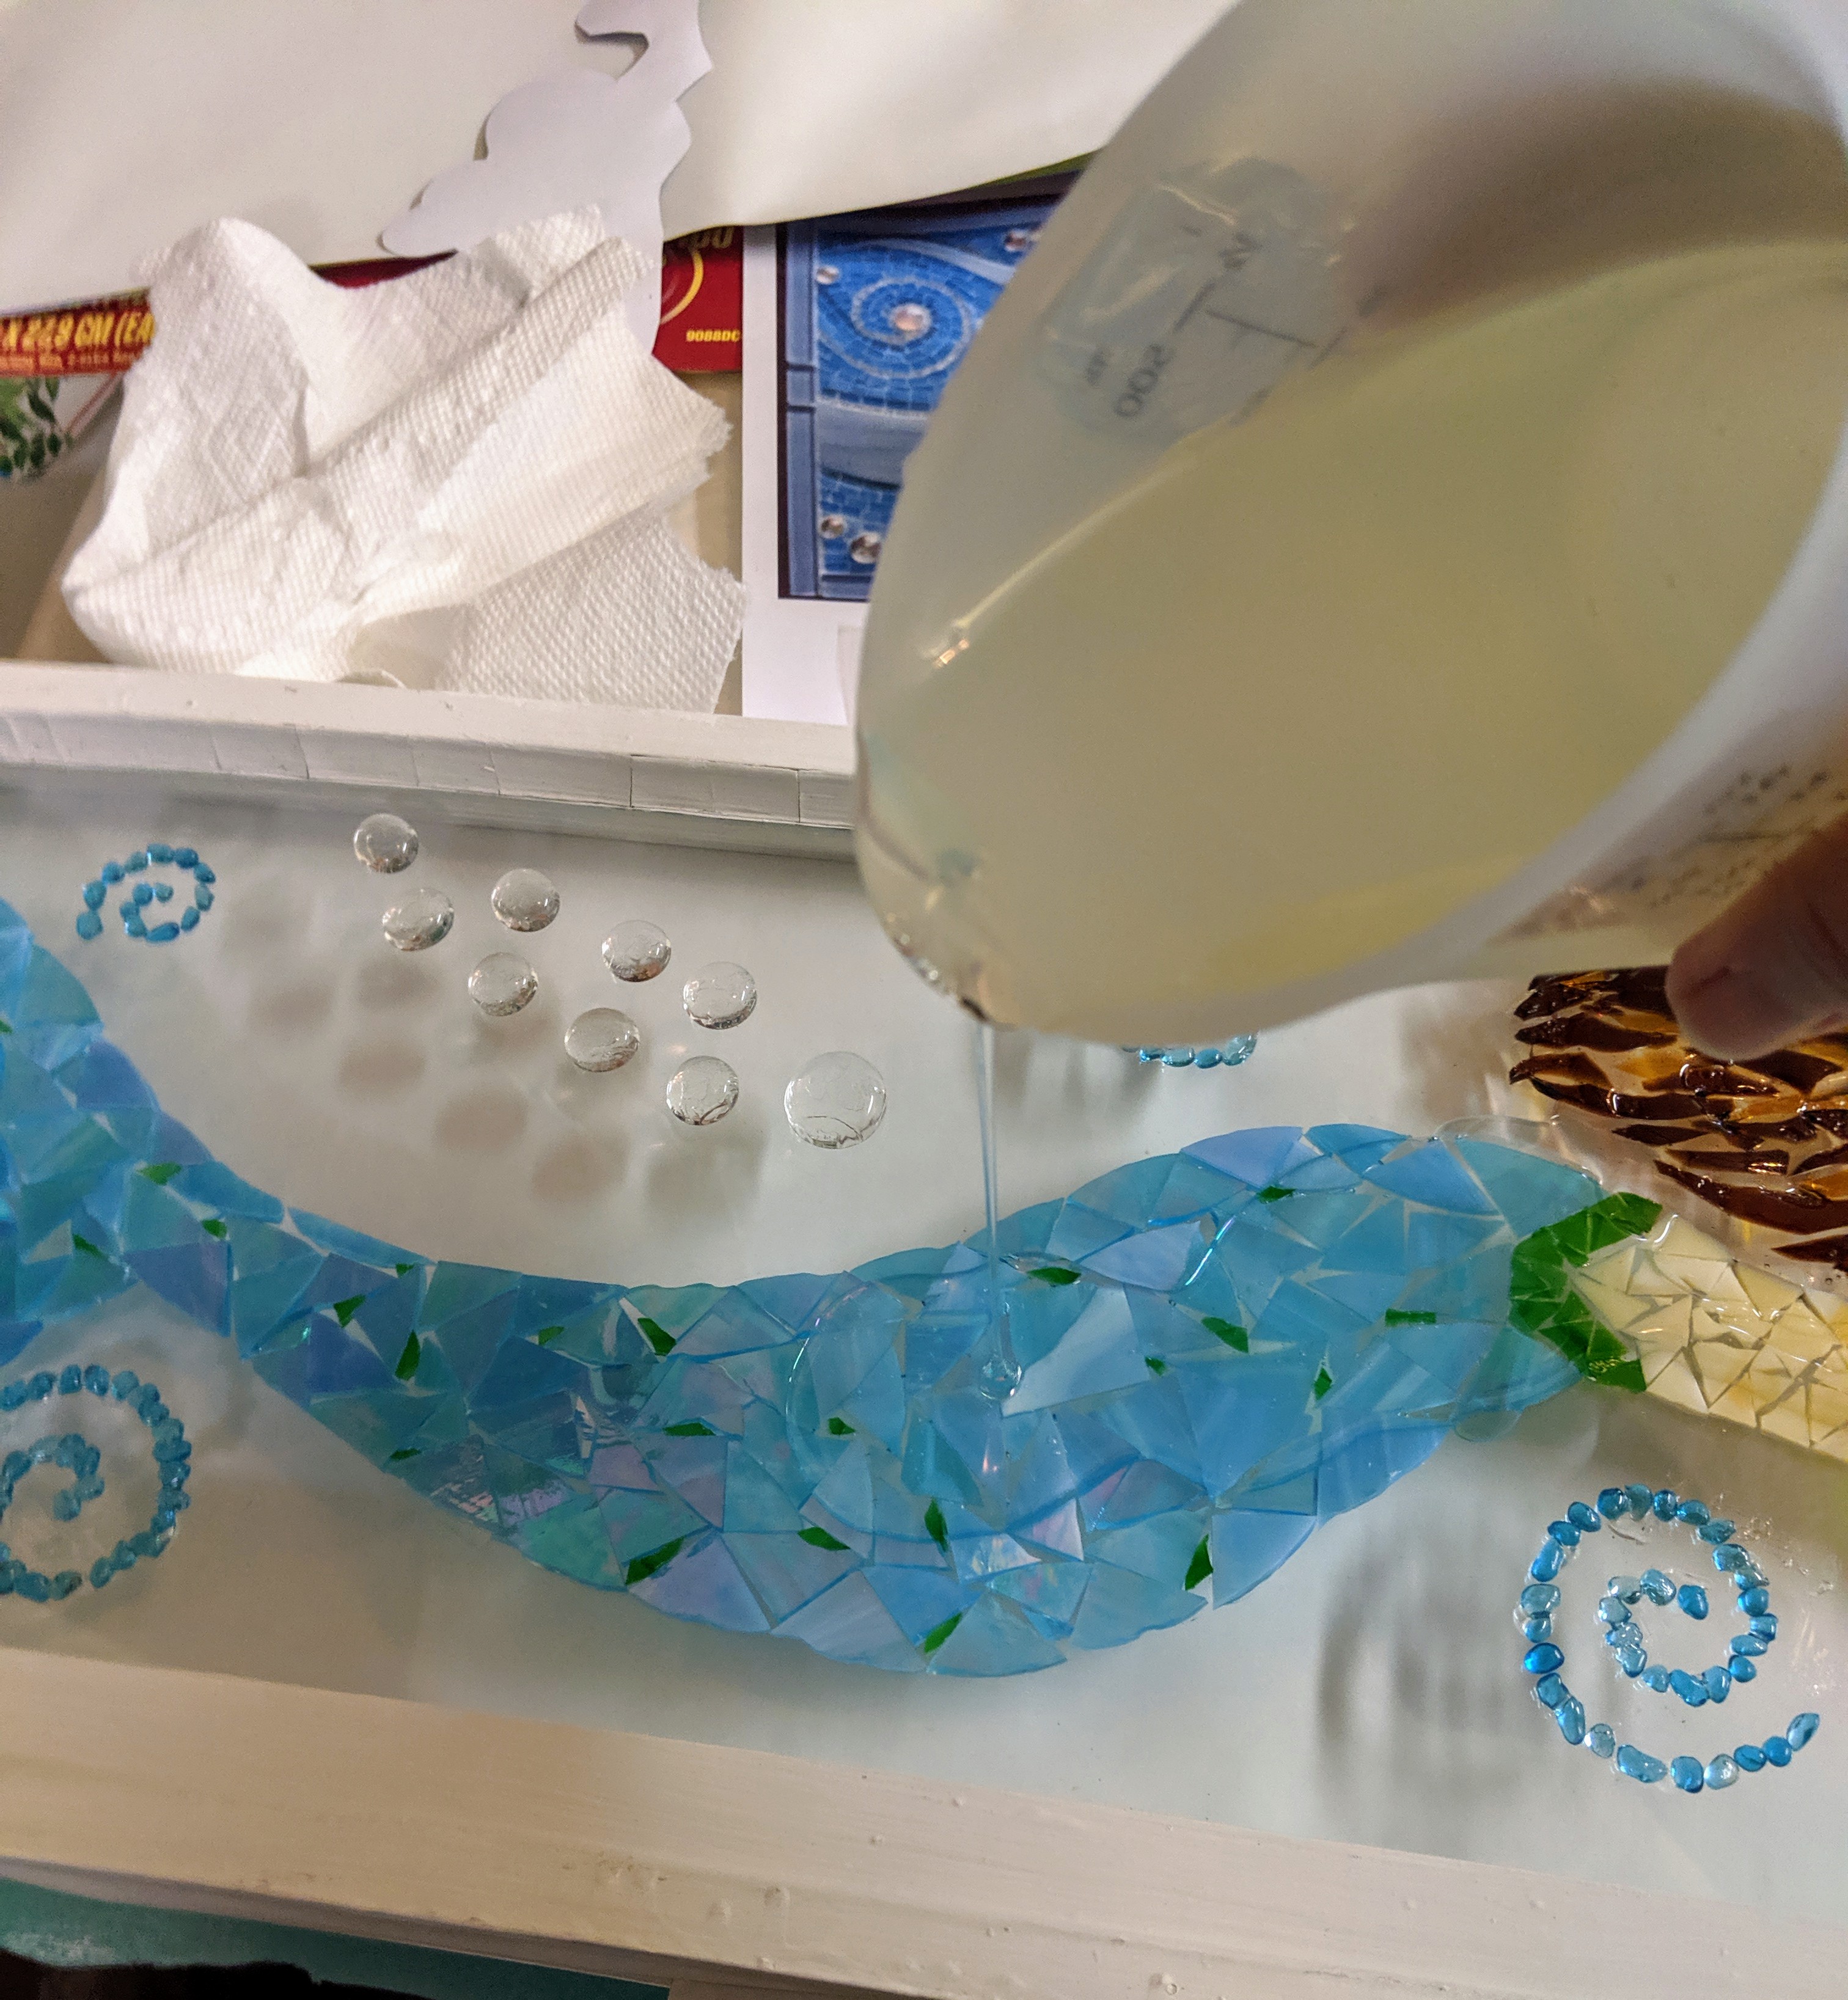
This morning I was able to pour the resin and decorate the background of the 9.5″ x 30″ mermaid window.
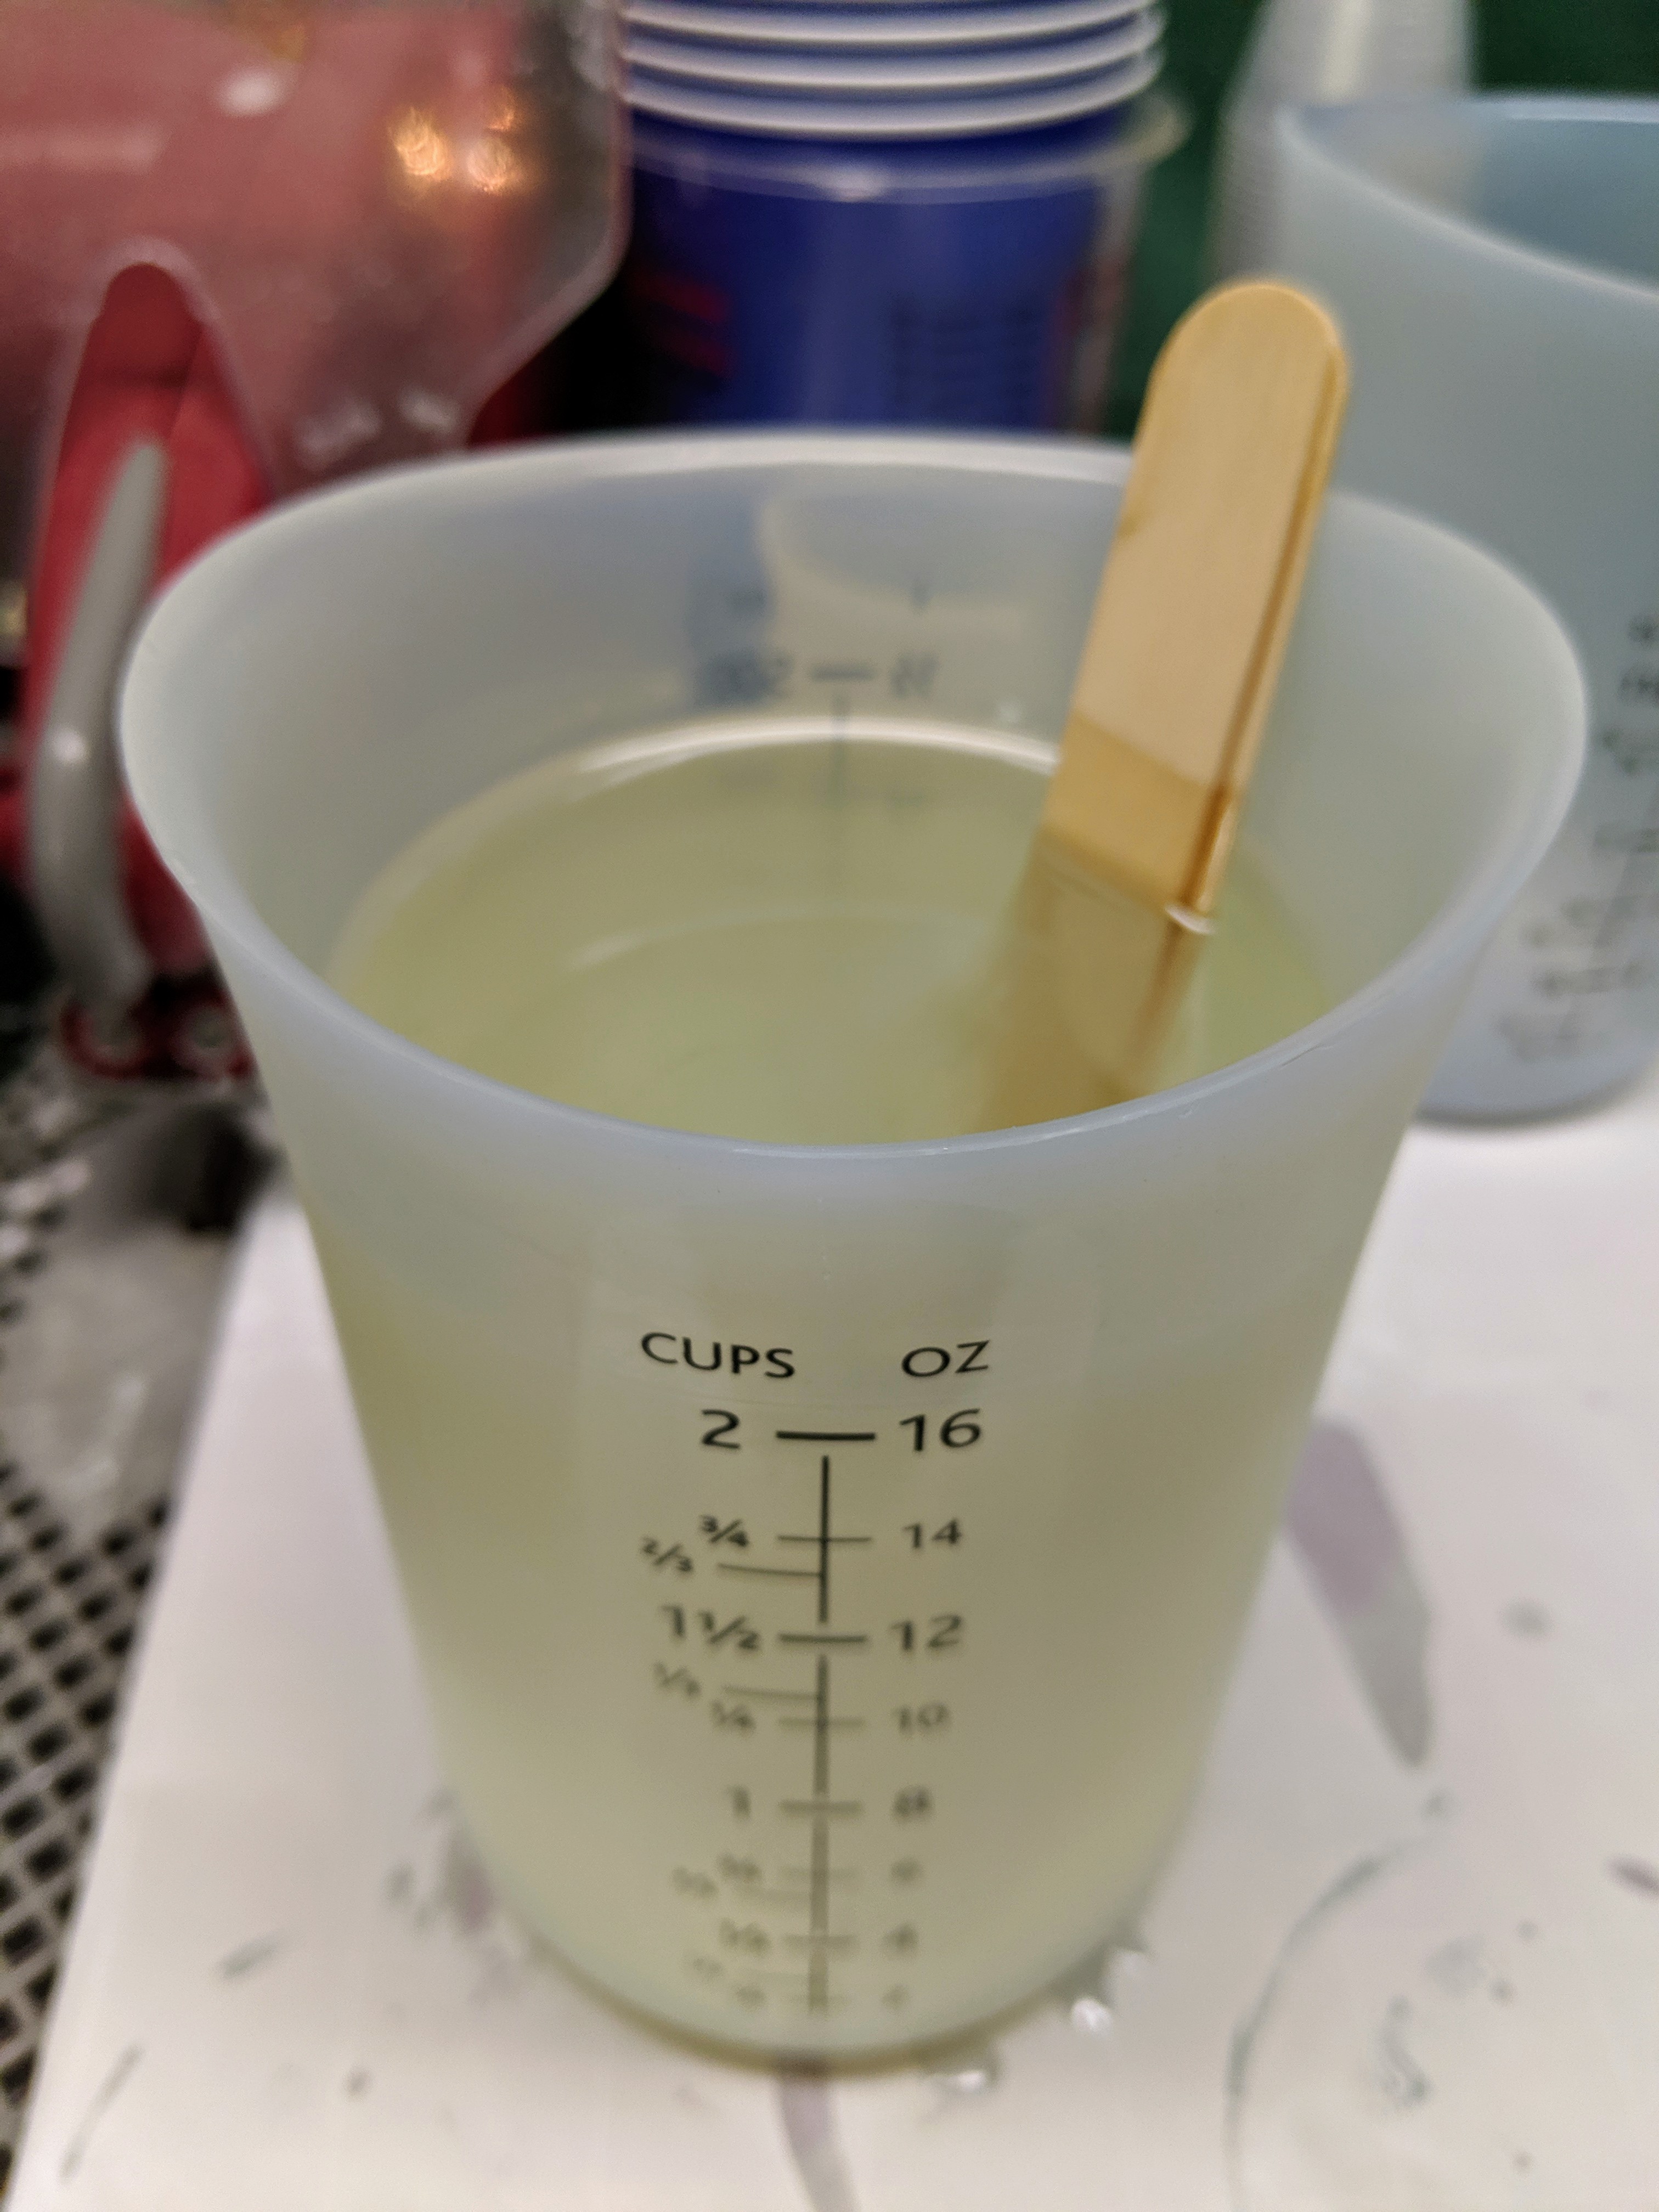
I mixed up 16 ounces of resin, which turned out to be a good amount. I had enough left over to start the first layer of one coaster, so there really wasn’t much in the way of waste. I love these silicone measuring cups because they are reusable and there is plenty of room to stir even when you fill it to 16 ounces.
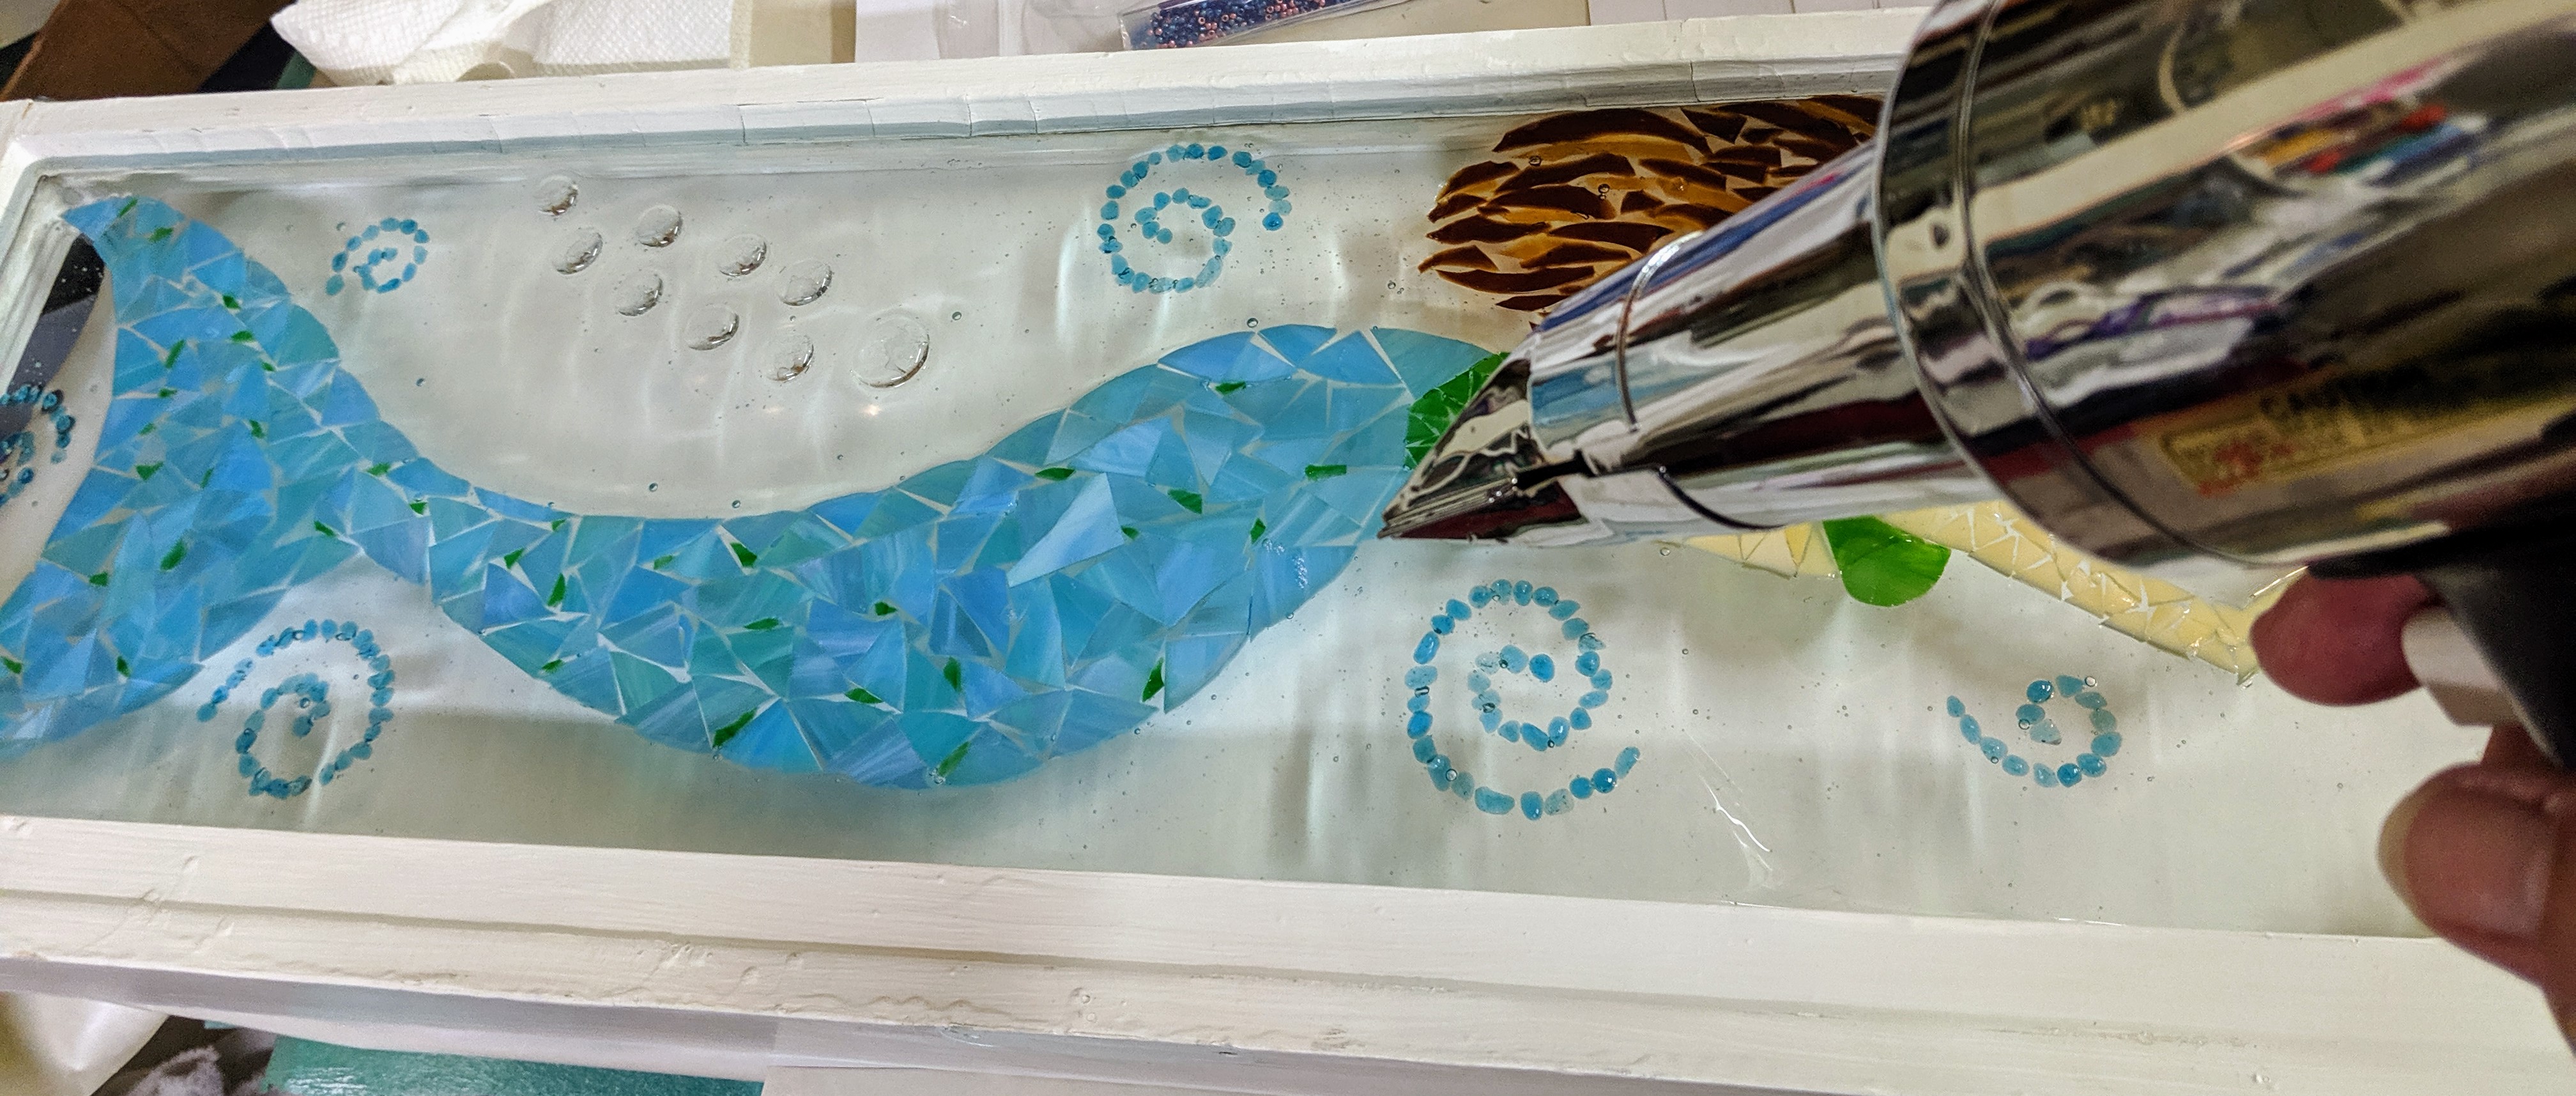
When the resin is well mixed, I started pouring it gently over the mosaic.
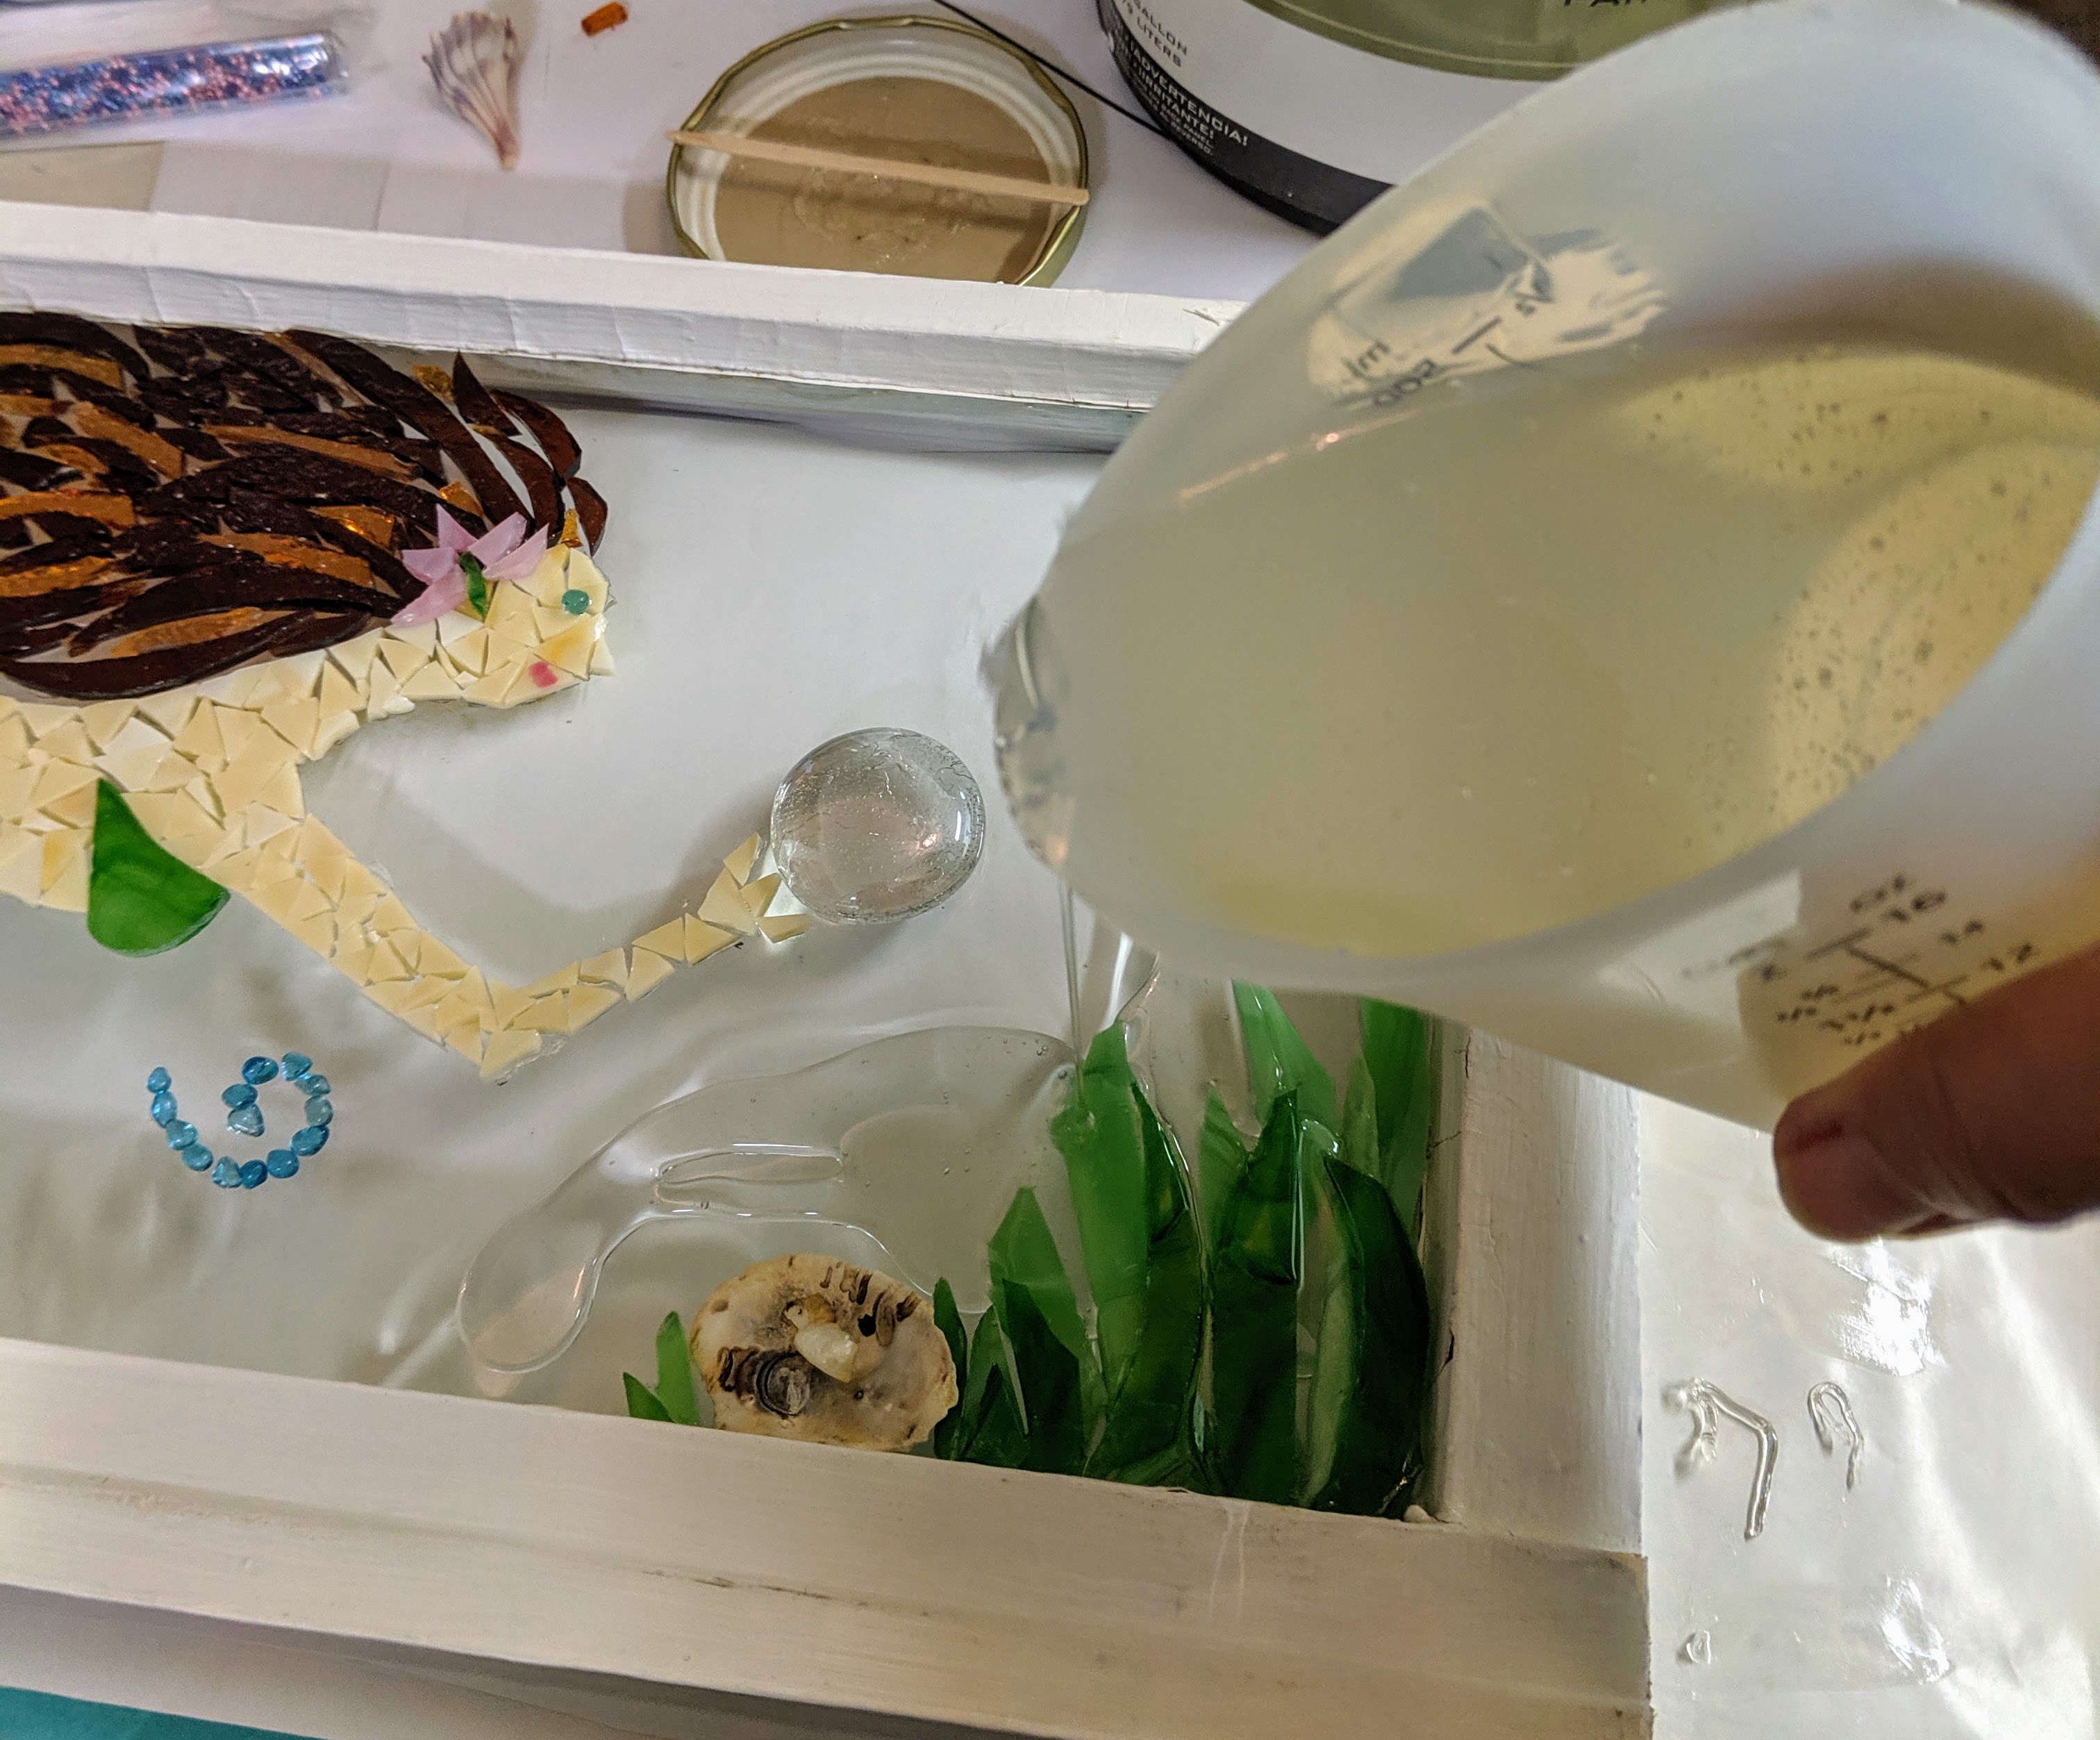
Once I feel like I have everything covered pretty well, it’s time to use the heat gun to remove the bubbles that form in the resin. I have been thinking about getting a craft blow torch for this because the heat gun is hard to control and can move the resin more than I would like.
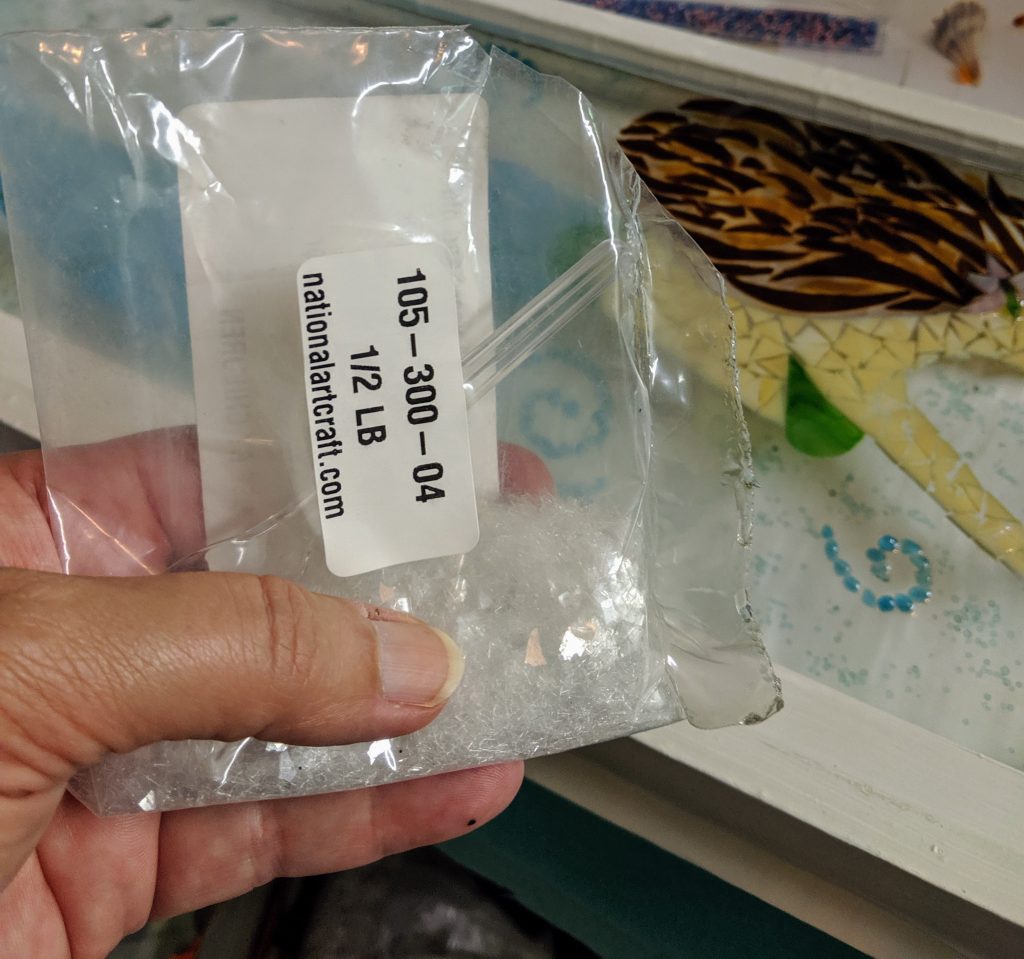
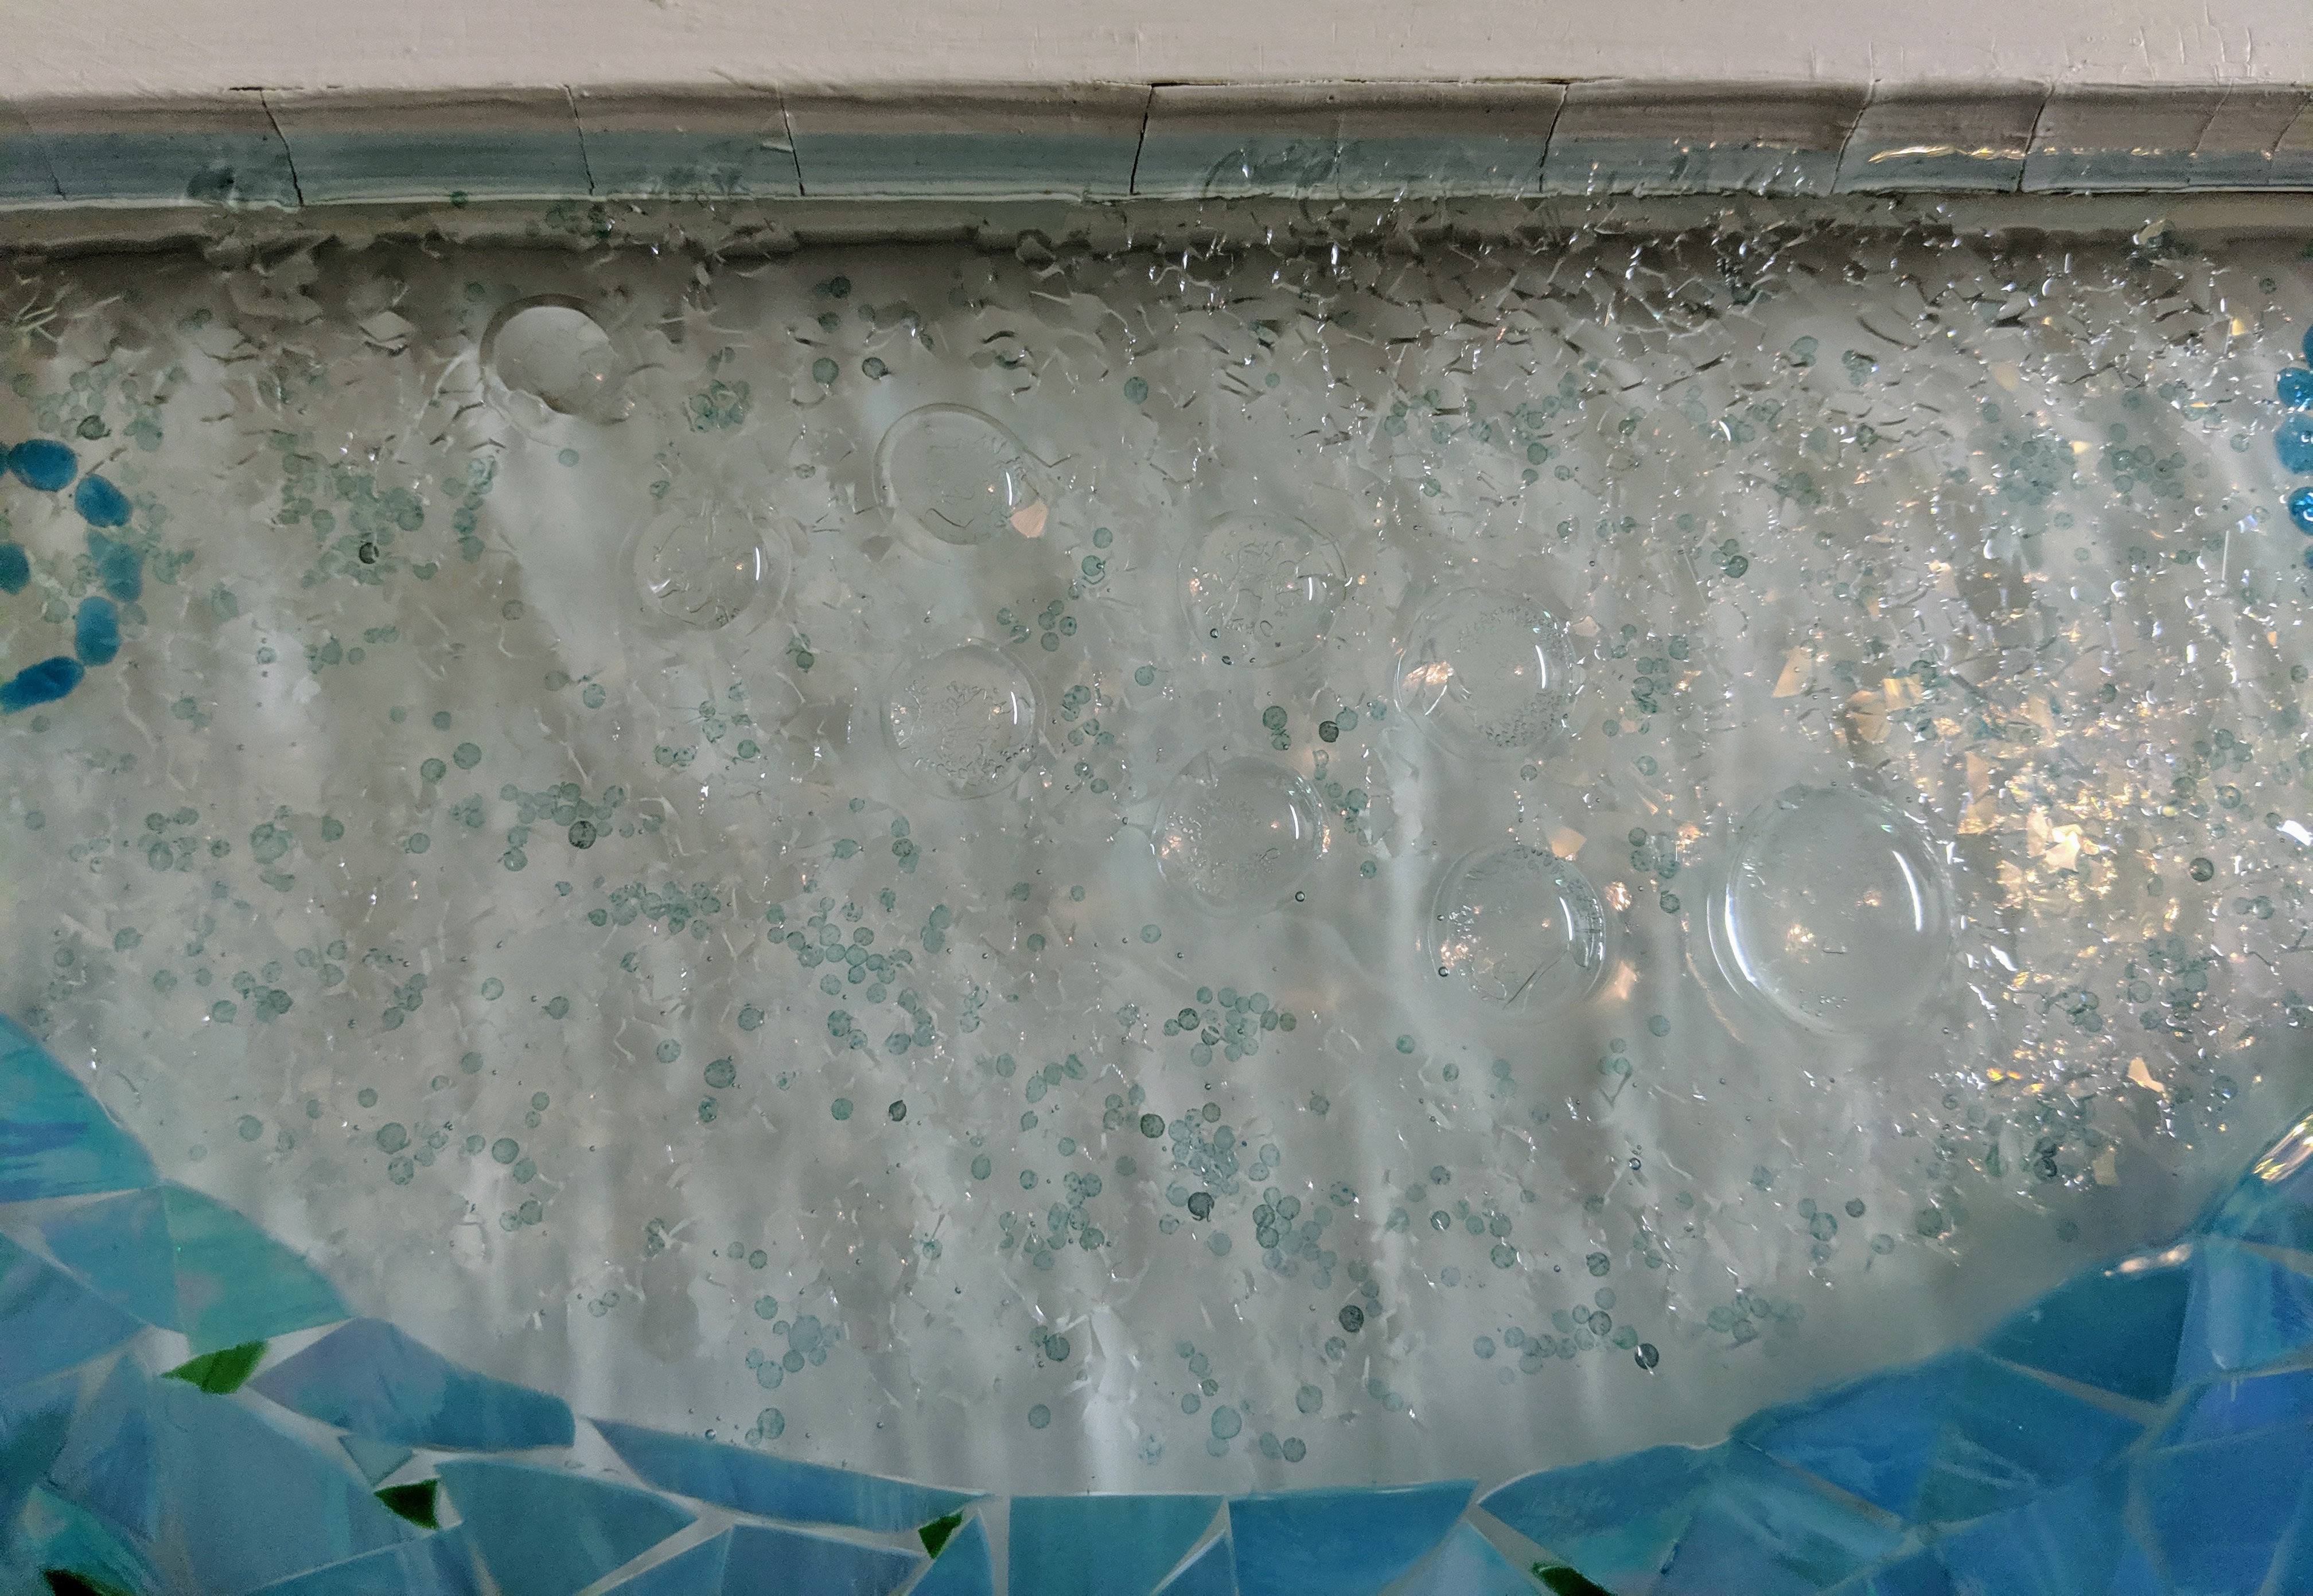
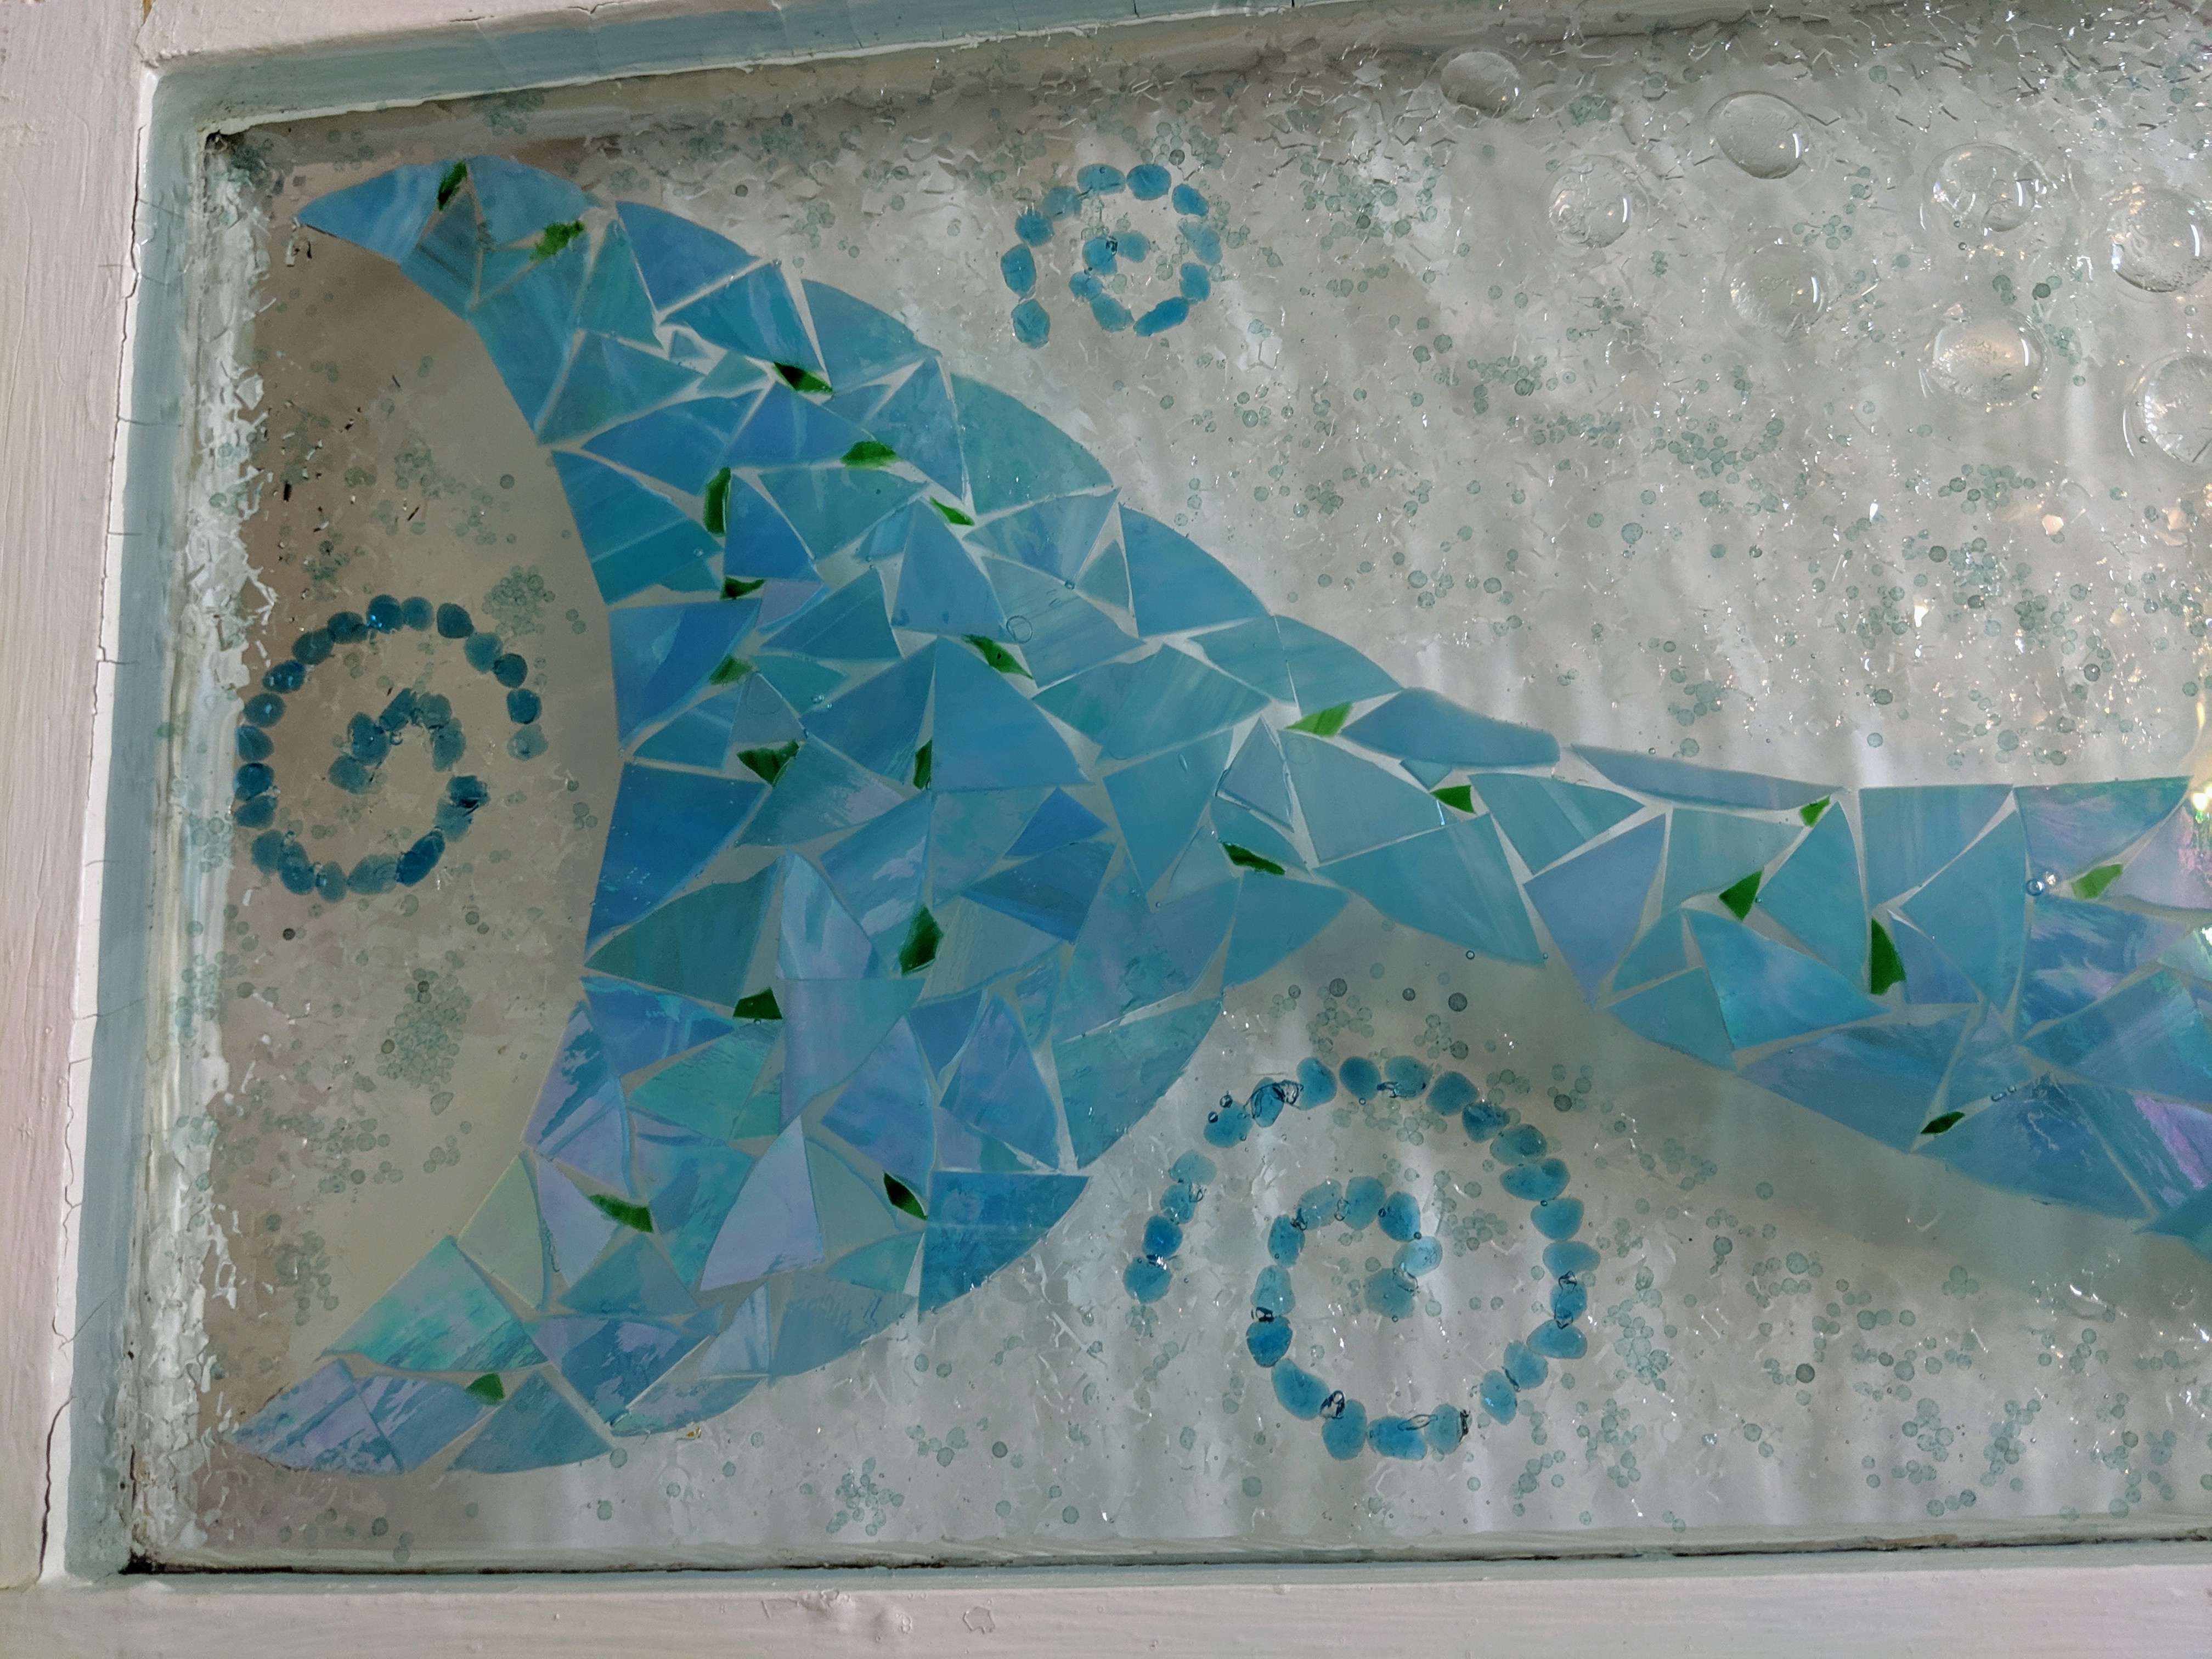
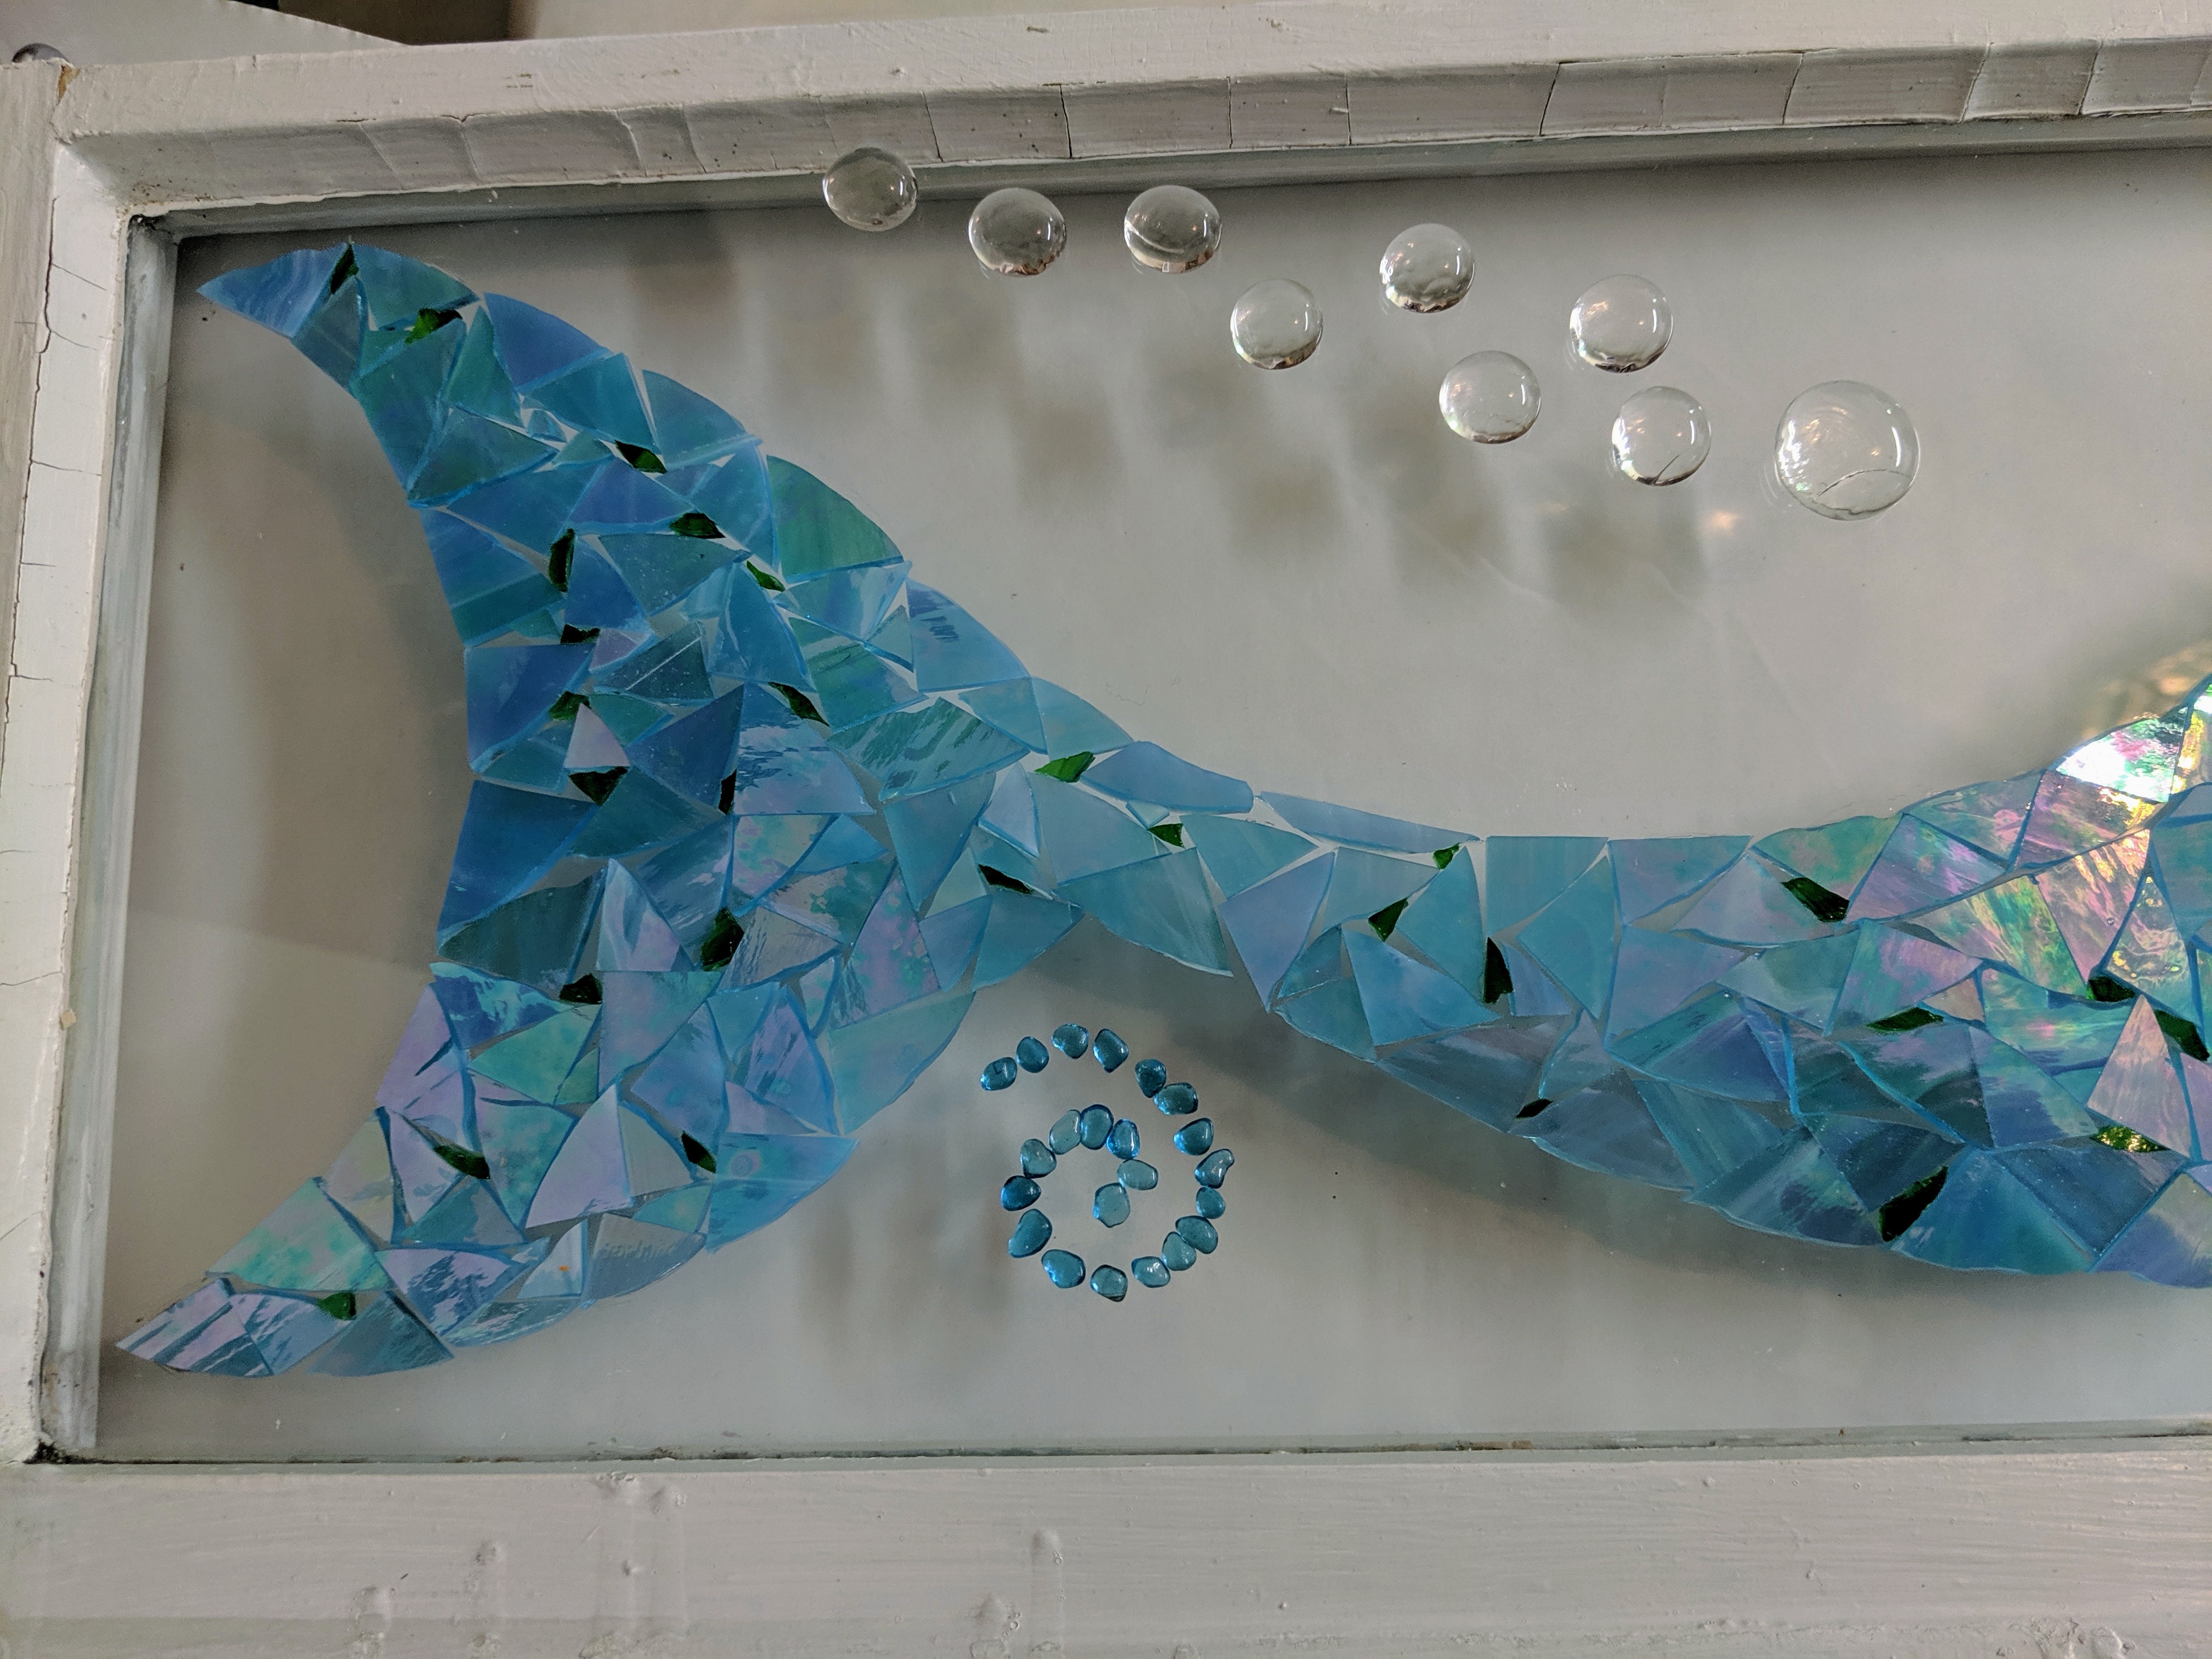
Now it’s time to add the decoration to the background. For this piece, I used some tiny blue filler (which I can’t get anymore because it was discontinued, but that’s another story). After the blue filler, I added clear glass flakes to add sparkle. My sister sent me some beads and I was thinking about using some of them, but I chickened out at the last minute because I haven’t tried them yet and I’m not sure how they will look in the resin. I’ll probably try them in a coaster first, rather than a larger piece like this.
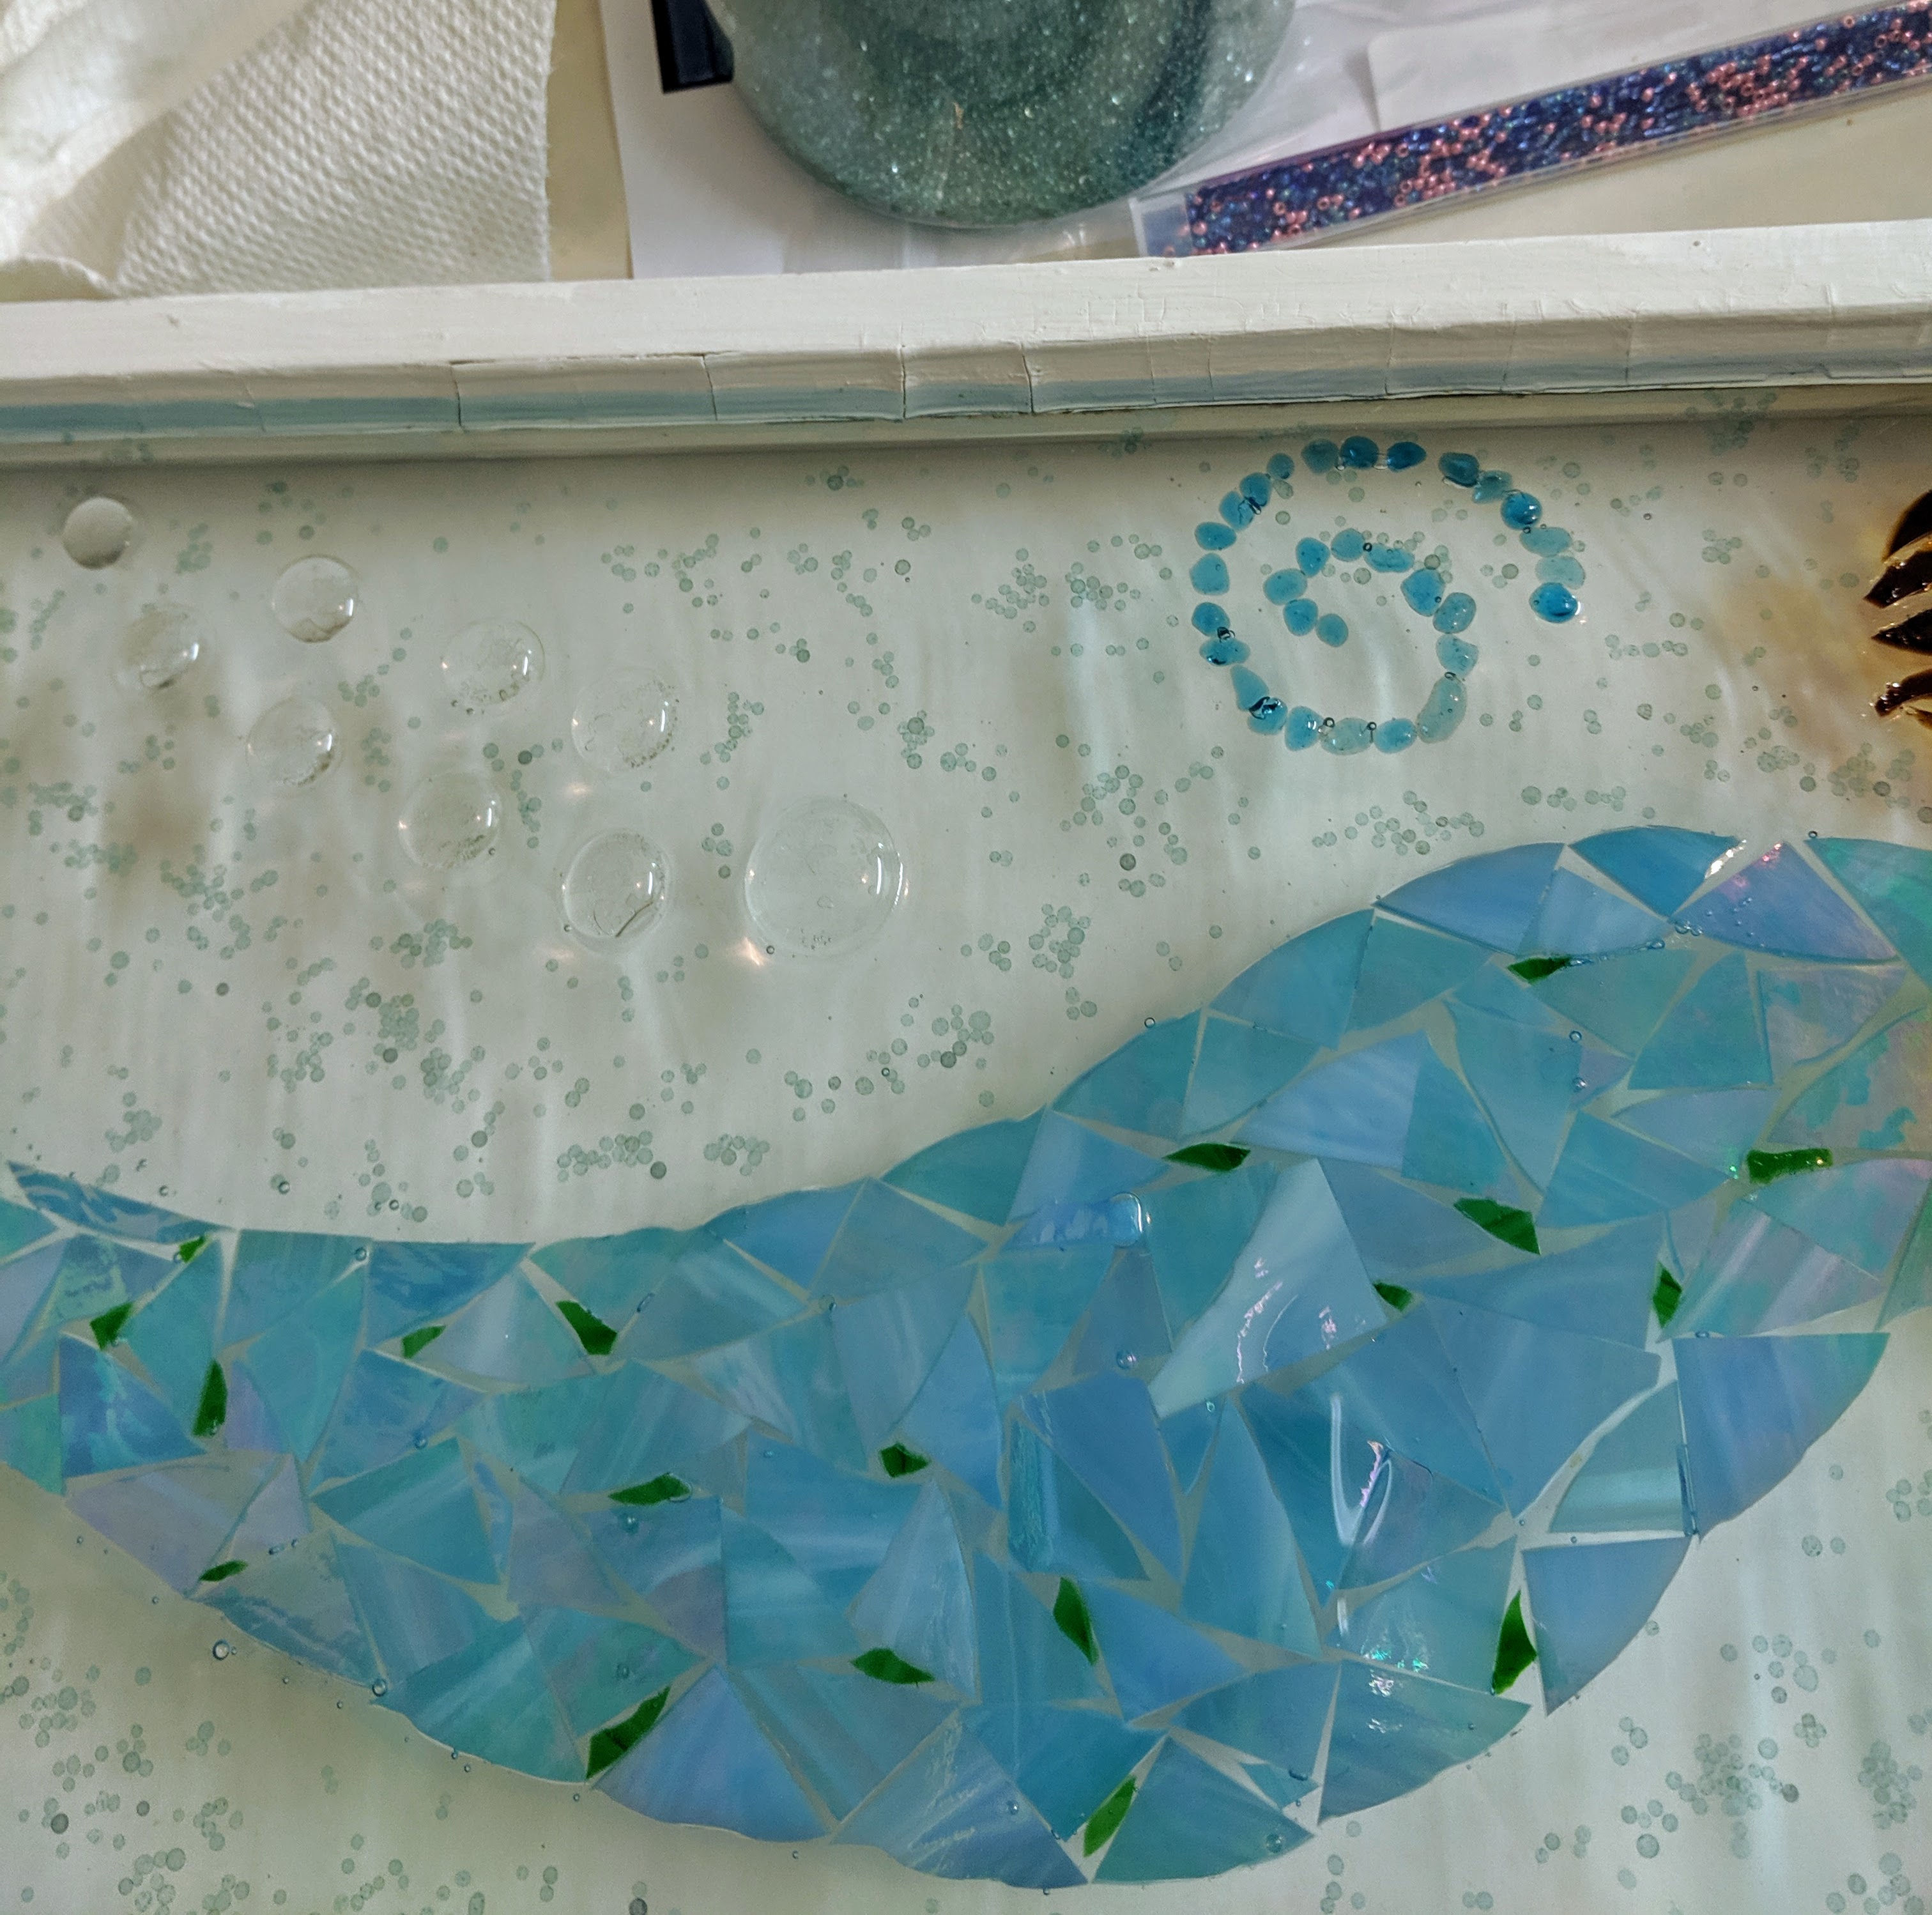
After that, I just keep an eye on the whole piece while the resin and the decorations settle down. I added a bit more of the decoration materials and touched up some spots that seemed to need a little more resin after shifting. It’s also important to check on the piece over the first hour of curing time to ensure you can remove any bubbles that form – sometimes they can be large and will detract from the look I am trying to achieve. They can be removed with the heat gun or sometimes a craft stick. Below are some up close detail photos of the window.
Today I went back and forth on, but finally committed to (read that, glued in place) some background decoration features for the mermaid. I glued them in place because they are small and the resin might push them out of place when I am pouring it. I don’t want to be trying to make the swirls look perfect when the resin is applied, so I used some Mac glue to secure them. I might add just *one* more little blue swirl. The next step is to let the glue dry overnight. Hopefully tomorrow everything will look great and I can pour and decorate the resin background to bring it all together!
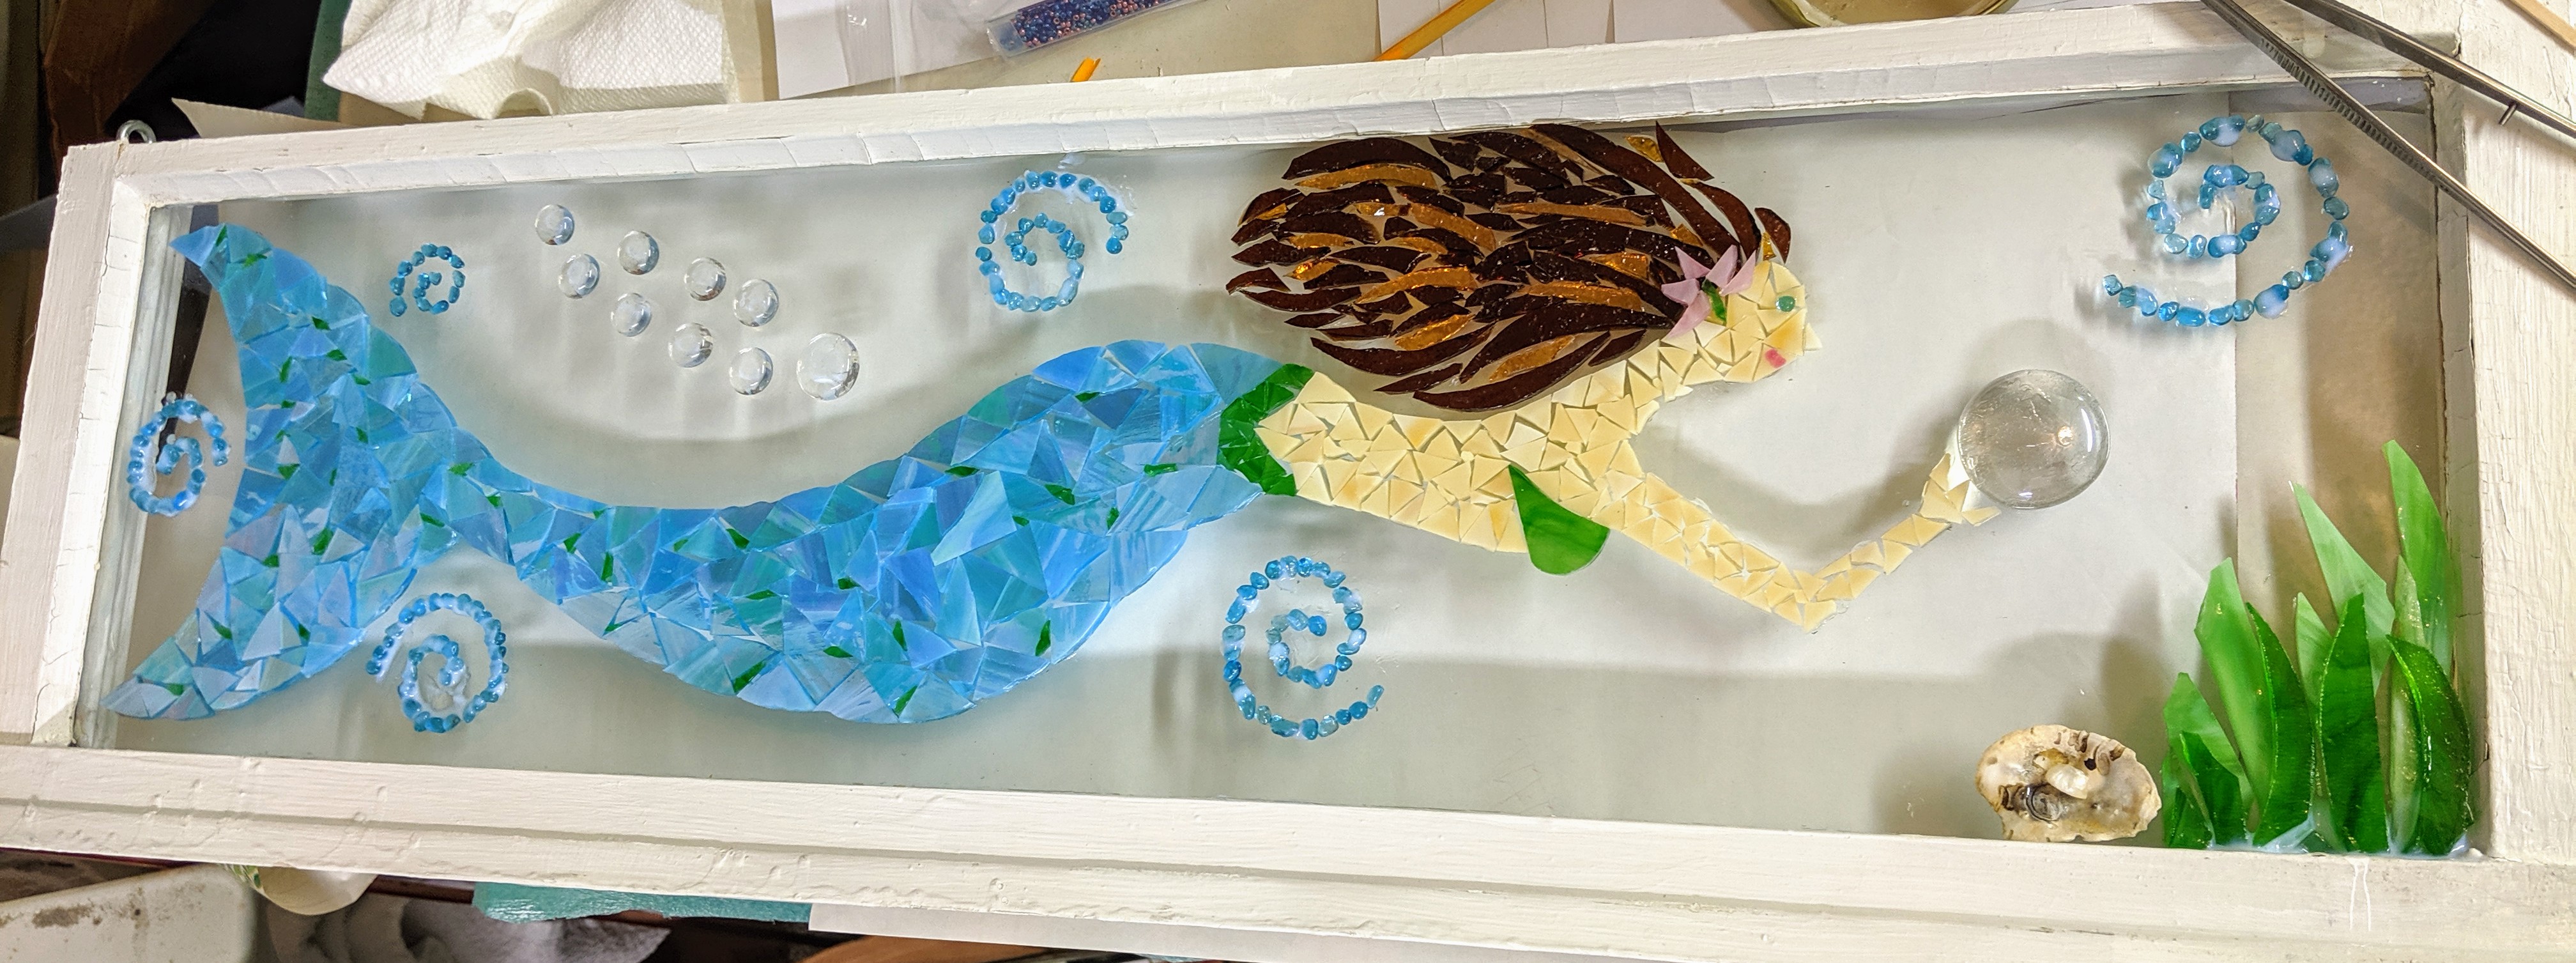
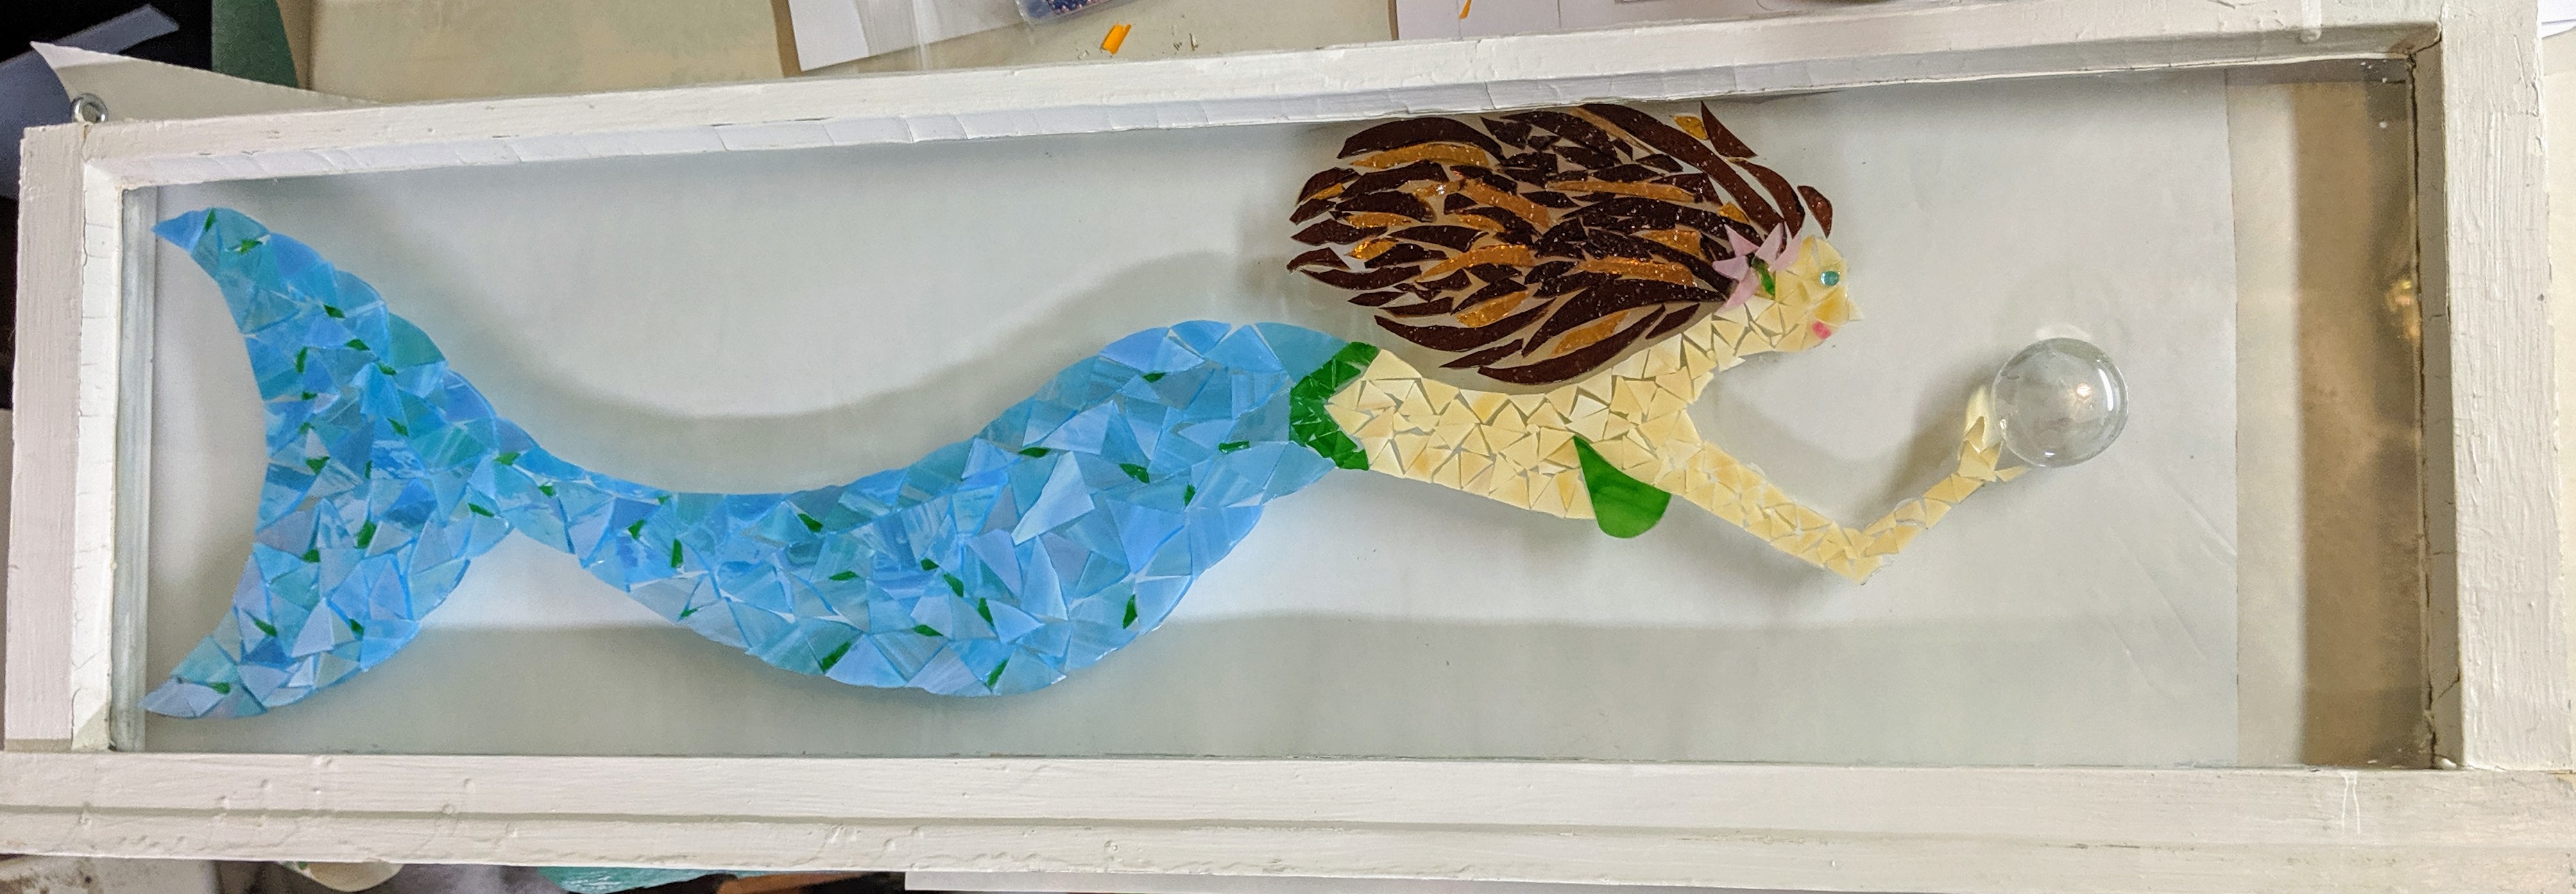
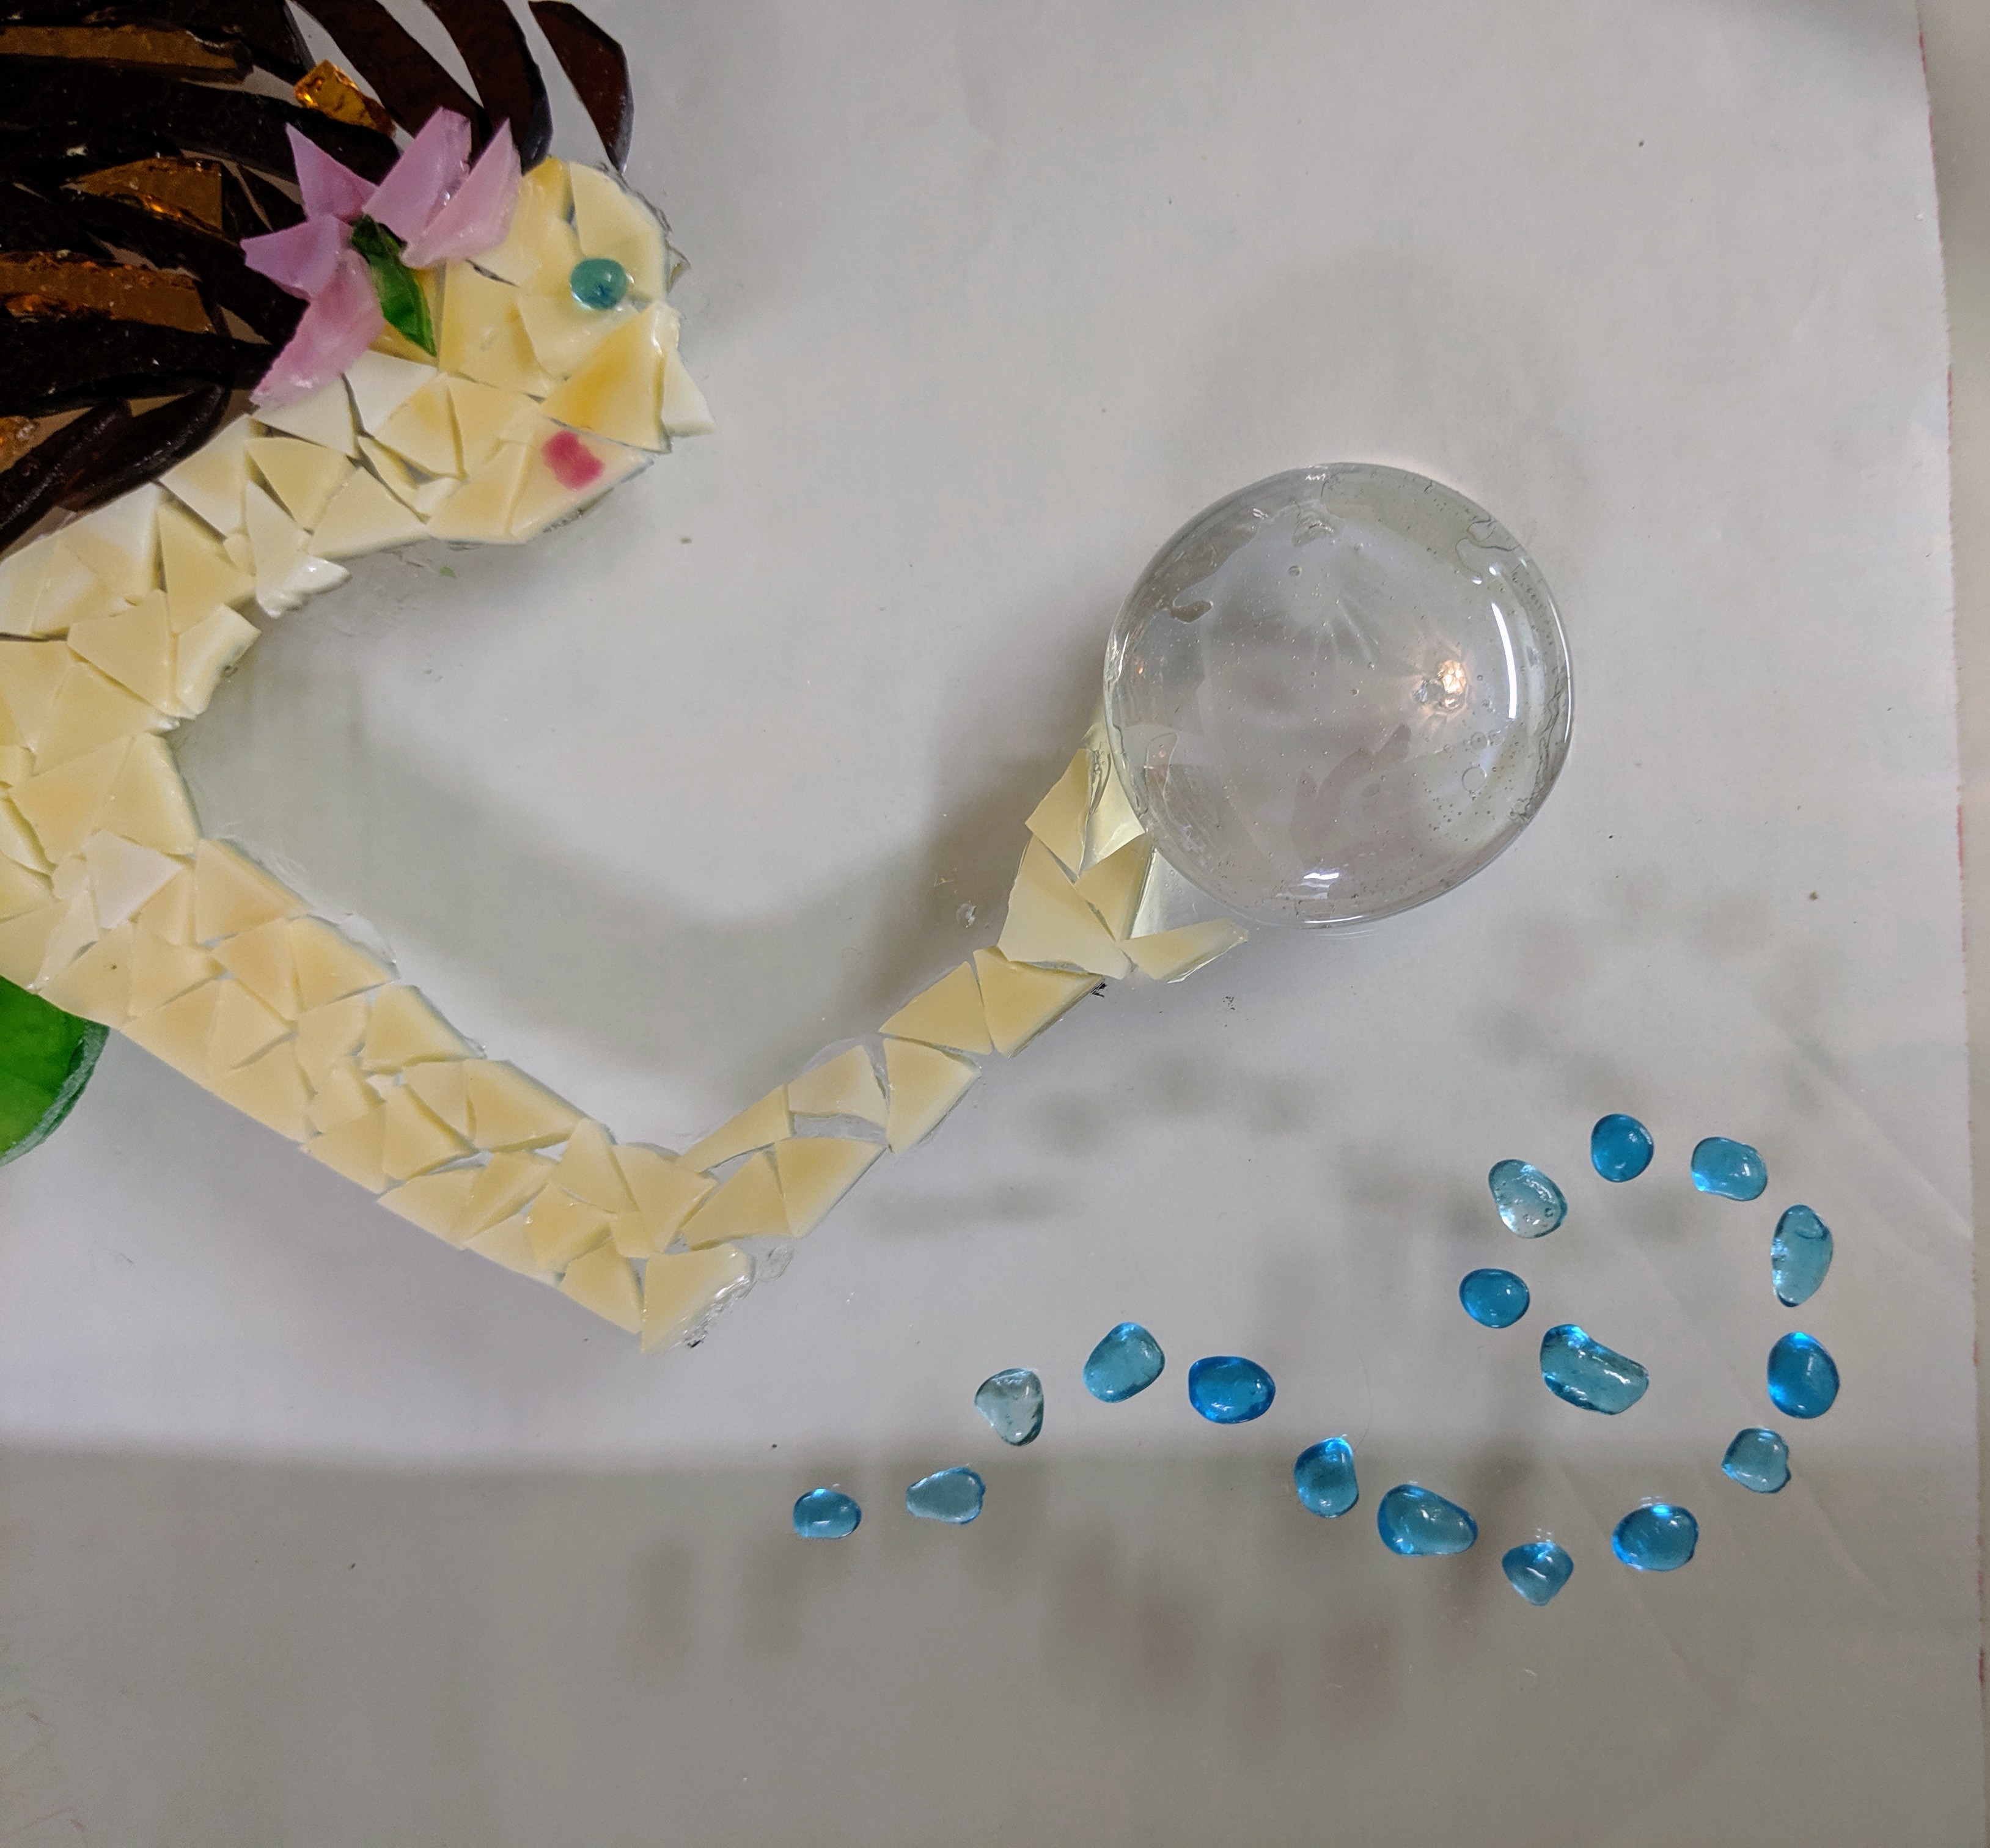
After comparing a few alternatives, I decided to give the mermaid a bubble to hold. I really liked the flower, though, so I added it to her hair. I also started embellishing her tail with some green accents and gluing down her upper body. I was able to pretty much finish her today, now I have to plan how I will decorate the background around her when I pour the resin.
I have all sorts of options for embellishing the background.
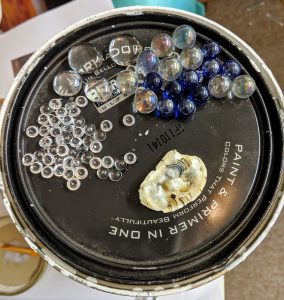
I’d like to add some swirls and bubbles, but the placement of everything can be hard for me to figure out, so I generally lay out several samples and move them around to help me decide.
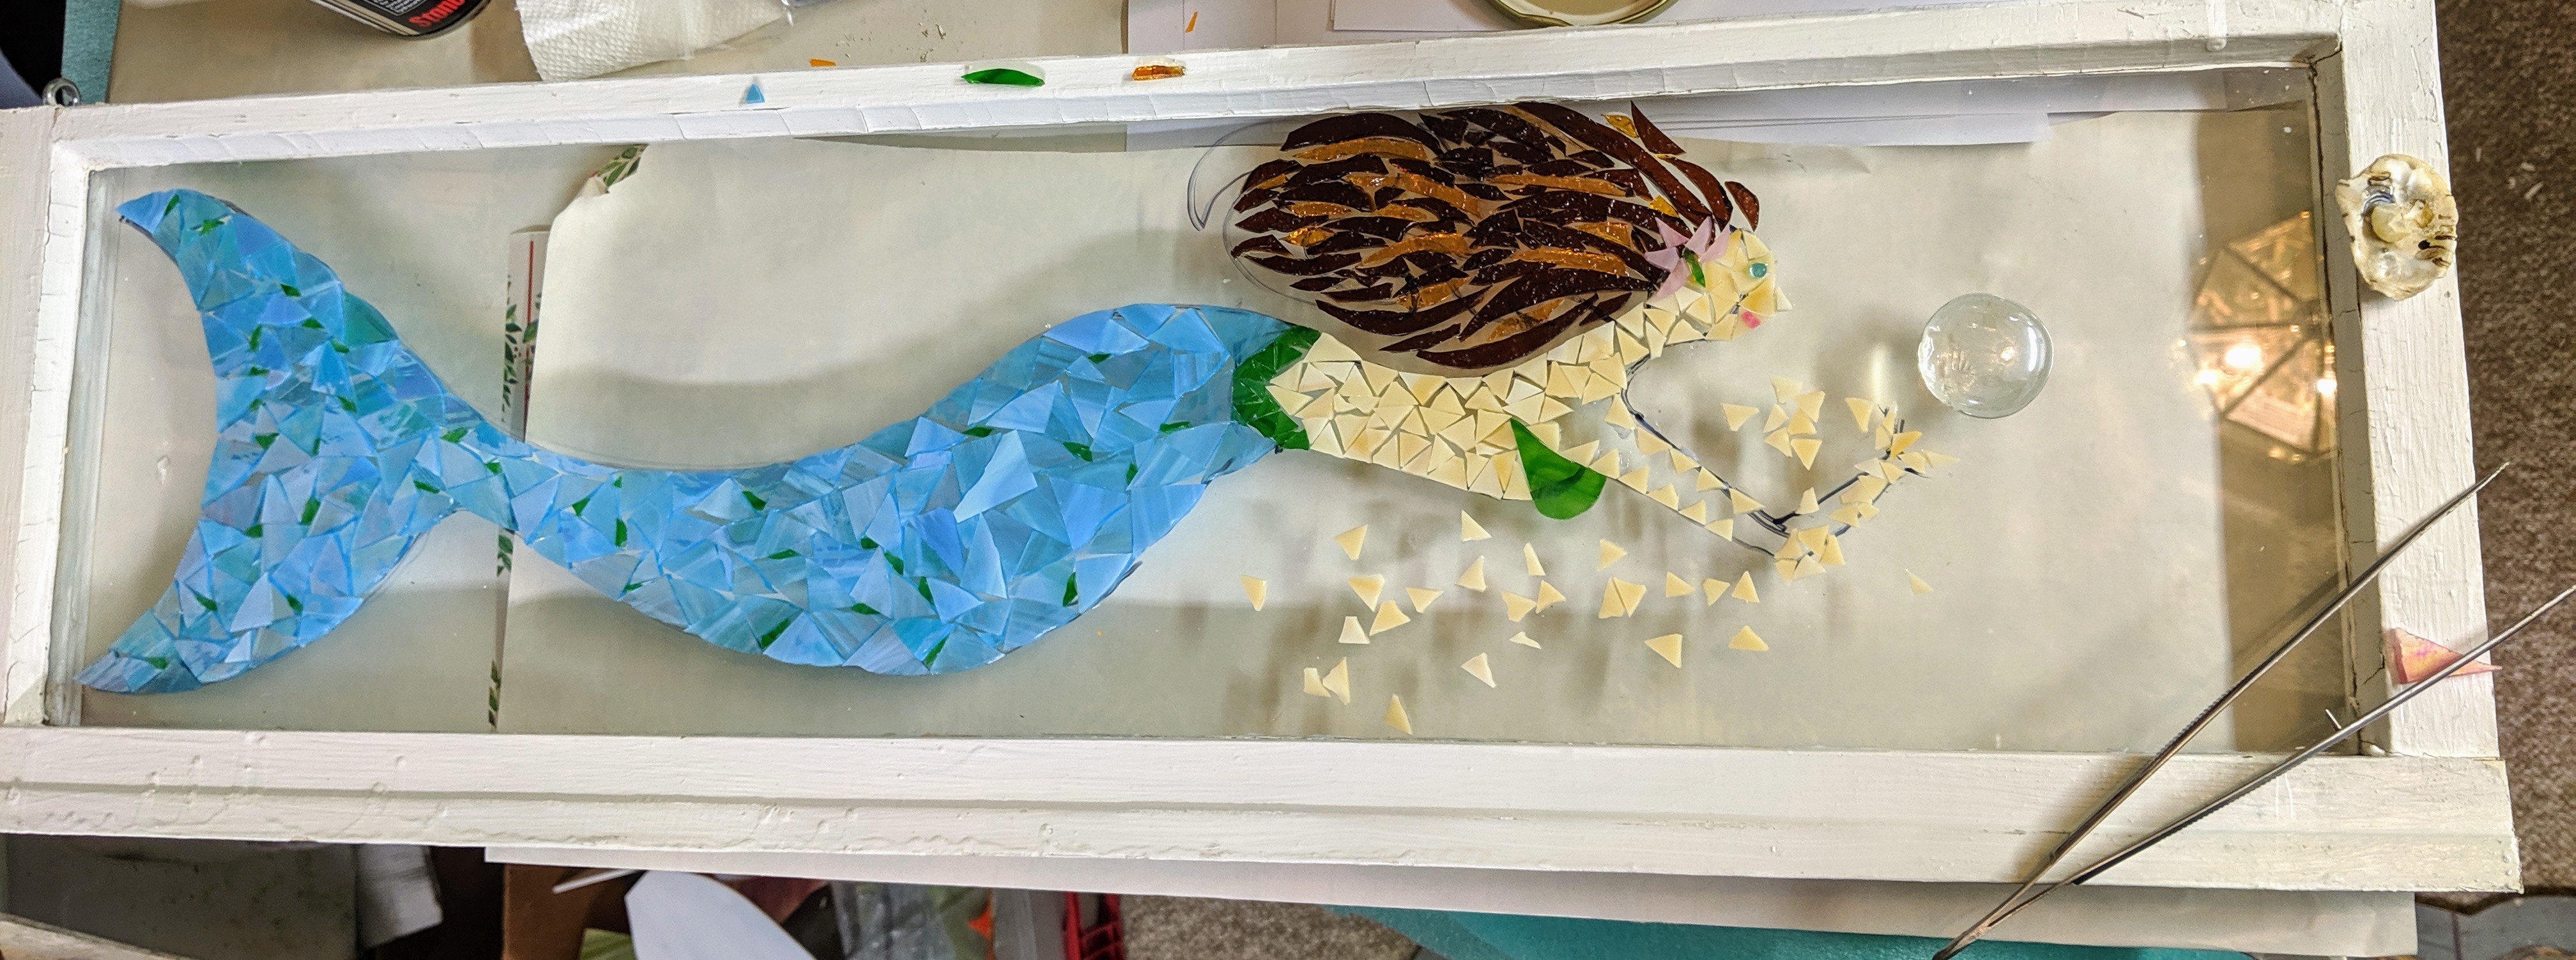
Today I was able to glue down the mermaid’s tresses and start thinking about her upper body. I spent almost all day working on her.
I used two colors of the same type of stained glass for her hair – a rich brown and an amber hue. My son says it looks like her hair is on fire. I arranged the pieces of glass and added a few details here and there as I glued it in place.
Once I had her hair done, I started trying out various colors for her upper body. This is my first round. None of her upper body / arms is glued (or really properly arranged) yet. I started with the sandy / tan glass and so far I think I like it. I would like to give her more depth, though, so I might need to incorporate some other shades, or just let her be sort of flat. I also can’t decide what she will be holding in her hands. Originally I planned for her to be holding a large marble (bubble), but the marble I have is not the right size (seems too small). I tried a large glass glob, and that seemed to be the right size, but it doesn’t add much in the way of interest to the overall piece. Then I thought I might use some of the pink glass I was thinking about using for her body and make a lotus flower out of it. I haven’t cut the glass for that yet, but it’s a possibility. I like the way the pink brings some interest to the mosaic, but I will also be decorating the background and will have the opportunity to add some interest then.
It’s time for the reveal of the coasters I made this week with the sand layer before the water. Spoiler alert, I like the water layer first final product a lot better.
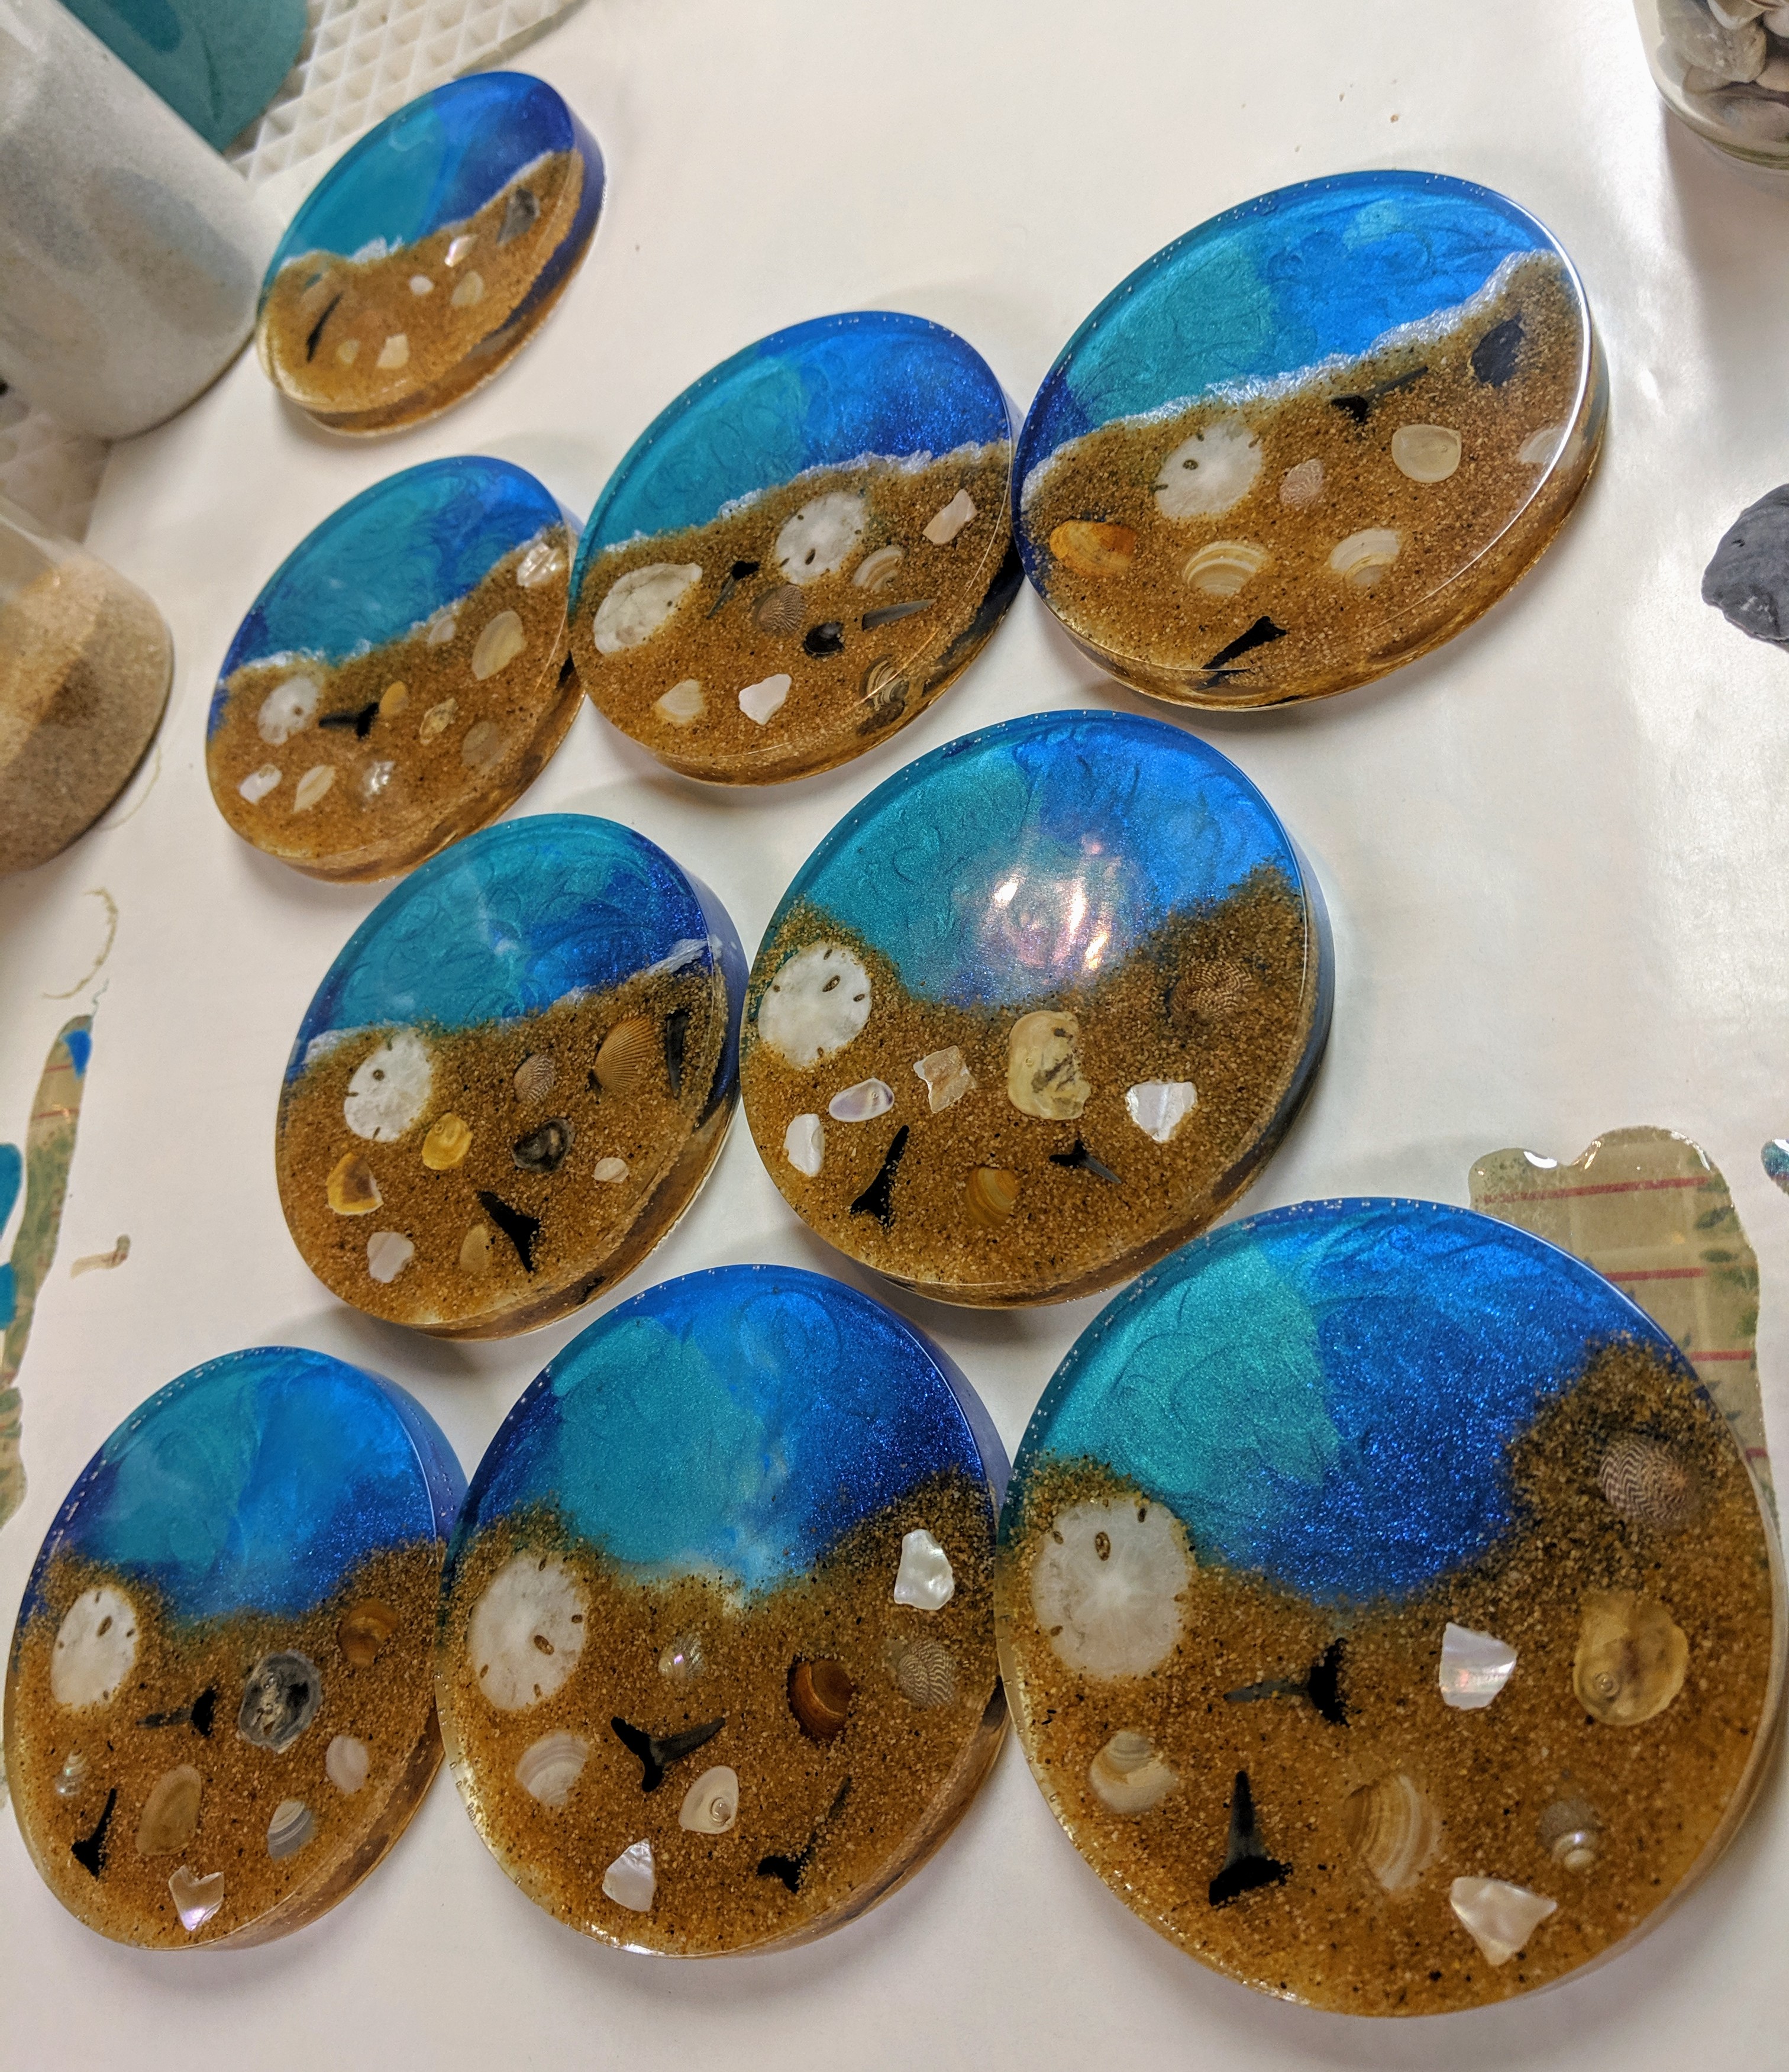
Here are my reasons. First, the water layer doesn’t distribute as well this way. I think pouring the pigmented resin on top of wet clear resin really makes it move more and look more like water. Even though I used a craft stick to make swirls in the water, they don’t look that different from the control coaster at the top left of the first photo, which I just poured and didn’t stir. (Does it sound like I’m talking about Martinis now?) Second, the sand comes up around the shells and other decorative items on the beach and makes it look like they are all suffocating.

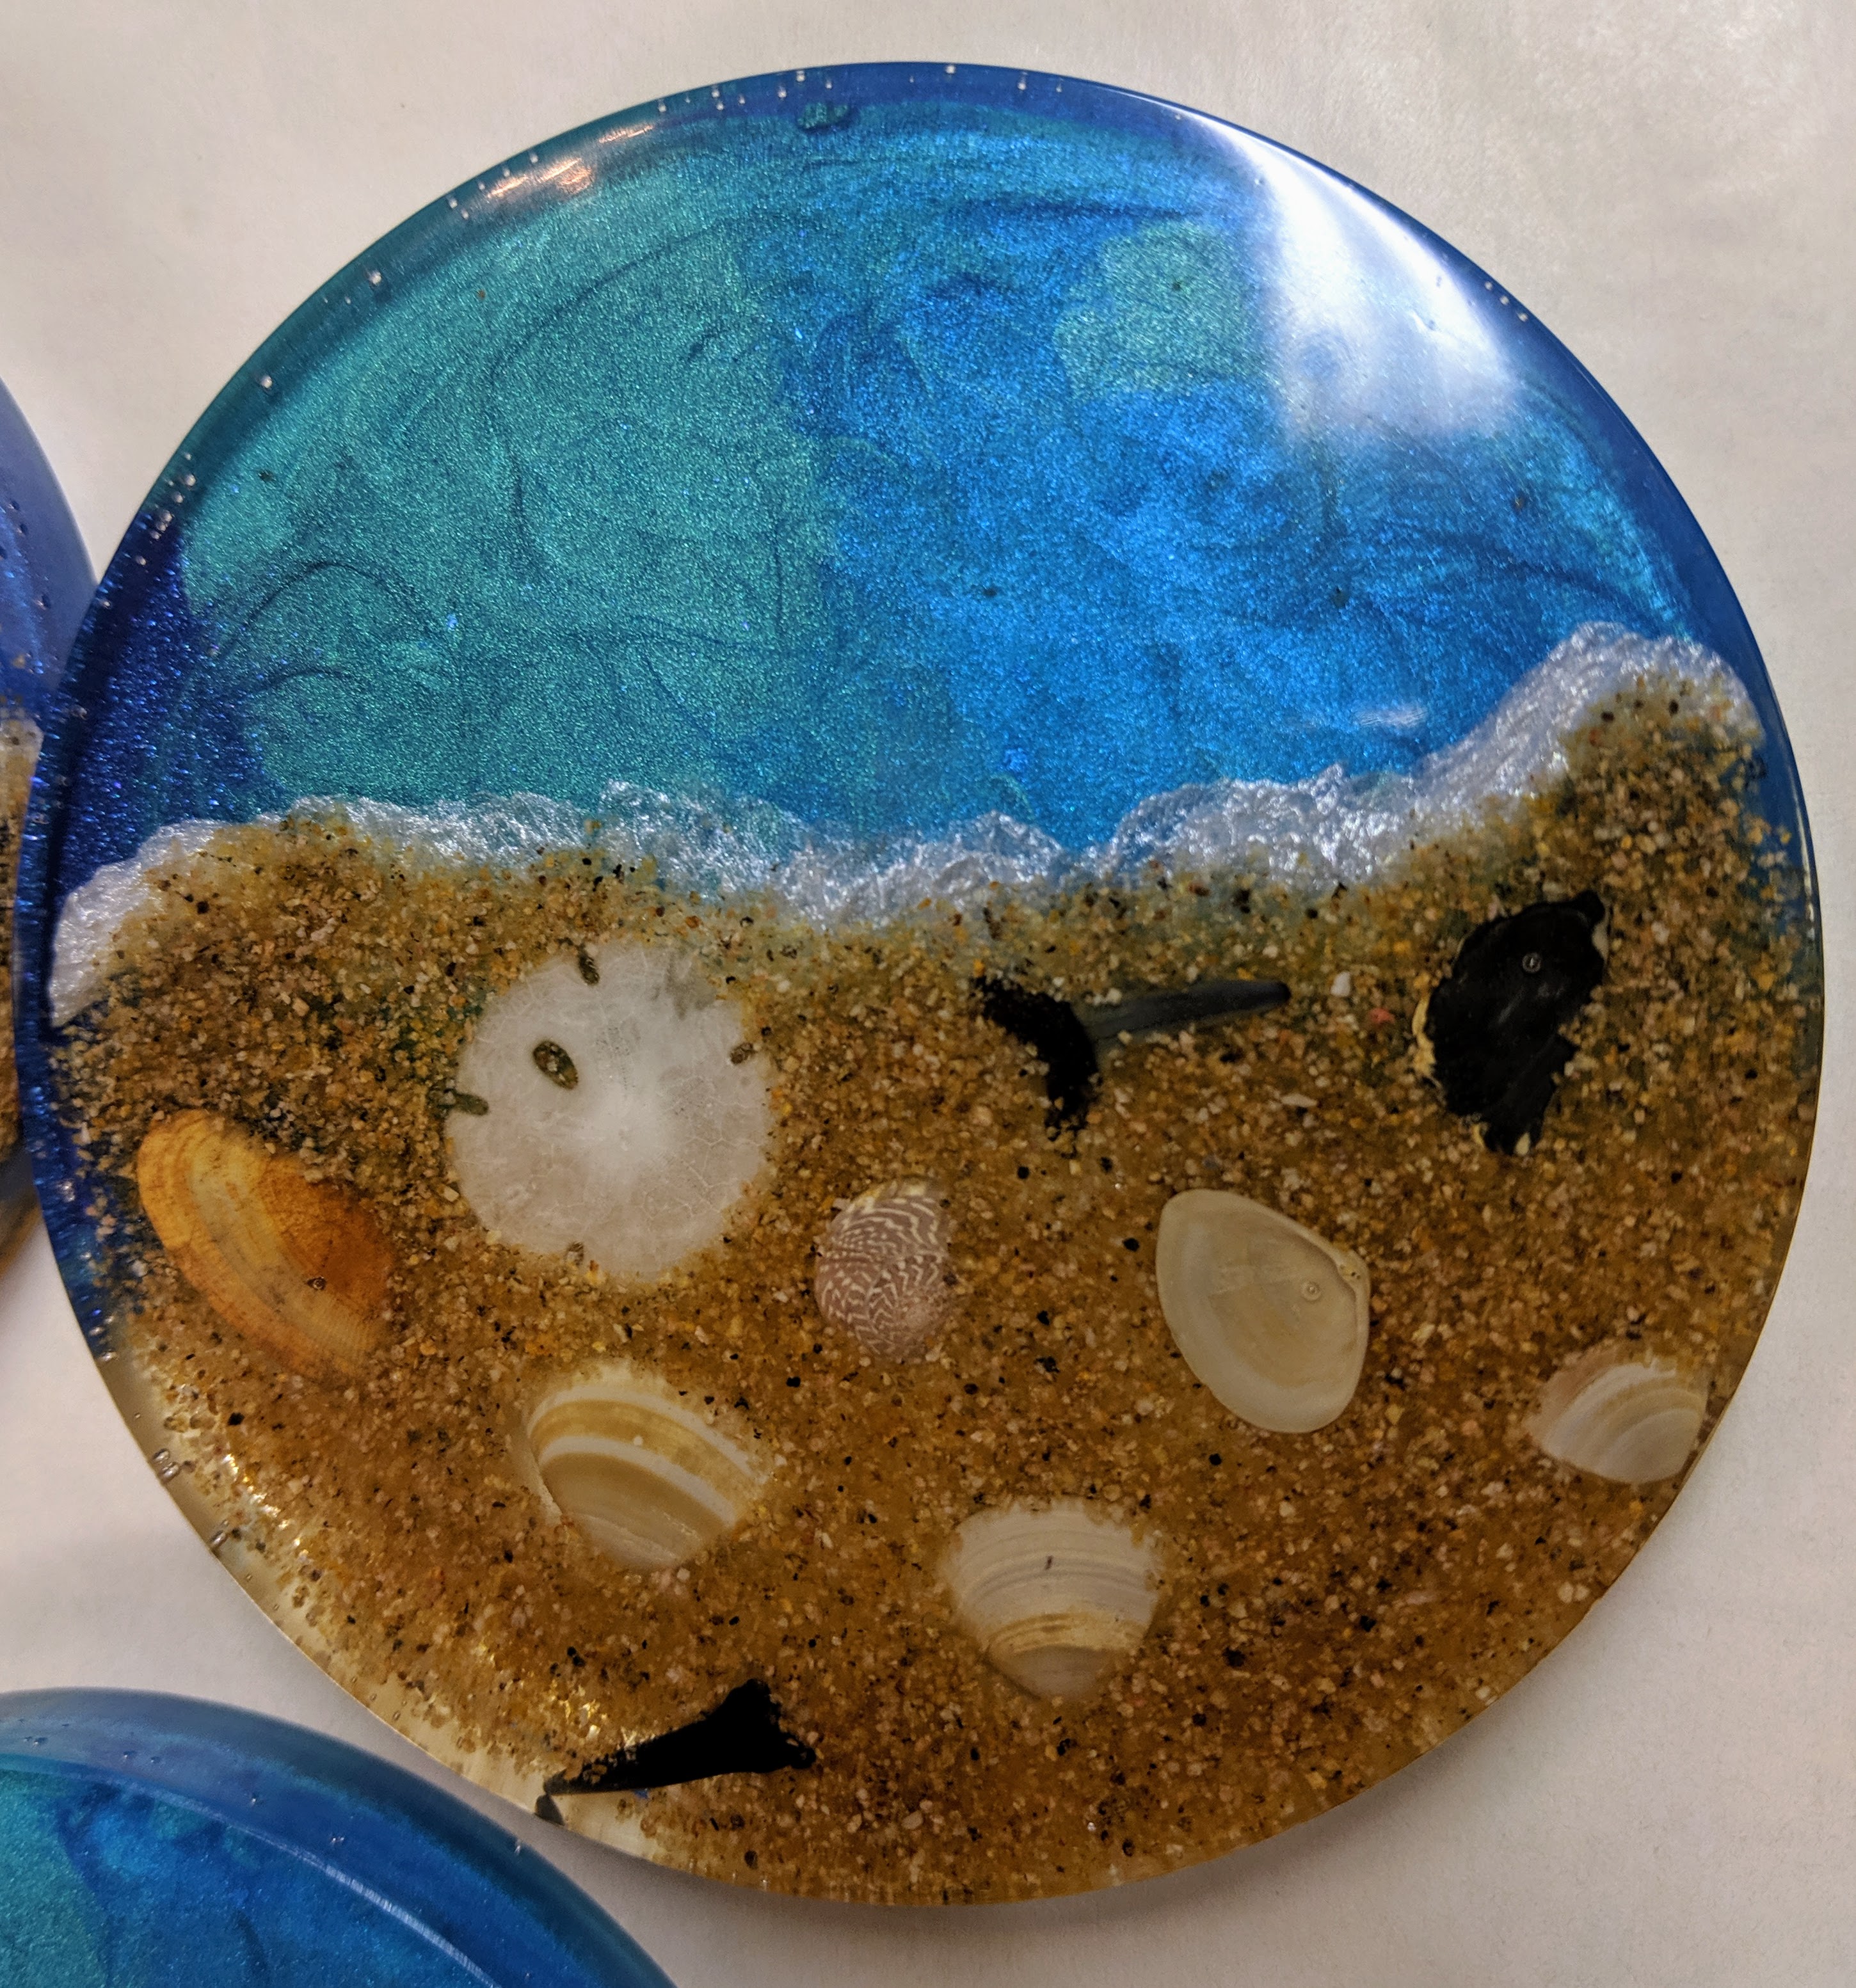
They’re still OK overall, but I think I will go back to my usual layering order. I do like the white pigment at the edge of the water / sand, but it will take some time for me to perfect my technique for placing it. However, I did an informal FB Friends poll and folks are really pretty much evenly split on whether they prefer bubbles or no bubbles. I guess I will have to keep making some of each!