So I spent a couple of days figuring out how to make the background, or sky, for this sun mosaic. I had planned on a completely different approach, but after looking at various types of glass, I decided that the background I had in mind was too “busy” for the glass I chose for this sun.
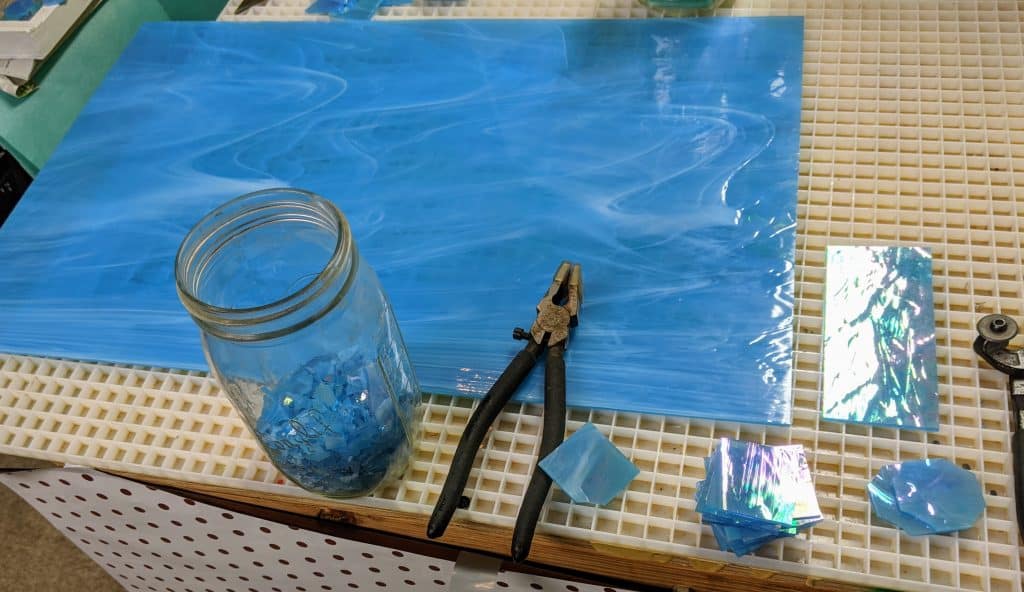
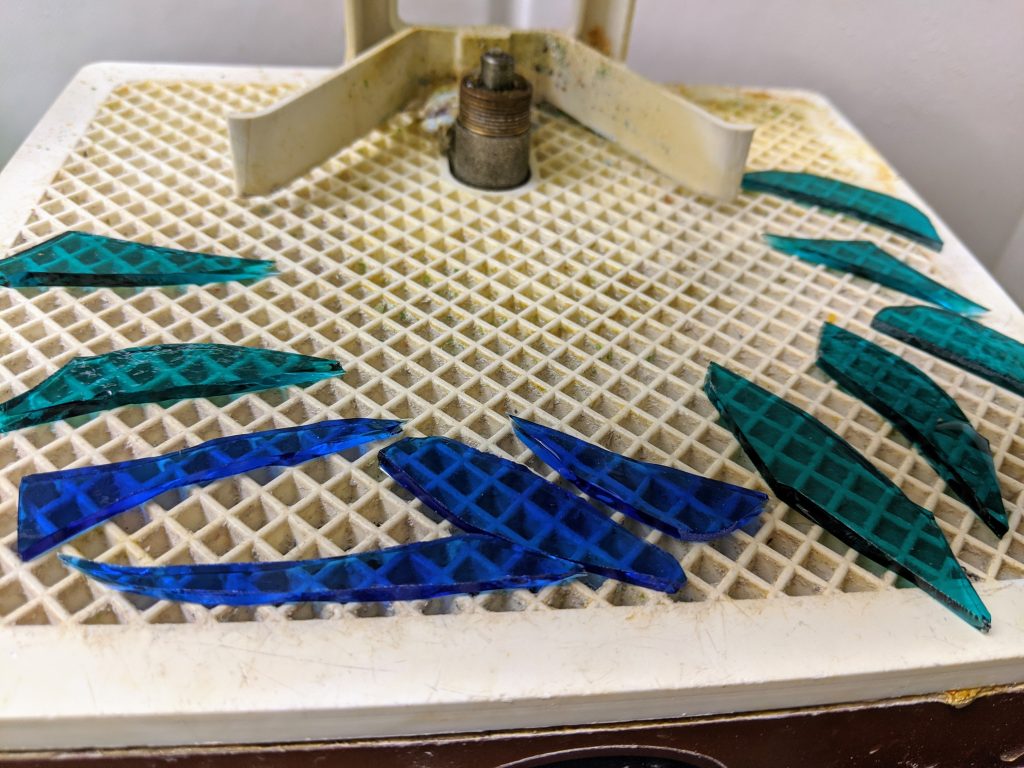
I chose the glass on the right
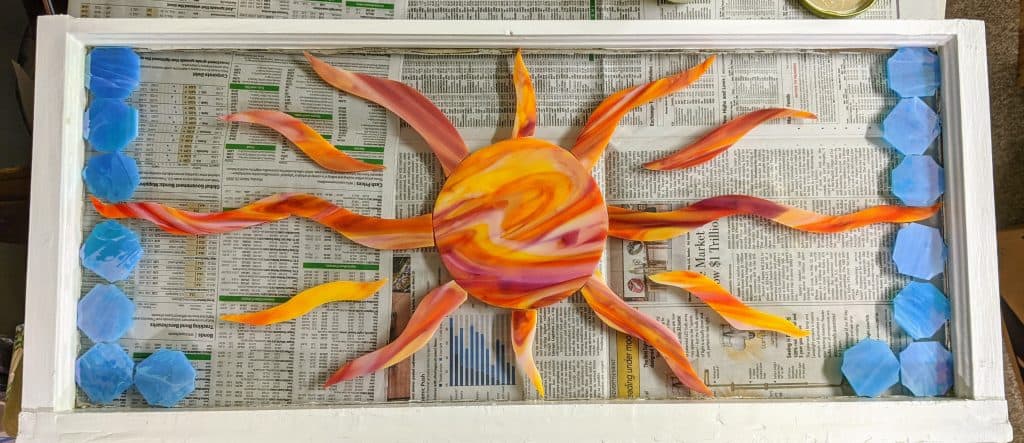
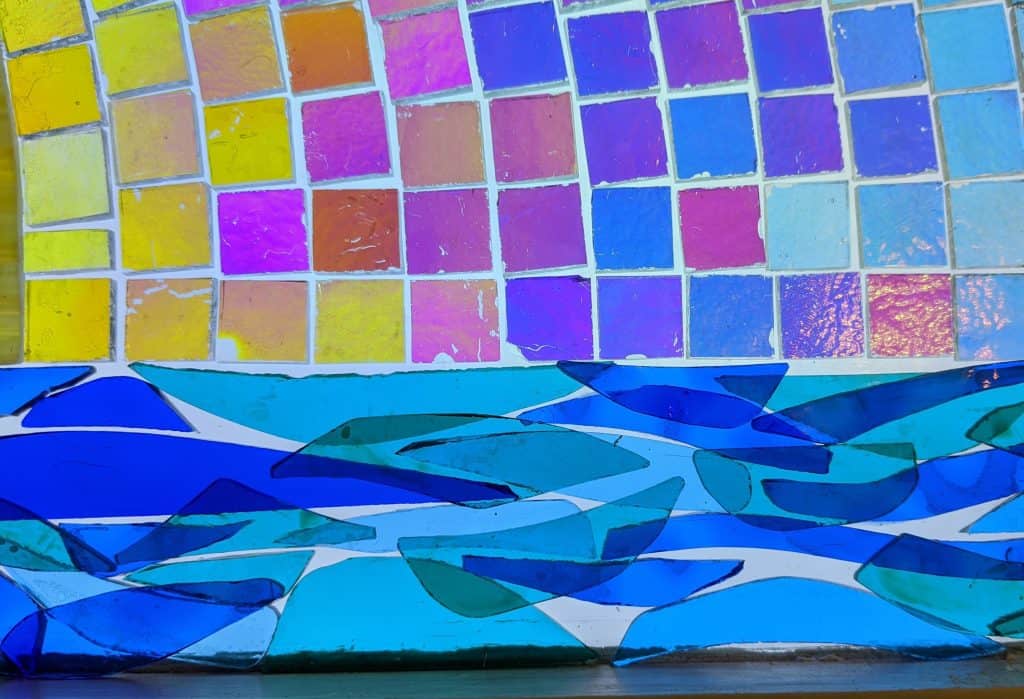
To help me make the decision, I set the whole window over large pieces of “sky” glass. I really had planned on making the background out of many, varied shades and types of blue glass, but ended up deciding that the iridized Spectrum (one of my standby favorites for lots of things) would be best against the multifaceted colors of the glass I used for the sun.
Now to cut it into a zillion pieces!Starting to fill in the sky
I spent today cutting the larger pieces for the sky / background. It will likely take a couple of days to fill in the smaller spaces between these.
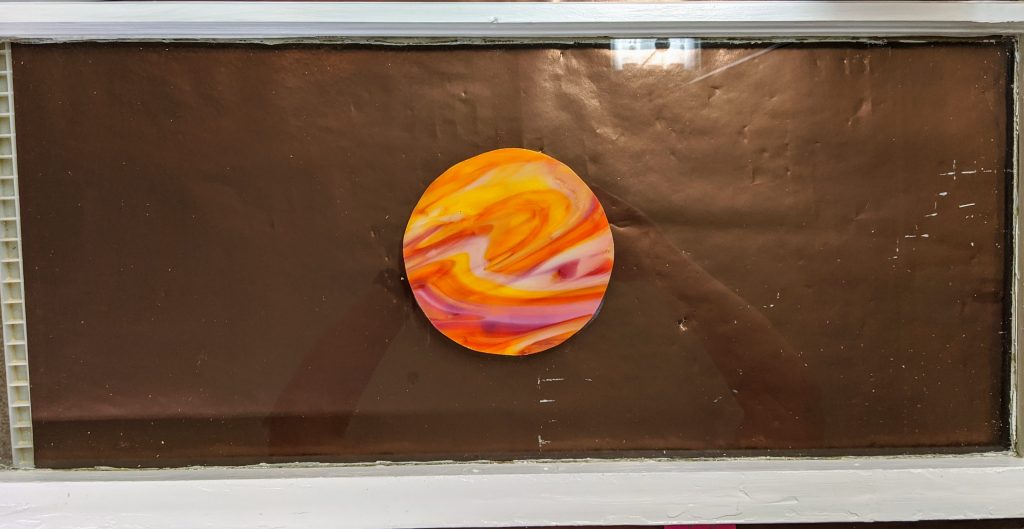
It’s always fun to start a new project. It can be a challenge to decide what to do next when you’re looking at a plain window. I really like to do sun mosaics, and I have a neat piece of glass that just shouts “SUN!” to me, so a few days ago I measured the middle of the window and then figured out what size sun I thought would look good there. I cut the circle down with my manual glass cutter, then smoothed the edges with my saw and grinder and glued it in place. Today it was ready to be joined by some rays.
Just a fiery ball of glass in a recycled 13.5″ x 30″ window.
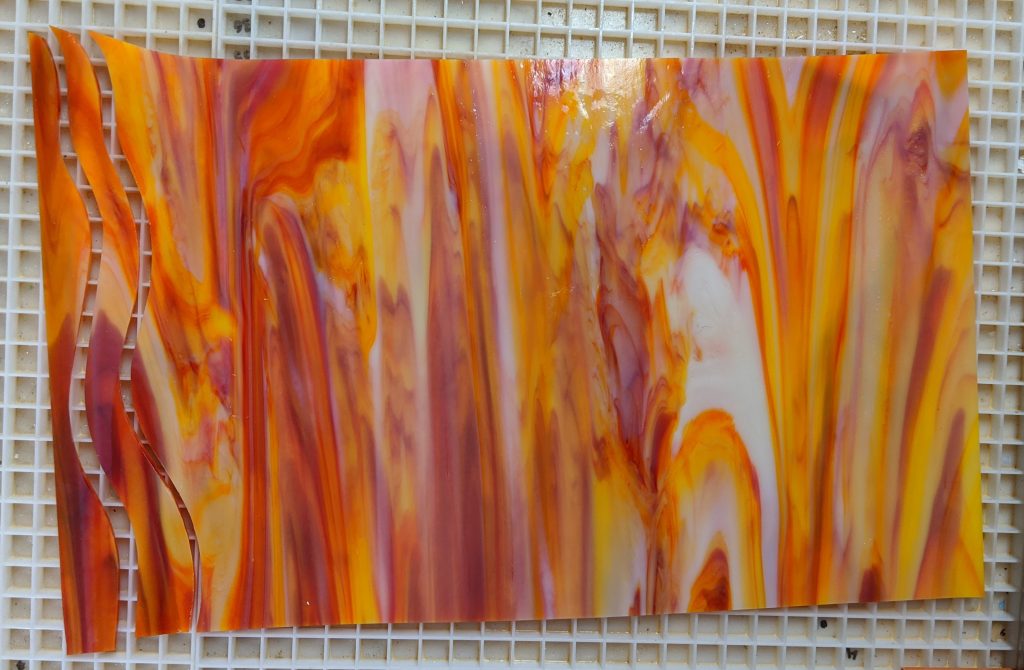
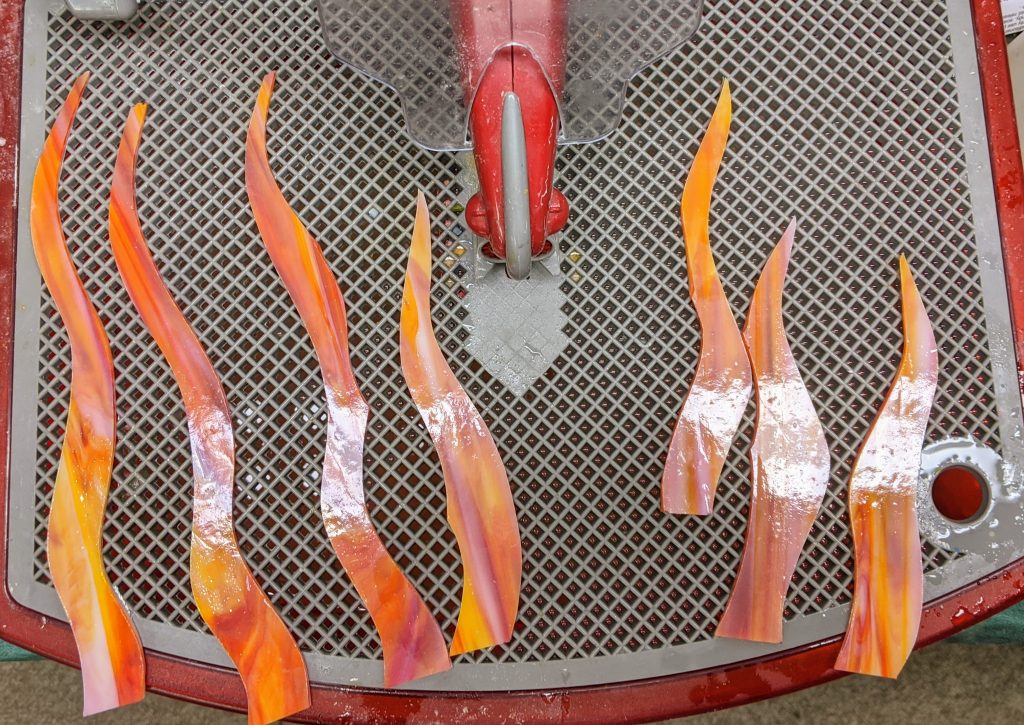
I free-form cut the longest rays that will go to the left or right of the ball with my manual glass cutter, then smoothed the shapes with my saw and grinder.
Rays emerging from the sheet
Smoothing edges on the saw
Once I had a few cut out, I set them in place around the ball of the sun. I’m not worried about the small gap between the ball and the rays because I plan to add a second layer of glass in a circle around the edge of the ball when I am further along with the base layer of glass.
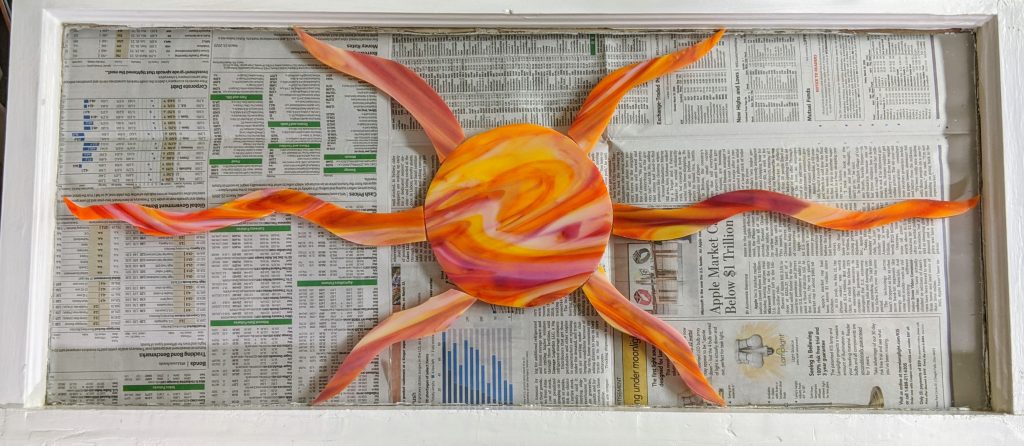
Adding the main rays
I plan to add a lot more detail in the background, but for now I want to get the major focal points in place around the sun. I haven’t glued any of the rays in place yet, but the ball of the sun is glued down.
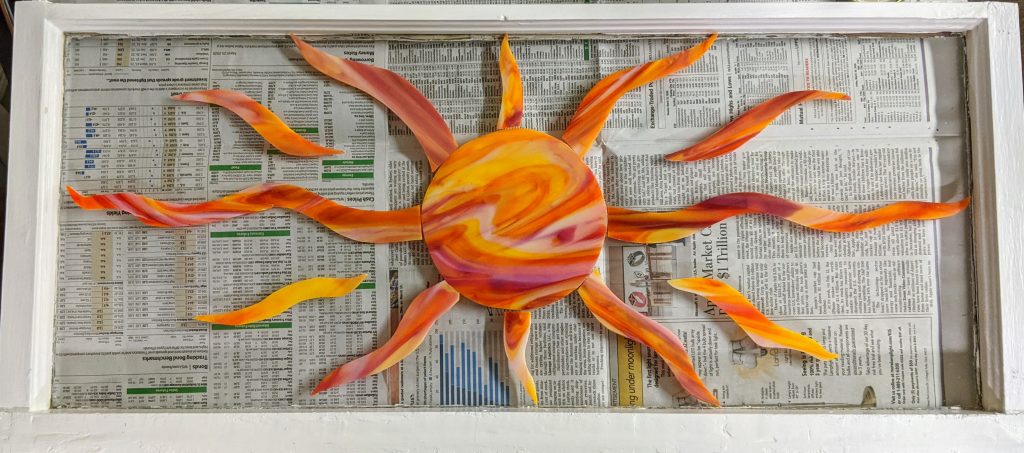
Main rays of the sun laid out
I think I might try to not use any more of the glass I used for the main sun / rays in the rest of the background. The decision I have to make now is whether the rest will be various shades of blue or if I will add more yellow / orange / red flame accents. Once I fill in the entire background with glass, I will coat it with resin to bring everything together. While I was working on this, I rough cut two additional circles and some extra main rays in case I decide to make some additional, similar projects from this sheet of glass. While working with the extras, I stacked them together and really liked the look of the rays overlapping. That might be the next version of this – layered rays. The pieces get heavy when I use a lot of layers, but it might be a fun experiment.
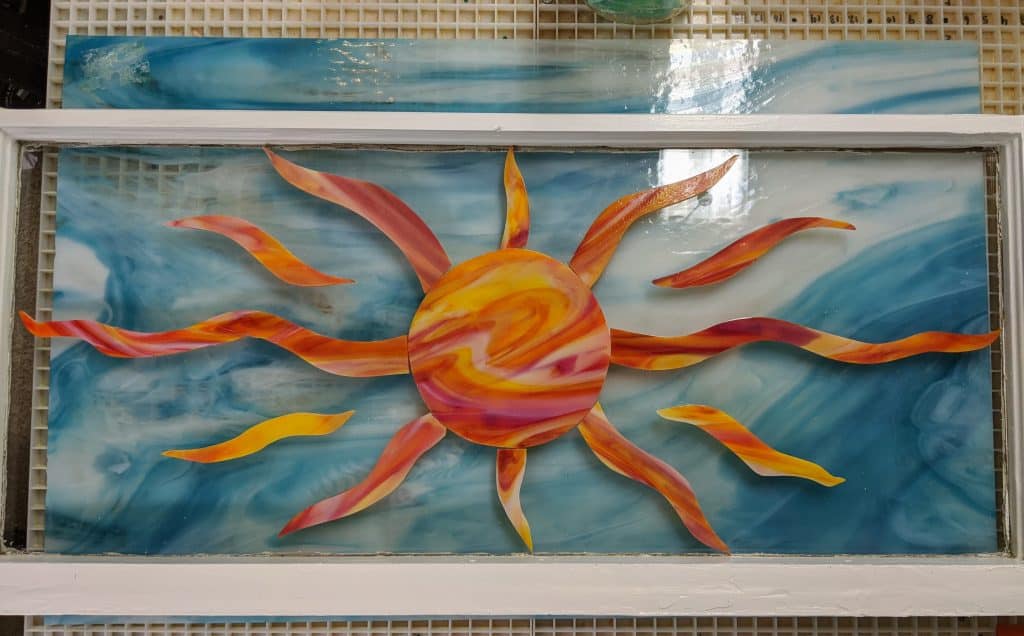
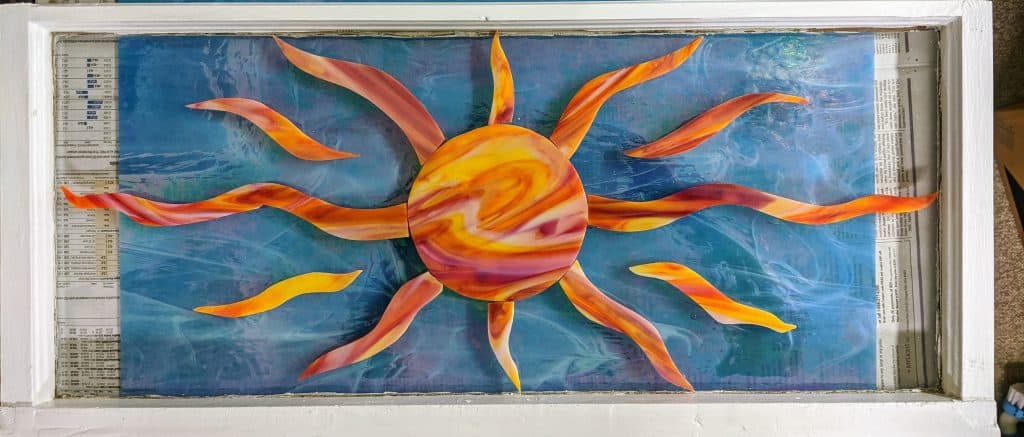
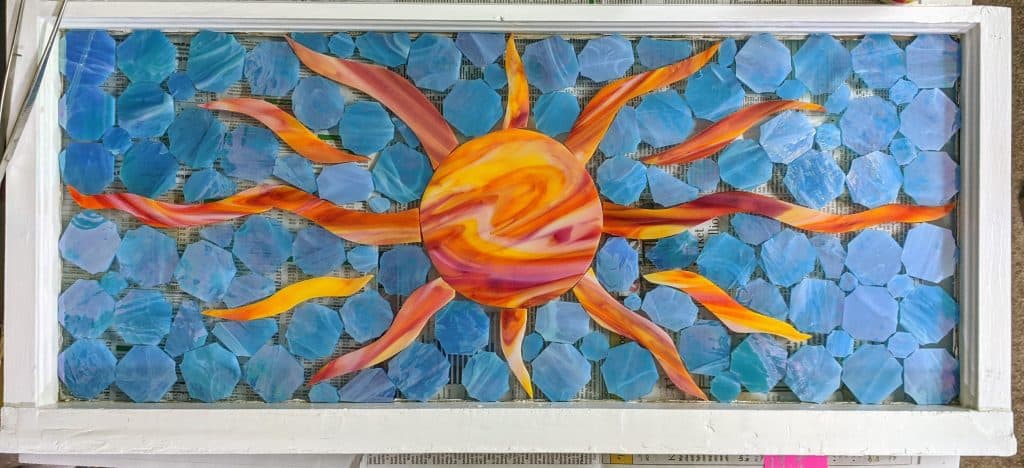
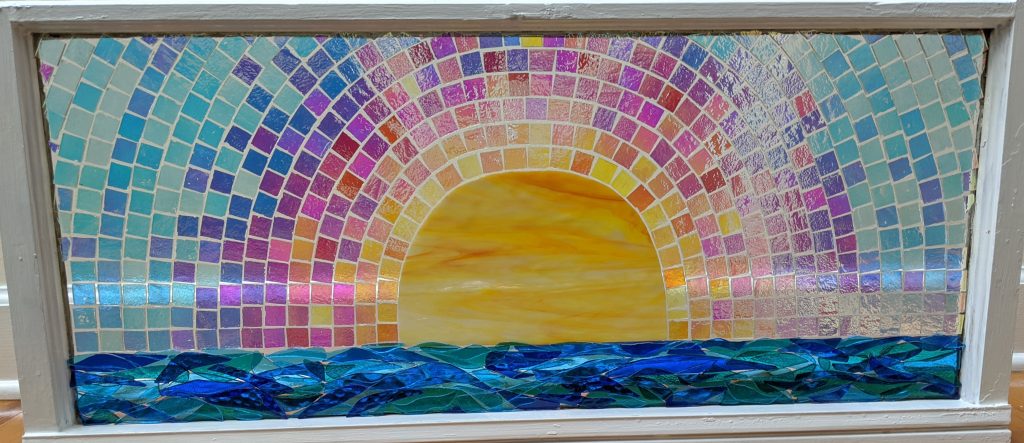
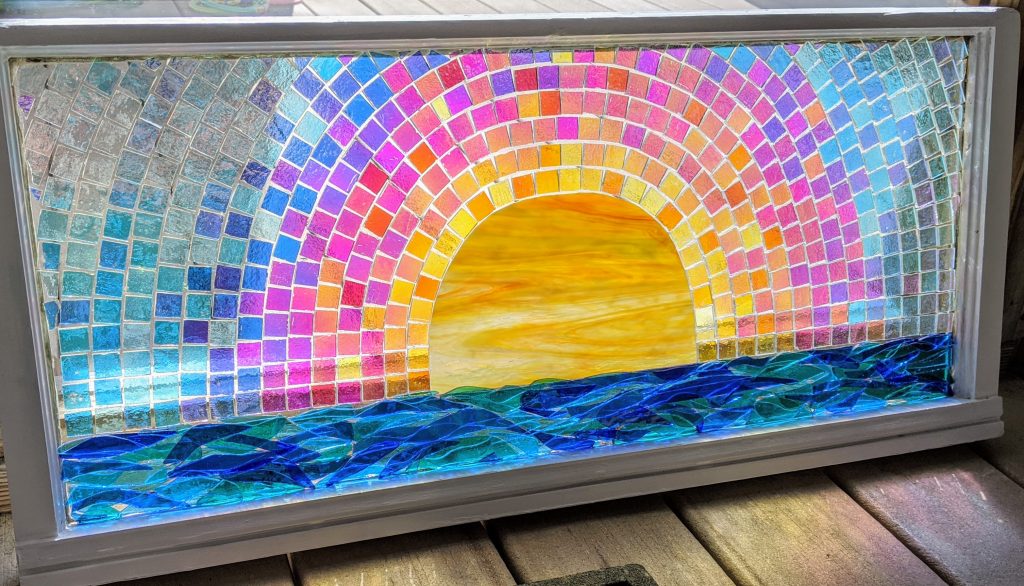
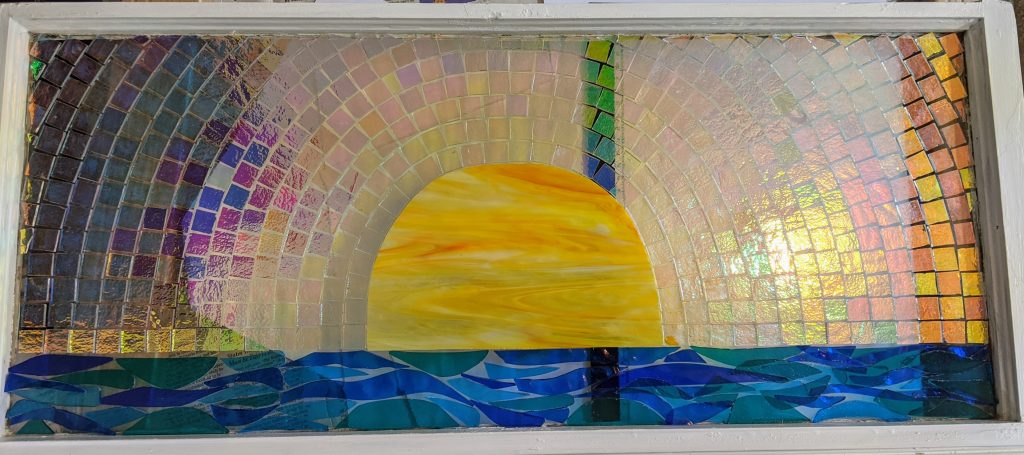
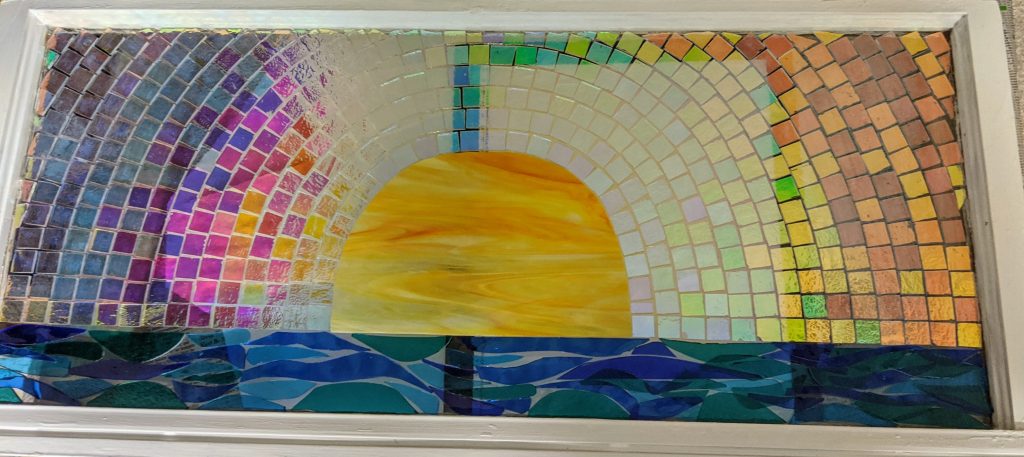
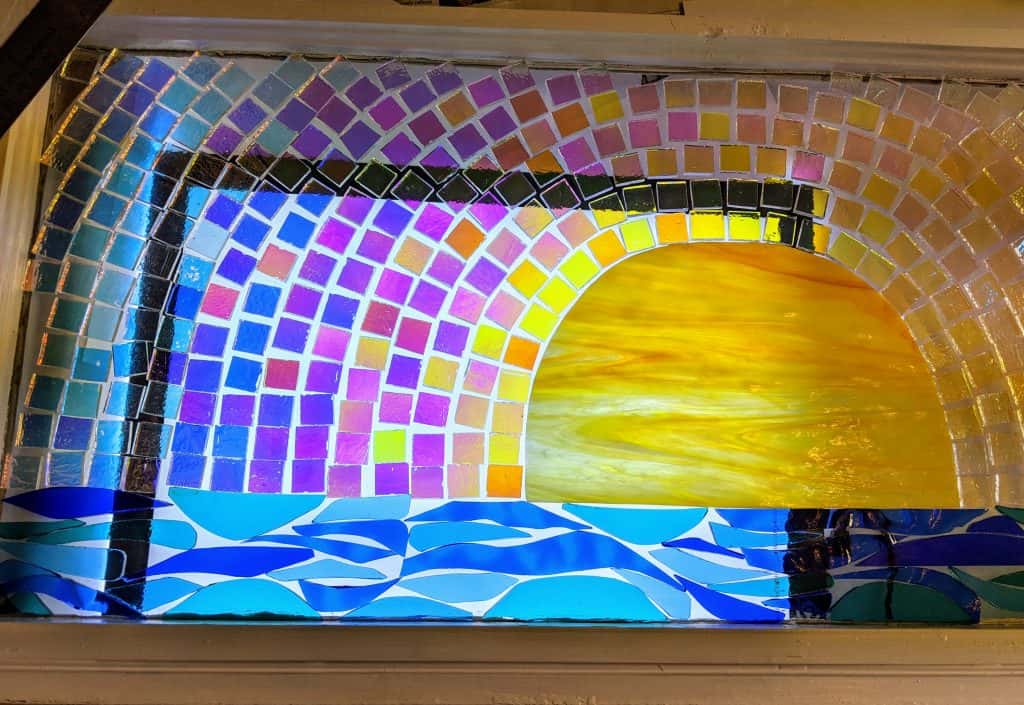
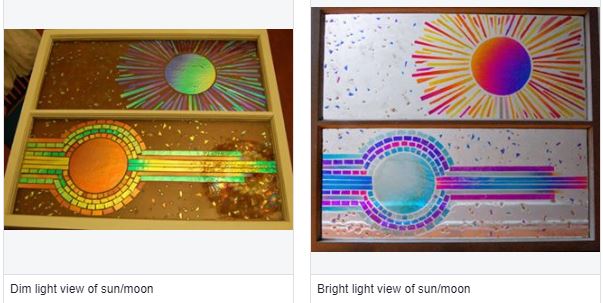
I had a few errant pieces of glass to glue in place today, but I was able to get a nice snapshot of how the mosaic will look in reflective light (in the evening). I’m really pleased with the look. The neat thing about the dichroic glass is your mosaic has two looks – the evening / night look (1st photo) and the daytime / bright sun look (2nd & 3rd photos). Even though I still have to pour the resin, I’m really happy with how this piece is shaping up.
Glass in place, no resin yet – reflective light
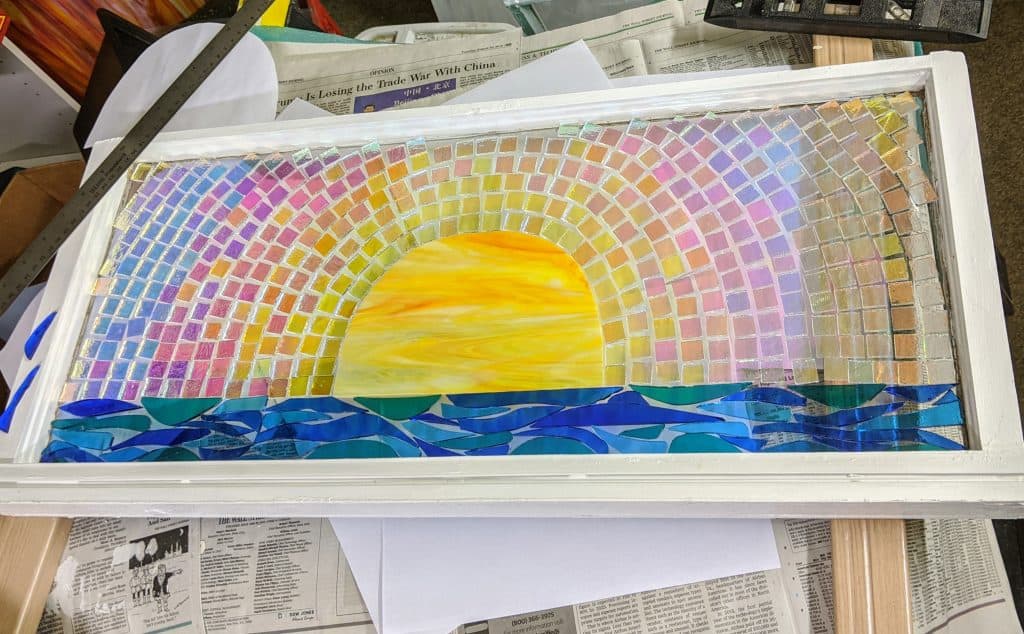
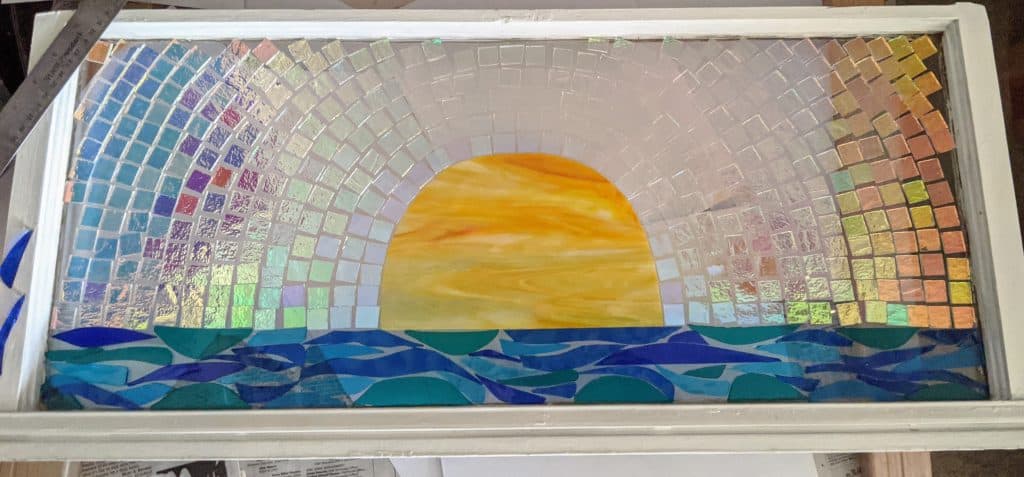
Glass in place, bright light, no resin yet (angle 1)Glass in place, bright light, no resin yet (angle 2)
I was able to make a few more waves Tuesday, but managed to really slice one of my fingers while grinding the glass, so I didn’t get as much done as I had planned. Today my finger is feeling better and I was able to make some more waves (this time I was smart and covered my fingers with band aids before I ground the glass for the waves).
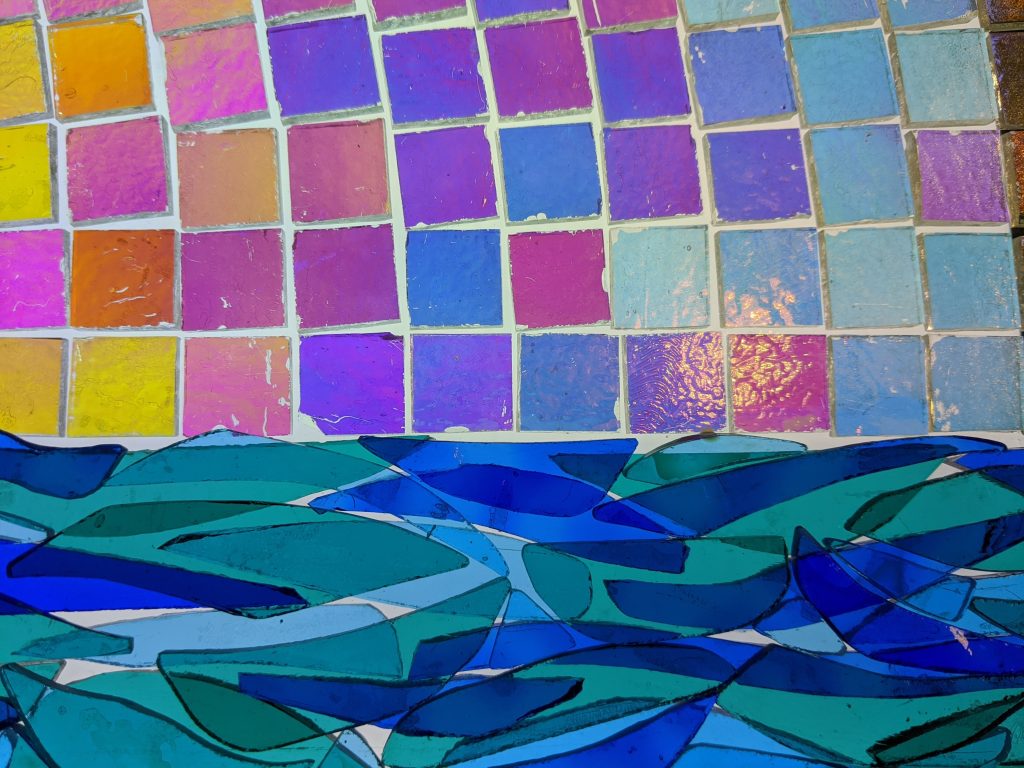
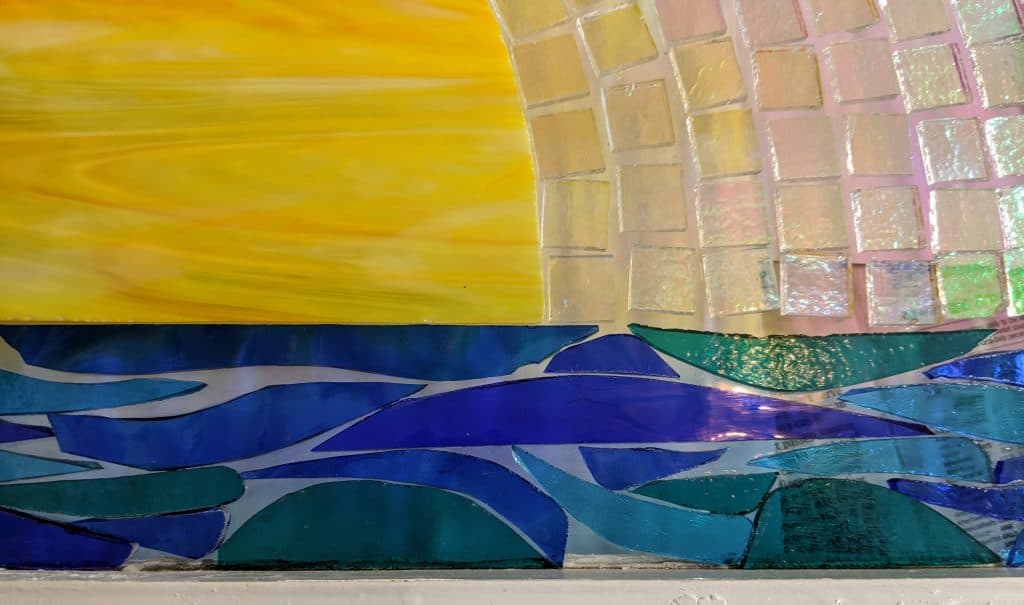
Close up of sea / wave layers
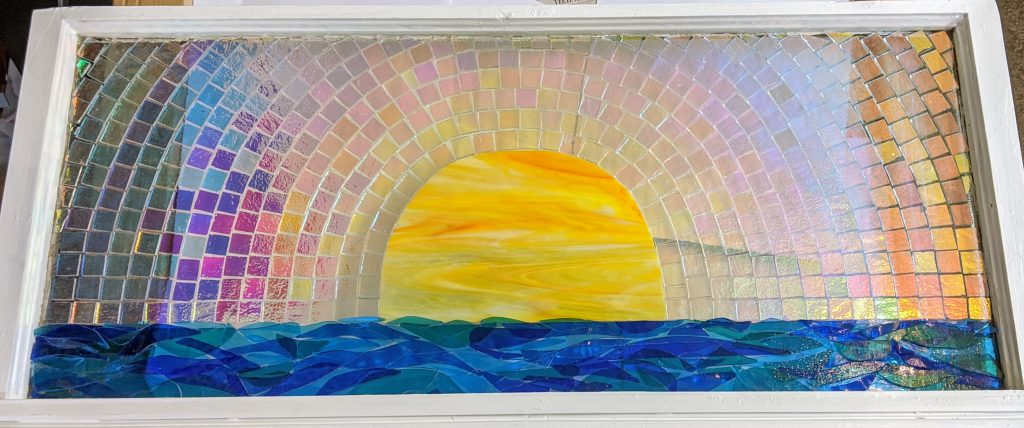
I was able to fill in quite a bit of detail on the sea / waves after all. My next step is to wait for the mosaic adhesive to dry, then I will be able to hold the entire window up to a light source to check for areas I want to augment. My light tray only covers about a third of the window at a time and I need to see “the big picture”.
Full view with today’s wave layers
Once I’ve seen the fully lit window, I’ll be able to plan the finishing steps, which will be pouring the resin coating and then decorating some areas of the resin with glass chips / frit. That’s the part I still need to plan. I’m also considering adding a layer of glass around the edges of the sun’s rays (adjacent to the frame), though I haven’t figured out exactly what yet.
I spent most of the day Monday working on gluing down the pieces I had already cut for the rays of the sun, and making waves to start layering the ocean below the sun. First I rough cut some waves, then used my grinder to shape and smooth the edges.
Ready to grind the glass pieces for the 2nd layer of waves
After I got the above pieces ready, I realized that I would need to glue the dichroic glass I had cut and laid out for the suns rays before I started working on the layering for the waves, so I set out to do that.
How the waves / rays looked when I started the day’s work
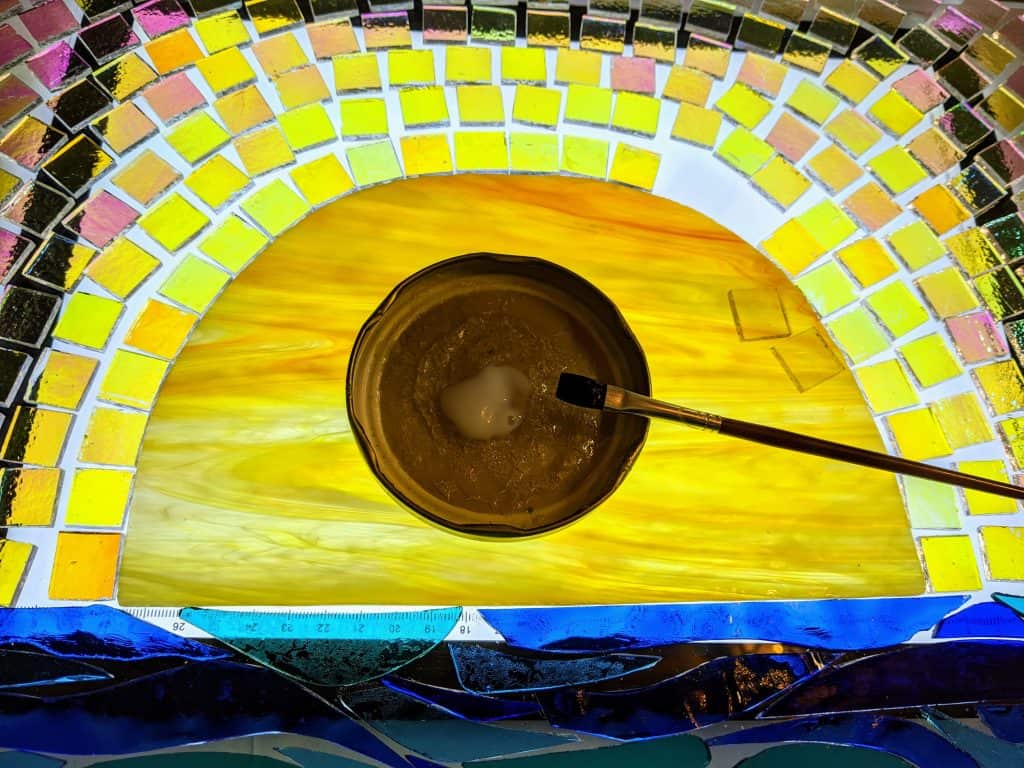
Using Mac mosaic adhesive and a small paint brush, I spread a thin layer of adhesive onto each piece and then position it where I want it. I already did this step for the main ball of the sun and the first layer of waves last week.
Gluing the rays around the sun
Using a light tray to help me see what I was doing, I worked one row at a time from the inner row to the outer edges. I decided to place the pieces a bit closer together than I previously had them laid out, so I had to rearrange some and also cut quite a few more squares.
Gluing the rays
Once I had all of the rays glued down, including the smaller filler pieces at the edges, I started gluing the second layer of waves in place.
Layering the waves
I will need to make quite a few more waves, but I at least got a start on them today. Gluing the rays in place took most of the day. I really want the mosaic adhesive on the rays to have plenty of time to cure before I pour the resin, otherwise they will be cloudy.
How everything looked at the end of today (light tray powered off)Snapshot with the flash on my camera (phone)One last snapshot with reflective light
Hopefully I’ll have time on Tuesday to put some additional waves in place. I also need to plan how / if I will embellish the resin when I pour it. I think I would like to do something at least around the edges of the frame.
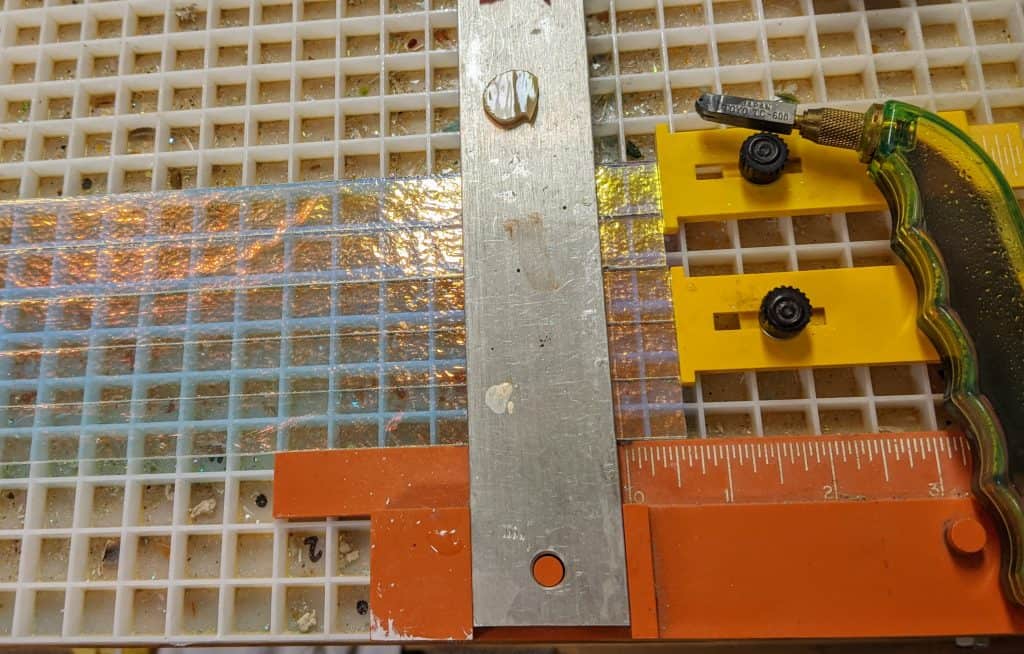
I needed to cut some more dichroic squares to fill in the rest of the background on the sunset window, and I got some time this afternoon, so I worked on that.
Cutting squares of light blue / red metallic dichroic glass.
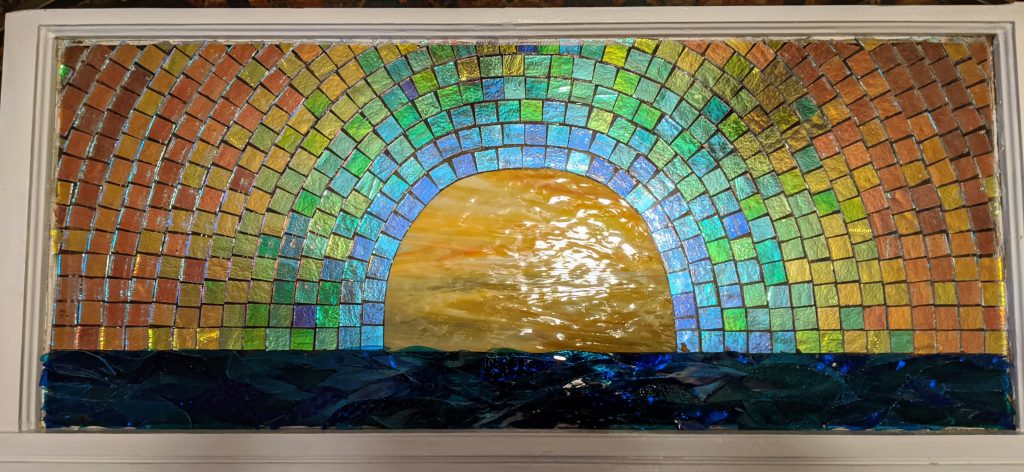
I filled in as I cut, leaving the smaller pieces I will need to cut to fill in the very edges for later. I have been having second thoughts about the overall look of this the past several days, so I haven’t glued anything in place yet. I also worked on the water / waves underneath the sun. So far I’m pretty pleased with the look of the waves. Now the challenge will be gluing the waves in place without jostling the rest of the pieces around too much.
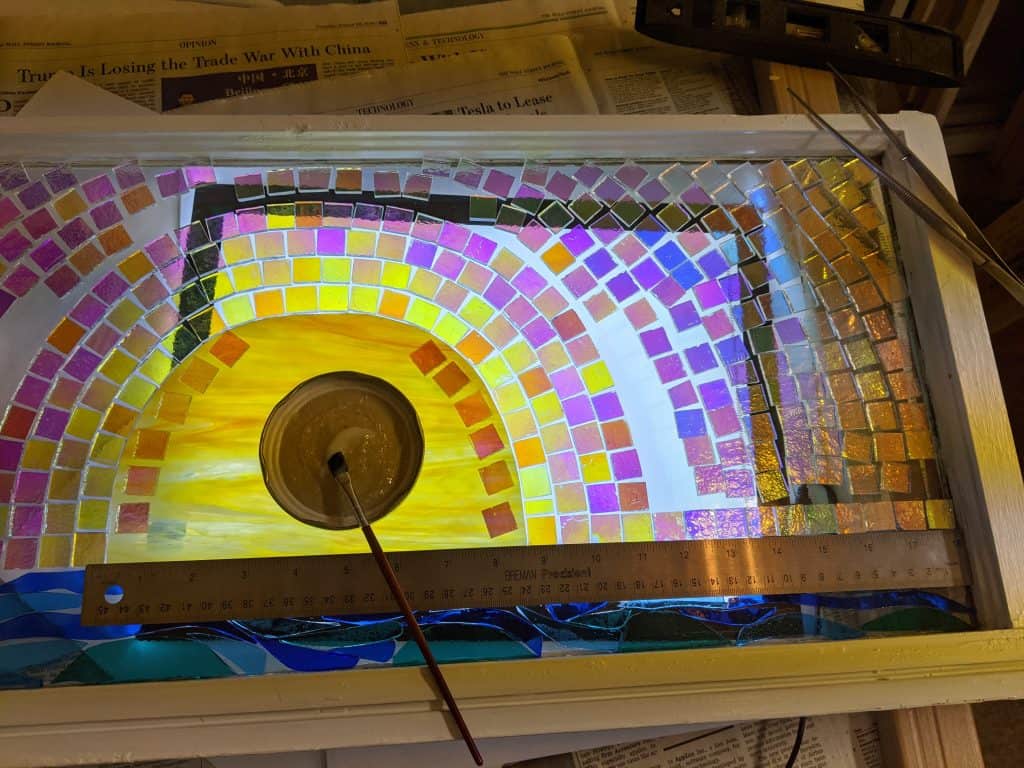
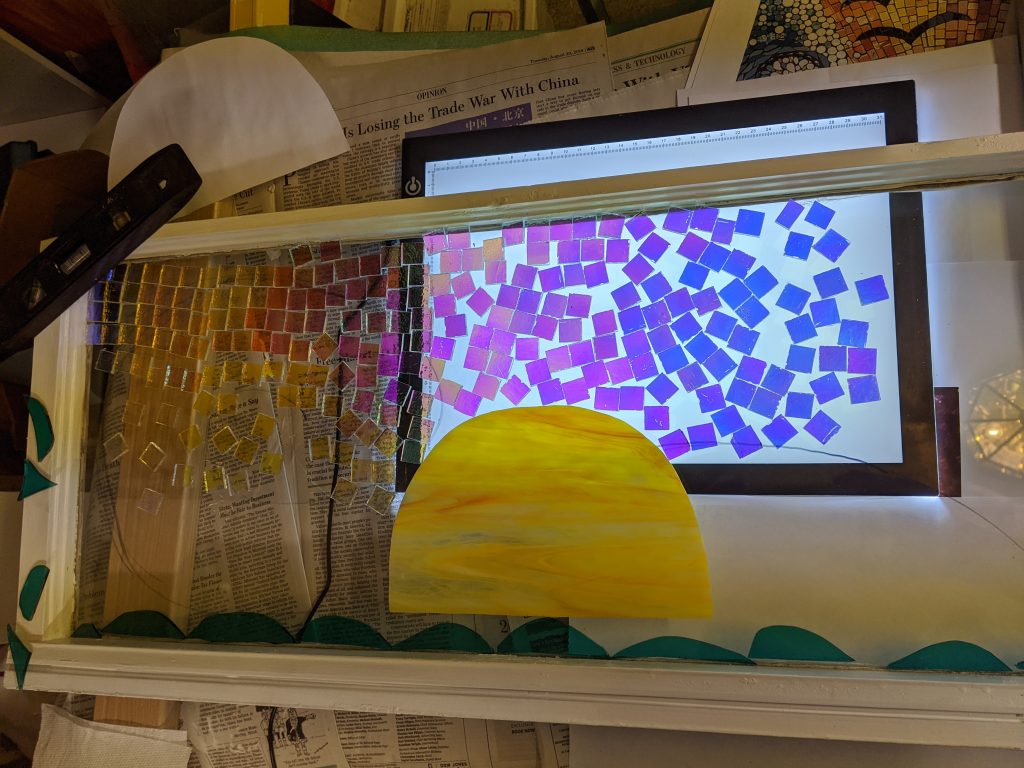
Filling in the edges using a light table.
The colors of this glass when the light table is underneath the window are surprisingly bright. I love working with this dichro glass. I am hoping the look of the blue squares I added on the edges today will have the effect I’m going for, as the reflecting color of the dichroic coating is metallic red on these pieces as opposed to silver / gold on the rest of the sunset’s rays.
Closeup of the area above the light table
I tried to get some photos with the light table off and a bit more reflective light, but it’s pretty challenging to do with my phone in this lighting. Later on I’ll get my husband to help with the photos, as he’s got better equipment and a lot more experience taking photos.
Ambient light in the room.More reflective angle.
I still need to glue down these pieces, then start cutting smaller pieces to fill in the gaps, especially around the edges and between the waves. I might try using some decorative flakes in the resin when I pour it, but I’m several days away from getting to that point right now. At least my confidence is up quite a bit now that I have most of the window filled in. I was procrastinating because I was afraid it would look too simplistic, but the progress I made today has made me more satisfied with the overall look. I will probably layer the waves to give them more texture, so they will have more depth (no pun intended).
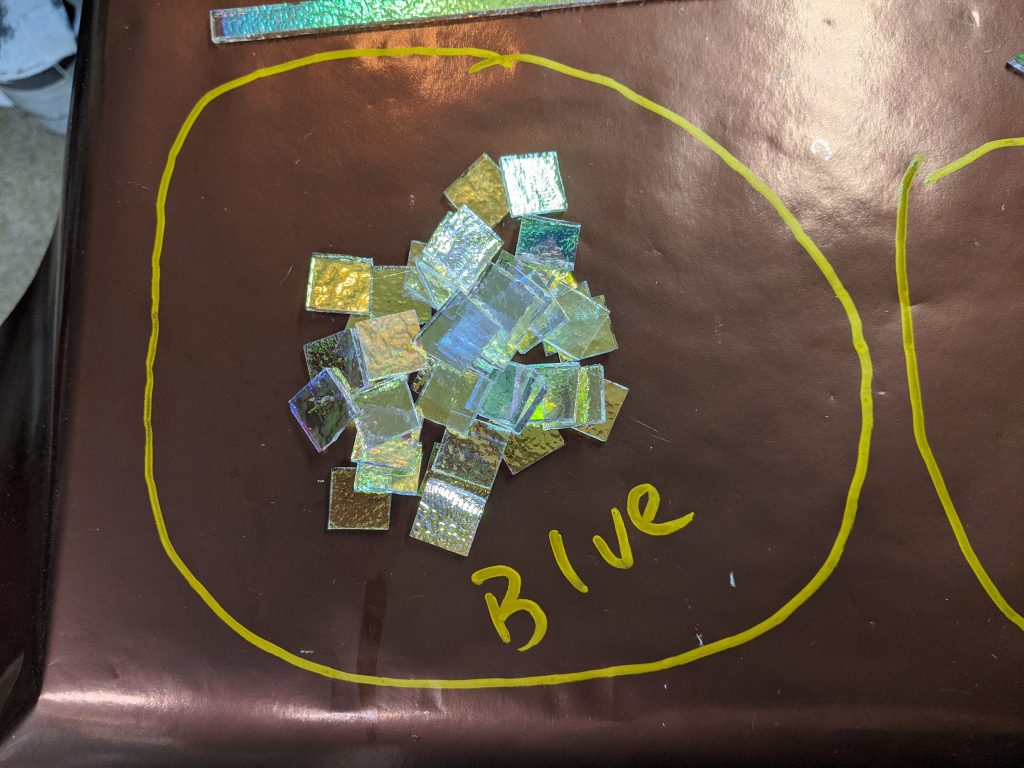
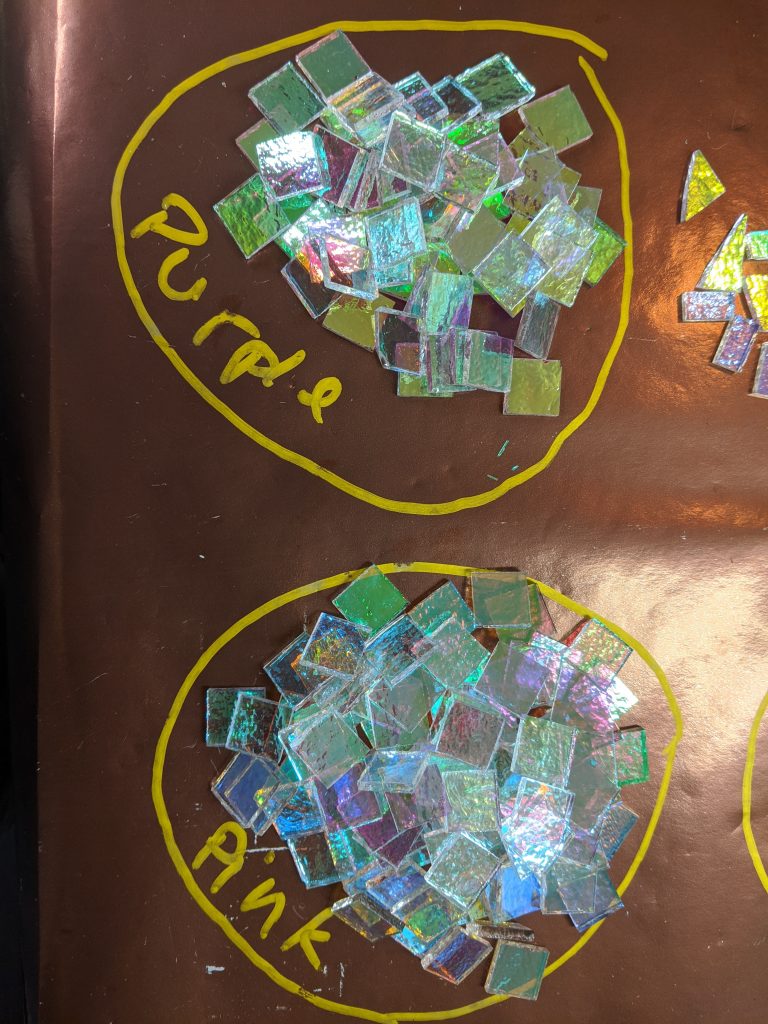
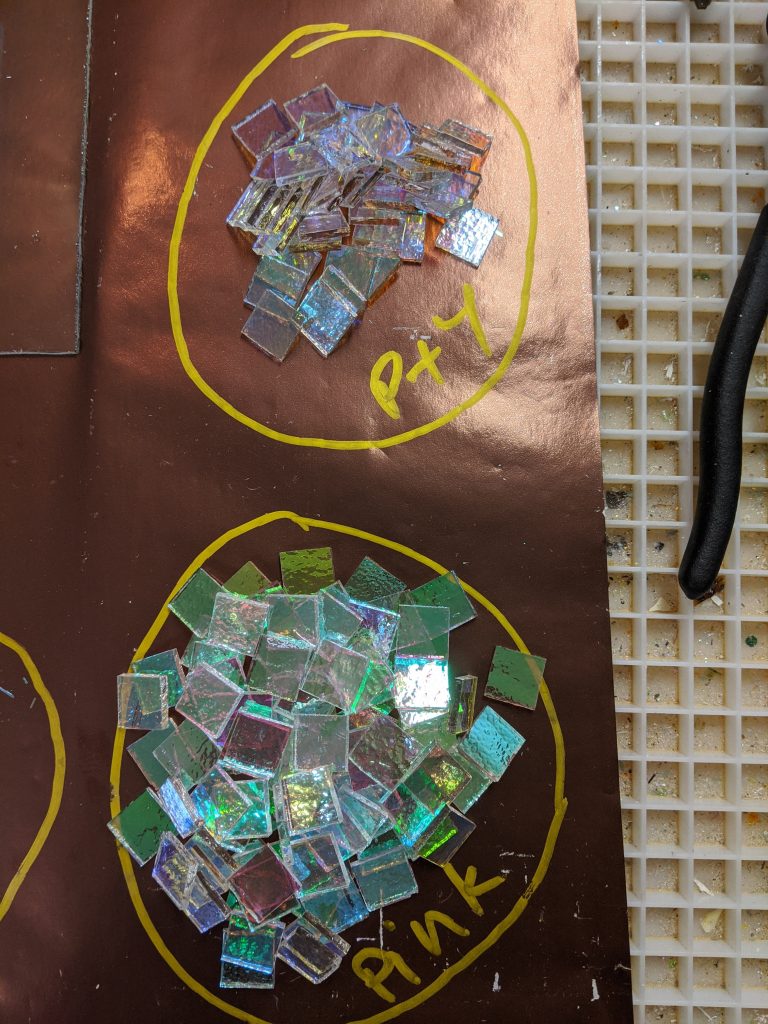
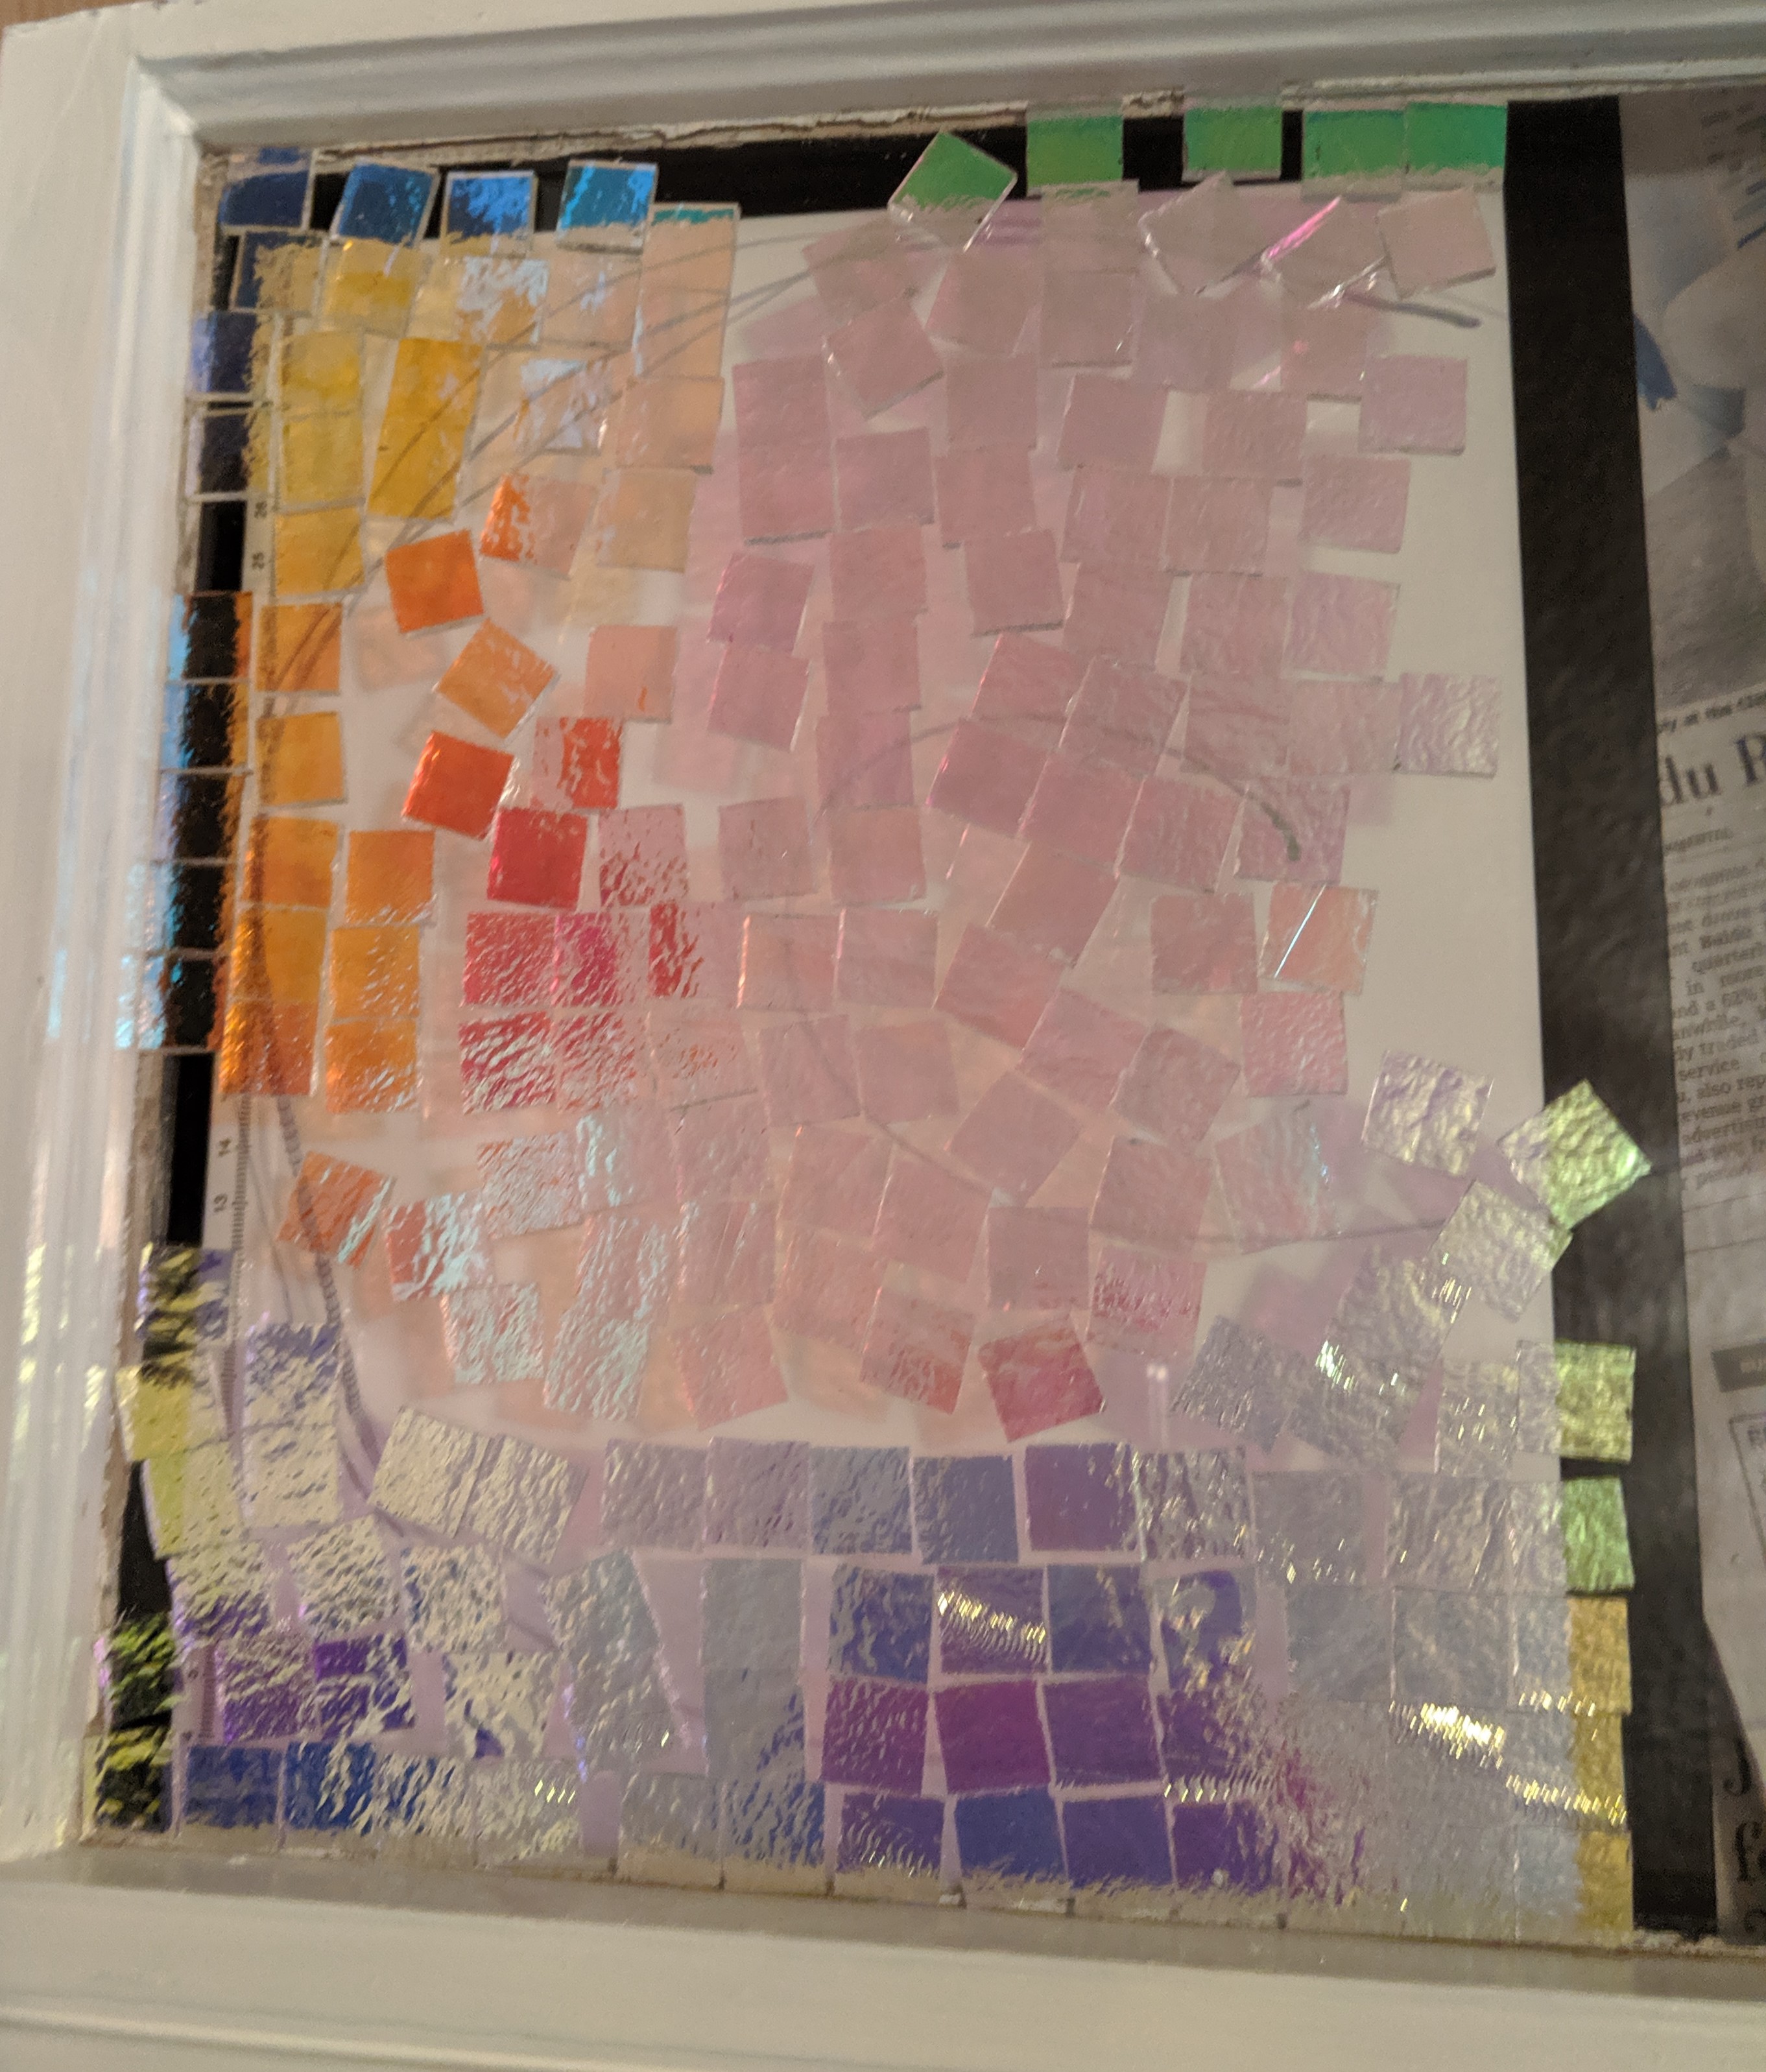
My Rainbow Row panels are waiting for warmer weather to get their resin coating, so in the mean time I revisited my dichroic sunset window project. I’d been stumped on what glass to use for the main sun in the center of the window, but today I made a commitment (well, at least cut out the shape even if I haven’t yet glued it in place). It was also time to sort the dichroic pieces I cut for the background by color. The sheets of dichro glass I am using are gradients of colors varying from yellow – pink – purple – blue. The pieces look like they are the same color when the light is reflecting off of the surface, so I have to use a light tray underneath to sort them out.
Sorting the background pieces.
My high tech sorting system.
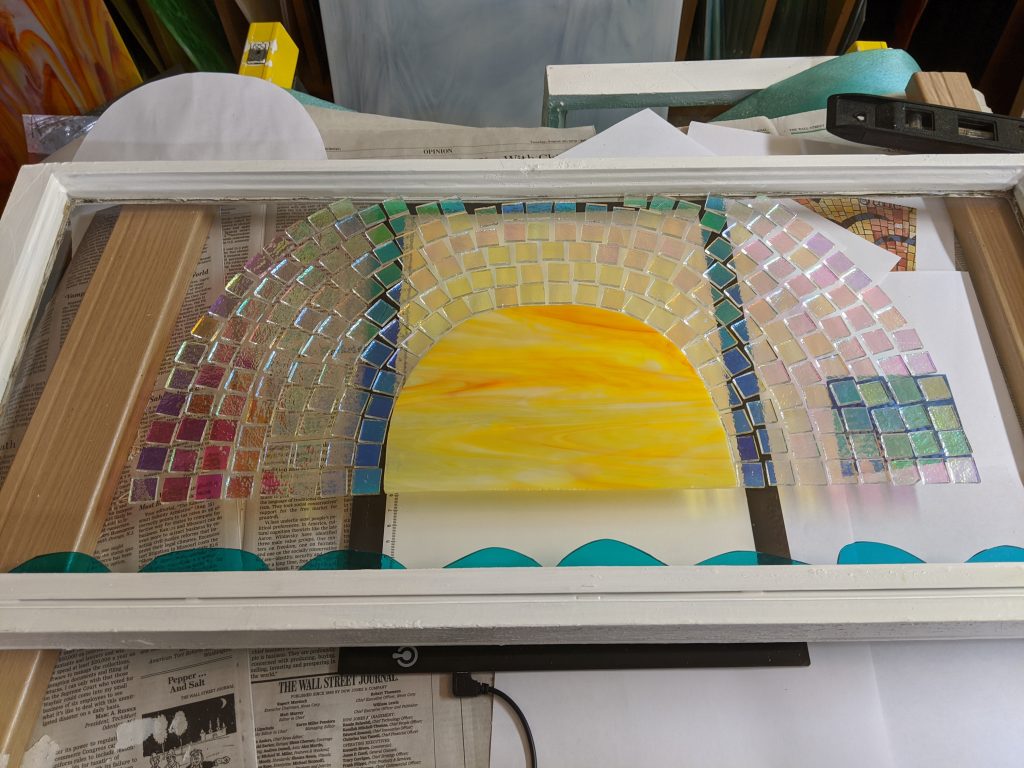
Once the background pieces were sorted, I laid them out in concentric rings around the sun. I still haven’t decided on how I am going to make the water beneath the sun. I started making wave shapes, but I’m starting to think I would like to use triangles, so I am putting that off for now.
Sun with rays laid out, reflective light.
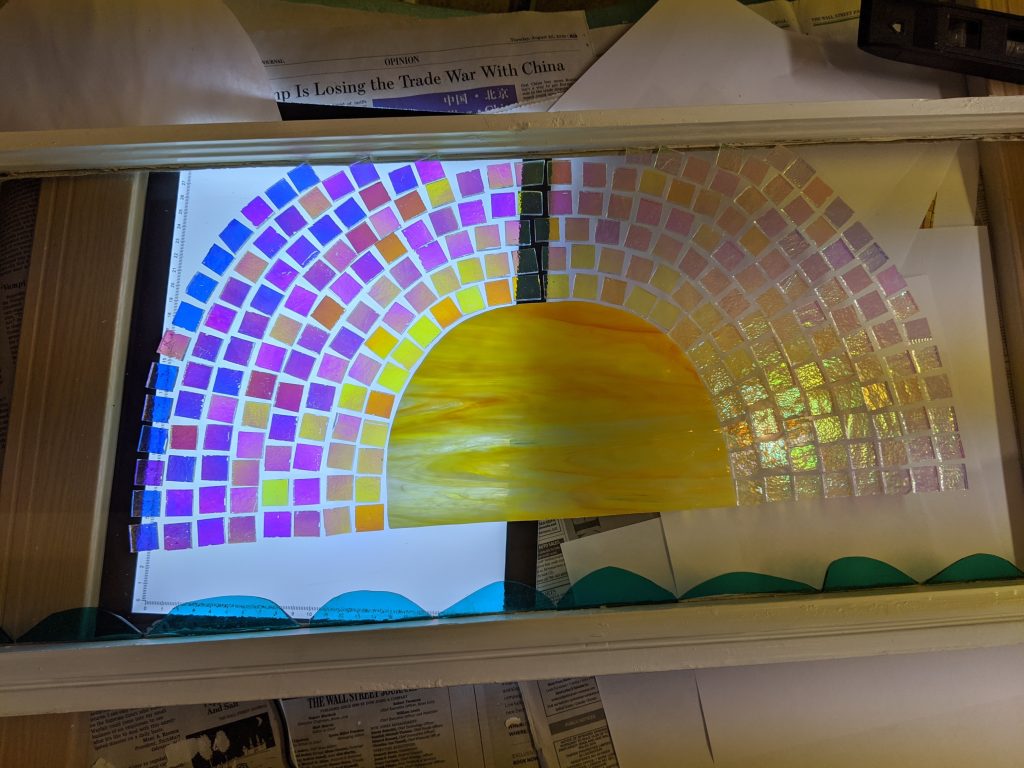
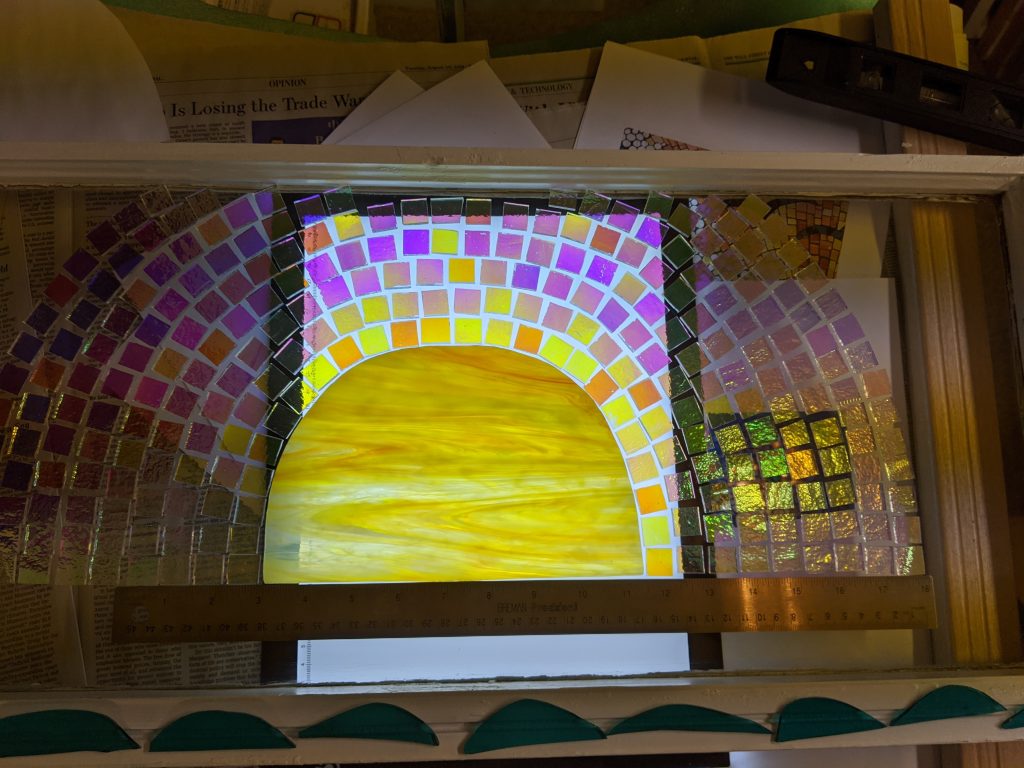
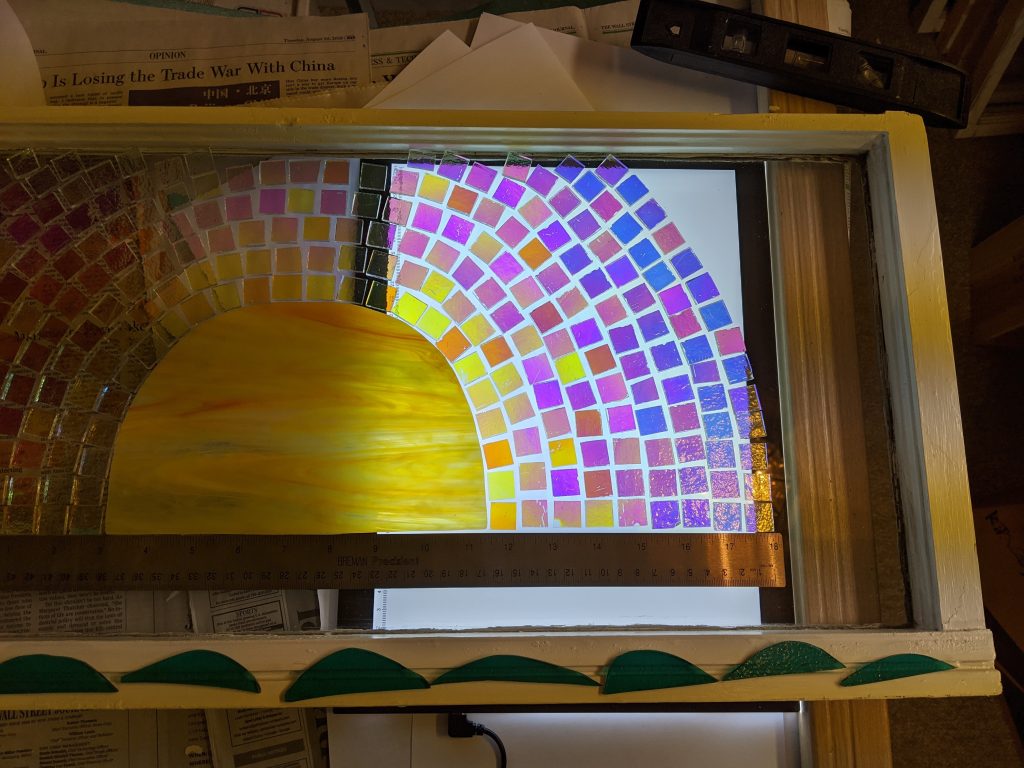
I laid the concentric background pieces for the rays of the sunset out in general in yellow – pink – purple – blue order with some variation for interest. In the next three photos, I’m moving the light tray from left to right underneath the window.
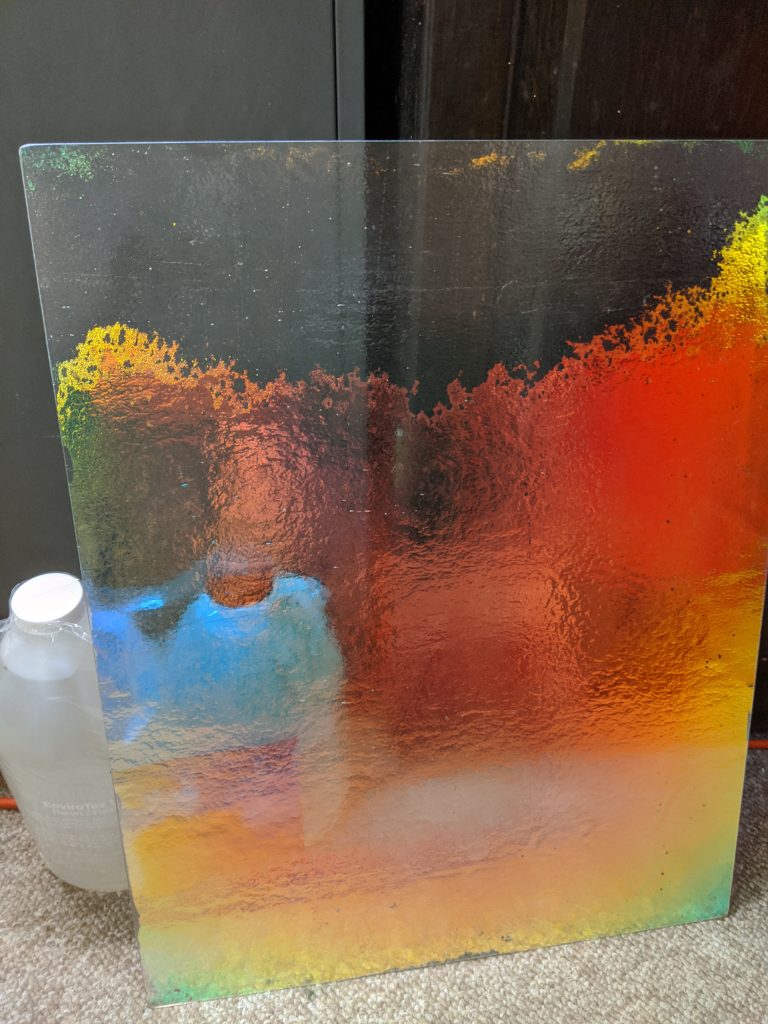
I will need to fill in the top rows with some pieces cut to fit the window later on. For now I’m just getting a feel for whether this is the look I wanted. My next decision is what color dichro or otherwise glass to use to fill out the edges. I have a neat piece of dichro that is very light blue when on the light table, but has a deep red metallic tint on the reflective view.
Reflective view is red.
Not the best photo, but it’s light blue.
This is actually two views of the same piece of glass – one with light reflecting and one with the light behind the sheet of glass.
I used some resin spray on this sheet of dichroic as the coating is unstable and could flake off when I’m cutting it. Now my work area smells like resin spray, so I called it a night. I will revisit cutting the background sheet into squares once the resin spray dries and the fumes dissipate.
I’m also still not sure I like the center of the sun being a different type of glass (non-dichroic). I want to look at it for awhile before I glue it in place.
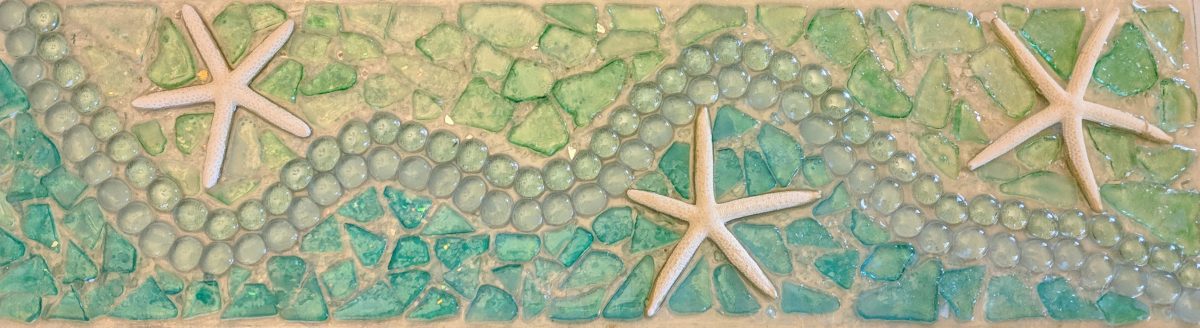
Today is the last day of the Charleston Holiday Market, and it was a busy day. My Mermaid mosaic, Starfish Trio, and Here Comes the Sun mosaic windows all found loving new homes, along with numerous smaller pieces. I’ve made a *little* bit of room to make some new things, so hopefully I will have time to revisit the sunset mosaic I started a few weeks ago with dichroic glass.
SC Flag
Palmetto & Crescent panel, 7.75" by 6.25" - SC Artisans Center
Palmetto & Crescent
Rainbow River
Colored mica set in resin 13.5″ x 30″. $300. Available by appointment in Charleston
Corner Sun
Corner Sun, Can be displayed vertically or horizontally.1 3.5" x 30" - $350 SC Artisans Center
Hummingbird w-Flowers
~13.5" x 30". Stained glass with sapphire mica accents set in resin in a recycled window. $500. SC Artisans Center
Rainbow Row
Rainbow Row, 13.5" x 30", $800 - SC Artisans Center
Charleston Harbor
Cooper river bridge window, Charleston Harbor, 13.5" x 30" - $800 - SC Artisans Center
Sunflowers
Stained glass and grout, recycled window, 30.5" w by 27" h - $1,000 - SC Artisans Center
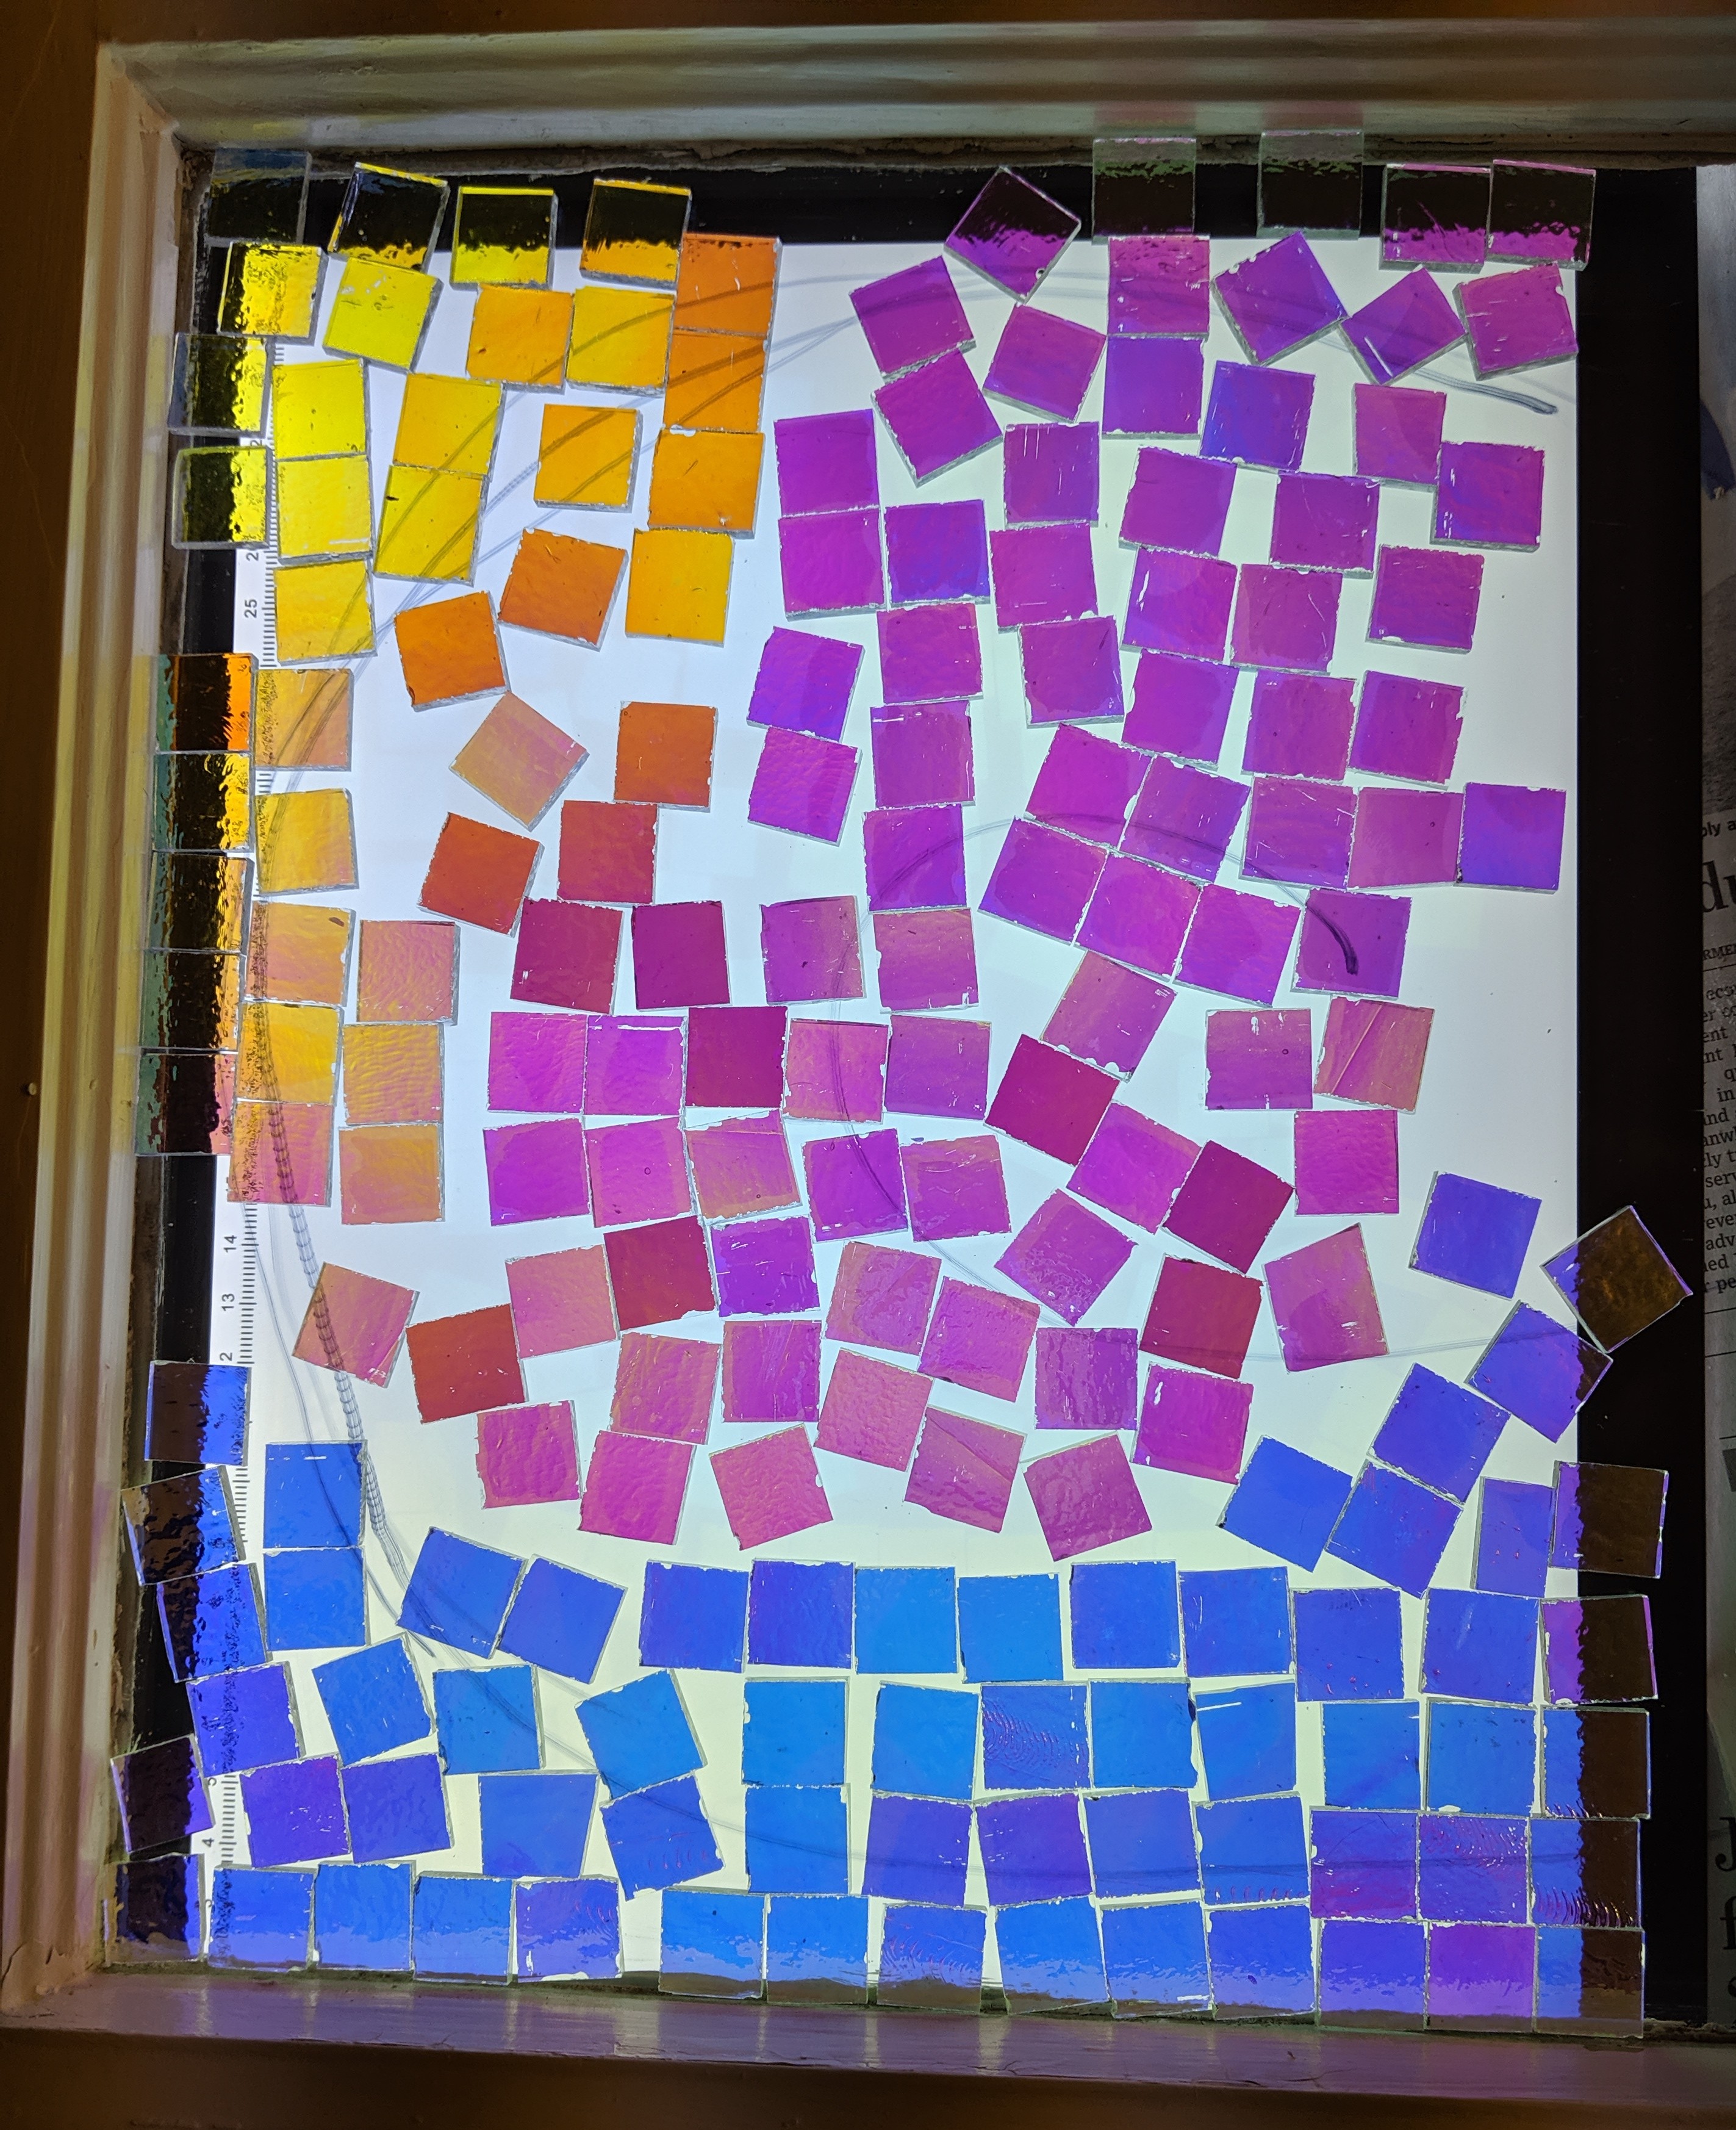
My light tray (small, inexpensive one) arrived today, so I decided to try it out. I wanted to be able to see the colors of the square pieces of dichroic glass I cut from a larger sheet when I lay them out on the window. The light tray is a huge help with this, but it is still a bit of a challenge, as the color perception changes based on the viewing angle. When I am directly over the window (perpendicular to it), this is how the colors look:
Perpendicular view
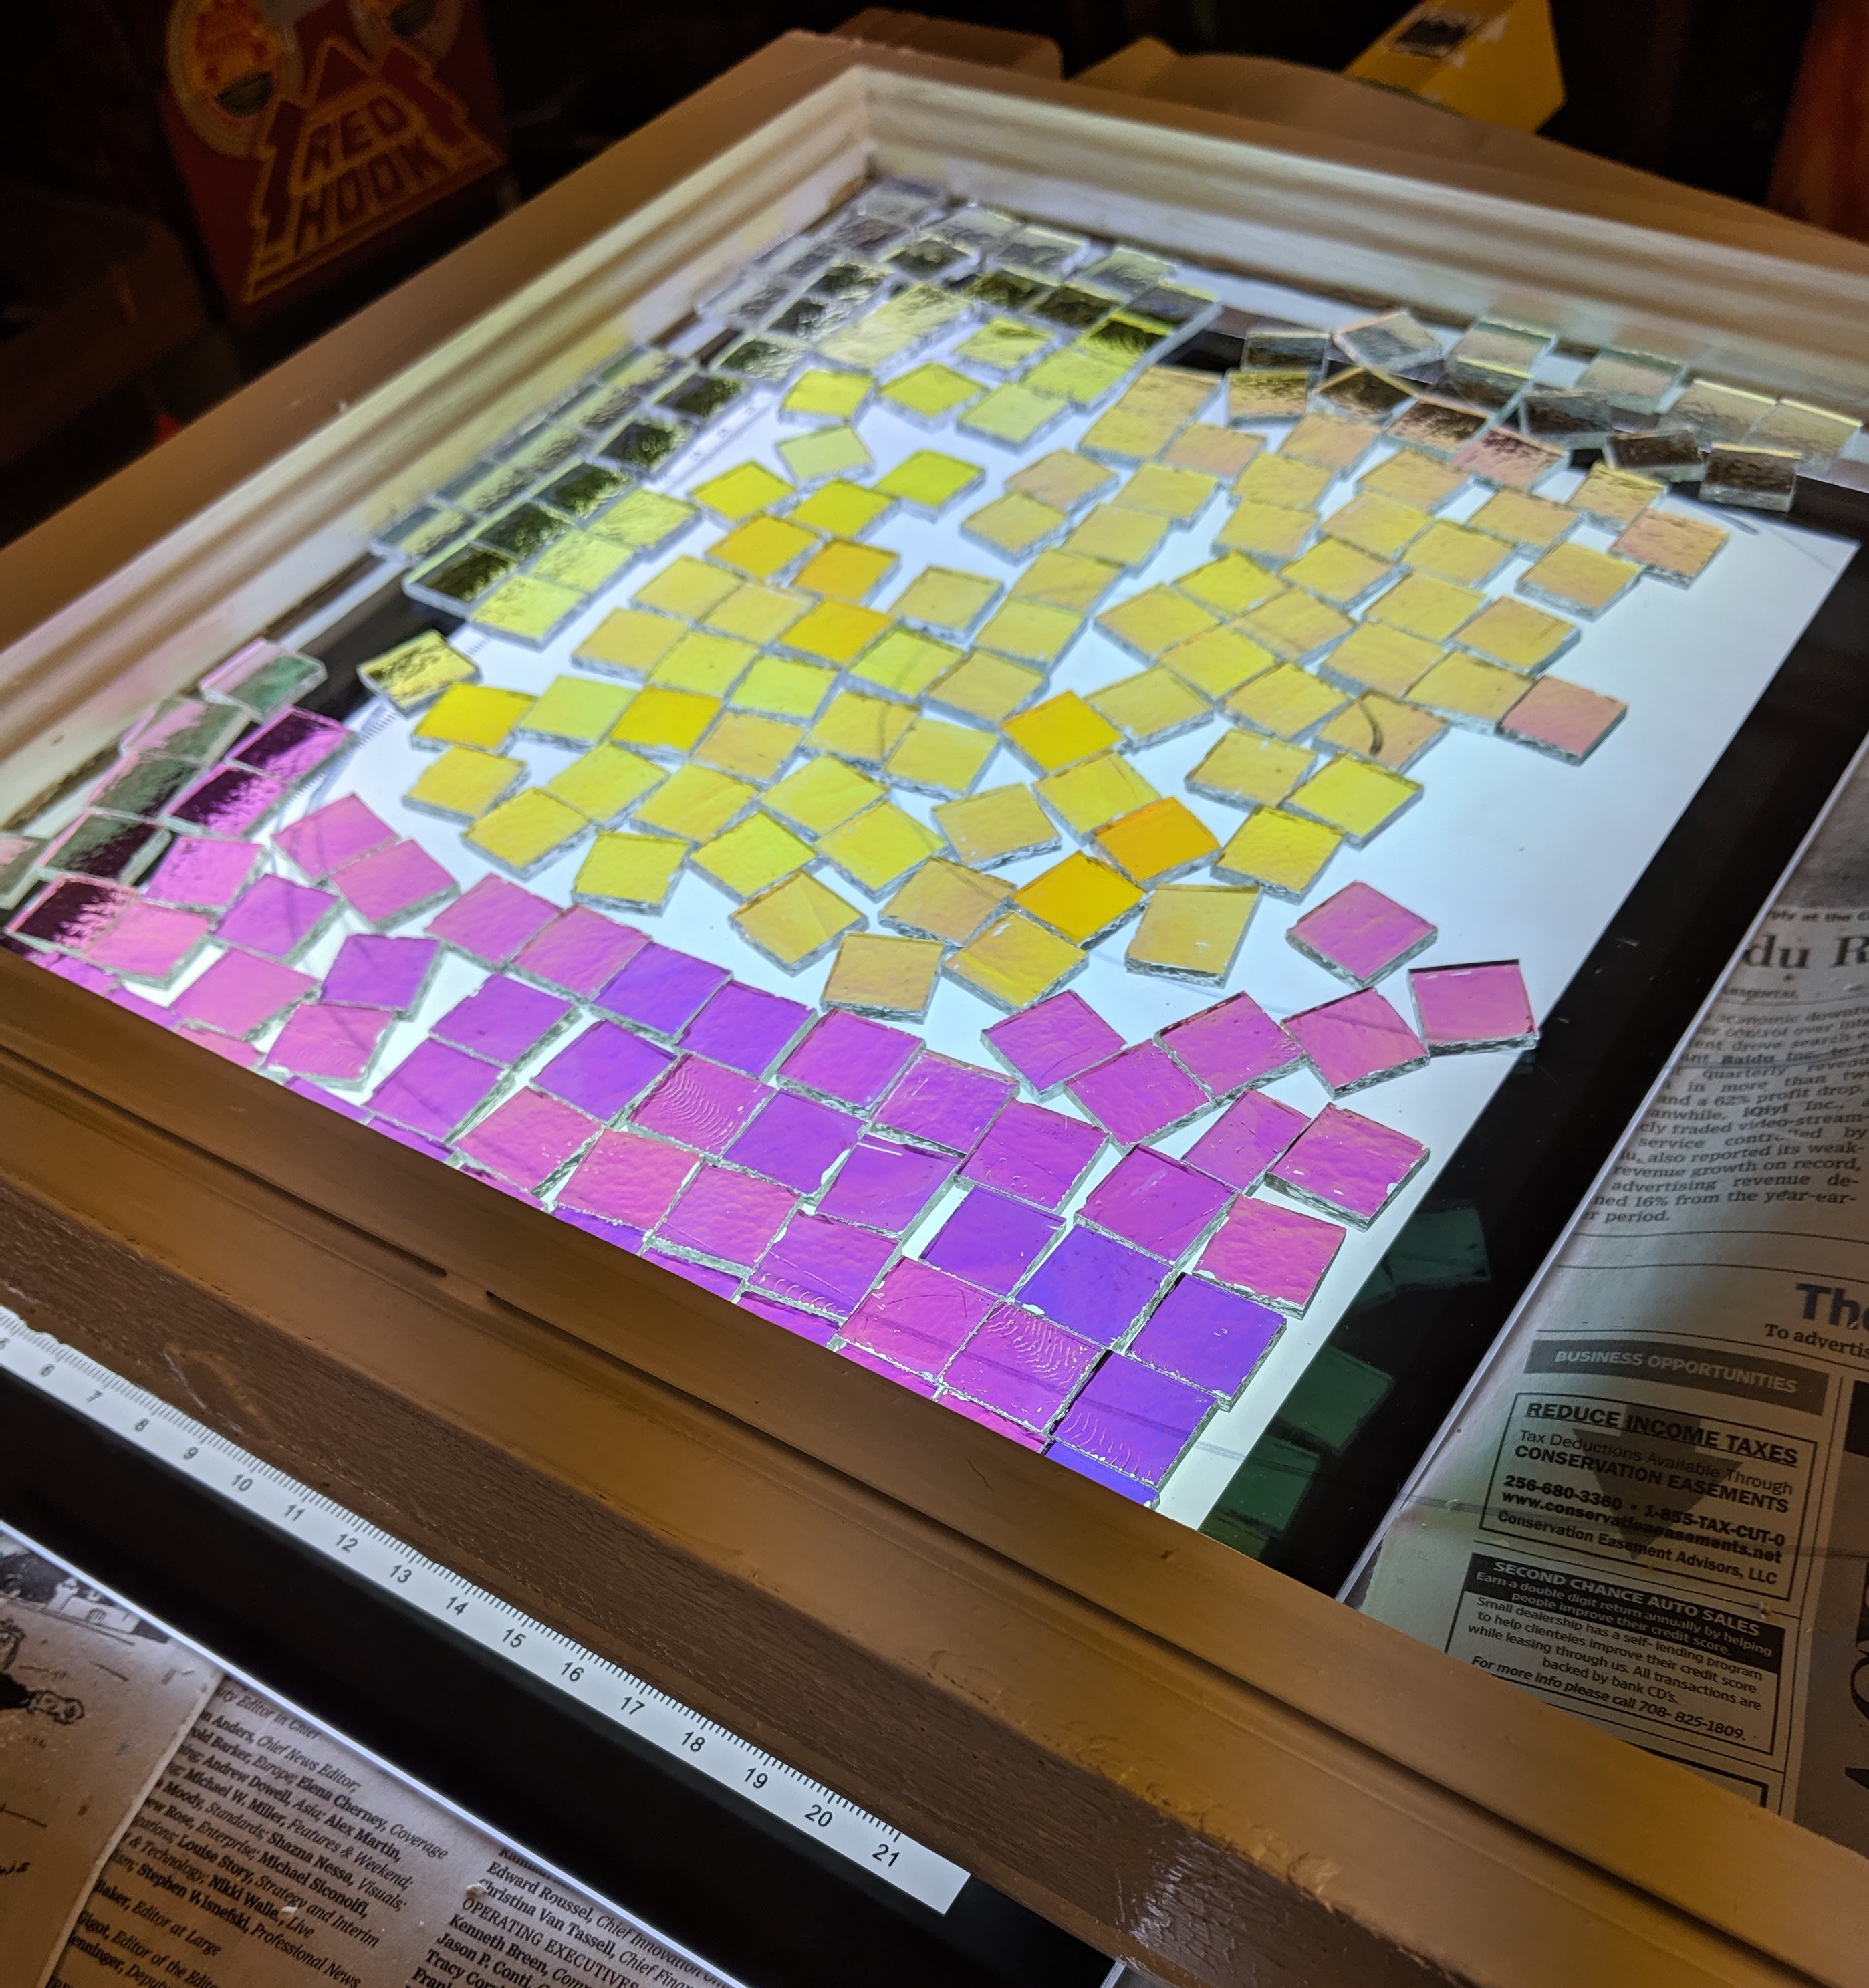
However, at a slight angle, the colors change significantly:
Colors look different at an angle
Short video of the angle changing.
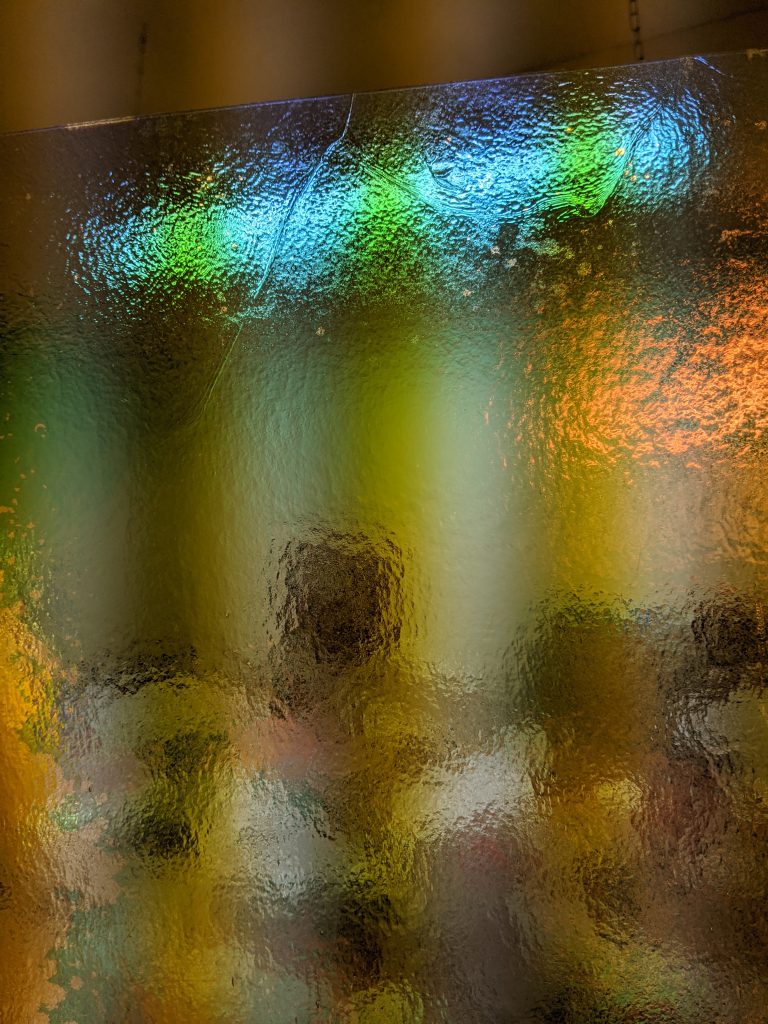
With the light tray off, the glass is metallic. This is due to the dichroic coating, and in very dim light the colors disappear and are replaced with a metallic shine. This photo doesn’t really capture it, but it’s the best I could do at the moment.
Reflective light
This Art Deco Sun / Moon mosaic is a good example of this type of glass:
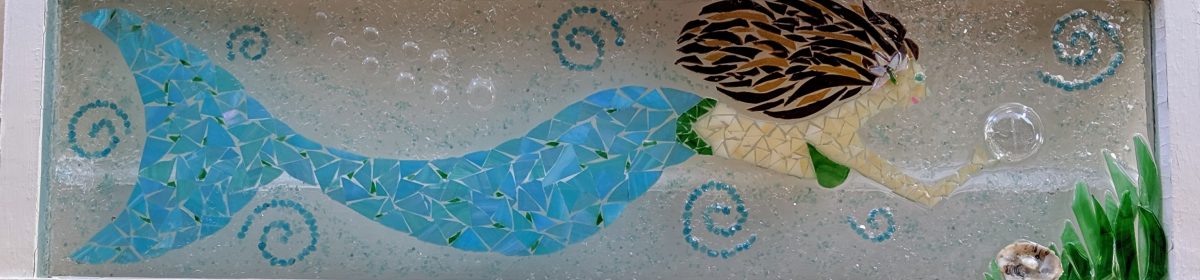
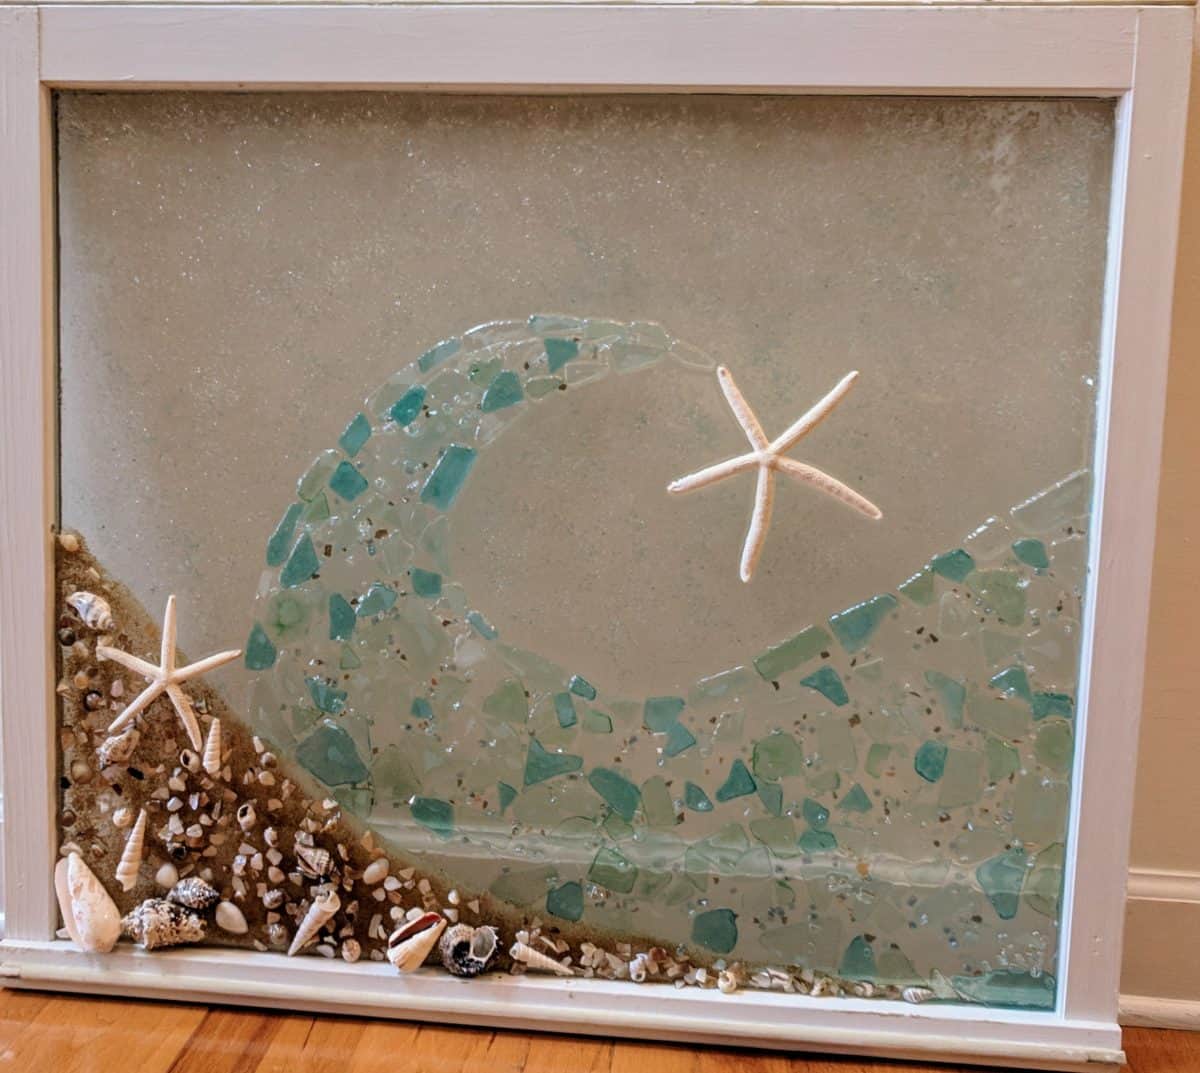
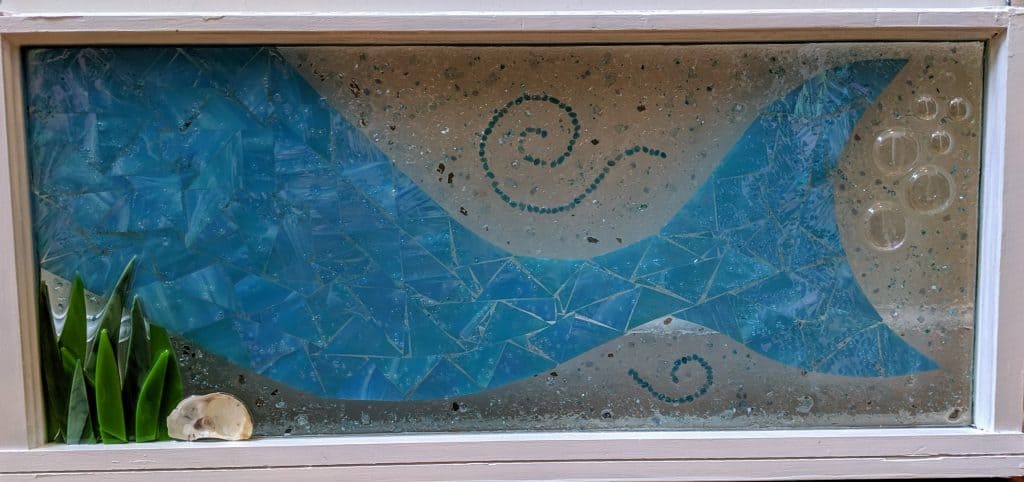
It’s not the best photo (I’m really not good at photographing these), but here is the finished Mermaid Tail Mosaic. Time to clean up a couple more old windows to recycle into the next artwork!
Mermaid Tail – stained glass, glass chips / flakes / globs, etc. set in resin, in a recycled window. Approximately 13.5″ x 30″


