Glass of Sherry
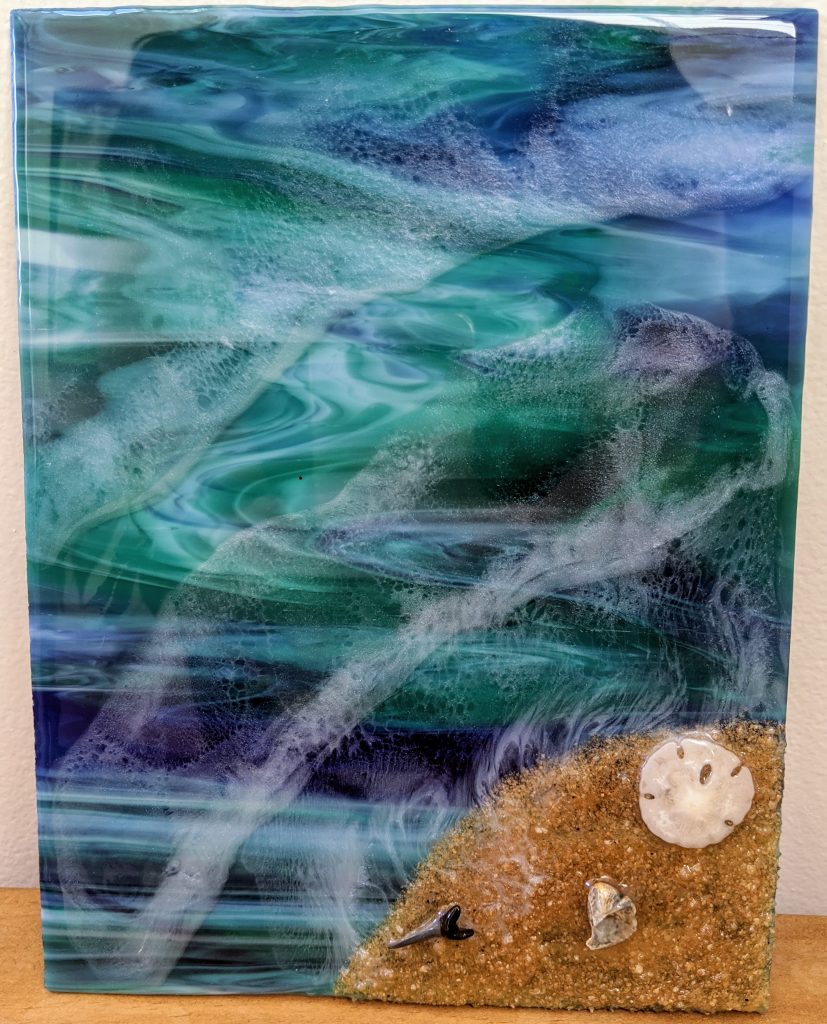
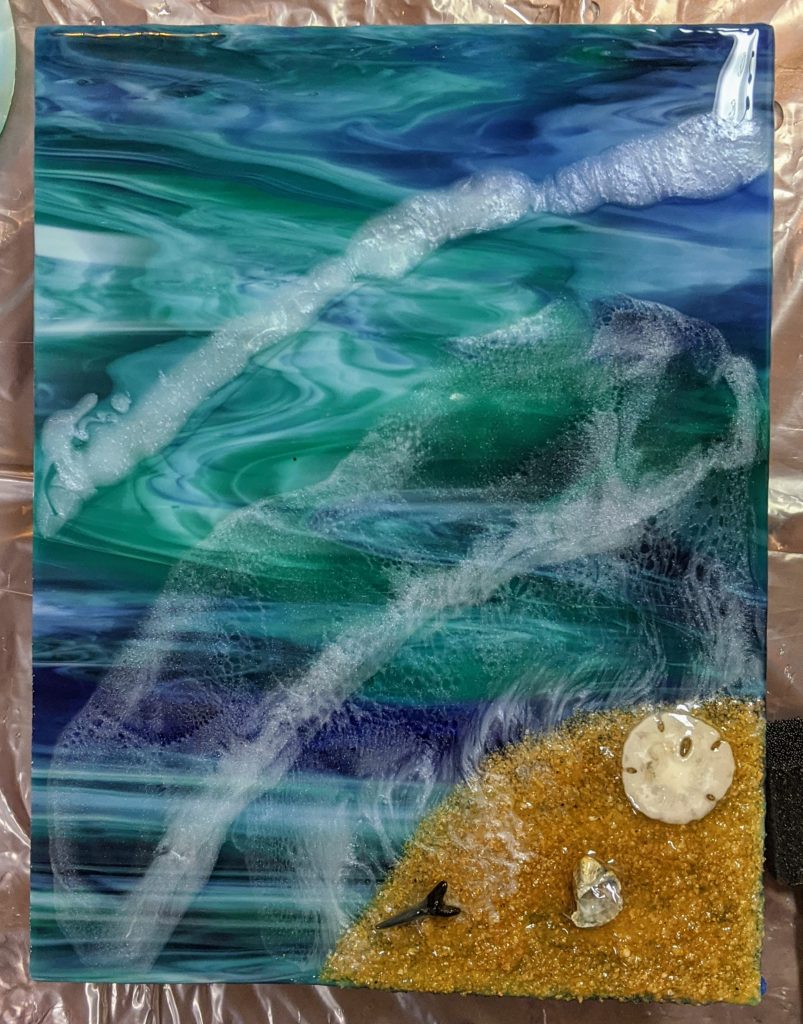
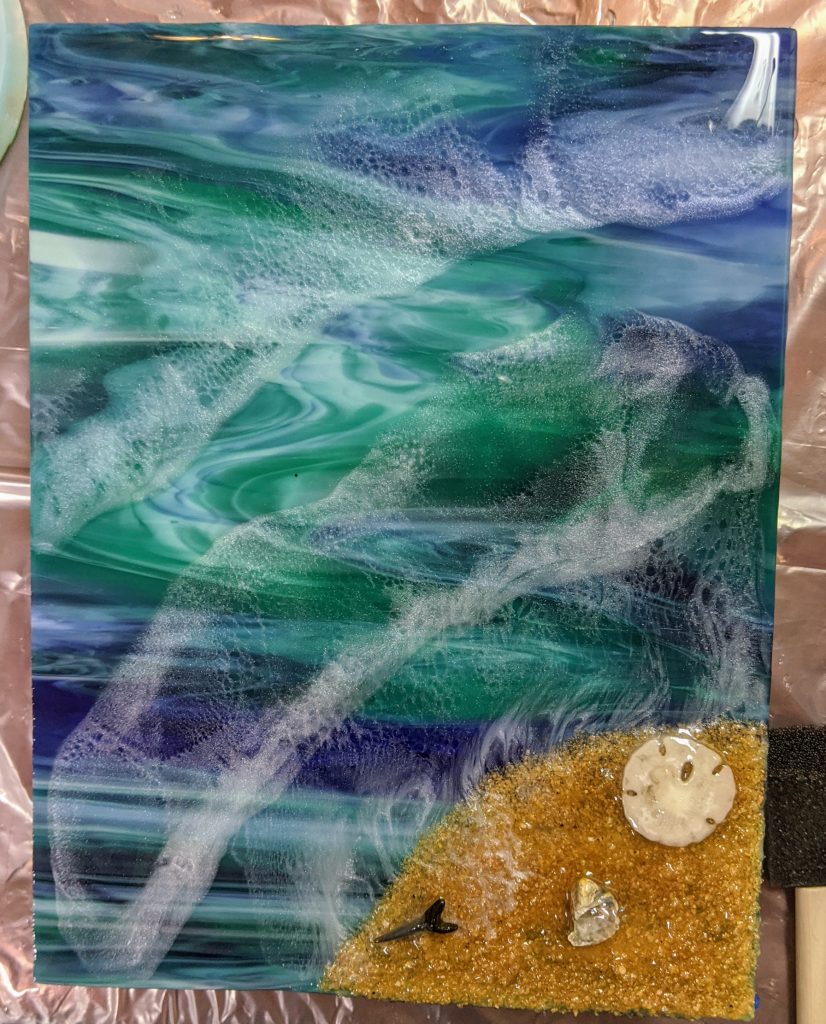
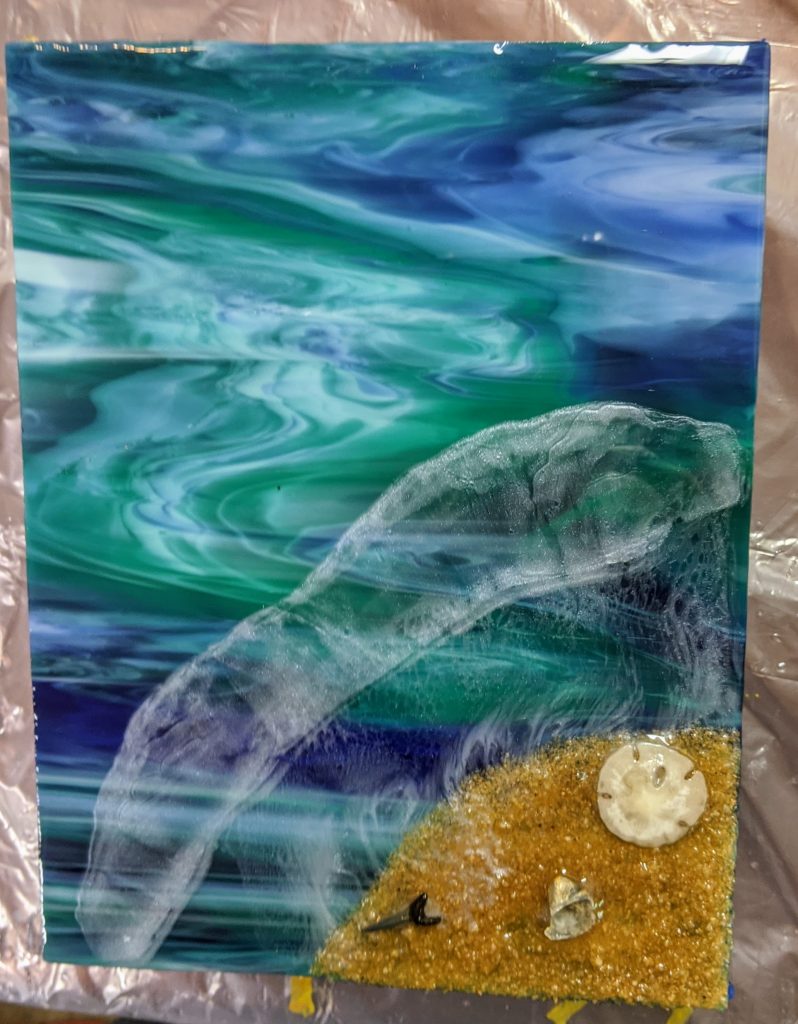
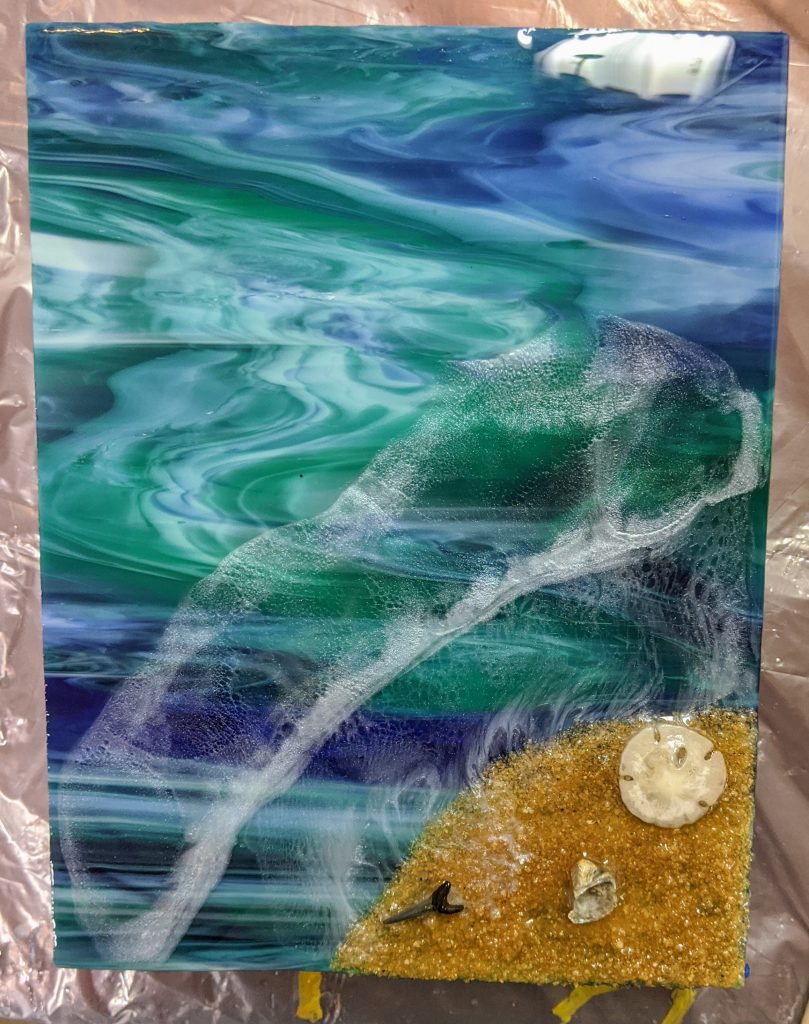
Today I added the last wave to my second beach glass panel, made another Palmetto and Crescent glass panel, finished a second metallic flake coaster and started a brand new cast resin bracelet project.
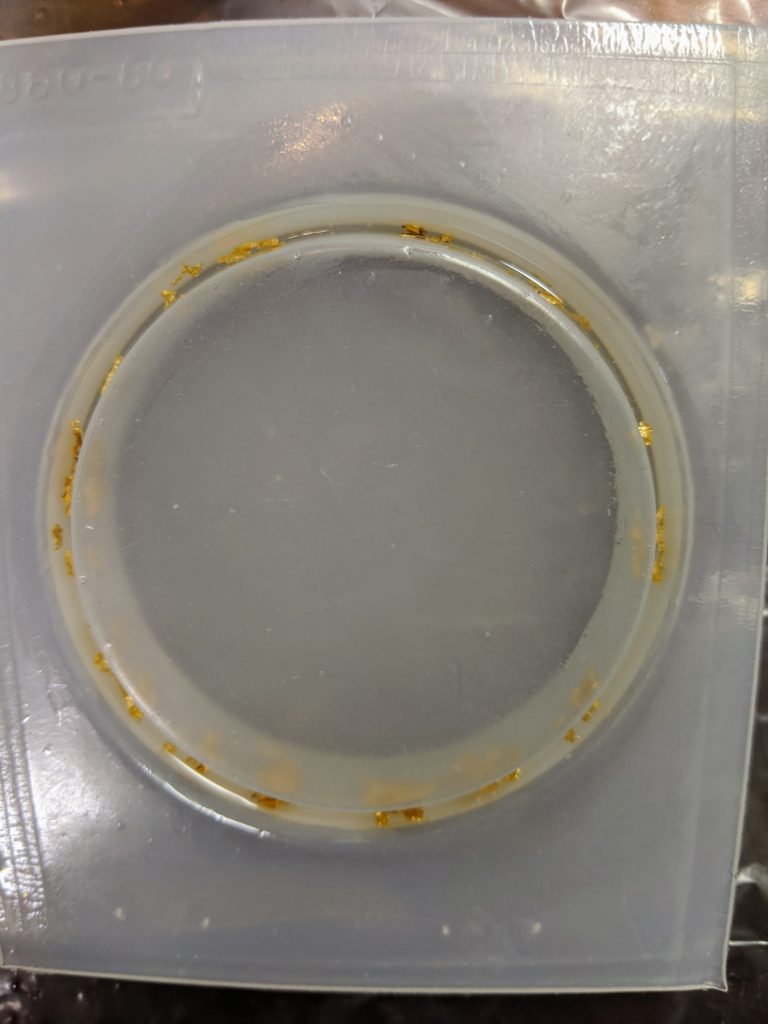
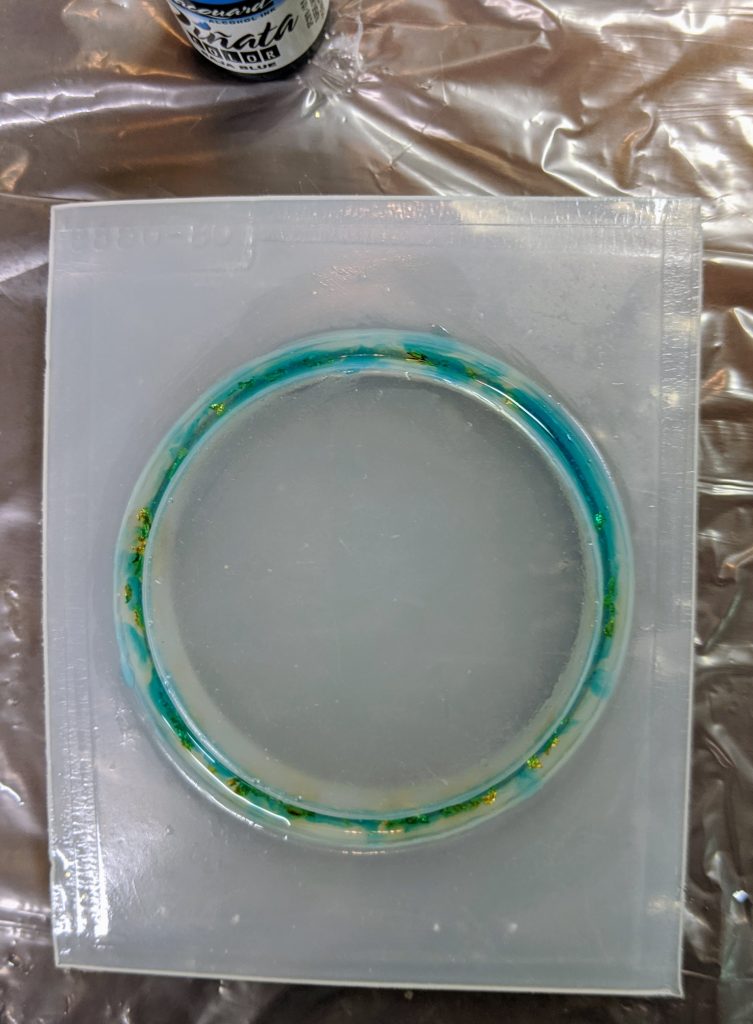
First I mixed up 80 ml of resin and set aside about a tbsp for the white wave for the beach panel. I spread the resin over the desired areas of the panels and mixed the white portion for the bubbles of the waves. I used the heat gun to manipulate the resin coating and also to remove bubbles. Next it was time to add the white bubble detail to the beach waves. I also got a new bangle bracelet mold and decided to use some of the extra resin for that. I should have waited until I had some mold release (this mold is hard plastic, not silicone like I’m used to), but I decided that I could try it out without the release for experience’s sake.
I couldn’t resist trying out a new bangle bracelet mold I ordered. I thought it was silicone, but it is hard plastic. I ordered some mold release for it, but this is an experiment to see how much I need the release chemical.
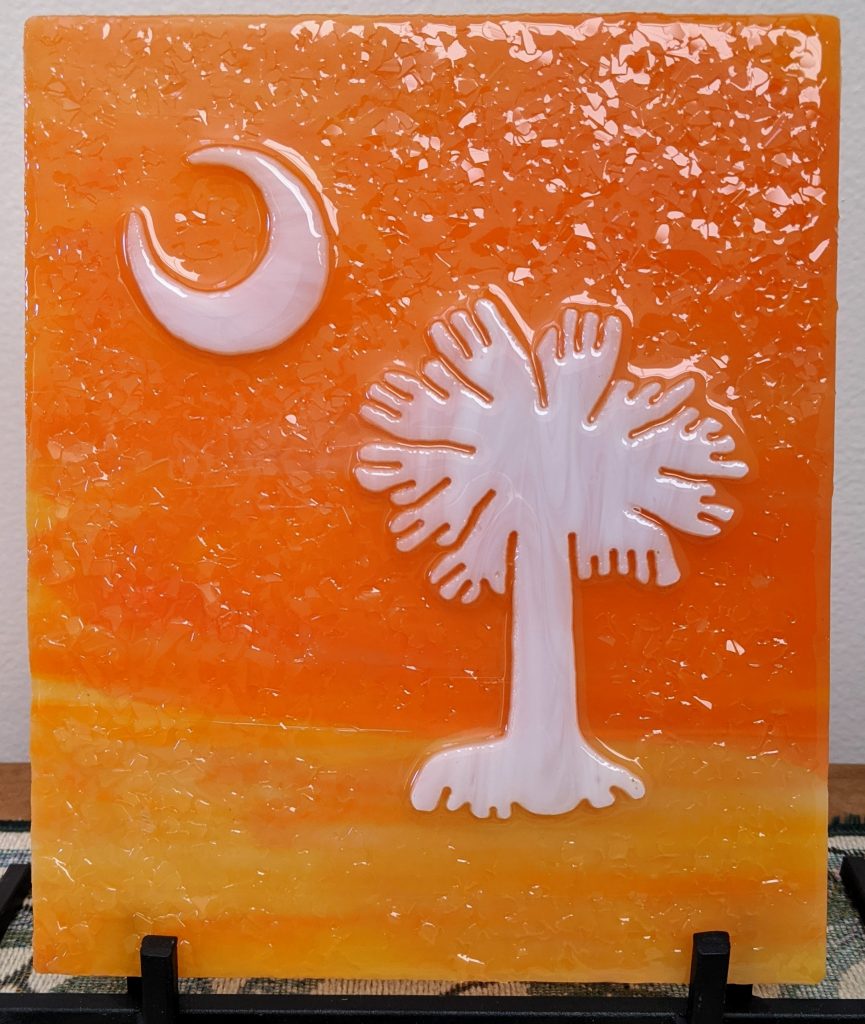
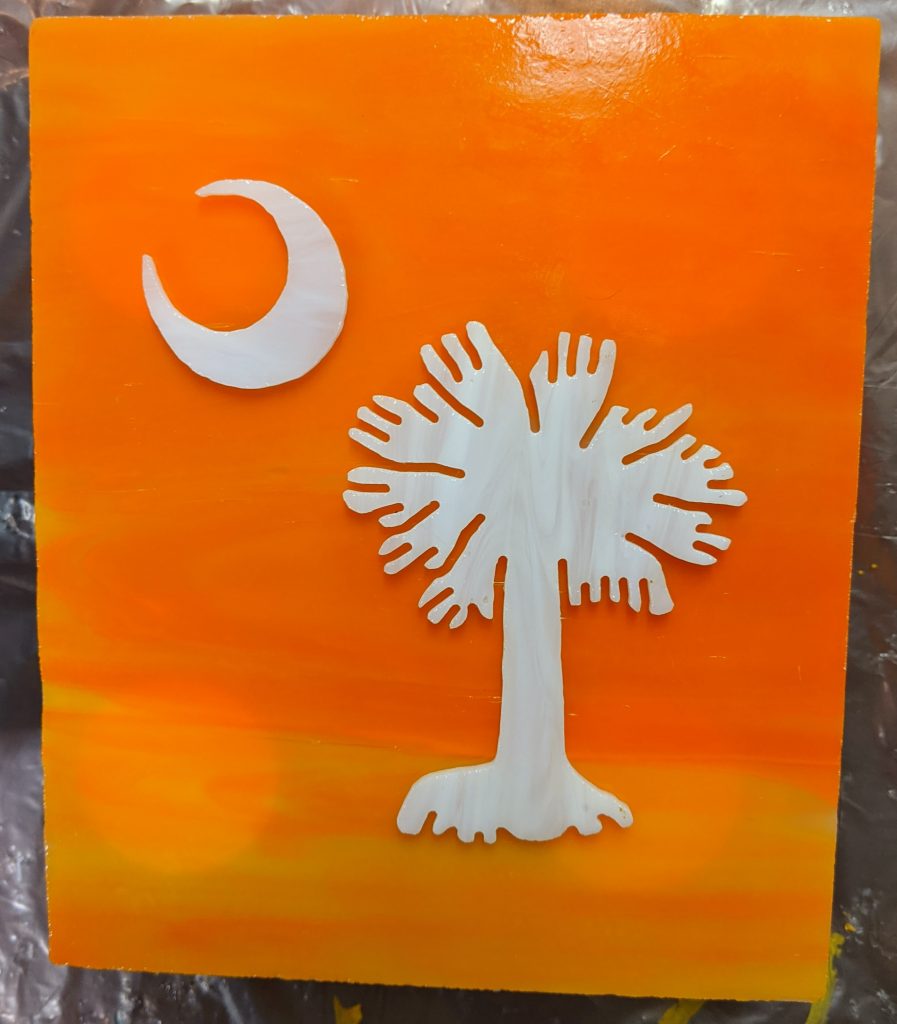
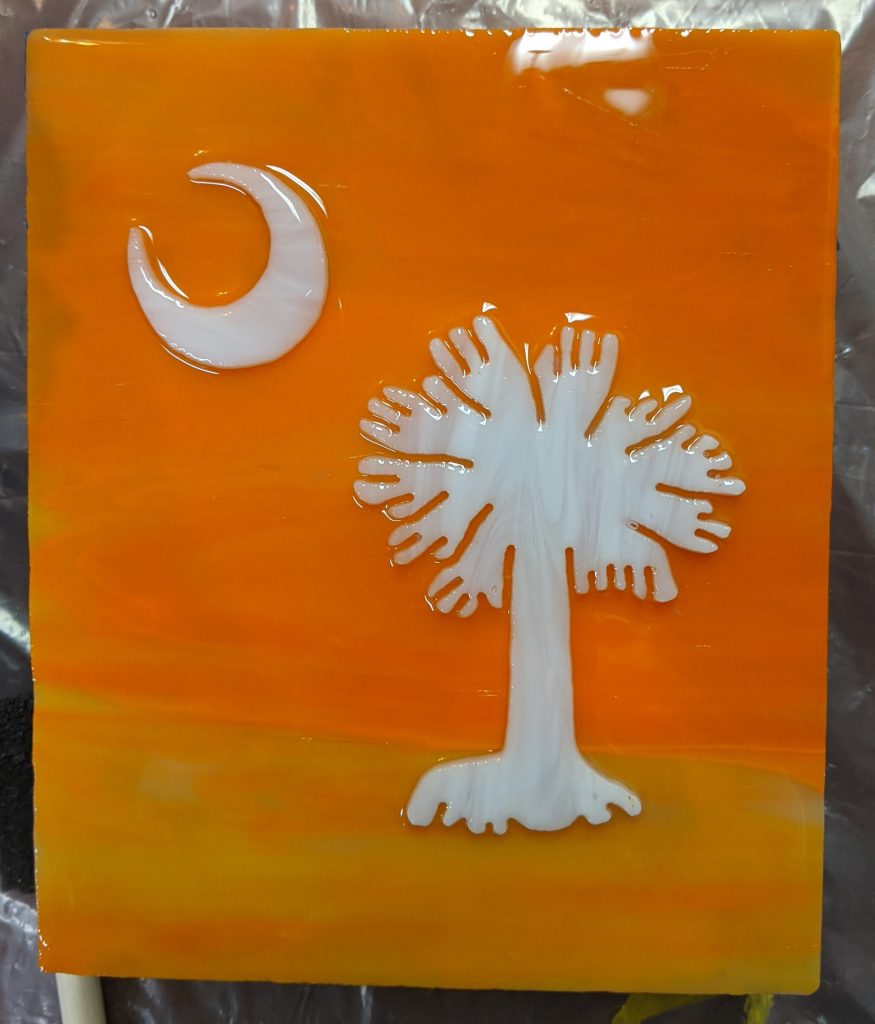
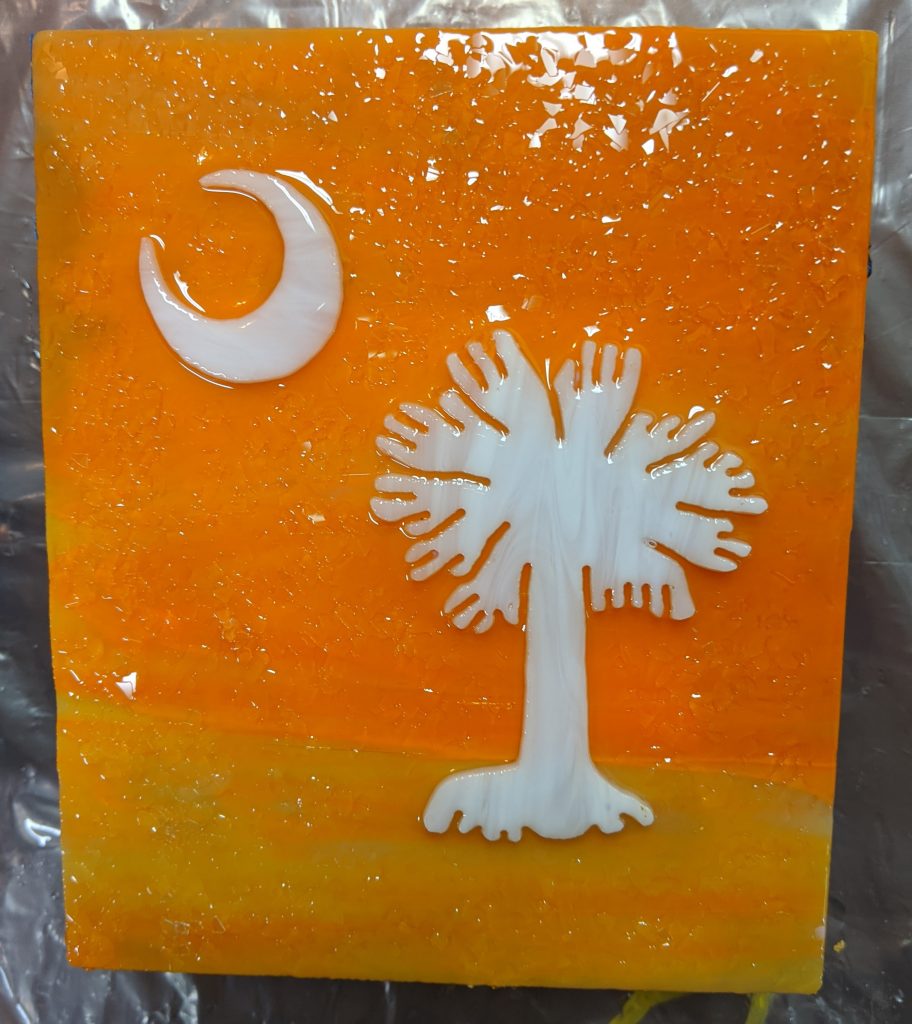
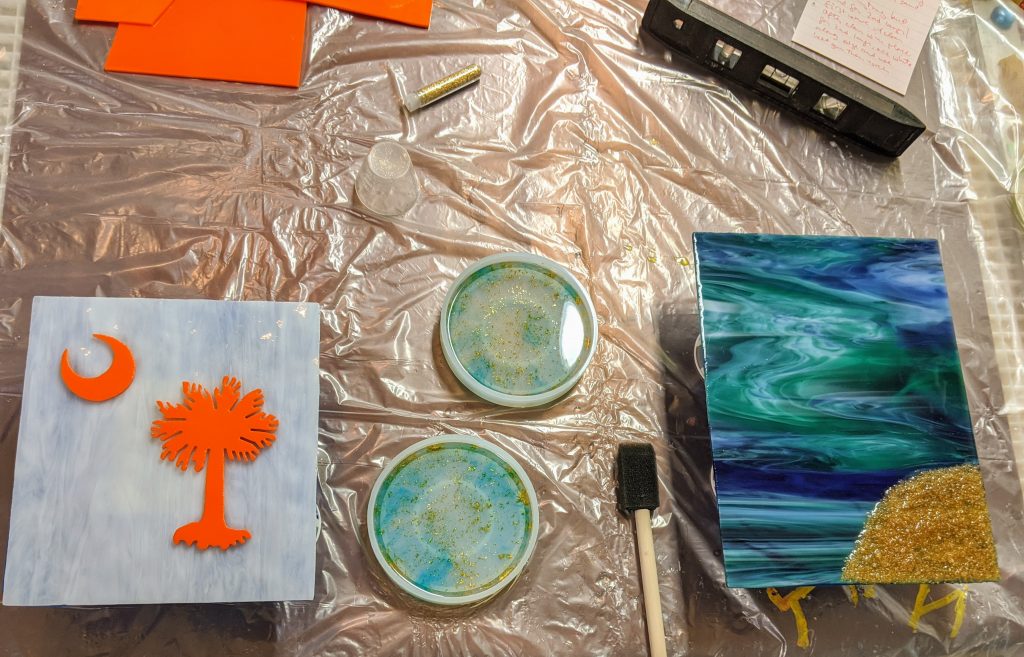
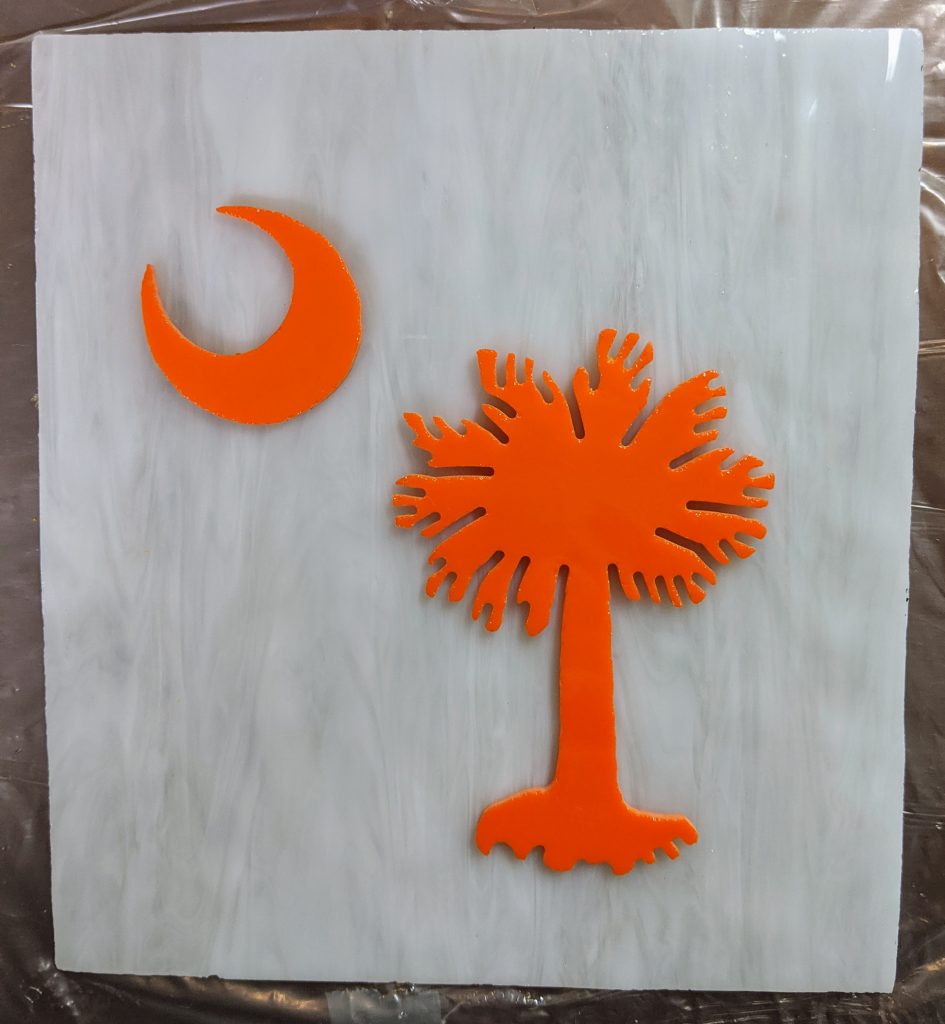
I also added some glass chips to an orange and white Palmetto and Crescent glass panel. The chips add some nice sparkle!
The bangle bracelet still needs a bit more resin, and it will take some practice to figure out how to place the decorations / pigments in that mold, so check back!
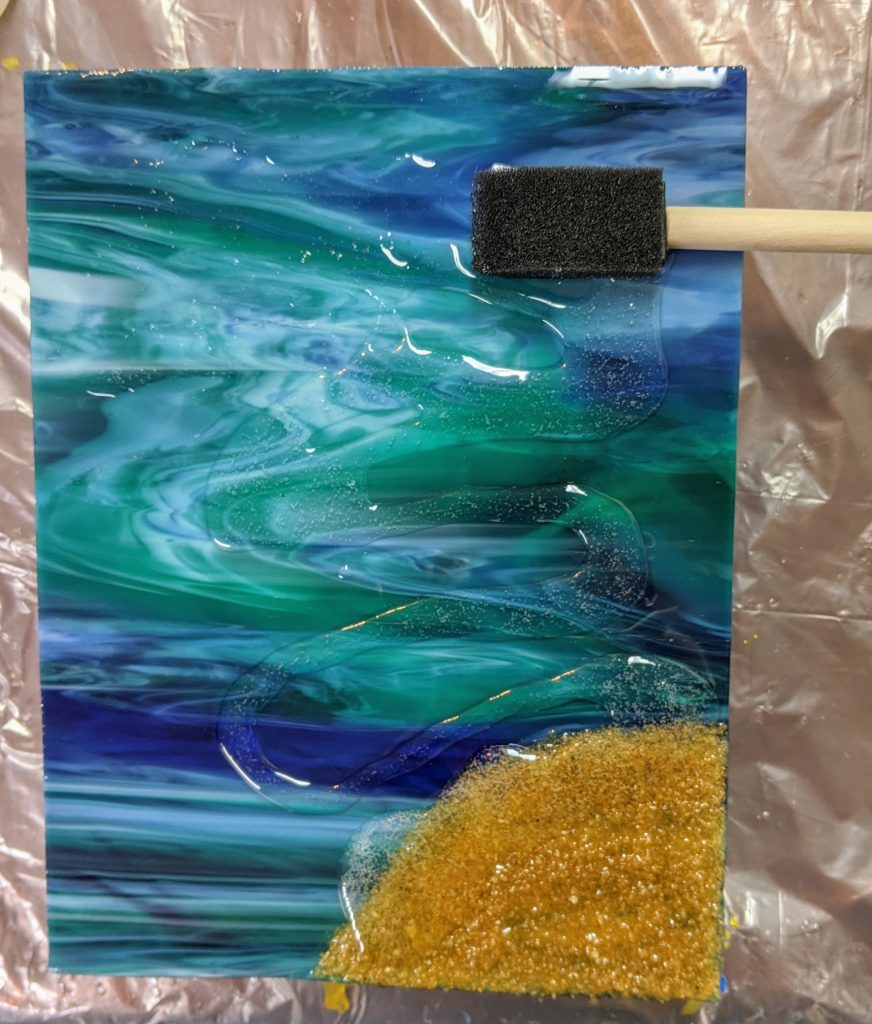
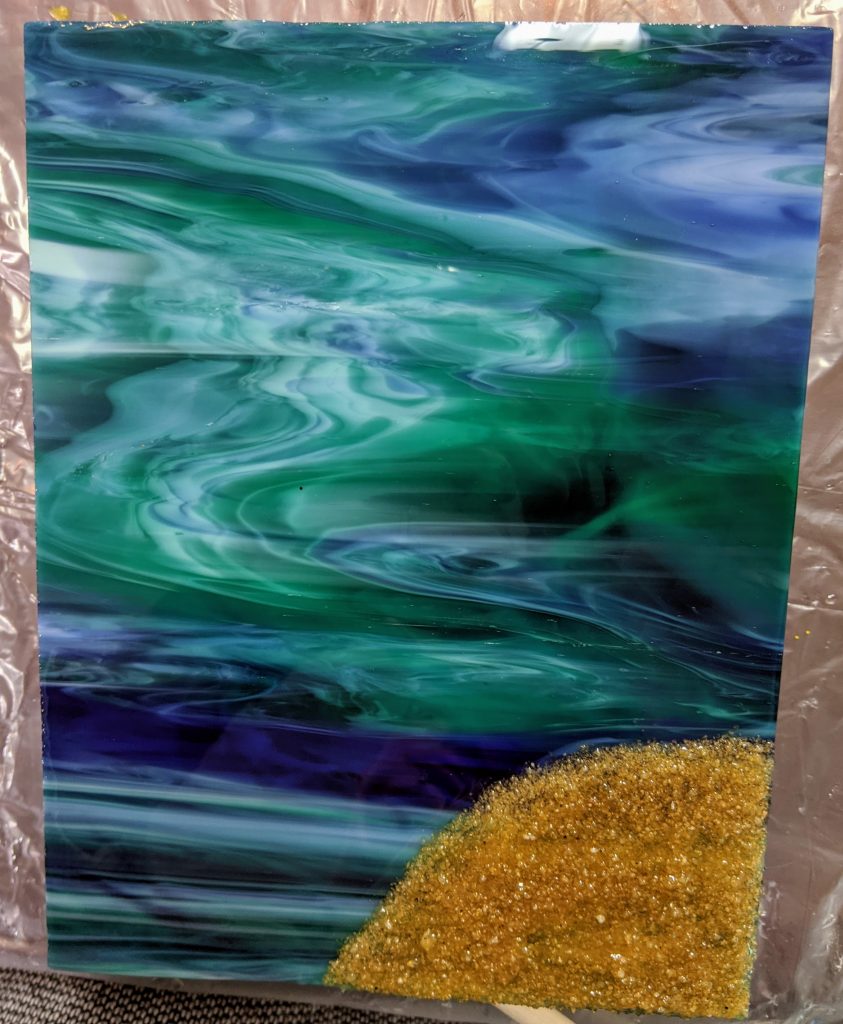
So doing the wave layers just takes a short amount of time (maybe an hour total including setup and cleanup) each day, but here is today’s progress. First I mixed 80 ml of resin, setting aside a very small amount (about 1 TBSP) for the white pigment for the wave bubbles. I then spread the resin over most of the glass, leaving out most of the part where the sand and the first white bubbles are located. I then used the heat gun to remove bubbles and added a line of white resin all along the very edge of the clear resin.
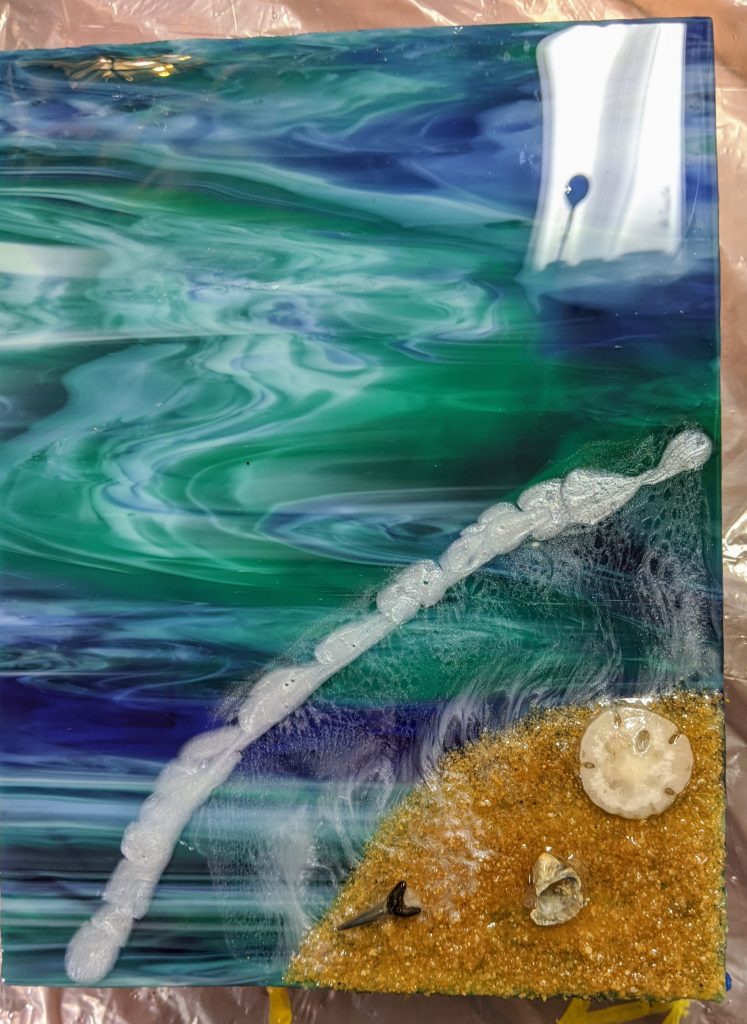
Next I used the heat gun to spread the white pigment and then the torch to add detail to the bubbles.
I also had some touch up to do on the Palmetto and Crescent panel, as I added glass chips late last night and sprayed over them with resin spray and I wasn’t happy with the look. Soooo I spread another layer of clear resin over the panel and added the chips again. I also used the leftover clear resin to finish up one of the coasters from yesterday, so tomorrow I should be able to see how it looks. 🙂 I will also add at least one more wave to the beach panel (hopefully also tomorrow).
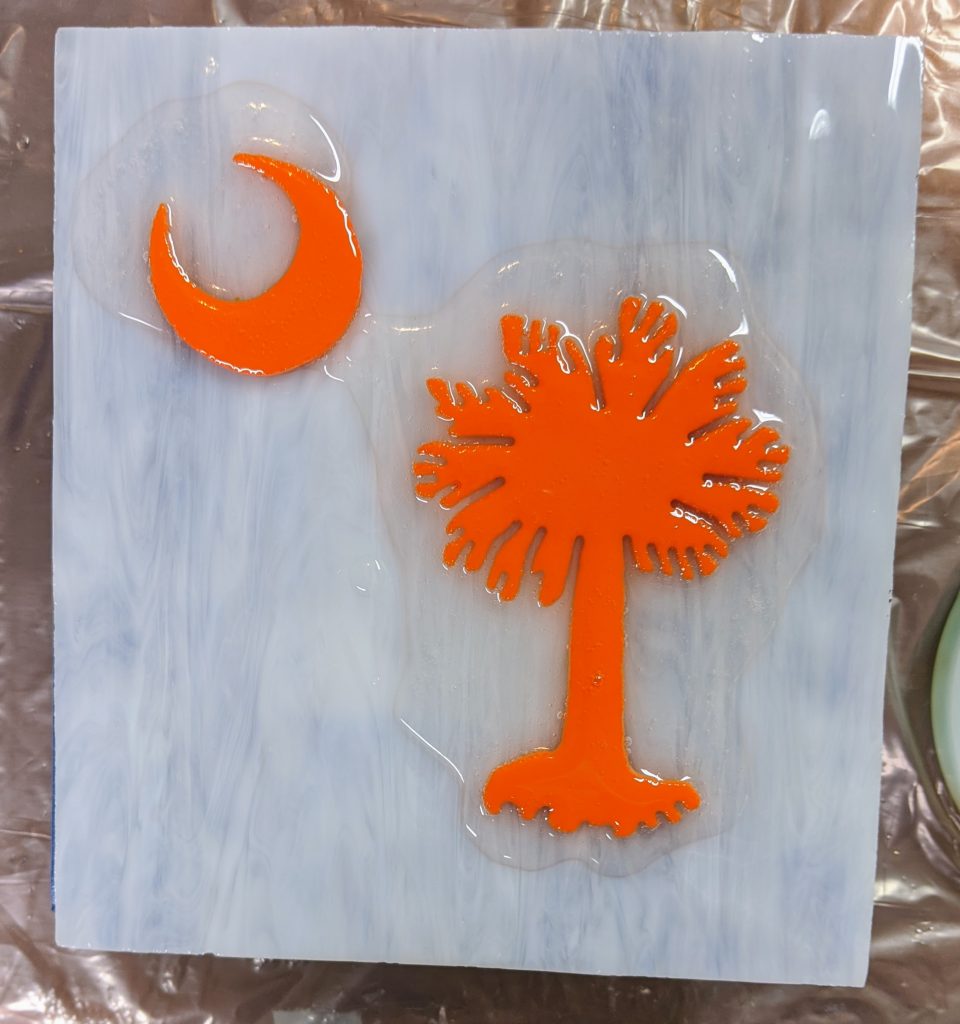
So yesterday I planned to work on these, but my real job was too busy, so today was the day. I added the first wave layer to my second beach / waves over stained glass panel, poured the resin coating on my stained glass “Clemson” colors Palmetto and Crescent panel, and added the second layer to my two alcohol ink / gold flake resin coasters.
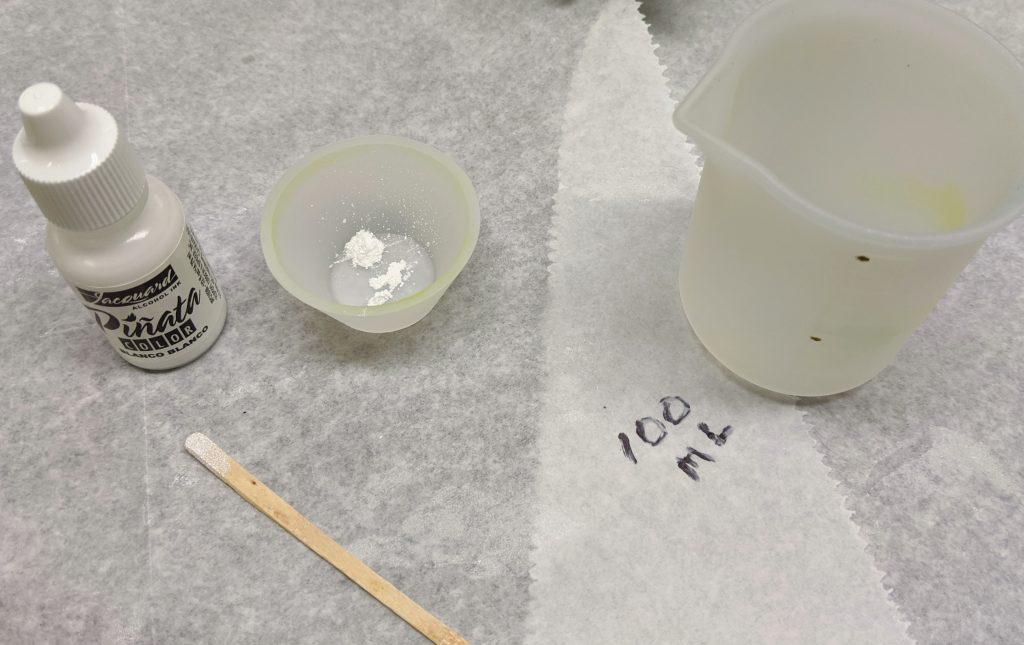
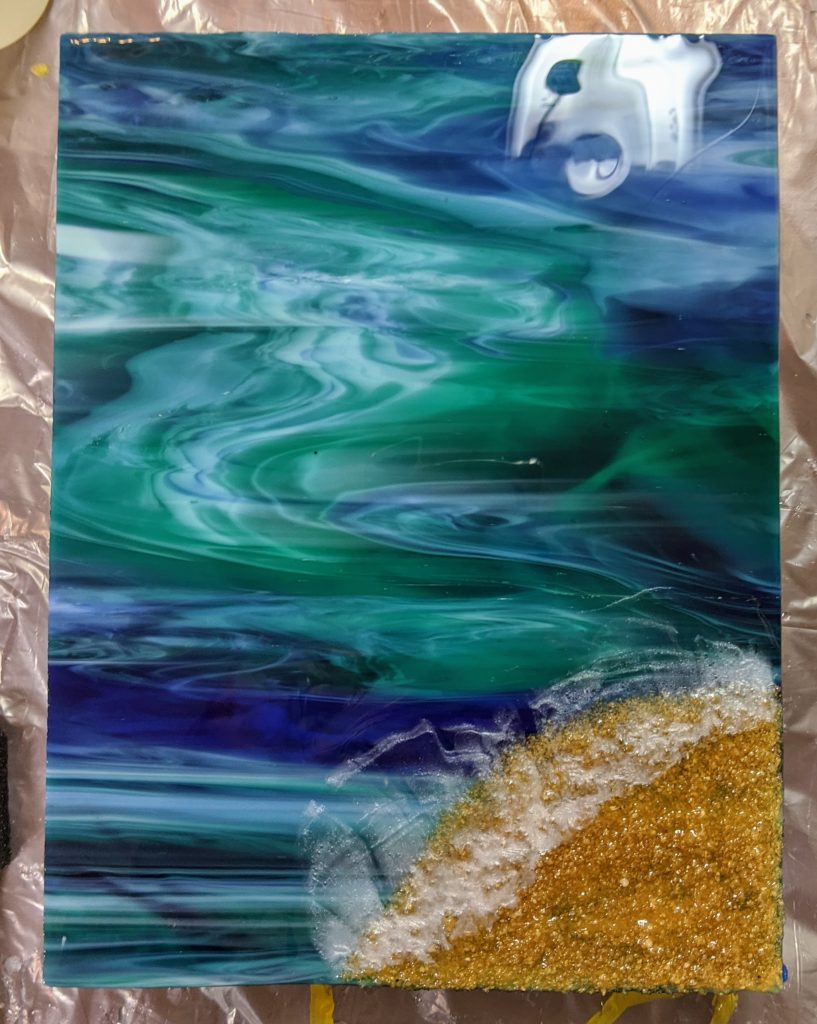
I mixed 100 ml of resin, then set a small amount aside for the white part of the waves on my beach panel. Next I poured the clear layer of resin over the glass panels and spread the resin around with a sponge on a stick.
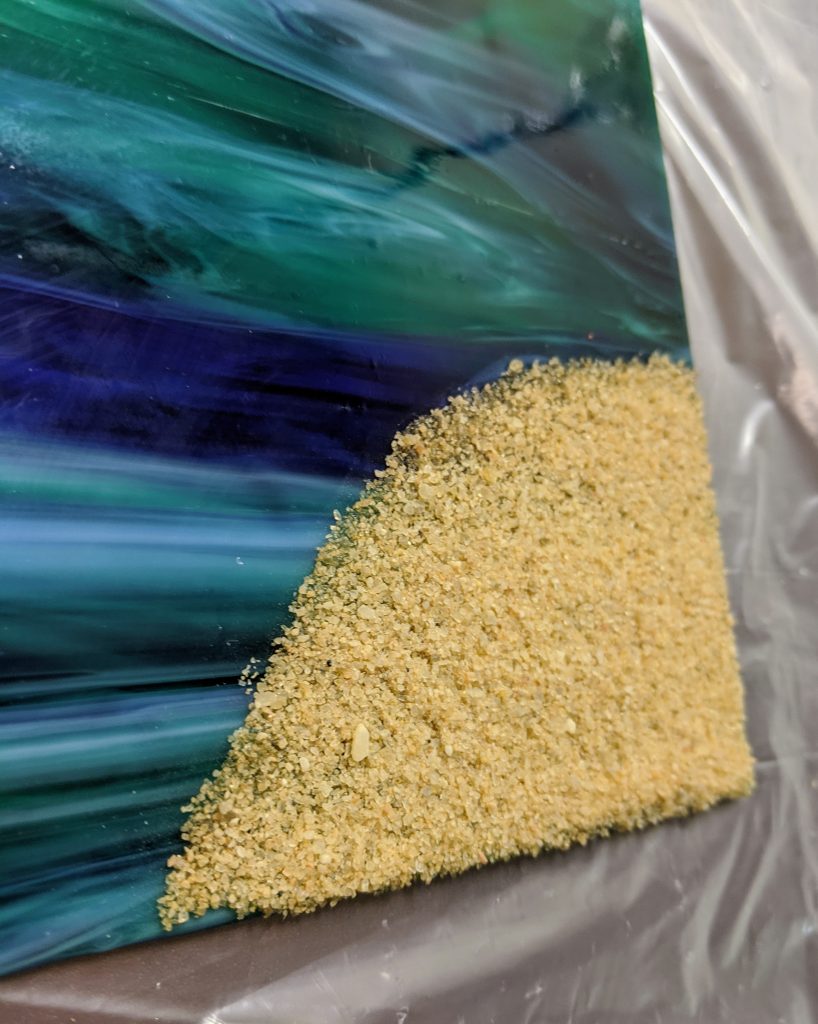
Once the resin was spread all over the base glass, I used my heat gun to remove bubbles and spread the resin a bit more evenly. Next, I added a line of white tinted resin (powdered pigment plus a drop of white alcohol ink) to the sandy beach part of the wave panel.
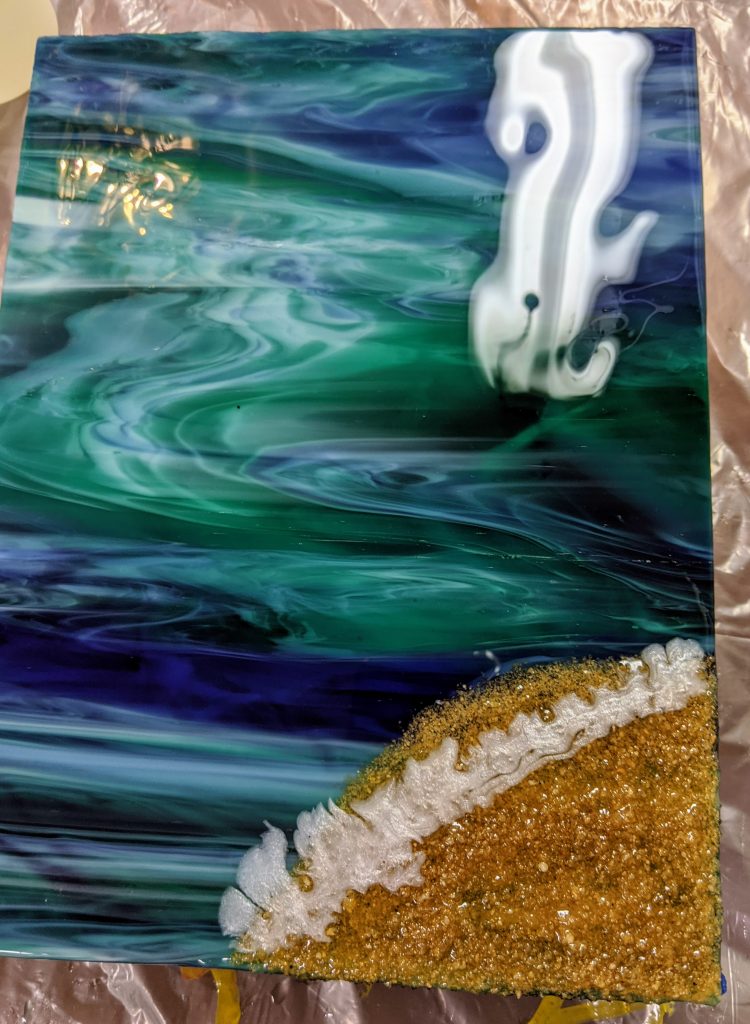
Next I used my craft torch to spread out the white bubbles of the wave. The alcohol ink drop helps create the feathery effect in the resin when the torch hits it. I really only wave the torch very briefly over the white resin one time. The torch can quickly crack the stained glass if it gets too hot.
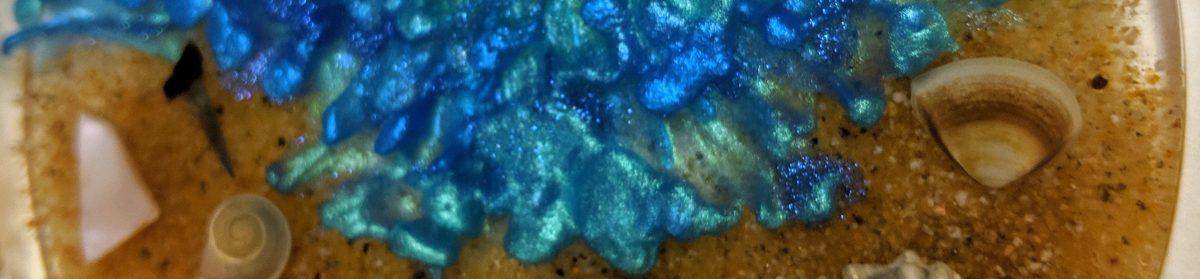
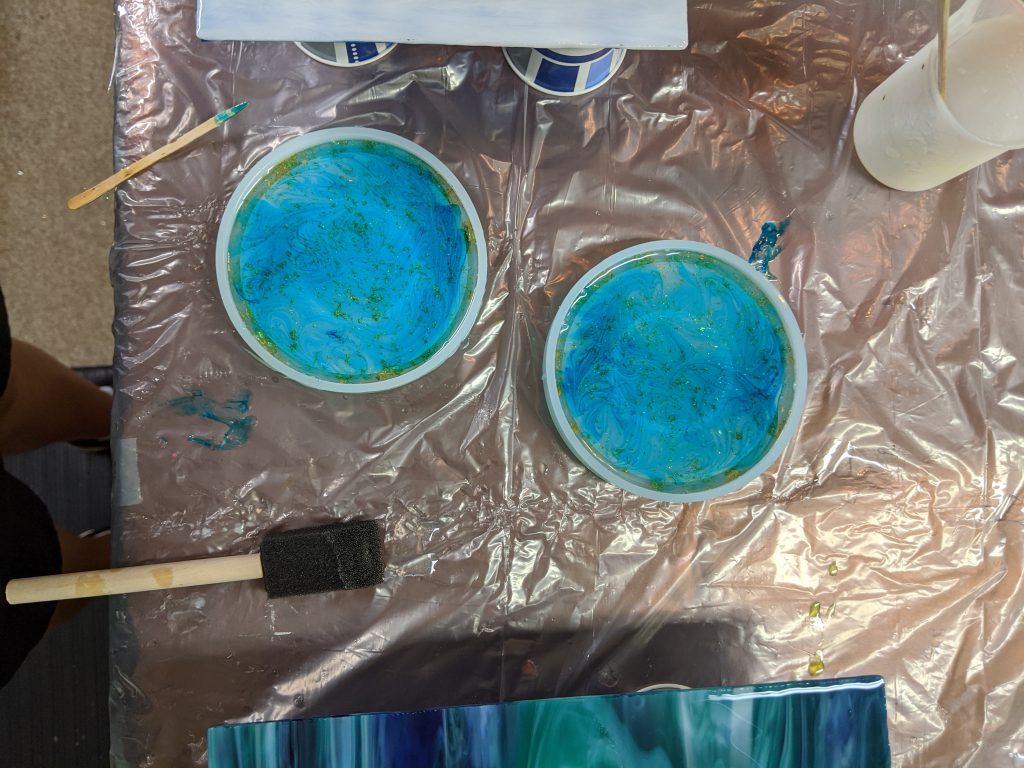
Next I poured the leftover clear resin into the coaster molds I started two days ago. The first layer was clear with some metallic flakes and a drop of blue alcohol ink. This layer was clear with about three drops of blue ink, which I added directly into the clear resin after I poured it into the molds. Afterward, I blew it with my heat gun (obligatory bubble removal) and manipulated a bit with a small craft stick.
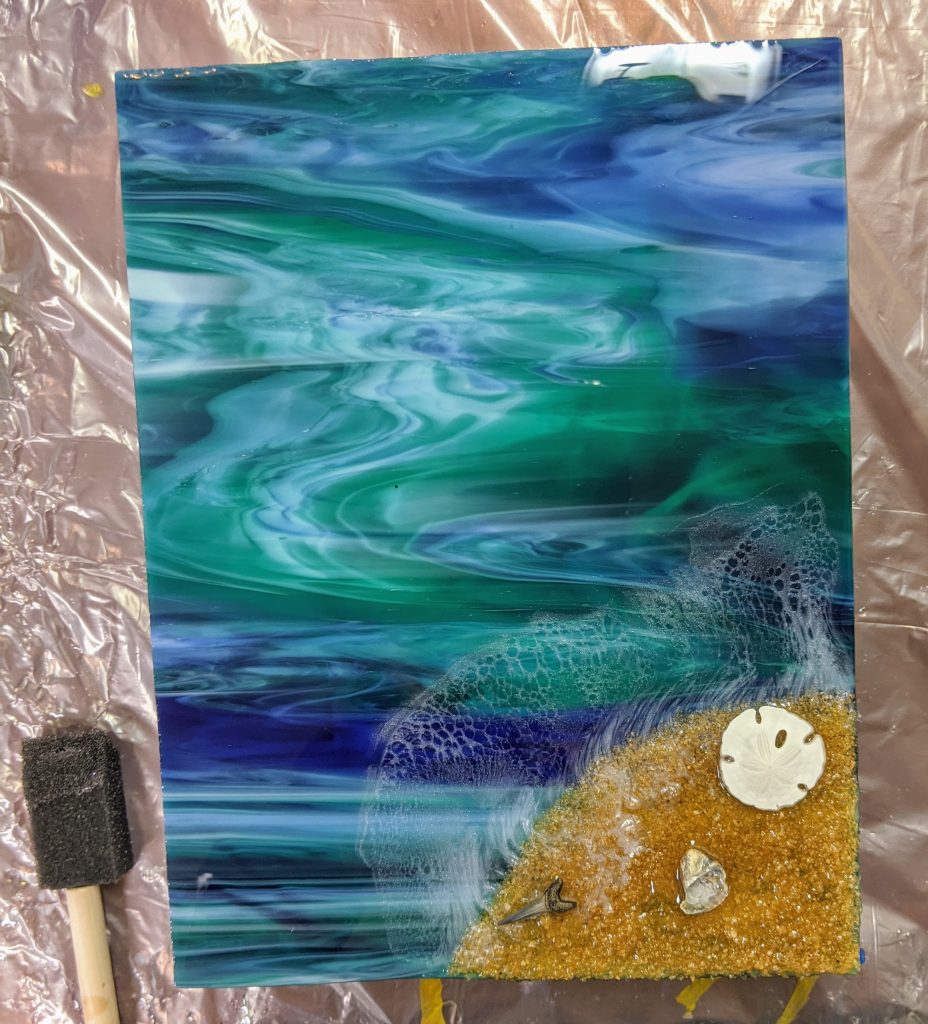
I will likely need to add another layer of clear resin to the coasters and I’m hoping to add two more layers of wave to the beach panel, but the palmetto and crescent panel should be all set tomorrow afternoon. I will probably also brush a very light coat of resin over the sand dollar, shark tooth and shell on the beach panel.
Today I started another layered wave over glass project. I need more practice to get the layers the way I want to see them. I also decided to make a “Clemson” version of the palmetto and crescent. My leftover resin went to a new coaster project where I’m trying out a new “beachy look” theme with metallic flakes and some blue alcohol ink.
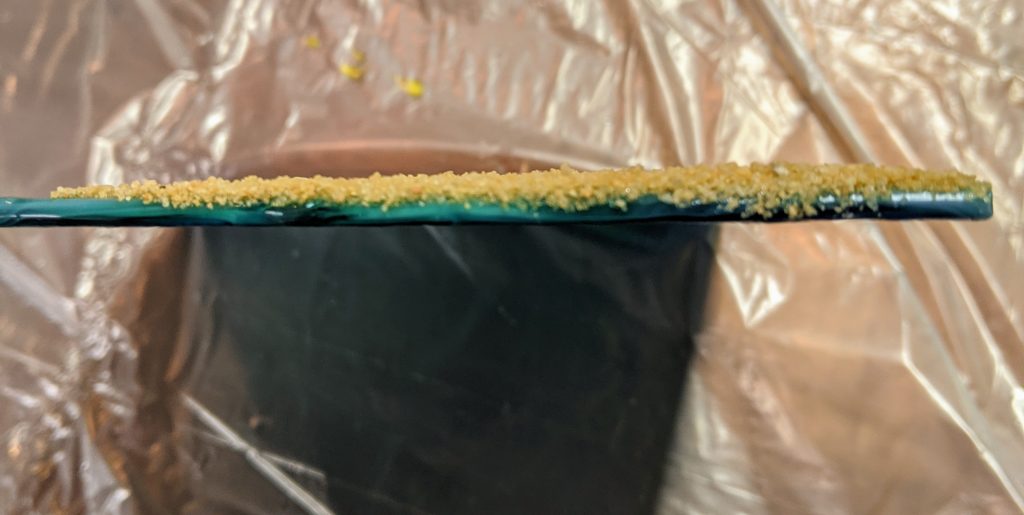
My first resin wave layers over glass project looked great, but I felt like I made the sand layer too thick, so for the past couple of days I have been slowly layering the sand to the point where it is pretty much opaque, but not thick. My plan for today was to pour the first layer of clear resin. I also wanted to add the first wave (white pigment), but I chickened out and decided to wait until the first resin layer had cured.
While I waited for the resin to settle over the sand and glass, I poured the first layer of resin into two coaster molds and added some metallic flakes and later some blue alcohol ink tinted resin drops as well.

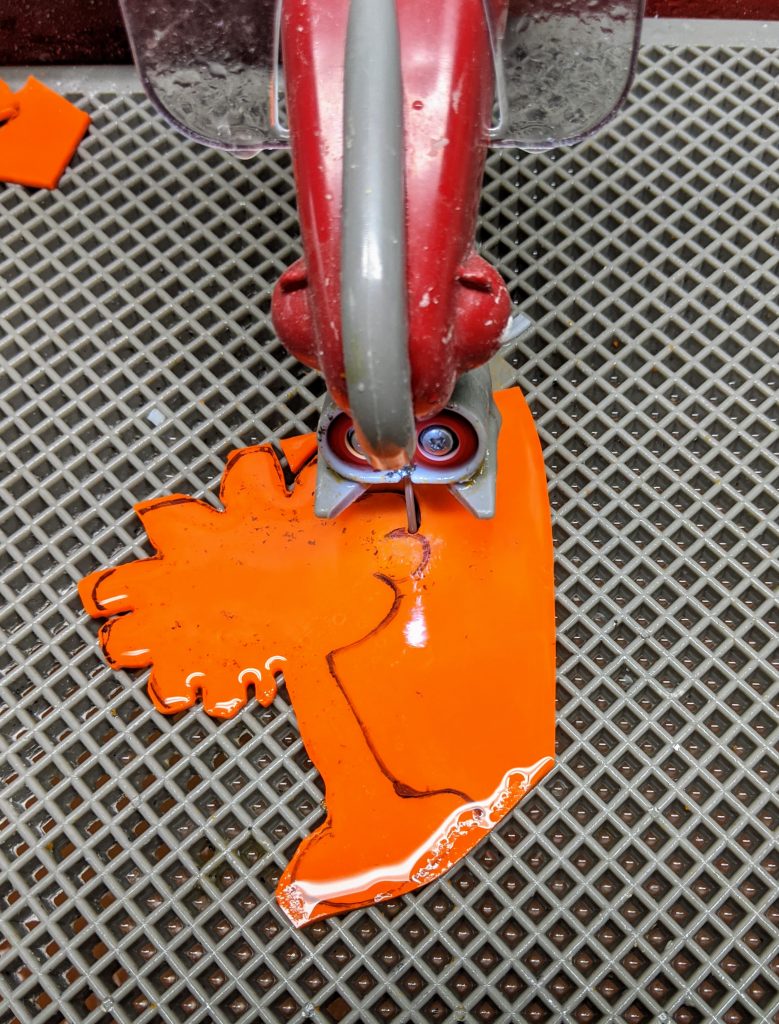
I ordered some bangle bracelet molds the other day and I’m hoping to use a mix similar to the one I used in these coaster molds in those, so I thought I’d try it out with my leftover resin today. I have no idea how it will turn out, but I think I will add another layer with more ink when I mix my next batch of resin for my art-glass-layered-wave-beach panel. I poured and spread the resin as needed, used my small craft stick to remove bubbles and then used the heat gun on all three items to further remove bubbles. While I waited for the resin to settle (you have to hang out for 30-60 minutes and watch for more bubbles in case they decide to pop up), I cut out two more palmetto and crescents using my glass saw; one set orange and one white.
Tomorrow I will add the second wave layer over the sand / beach on the glass panel and hopefully layers for the orange / white palmetto and crescent glass panel and another tinted layer for the coaster experiment.