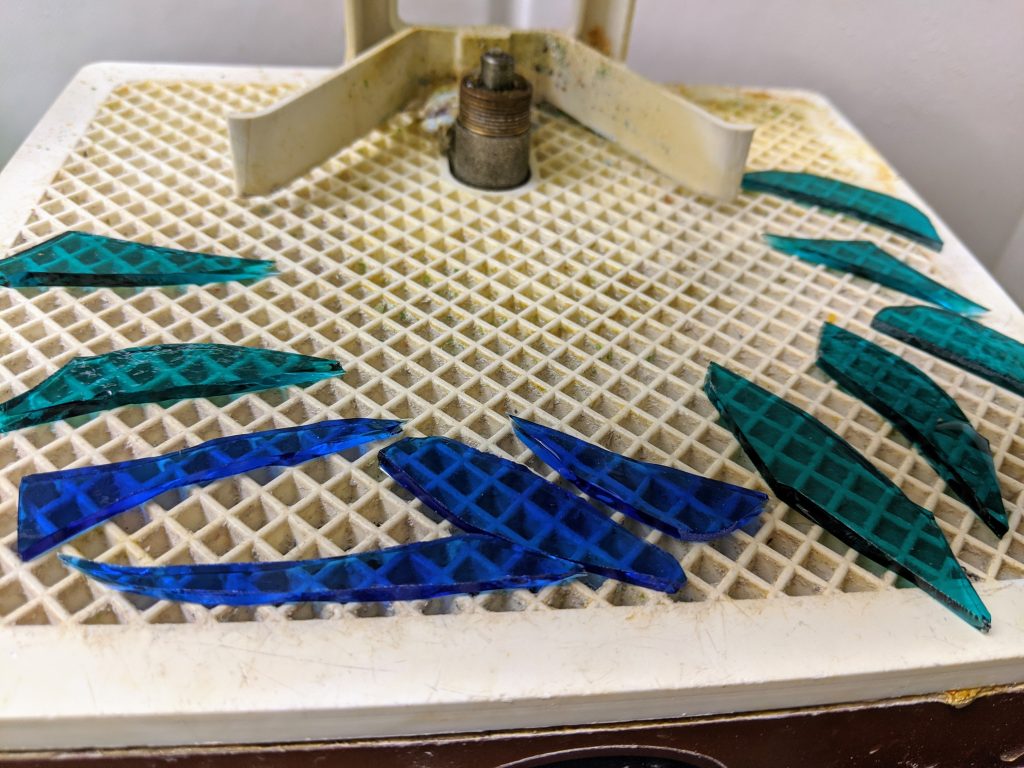
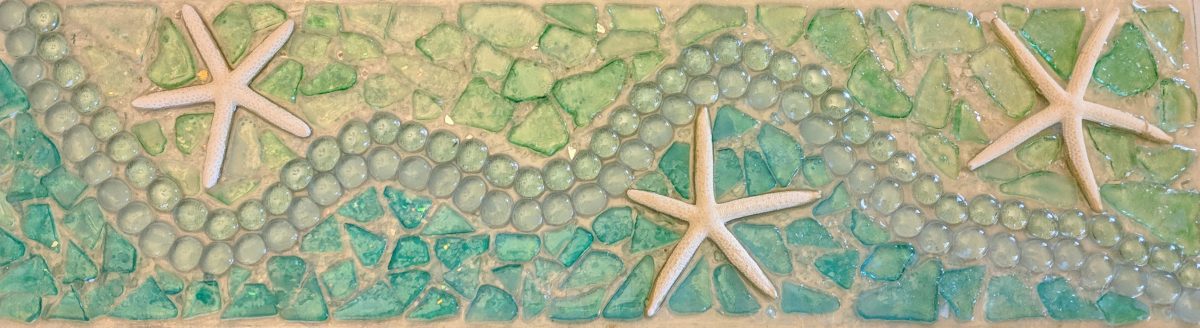
I was able to make a few more waves Tuesday, but managed to really slice one of my fingers while grinding the glass, so I didn’t get as much done as I had planned. Today my finger is feeling better and I was able to make some more waves (this time I was smart and covered my fingers with band aids before I ground the glass for the waves).
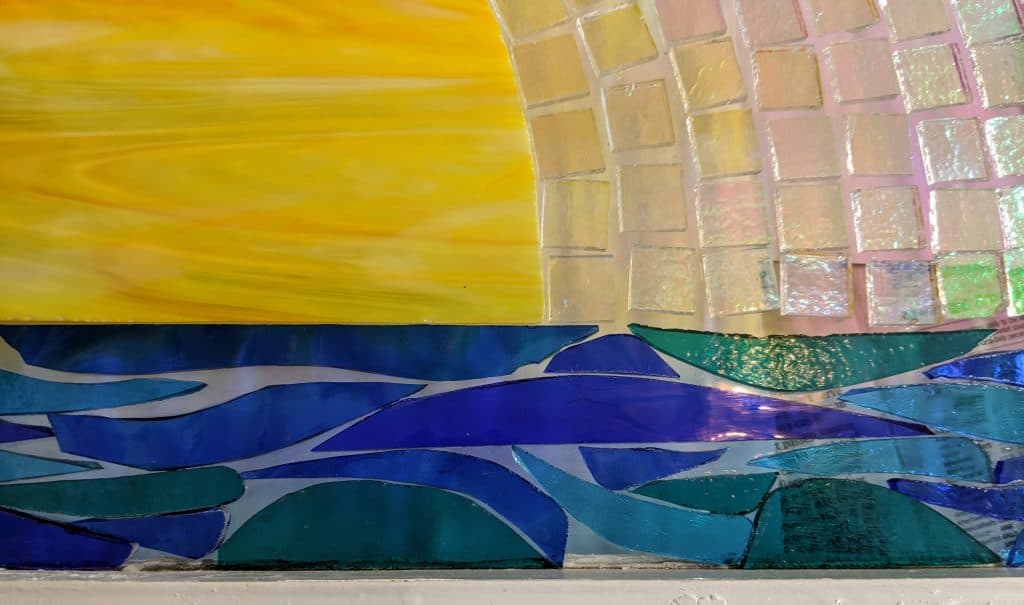
Close up of sea / wave layers
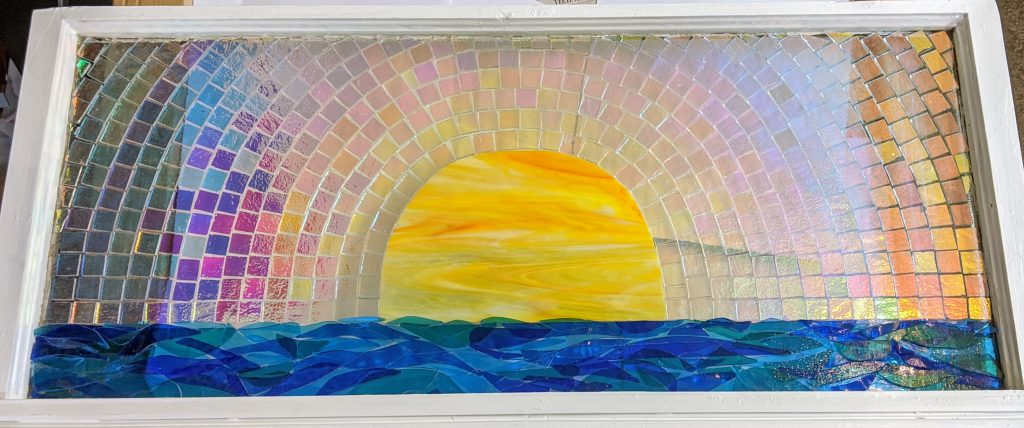
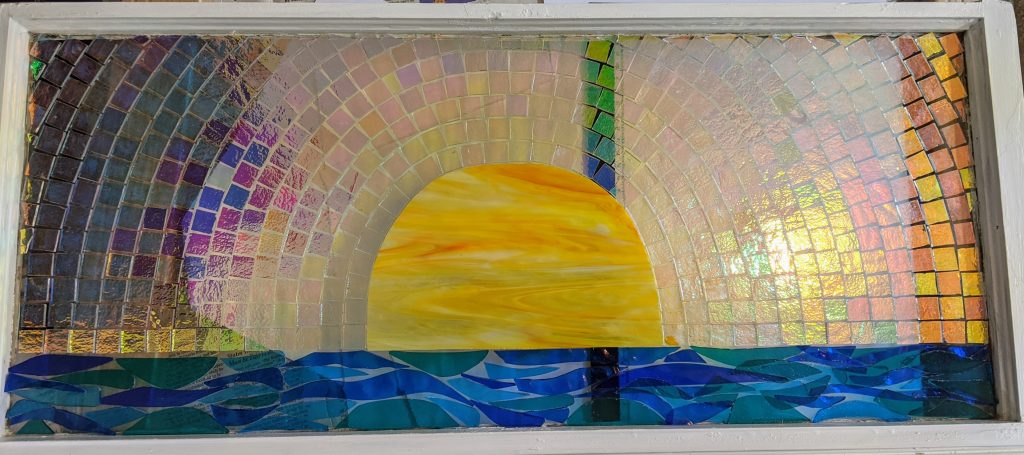
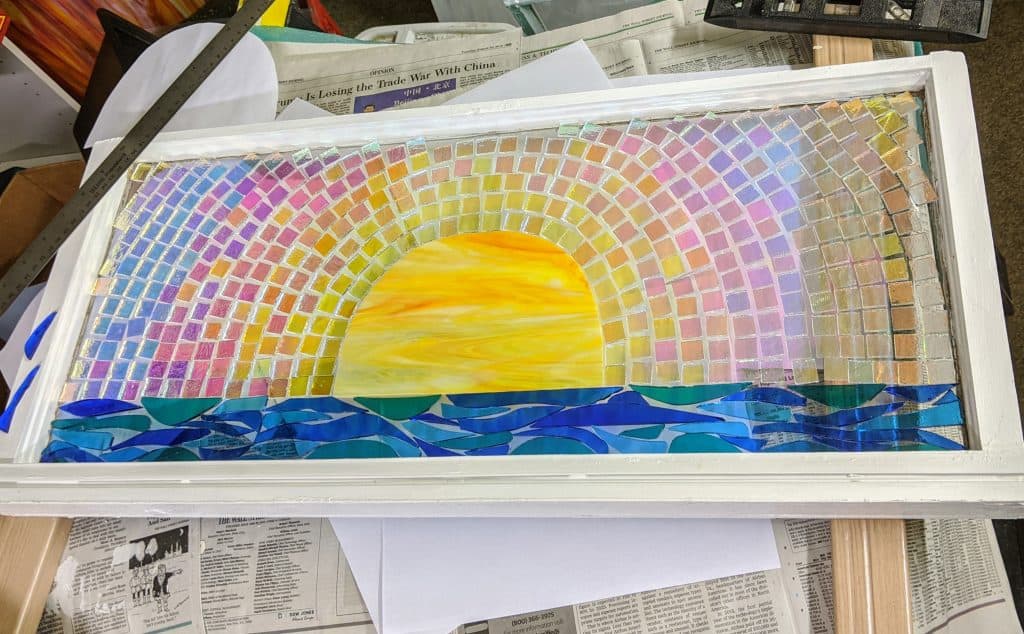
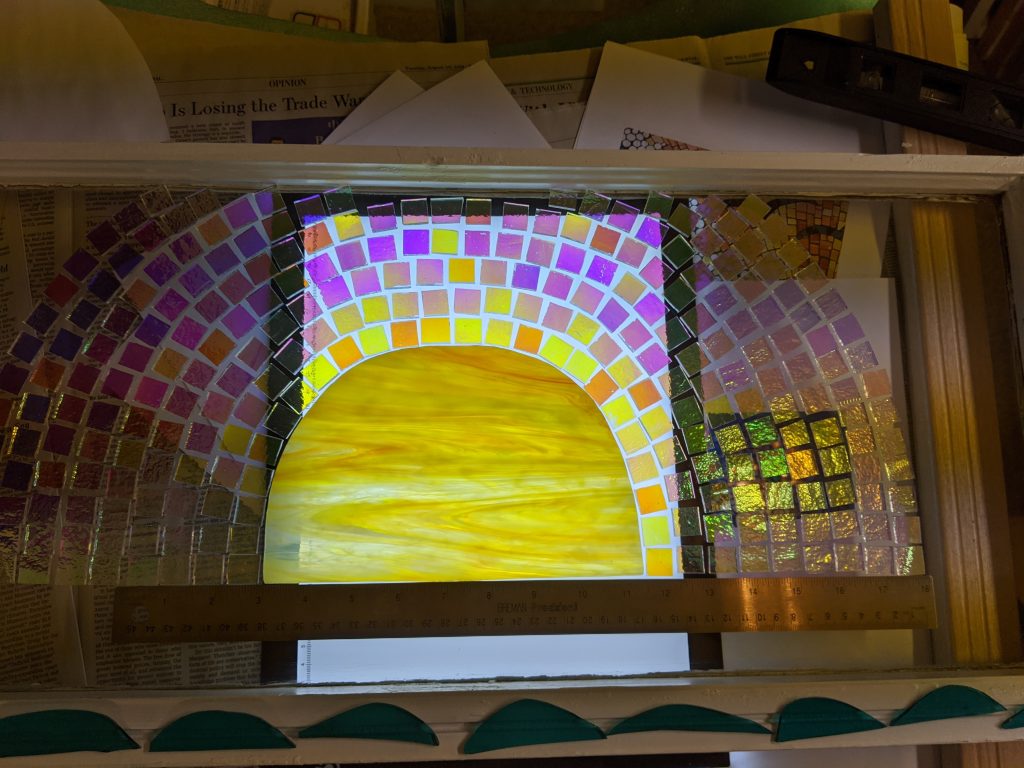
I was able to fill in quite a bit of detail on the sea / waves after all. My next step is to wait for the mosaic adhesive to dry, then I will be able to hold the entire window up to a light source to check for areas I want to augment. My light tray only covers about a third of the window at a time and I need to see “the big picture”.
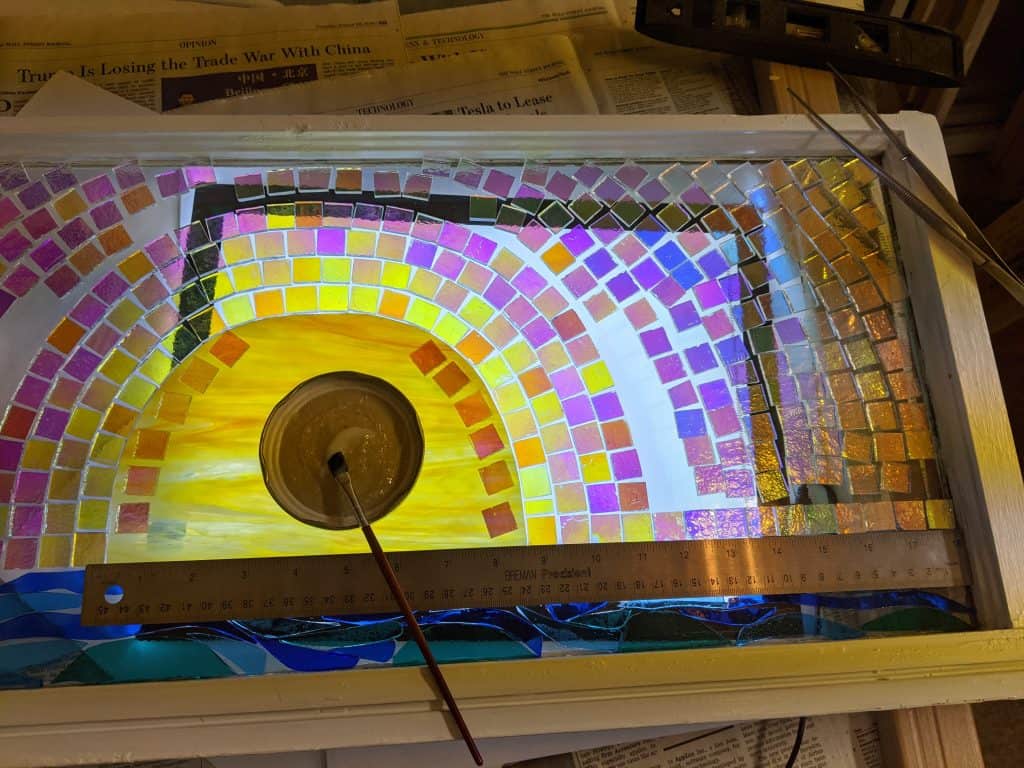
Full view with today’s wave layers
Once I’ve seen the fully lit window, I’ll be able to plan the finishing steps, which will be pouring the resin coating and then decorating some areas of the resin with glass chips / frit. That’s the part I still need to plan. I’m also considering adding a layer of glass around the edges of the sun’s rays (adjacent to the frame), though I haven’t figured out exactly what yet.
I spent most of the day Monday working on gluing down the pieces I had already cut for the rays of the sun, and making waves to start layering the ocean below the sun. First I rough cut some waves, then used my grinder to shape and smooth the edges.
Ready to grind the glass pieces for the 2nd layer of waves
After I got the above pieces ready, I realized that I would need to glue the dichroic glass I had cut and laid out for the suns rays before I started working on the layering for the waves, so I set out to do that.
How the waves / rays looked when I started the day’s work
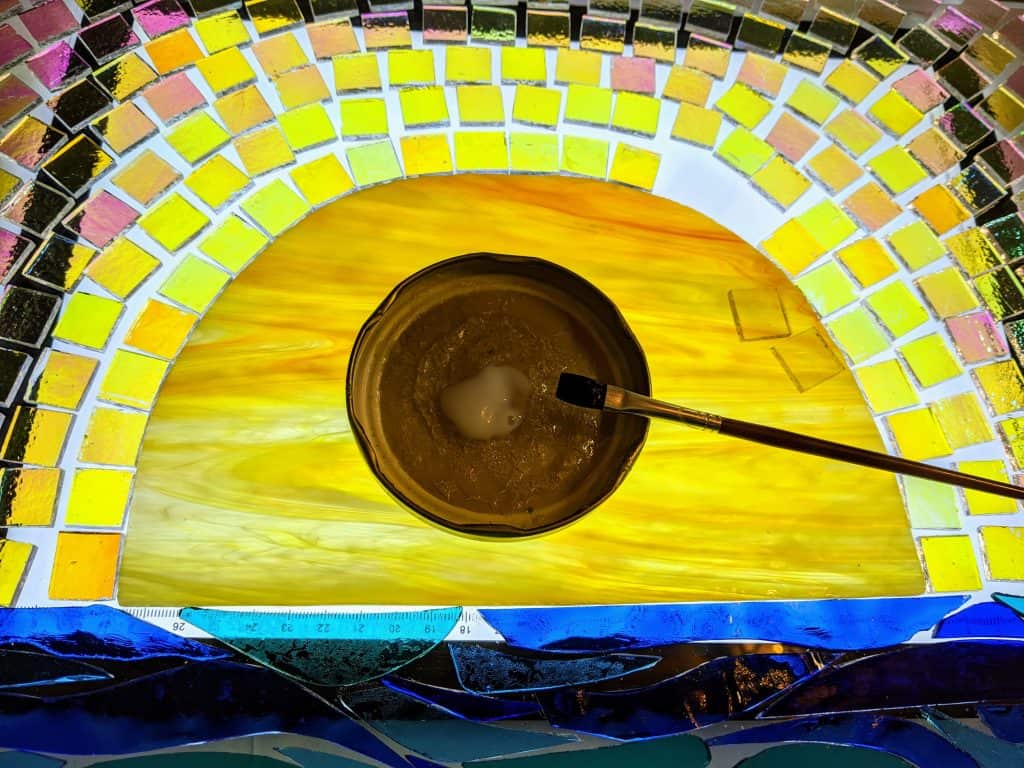
Using Mac mosaic adhesive and a small paint brush, I spread a thin layer of adhesive onto each piece and then position it where I want it. I already did this step for the main ball of the sun and the first layer of waves last week.
Gluing the rays around the sun
Using a light tray to help me see what I was doing, I worked one row at a time from the inner row to the outer edges. I decided to place the pieces a bit closer together than I previously had them laid out, so I had to rearrange some and also cut quite a few more squares.
Gluing the rays
Once I had all of the rays glued down, including the smaller filler pieces at the edges, I started gluing the second layer of waves in place.
Layering the waves
I will need to make quite a few more waves, but I at least got a start on them today. Gluing the rays in place took most of the day. I really want the mosaic adhesive on the rays to have plenty of time to cure before I pour the resin, otherwise they will be cloudy.
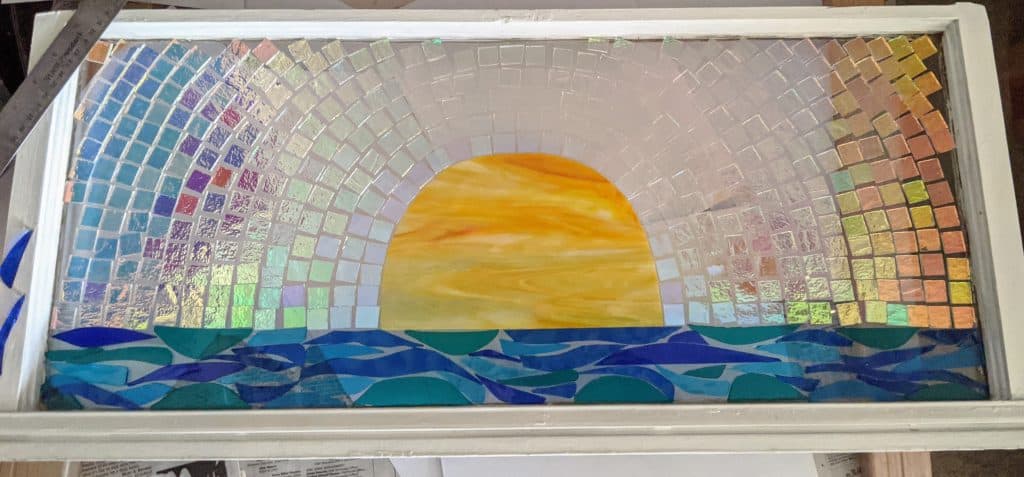
How everything looked at the end of today (light tray powered off)Snapshot with the flash on my camera (phone)One last snapshot with reflective light
Hopefully I’ll have time on Tuesday to put some additional waves in place. I also need to plan how / if I will embellish the resin when I pour it. I think I would like to do something at least around the edges of the frame.
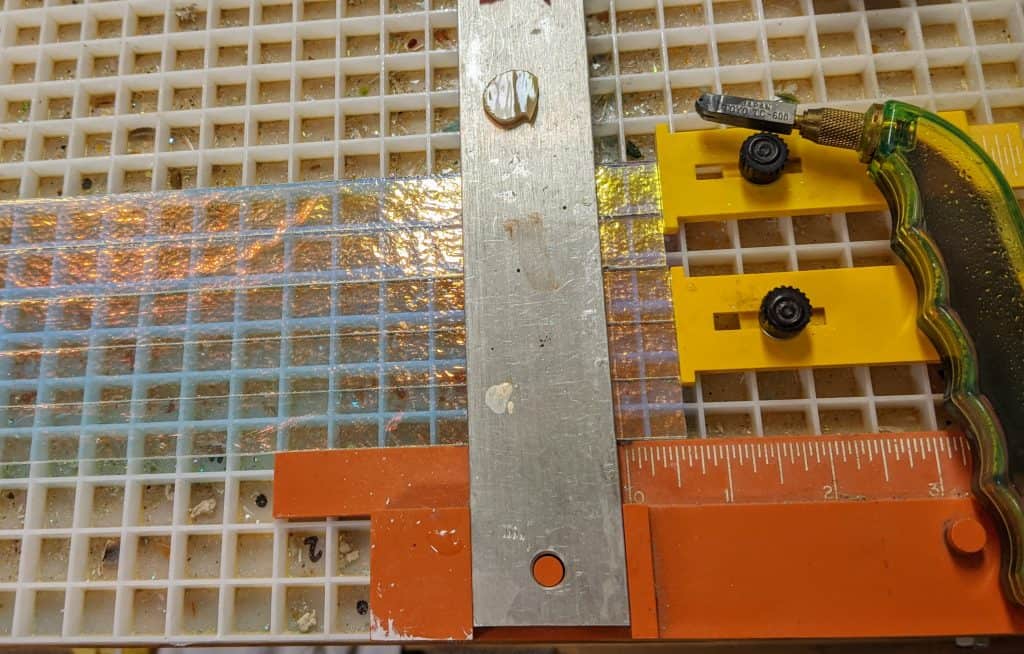
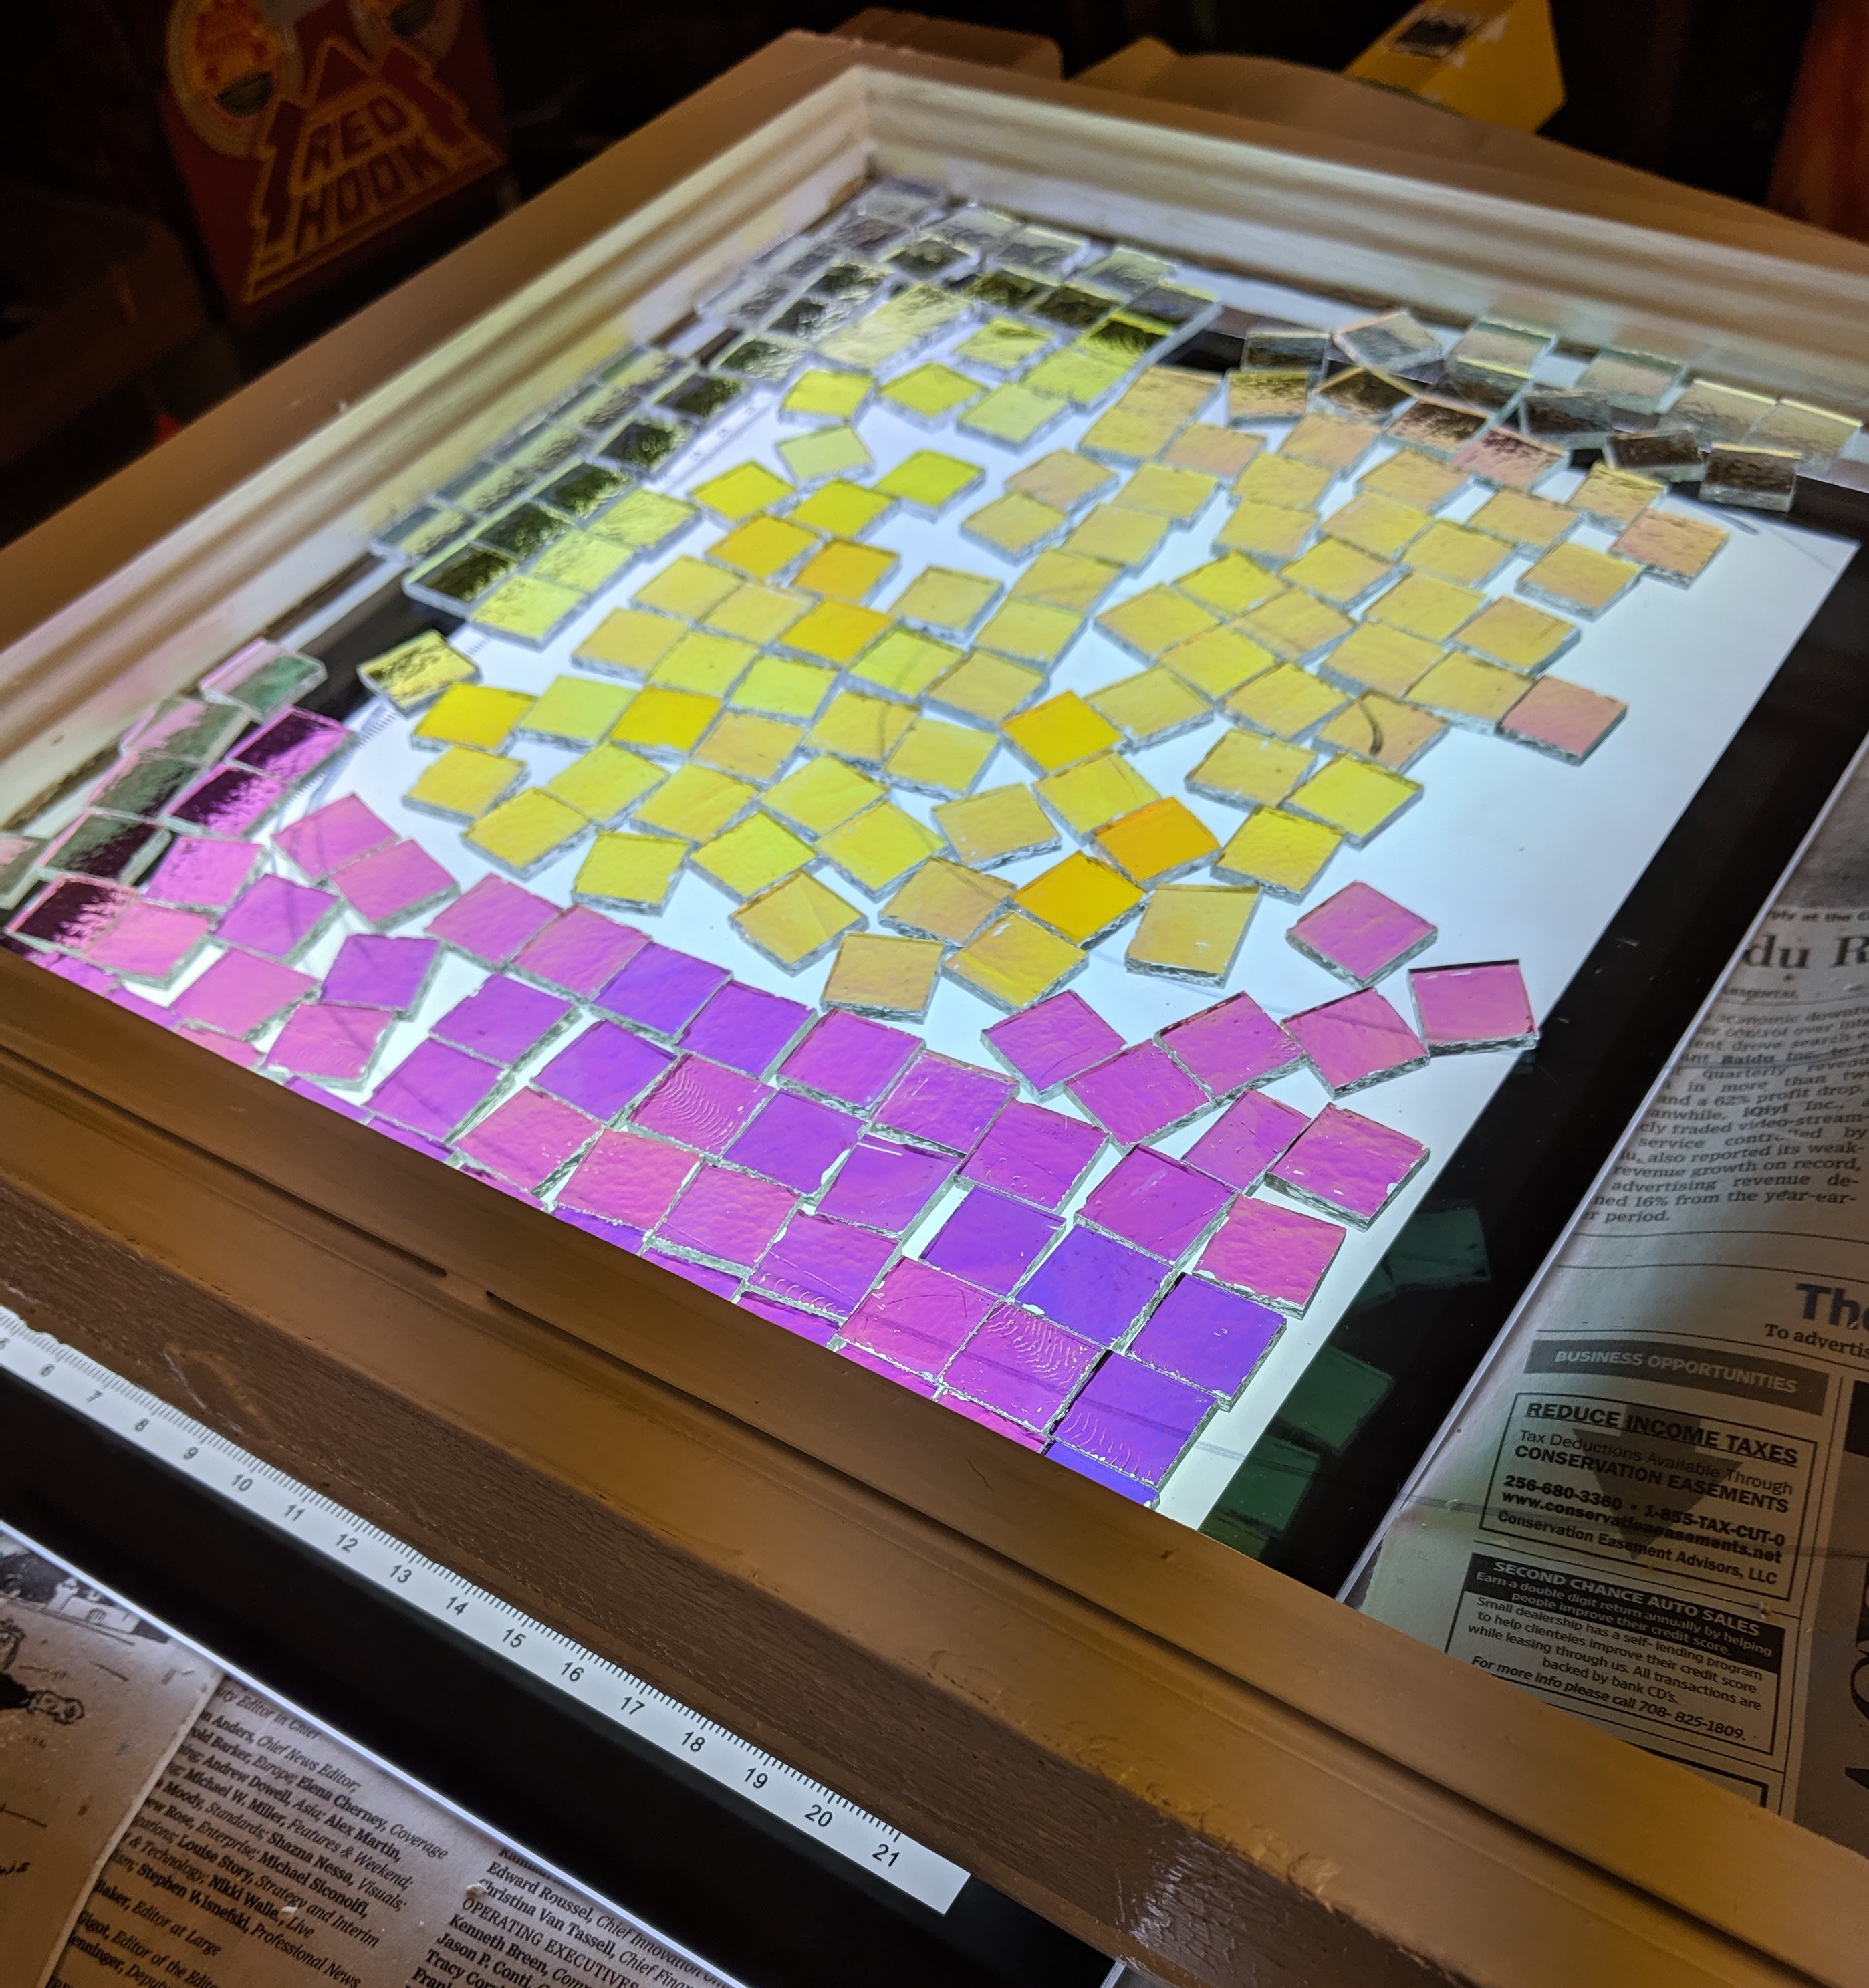
I needed to cut some more dichroic squares to fill in the rest of the background on the sunset window, and I got some time this afternoon, so I worked on that.
Cutting squares of light blue / red metallic dichroic glass.
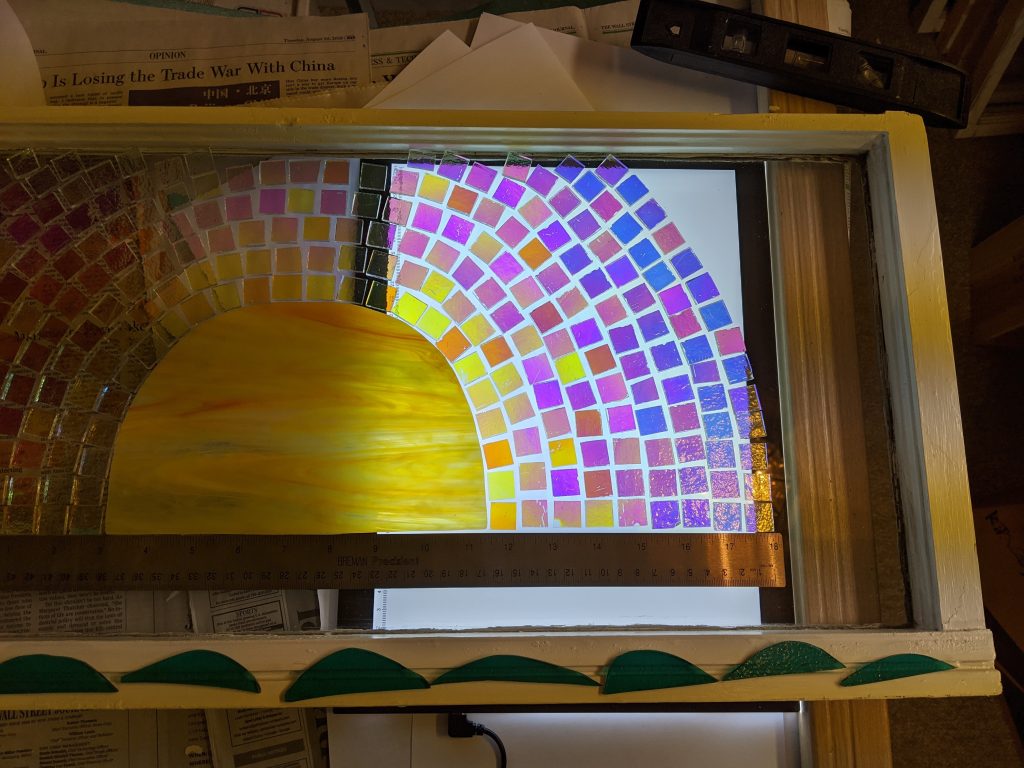
I filled in as I cut, leaving the smaller pieces I will need to cut to fill in the very edges for later. I have been having second thoughts about the overall look of this the past several days, so I haven’t glued anything in place yet. I also worked on the water / waves underneath the sun. So far I’m pretty pleased with the look of the waves. Now the challenge will be gluing the waves in place without jostling the rest of the pieces around too much.
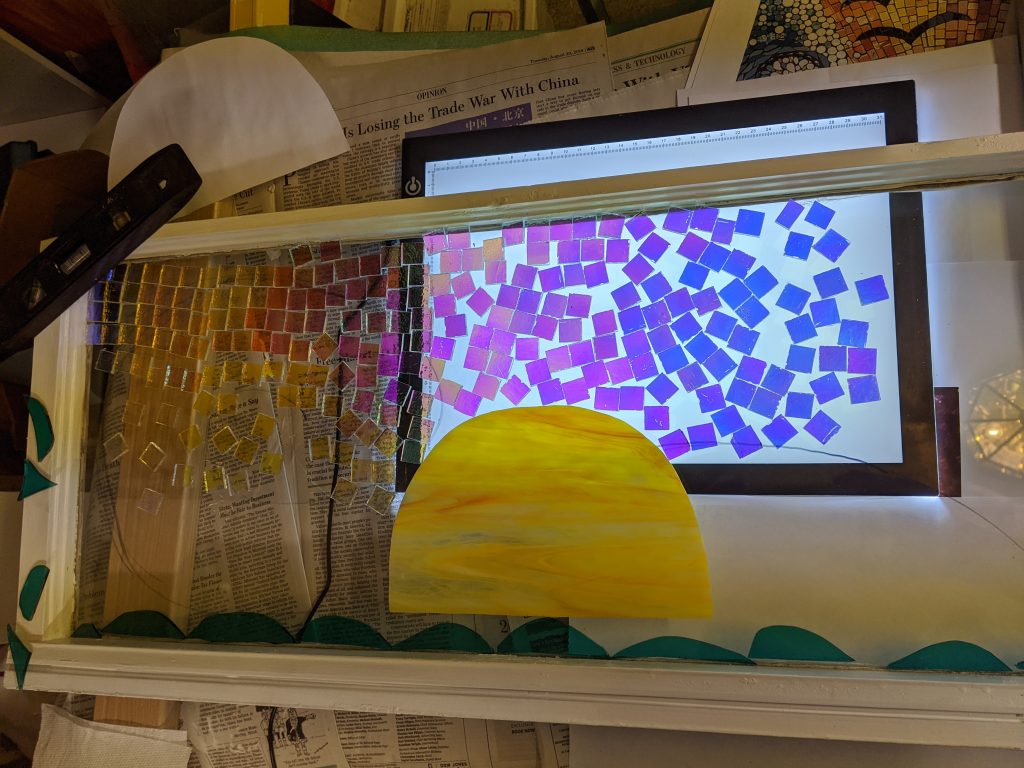
Filling in the edges using a light table.
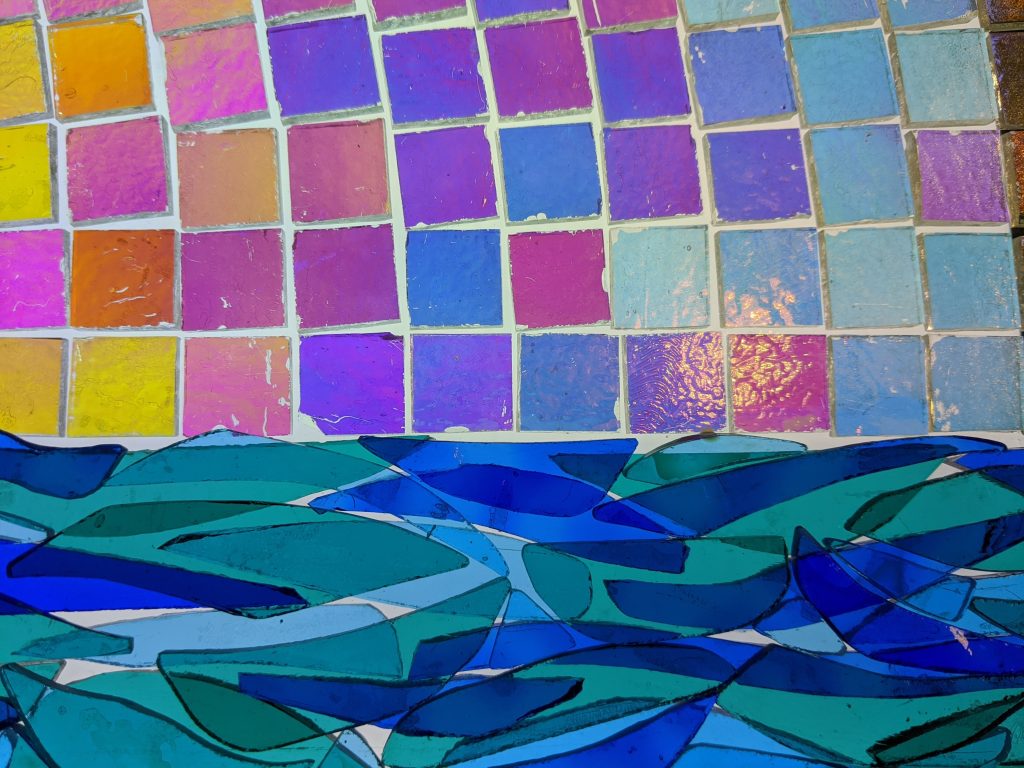
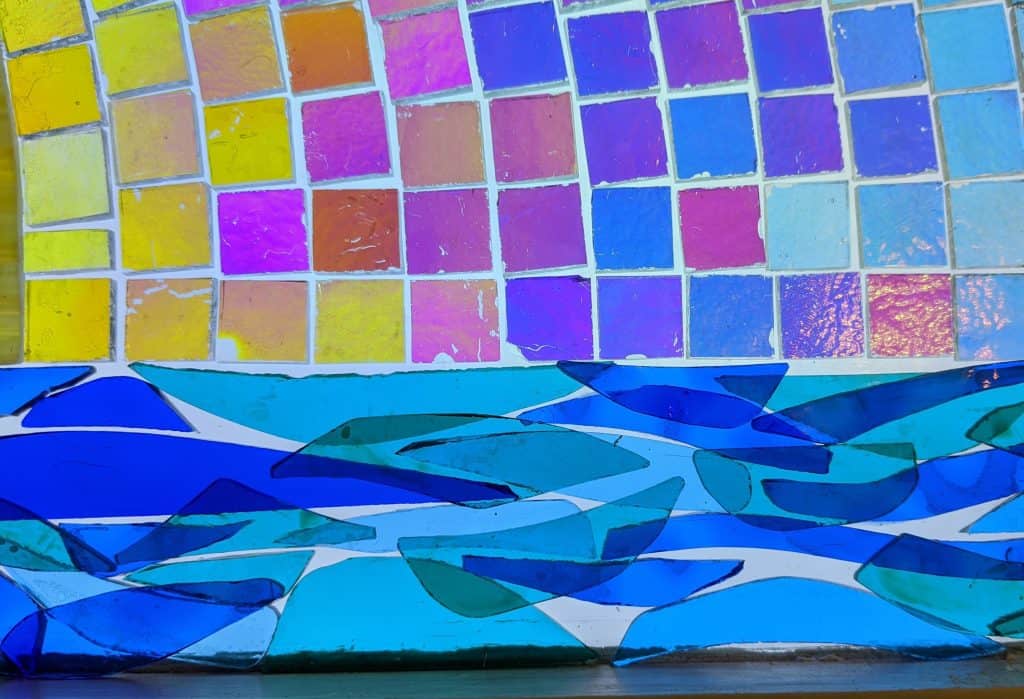
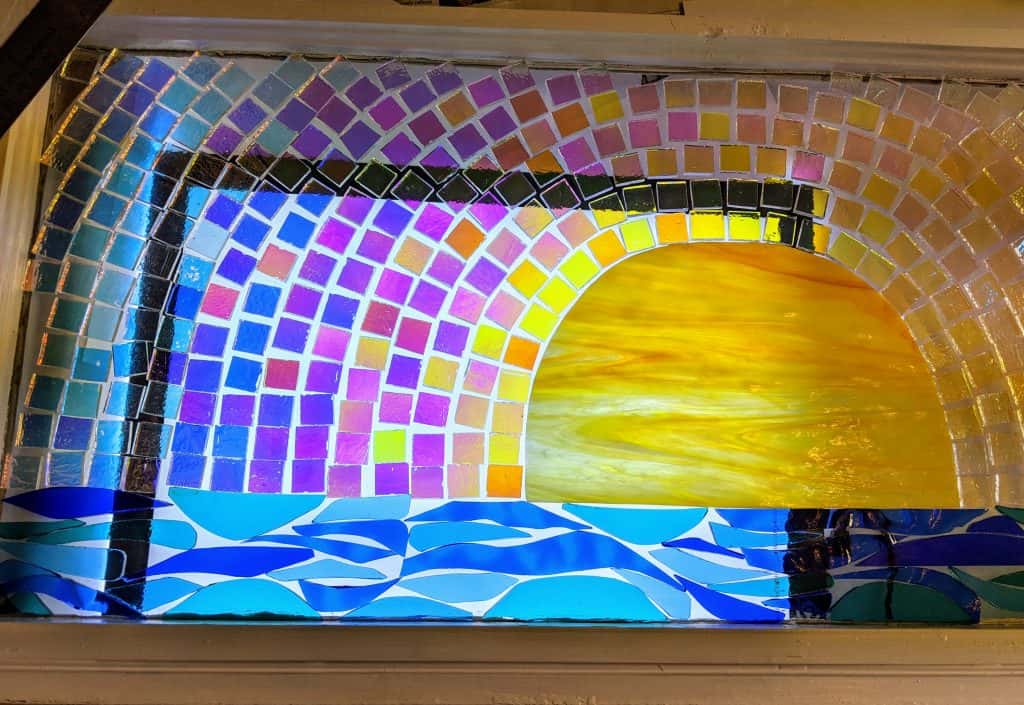
The colors of this glass when the light table is underneath the window are surprisingly bright. I love working with this dichro glass. I am hoping the look of the blue squares I added on the edges today will have the effect I’m going for, as the reflecting color of the dichroic coating is metallic red on these pieces as opposed to silver / gold on the rest of the sunset’s rays.
Closeup of the area above the light table
I tried to get some photos with the light table off and a bit more reflective light, but it’s pretty challenging to do with my phone in this lighting. Later on I’ll get my husband to help with the photos, as he’s got better equipment and a lot more experience taking photos.
Ambient light in the room.More reflective angle.
I still need to glue down these pieces, then start cutting smaller pieces to fill in the gaps, especially around the edges and between the waves. I might try using some decorative flakes in the resin when I pour it, but I’m several days away from getting to that point right now. At least my confidence is up quite a bit now that I have most of the window filled in. I was procrastinating because I was afraid it would look too simplistic, but the progress I made today has made me more satisfied with the overall look. I will probably layer the waves to give them more texture, so they will have more depth (no pun intended).
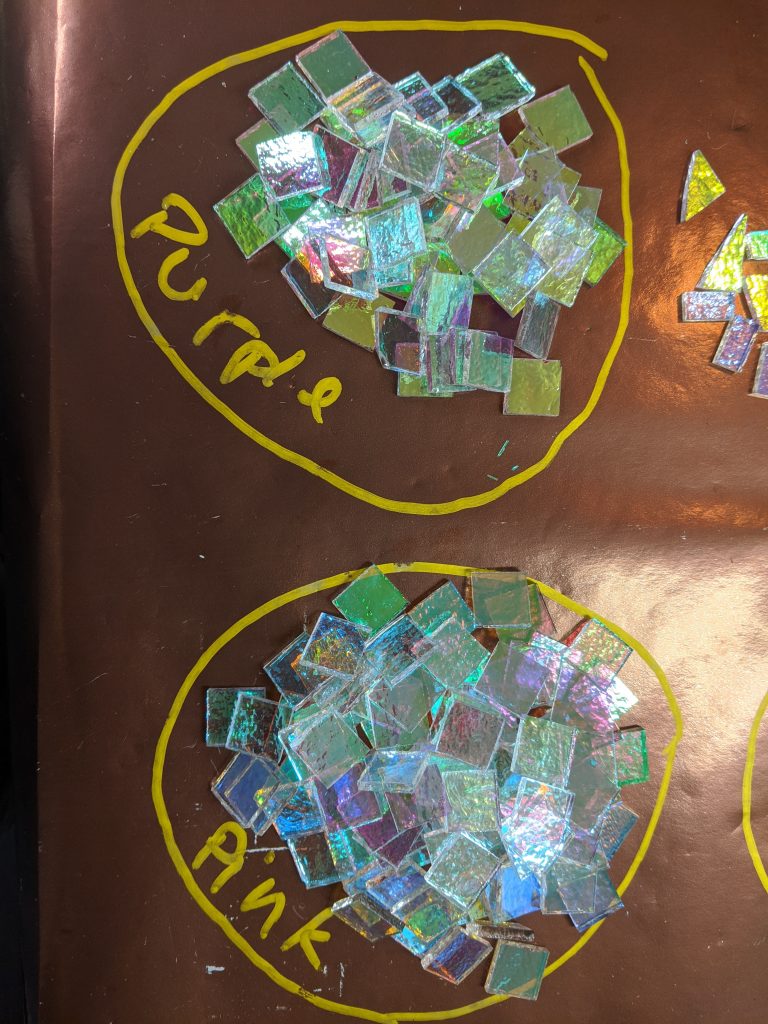
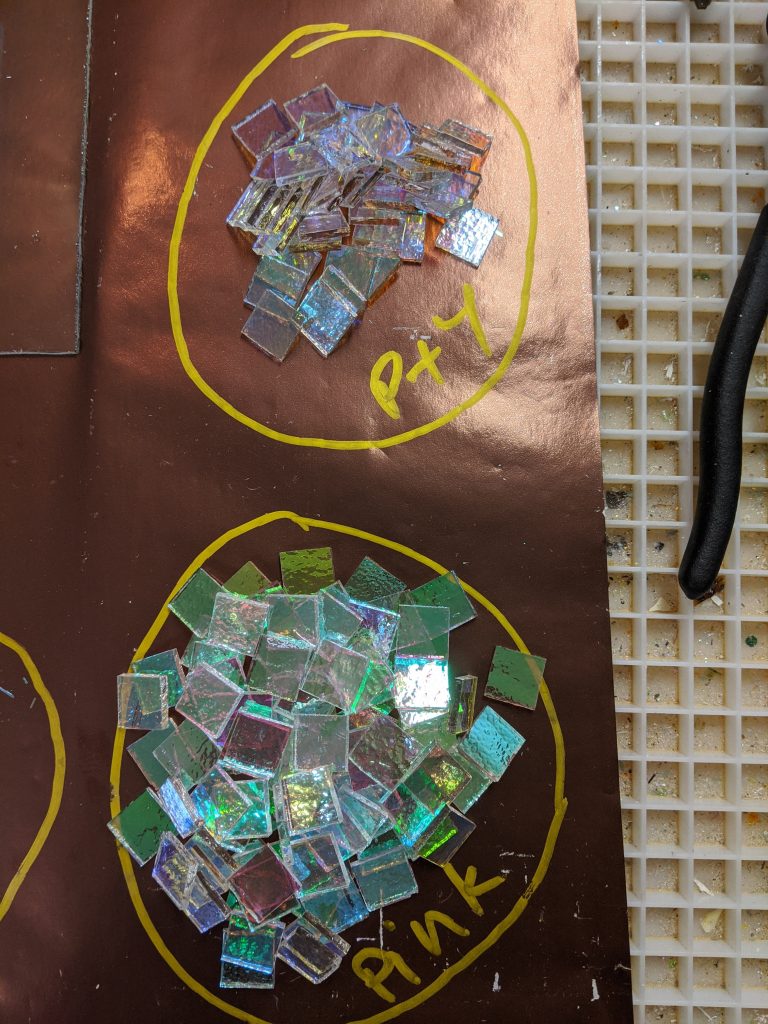
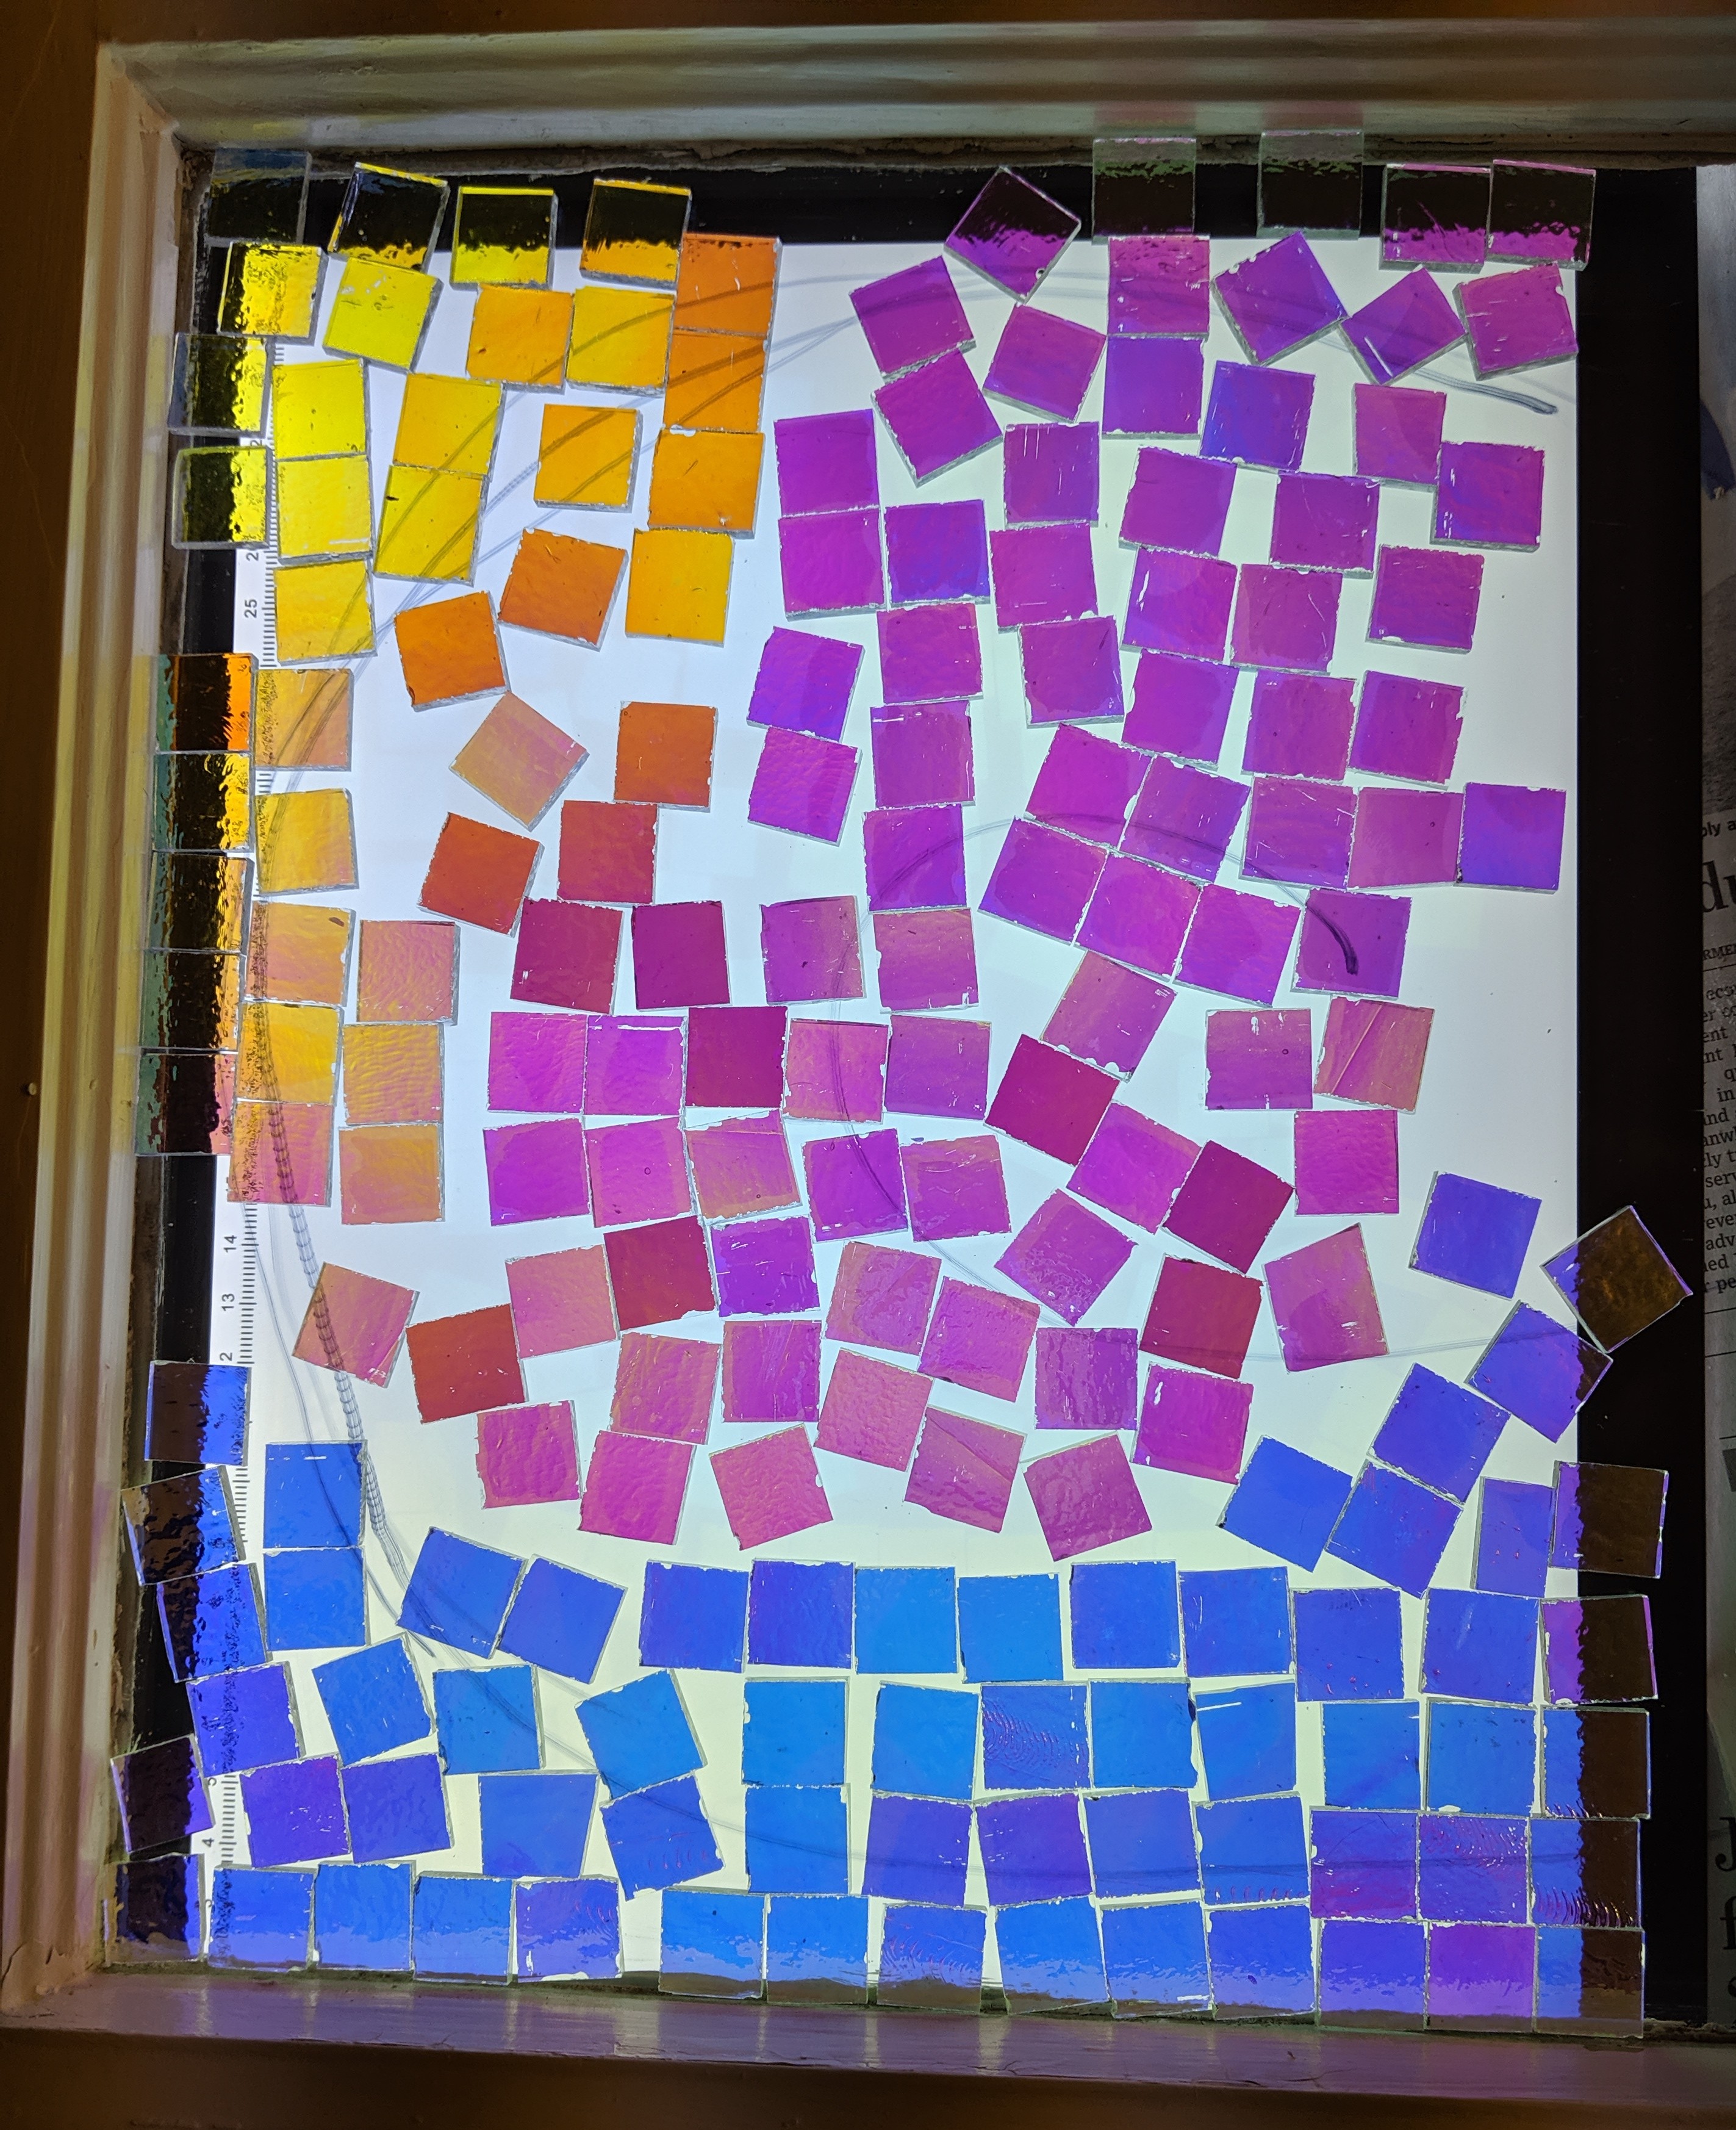
My Rainbow Row panels are waiting for warmer weather to get their resin coating, so in the mean time I revisited my dichroic sunset window project. I’d been stumped on what glass to use for the main sun in the center of the window, but today I made a commitment (well, at least cut out the shape even if I haven’t yet glued it in place). It was also time to sort the dichroic pieces I cut for the background by color. The sheets of dichro glass I am using are gradients of colors varying from yellow – pink – purple – blue. The pieces look like they are the same color when the light is reflecting off of the surface, so I have to use a light tray underneath to sort them out.
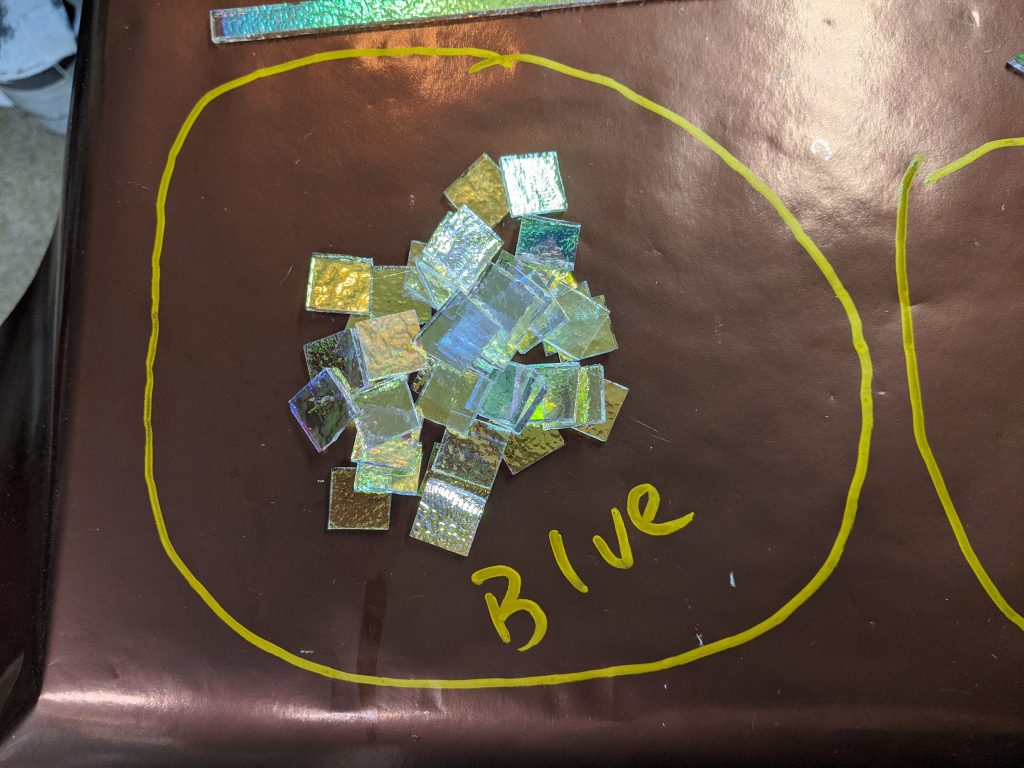
Sorting the background pieces.
My high tech sorting system.
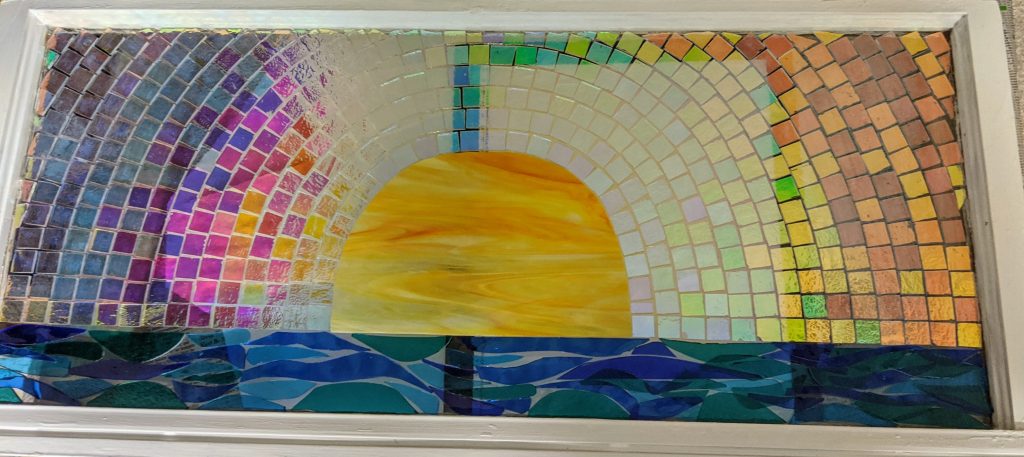
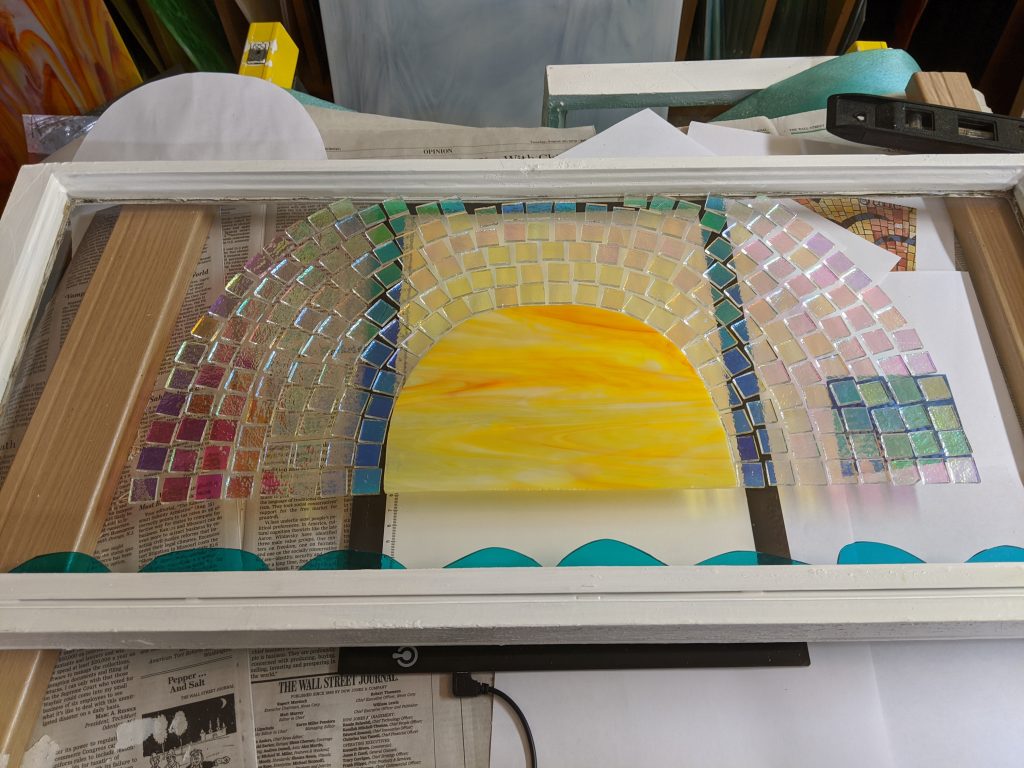
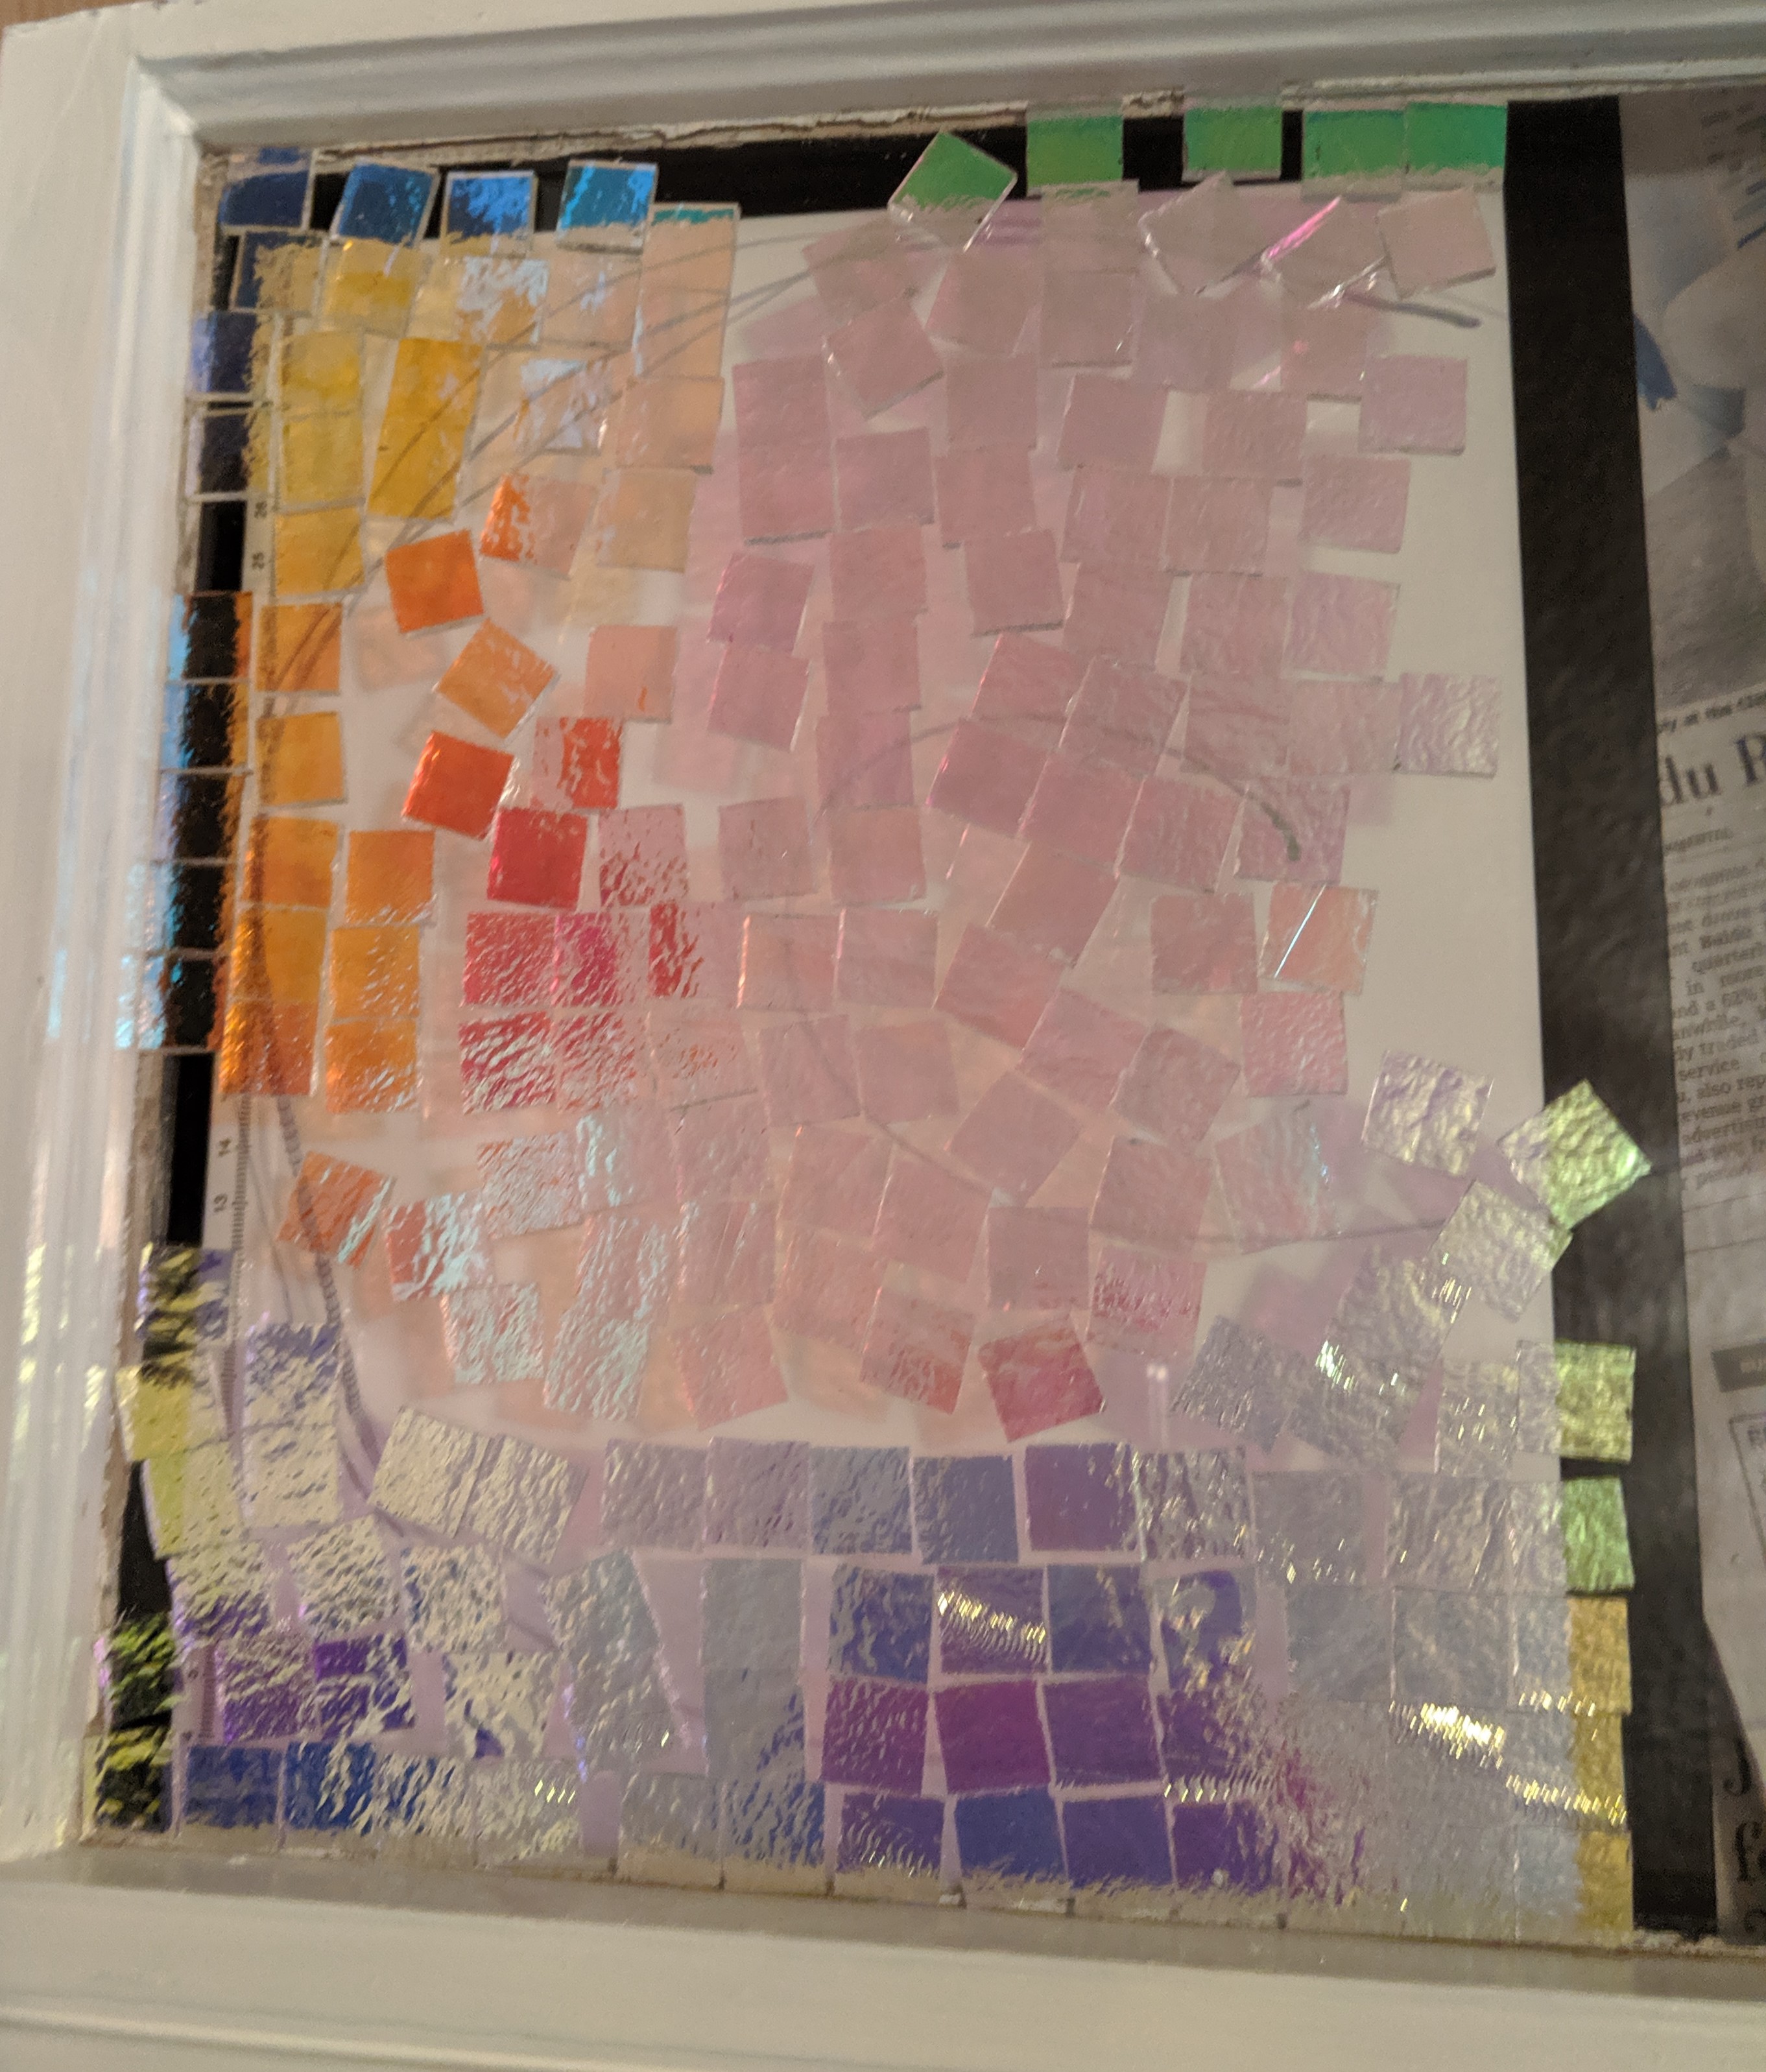
Once the background pieces were sorted, I laid them out in concentric rings around the sun. I still haven’t decided on how I am going to make the water beneath the sun. I started making wave shapes, but I’m starting to think I would like to use triangles, so I am putting that off for now.
Sun with rays laid out, reflective light.
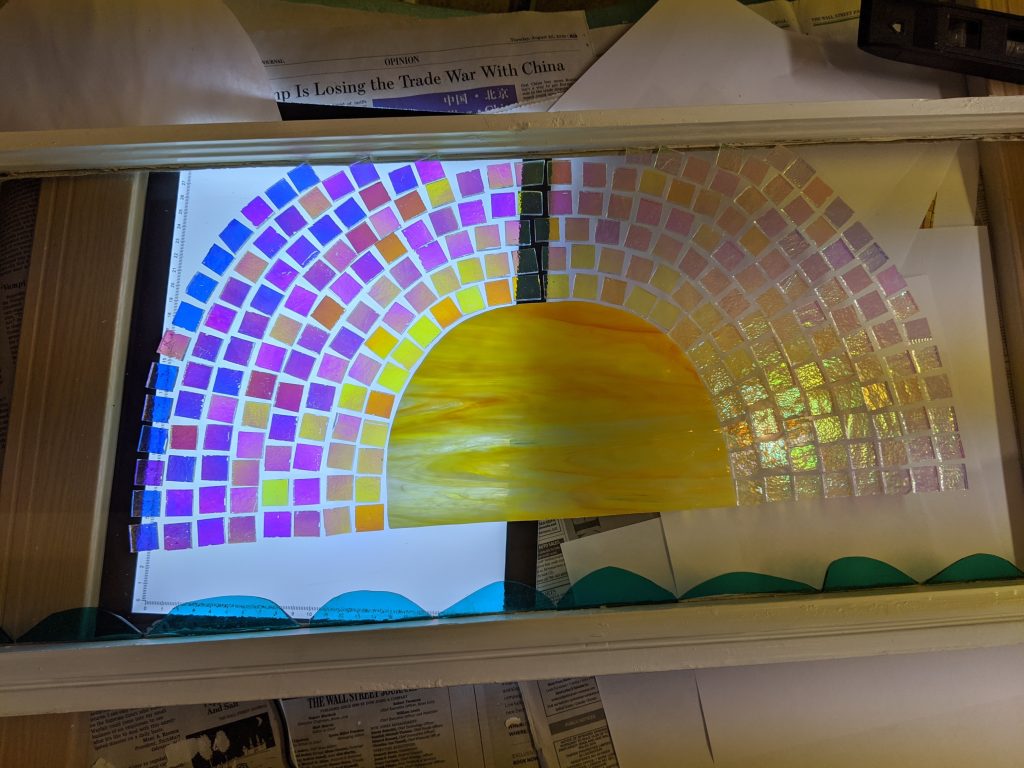
I laid the concentric background pieces for the rays of the sunset out in general in yellow – pink – purple – blue order with some variation for interest. In the next three photos, I’m moving the light tray from left to right underneath the window.
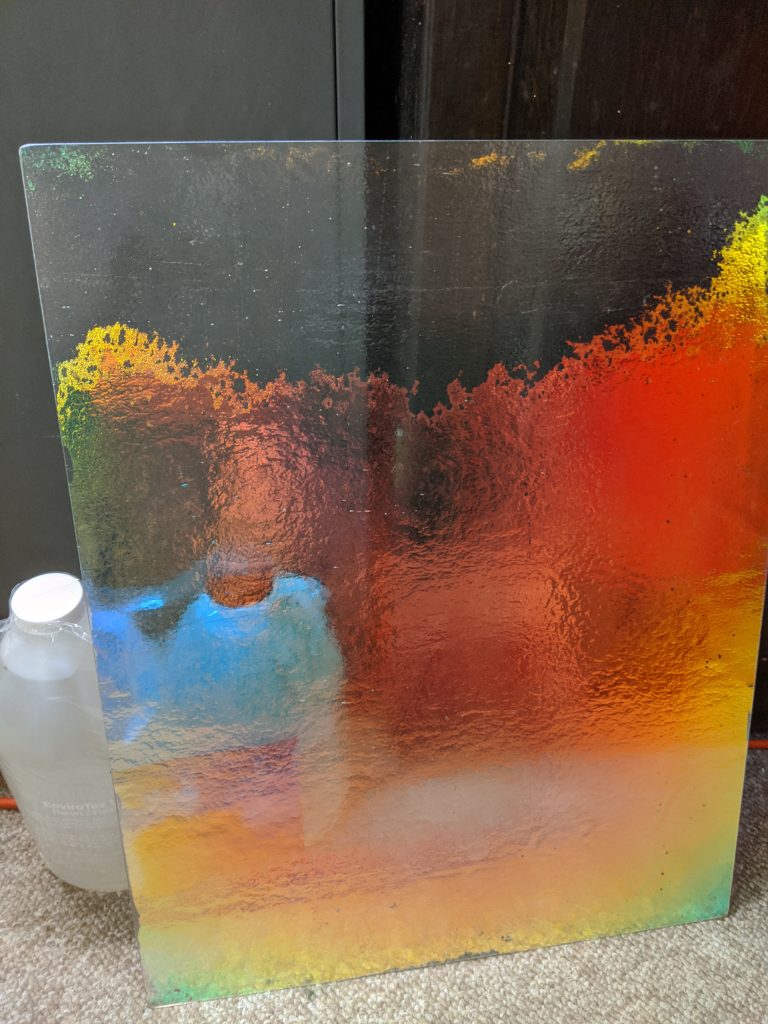
I will need to fill in the top rows with some pieces cut to fit the window later on. For now I’m just getting a feel for whether this is the look I wanted. My next decision is what color dichro or otherwise glass to use to fill out the edges. I have a neat piece of dichro that is very light blue when on the light table, but has a deep red metallic tint on the reflective view.
Reflective view is red.
Not the best photo, but it’s light blue.
This is actually two views of the same piece of glass – one with light reflecting and one with the light behind the sheet of glass.
I used some resin spray on this sheet of dichroic as the coating is unstable and could flake off when I’m cutting it. Now my work area smells like resin spray, so I called it a night. I will revisit cutting the background sheet into squares once the resin spray dries and the fumes dissipate.
I’m also still not sure I like the center of the sun being a different type of glass (non-dichroic). I want to look at it for awhile before I glue it in place.
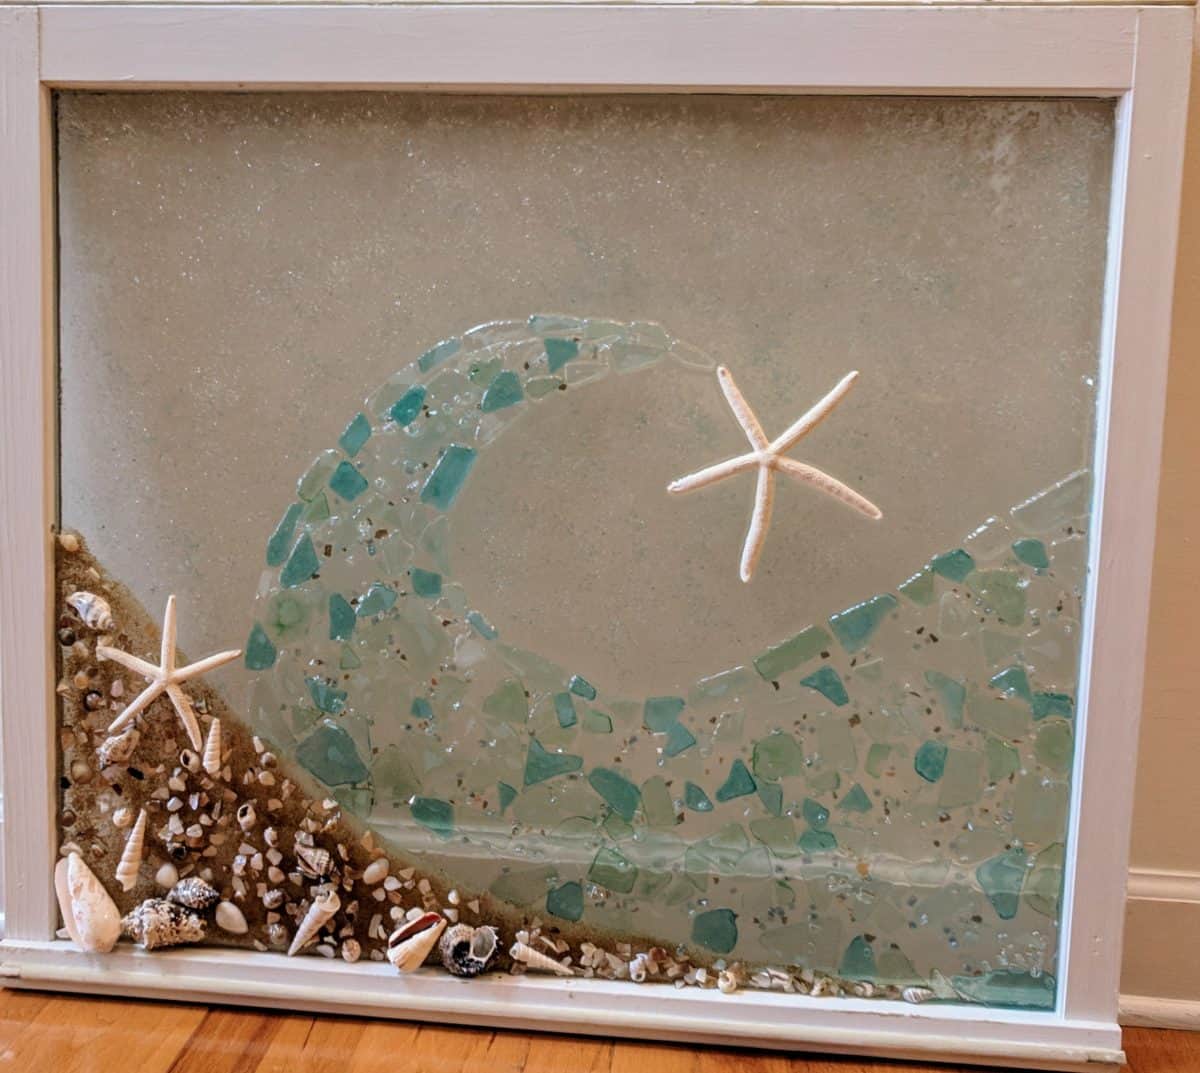
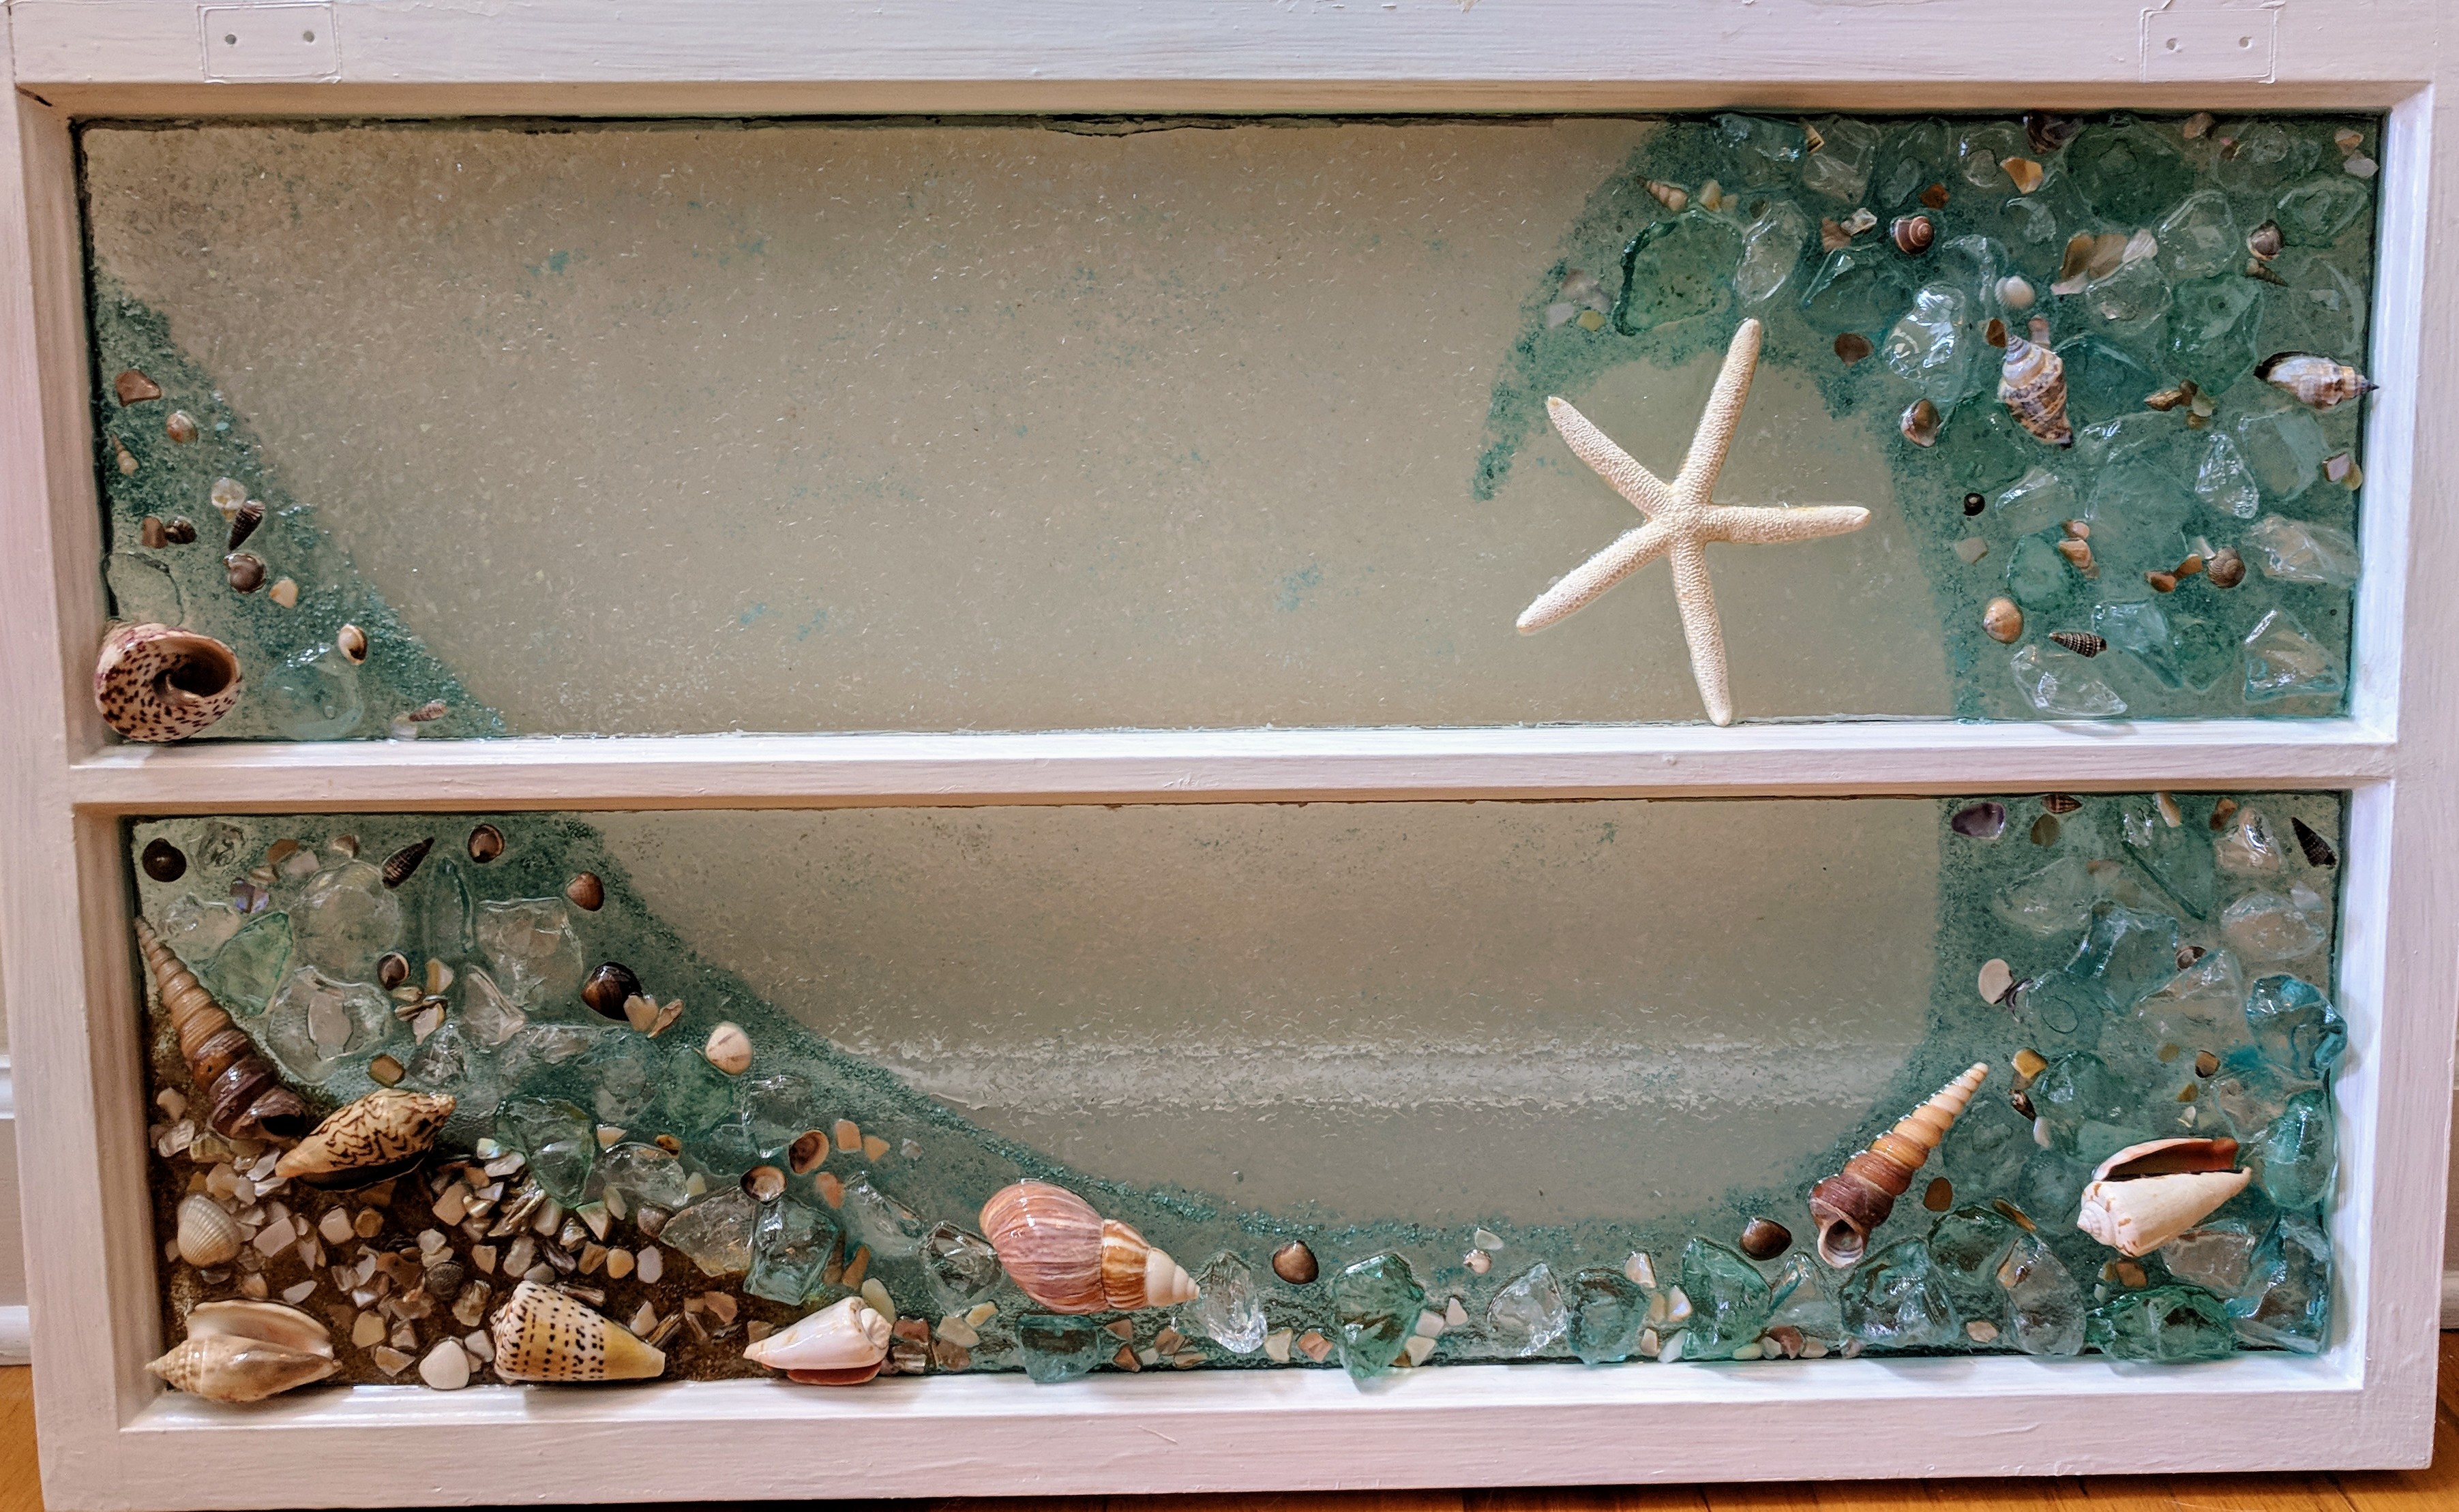
Today is the last day of the Charleston Holiday Market, and it was a busy day. My Mermaid mosaic, Starfish Trio, and Here Comes the Sun mosaic windows all found loving new homes, along with numerous smaller pieces. I’ve made a *little* bit of room to make some new things, so hopefully I will have time to revisit the sunset mosaic I started a few weeks ago with dichroic glass.
SC Flag
Palmetto & Crescent panel, 7.75" by 6.25" - SC Artisans Center
Palmetto & Crescent
Rainbow River
Colored mica set in resin 13.5″ x 30″. $300. Available by appointment in Charleston
Corner Sun
Corner Sun, Can be displayed vertically or horizontally.1 3.5" x 30" - $350 SC Artisans Center
Hummingbird w-Flowers
~13.5" x 30". Stained glass with sapphire mica accents set in resin in a recycled window. $500. SC Artisans Center
Rainbow Row
Rainbow Row, 13.5" x 30", $800 - SC Artisans Center
Charleston Harbor
Cooper river bridge window, Charleston Harbor, 13.5" x 30" - $800 - SC Artisans Center
Sunflowers
Stained glass and grout, recycled window, 30.5" w by 27" h - $1,000 - SC Artisans Center
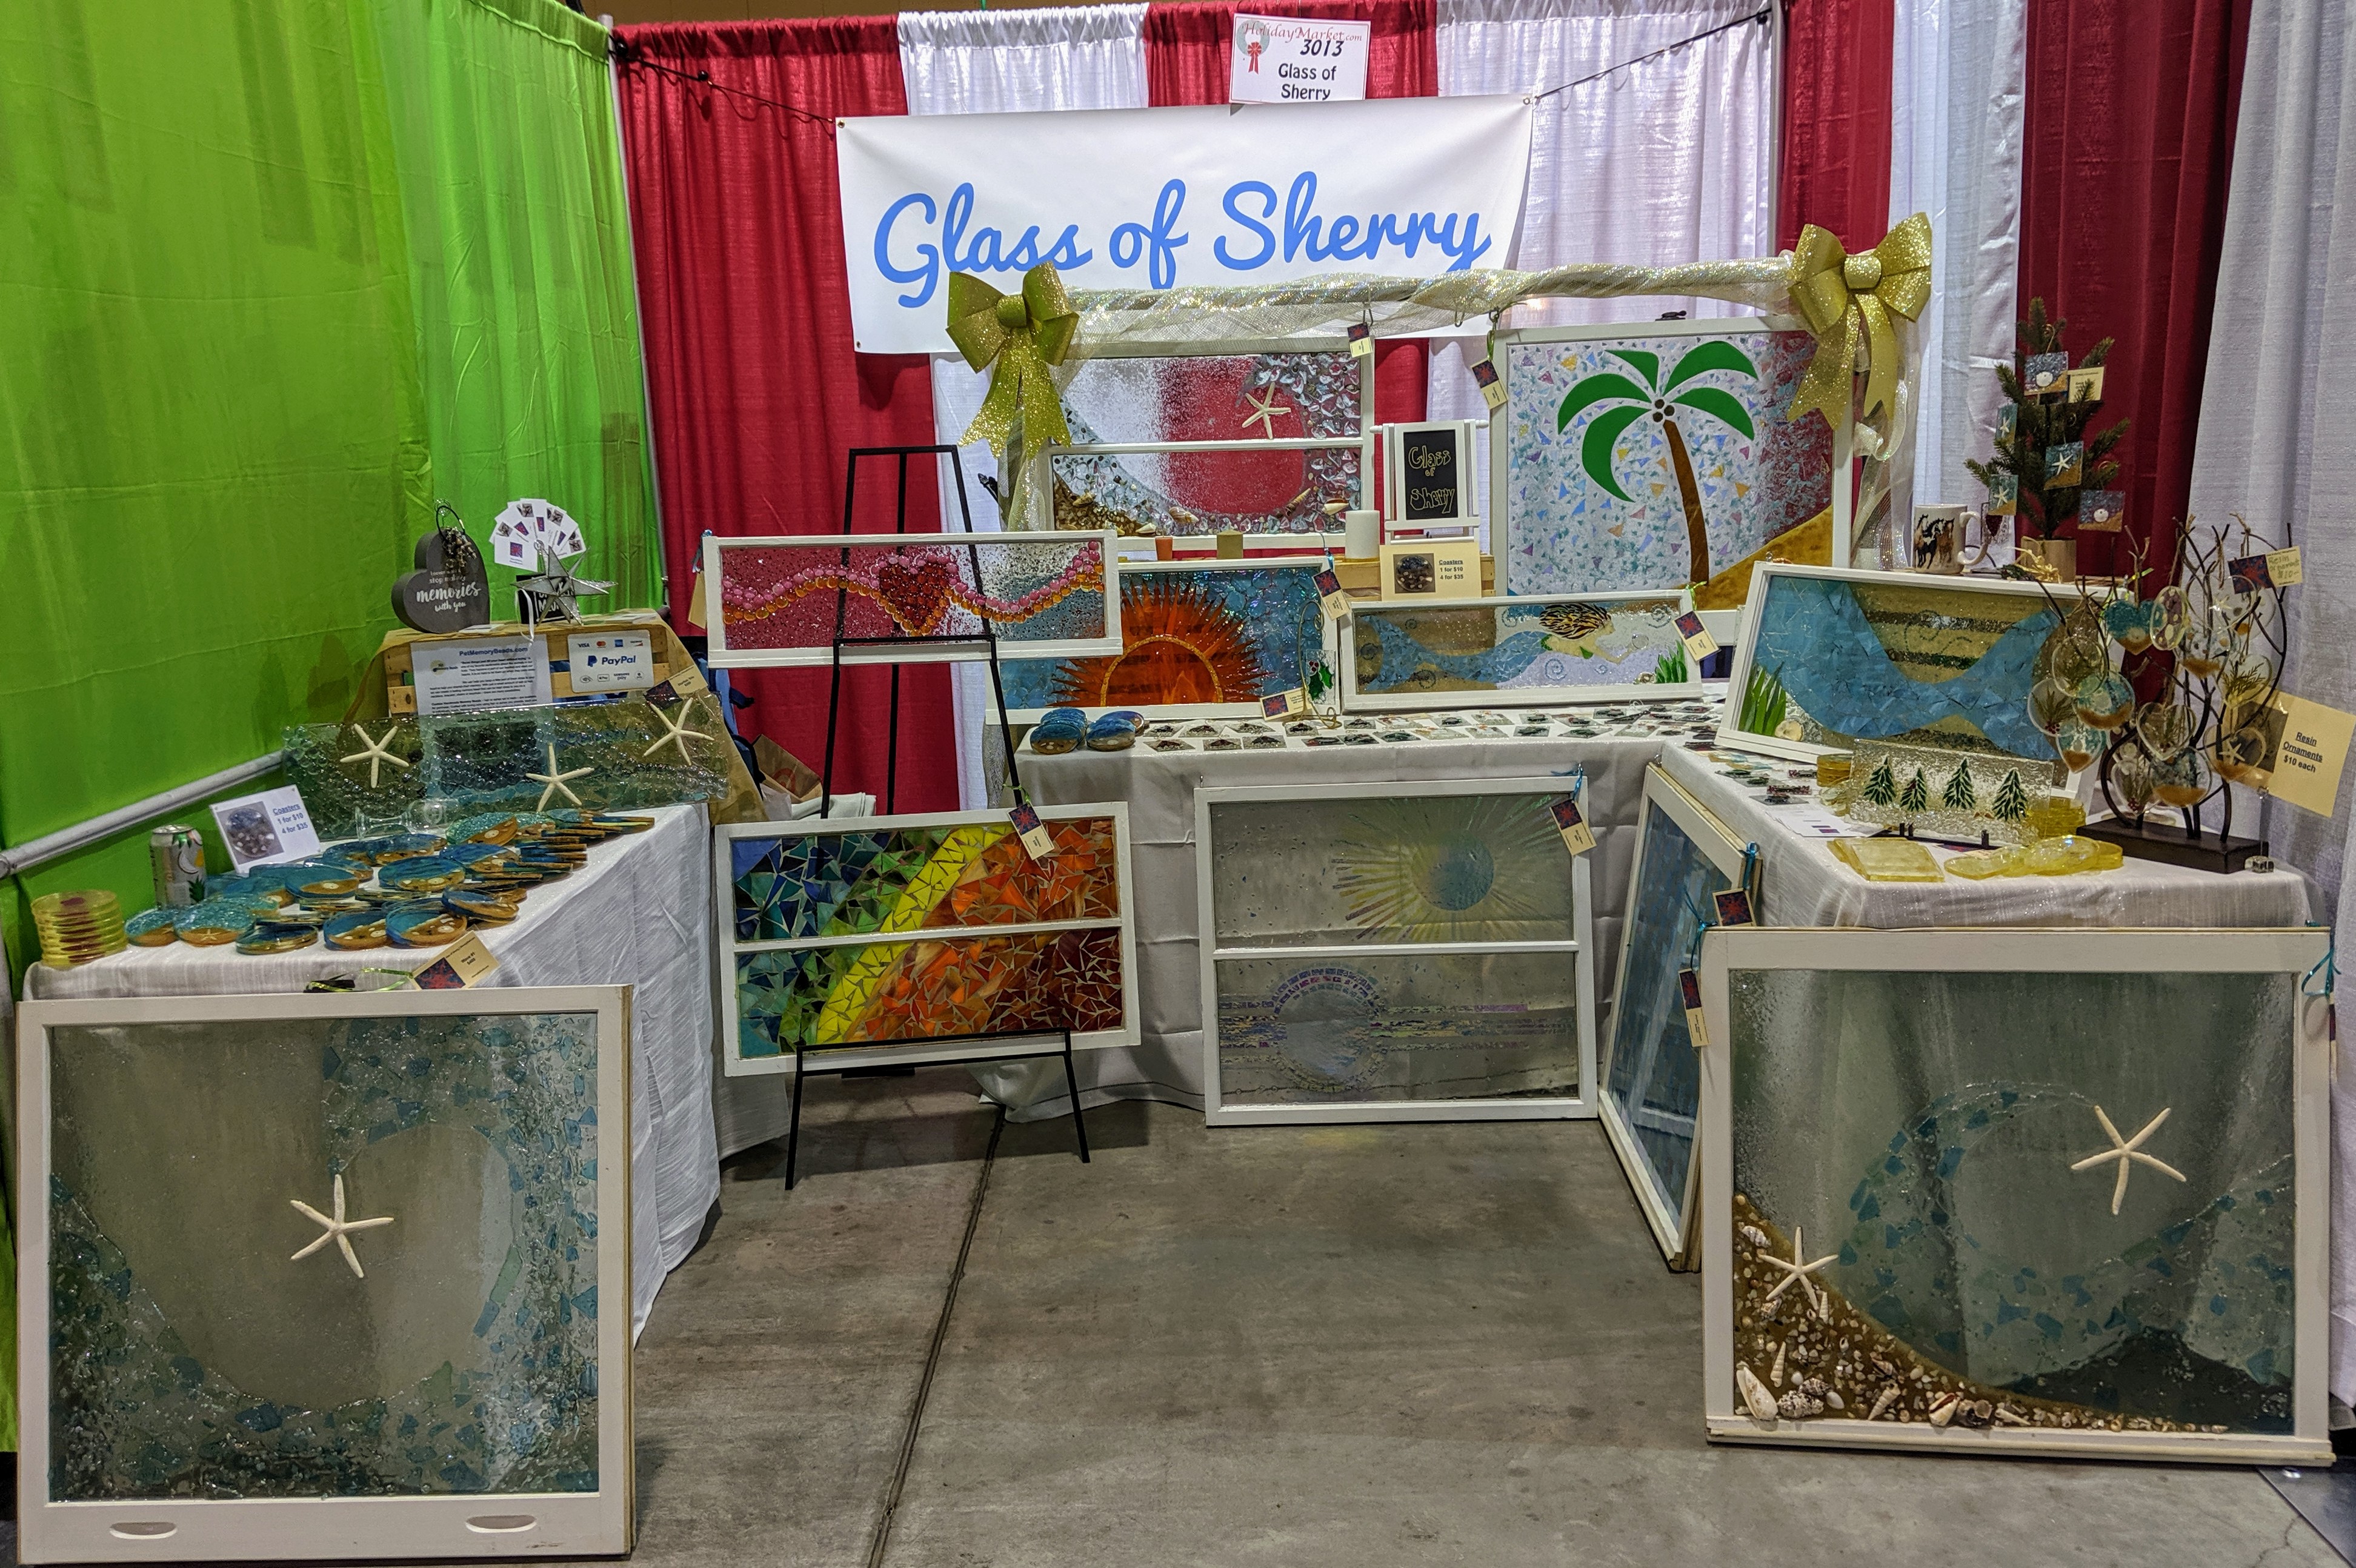
I had a busy first day at the Charleston Holiday Market today (you can get a coupon for a dollar off admission if you visit their website). I will be there from 10am to 6pm tomorrow (Saturday) and 11am to 5pm on Sunday. I don’t think I will have a single coaster left by this time Sunday. My Beach Window went to a loving home, and several ornaments did, as well. Since this is my first time participating in such a large show, it is a great learning experience!
My booth at the Charleston Holiday Market.
The best part is that I will have a whole year to prepare for next time; I will know what items resonate with people most and be able to work on similar projects. The date for this creeped up on my quickly because I signed up late in the game, but I will have plenty of time to prepare for next year. Since all of my projects (coasters, ornaments) take at a minimum 2 days to make (windows much longer), I can’t quickly make more. That is part of what makes them special, though! I still have some coasters, plenty of ornaments (both glass and resin) and several window mosaics for the rest of the weekend, though. Come on out to the Convention Center and visit – it’s a great time! Another bonus is that my booth is right next to Mountain Mist – I love their products (especially anything in Orange Blossom scent). My family thinks I will spend all of my earnings in their booth, though.
If I sell out of anything you really like, I can make more – just send me a message. My items are all one of a kind, but I can make something pretty close to what I made before (especially in glass – the coasters are more difficult to reproduce).
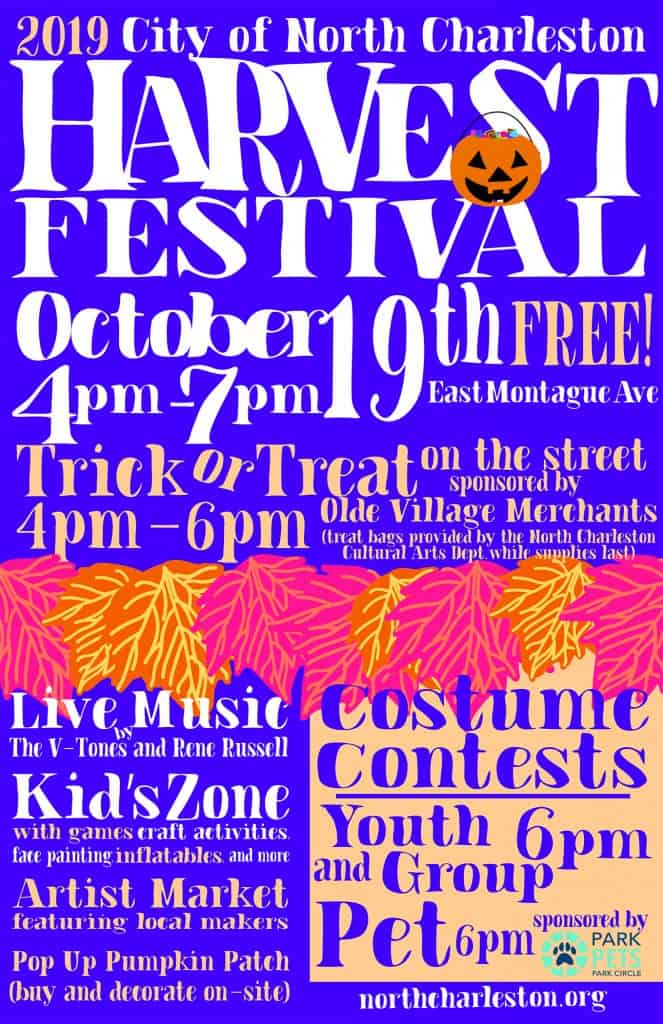
I will have a booth at the North Charleston Harvest Festival on Saturday, October 19th from 4-7pm. Come check it out!
The
City of North Charleston announces the 7th Annual Harvest Festival featuring
live musical performances, an artist market, costume contests, trick-or-treat
on the street, a pop-up pumpkin patch, children’s activities, and more.
The fall festivities will take place in the Olde Village of North Charleston,
located on East Montague Avenue near Park Circle, on Saturday, October 19, 2019,
from 4:00-7:00pm. Admission and parking are free. East Montague
Avenue will close to vehicular traffic from Jenkins Avenue to
Virginia Avenue at 2:00pm and remain closed
for the duration of the event.
The celebration includes live music by the
delightfully eclectic V-Tones of Charleston and singer-songwriter Rene Russell.
The Kid’s Zone offers a craft activity led by the City’s artist-in-residence Katherine
Hester, carnival games, face painting, drumming with RBM African Drum and Dance,
and a variety of inflatables. An artist market featuring local artists,
crafters, and makers will line two blocks of East Montague Avenue, along with a
few festive treat vendors. In addition, many of the restaurants in the Olde
Village will offer food and drink specials.
Other highlights include trick-or-treating on the
street with free treat bags for kids age 12 and under (4:00-6:00pm, while
supplies last); a pop-up pumpkin patch with on-site decorating stations (cash
only – prices of pumpkins vary); a mechanical bull, photo booths, and costume
contests with categories for youth, groups, and pets. The contests are free to
enter and prizes will be furnished by the City of North Charleston Recreation
Department, merchants of the North Charleston Olde Village, and Park Pets.
Participants for all contests should be prepared to line up for judging at 5:45pm
for the contests to begin at 6:00pm.
The annual Harvest Festival
is a rain or shine event produced by the City of North Charleston in
collaboration with the North Charleston Olde Village merchants. For information
on additional programs and events, visit the Arts & Culture section of the
City’s website at www.northcharleston.org.
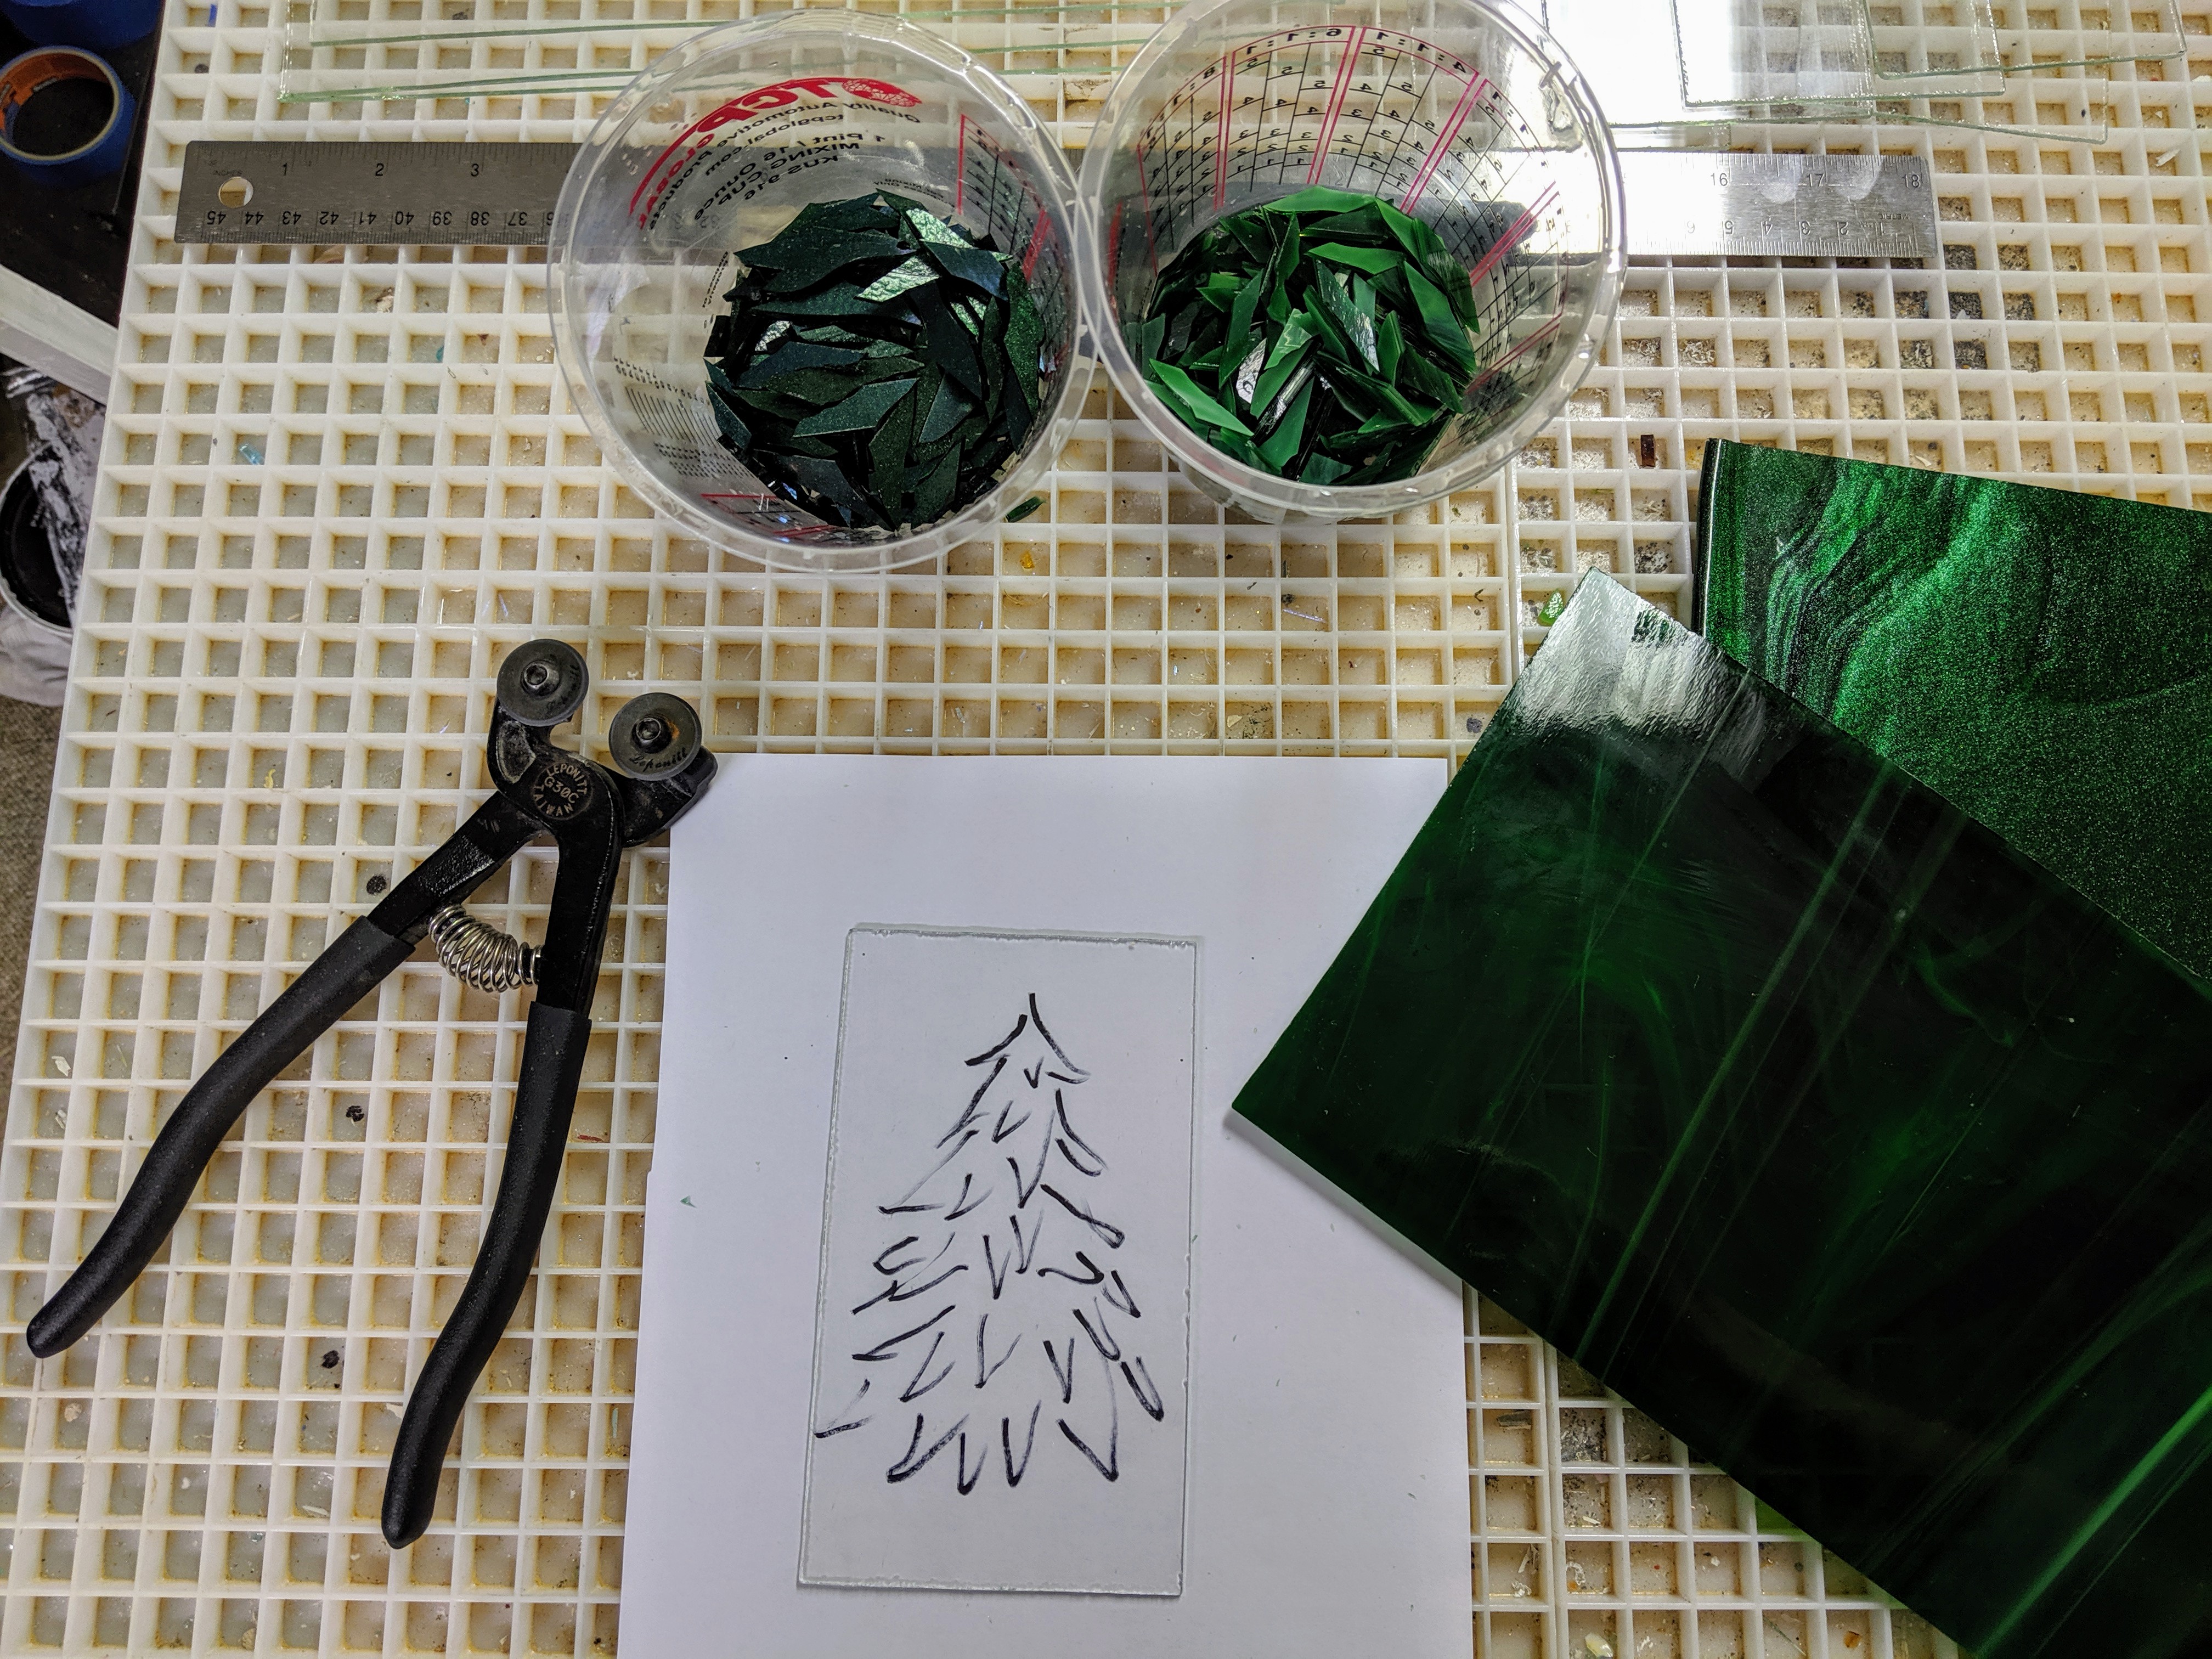
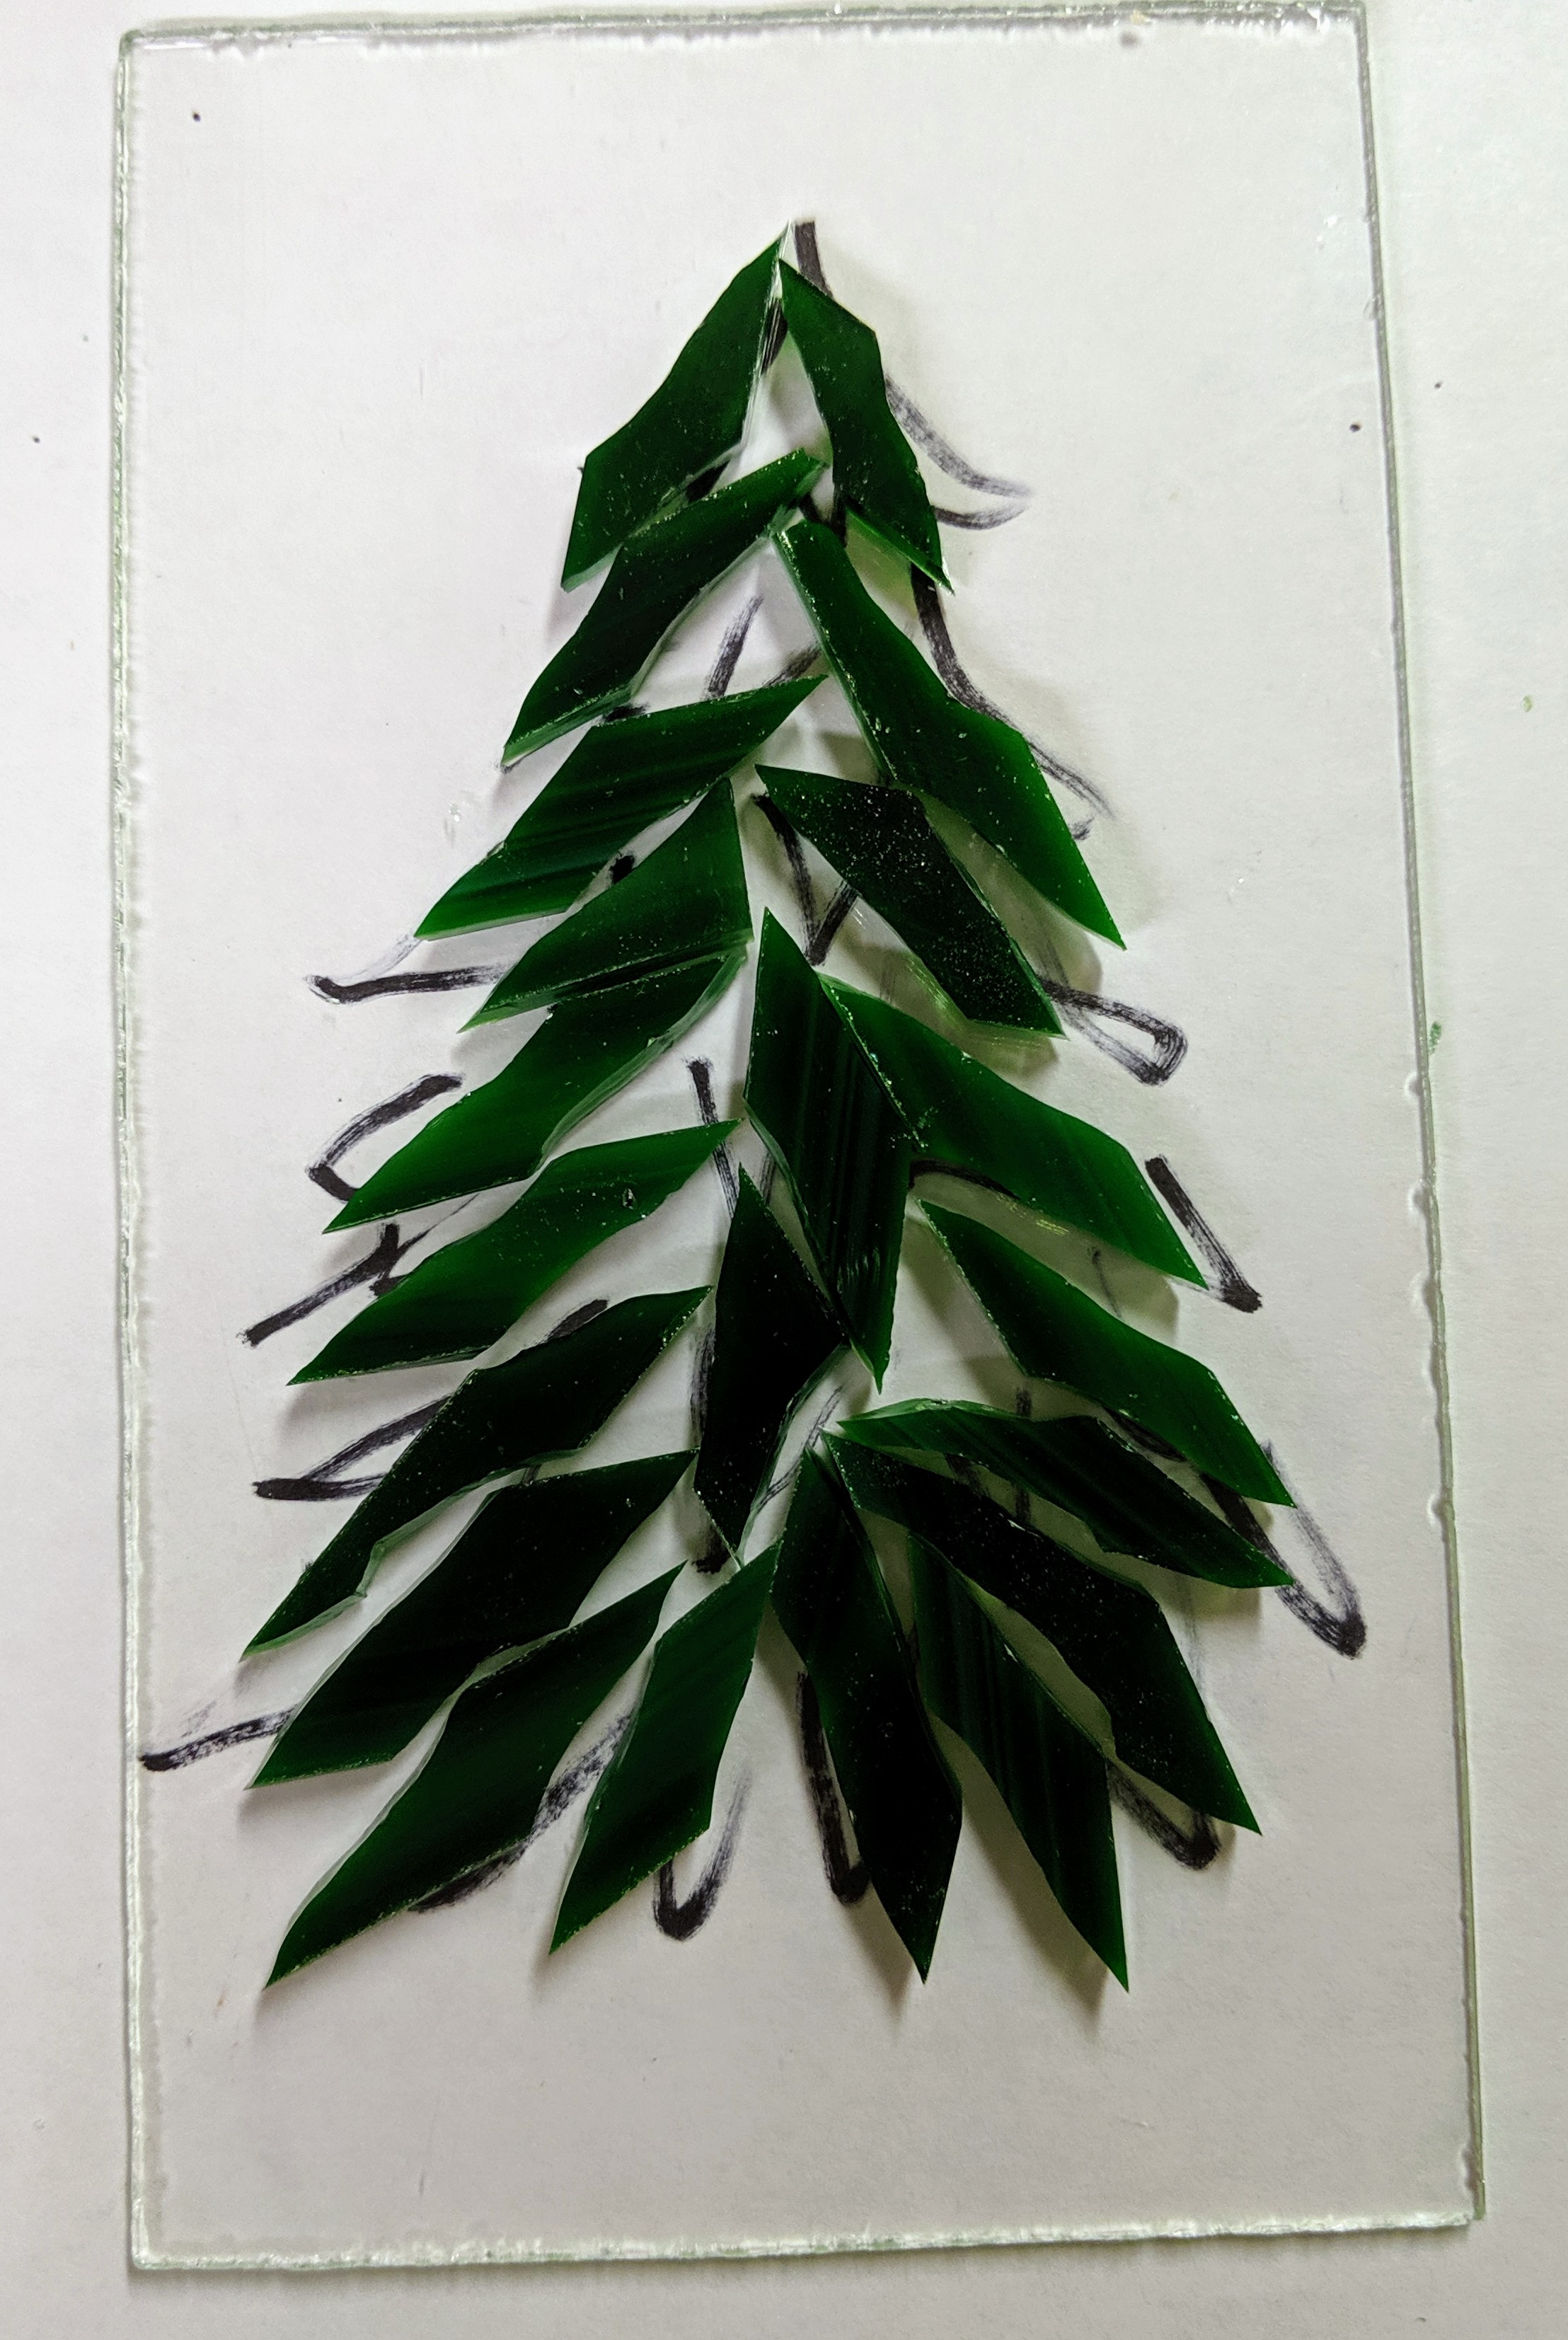
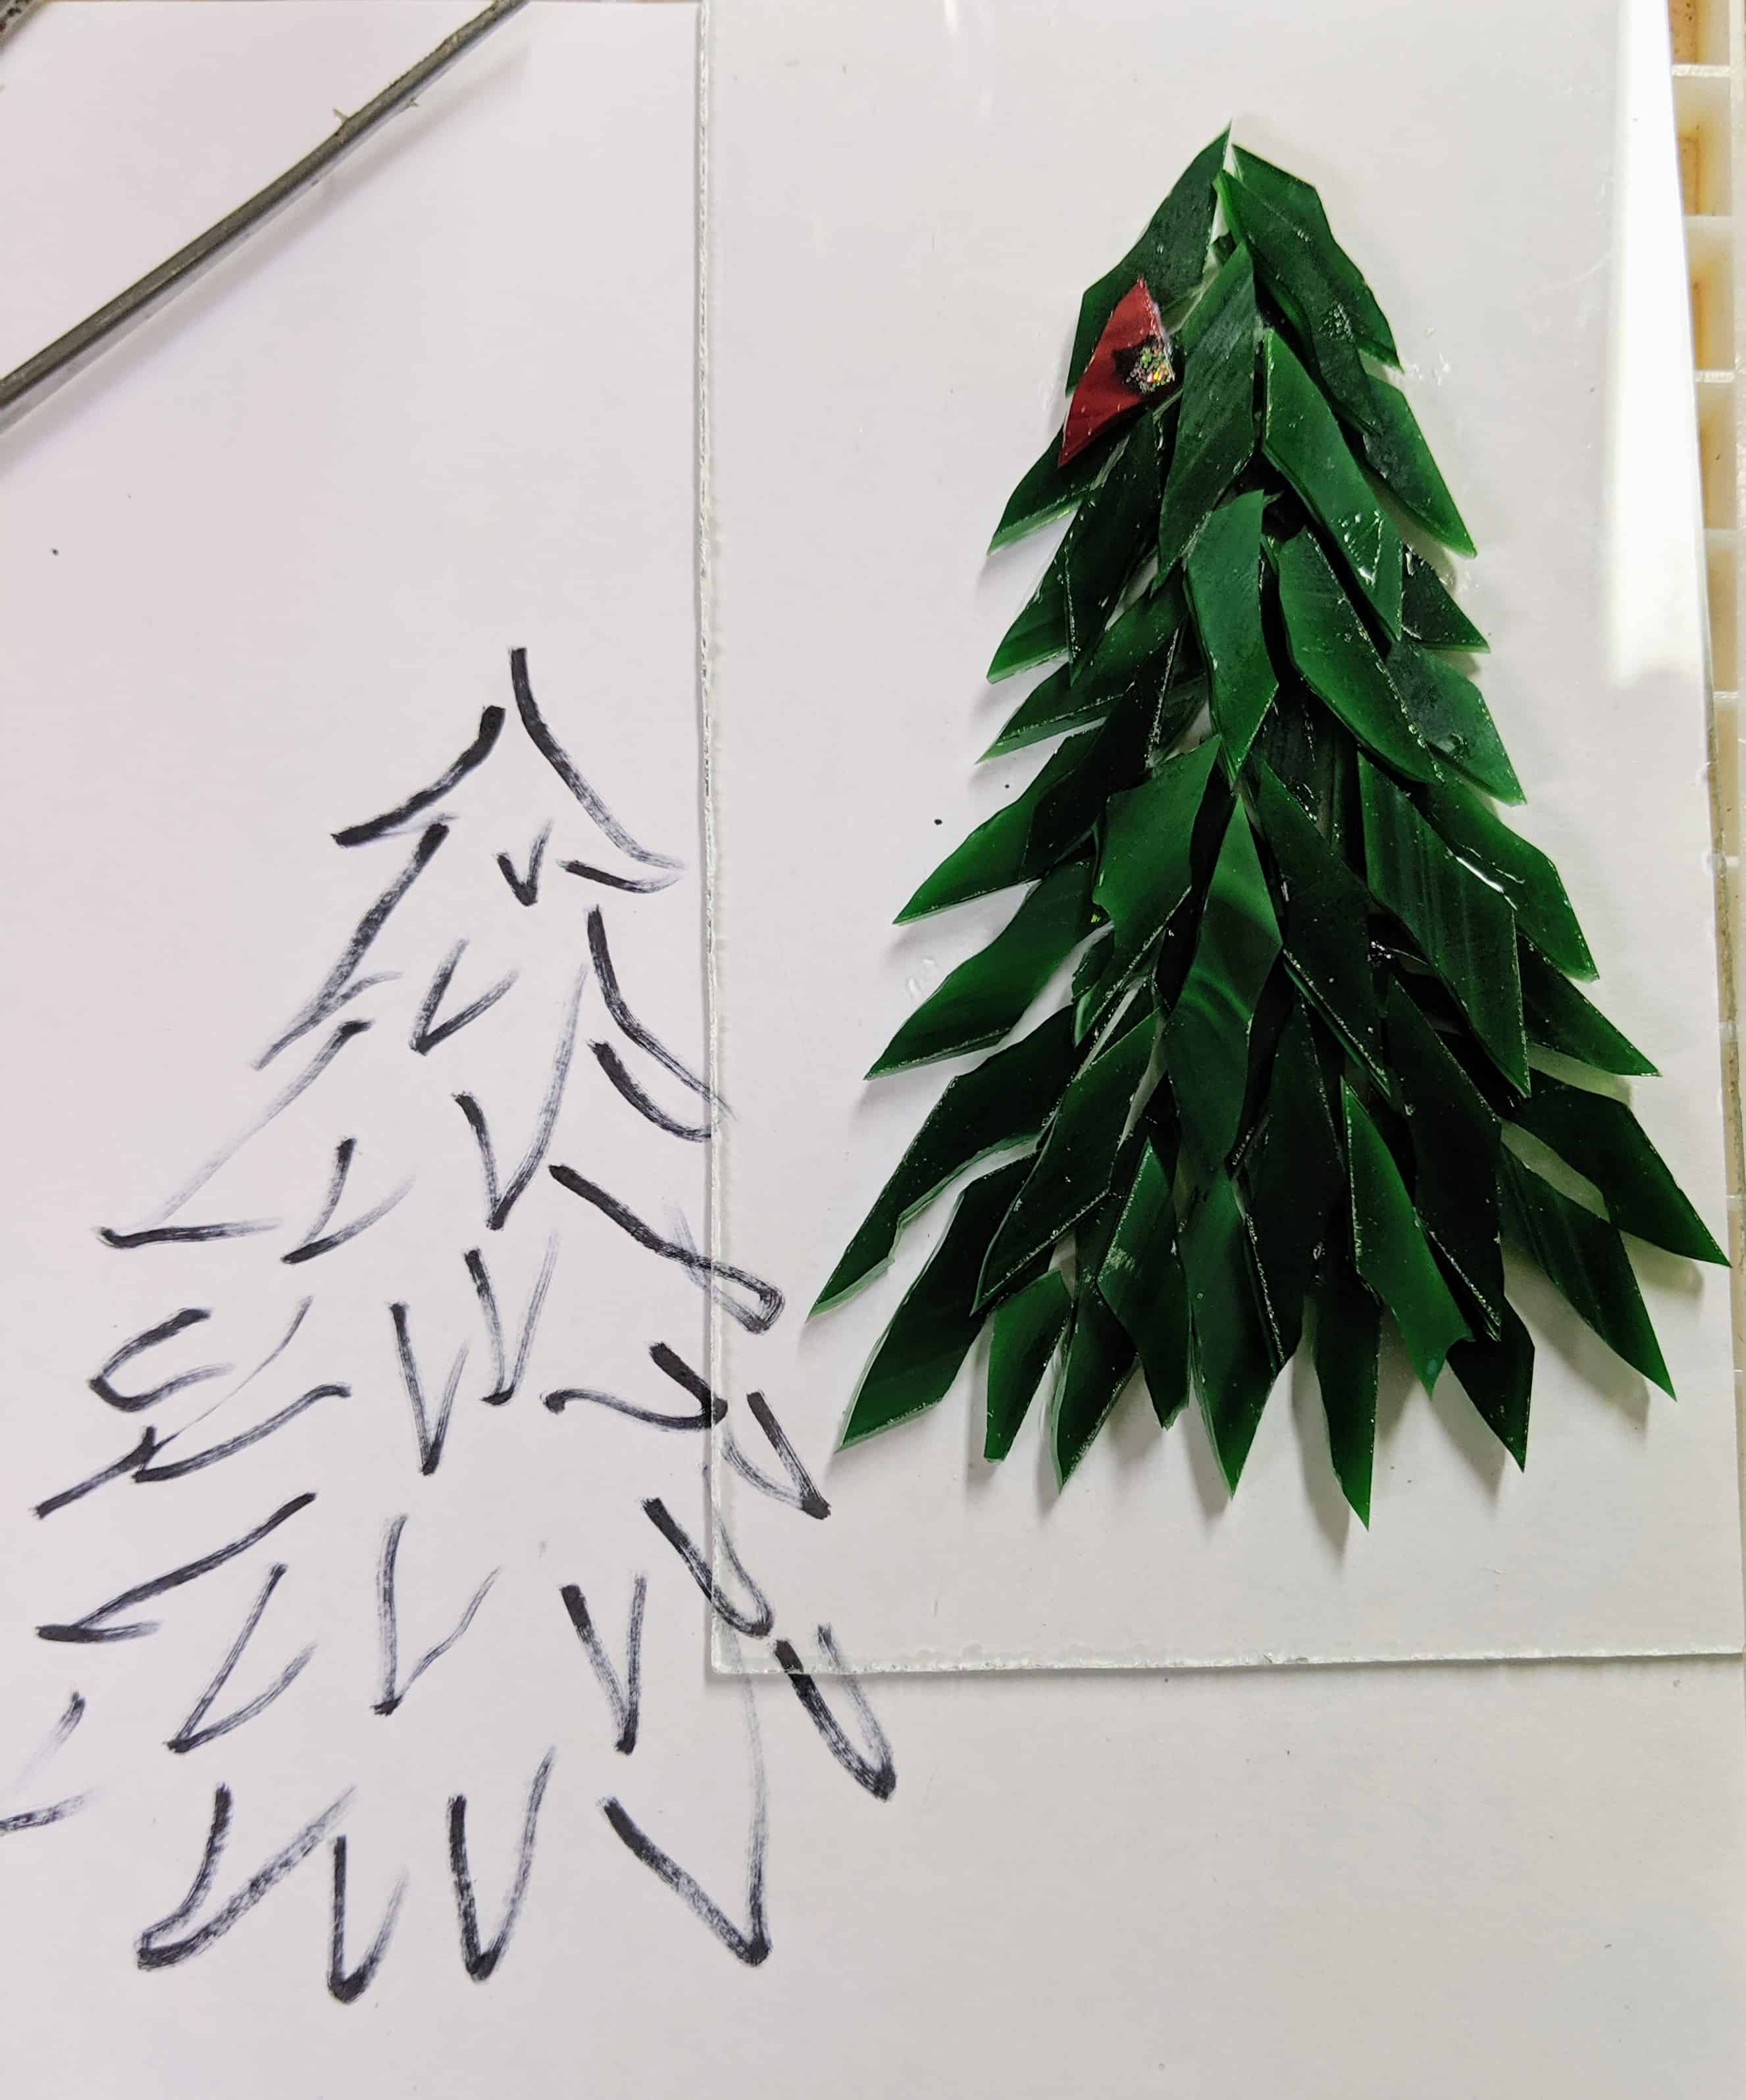
I just started a dichroic window project, but yesterday my eldest child suggested that I make some evergreen trees, so I set that aside for a few days. I decided to start with just a small suncatcher and then see if I could expand it a bit in future projects. First I looked at some photos of trees online to decide what “look” I liked, then I grabbed a Sharpie marker and made a rough sketch. After that, I cut some clear background glass. Then I pulled out some green glass and cut it into strips. The strips were cut with mosaic nippers into pieces that would become the branches.
A sketch and the raw materials
Now it was time to start laying out the branches. I liked the way the first layer looked, so I went ahead and glued it down using Mac glue.
The first layer
I might make some later on with just one layer, but for this tree I decided to fill in the gaps with a second layer, giving the tree more dimension. I also added a whimsical little cardinal bird to it. I have to wait for the glue to dry before I pour the resin layer, but for now, this is how it looks.
The second layer
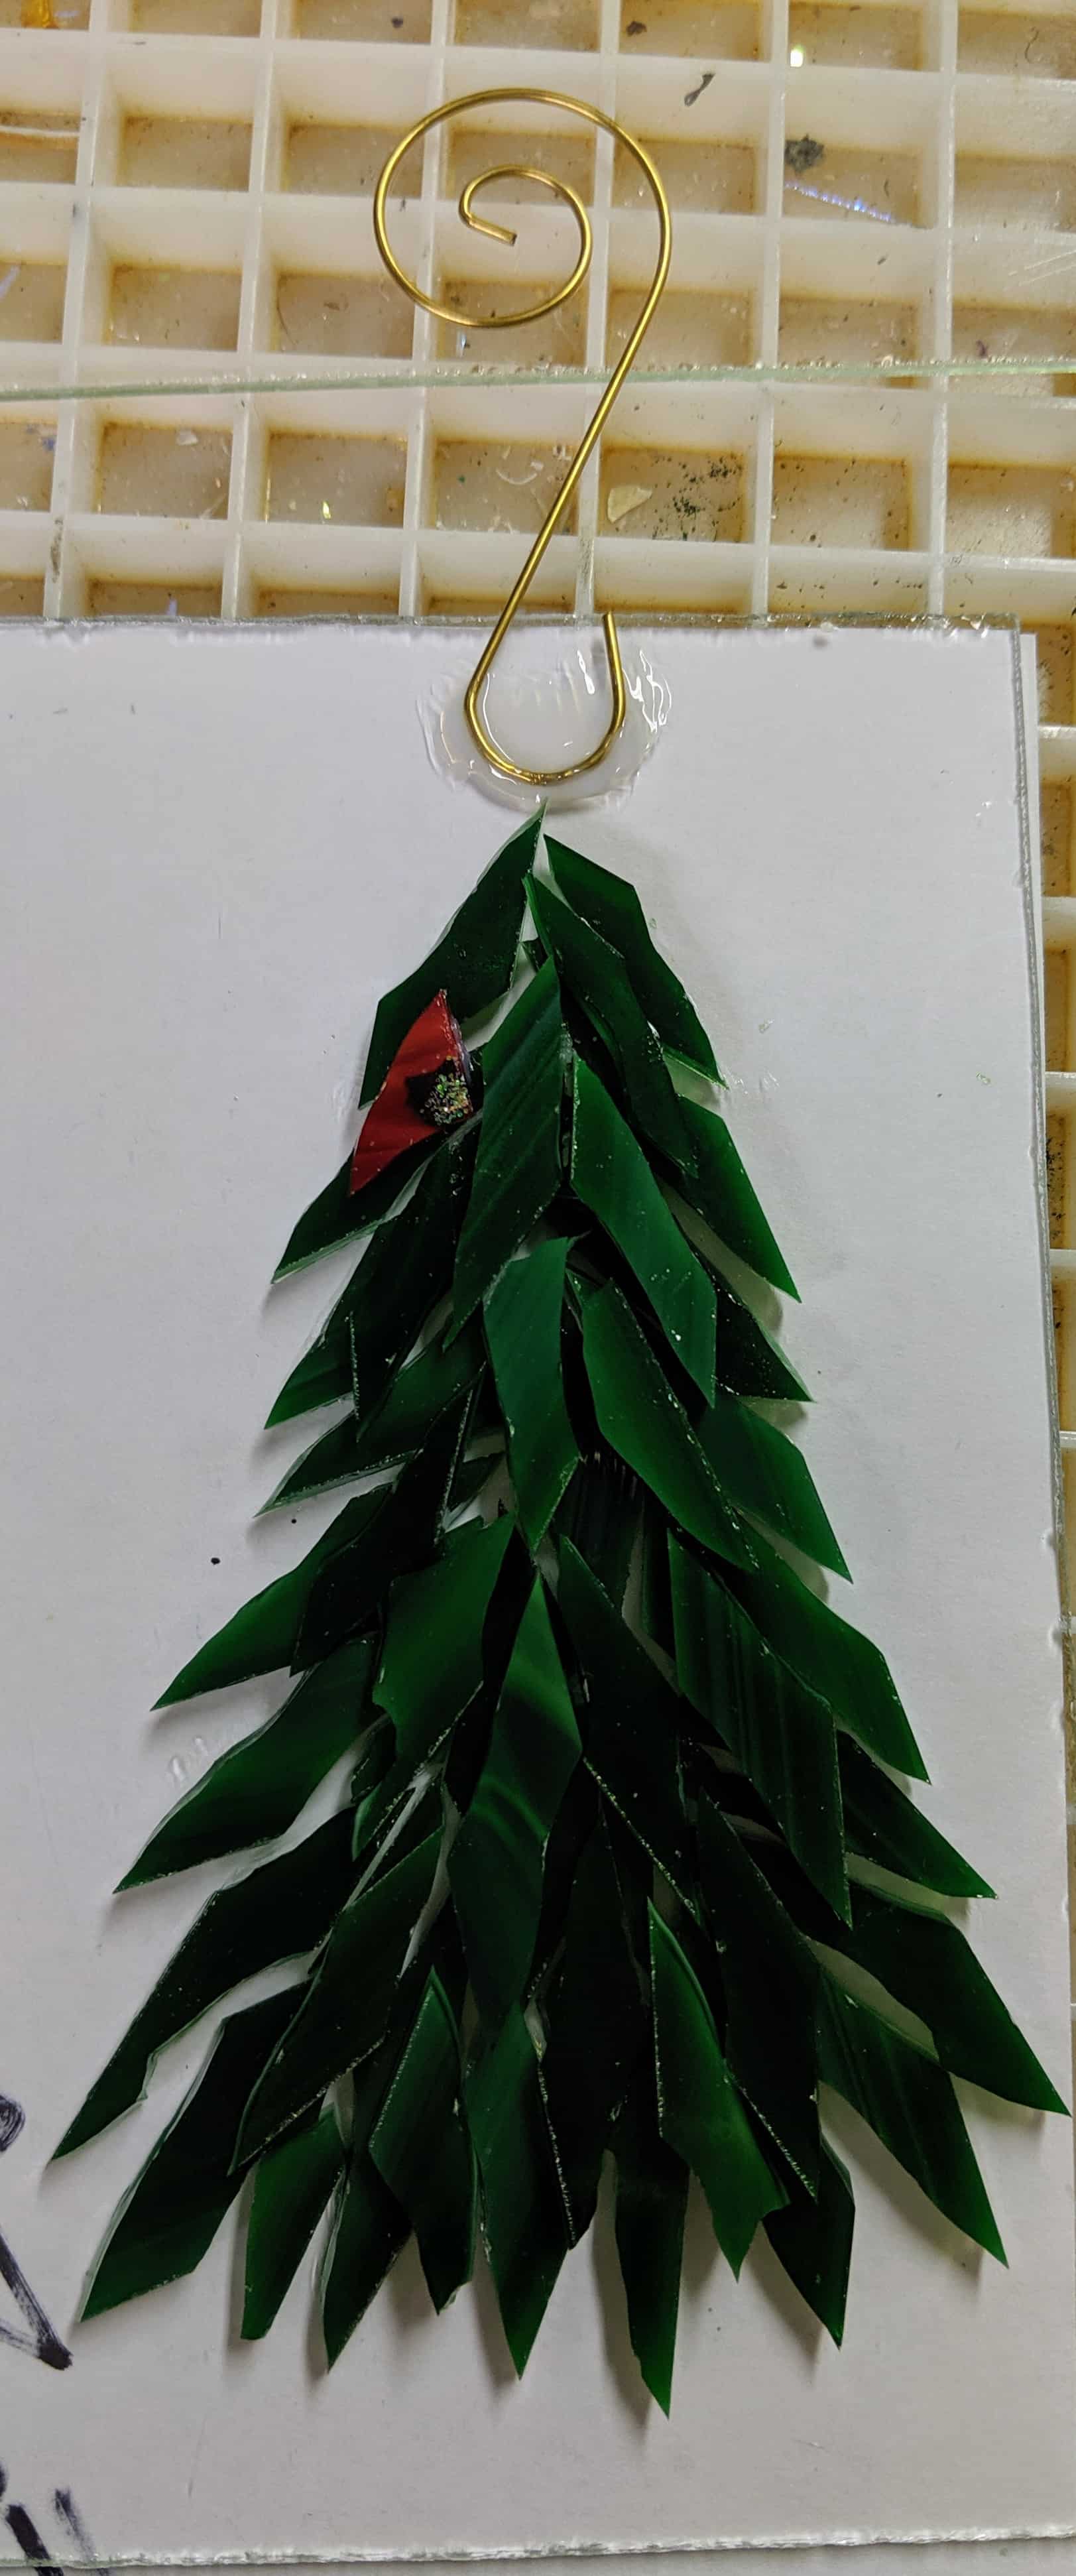
I also added a hanger that will be held in place by the resin. I won’t use hangers if I make a larger version of this later on.
Everything glued in place
Tomorrow I can pour the resin and decorate it with some glass chips for snow and sparkle.
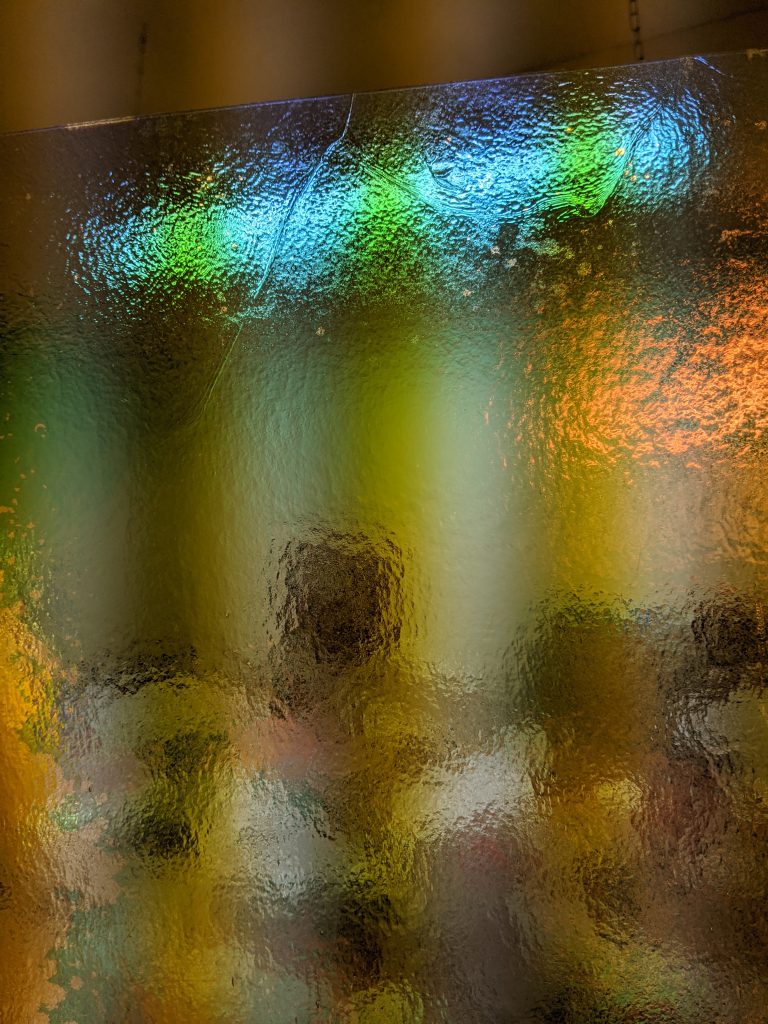
My light tray (small, inexpensive one) arrived today, so I decided to try it out. I wanted to be able to see the colors of the square pieces of dichroic glass I cut from a larger sheet when I lay them out on the window. The light tray is a huge help with this, but it is still a bit of a challenge, as the color perception changes based on the viewing angle. When I am directly over the window (perpendicular to it), this is how the colors look:
Perpendicular view
However, at a slight angle, the colors change significantly:
Colors look different at an angle
Short video of the angle changing.
With the light tray off, the glass is metallic. This is due to the dichroic coating, and in very dim light the colors disappear and are replaced with a metallic shine. This photo doesn’t really capture it, but it’s the best I could do at the moment.
Reflective light
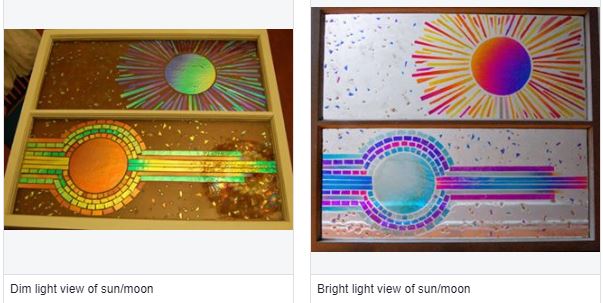
This Art Deco Sun / Moon mosaic is a good example of this type of glass:
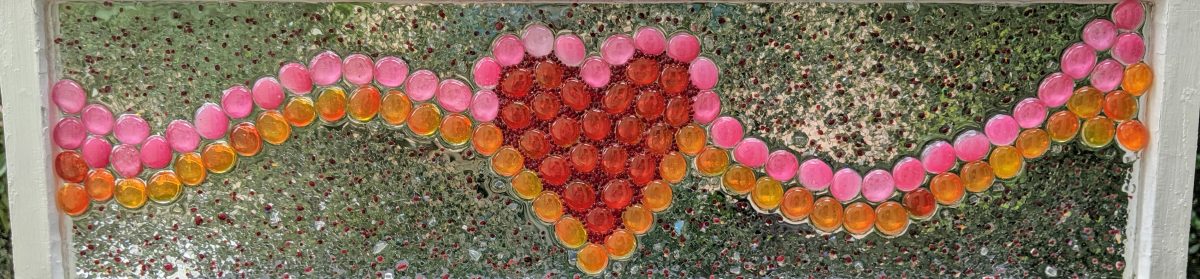
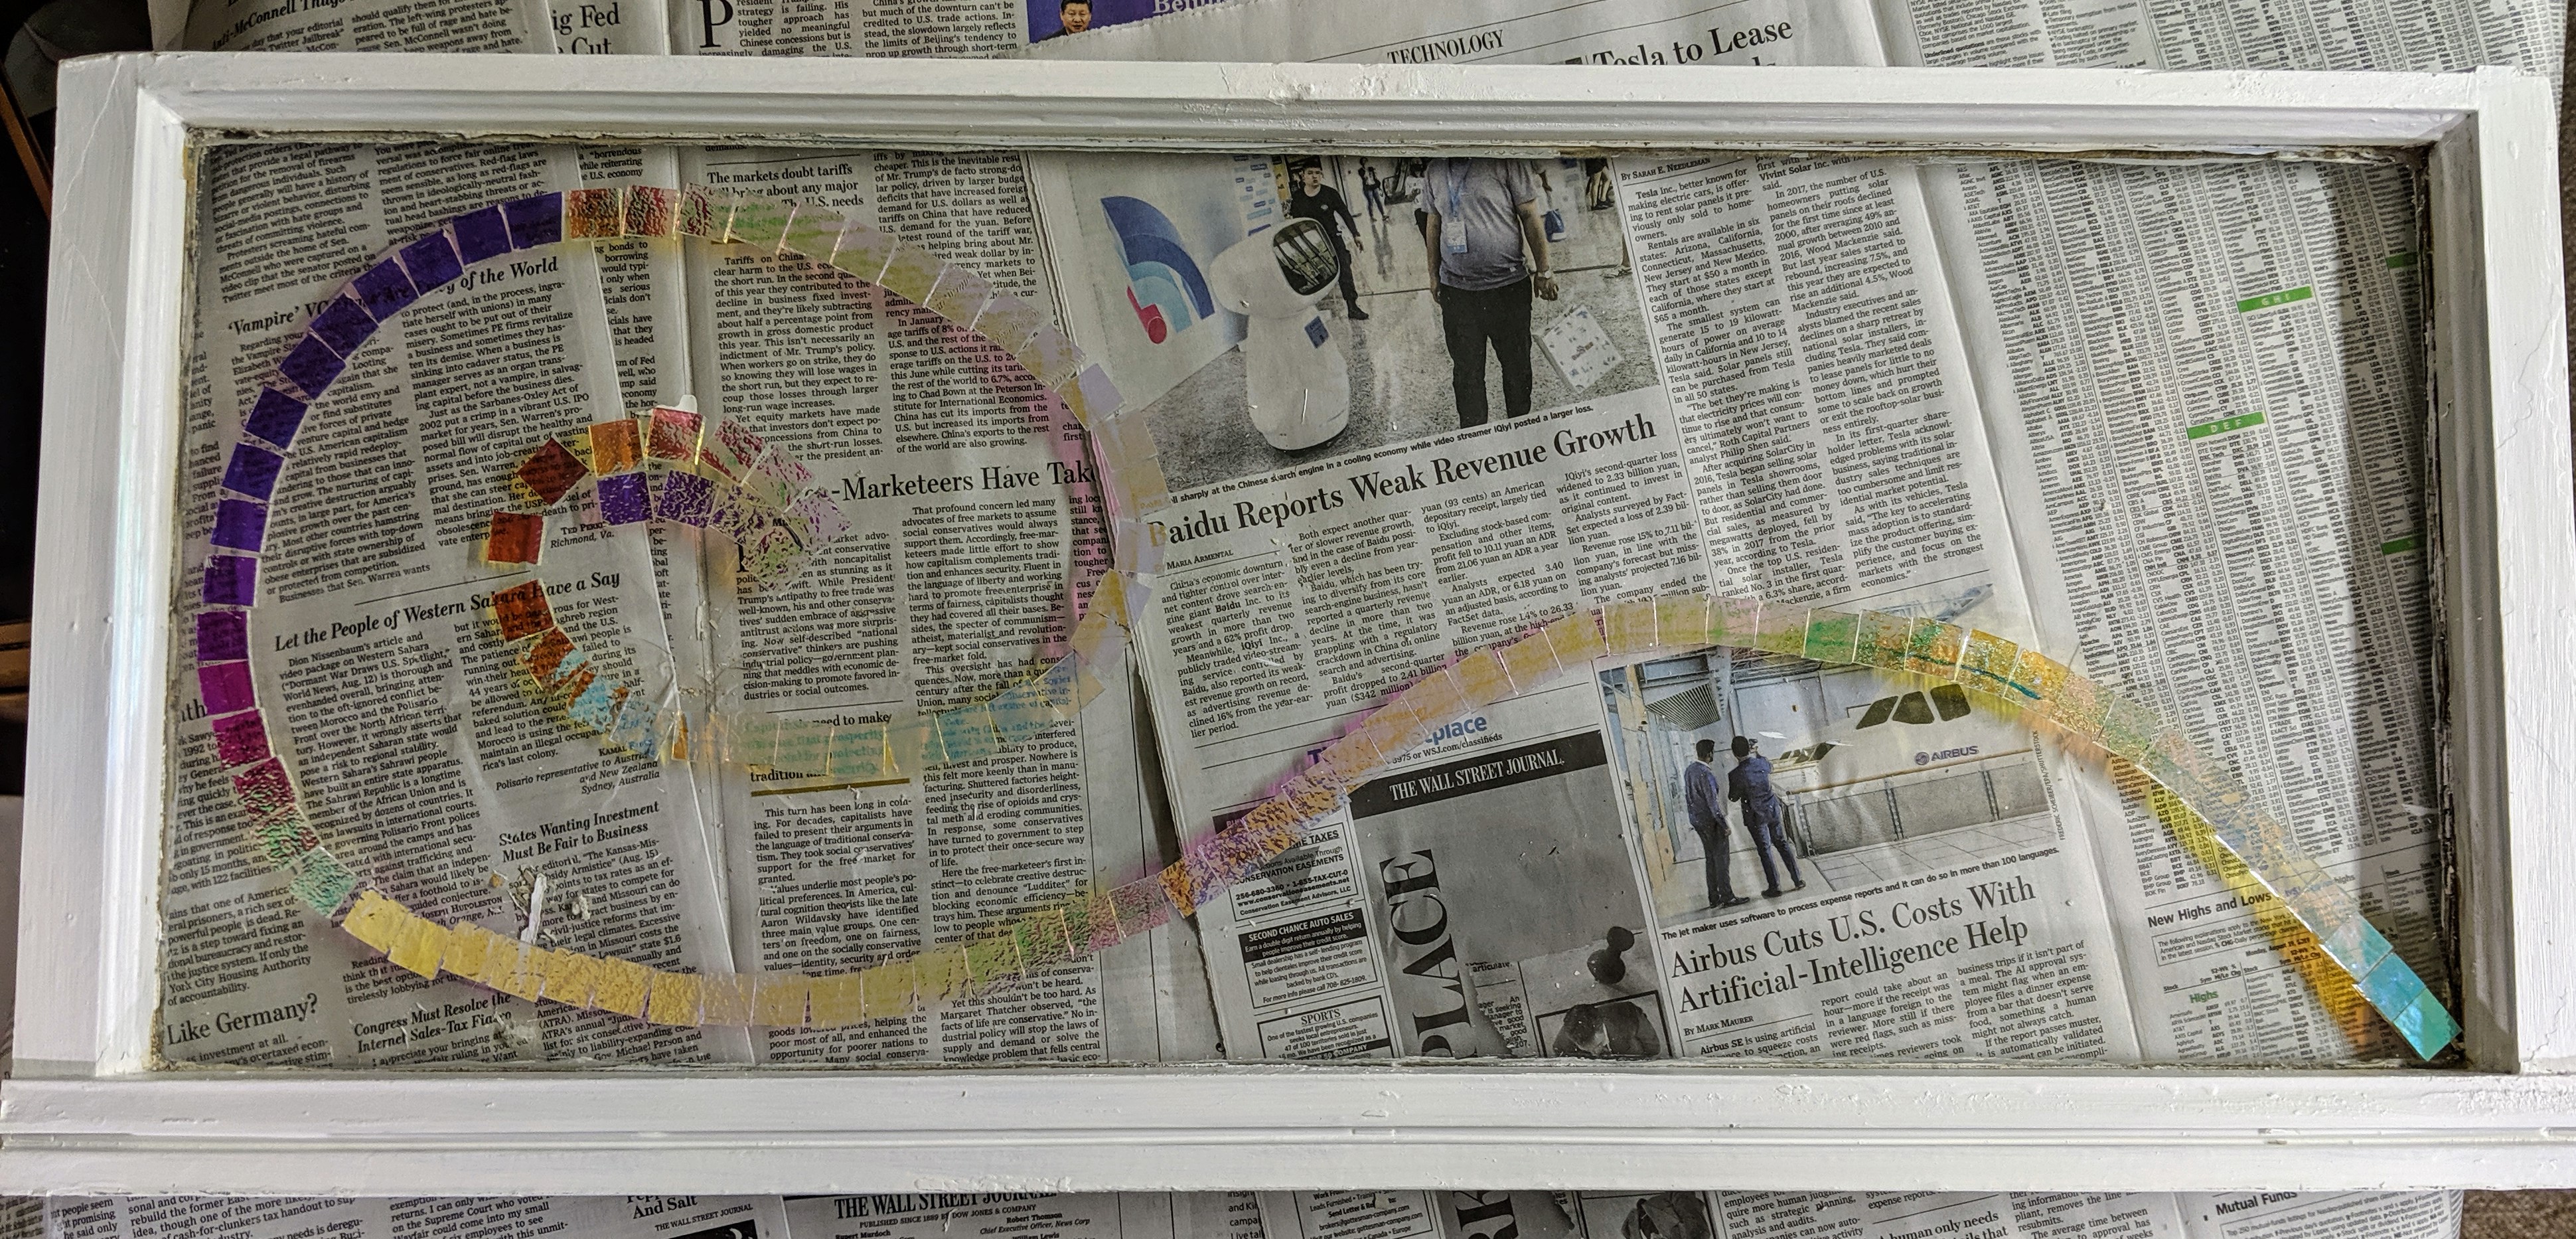
I prepped two more half windows and am trying to figure out what to put in the first one. I have a lot of beach / sea themed mosaics on hand, so I think I will do something different with this one. I love this dichroic glass, so I think I will start with it and see where it takes me – sort of a Ribbon of Light.
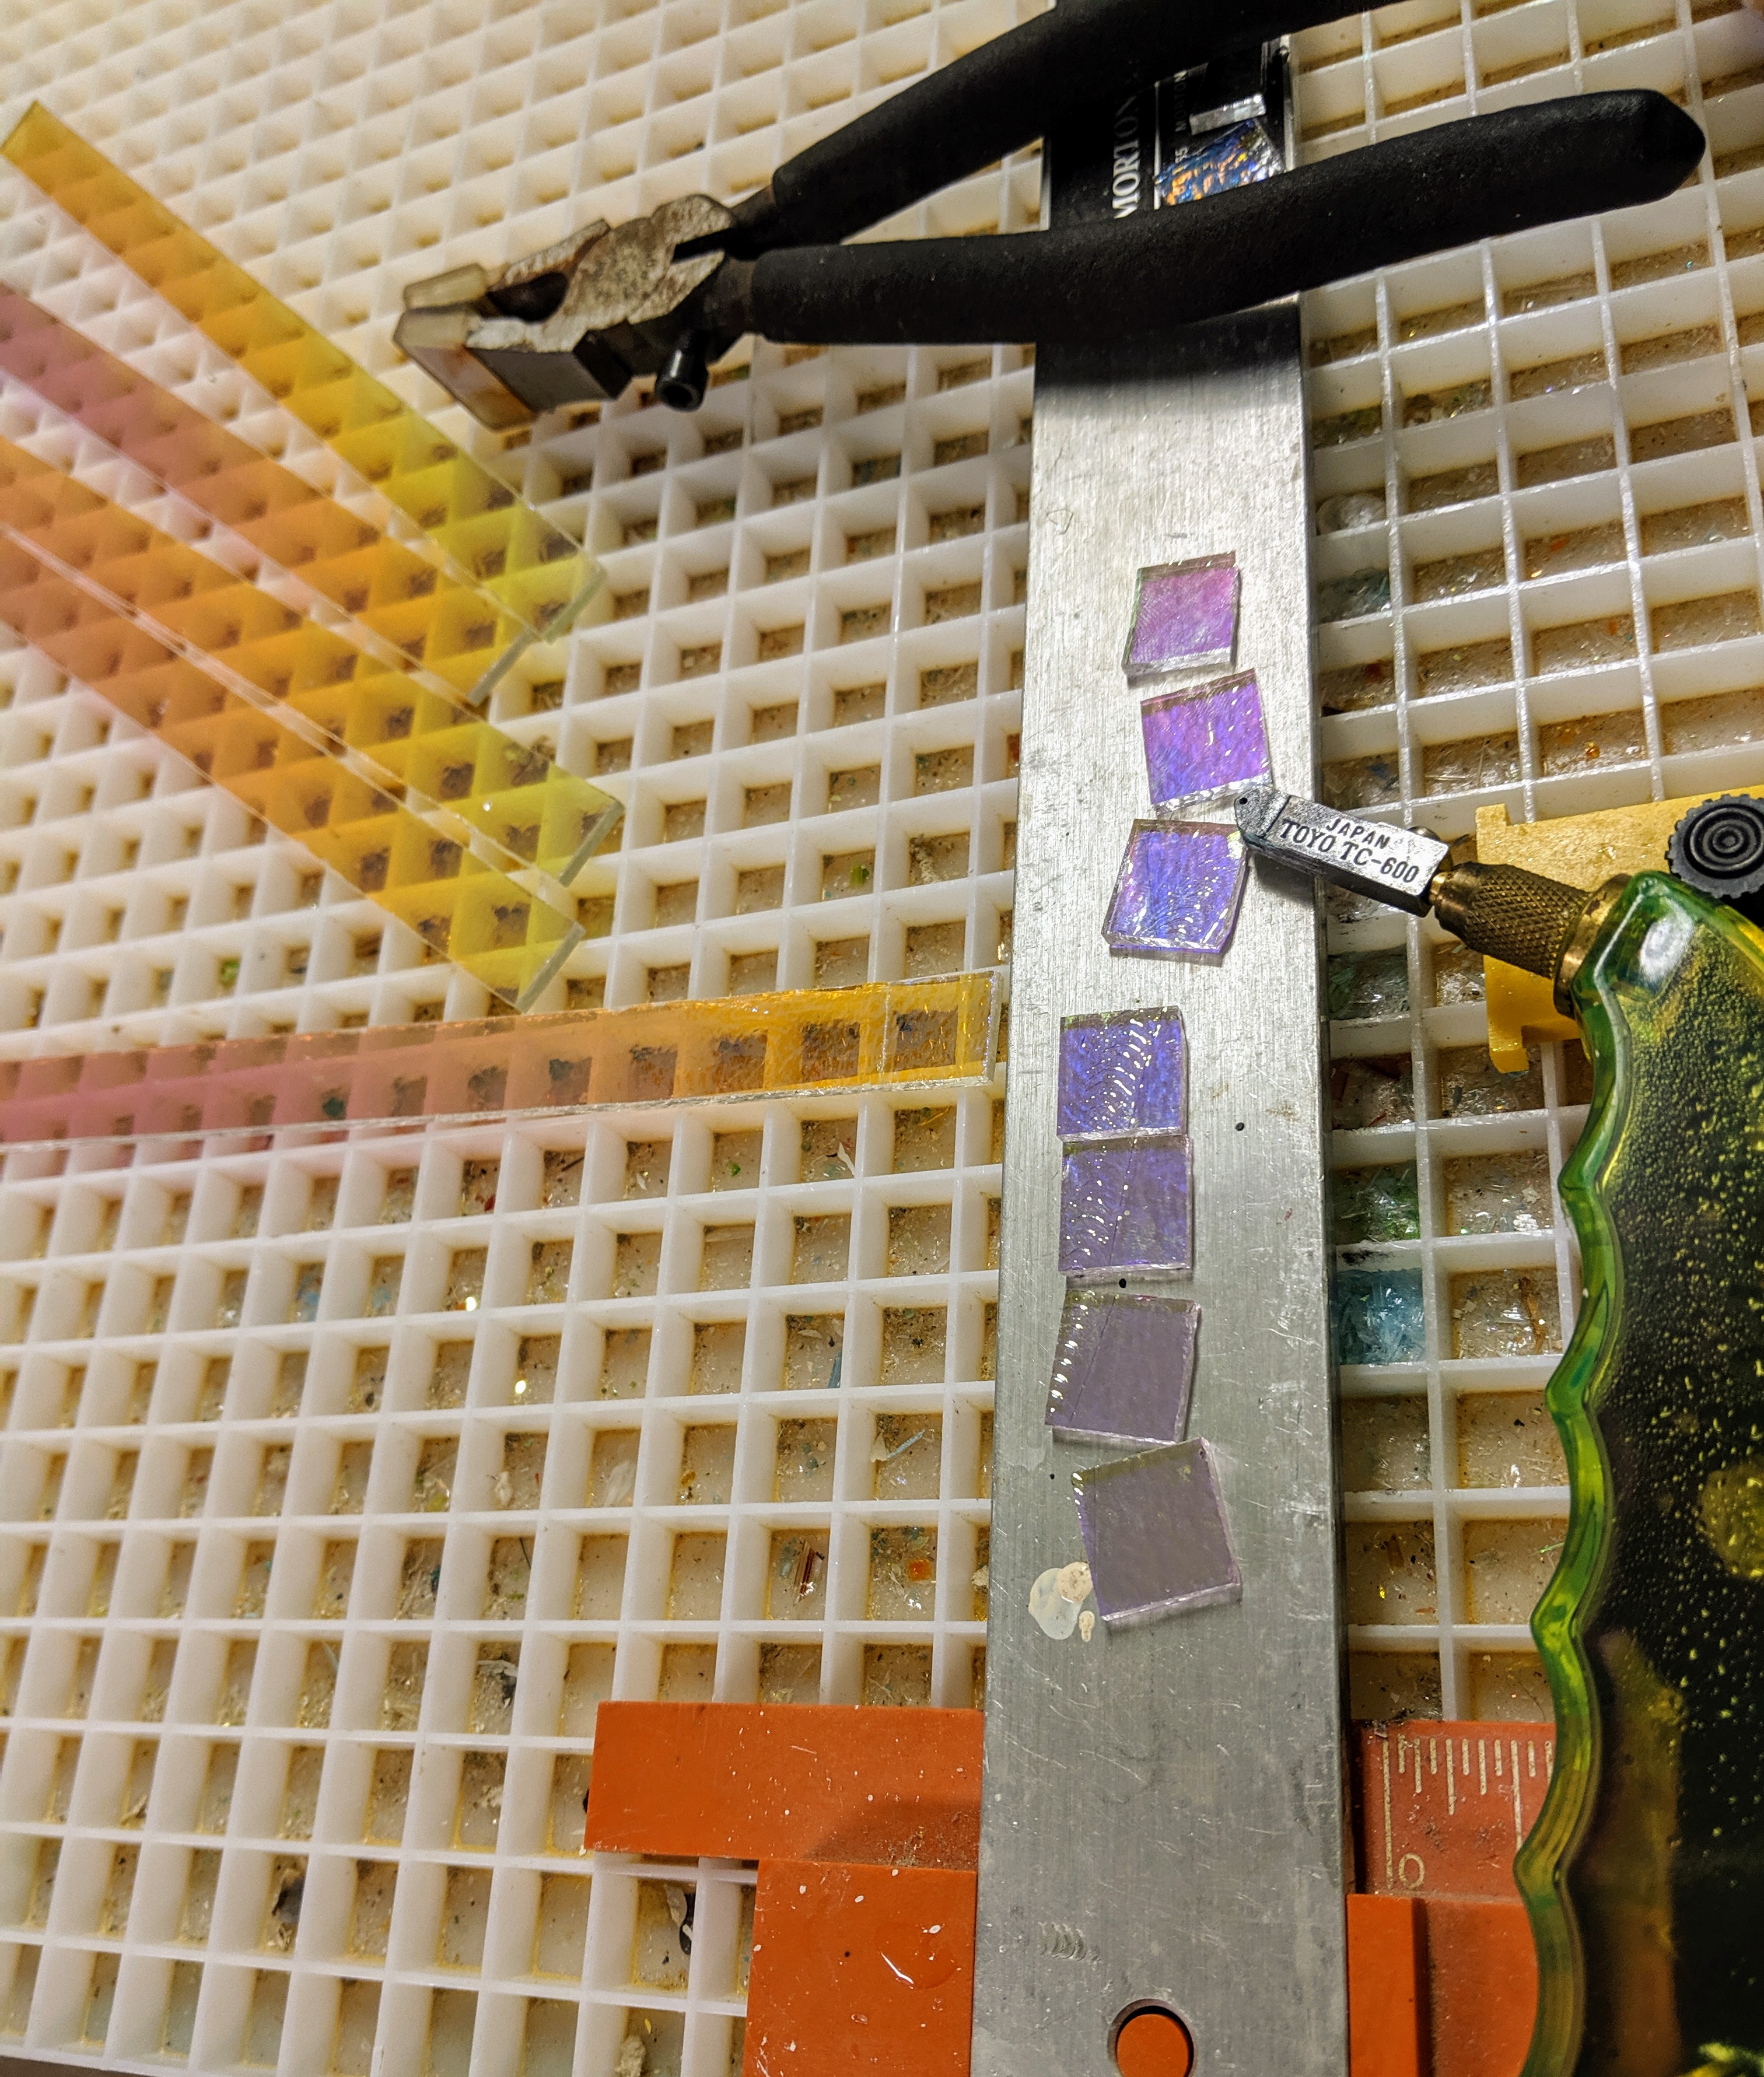
Cutting the large sheet of dichroic glass into strips.
Cutting the strips into squares.
I like the idea of having all uniform square pieces for the “ribbon” part of the mosaic, but when I lay them out, I have the urge to make a lot of them trapezoidal so the curves are smoother. We’ll see if the urge wins out or not. I also broke down and ordered a light box, as I can’t tell what color the dichro pieces will be without one (well, not without holding each individual piece up to the light source, which is too tedious with a 30″ window).
First draft of the “ribbon”.
This is just the first, very rough draft for this project. Still lots of adjustments to make and planning to do before any glue is involved!


