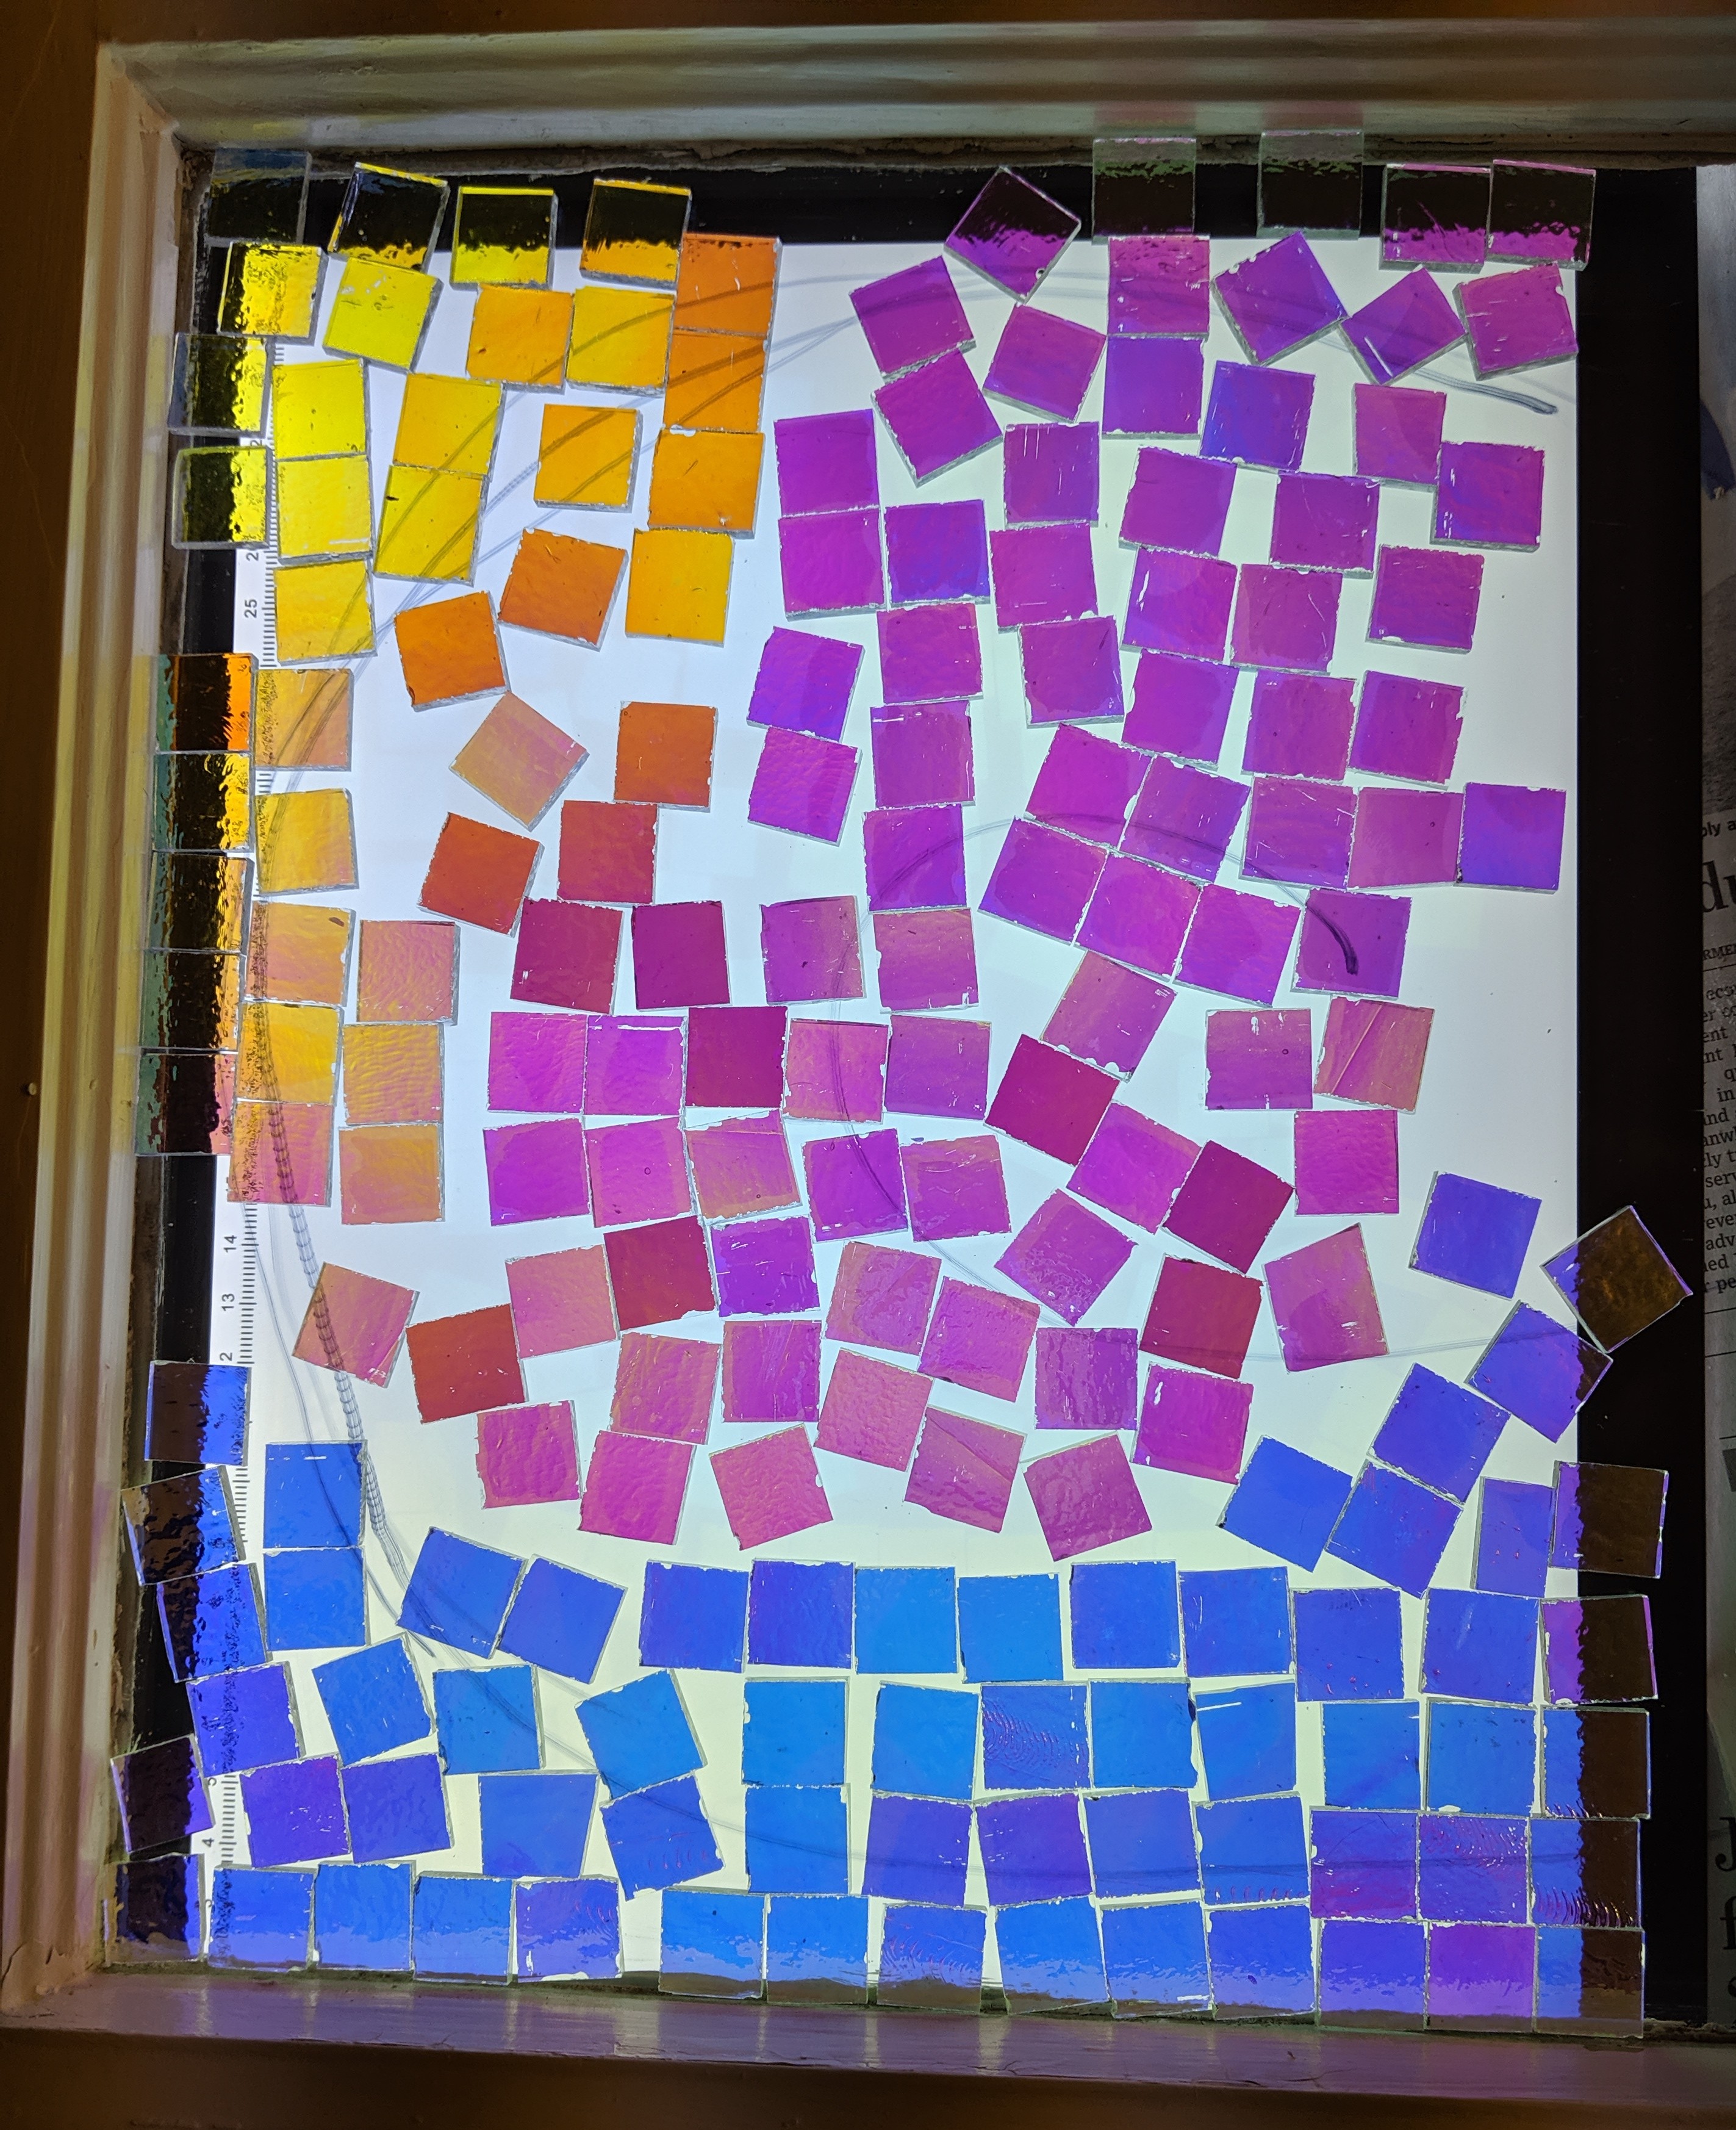
My light tray (small, inexpensive one) arrived today, so I decided to try it out. I wanted to be able to see the colors of the square pieces of dichroic glass I cut from a larger sheet when I lay them out on the window. The light tray is a huge help with this, but it is still a bit of a challenge, as the color perception changes based on the viewing angle. When I am directly over the window (perpendicular to it), this is how the colors look:
Perpendicular view
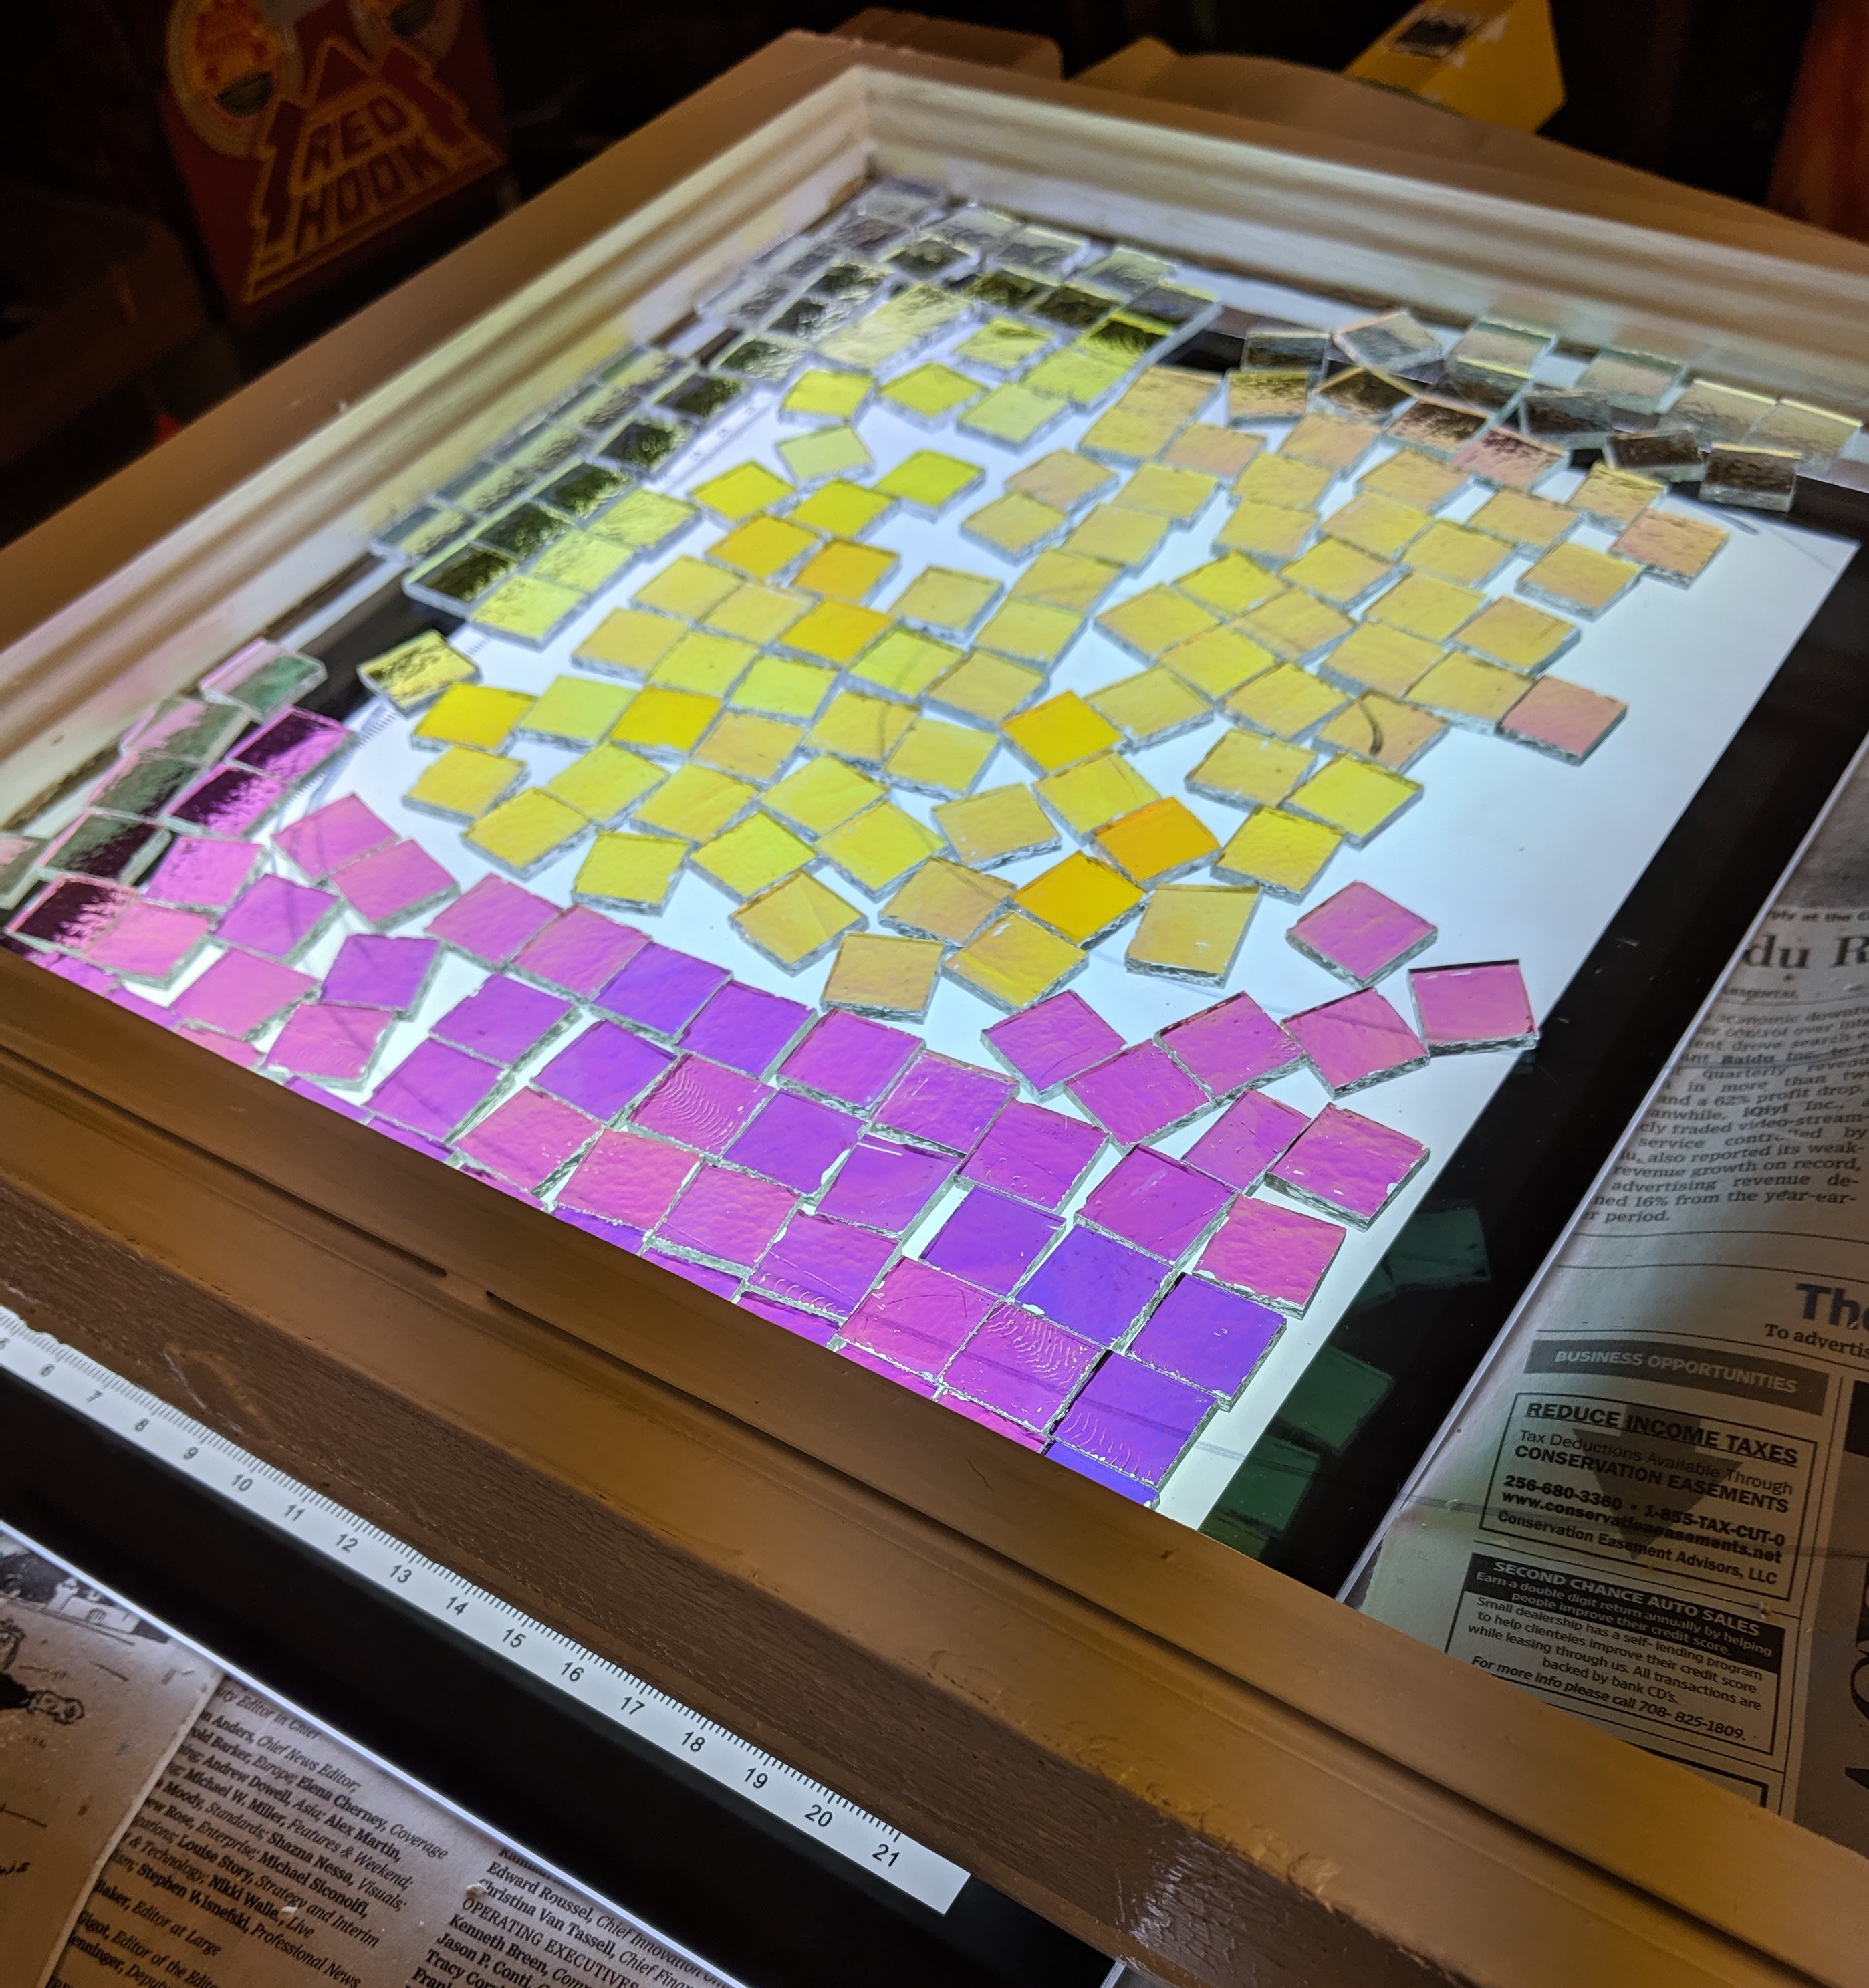
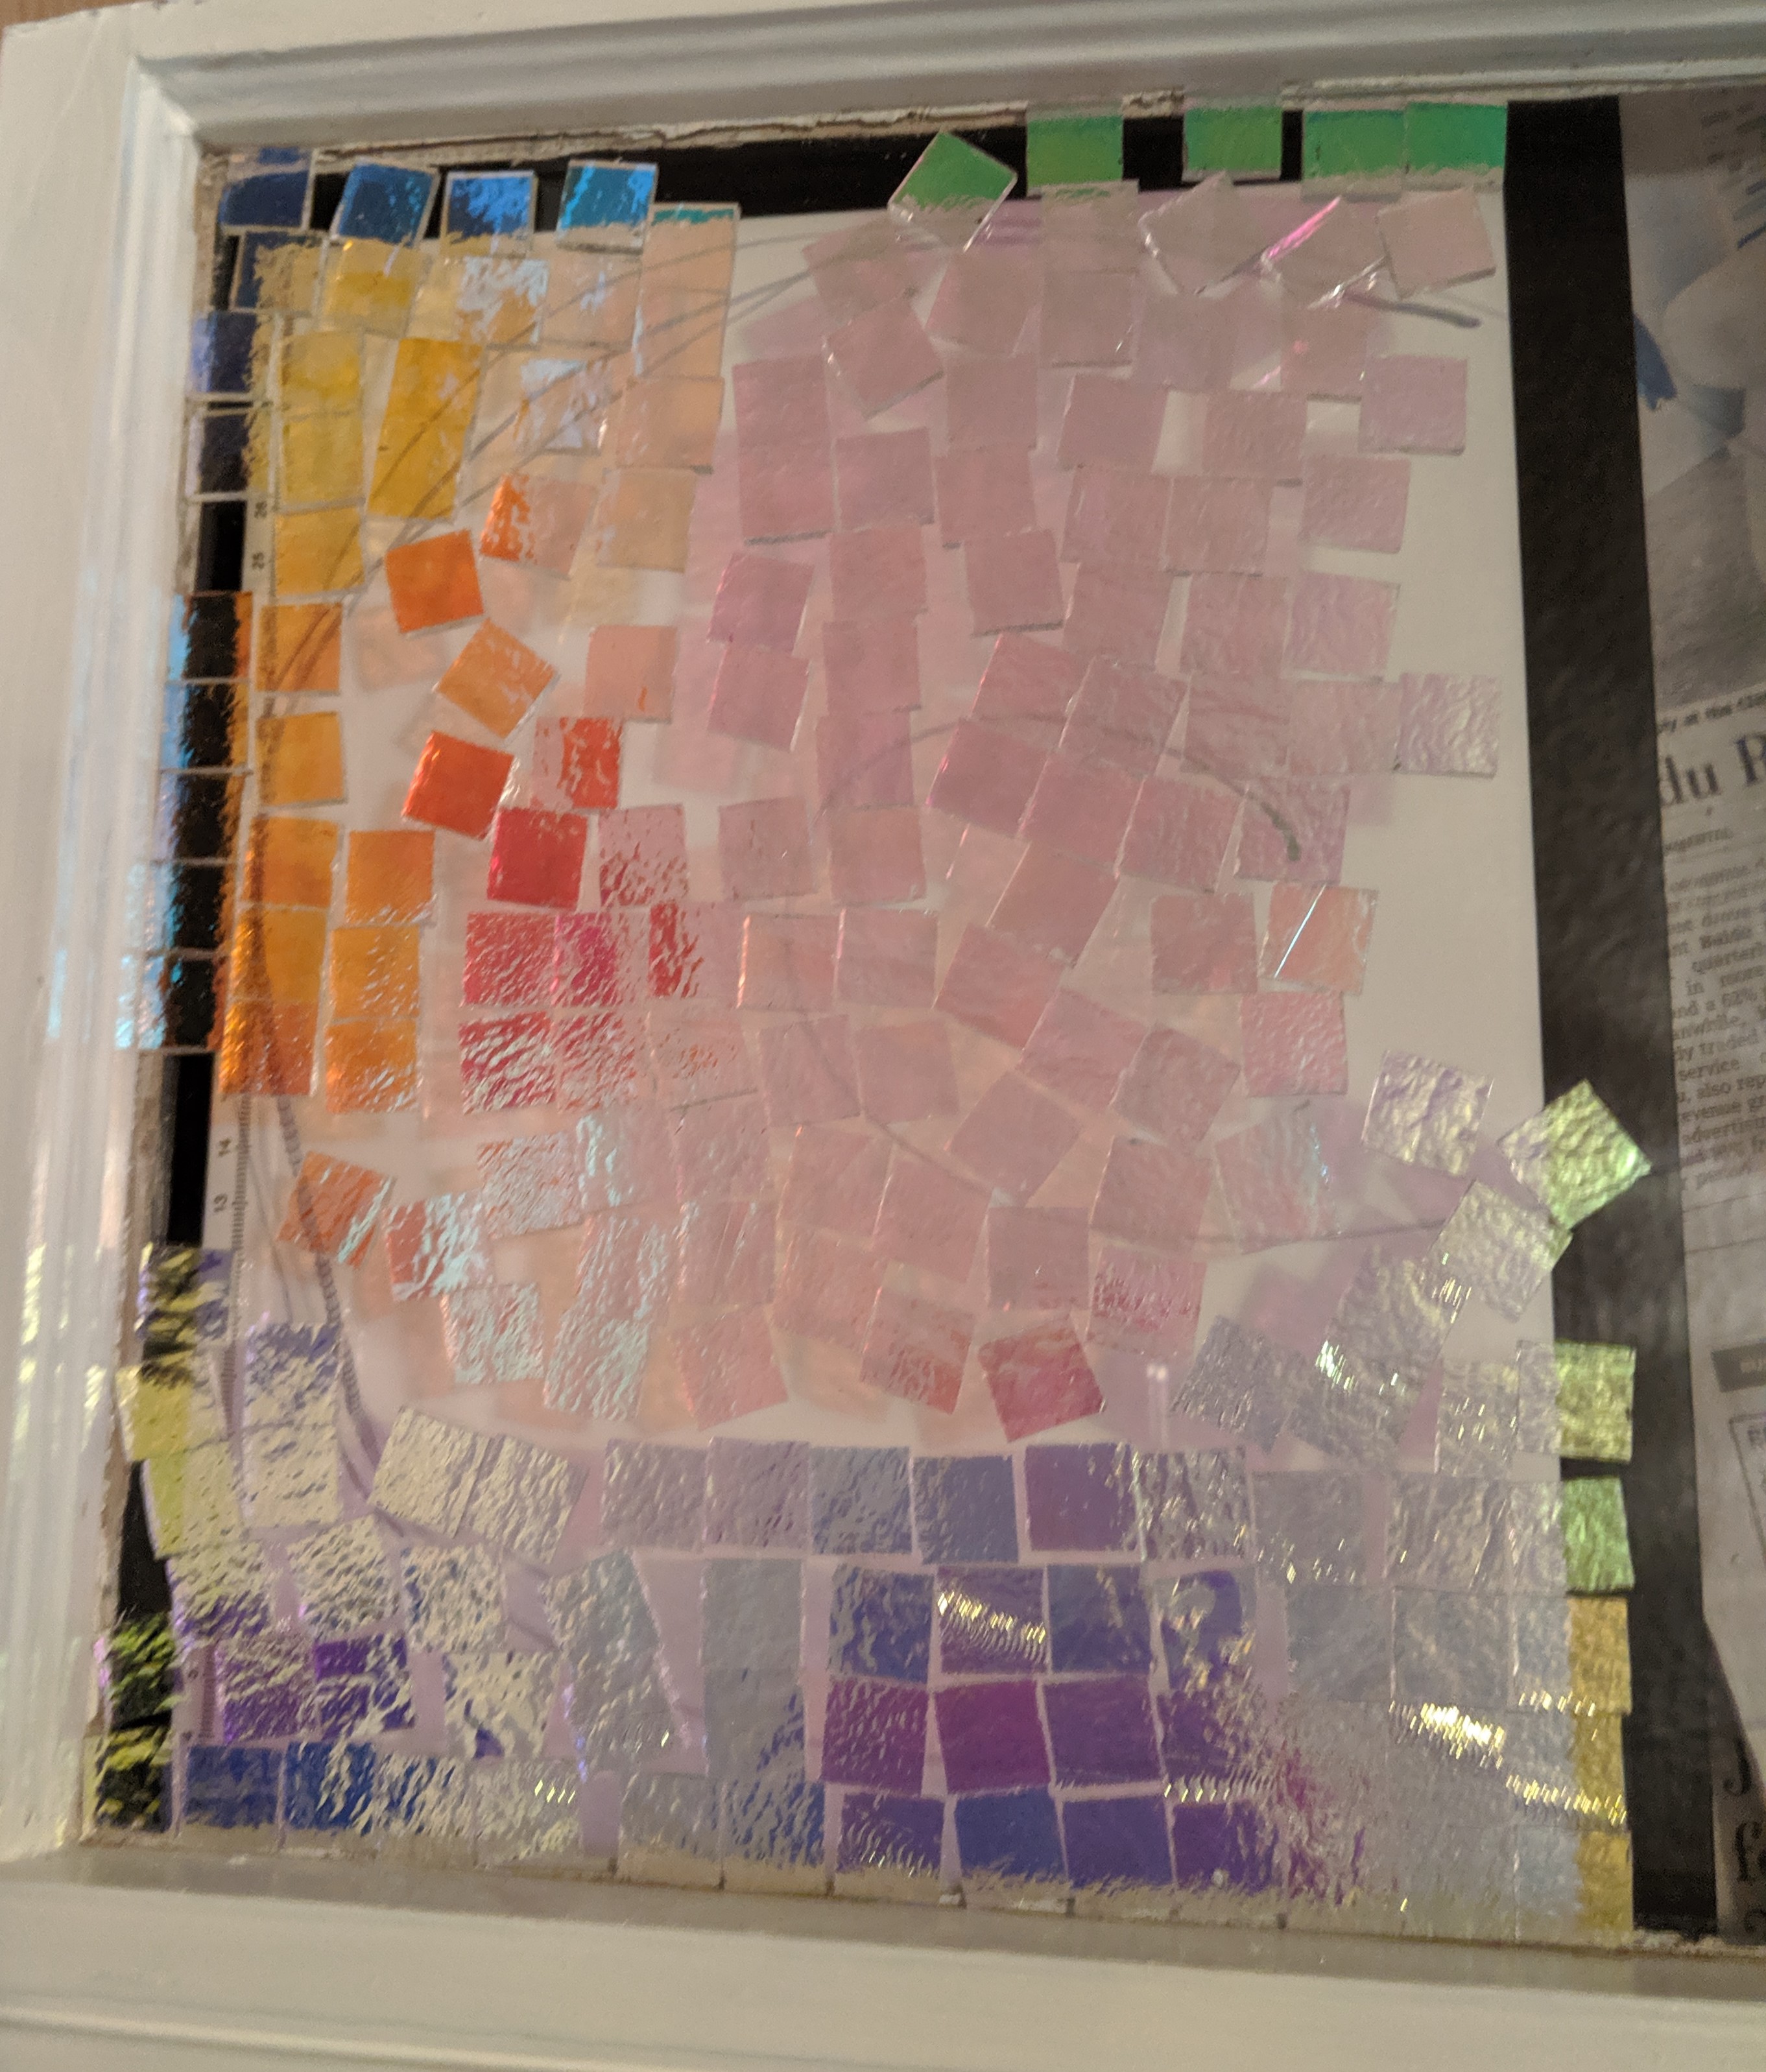
However, at a slight angle, the colors change significantly:
Colors look different at an angle
Short video of the angle changing.
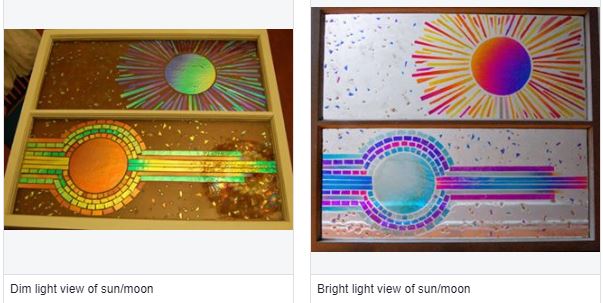
With the light tray off, the glass is metallic. This is due to the dichroic coating, and in very dim light the colors disappear and are replaced with a metallic shine. This photo doesn’t really capture it, but it’s the best I could do at the moment.
Reflective light
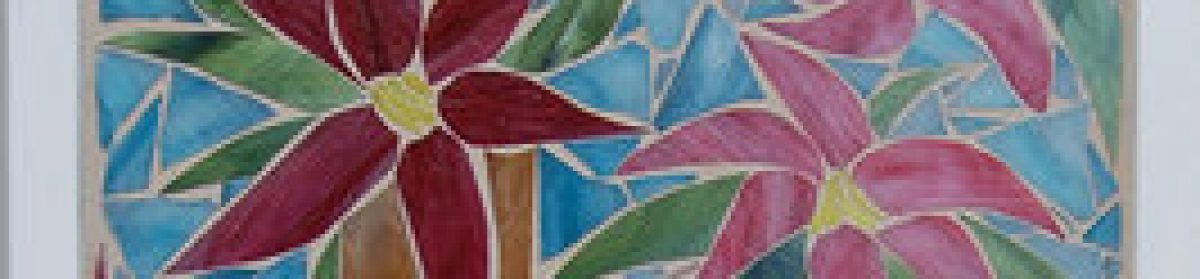
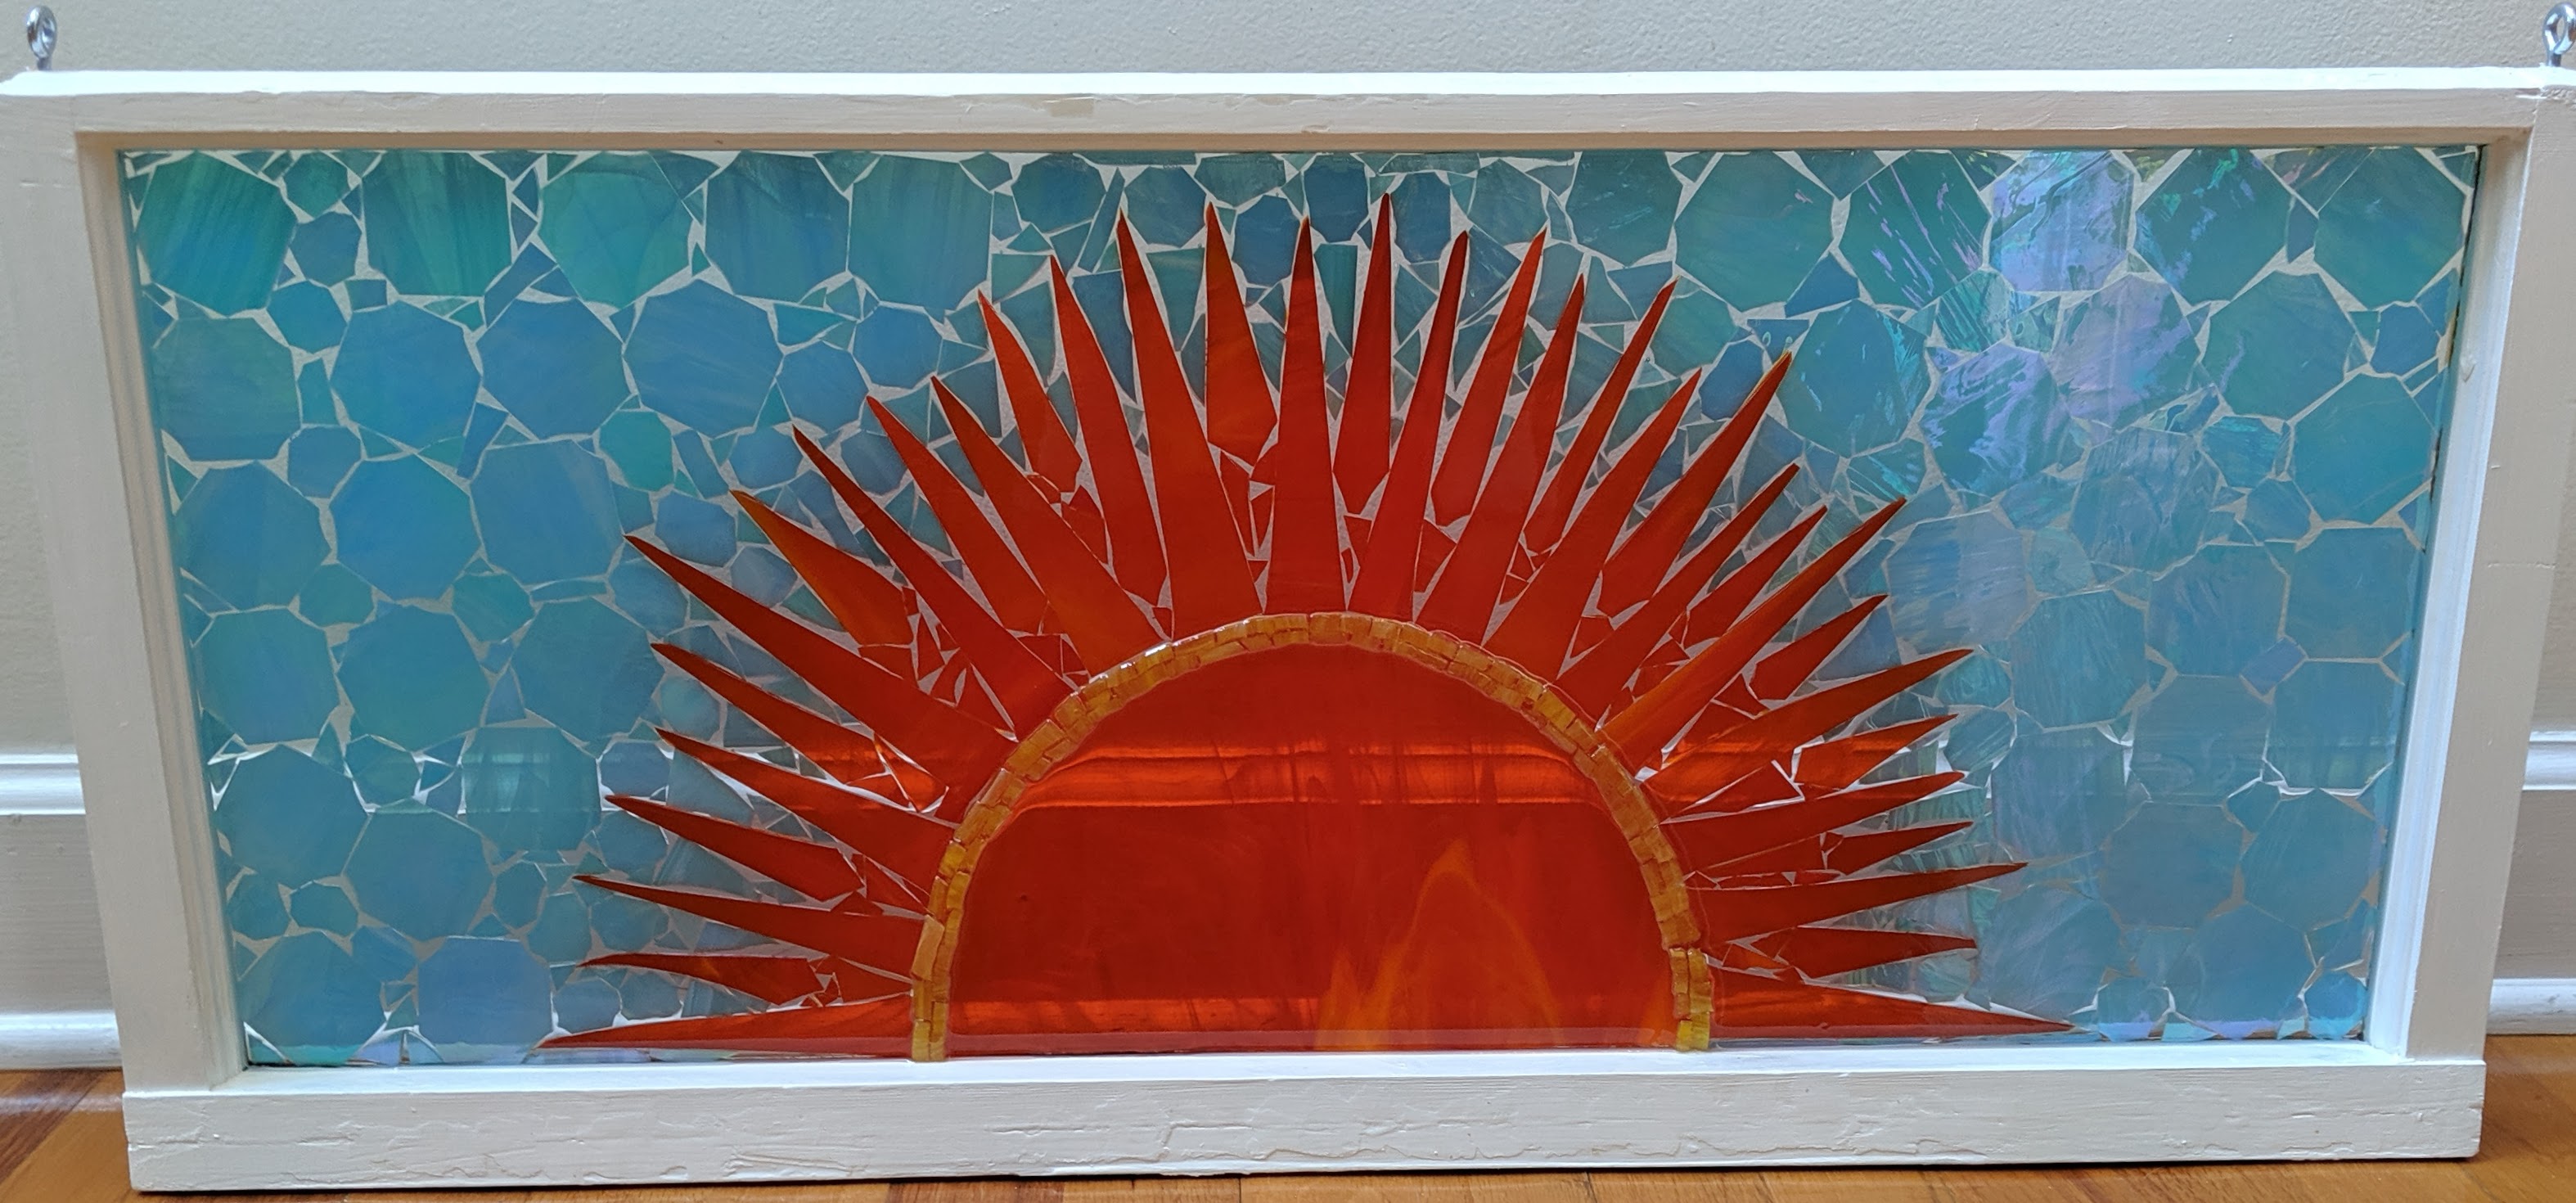
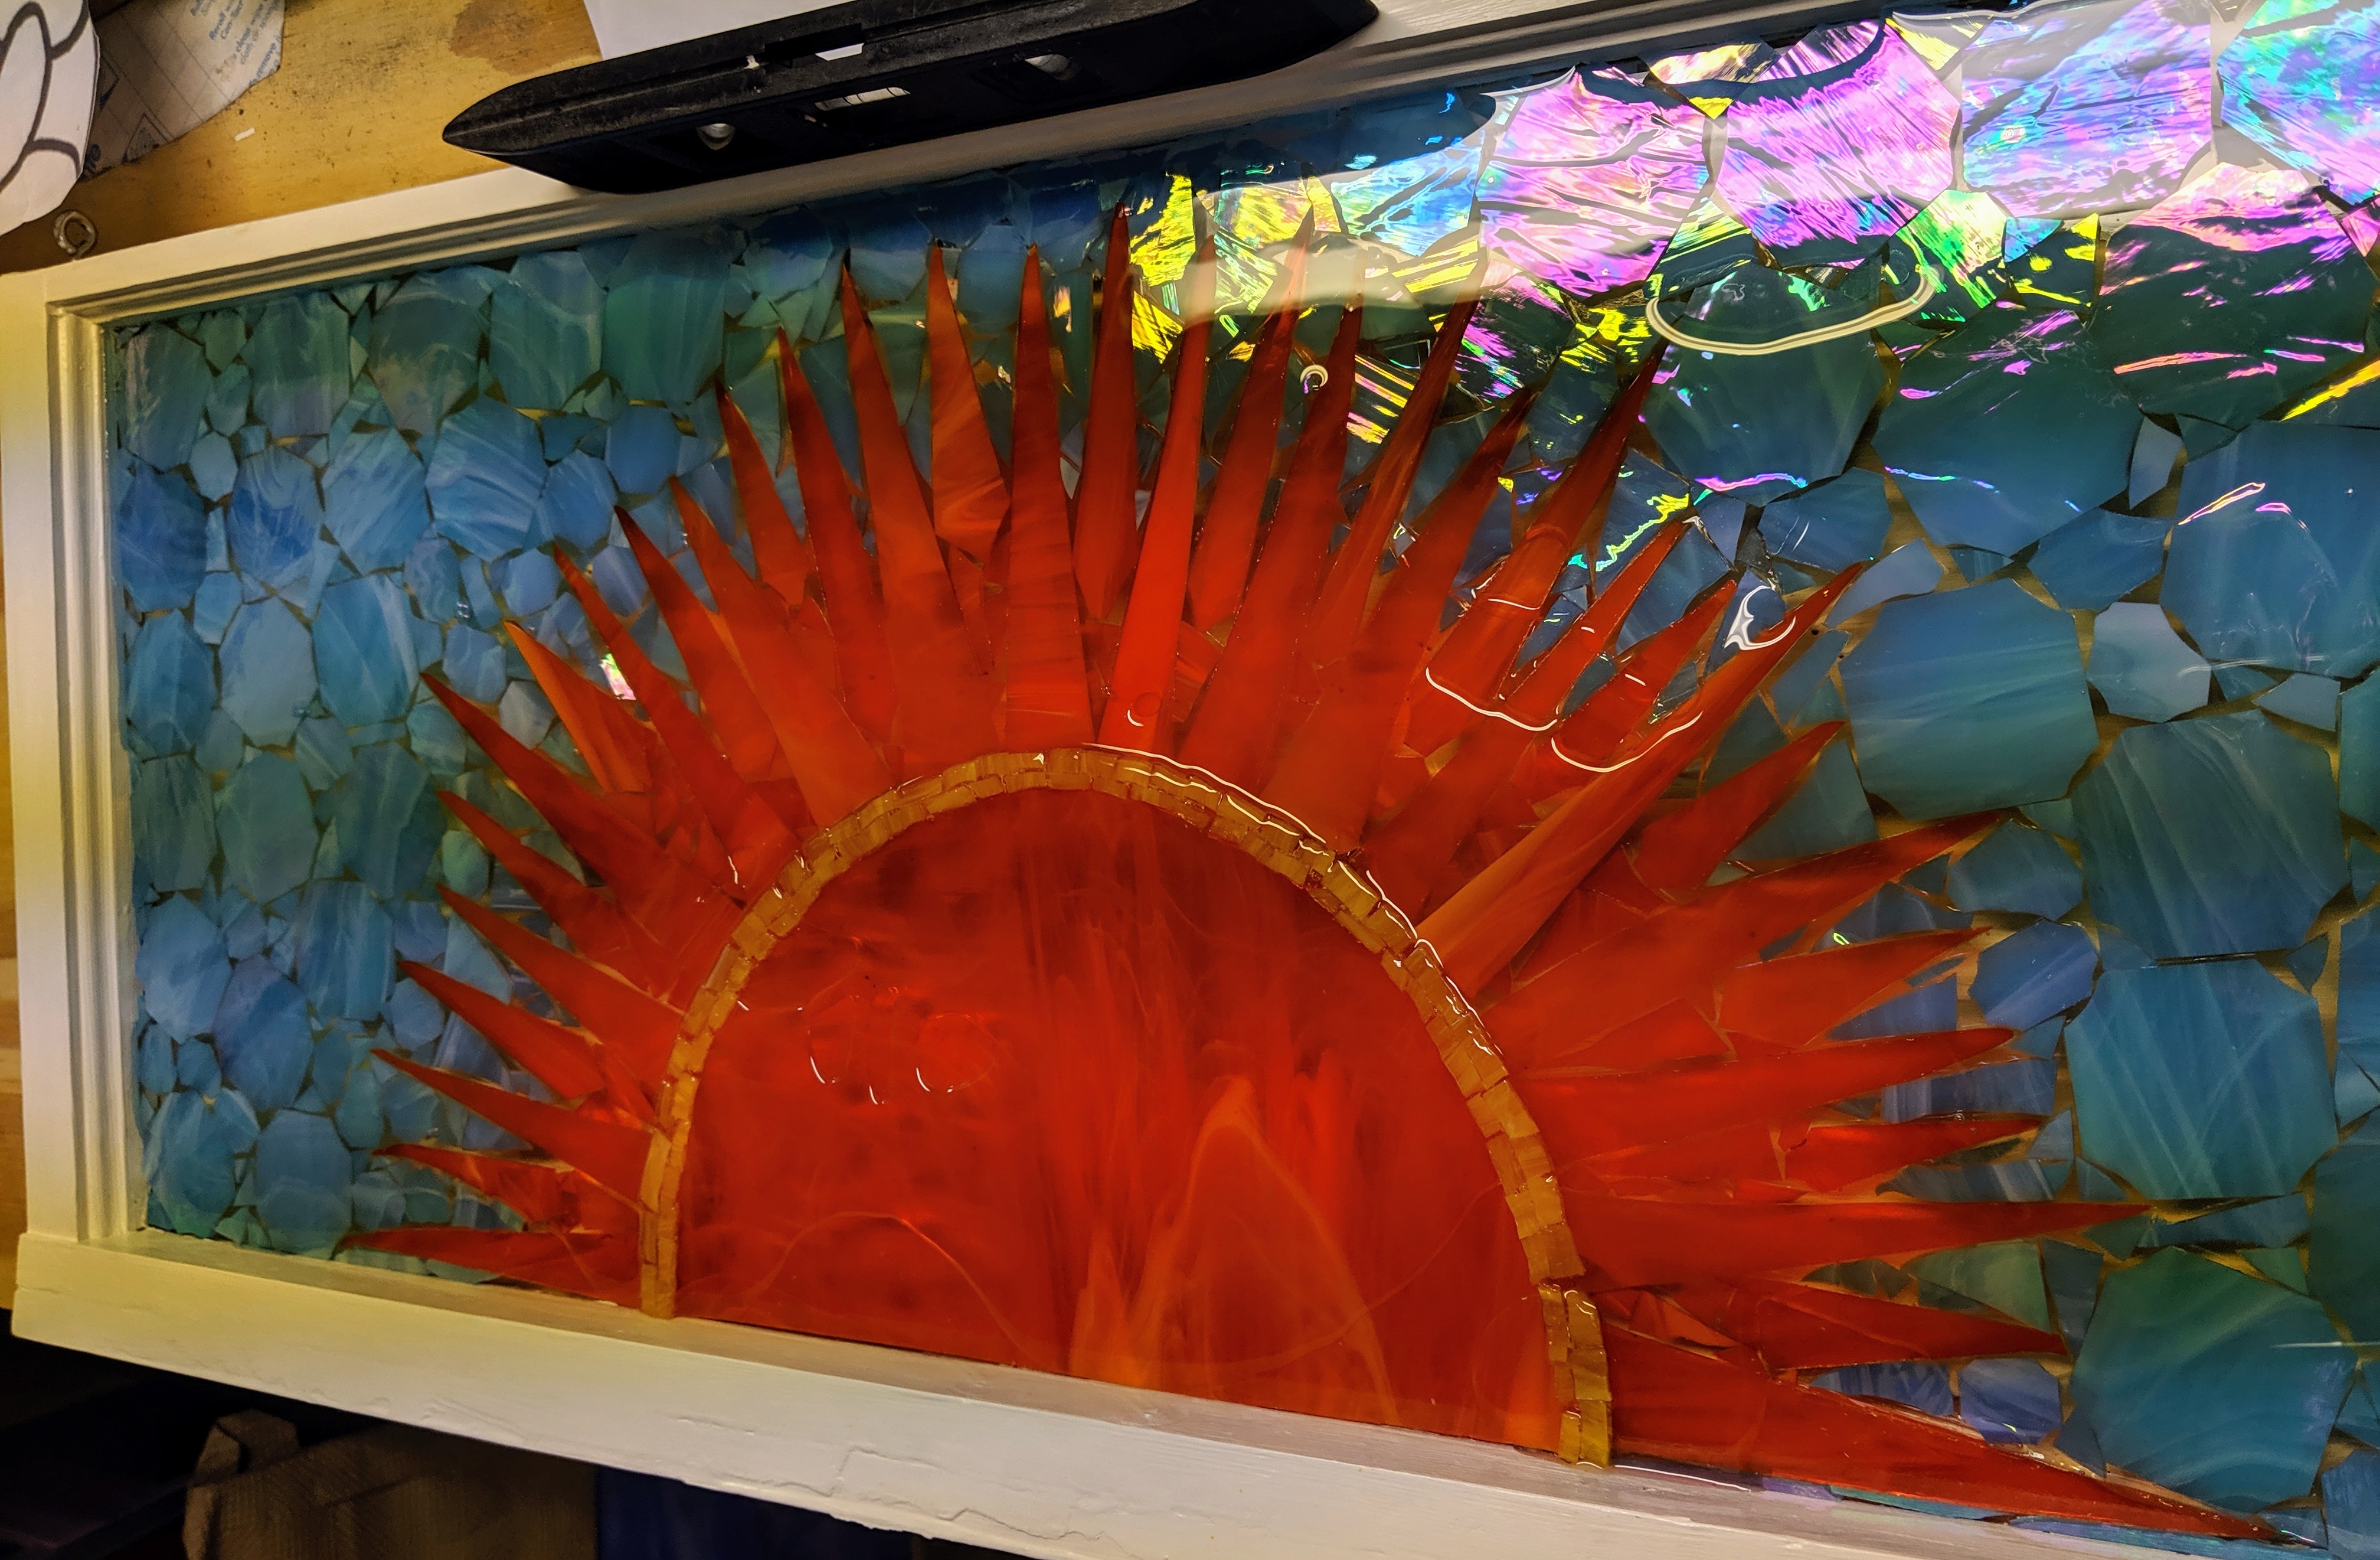
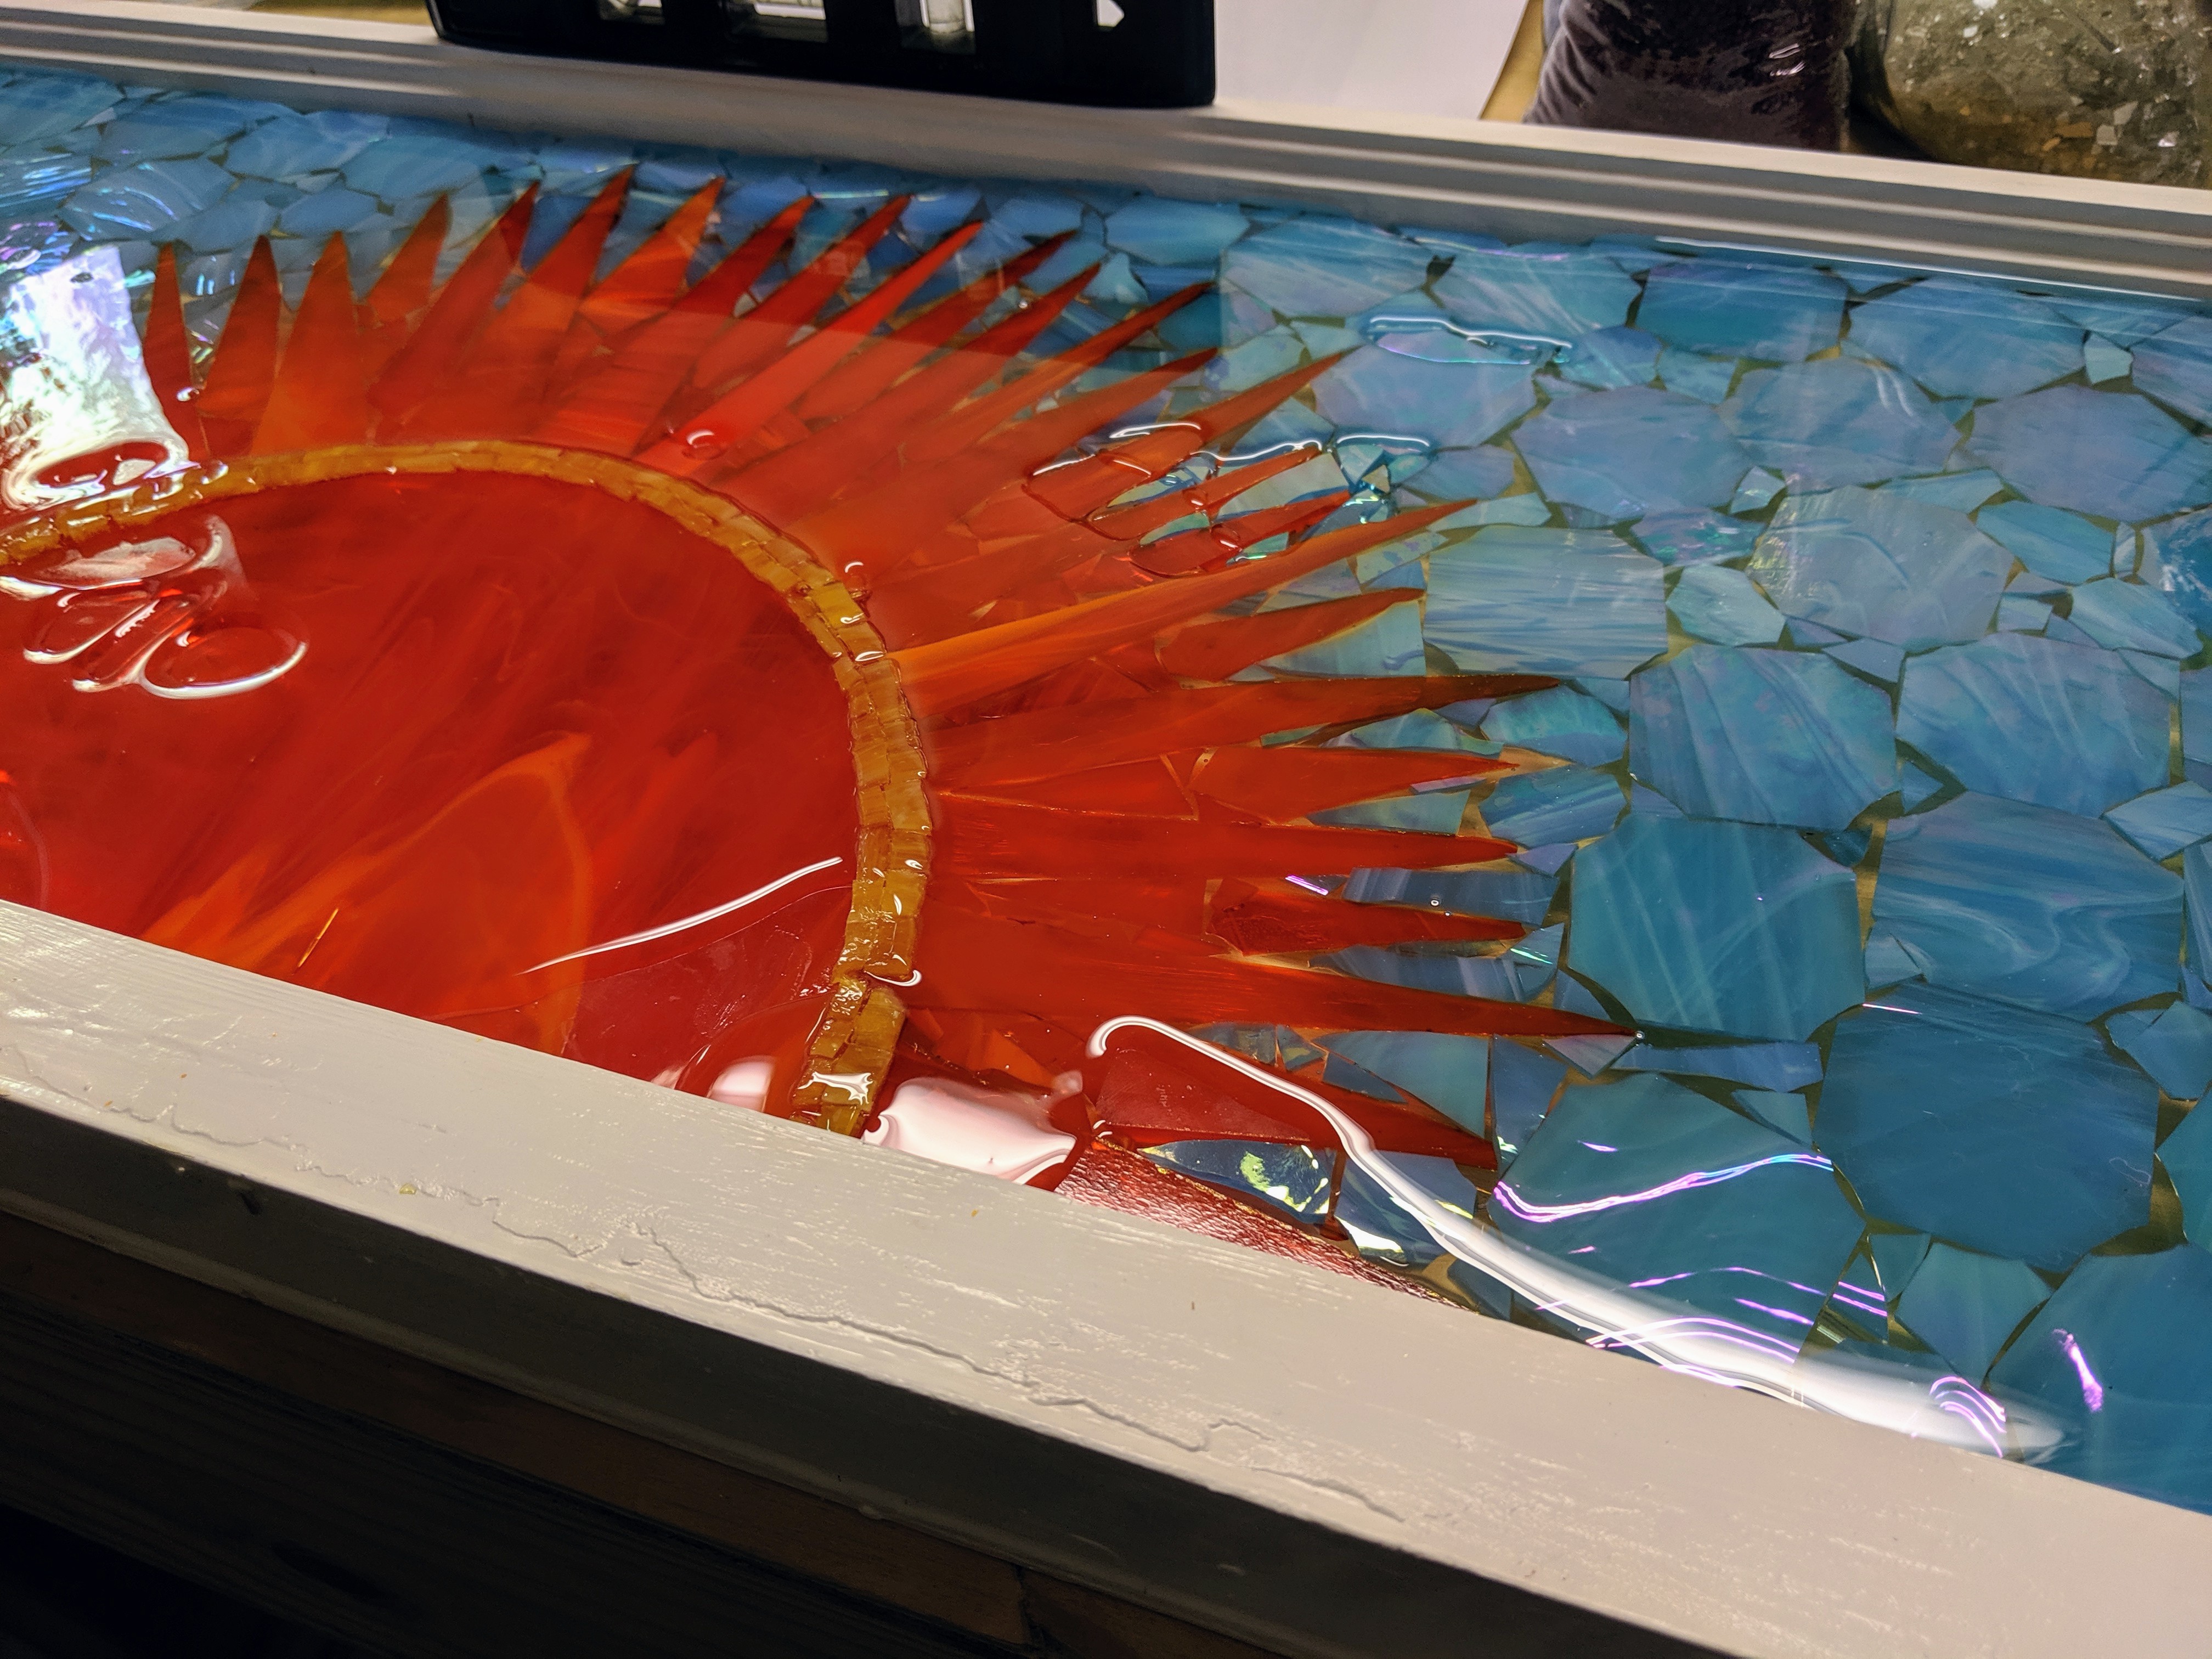
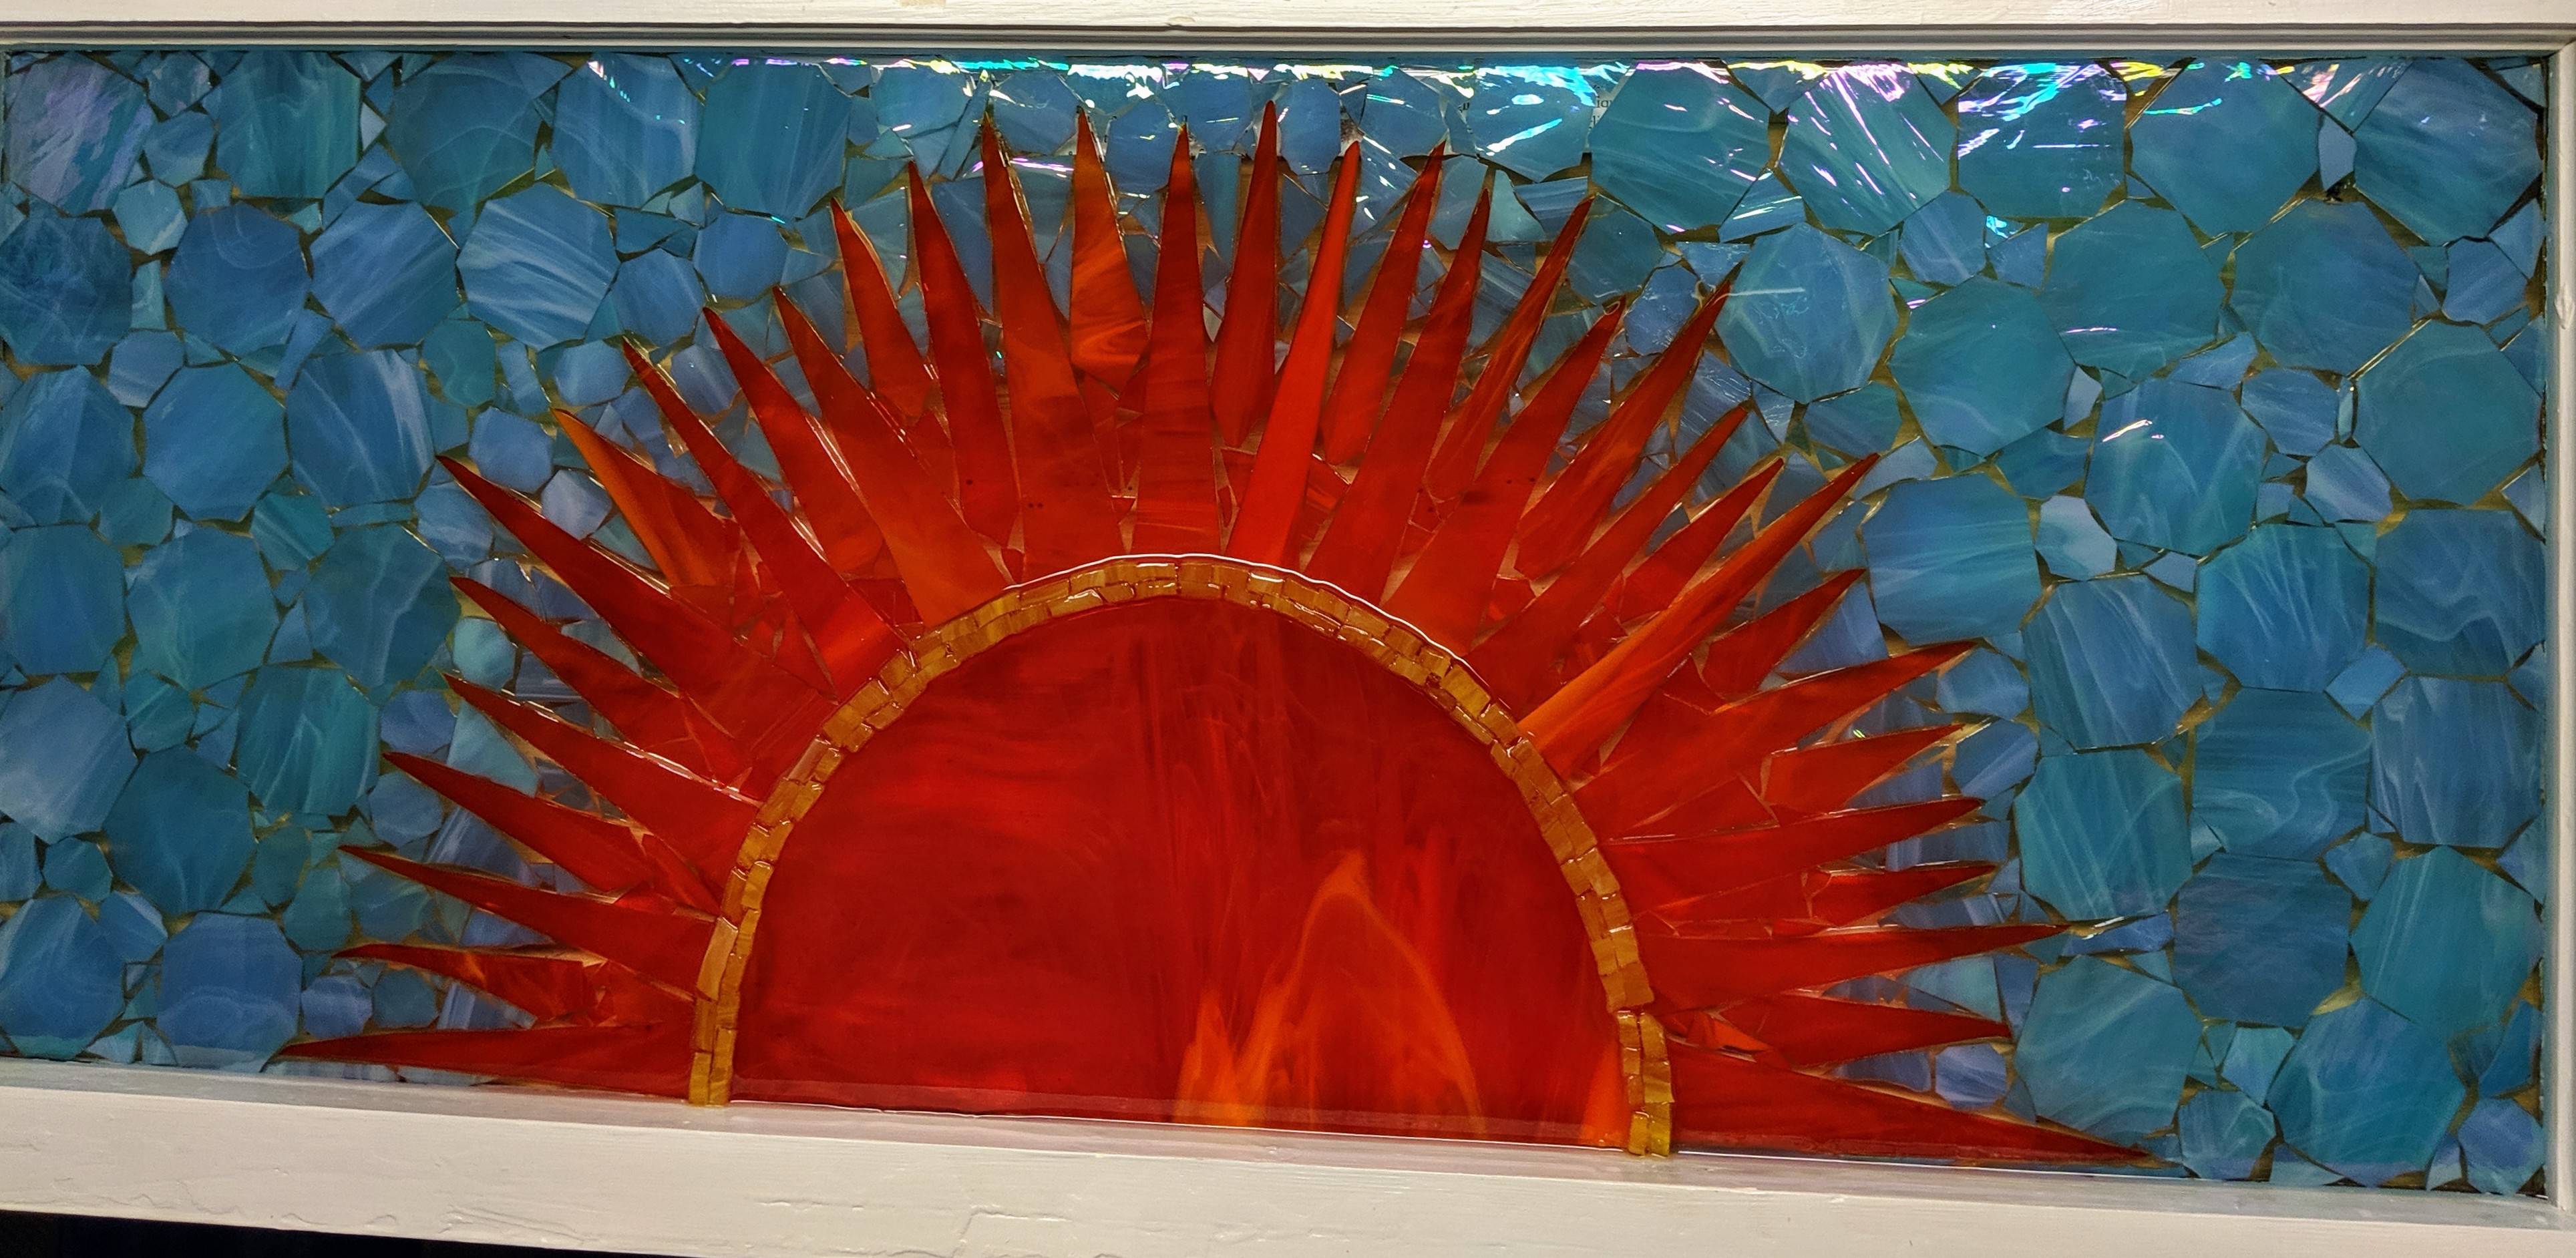
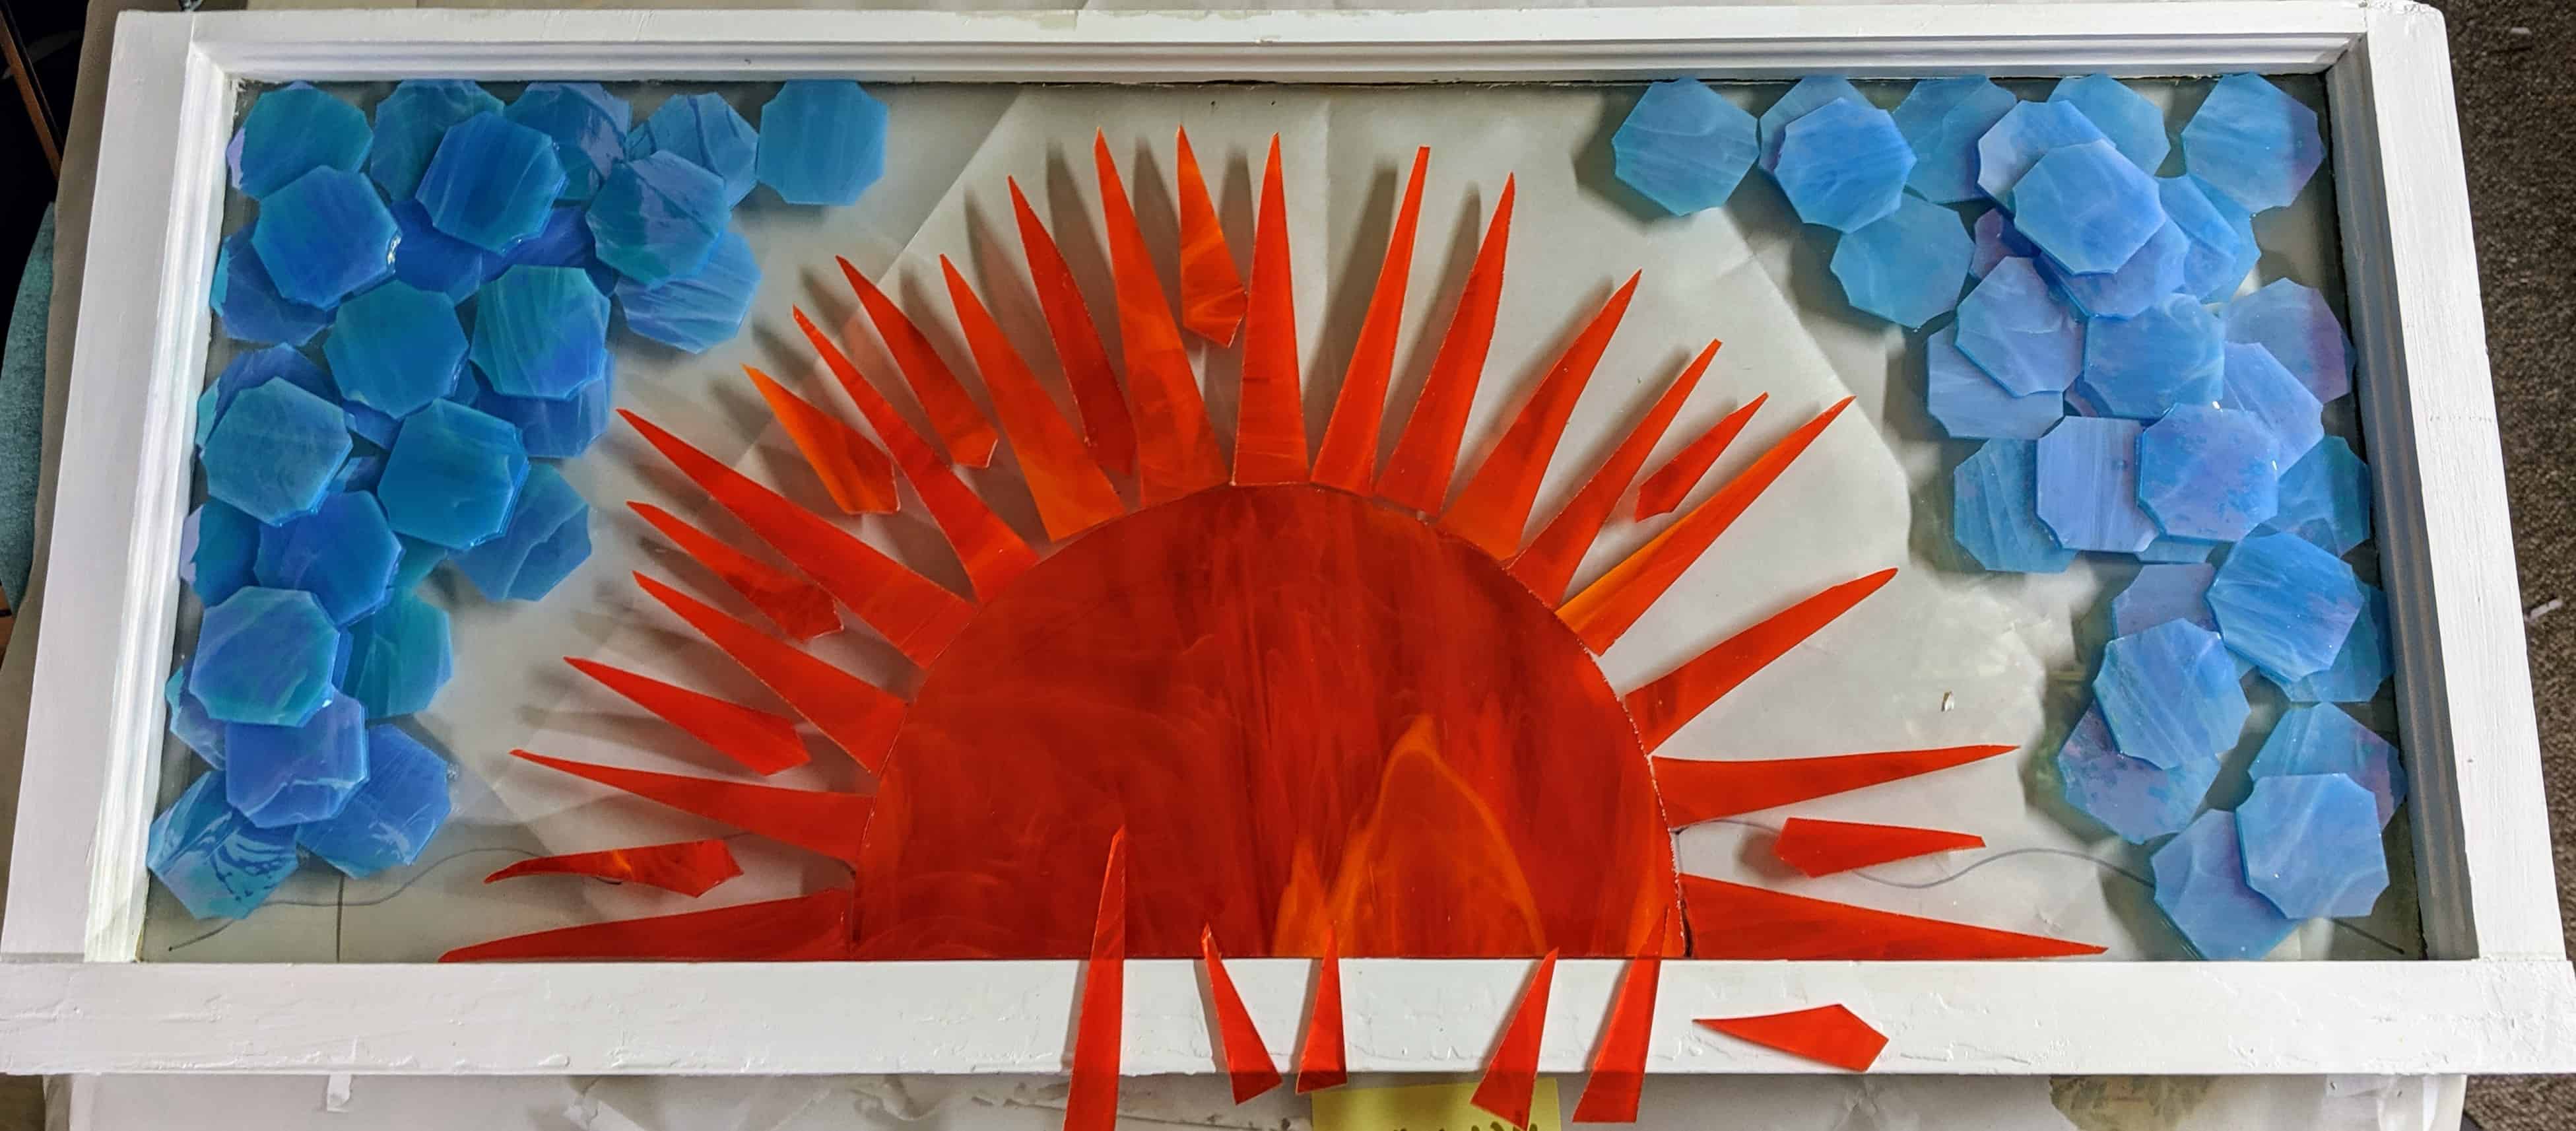
This Art Deco Sun / Moon mosaic is a good example of this type of glass:
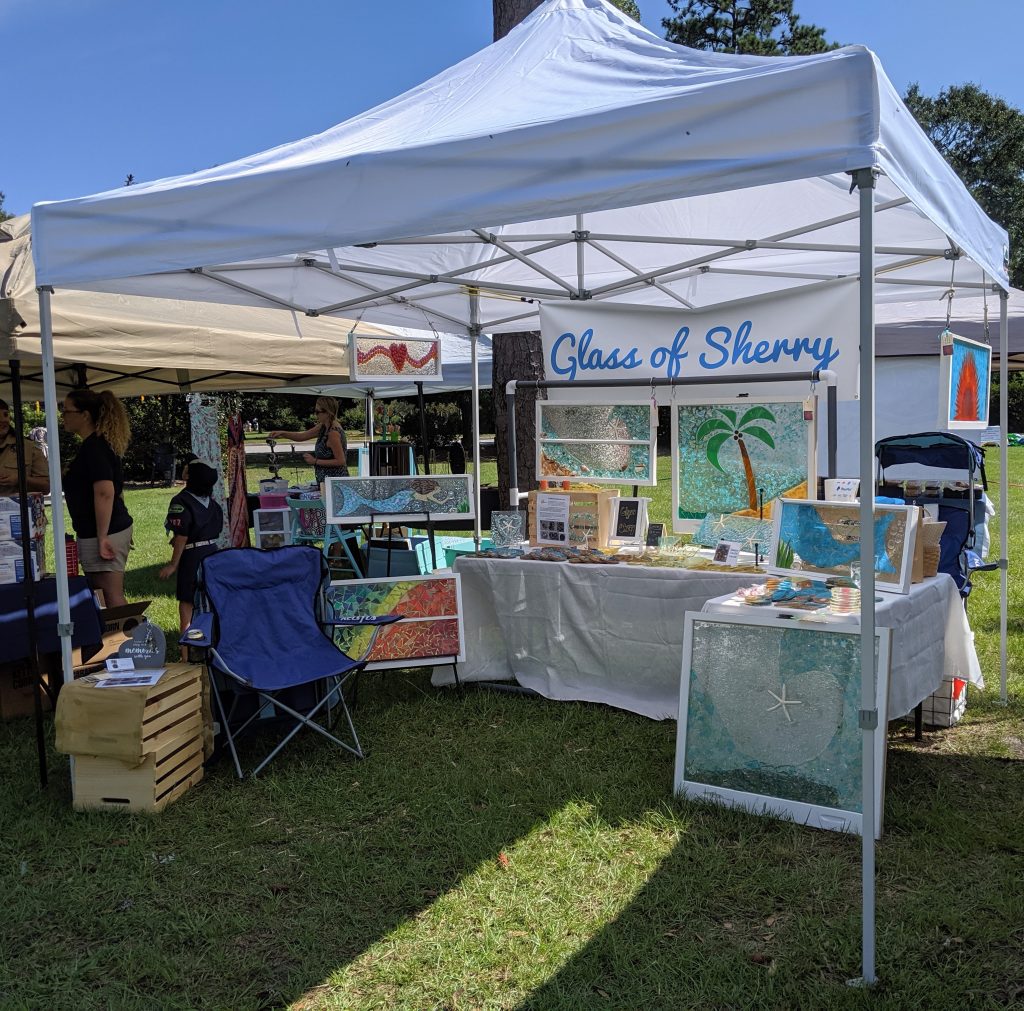
I’ll be at the Farmers Market in Park Circle again tomorrow, Thursday September 19th from 3-7 pm. Come by and visit me! Mention the code “VisitTen” to receive 10% off any in stock window!
I prepped two more half windows and am trying to figure out what to put in the first one. I have a lot of beach / sea themed mosaics on hand, so I think I will do something different with this one. I love this dichroic glass, so I think I will start with it and see where it takes me – sort of a Ribbon of Light.
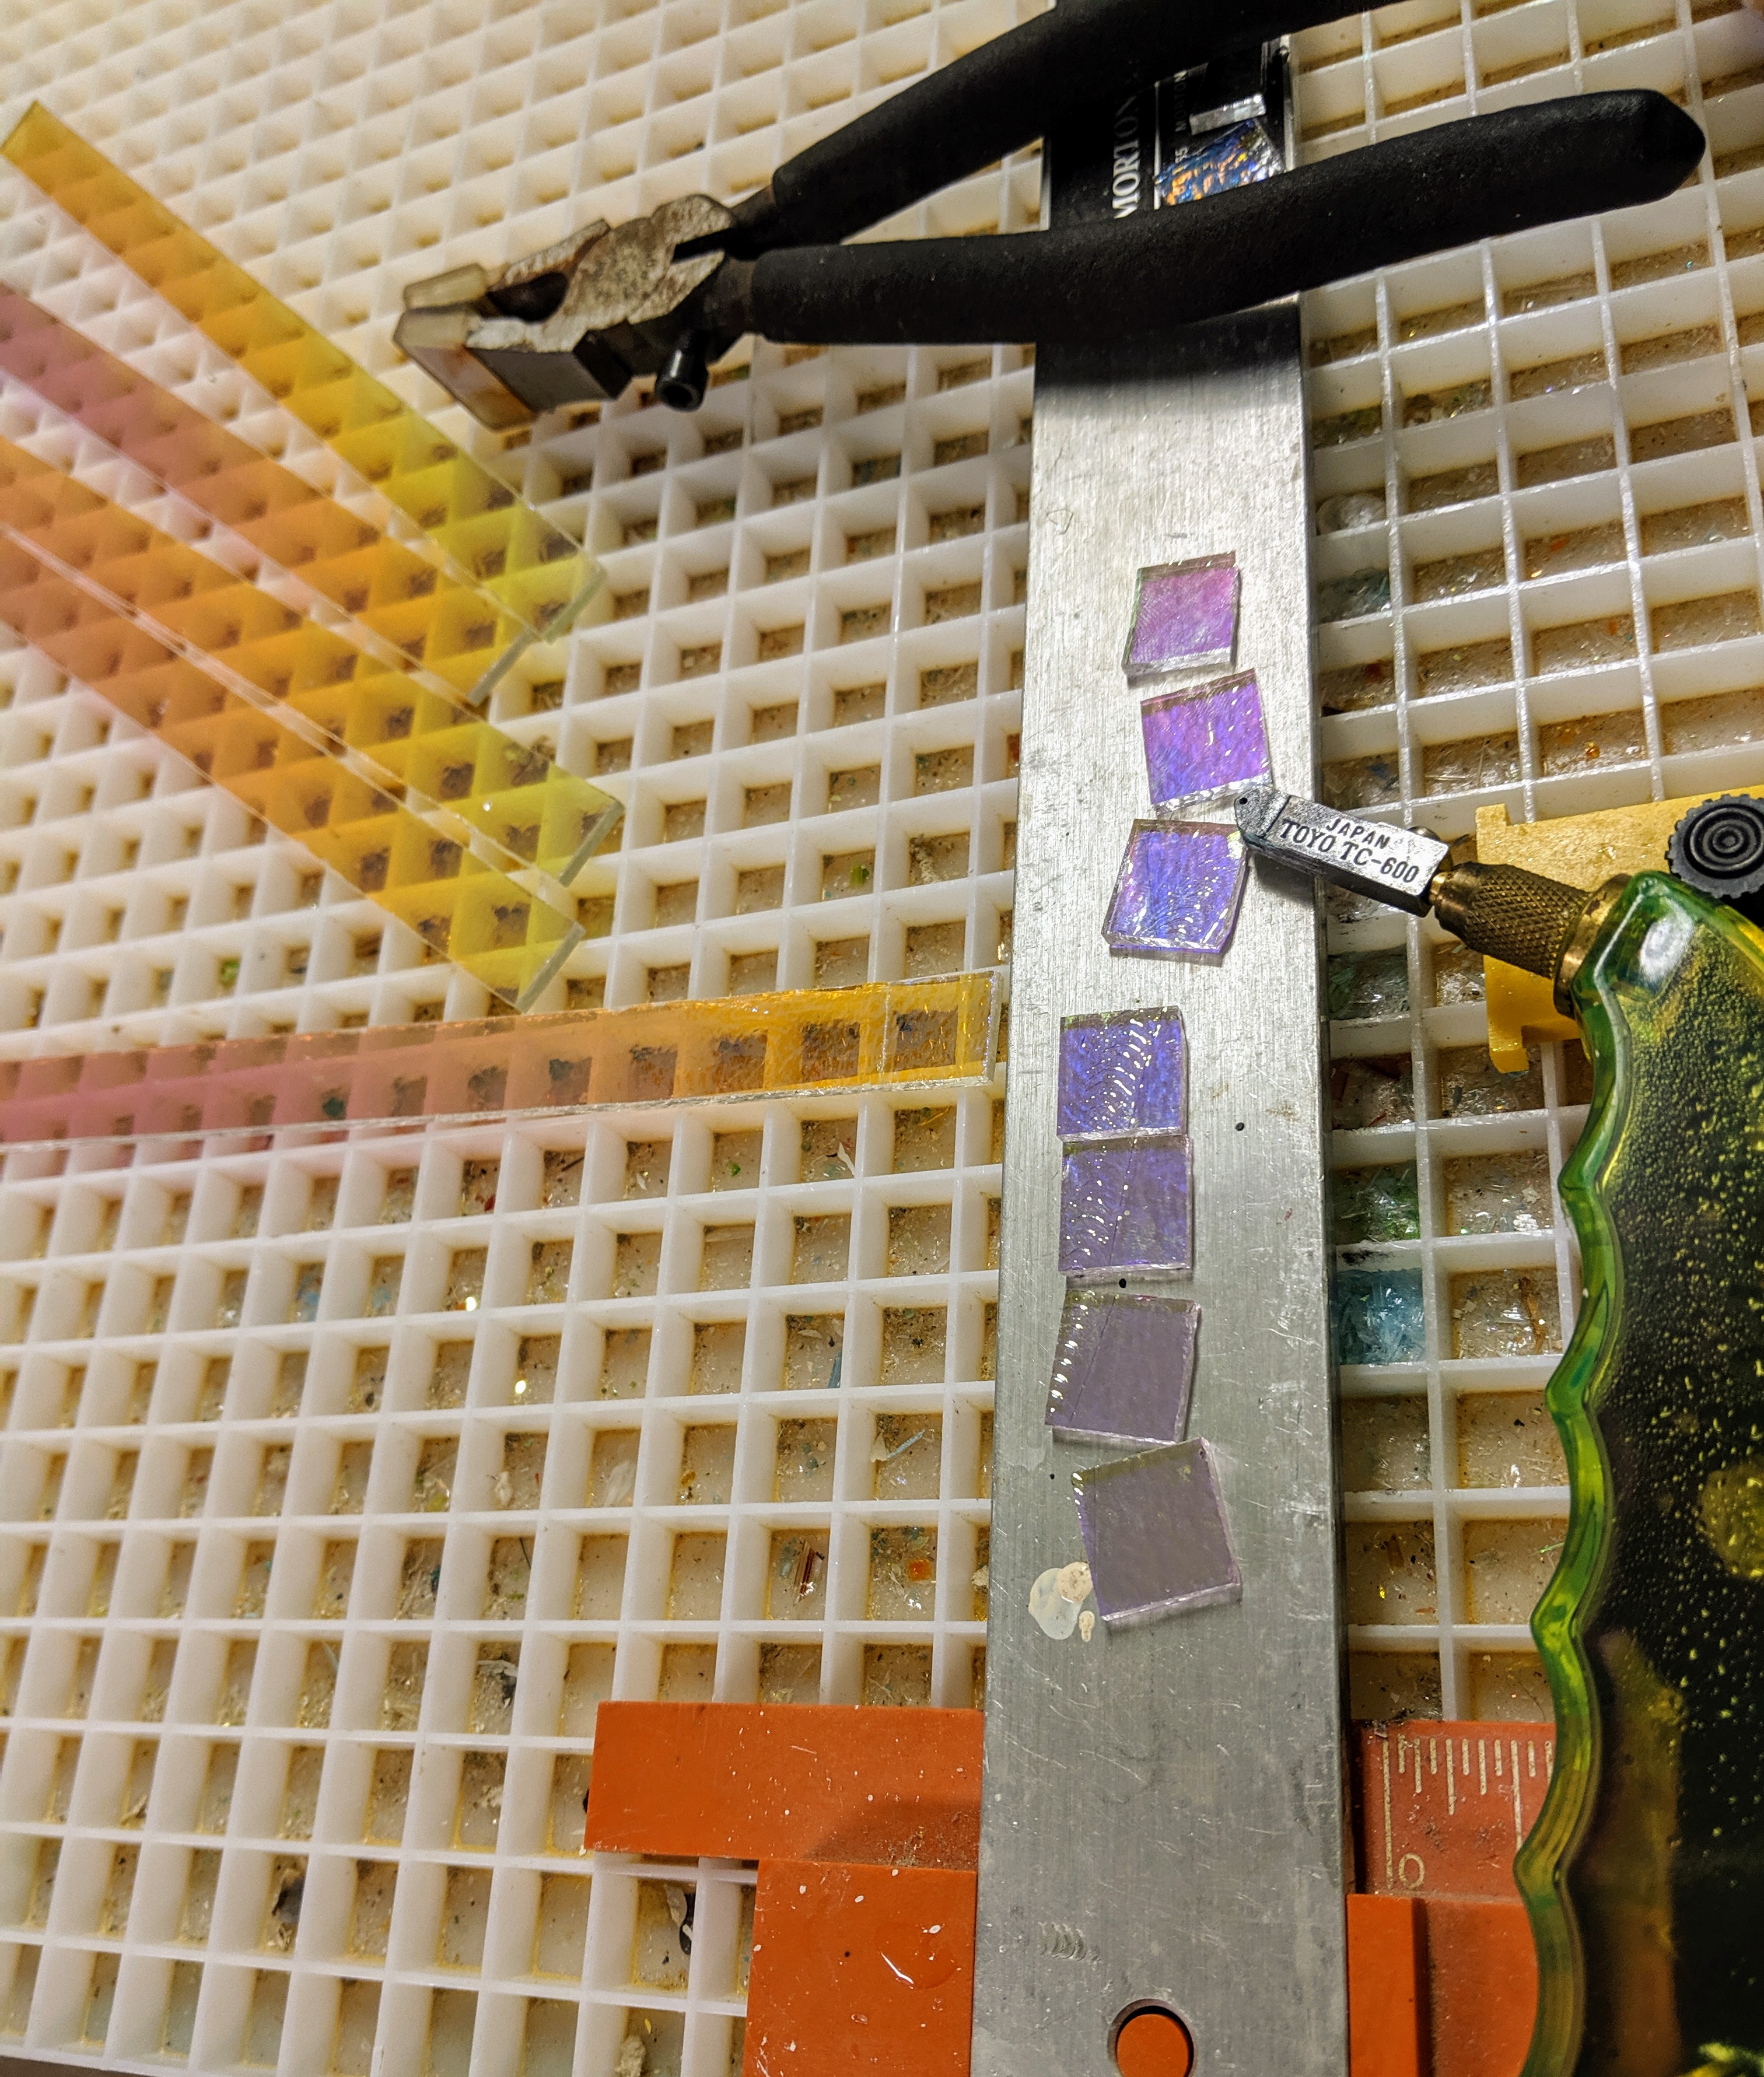
Cutting the large sheet of dichroic glass into strips.
Cutting the strips into squares.
I like the idea of having all uniform square pieces for the “ribbon” part of the mosaic, but when I lay them out, I have the urge to make a lot of them trapezoidal so the curves are smoother. We’ll see if the urge wins out or not. I also broke down and ordered a light box, as I can’t tell what color the dichro pieces will be without one (well, not without holding each individual piece up to the light source, which is too tedious with a 30″ window).
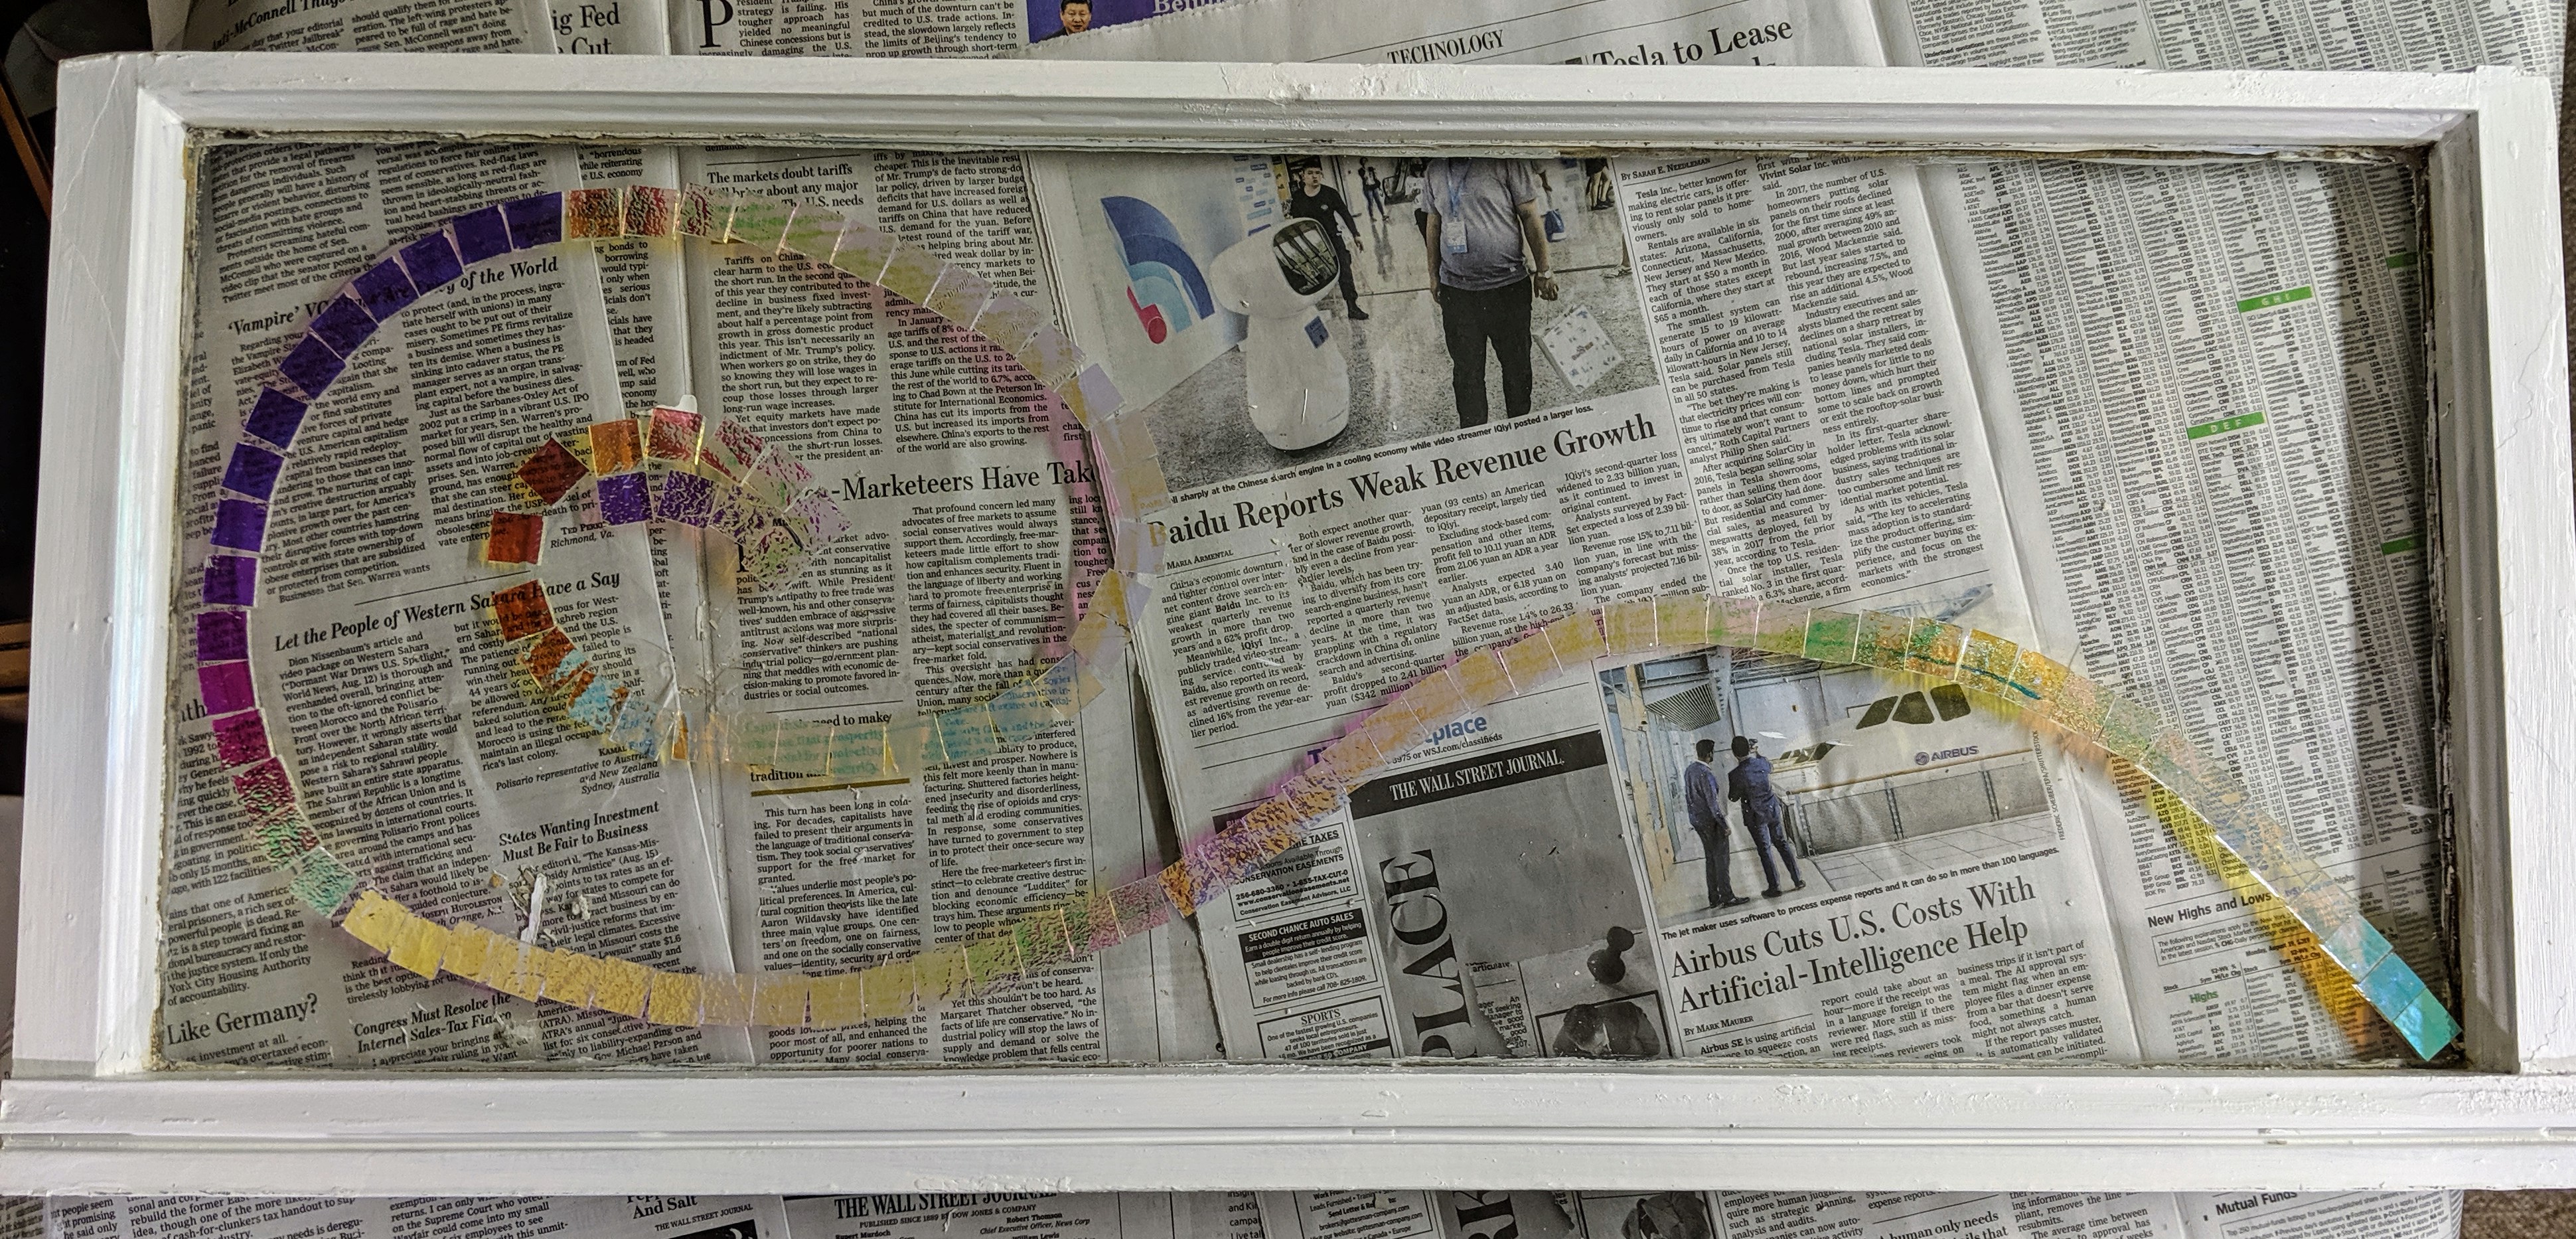
First draft of the “ribbon”.
This is just the first, very rough draft for this project. Still lots of adjustments to make and planning to do before any glue is involved!
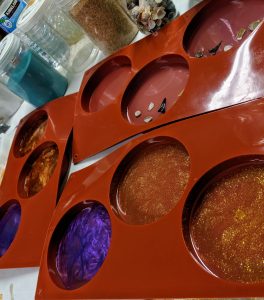
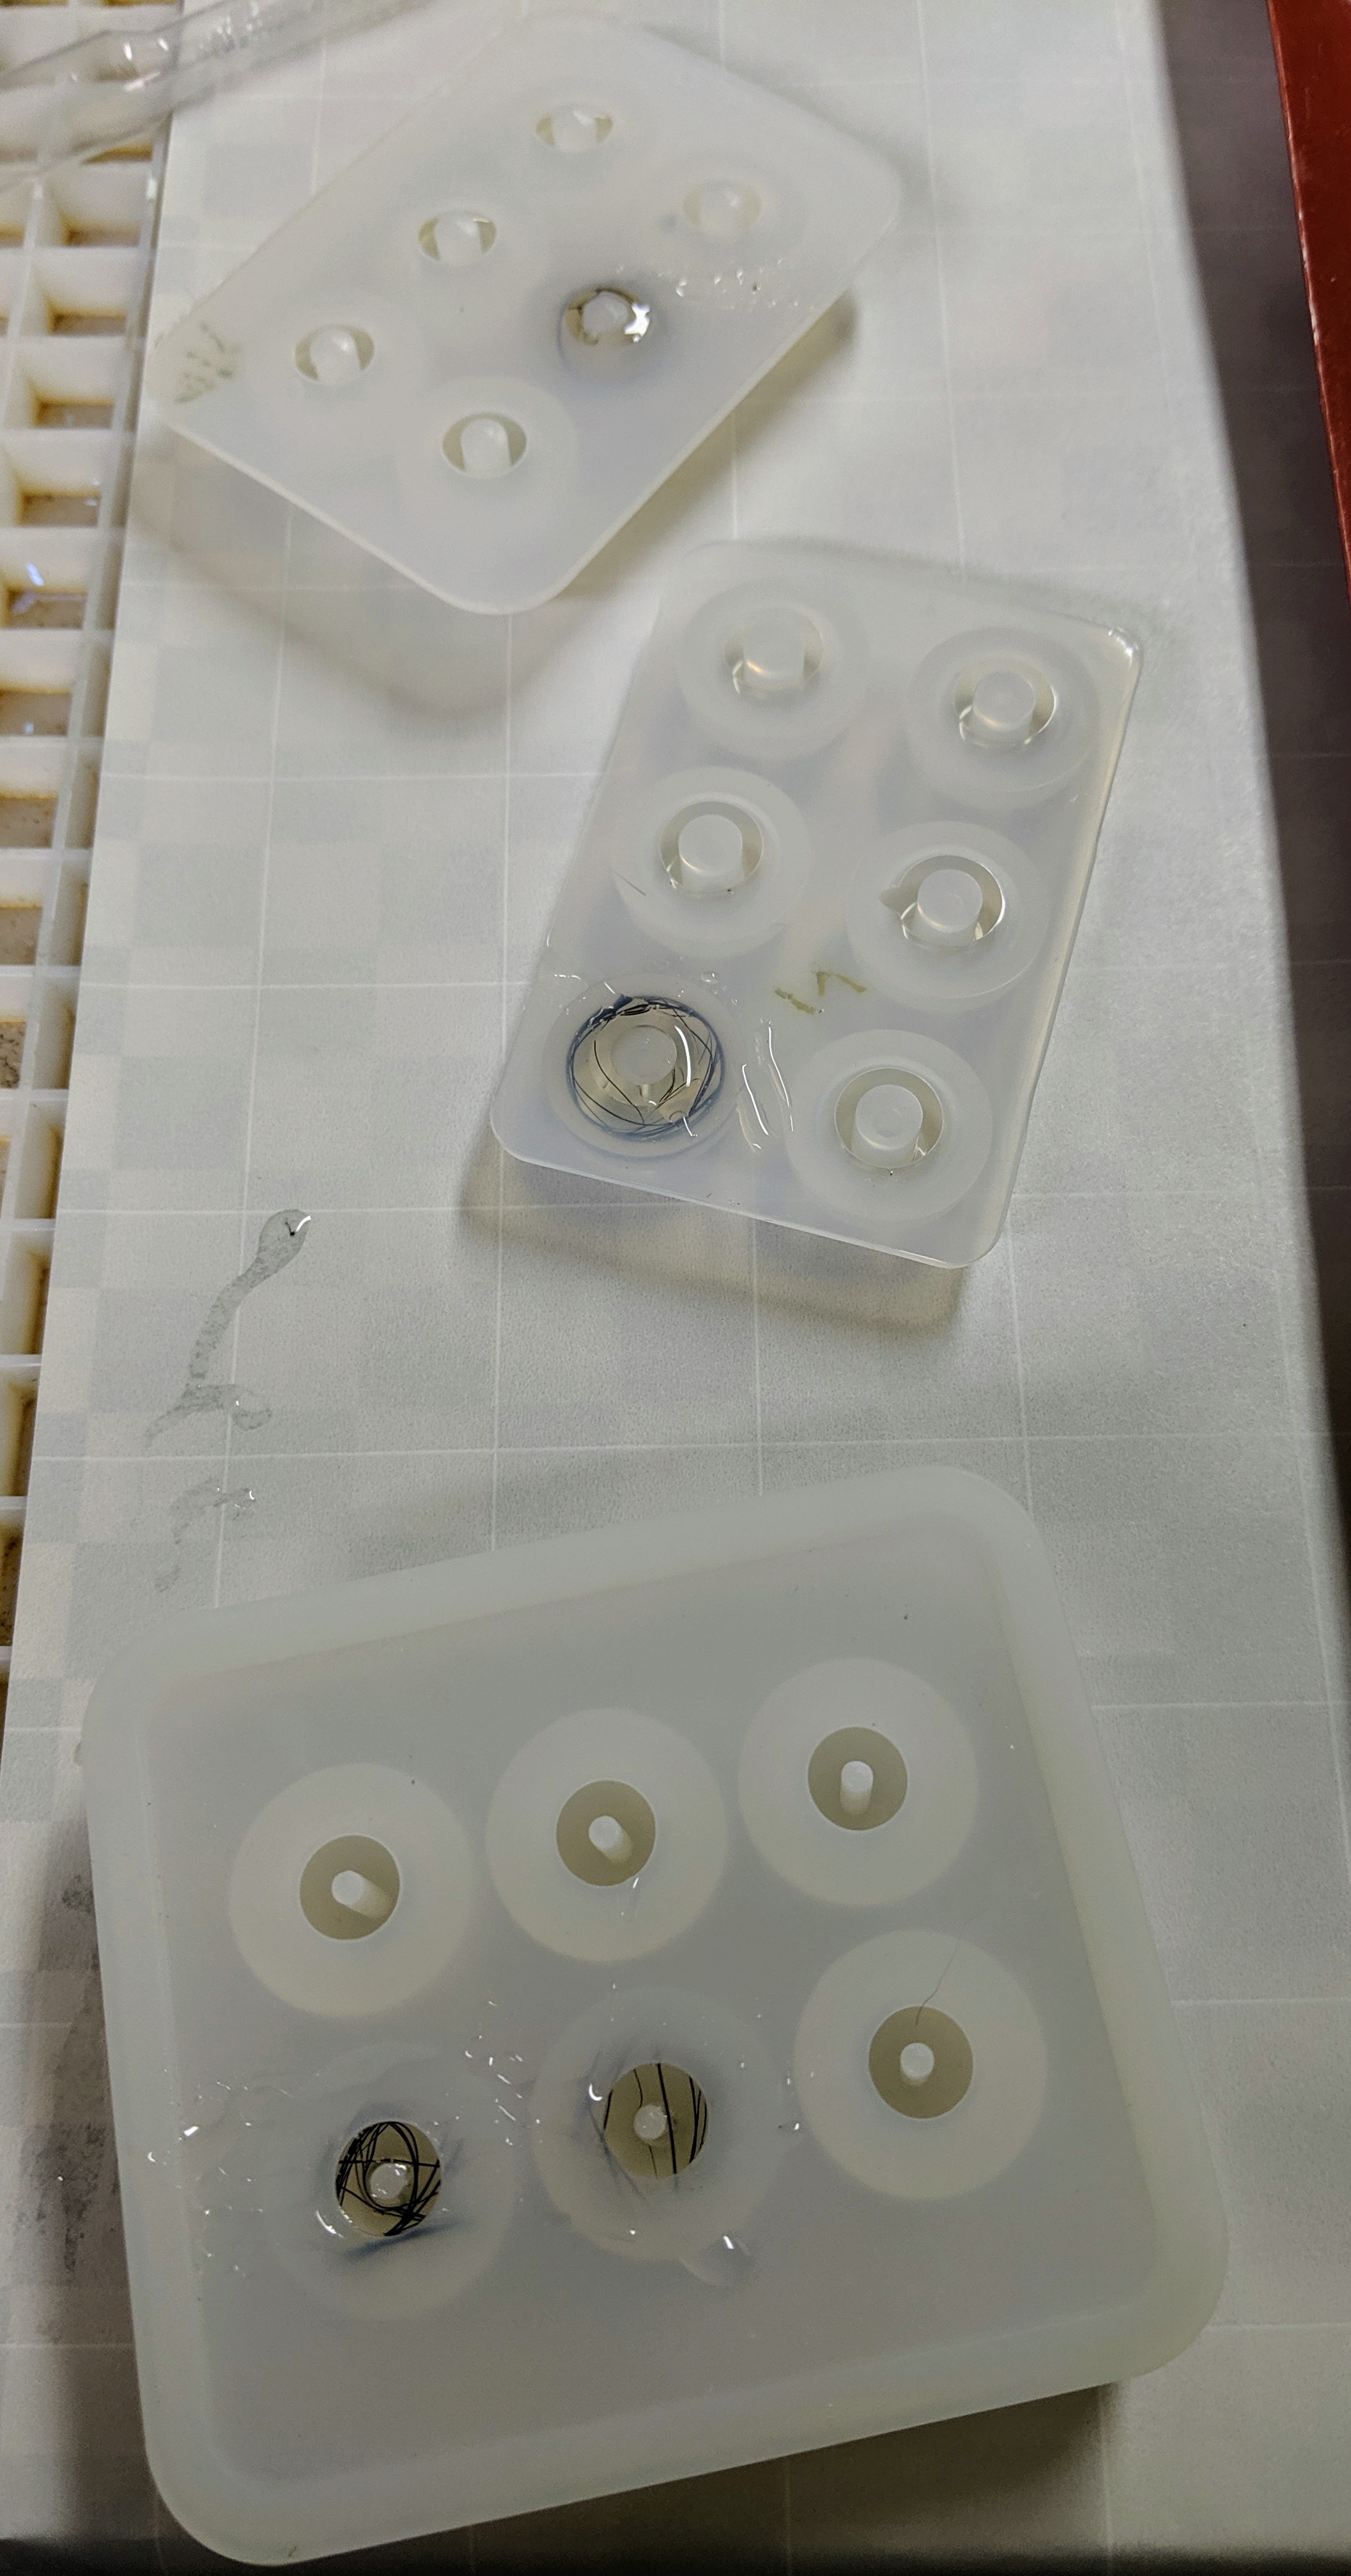
Since my coaster molds are a bit out of shape, I thought I would experiment with a couple of new colors of pigment I haven’t tried before while I wait for the new molds. I also wanted to make some other accent beads, so I thought this would be a good chance to try the colors in those molds as well.
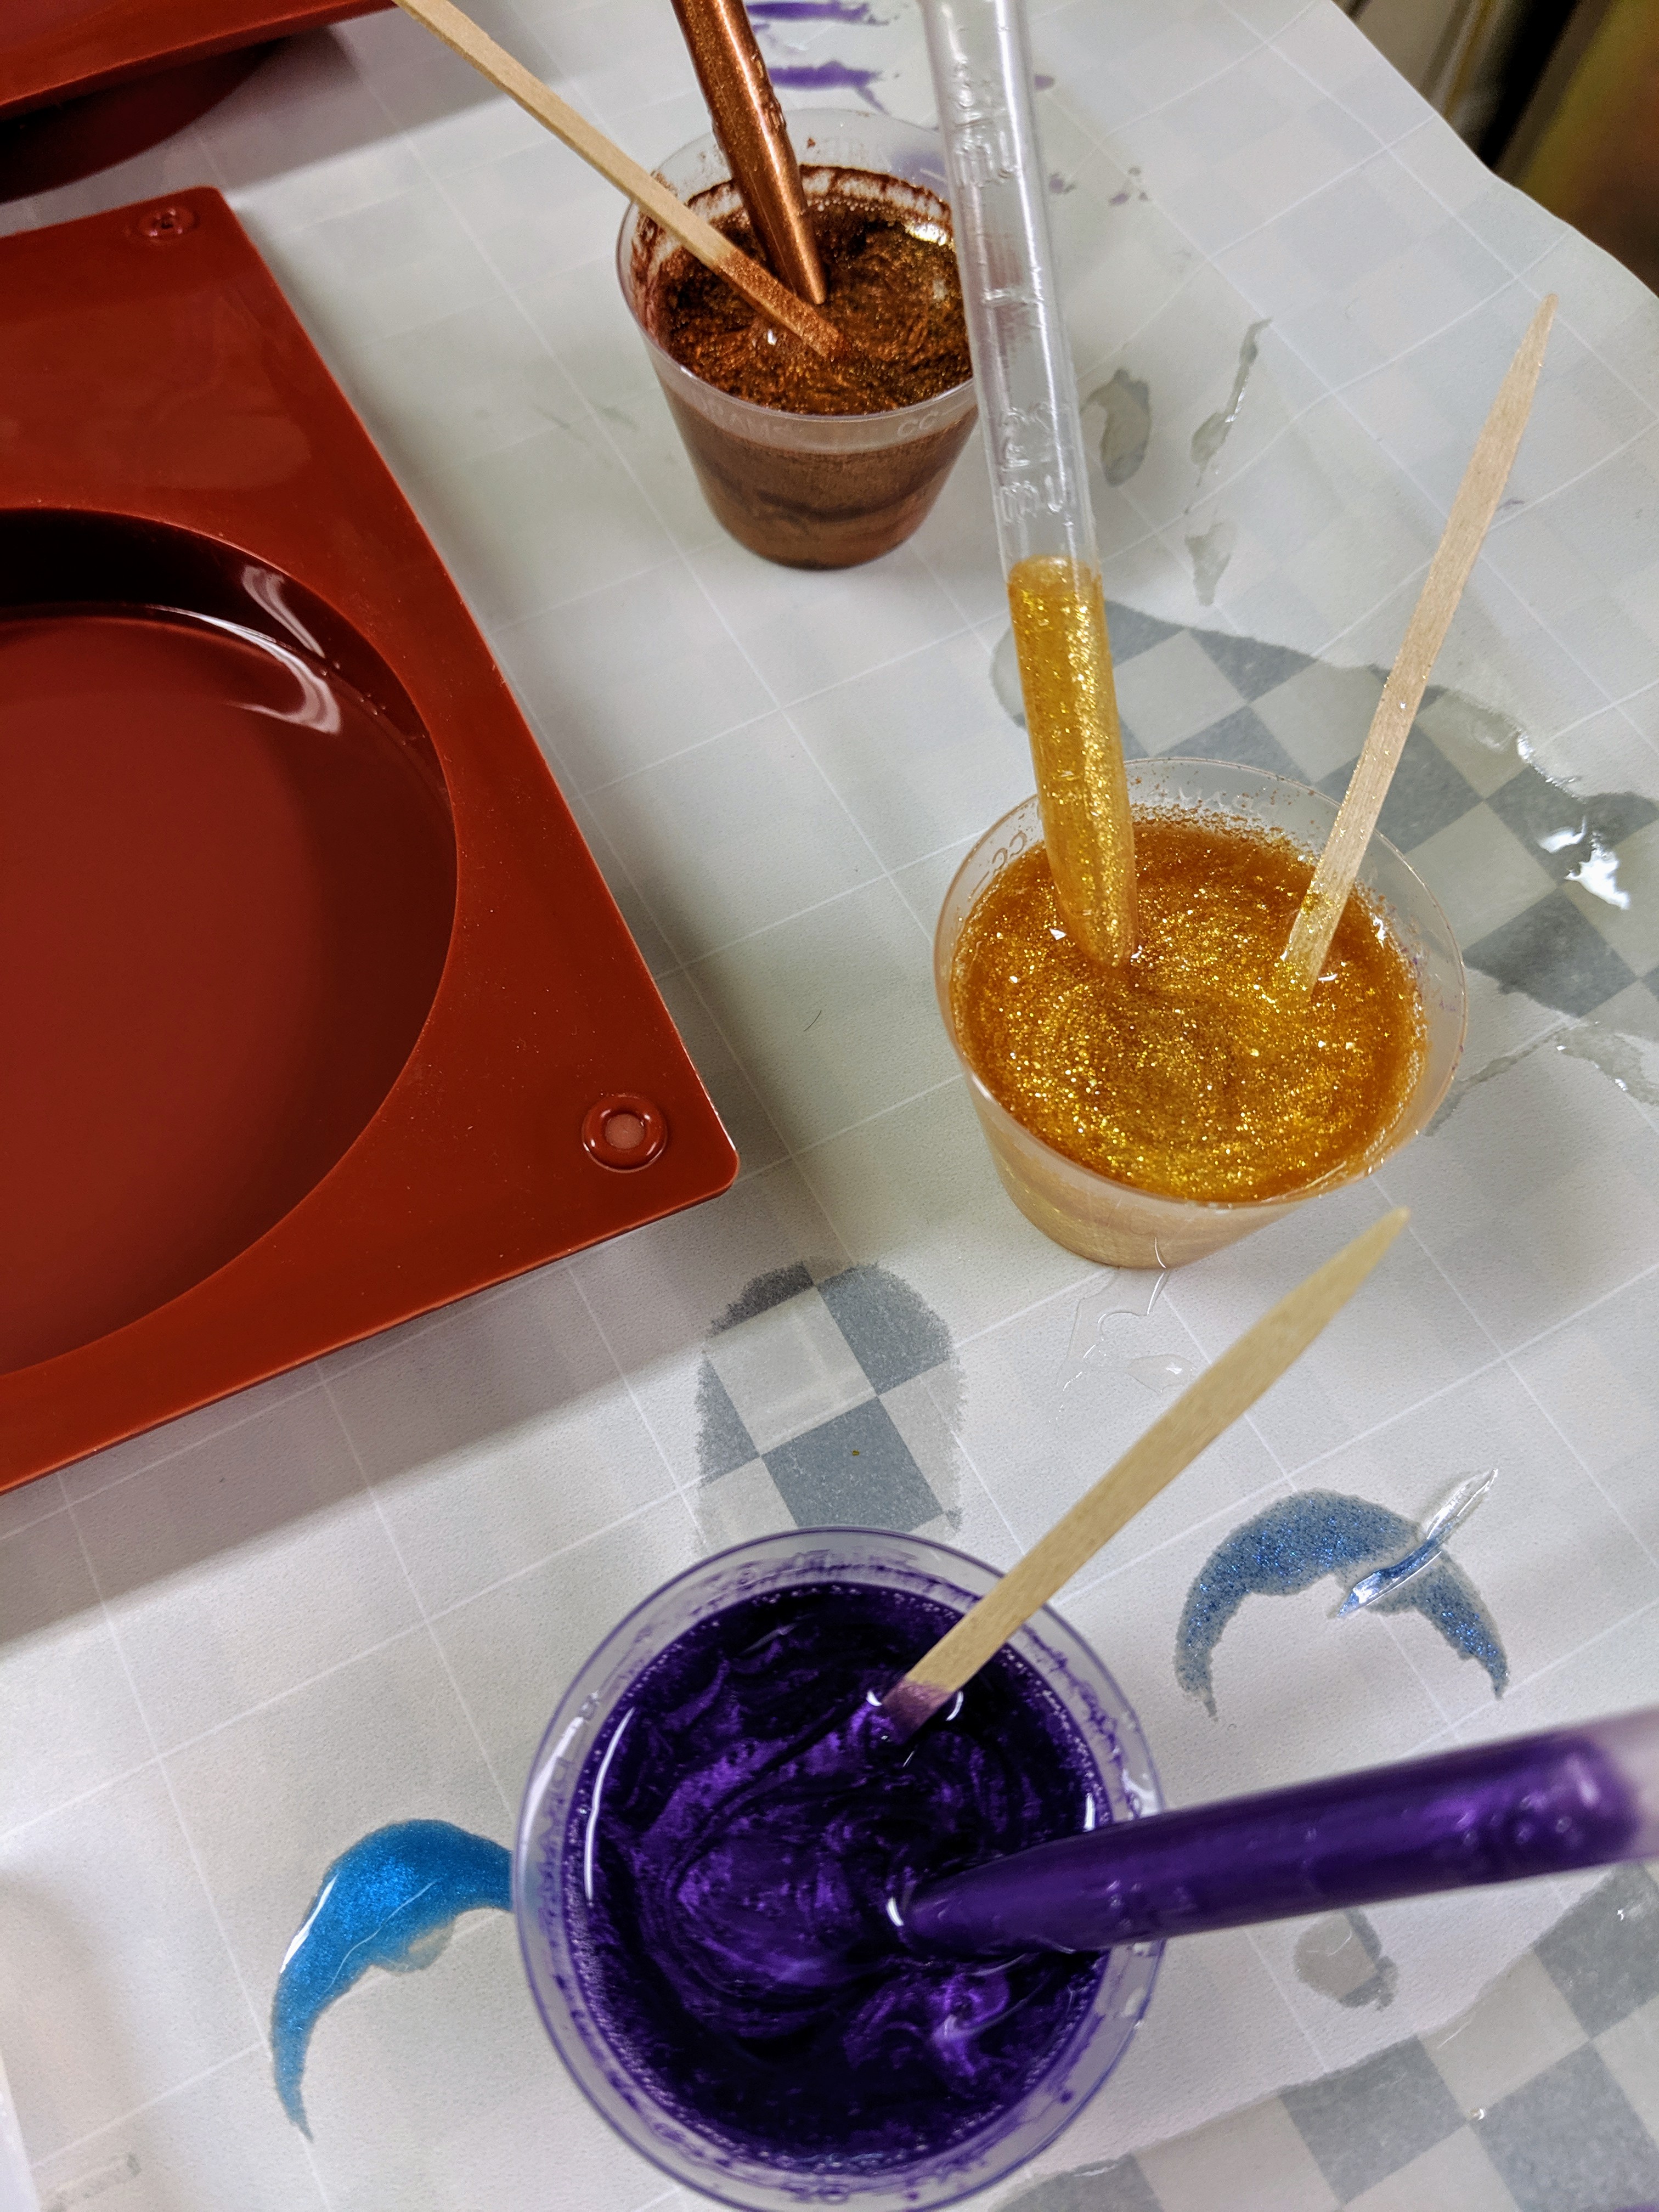
Mixing Pigments
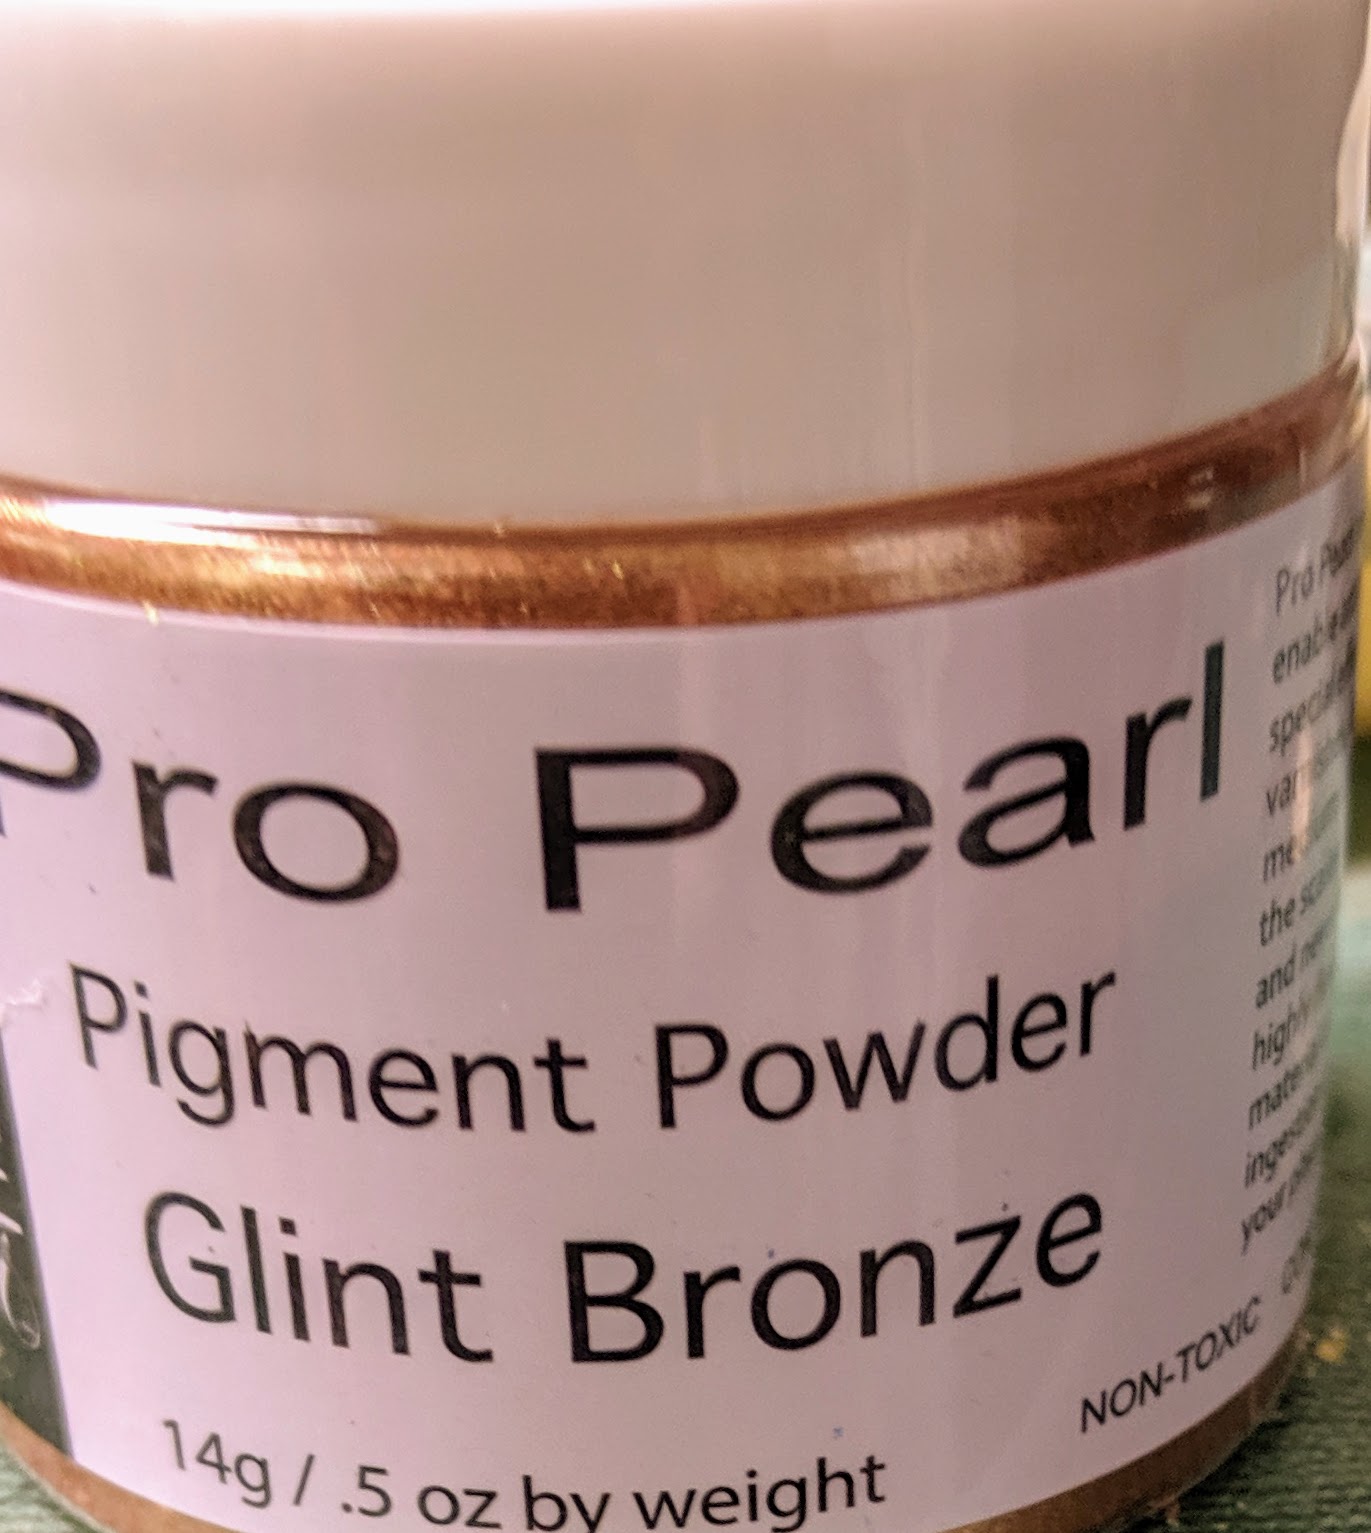
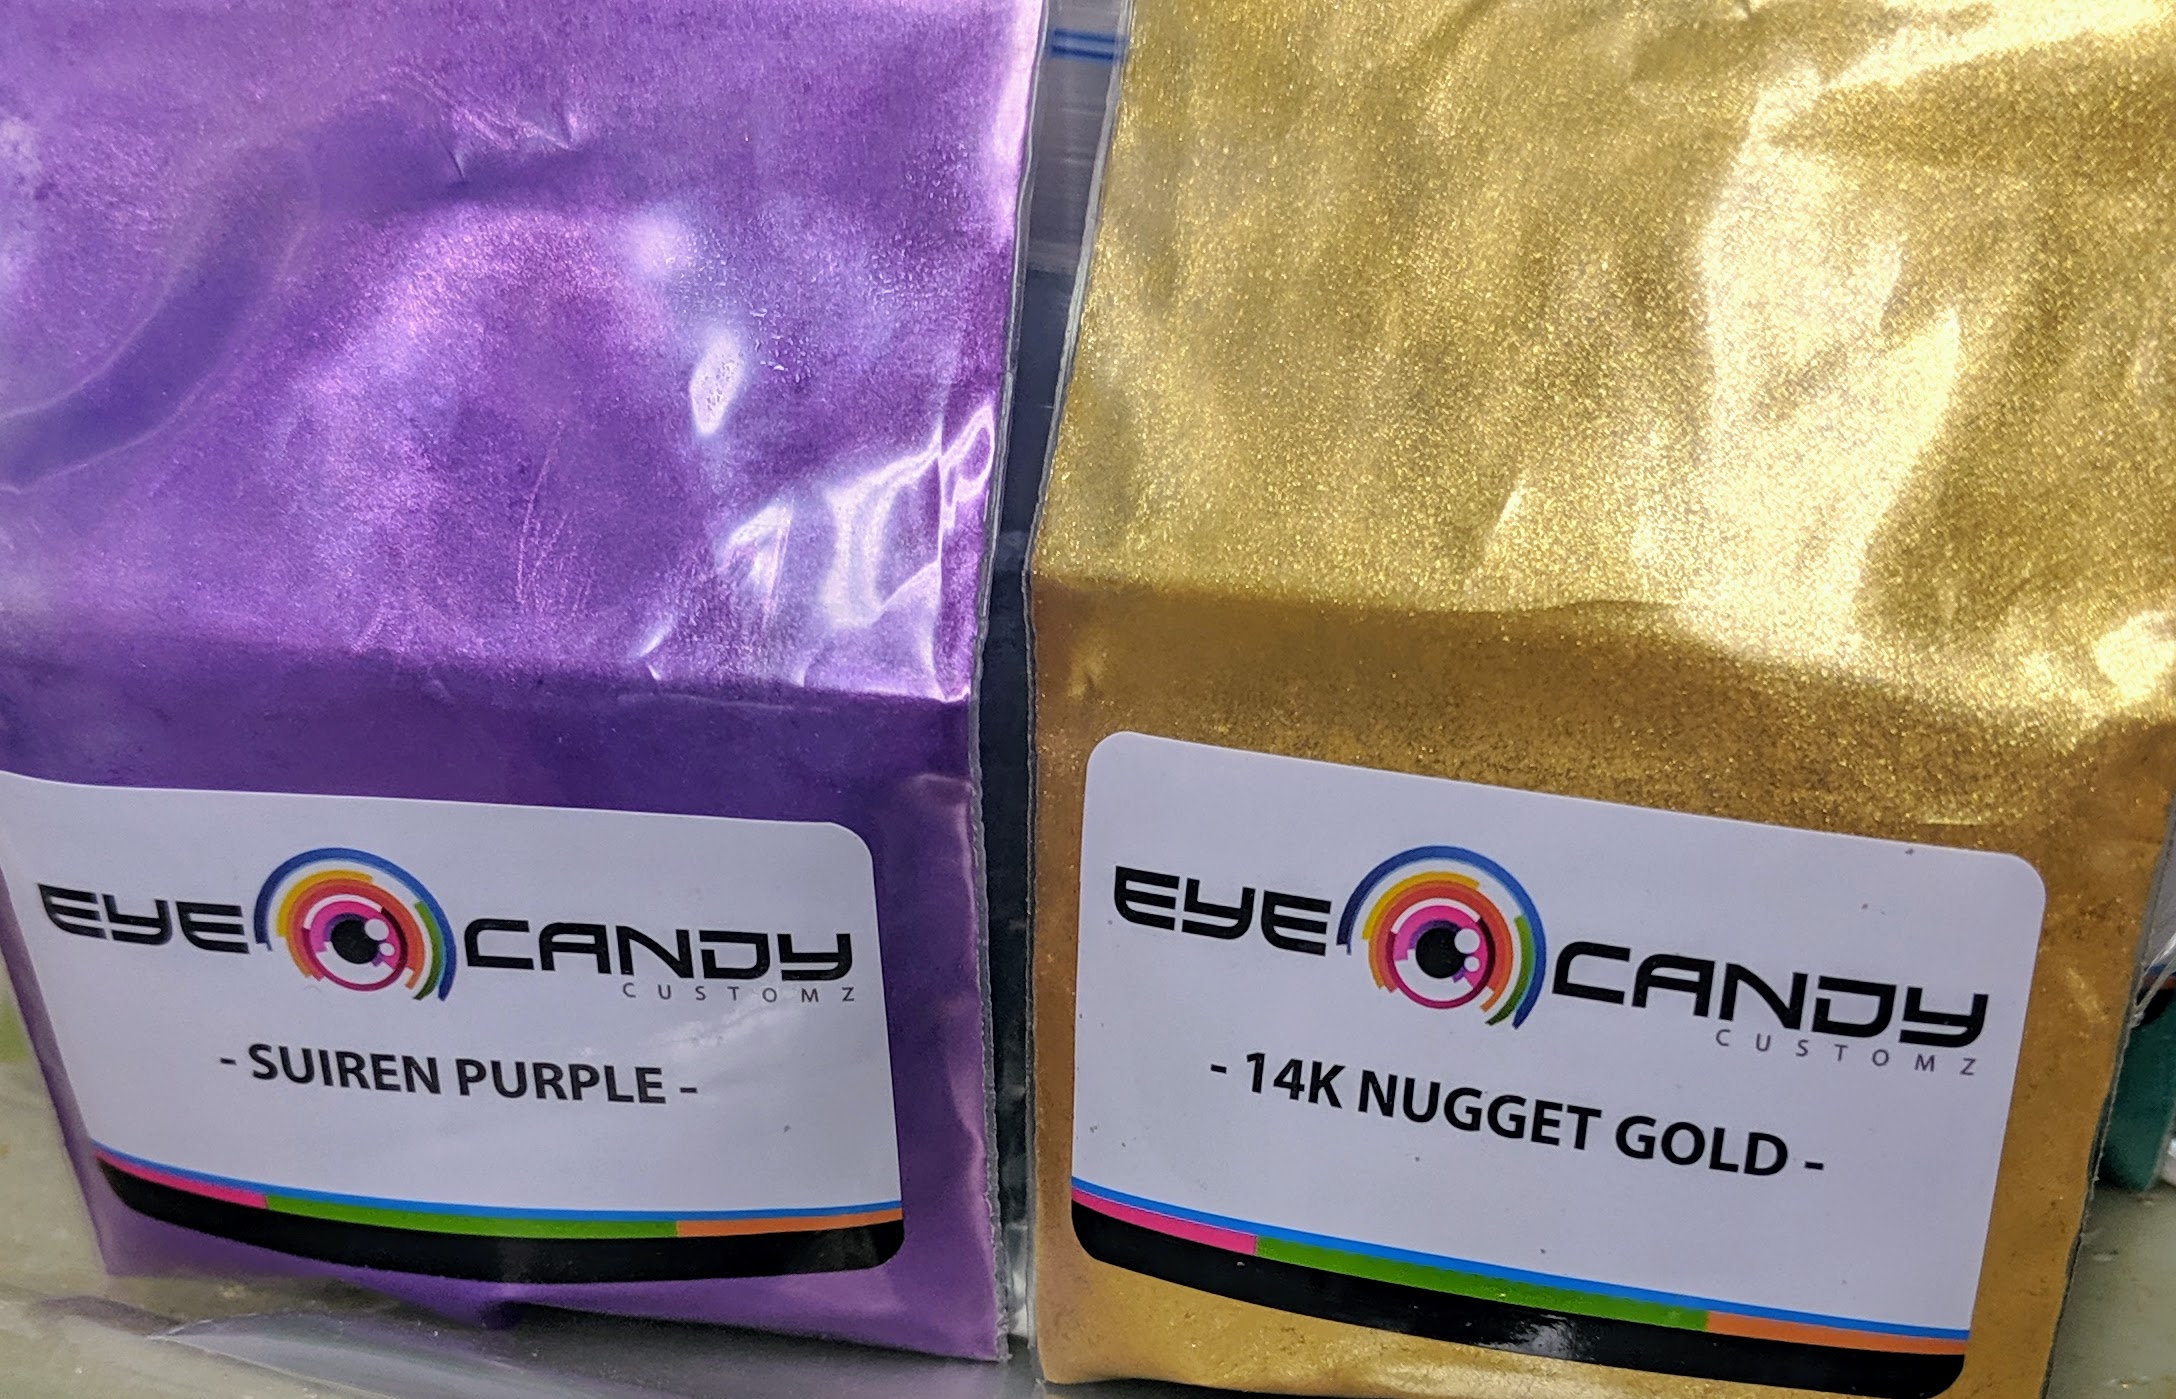
I used the purple pigment last week, and I wanted to make some additional beads using it. However, I hadn’t tried the Bronze or Gold pigments yet. The gold pigment is extremely light and flew all over the place when I was trying to mix it with the resin. I piped the colored resin into the bead molds right away. I wanted to do this quickly, since it is difficult to get the resin into them when it starts to thicken. I made several with the gold and purple and one with the bronze pigment.
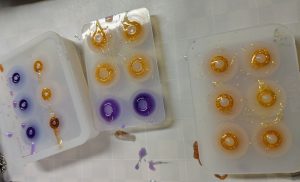
Beads of each color
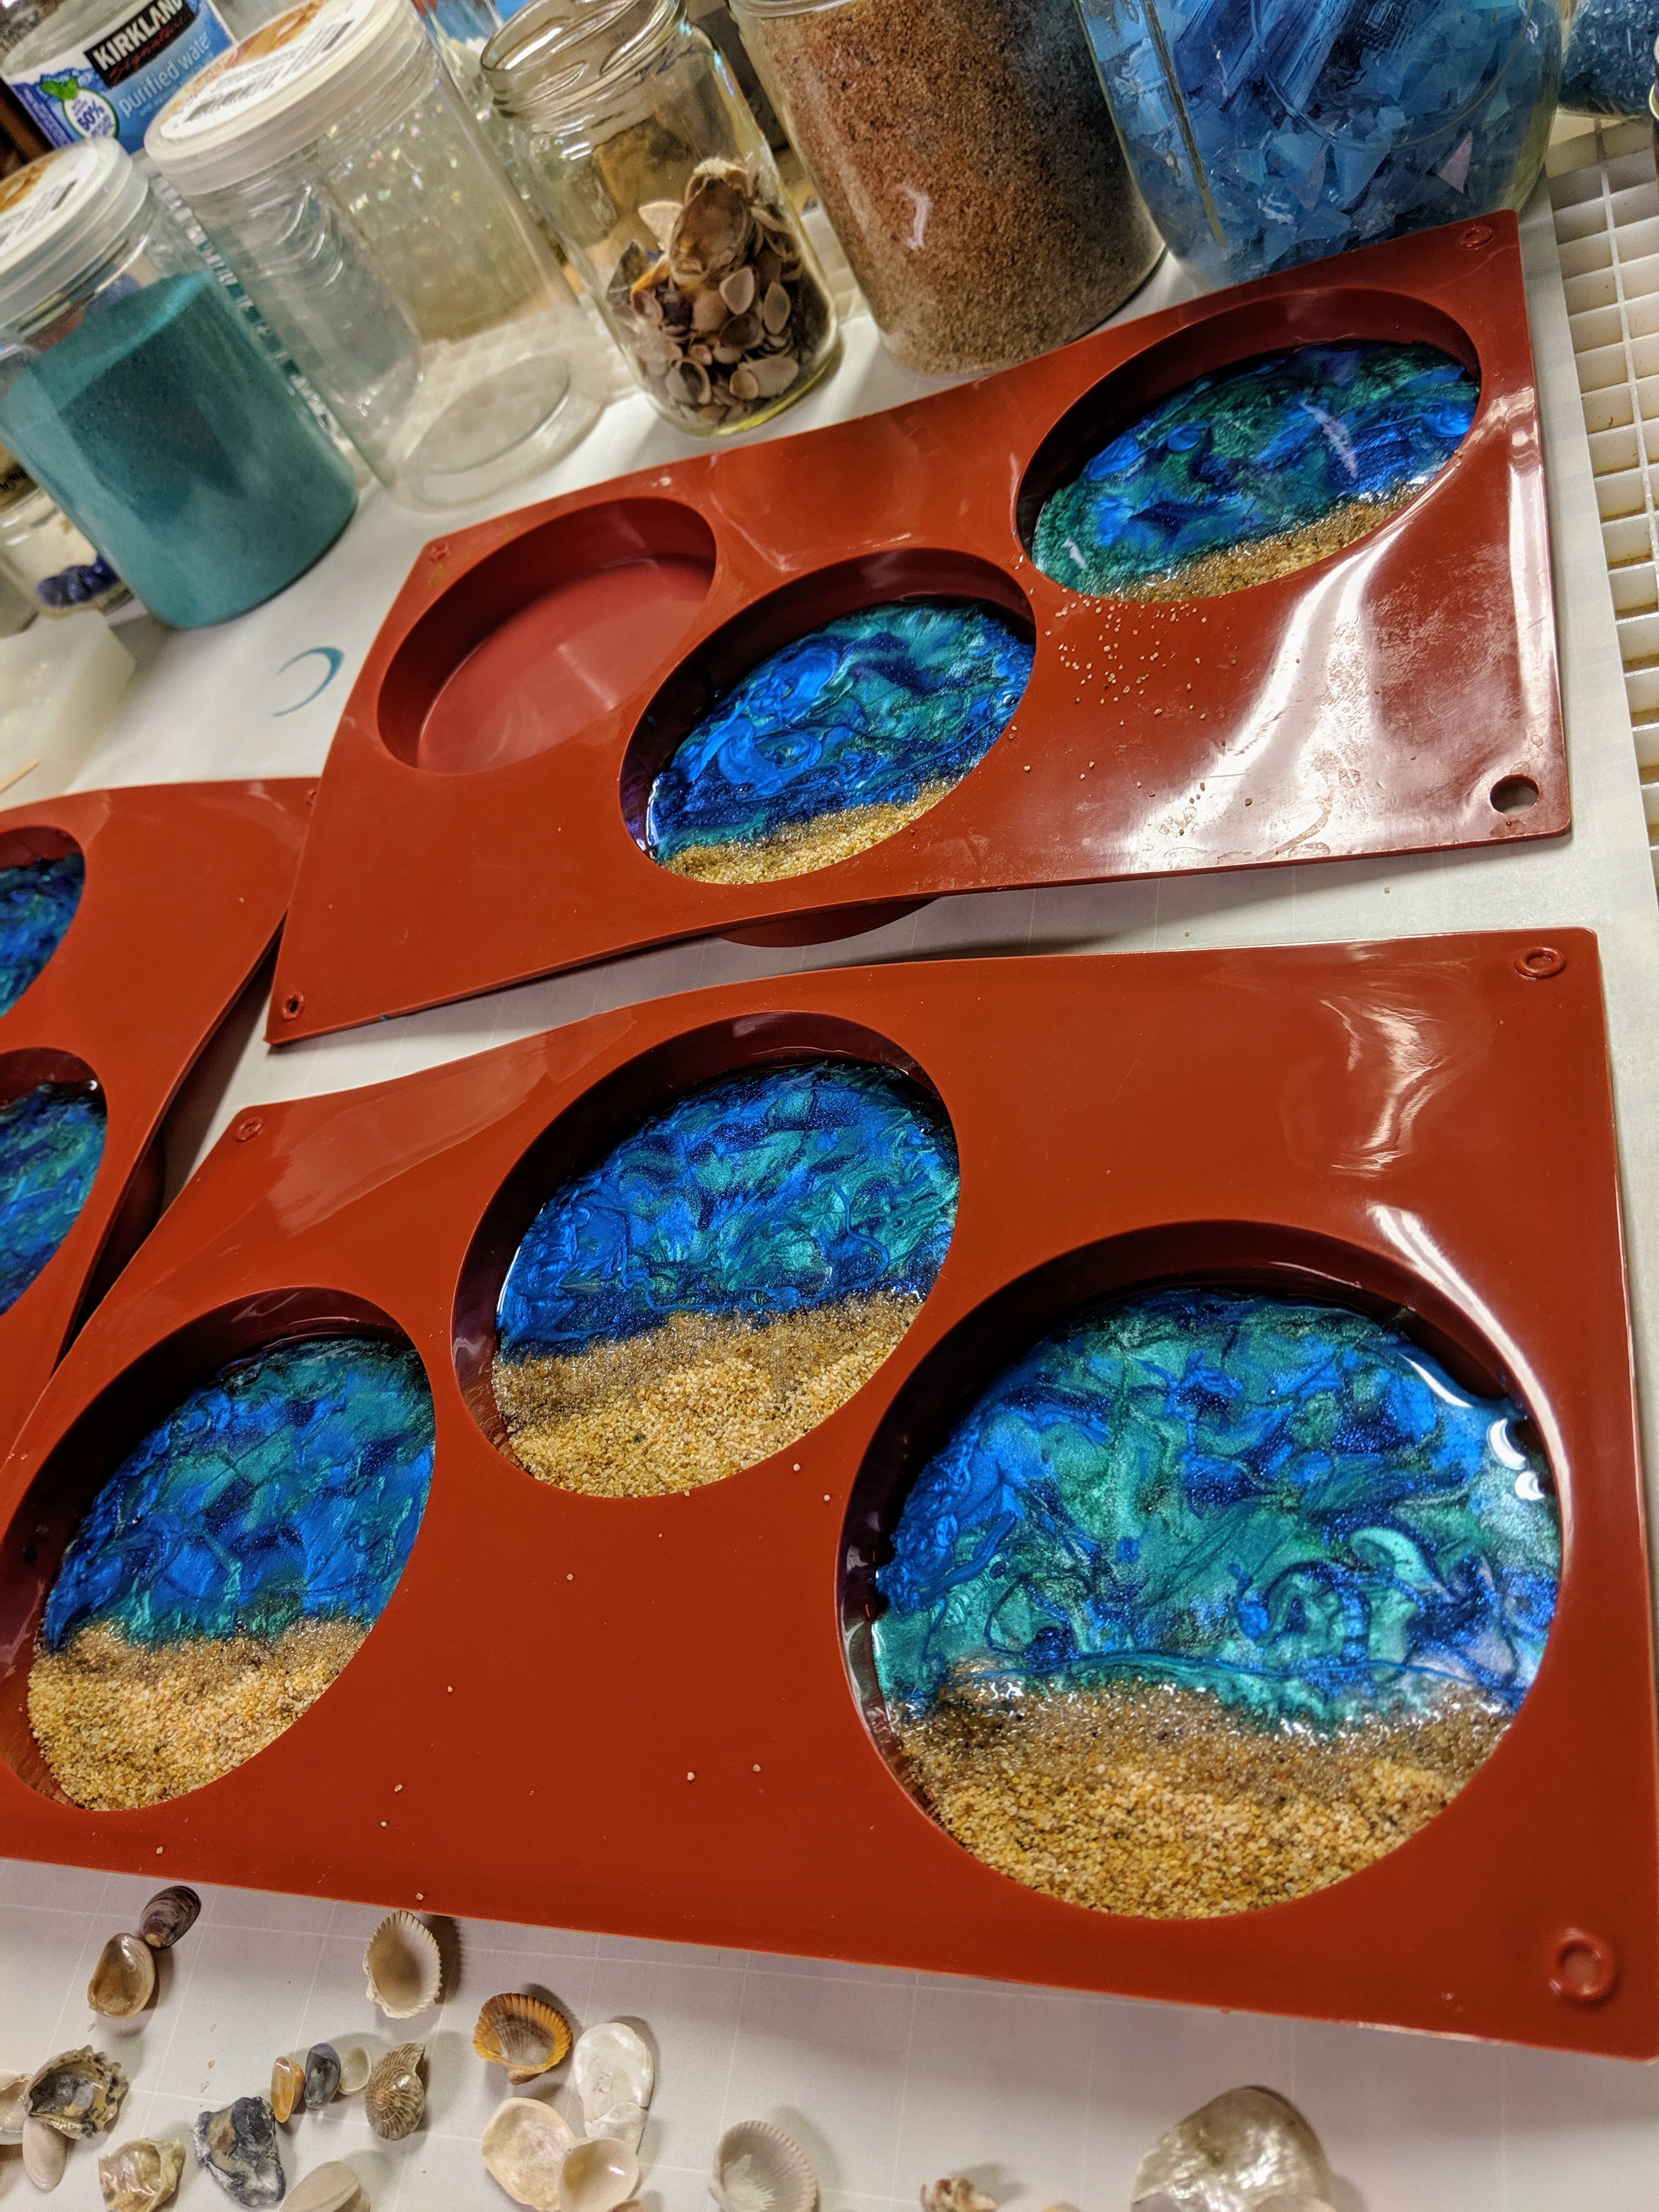
After pouring a thin layer of Envirotex Lite resin into eight of the coaster molds and removing bubbles with a heat gun, I added the pigmented resin on top. I then swirled them around a bit with my craft sticks. I also waited about 20 minutes before adding shells to two of the molds.
Adding decorative elements.
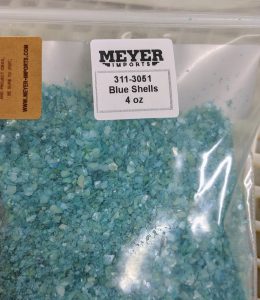
Glass called “Blue Shells”
I also have some new material to try using as the water element in the beachy coasters. It was very expensive, so I will likely limit using it to particularly special projects after today.
I waited until the resin was starting to thicken before adding the shells, and waited even longer (maybe 20 minutes) before adding the sand and the glass chips to the resin in the mold.
I decided there wasn’t enough of the gold pigment in the gold coaster molds, so I mixed up another medicine cup full using some that was left over from the initial batch of resin and added it to the molds. If all goes well overnight, I will add another clear layer of resin to the coasters tomorrow and demold the beads to see how they turned out. I am a bit leery of pouring another layer of resin today after the experience the other day with the resin turning yellow during curing. The manufacturer got back to me and recommended I use a different product, EasyCast, for molds / thicker applications. I can continue to use this type in 1/8″ layers, though. I can’t wait to see how they turn out!
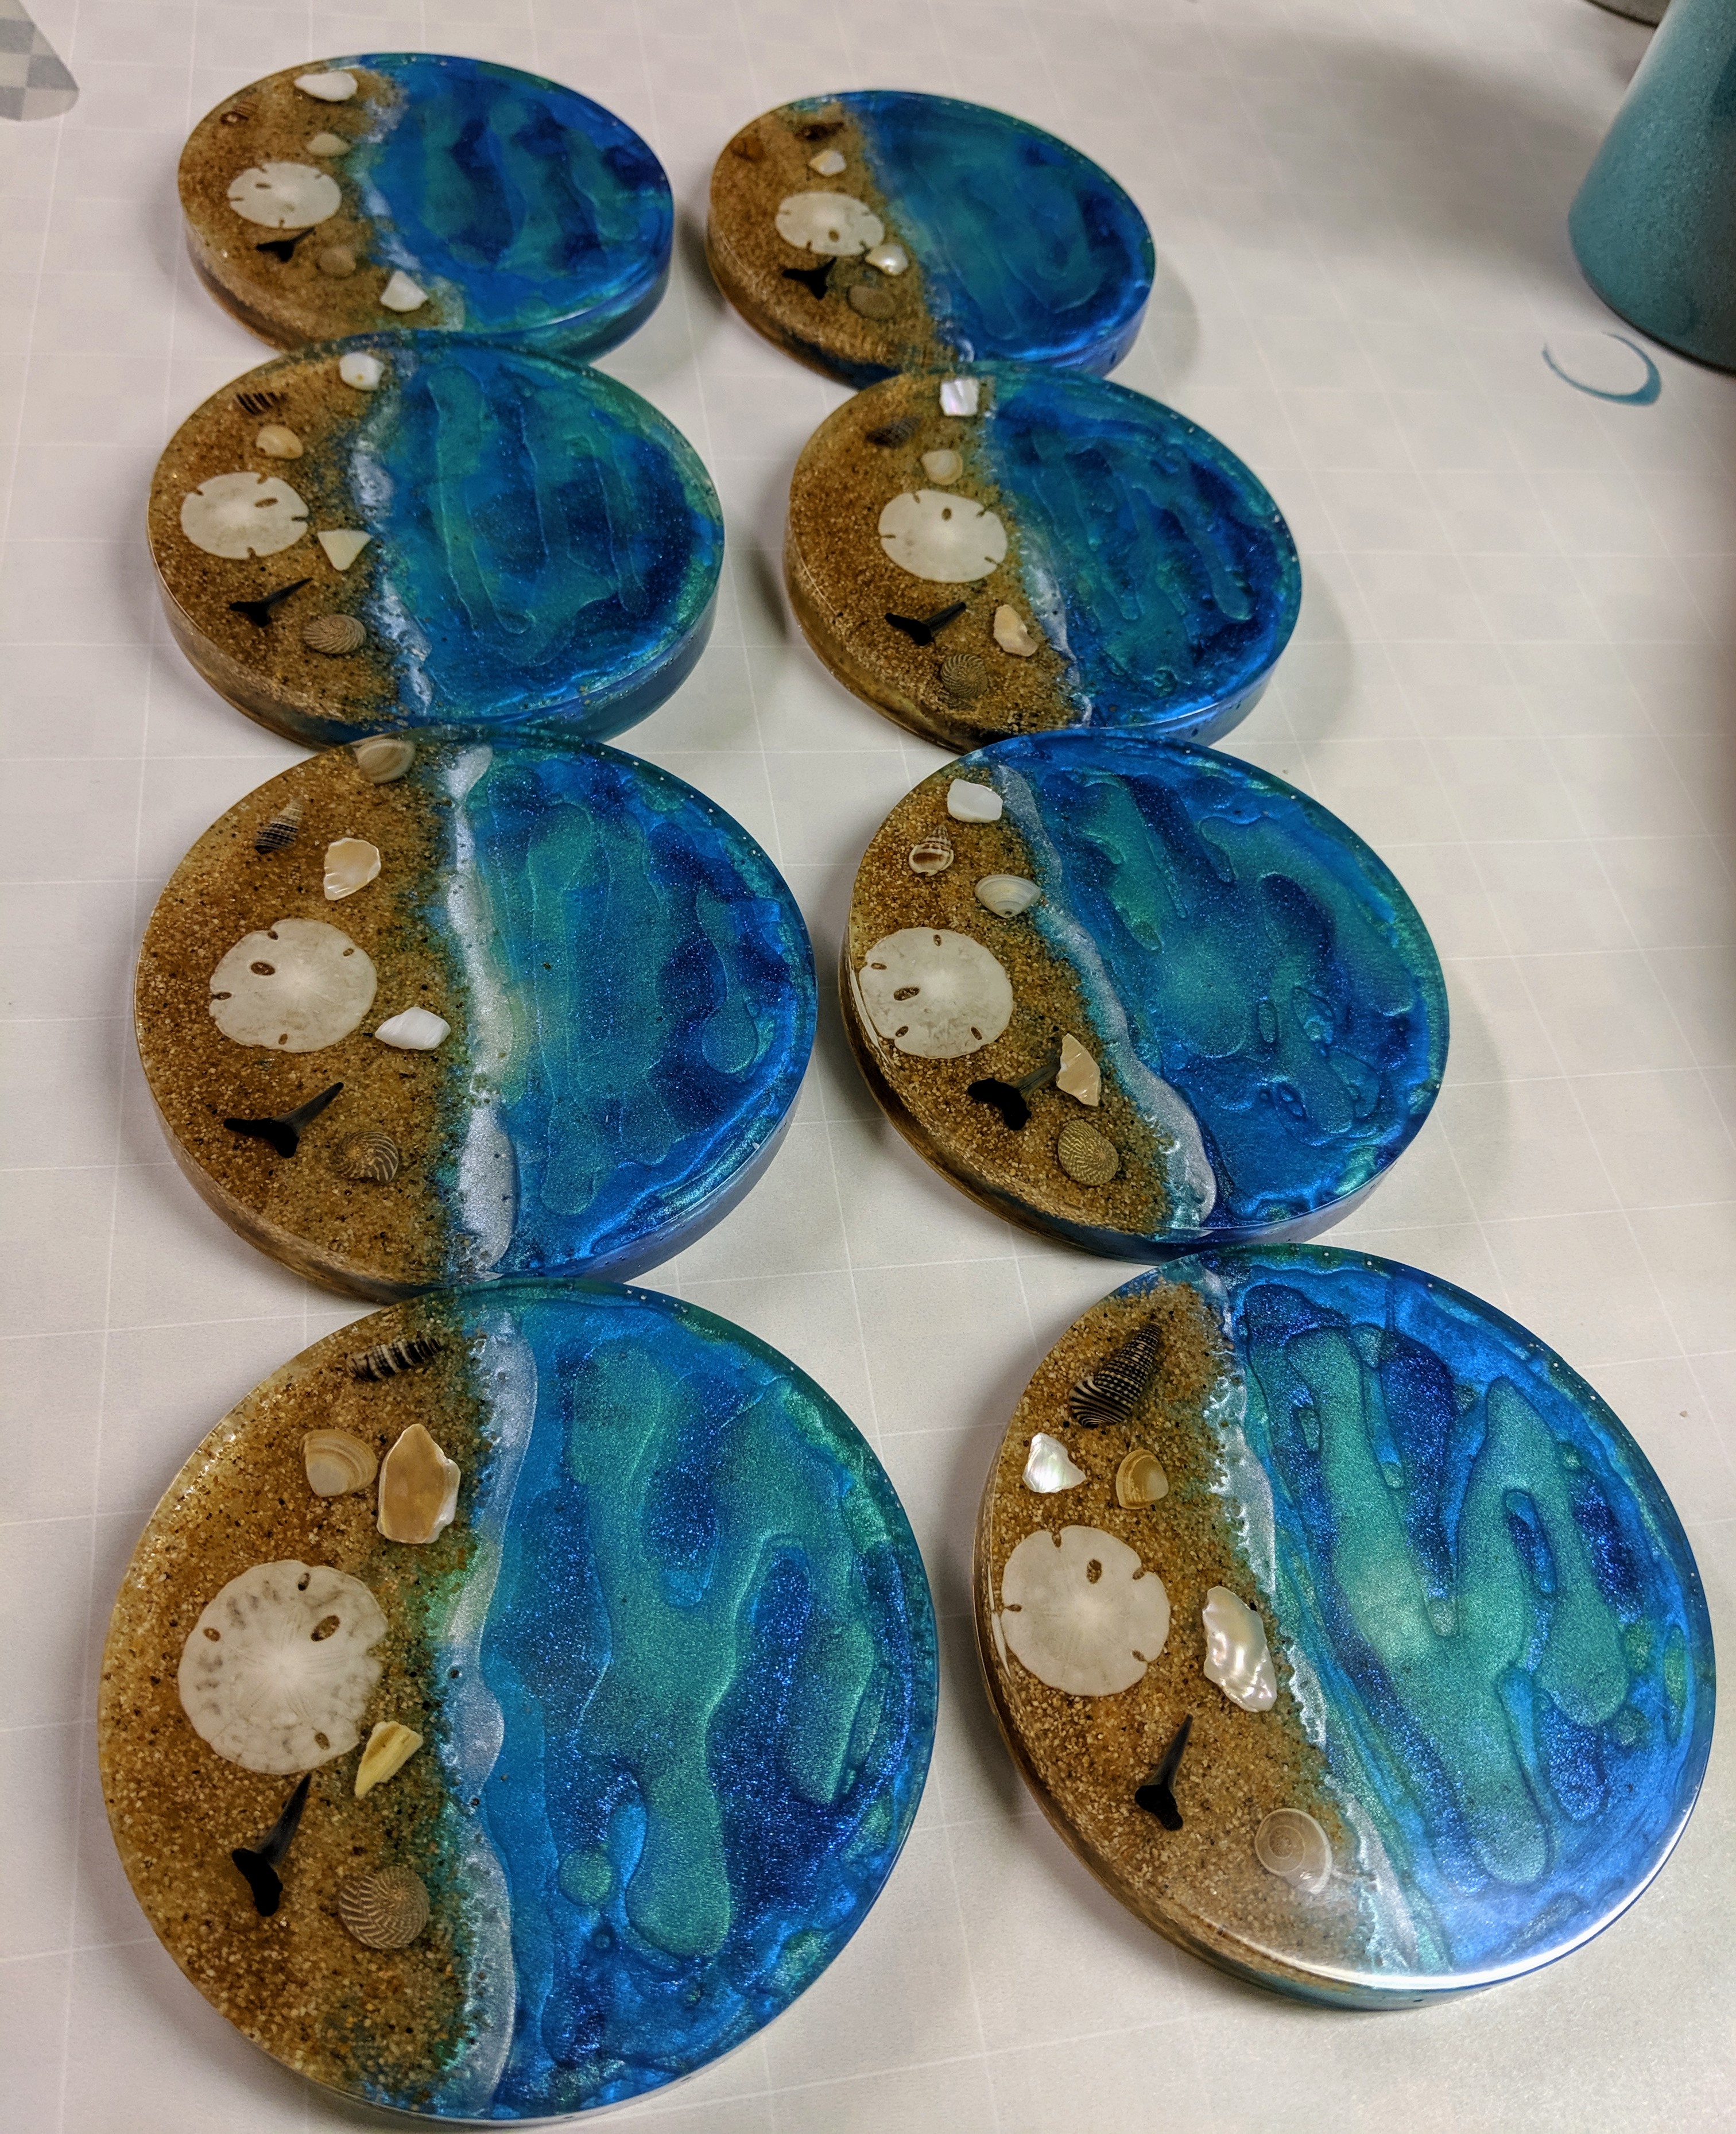
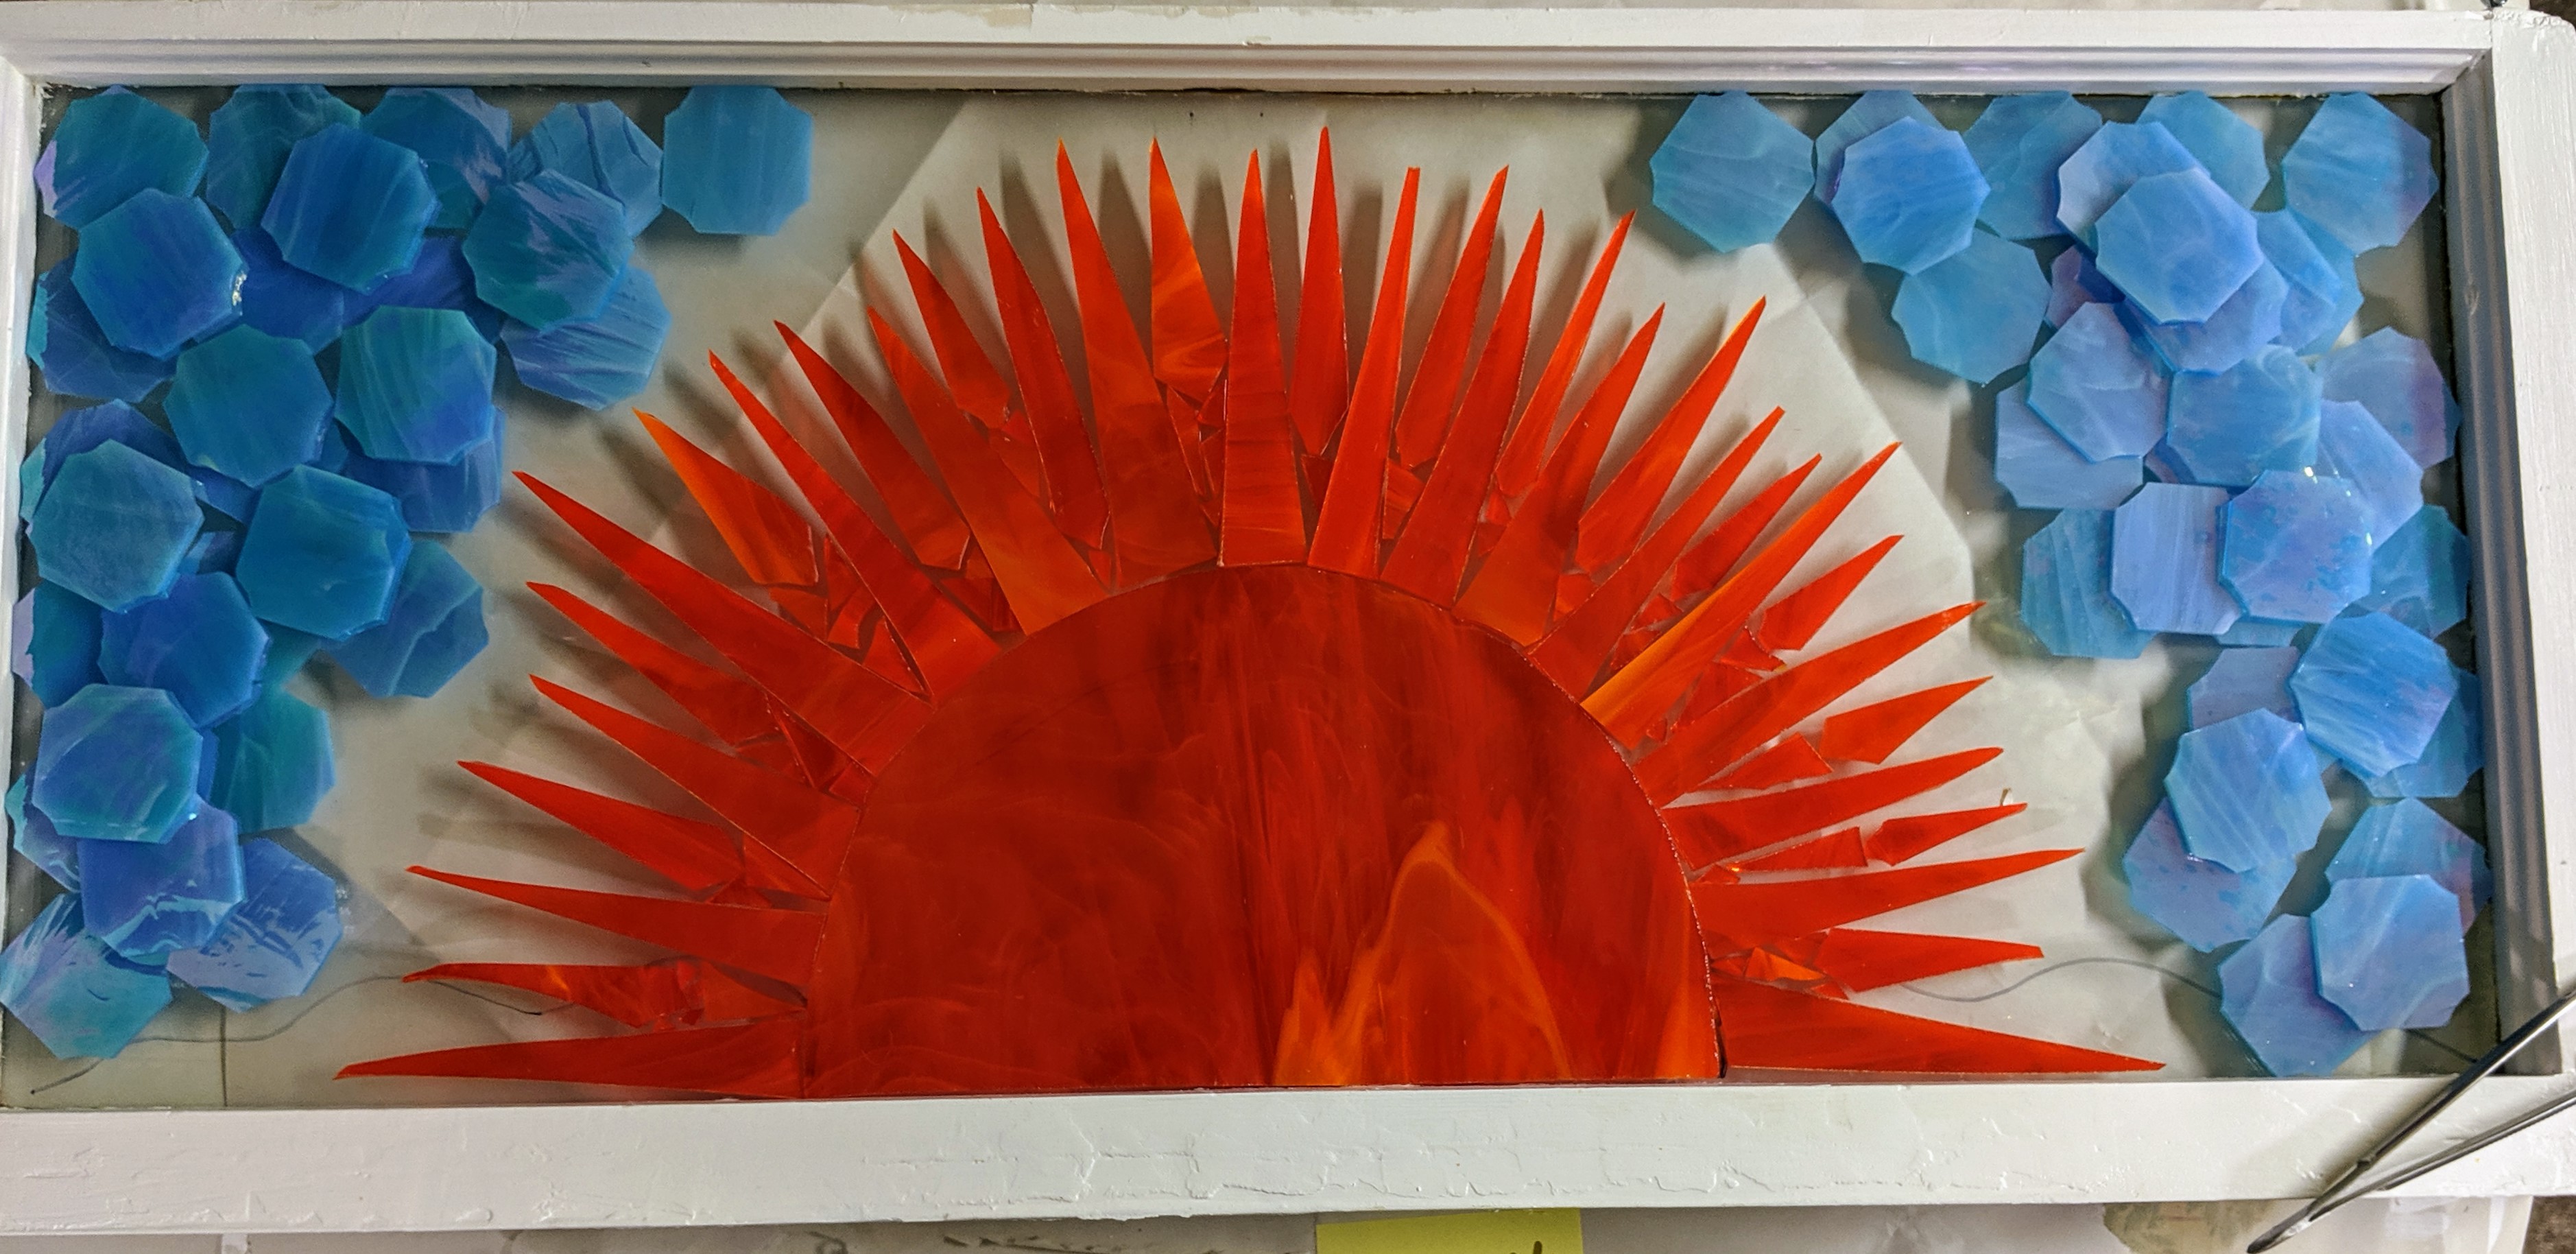
Here is some of the fruit of the labor of prior days. The sun mosaic is complete, and I have 8 coasters and some beads ready, as well.
Here comes the sun!
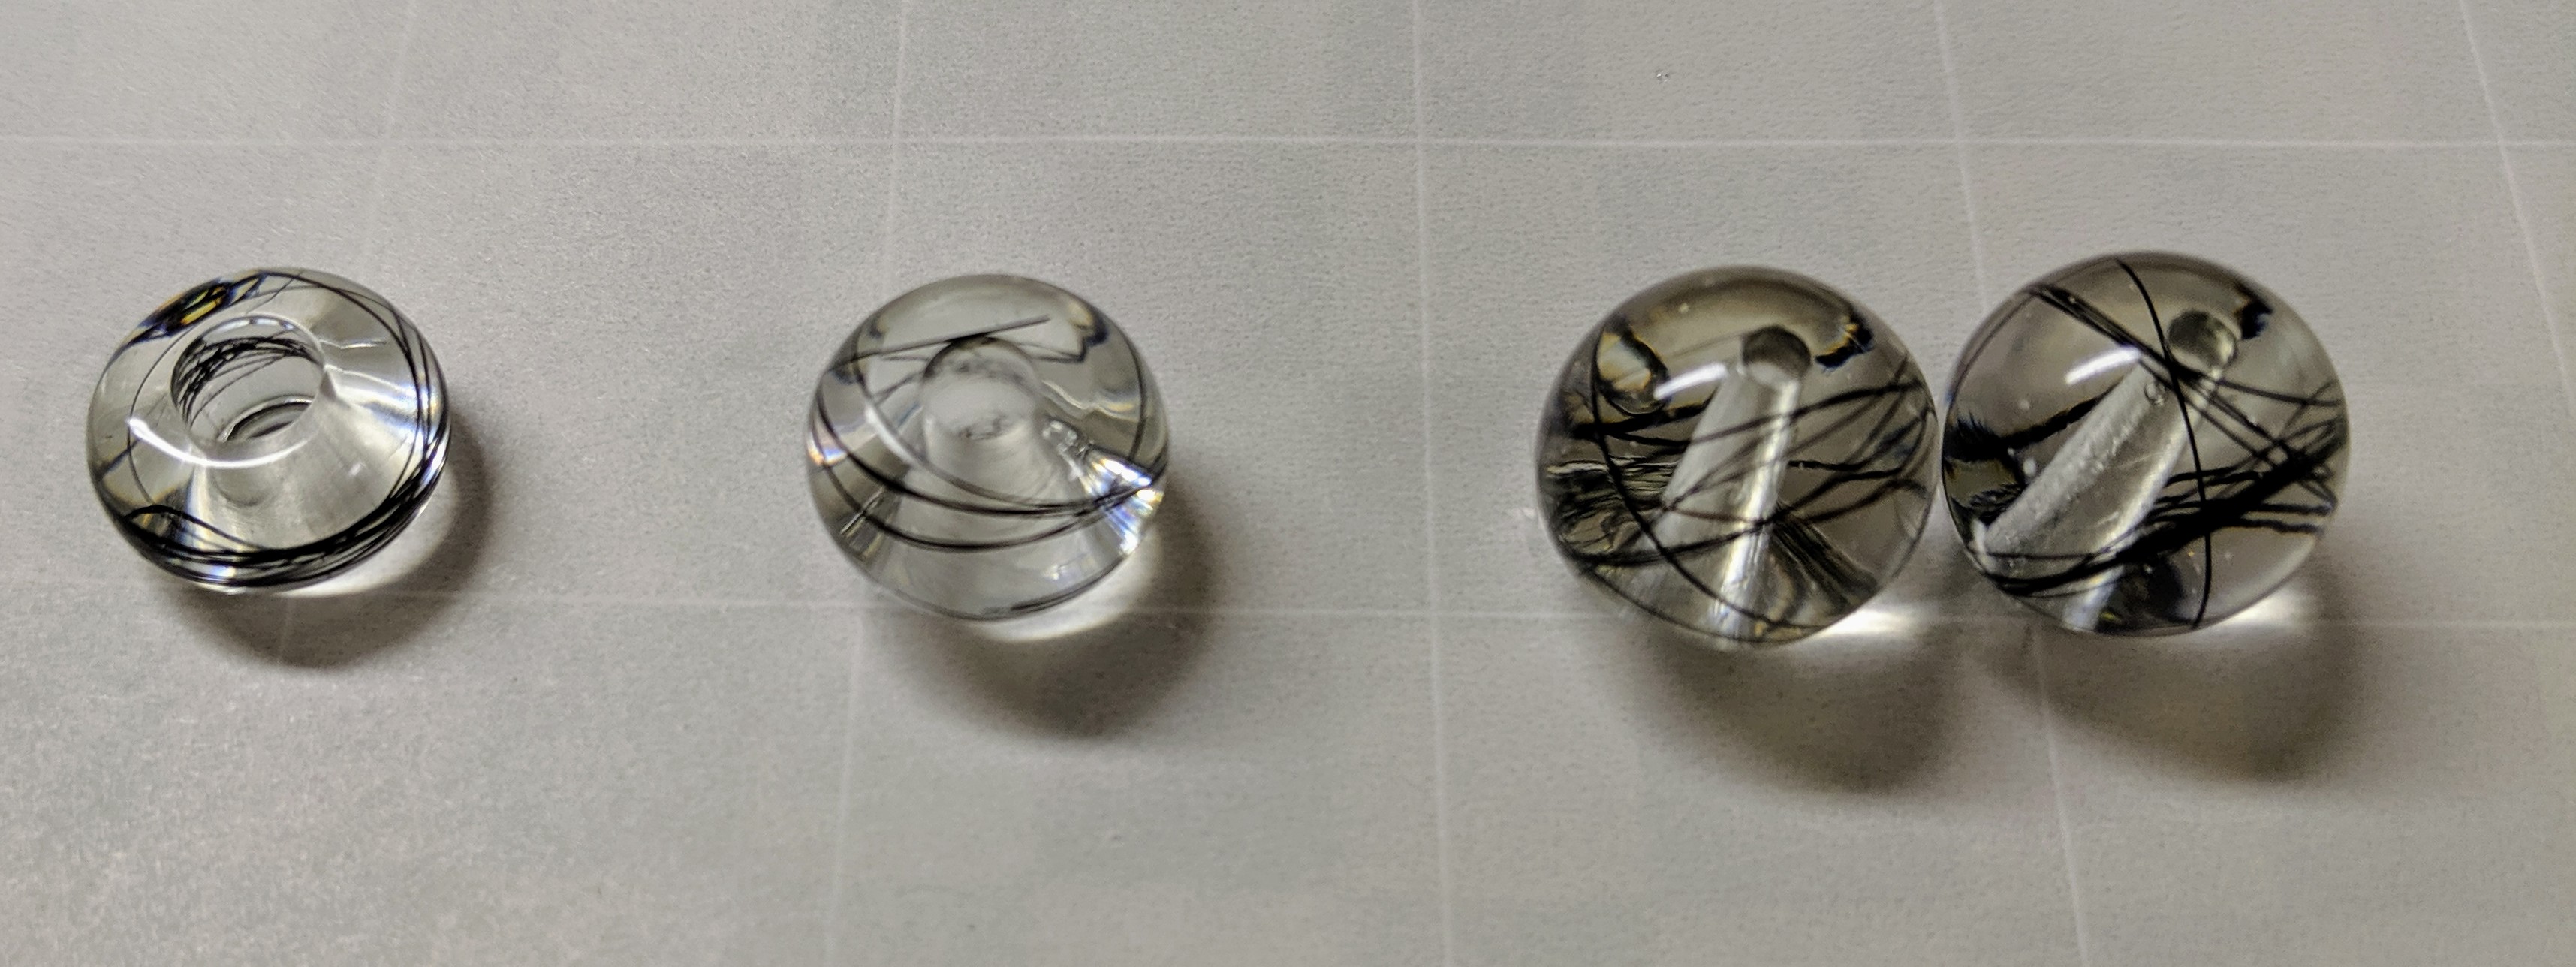
I had a new request for some memory beads, but I’m not yet sure what type she will want. Since I had some resin handy, I just made a selection of beads. They turned out pretty well!
Rondelle (6 mm hole), rondelle (5 mm hole), ball beads.
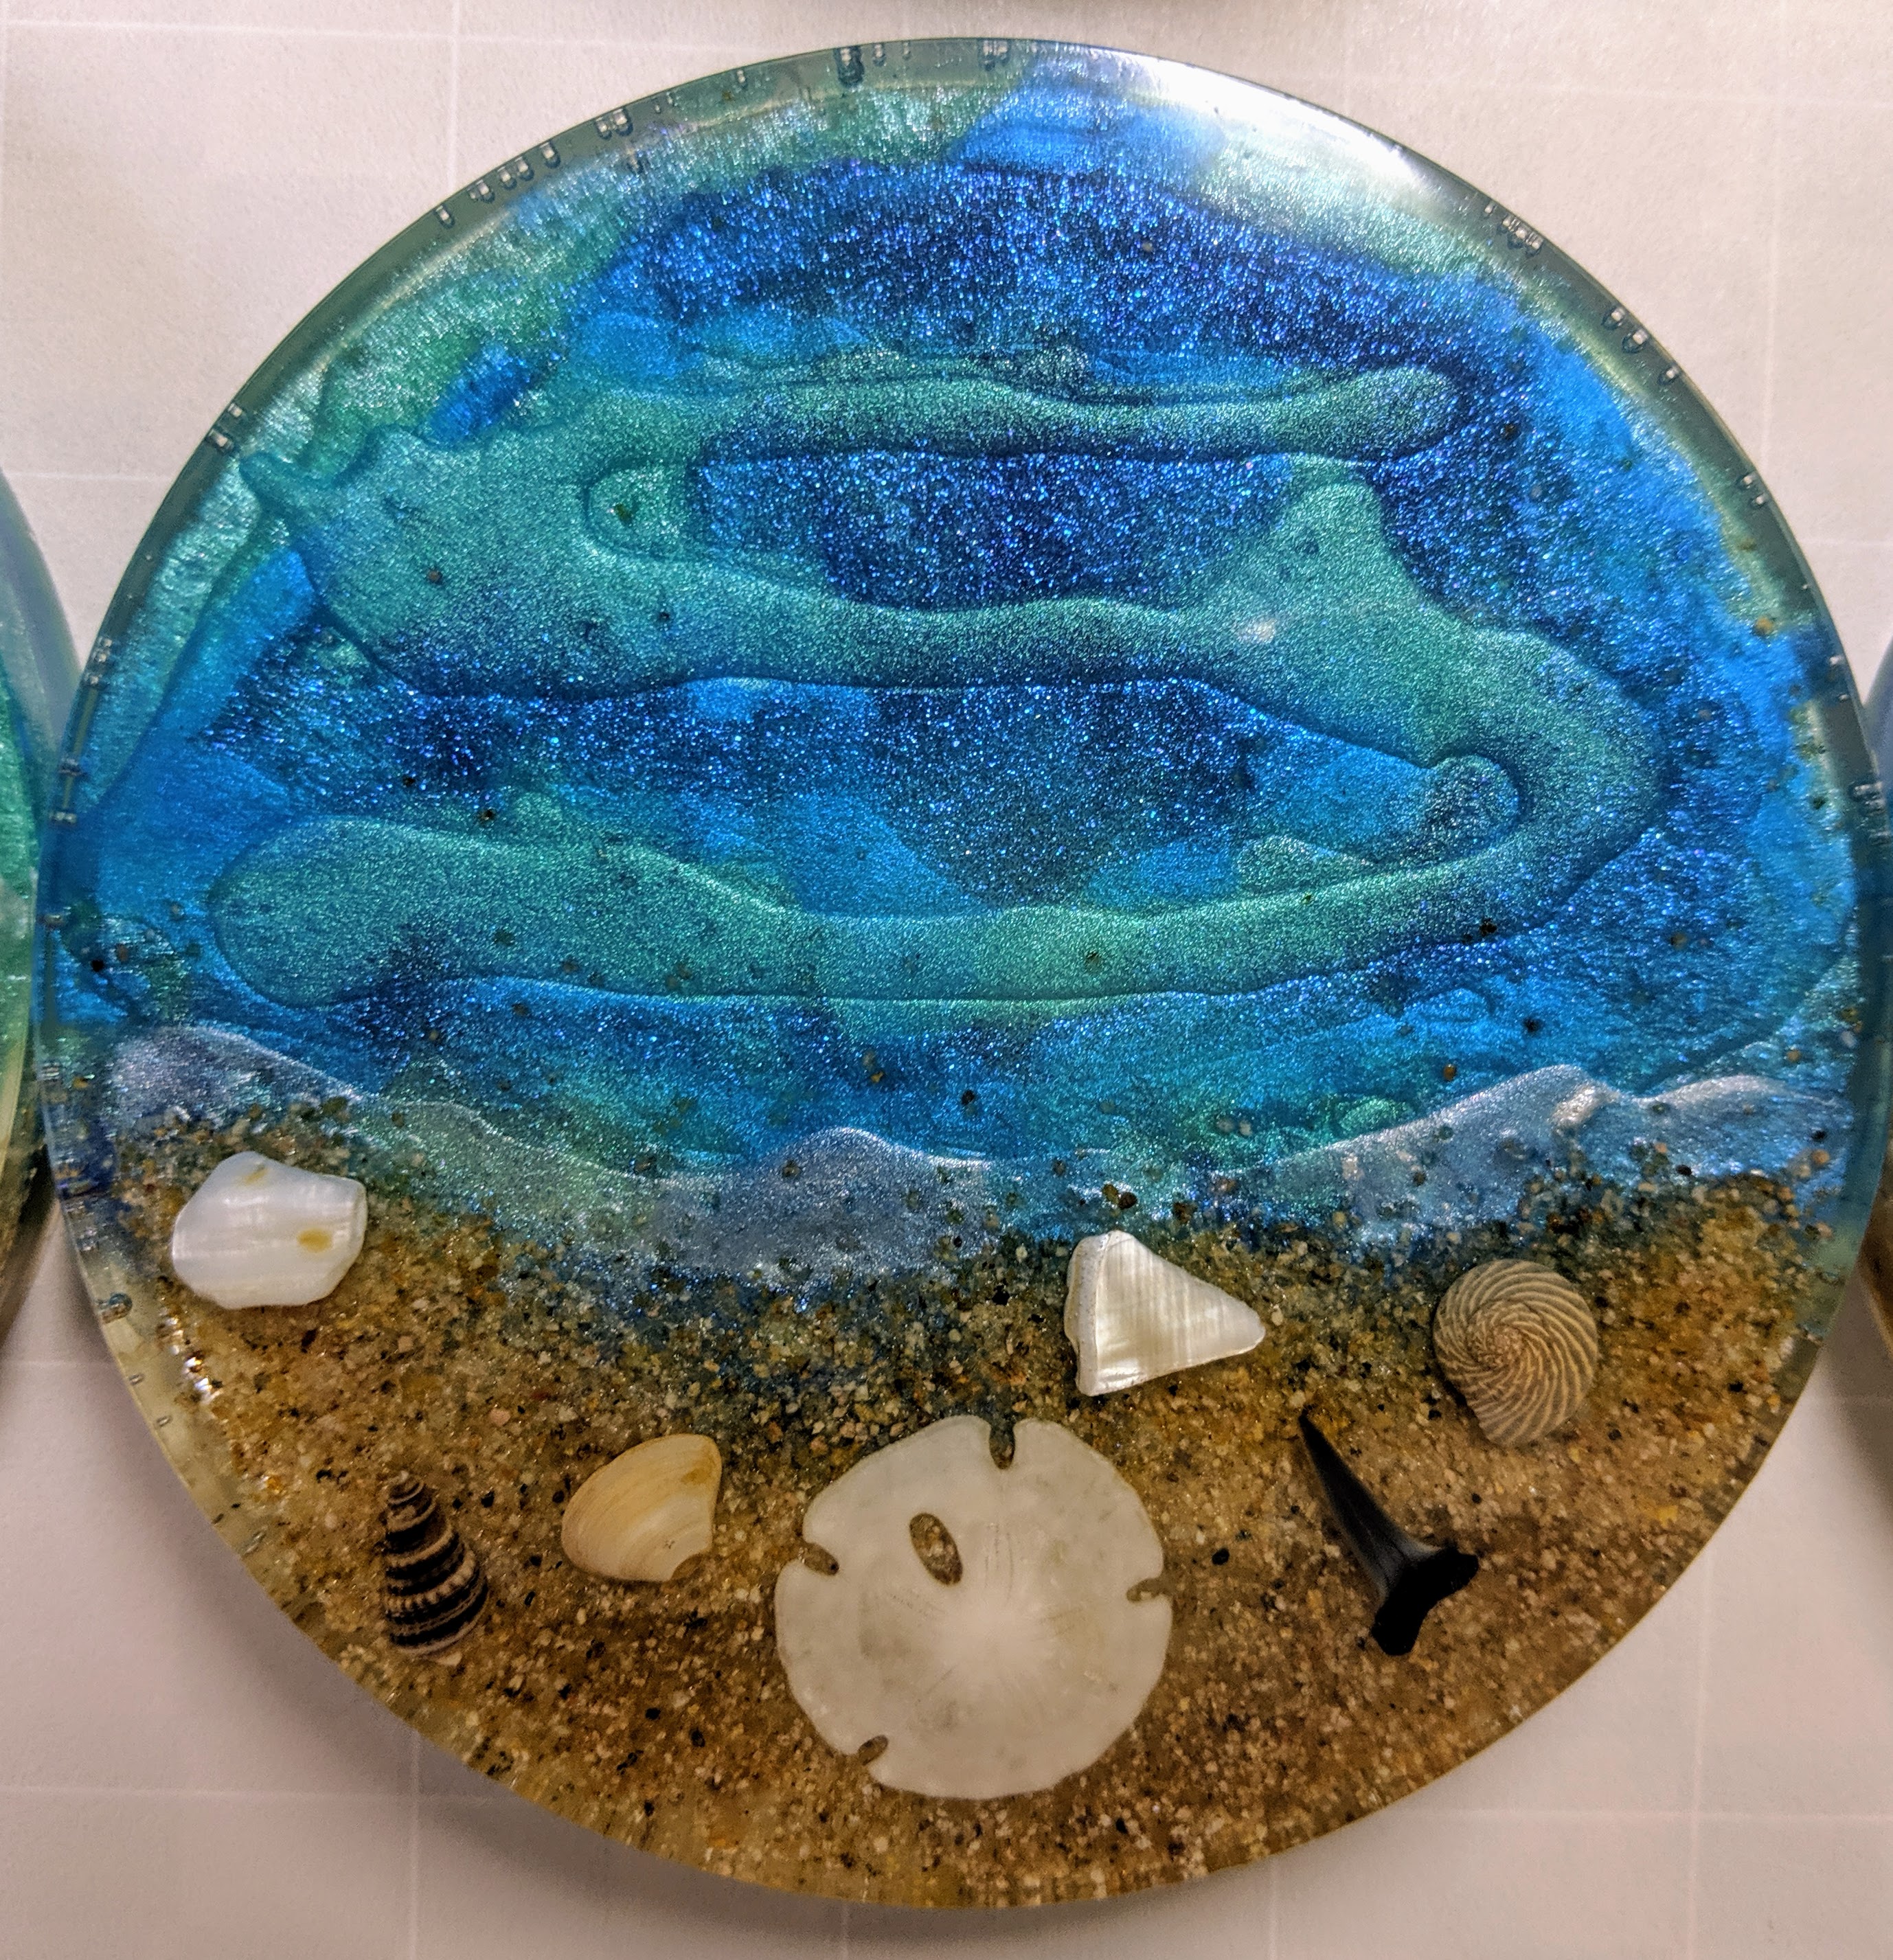
The coasters I made with the quick layering technique turned out OK. I think next time I will swirl the water pigmented layers a bit. I was hesitant to do that because the layer underneath wasn’t cured, but I think the pigments need to be moved around a bit more. I also think the look of the bubbles at the edge of the water are improved with this technique.
Today was a very busy, but productive, day. I finished the sun panel by pouring the resin over it, set a few memory beads in their molds, and made 8 coasters using the layer method where you don’t cure the resin overnight between layers. At times I felt like the proverbial one-armed paper hanger! It was a challenge doing all this in one day, but hopefully it was a success. I will find out tomorrow when I can take the beads and coasters out of their molds. Here is the basic rundown of the methodology and things to note.
Pouring the resin.
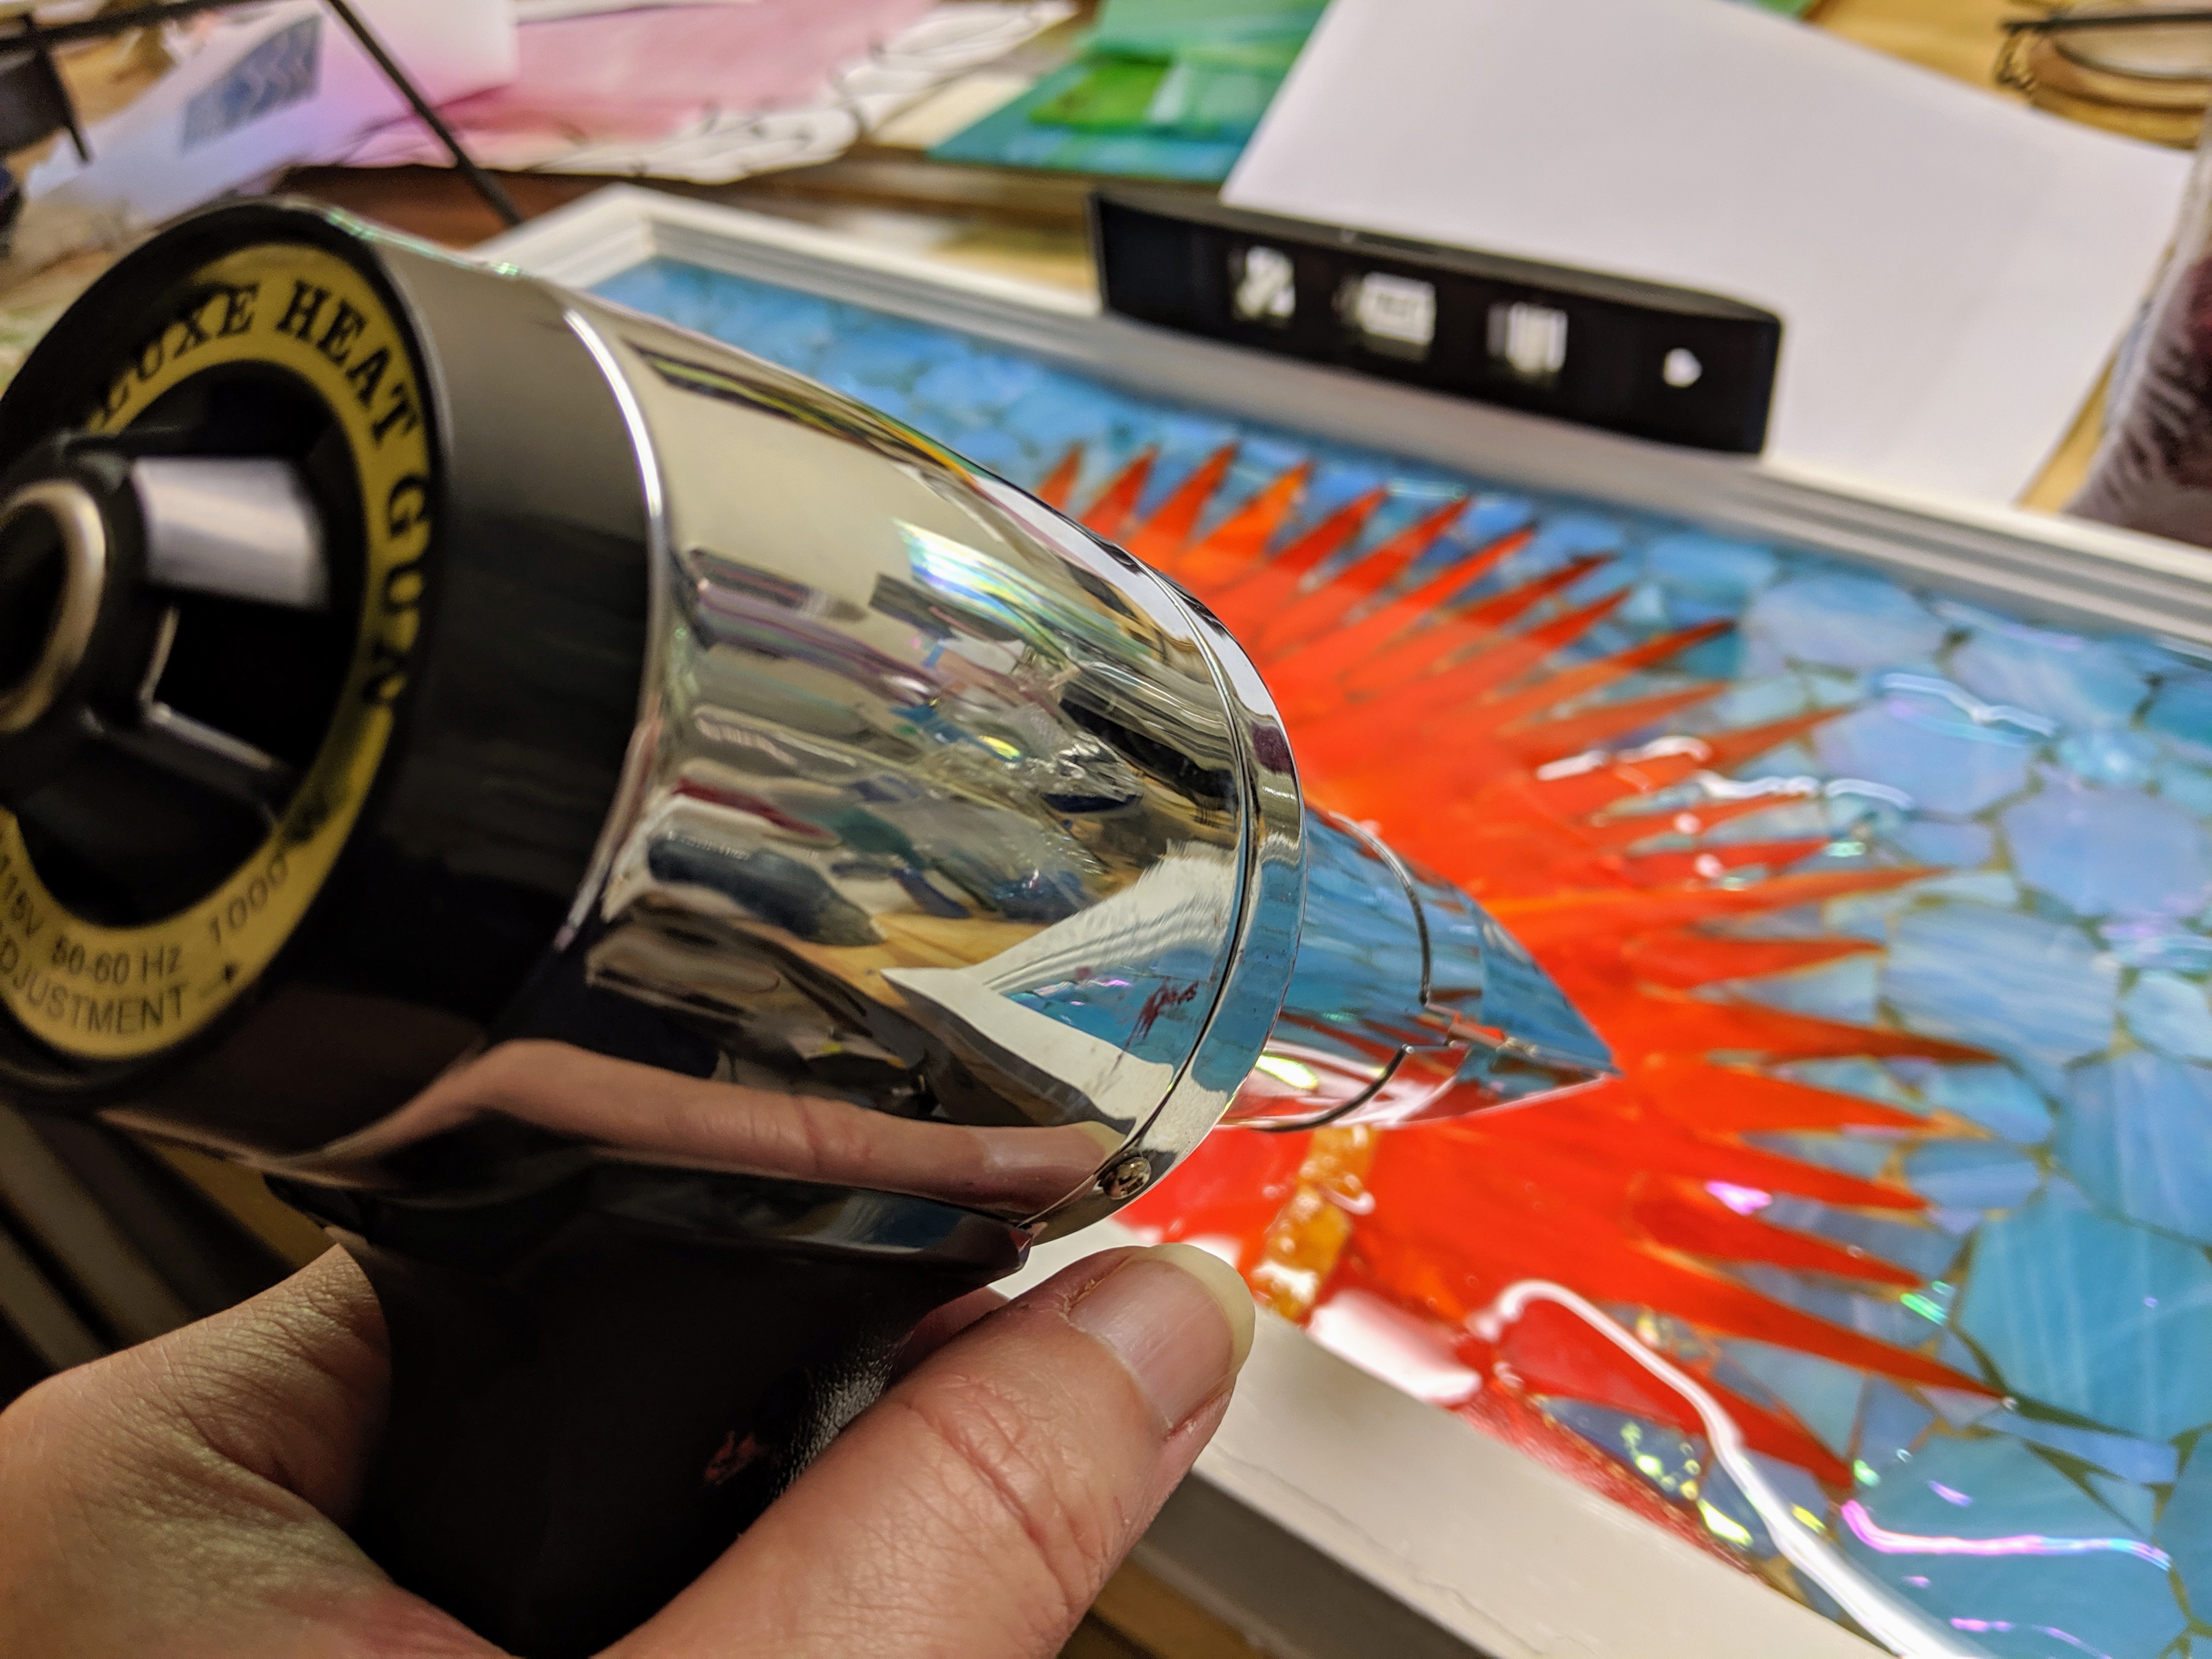
Pouring the resin on the sun mosaic was pretty straightforward, since everything was pretty much secured in place one way or another. I mixed up 16 ounces of resin and used almost all of it to cover the glass. After pouring, I immediately used my heat gun to help distribute the resin evenly across the window as well as to remove bubbles that form as the resin settles under the individual pieces of glass.
Pouring the resin.
I thought about adding some glass chips to the resin, like I had planned to do, but I just wasn’t sure how that would look in the end, so I decided to save that to try on a smaller project that won’t be such a big deal if I don’t like the way it ends up looking. I normally use the glass chips in a clear background, but this whole window has glass in it, so I chickened out.
Using the heat gun.
The difficult part comes after the resin is poured and bubbles start to emerge. For the next 45 minutes to an hour, I had to repeatedly use the heat gun to remove bubbles as they emerged in the resin.
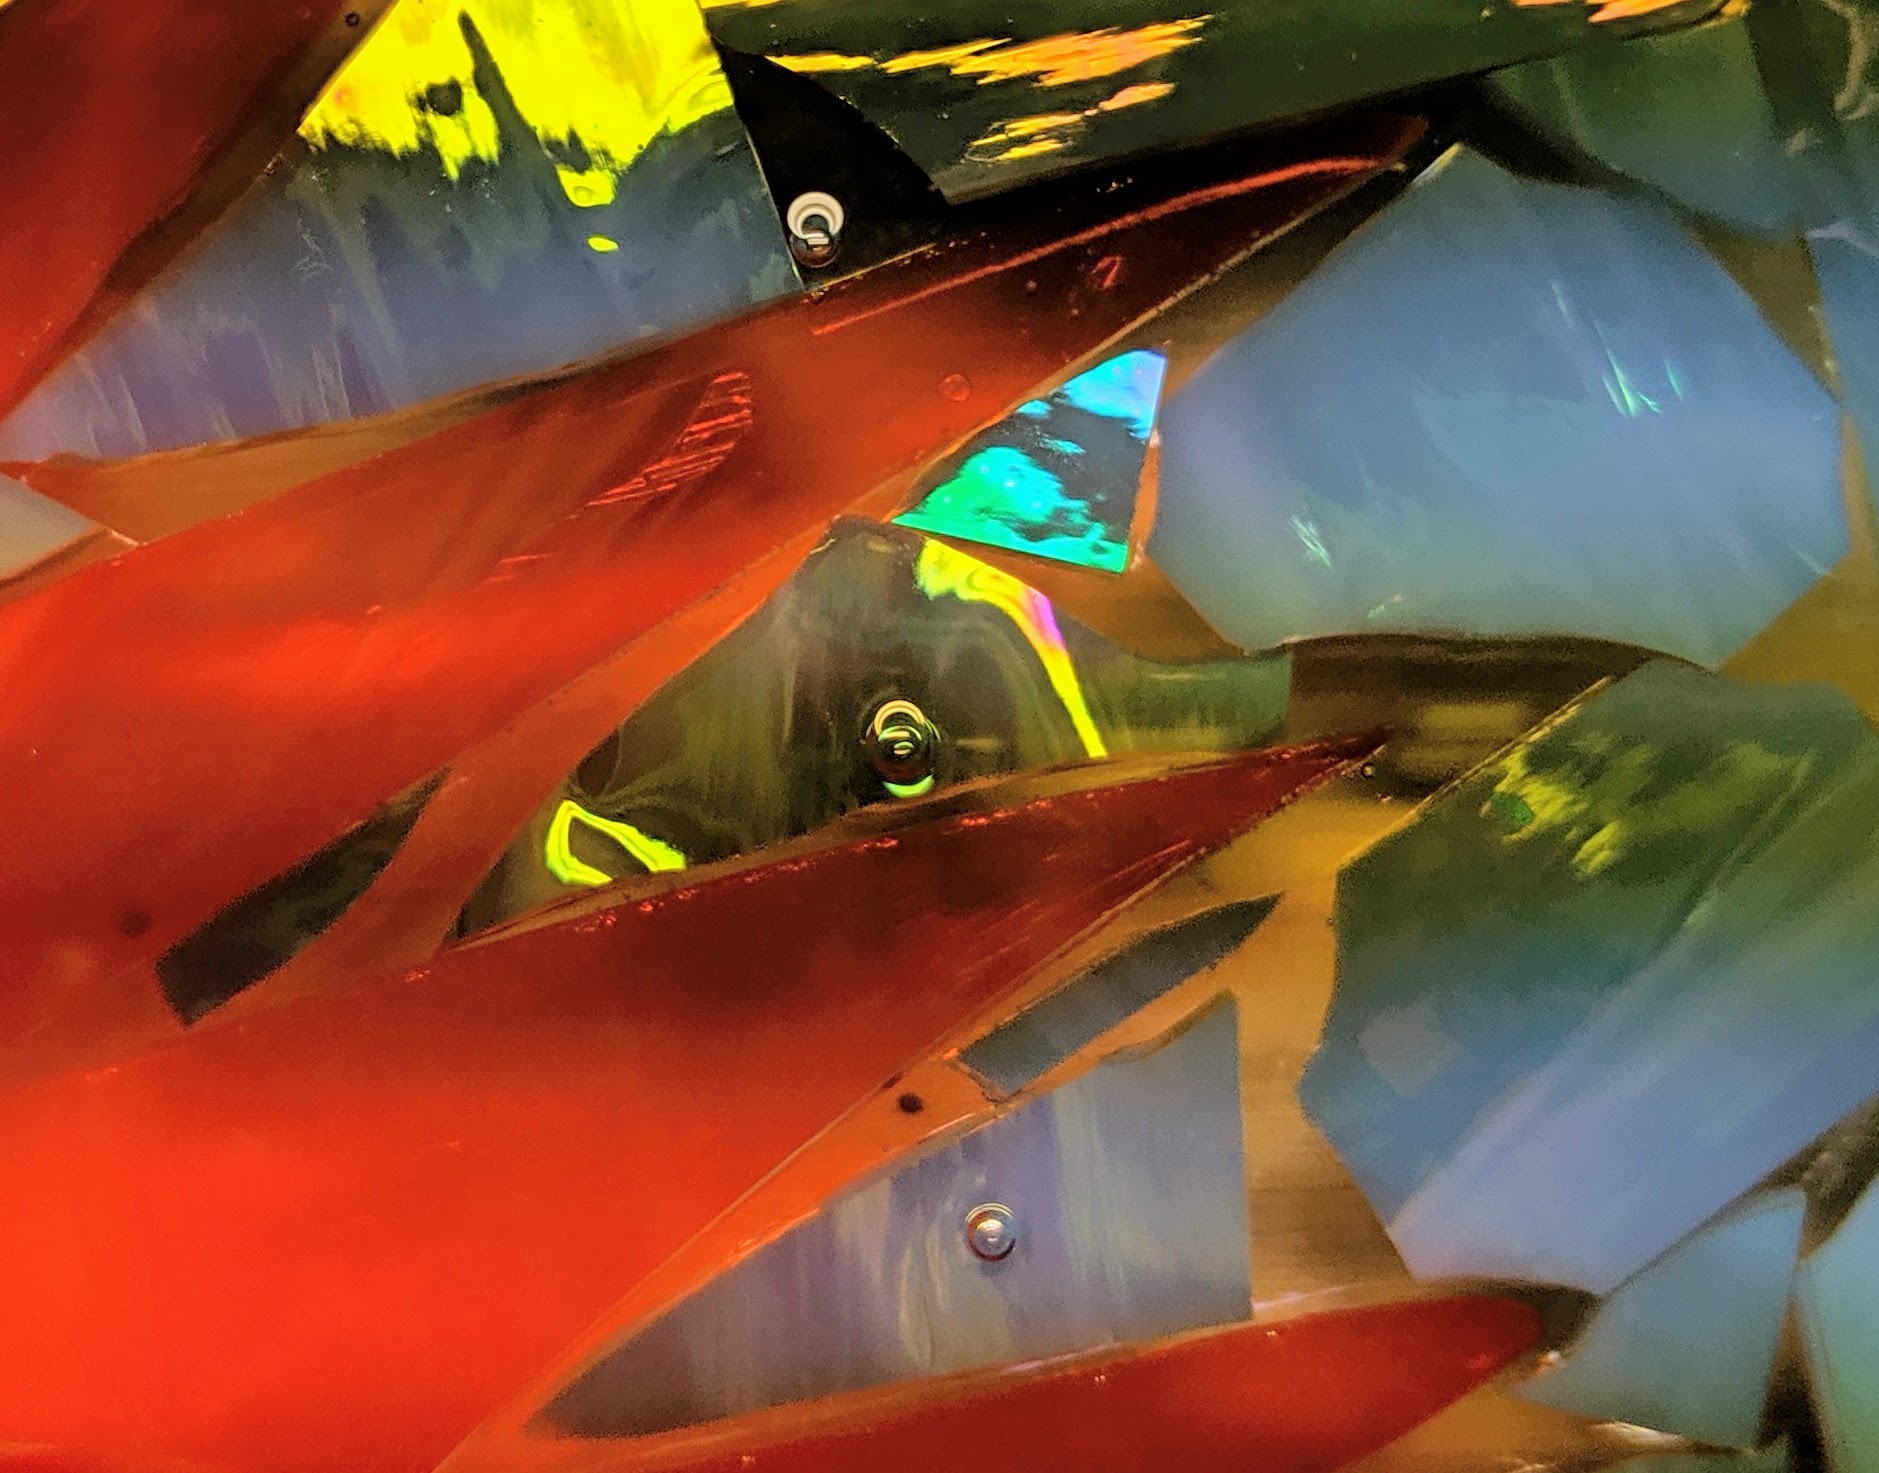
Bubbles forming in the resin.
While I monitored the bubbles on the sun mosaic, I used a bit of the resin to make a few memory beads. The beads take very little resin, and I had enough left to make about four of them.
Using extra resin for some beads.
Since the bubbles in the mosaic weren’t slowing down, I decided to make another batch of resin and try to do the coasters in layers without curing in between. I read that this results in a stronger end product, though I haven’t had any “strength” issues with my previous creations.
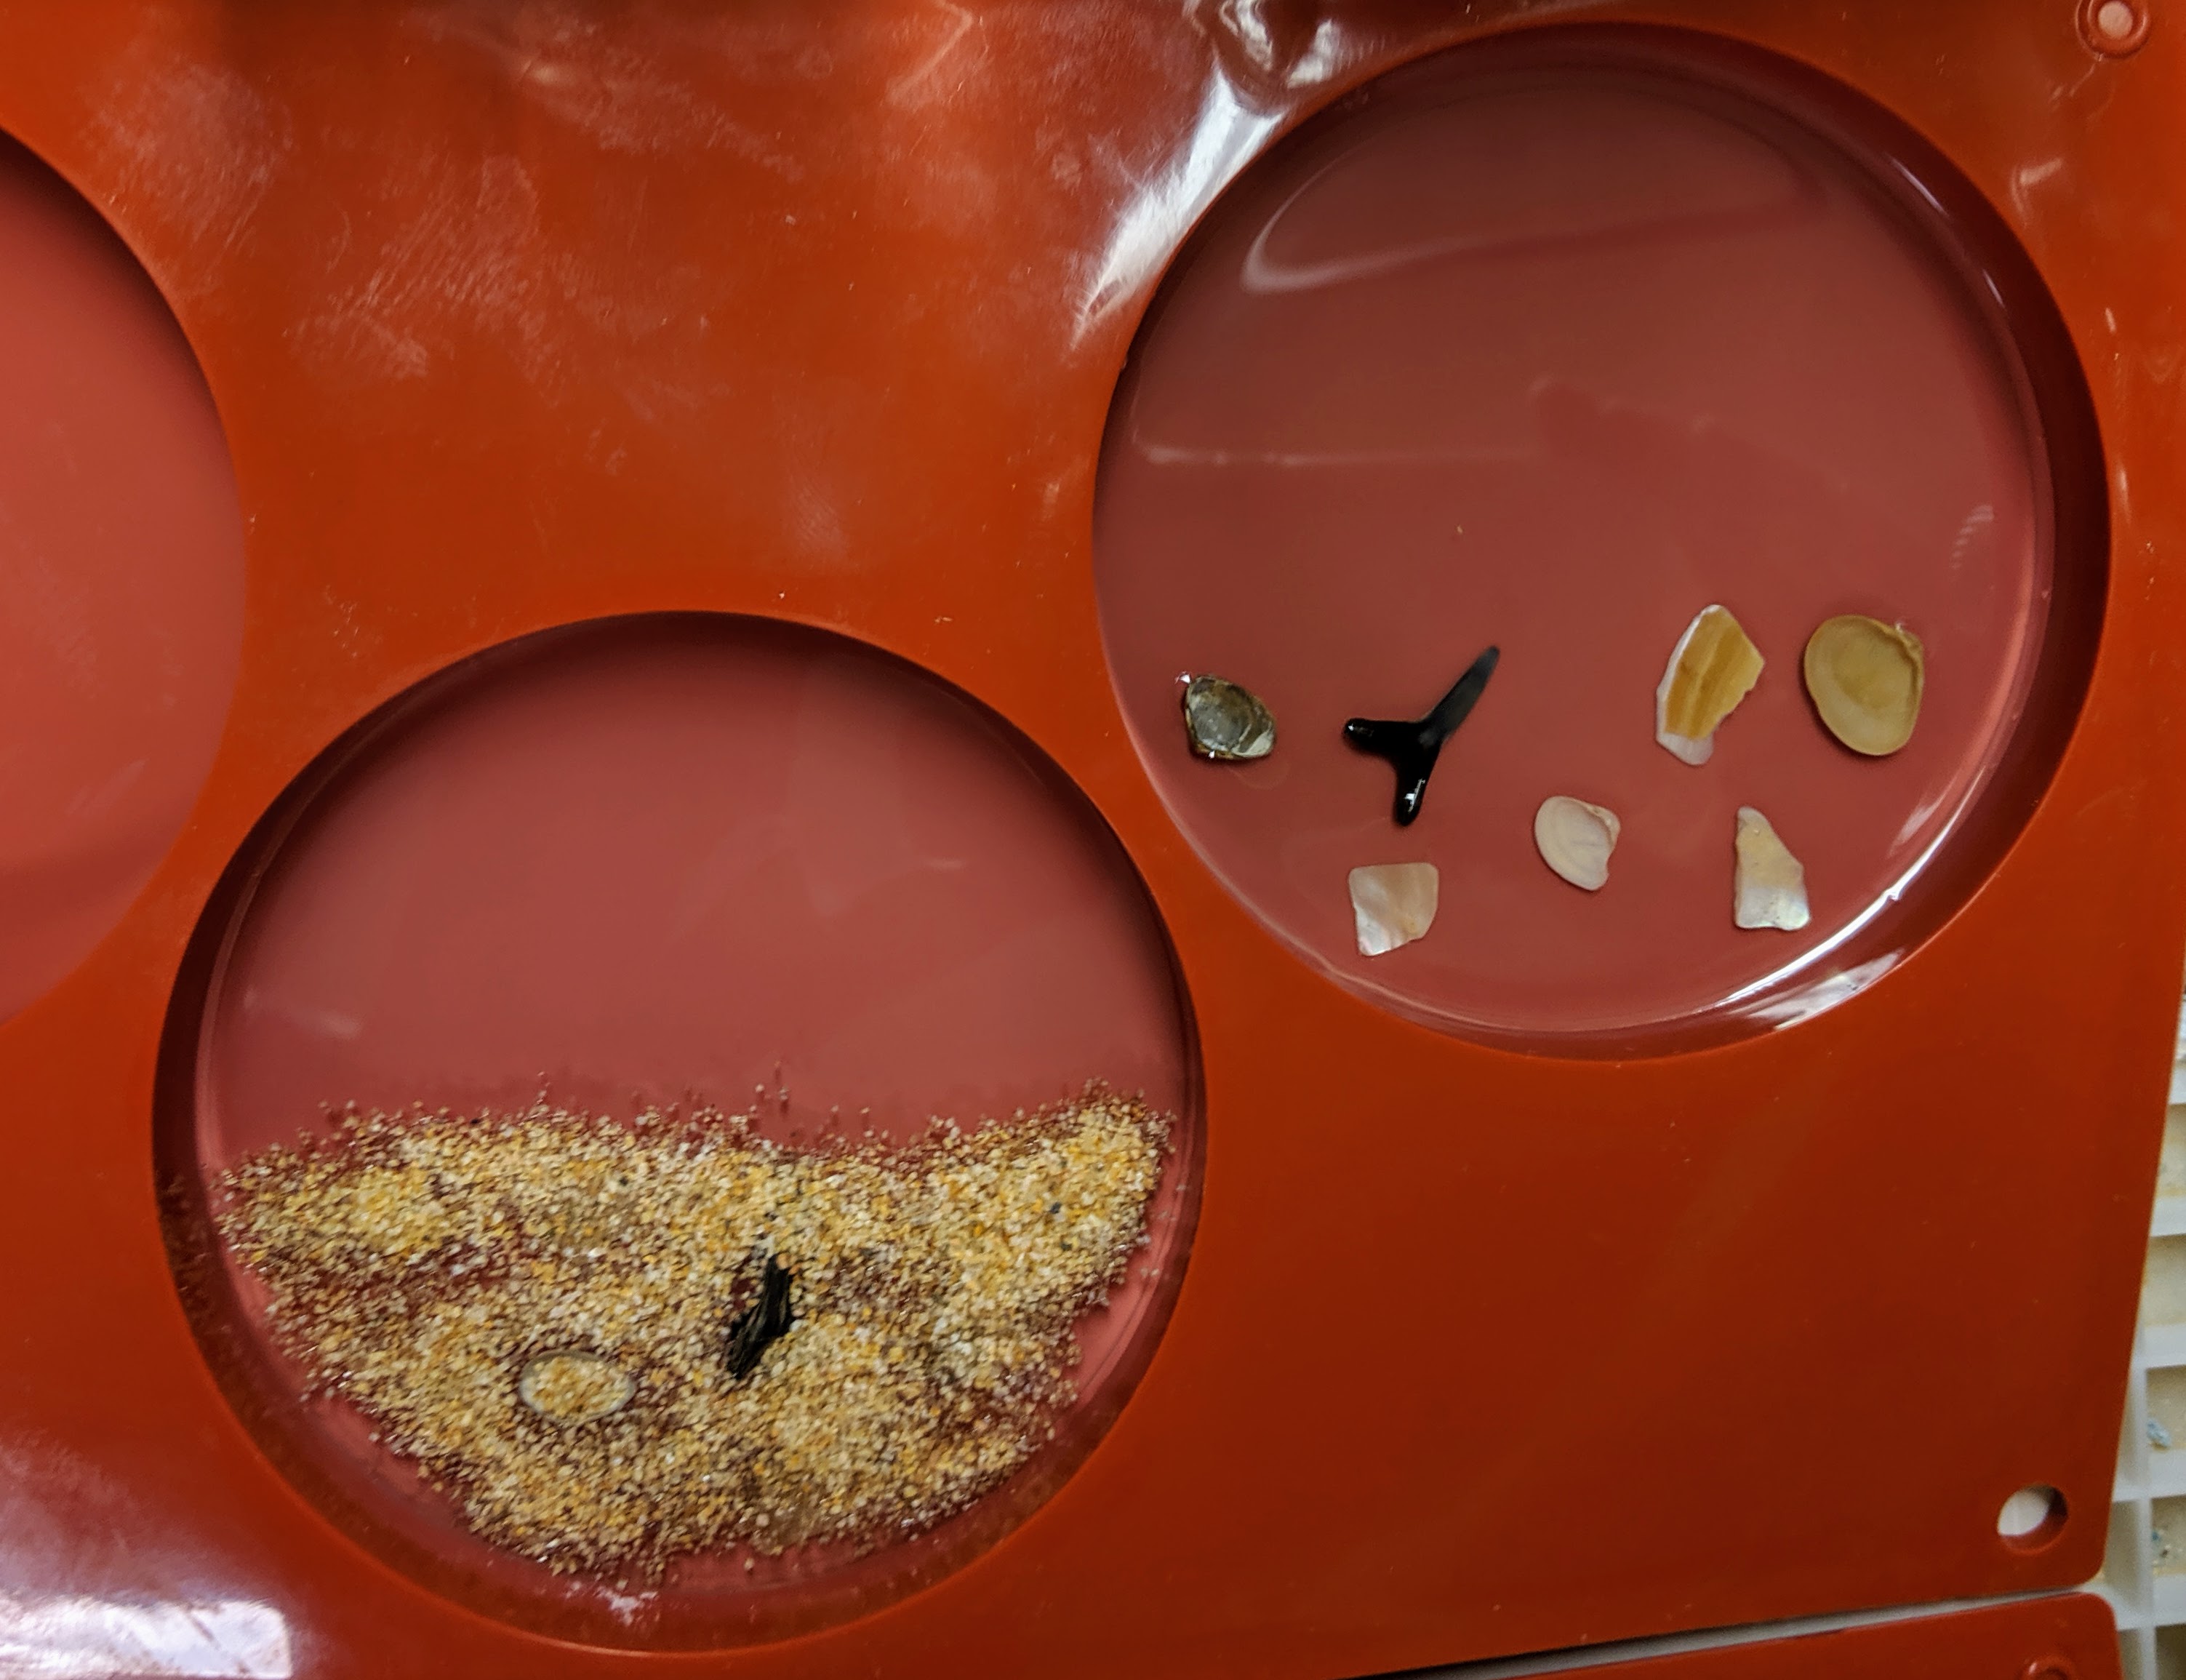
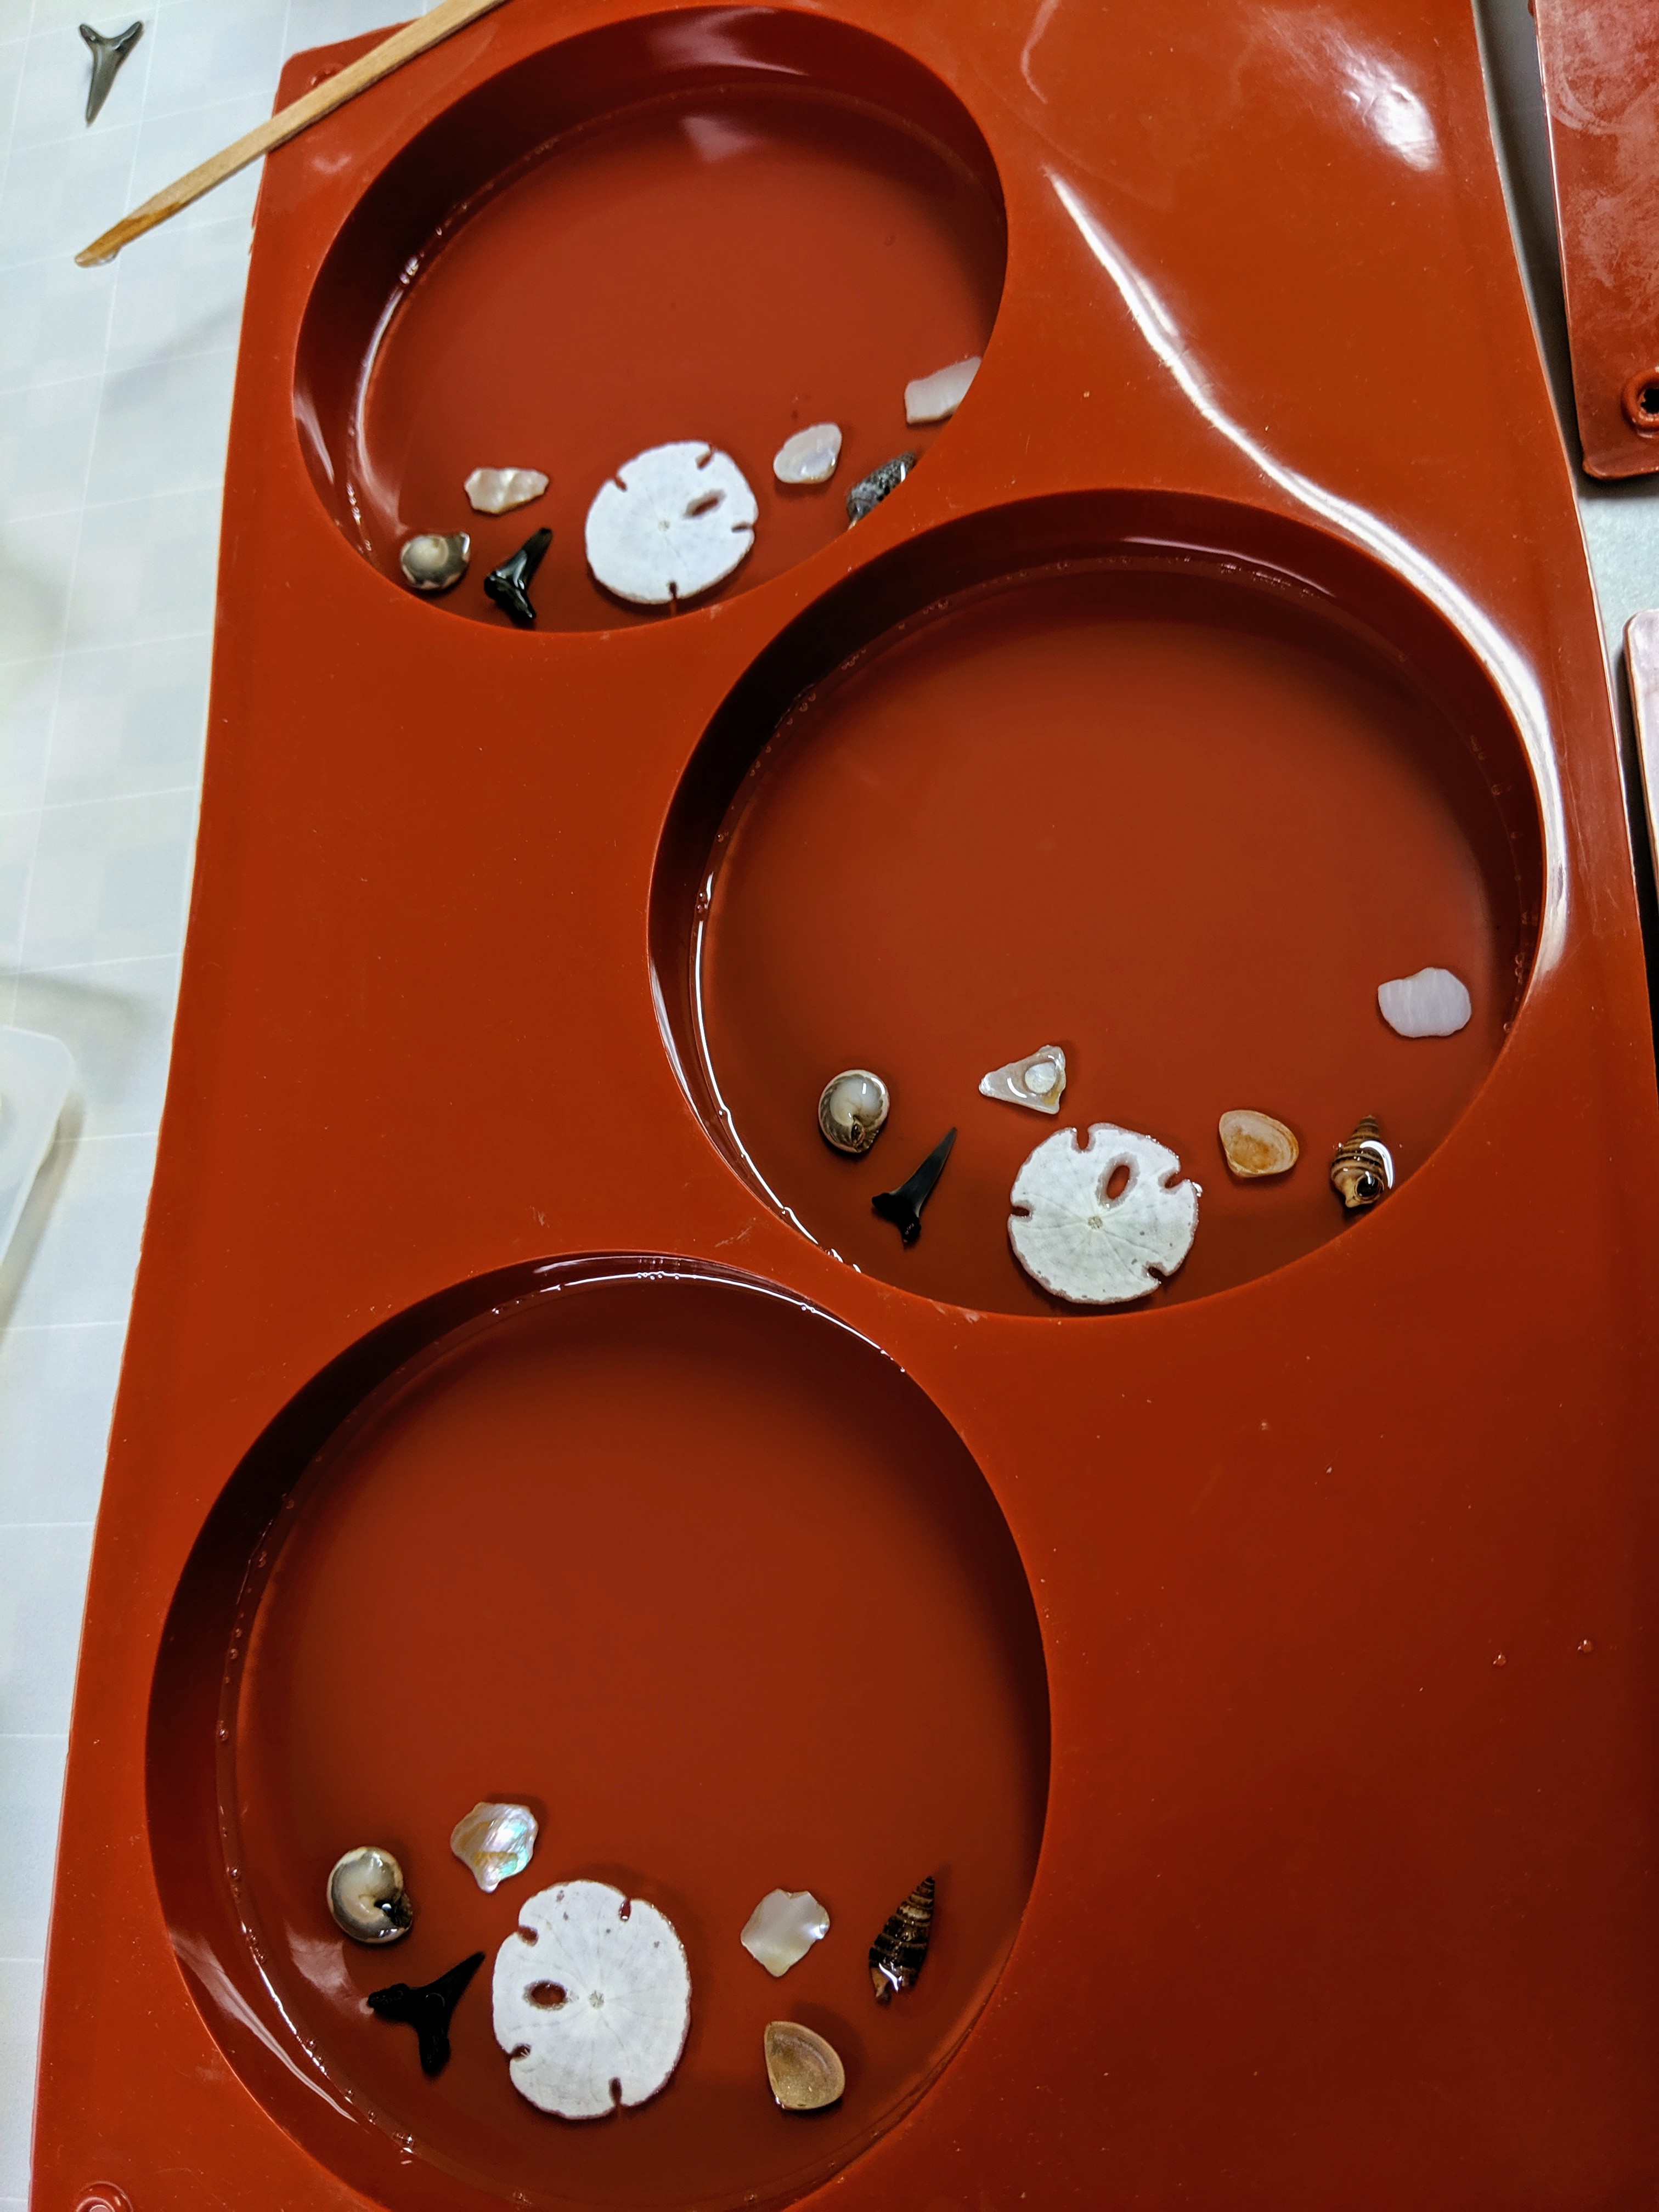
First layer poured and decorated.
I poured about an ounce of resin in each mold, waited about half an hour, then started placing the shells, shark teeth, etc in the resin. I then waited about 2 hours before the next step.
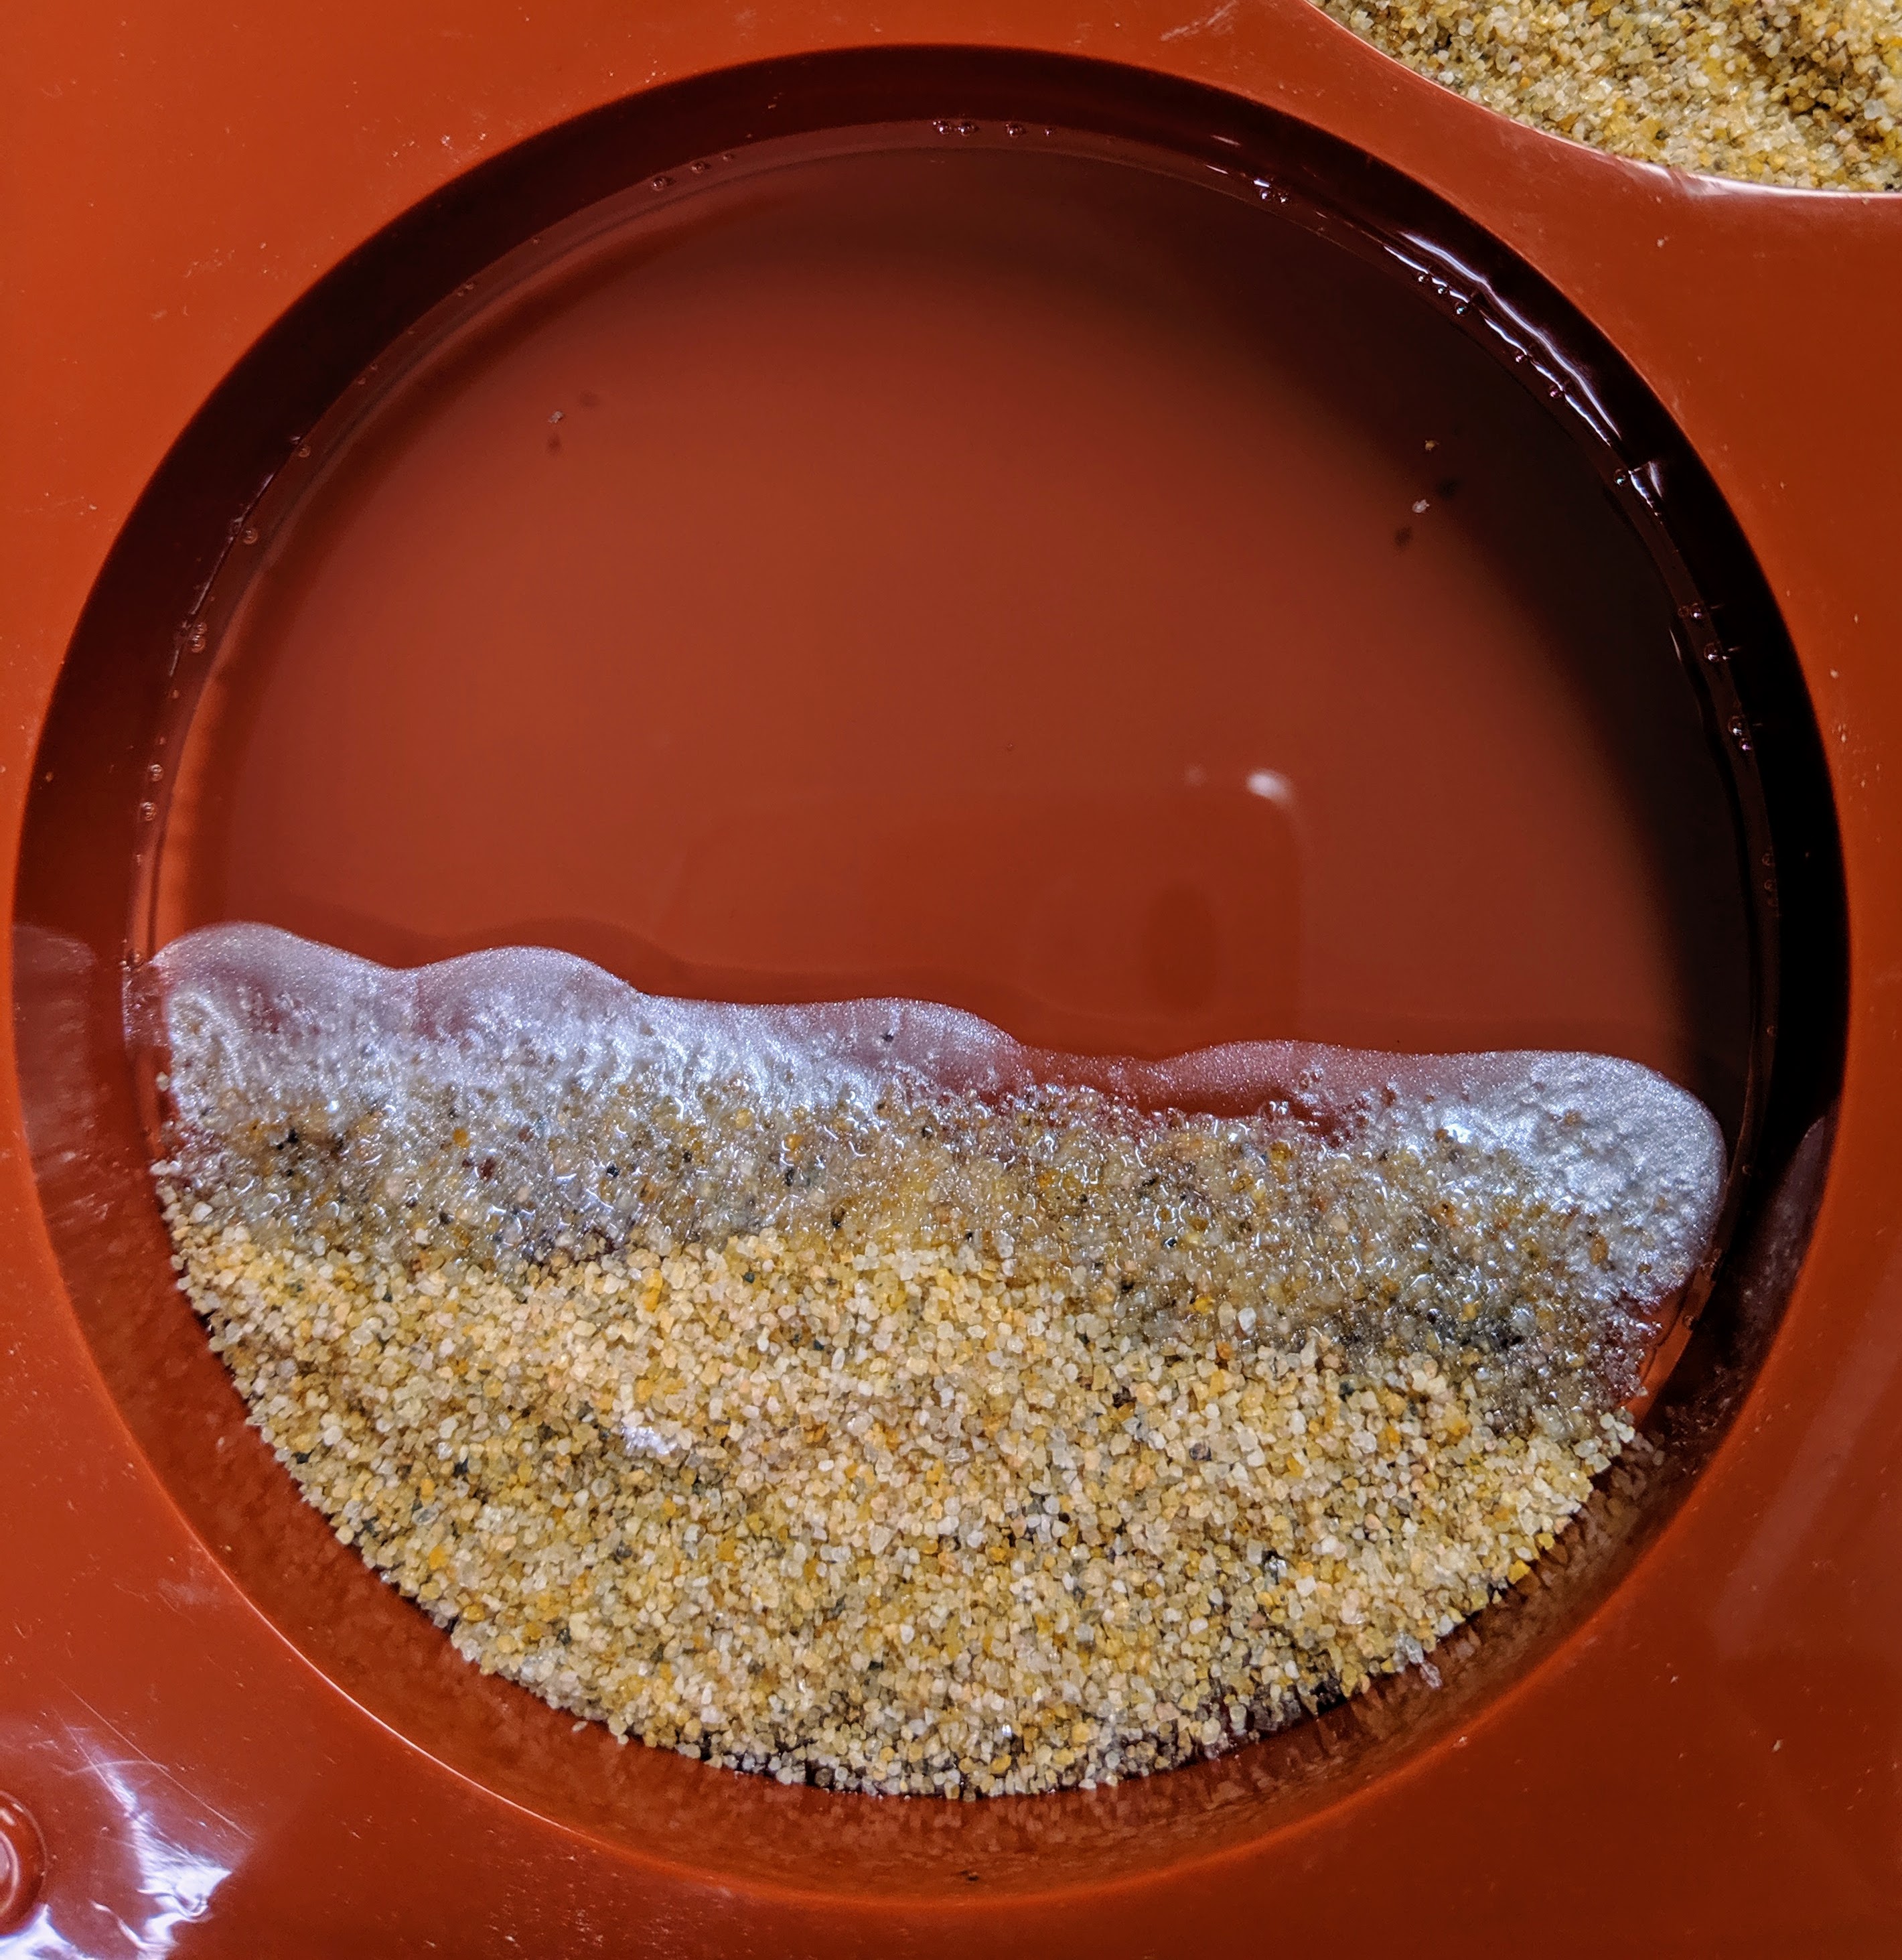
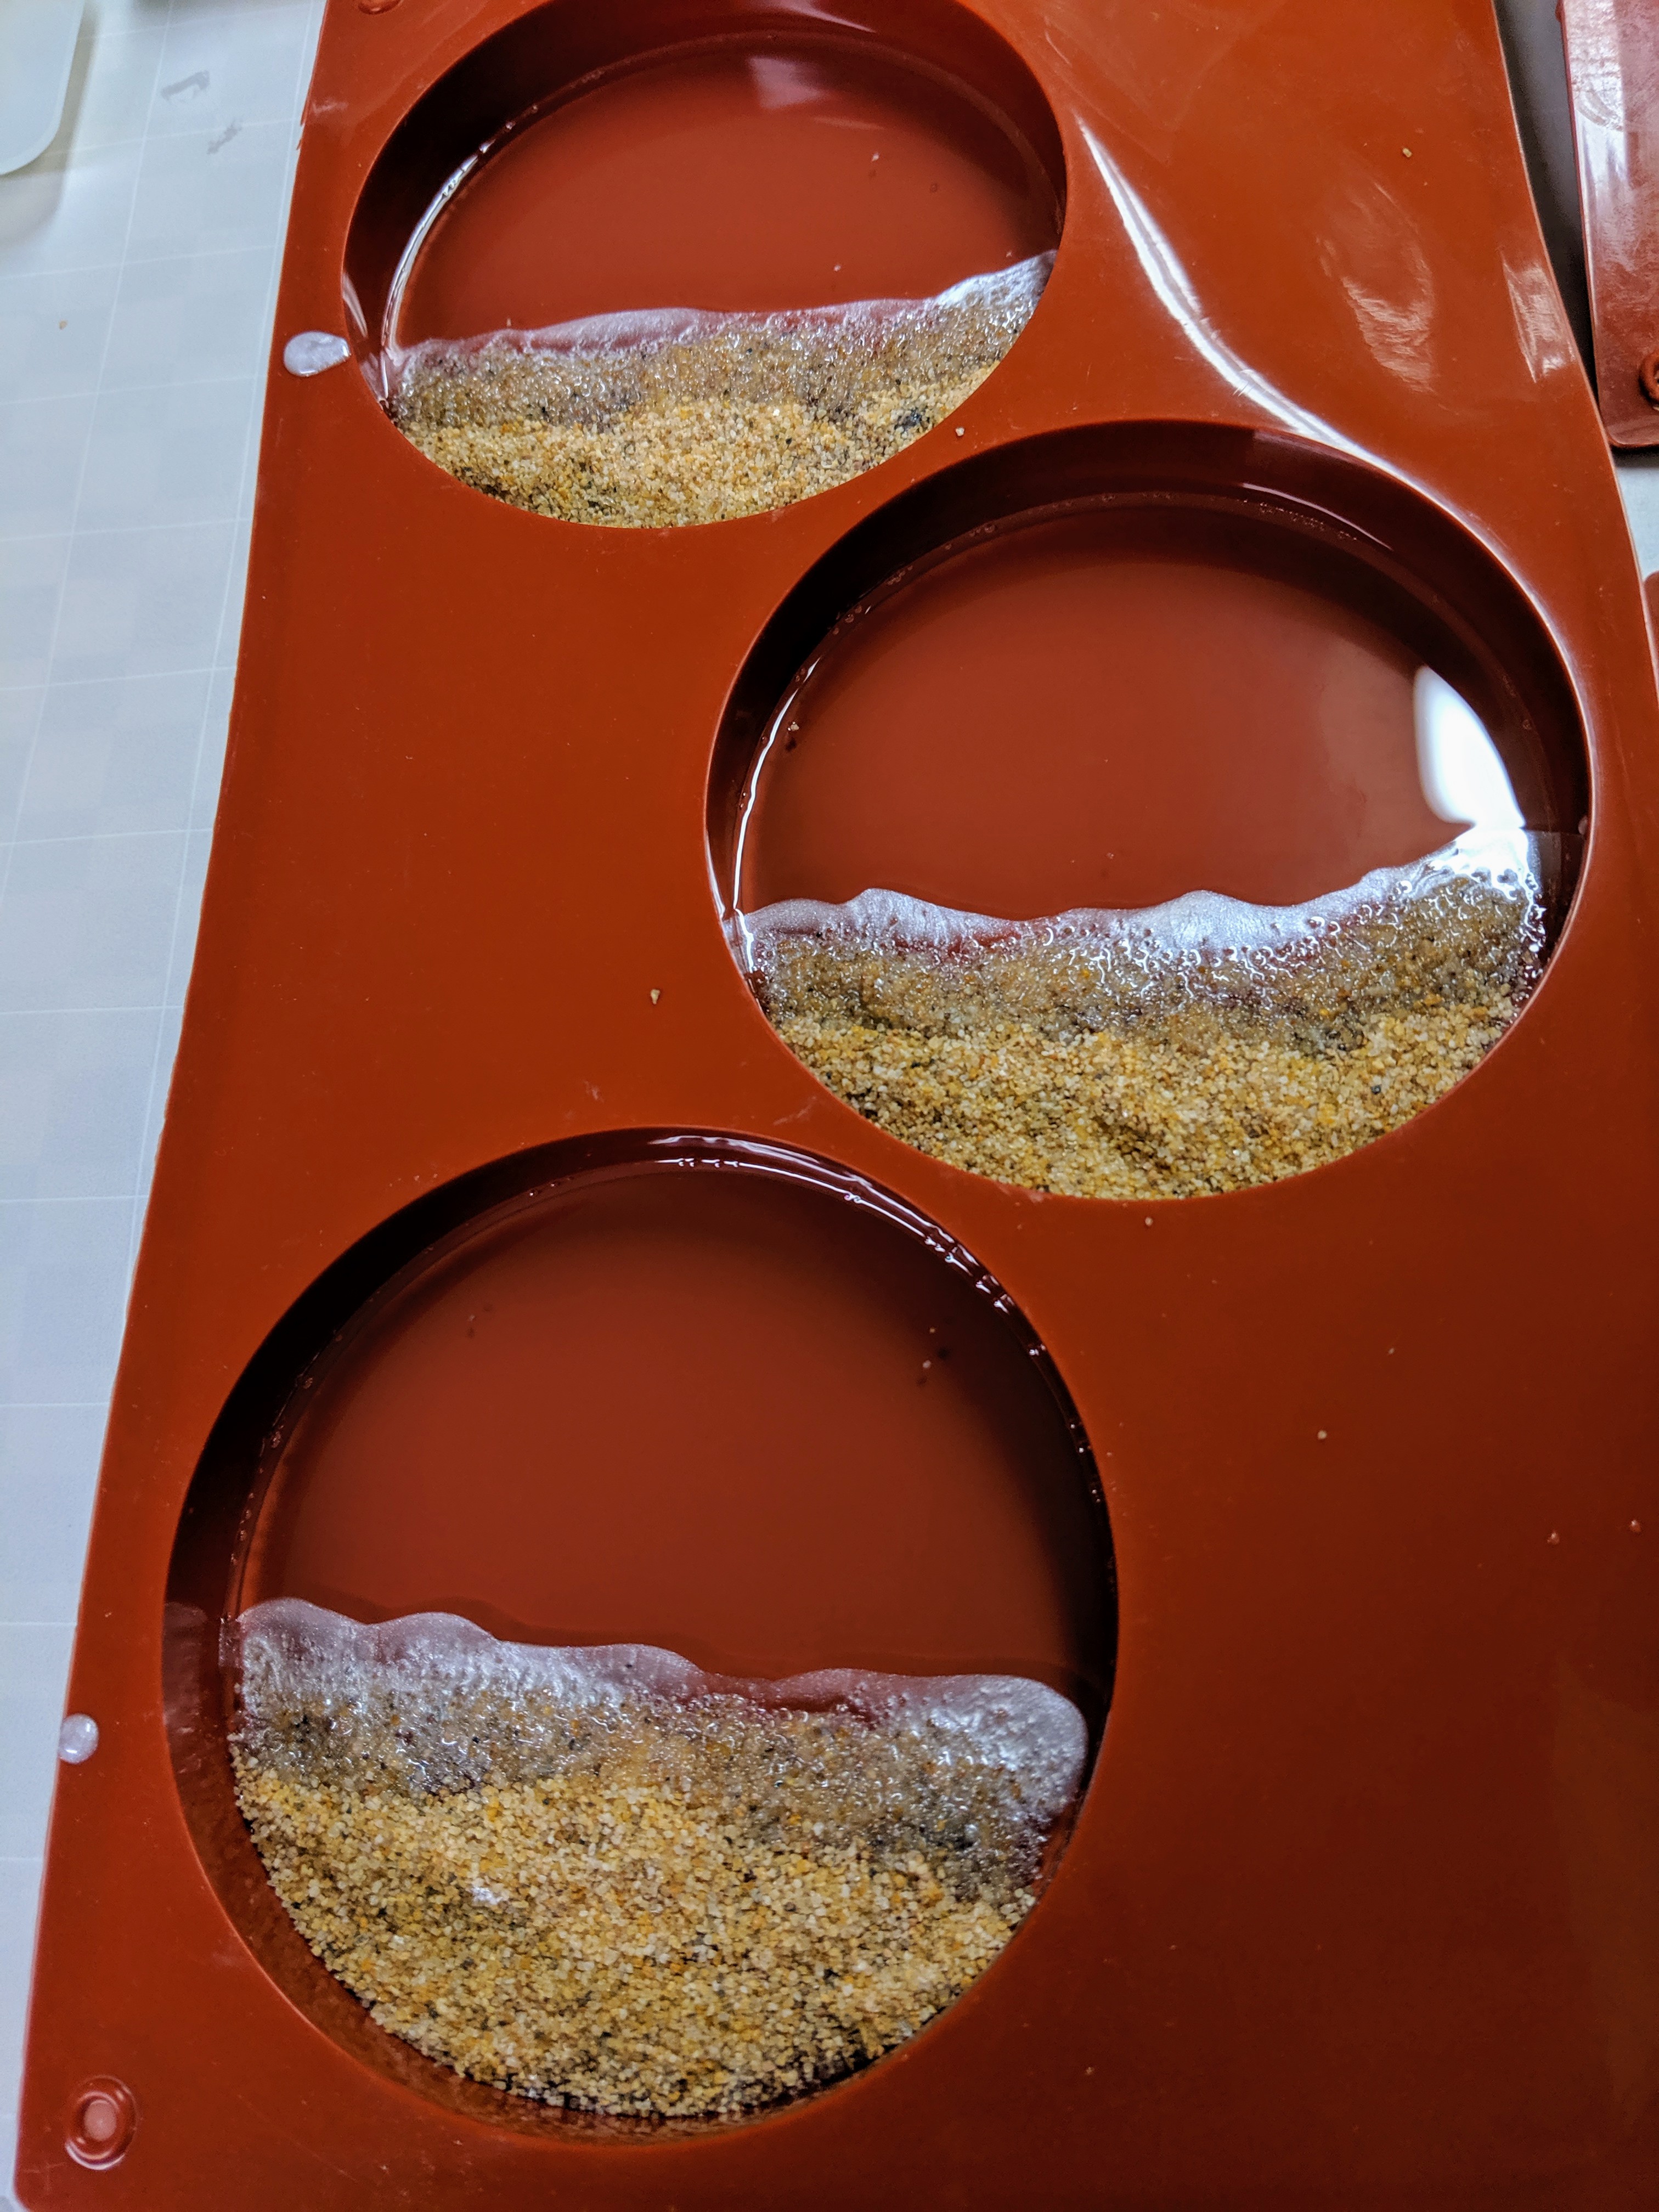
Added the sand for the beach and the white bubbles.
First I added the sand for the beach, which I made smaller than usual in this batch. I mixed up just about 3 CCs of resin and added the white pigment, then drizzled it in a line along the edge of the “beach” using a small craft stick. I went back and added a bit more after it dissipated a little. I also had enough white resin left over to make a couple of experimental beads. The white resin still spread out a bit more than I anticipated. I just drizzled a thin line and by the time I took photos, it had spread into the sand.
Bubbles added.
I wanted to let this layer cure enough that it would be more gel-like than liquid, as I believe that causes the white pigment to spread out more than I want it to (I really want it to be a thin layer at the edge of the sand and water to look like bubbles when the waves are crashing at the beach). Since it was just a small amount of resin, that didn’t take very long, and I started mixing up the various colors of pigment for the water.
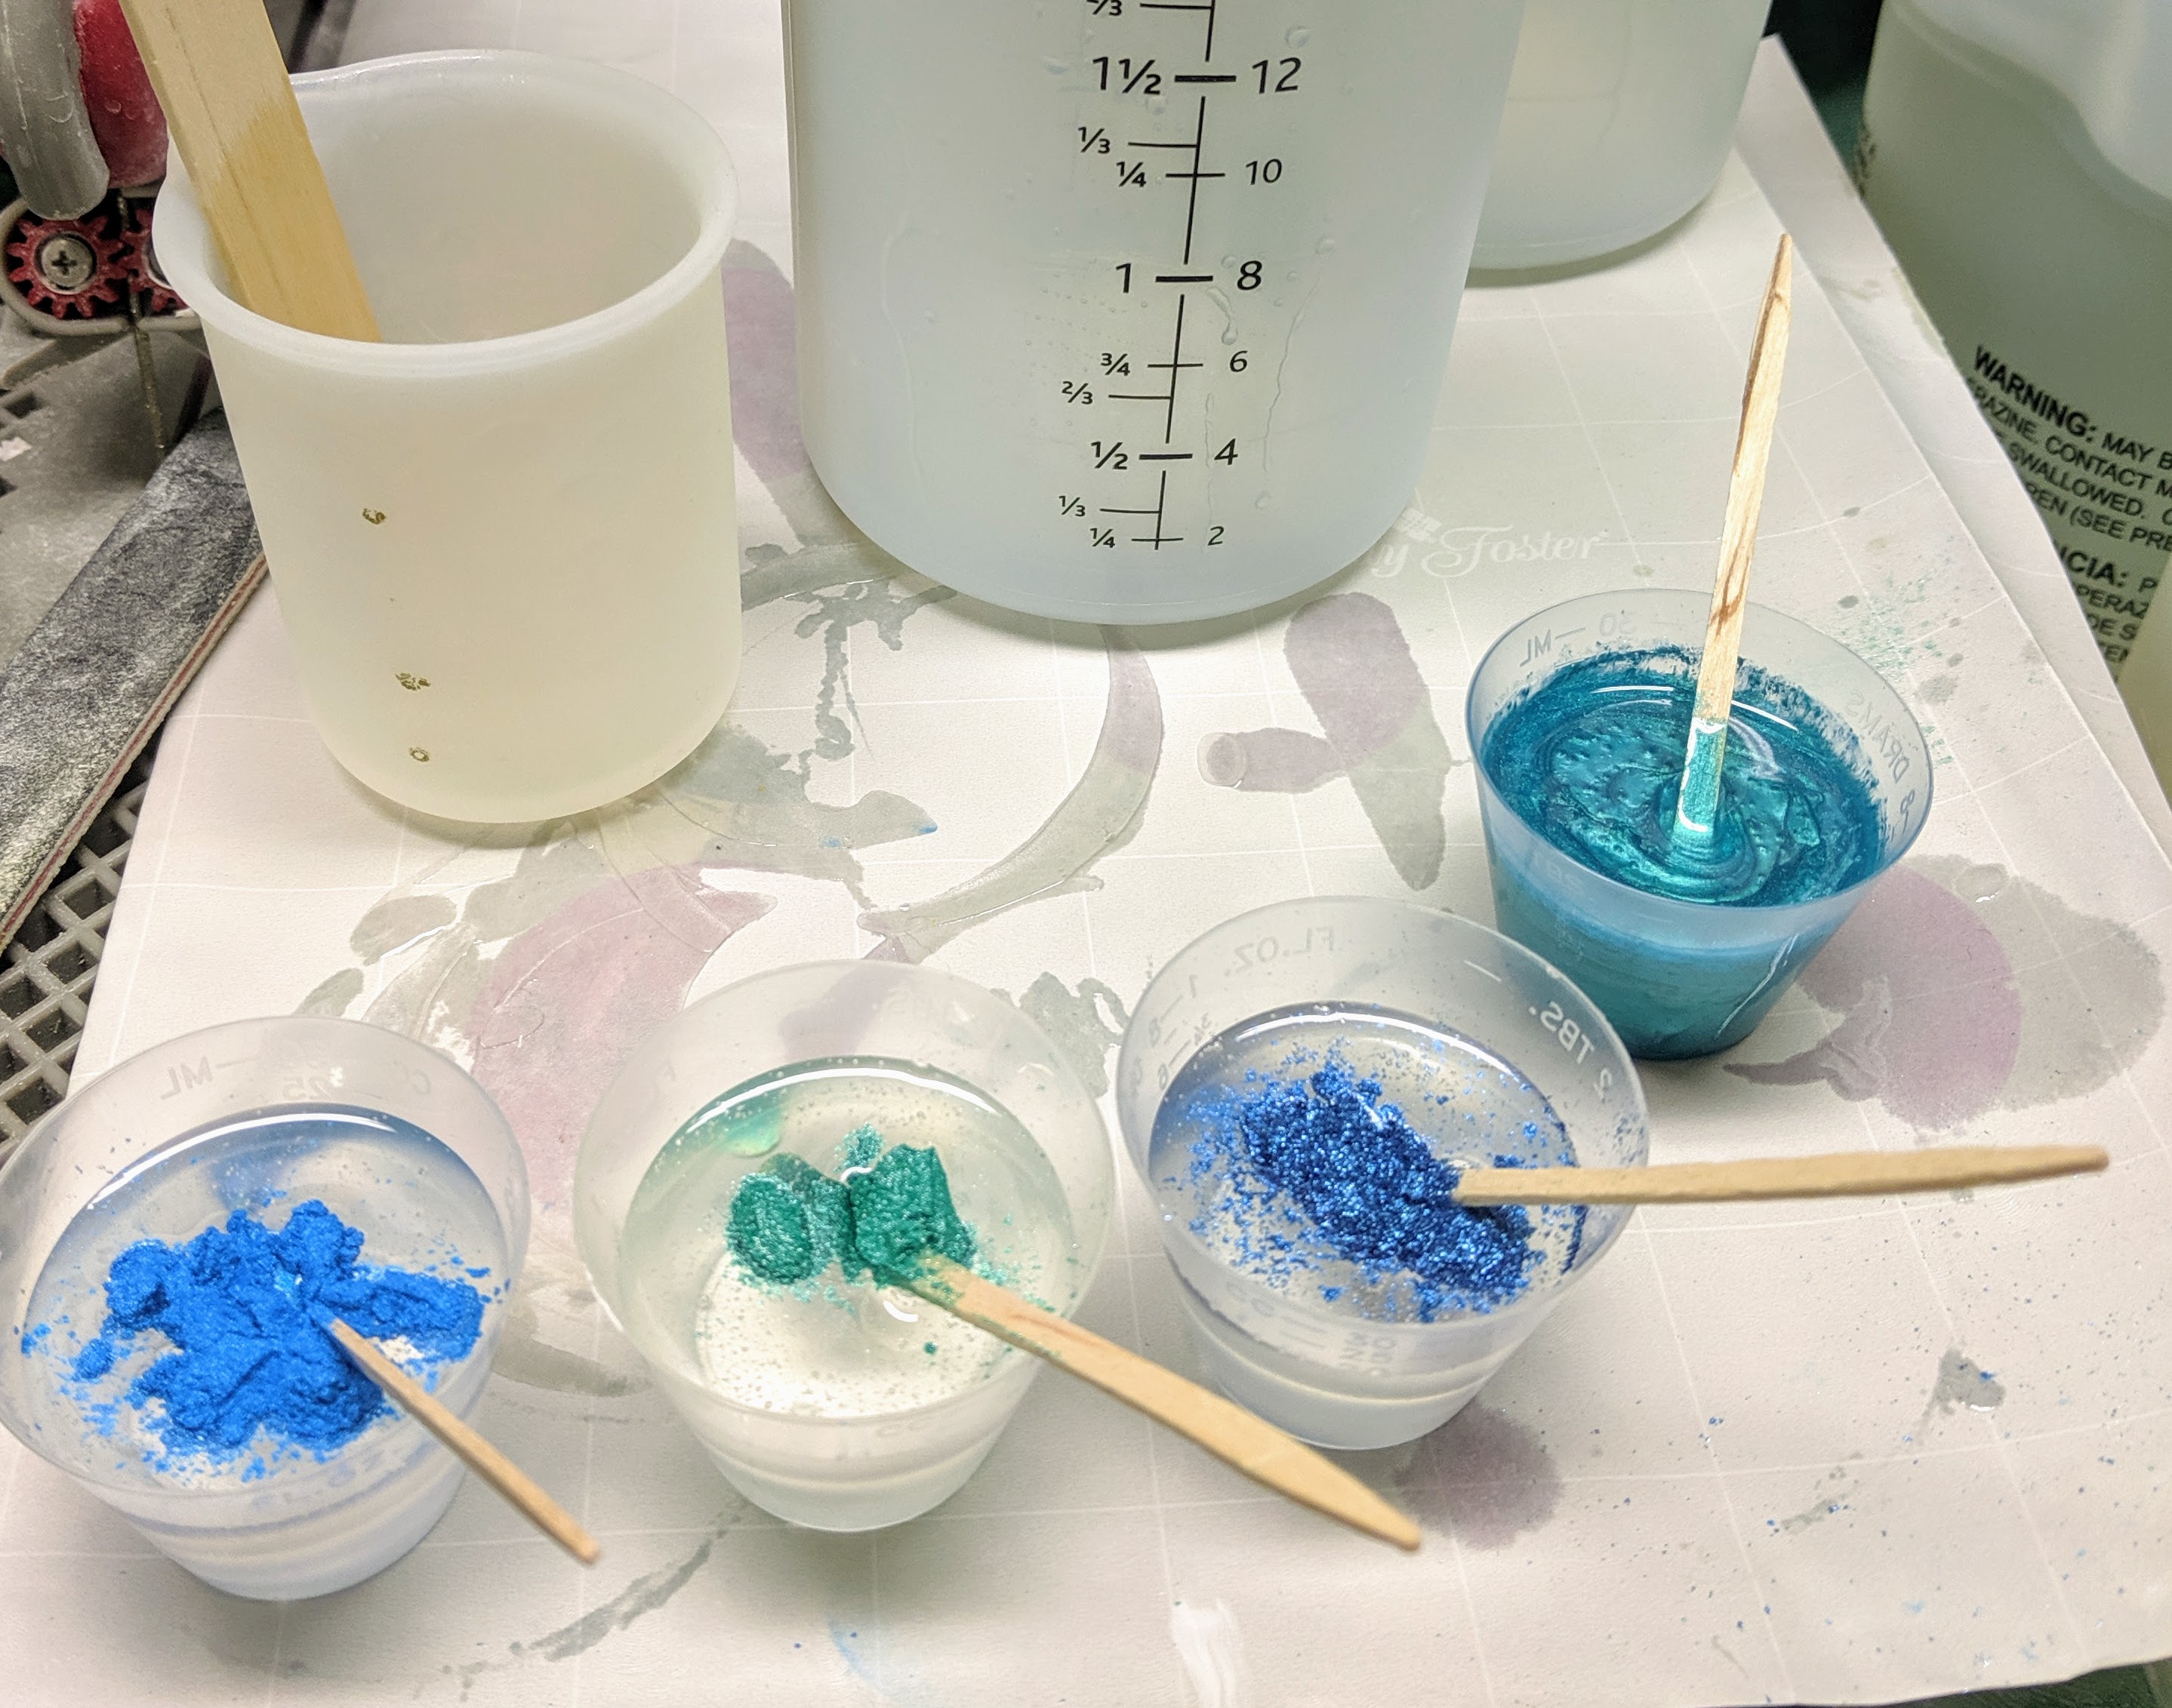
80 ccs of resin for pigment.
I mixed up 80 ccs of resin using a small silicone measuring cup, then split it evenly between the four medicine cups. I then scooped a bit of pigment powder into each cup and mixed it together. After all the colors were ready, I drizzled some of the Caribbean Blue (far right in the above photo) in a few lines into the mold. It will be interesting to see if making lines with the pigmented resin results in a different look for the water in the coasters.
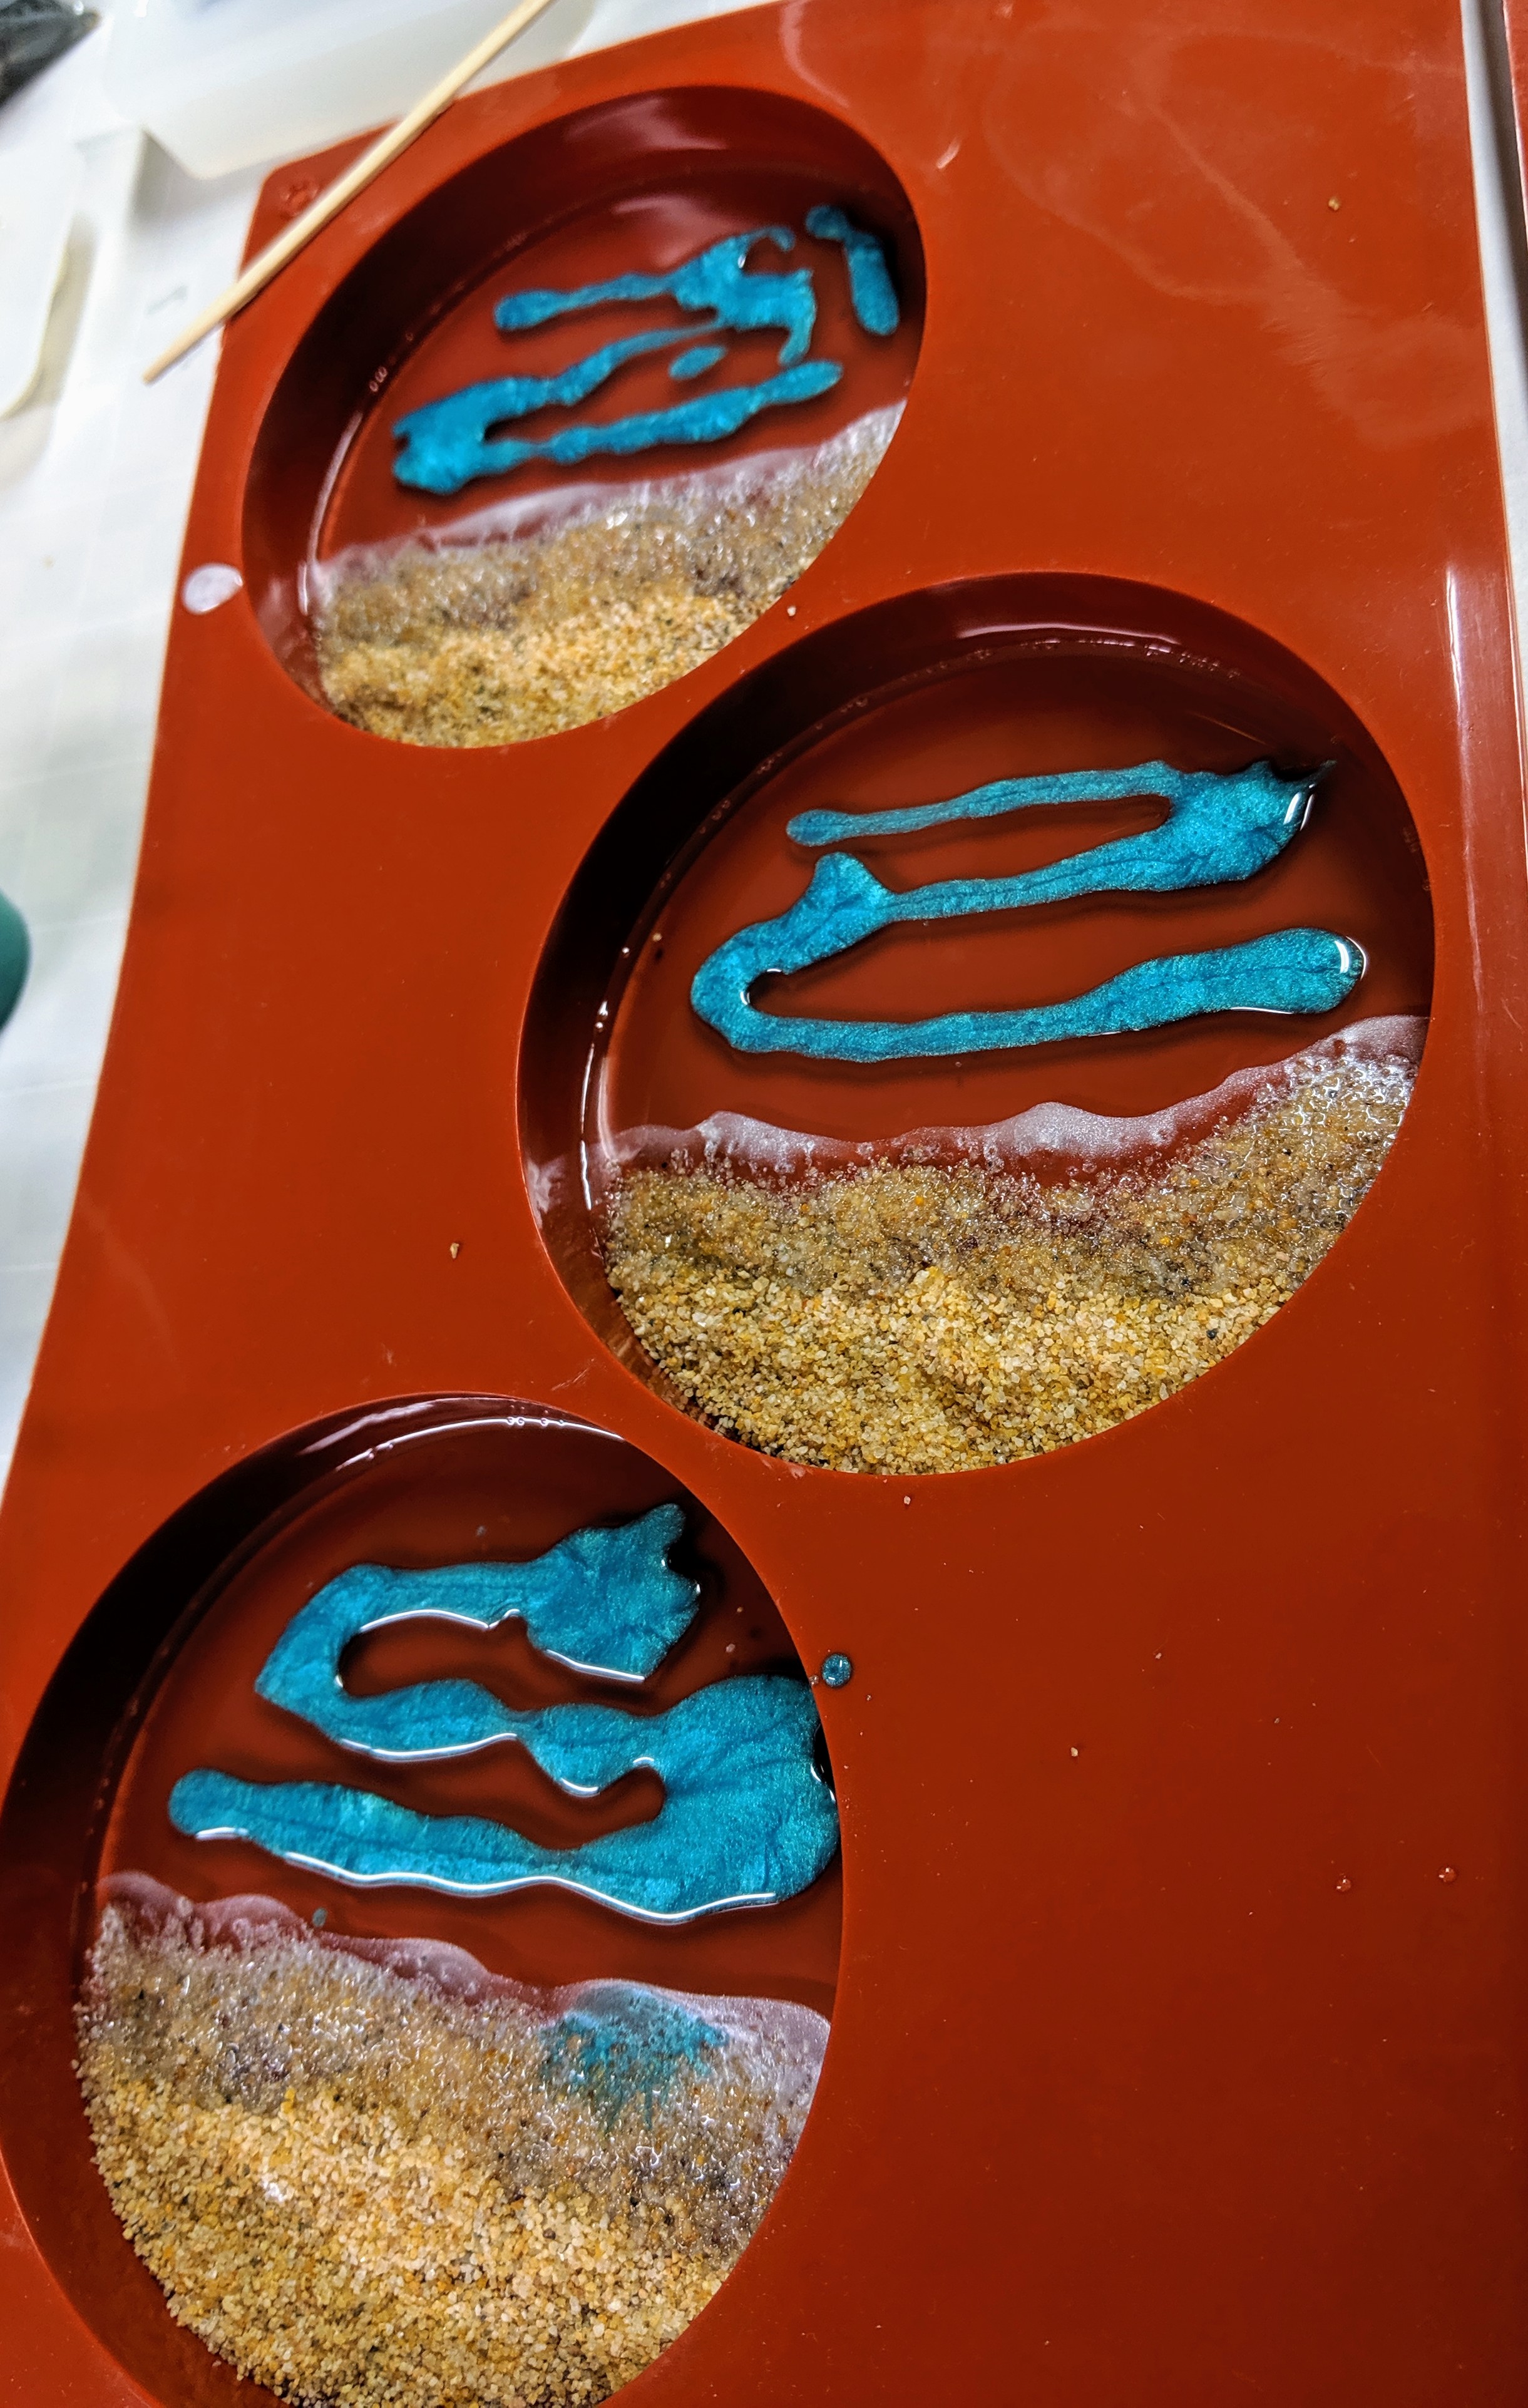
Adding the first color for the water.
After that, I repeated the steps for each of the other three colors. I tried to fill in empty areas with each color. I didn’t add any of the water-pigmented resin to the sand, but I knew it would drift over it a bit after the last step.
Two colors added.Adding colors.
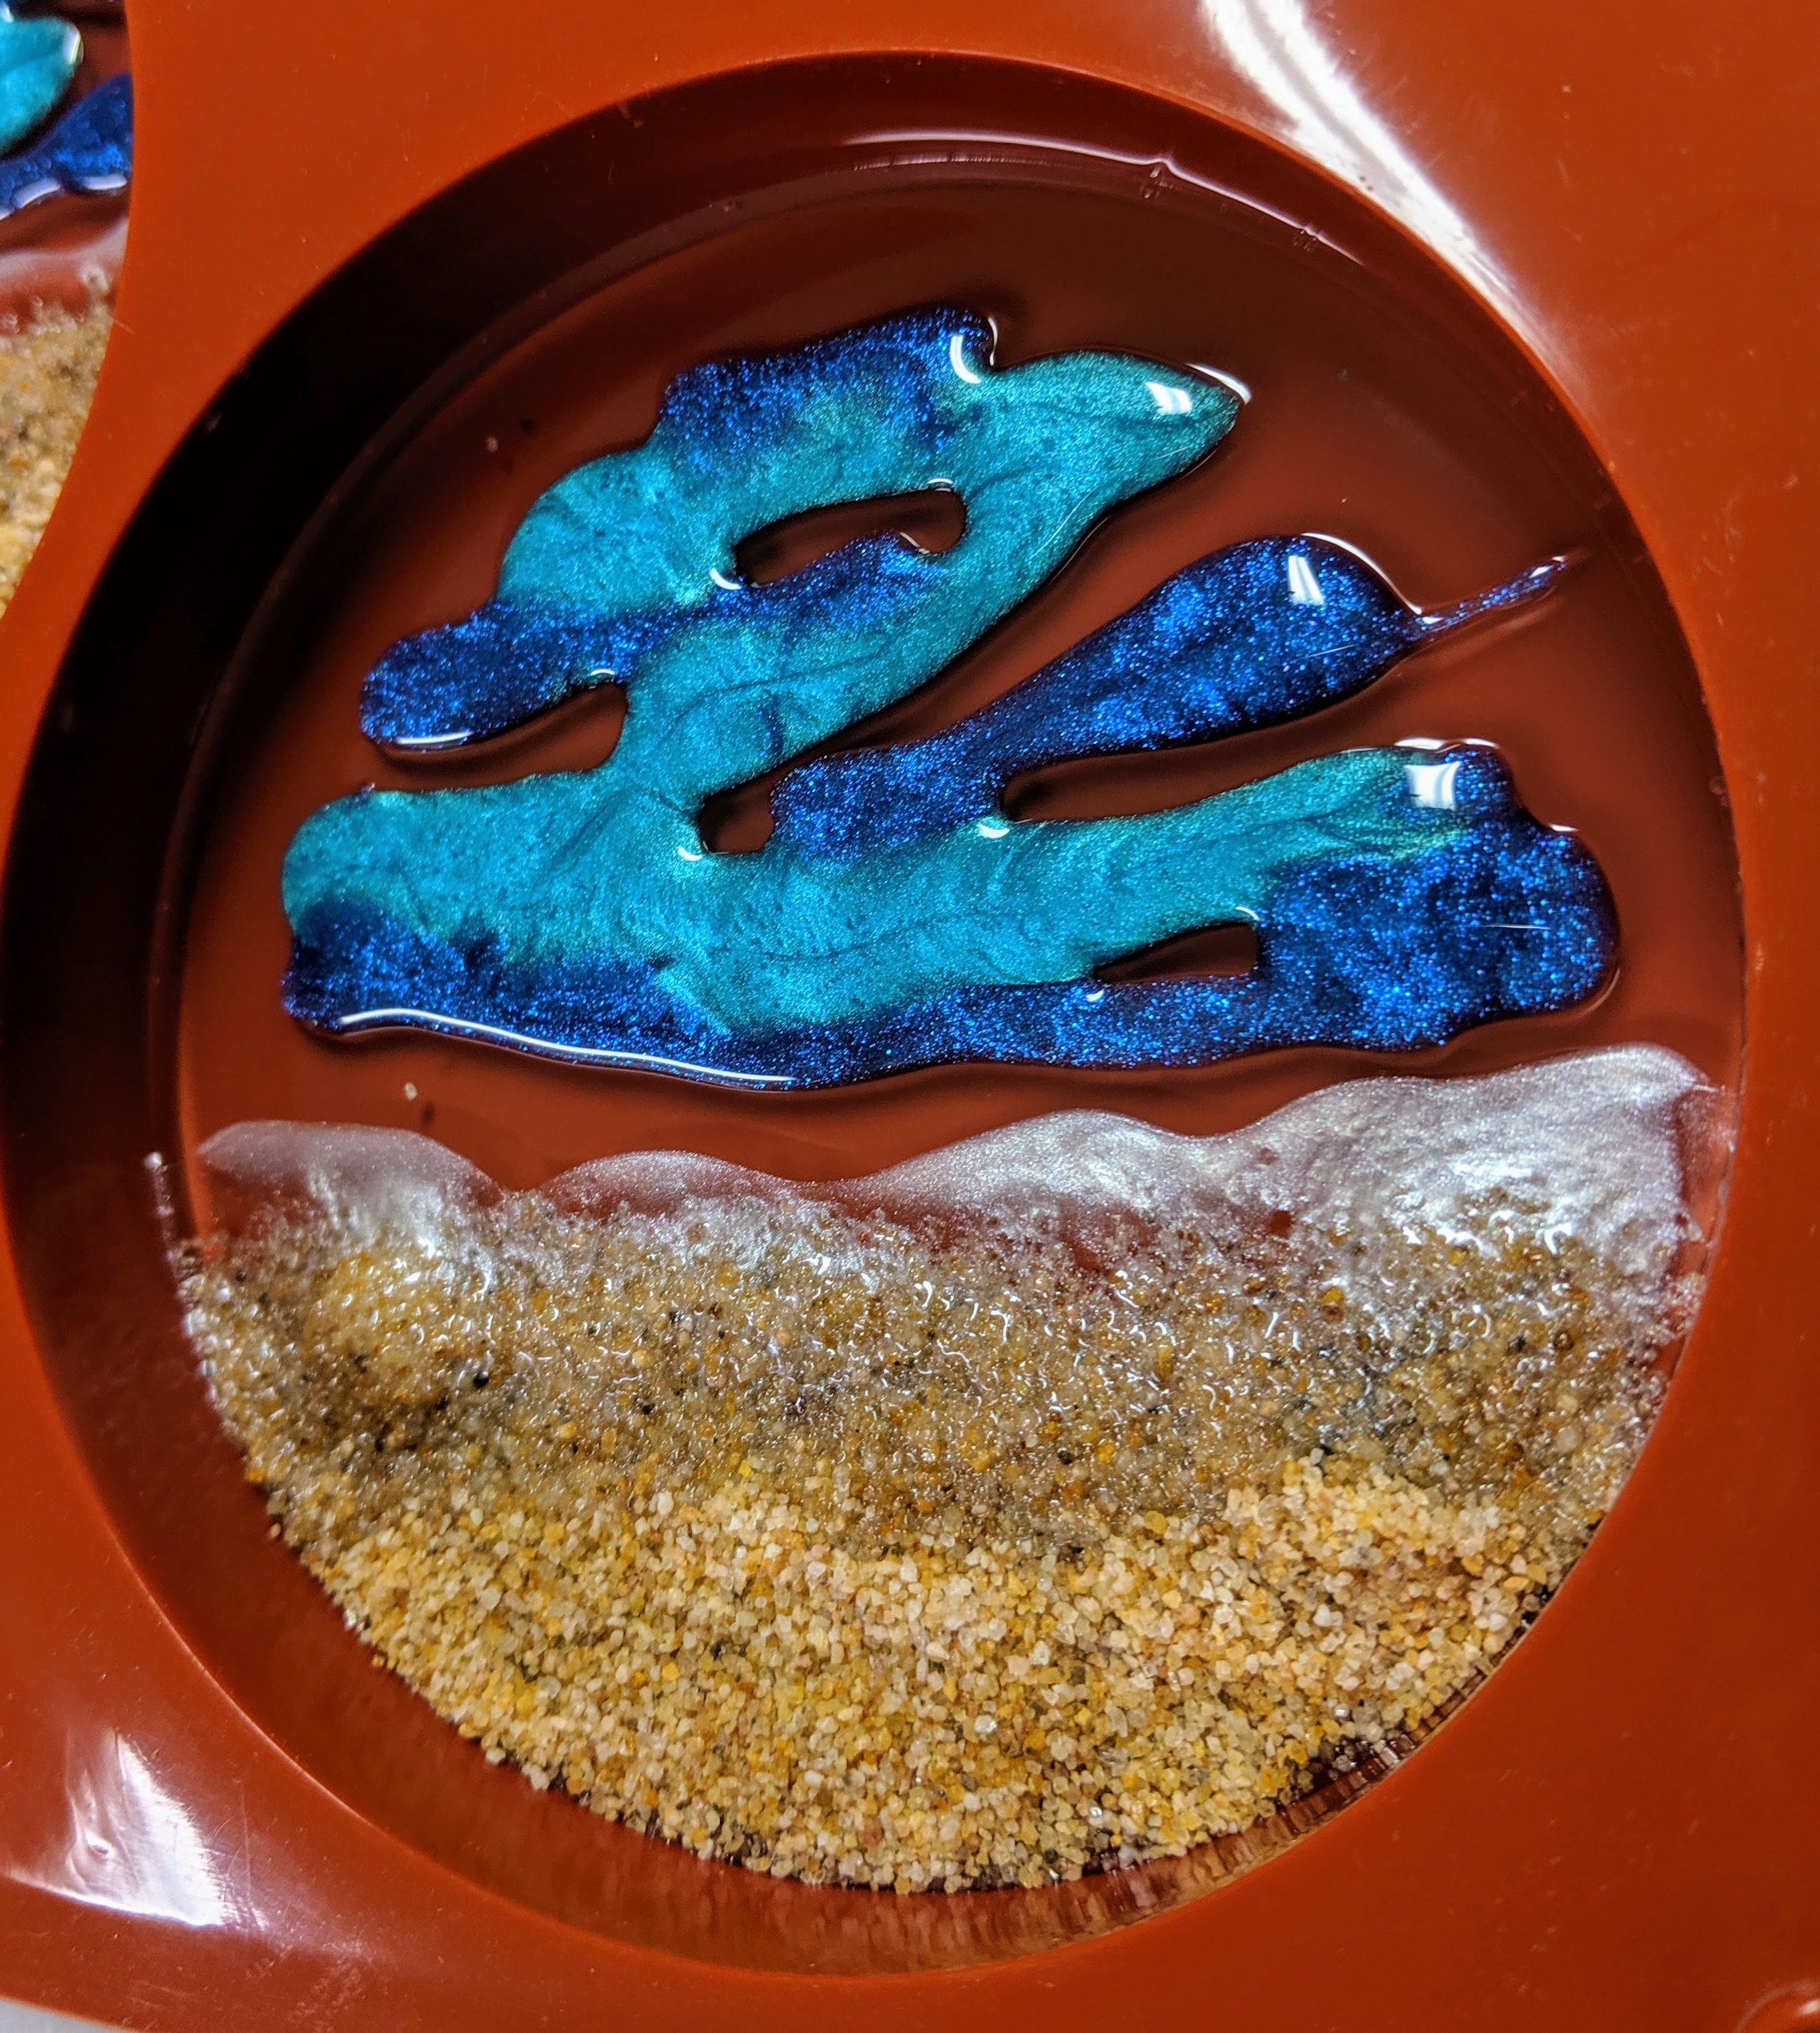
I used up every last usable drop of the pigmented resin I mixed for the water. I really wanted to fill in all the gaps.
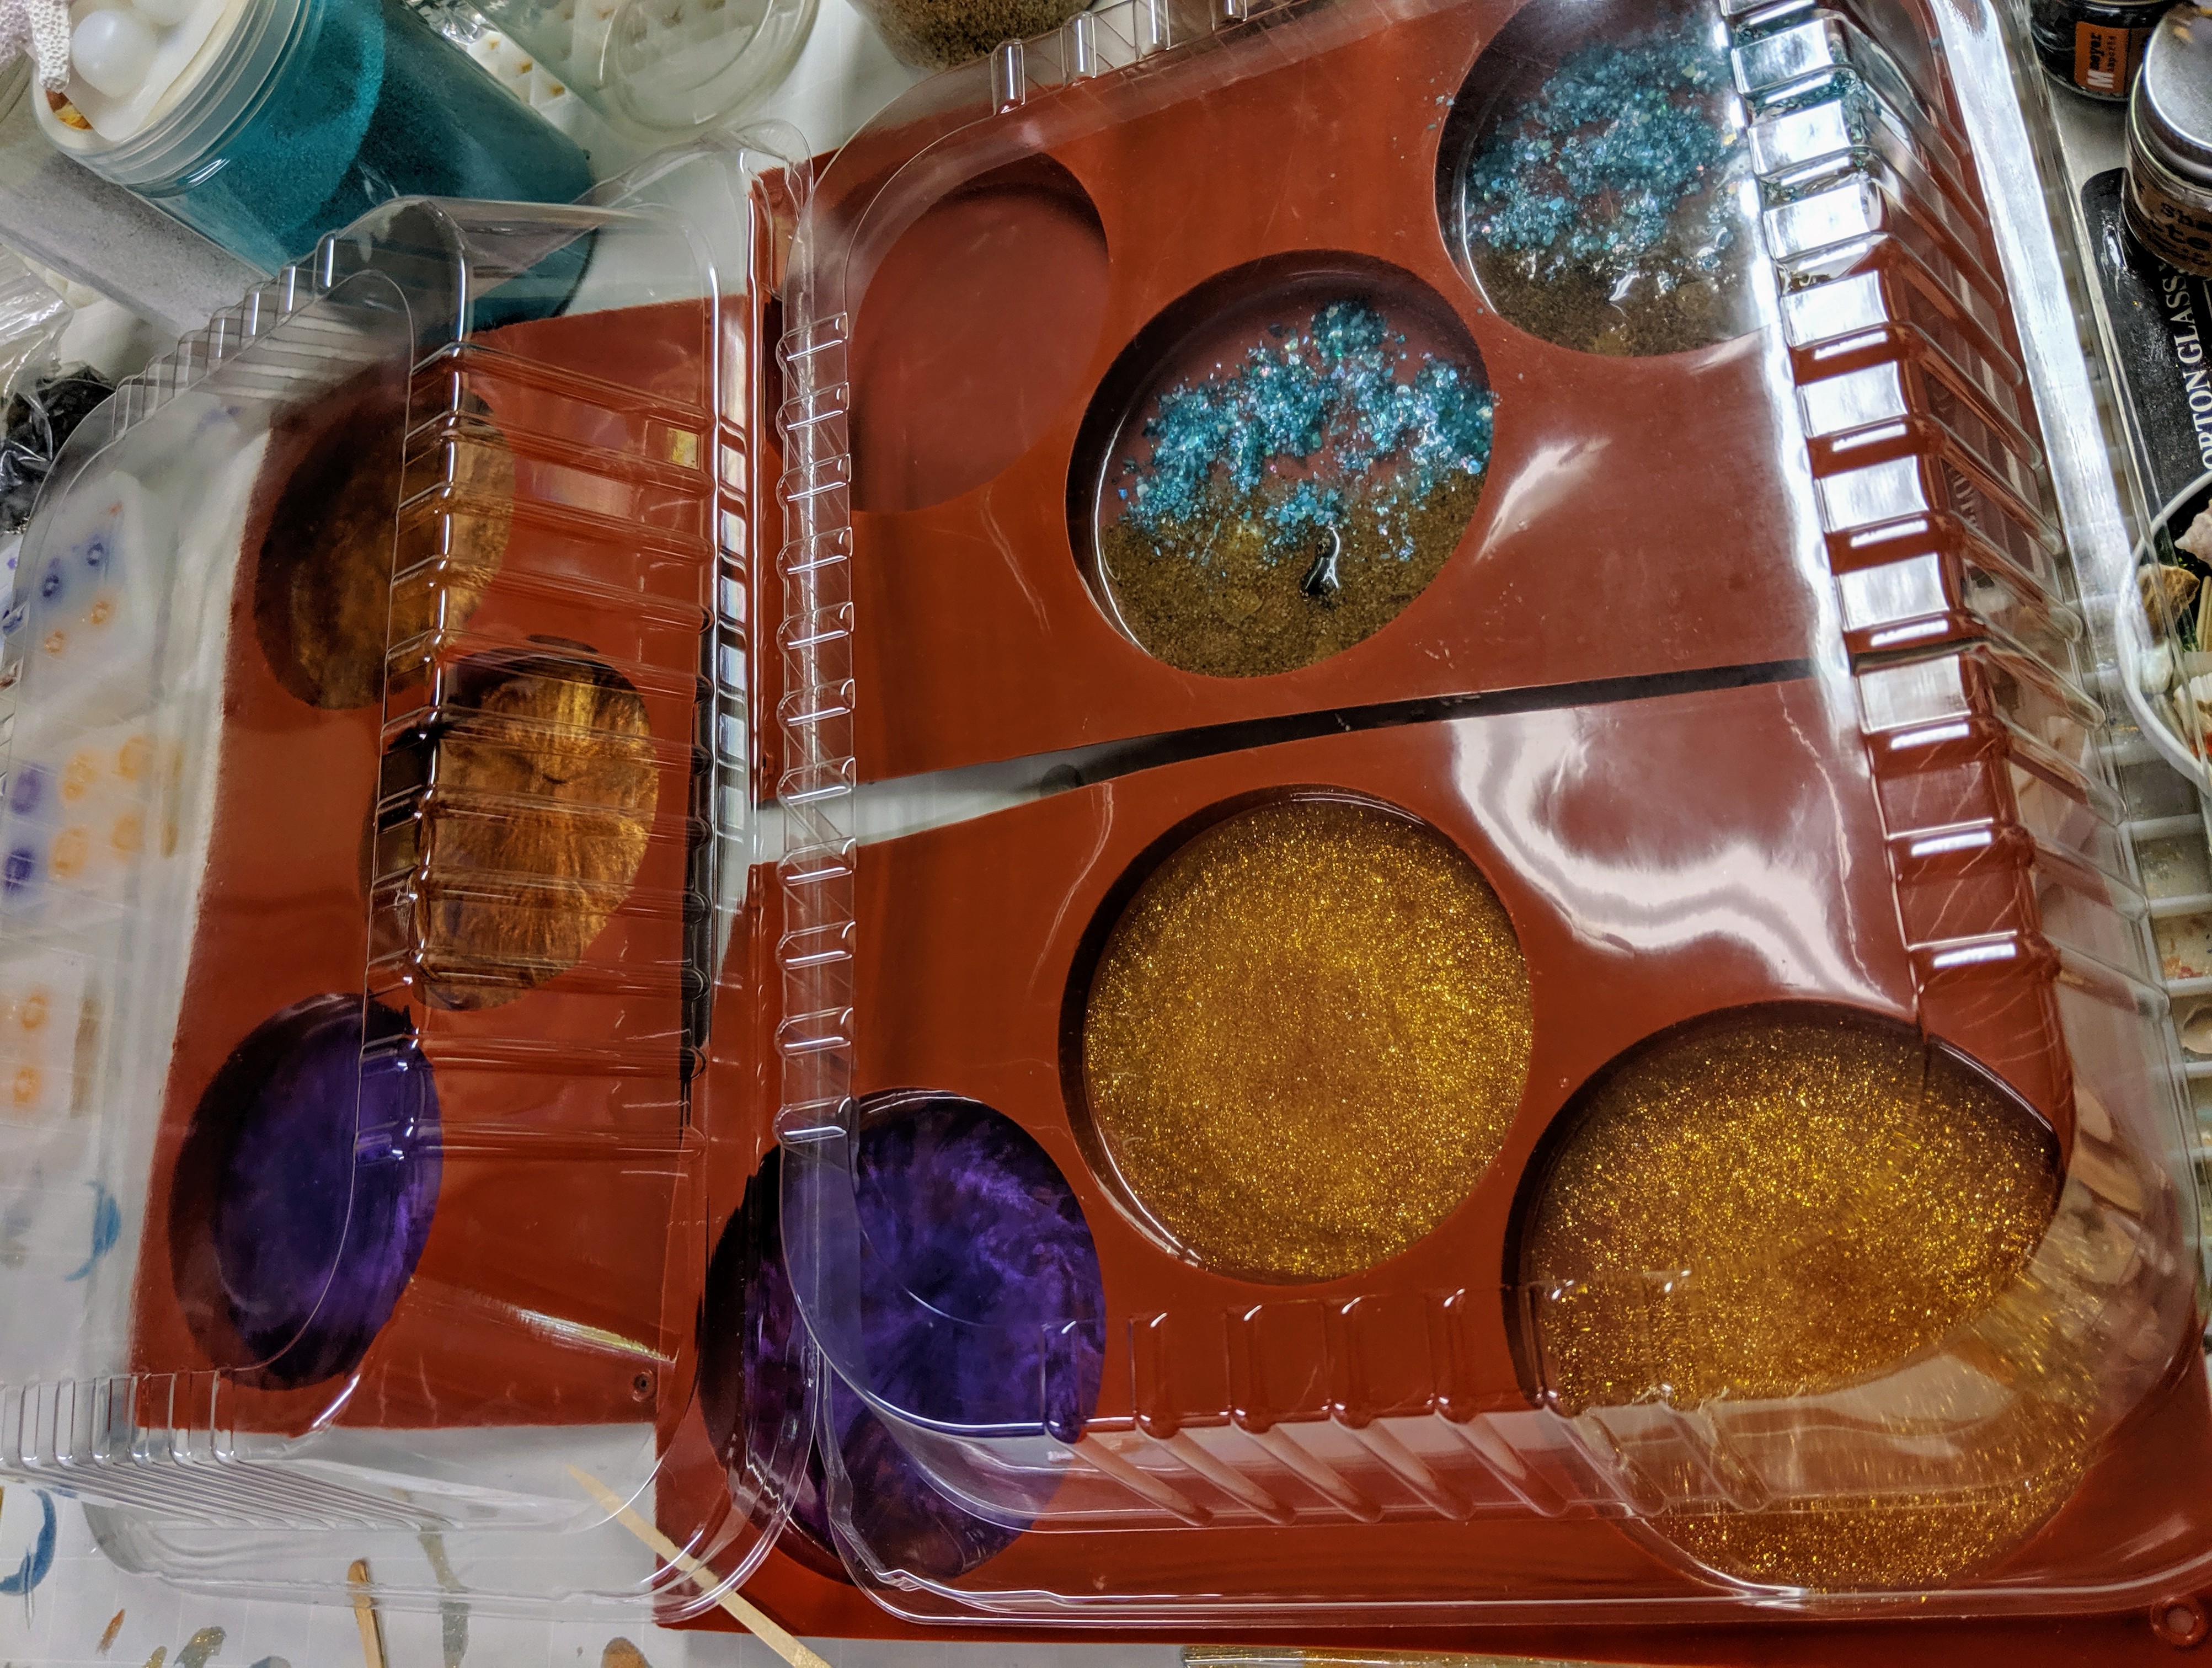
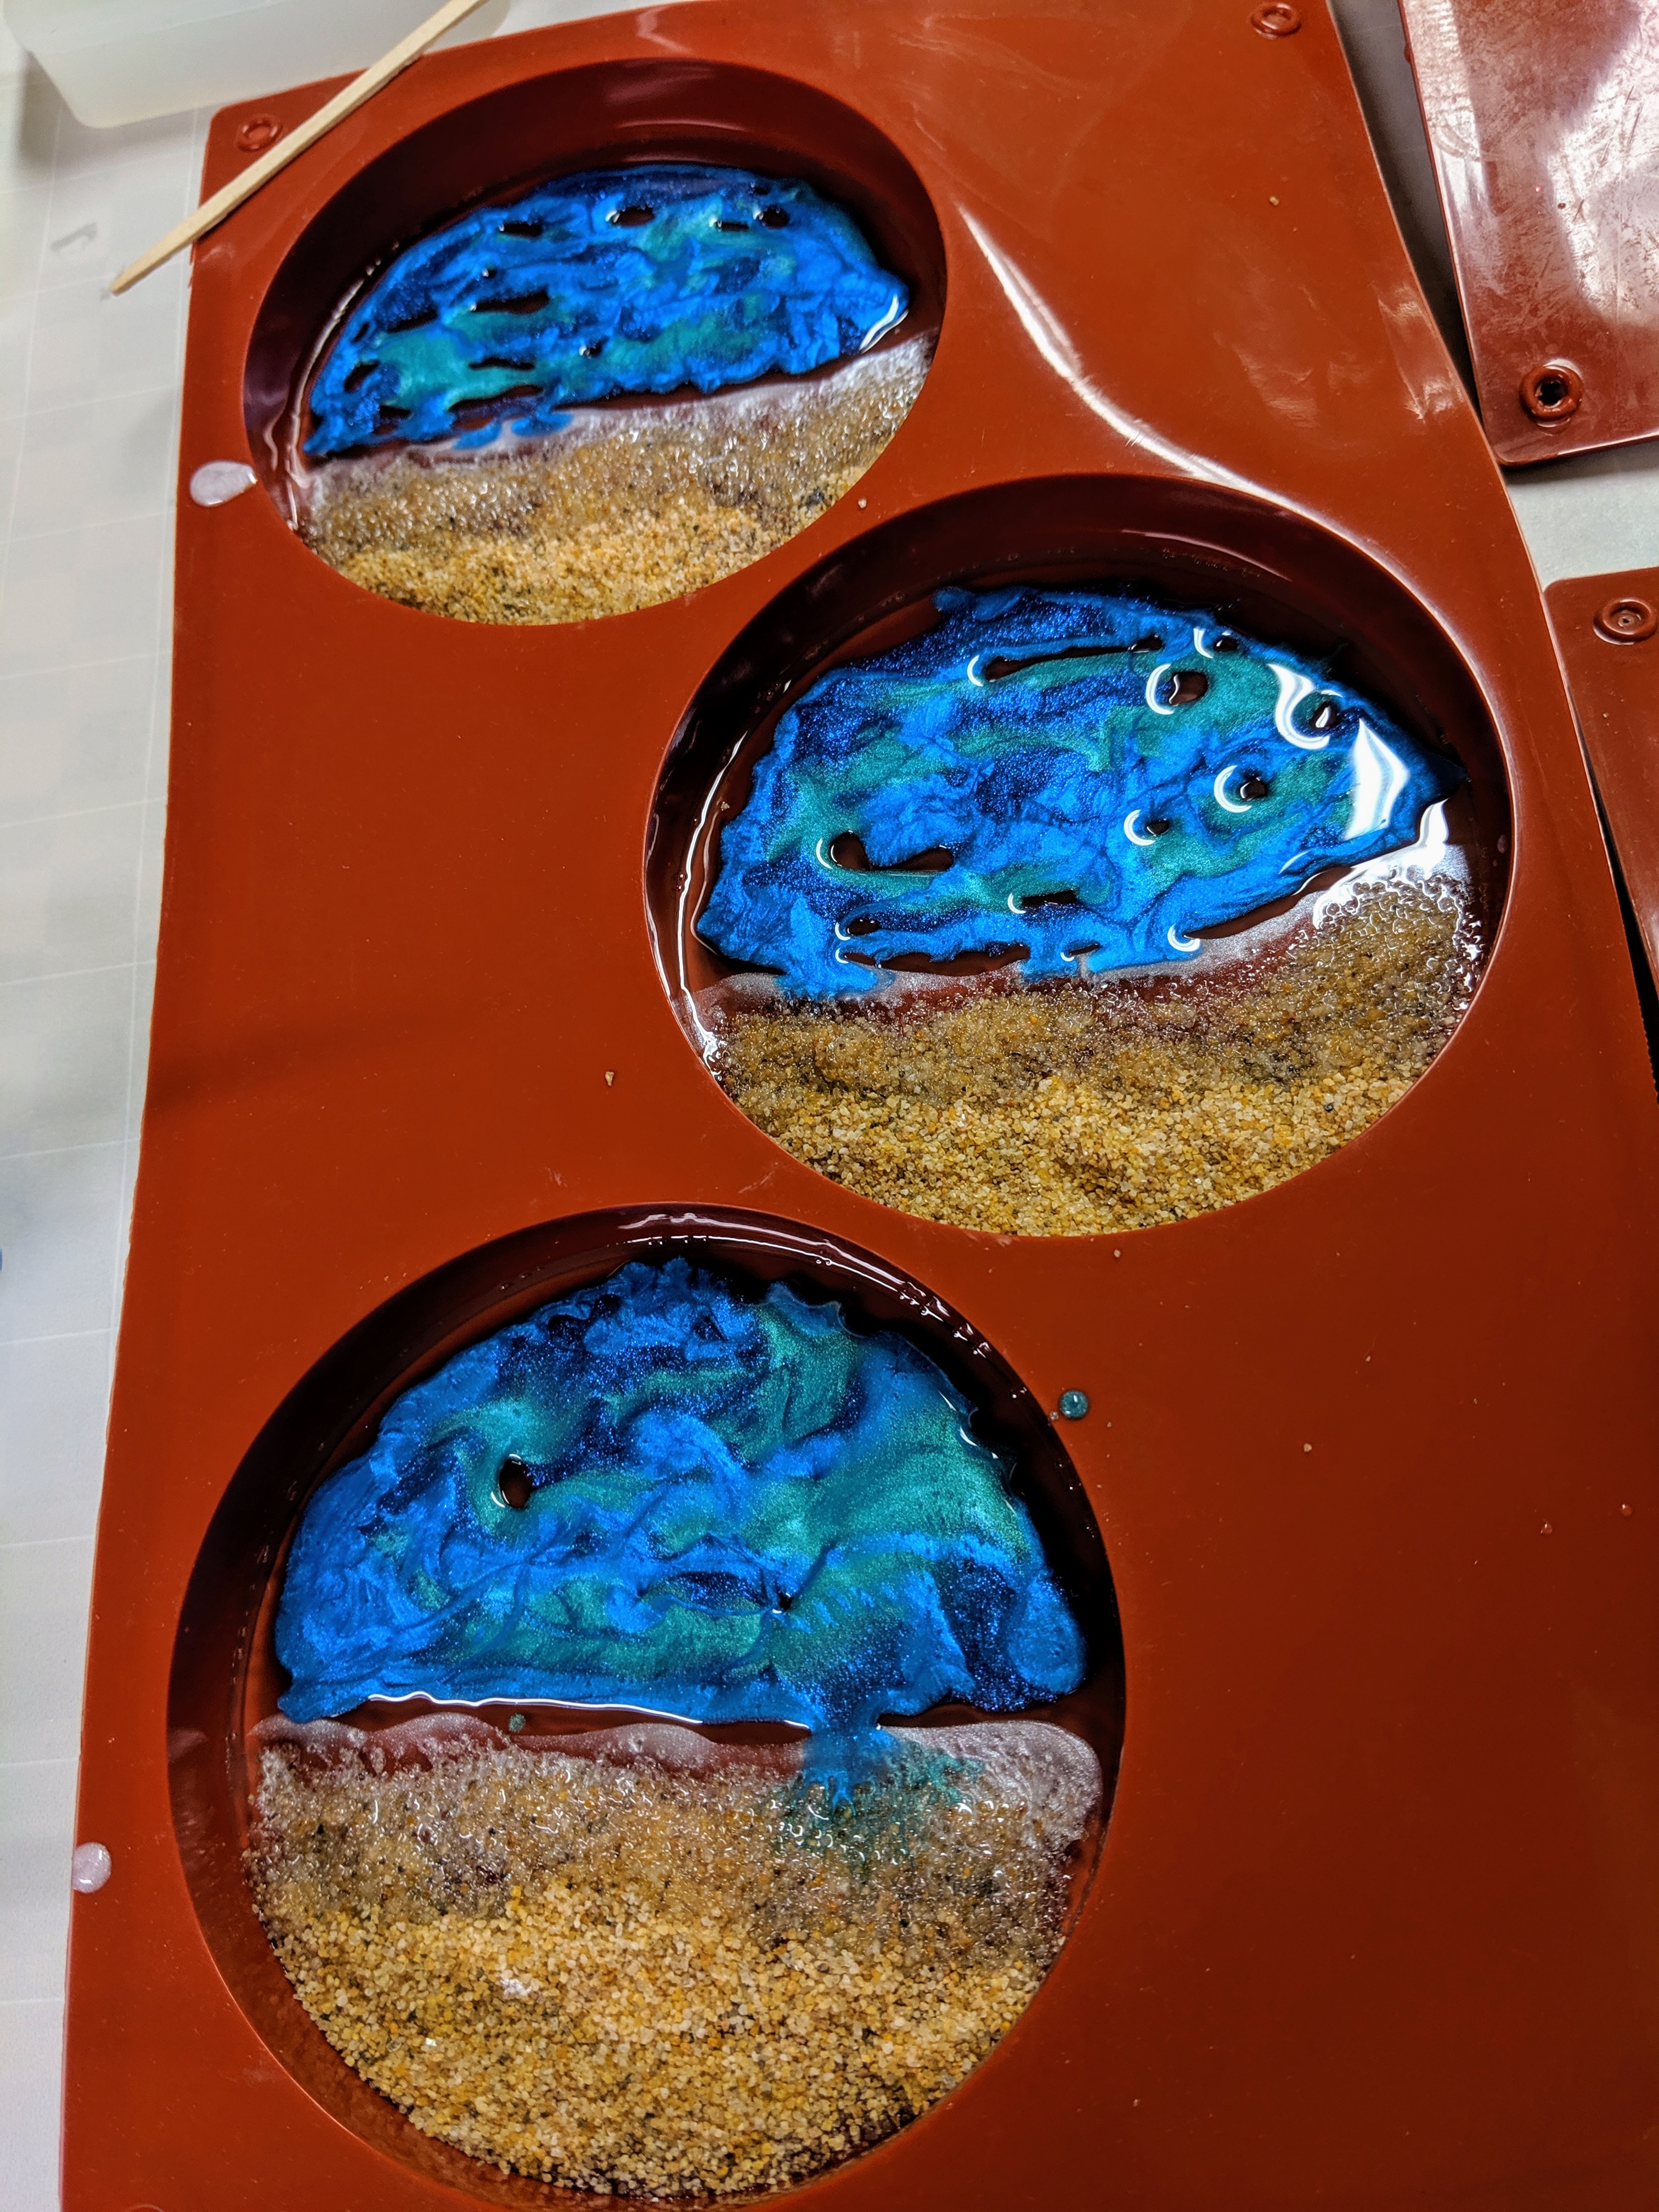
All four colors added.
The final step was to add the last layer of clear resin, so I mixed up my last batch of the day, 14 ounces of resin. The reason I go back and forth between ccs and ounces is because my measuring cups have different measurements which I use for different purposes, just for convenience and ease of reading. For some reason, these really had a lot of late-emerging bubbles – much more persistent than I usually see with coasters. That could be a side effect of not letting the layers cure fully between pours. Having to use the heat gun so much moved the pigment / water around quite a bit (at least on the bottom of the coasters). I might need to get a blow torch, as I think they might be more precise in removing bubbles without moving the resin around so much. I’m a bit impatient to see how these turn out, but I have no other choice but to wait until they fully cure to find out how they look. Unlike the sun mosaic, which I can look at while it cures. The only problem with that is keeping curious fingers out of the resin while it is still soft (yes, my children have been known to poke at things during this stage). Hopefully tomorrow I can bring it upstairs to photograph.
Resin curing.
Just a side note – I’m normally a day behind posting these, but I try to write the post the same day as I do the project so all the details are fresh in my memory. That means when I reference “today”, it’s not usually the same day as the post went live. I’ll actually be pulling these out of their molds on the 30th, but I will also schedule this to post on the 30th at a somewhat random time.
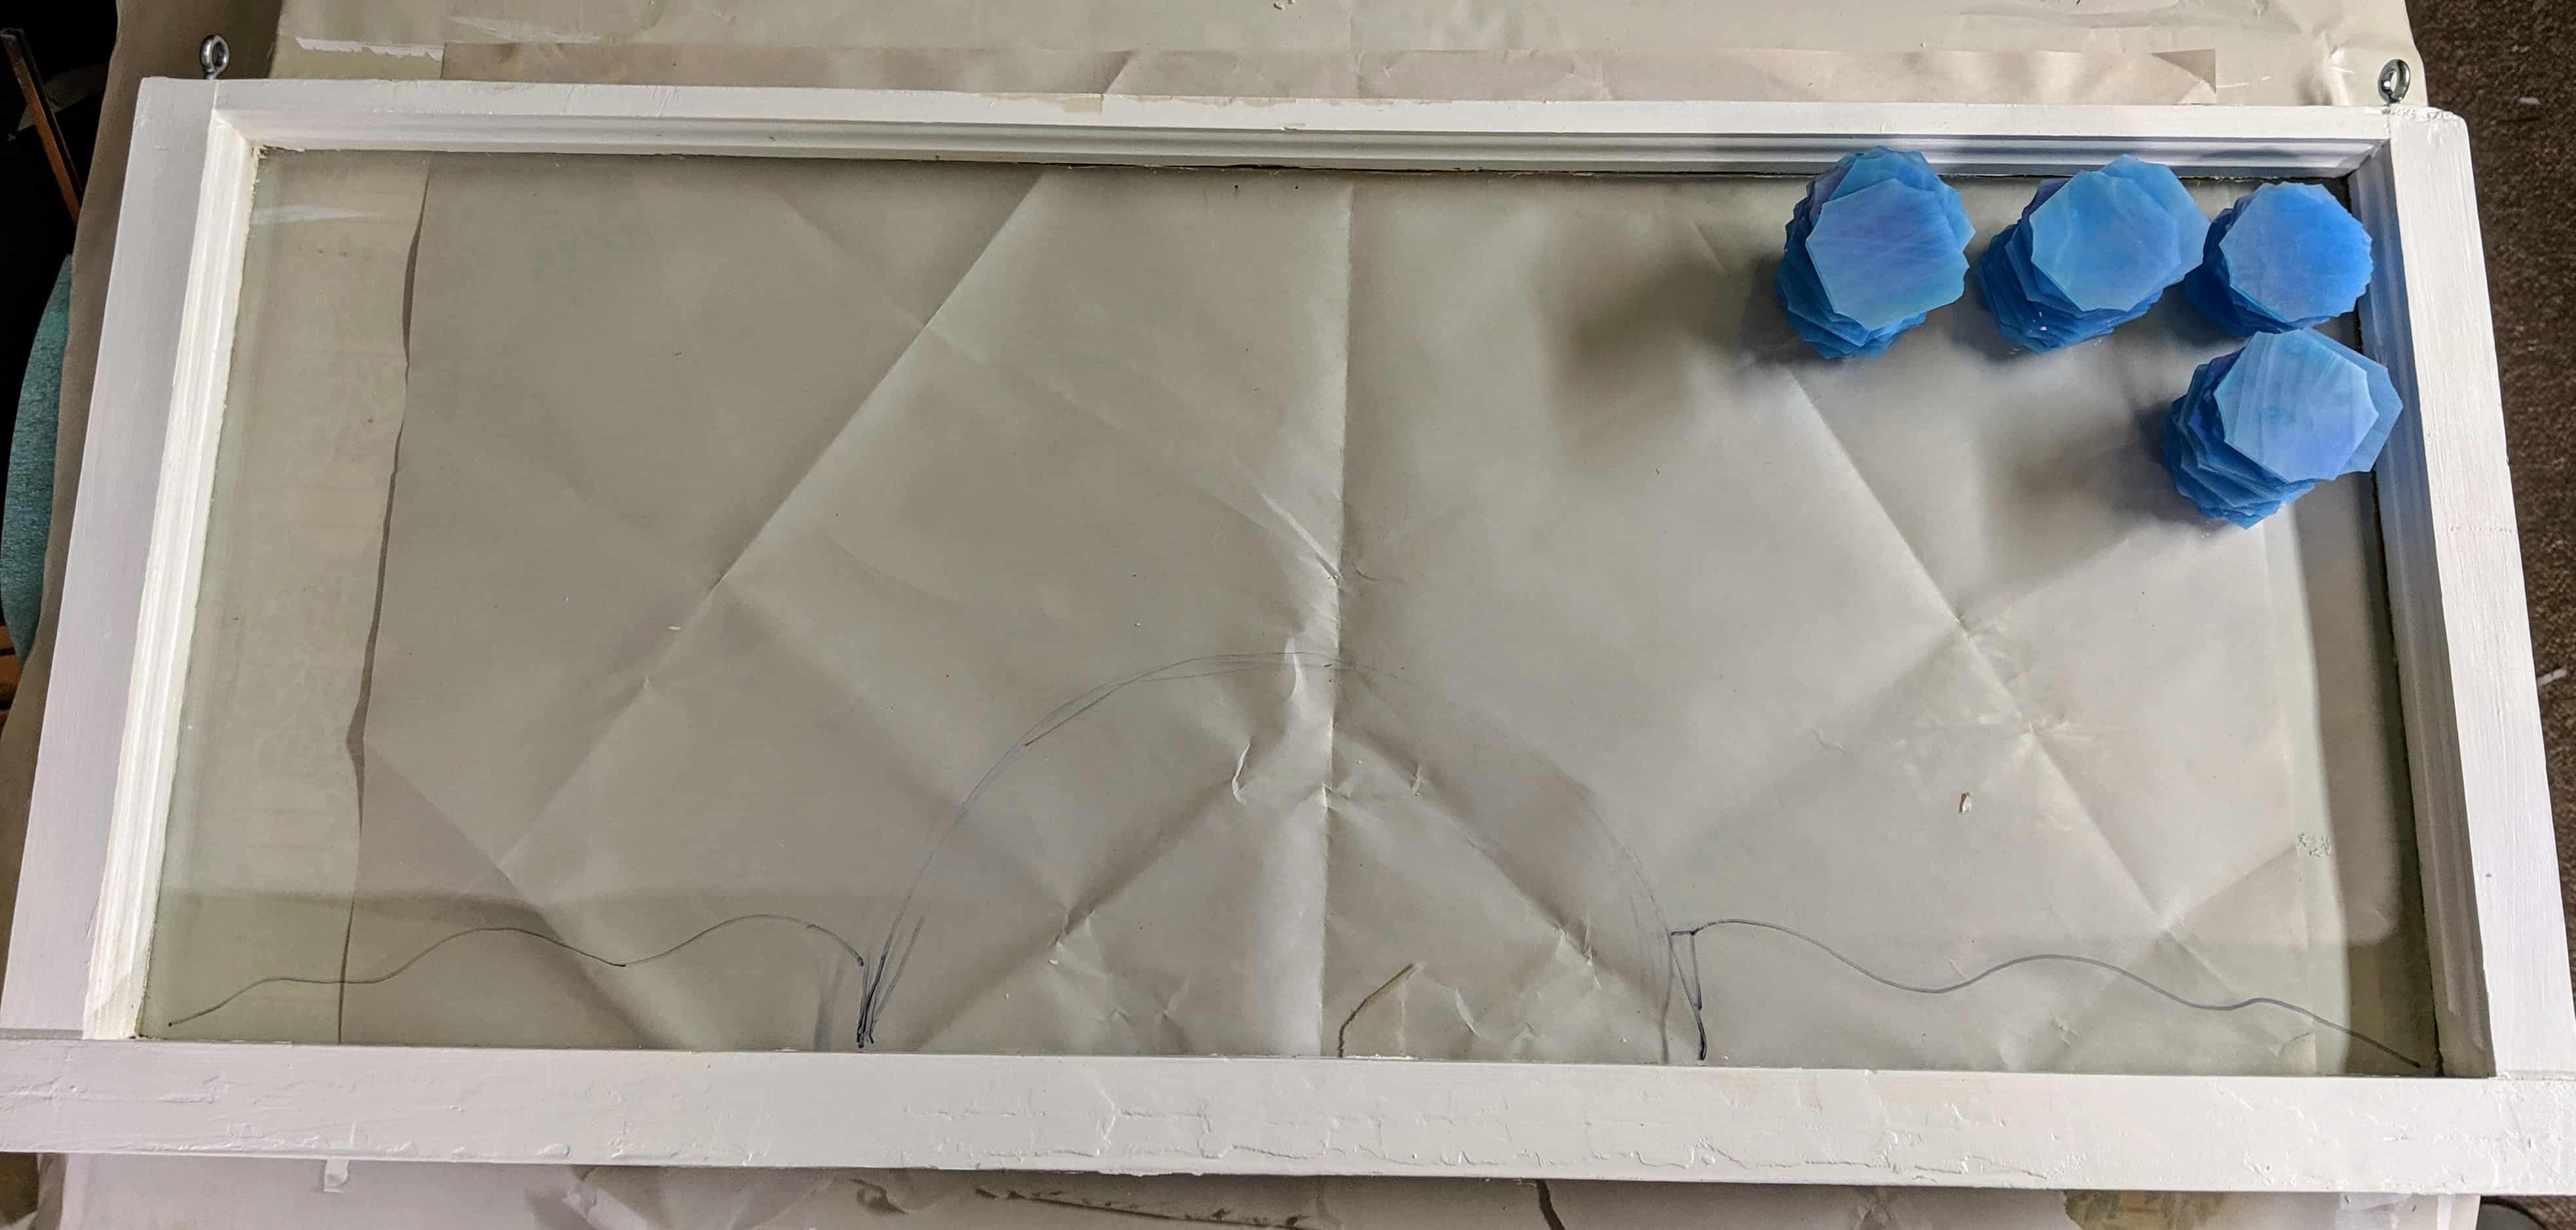
I like making sun mosaics, and they have been popular in the past, so I decided to try another with this latest old window frame I’ve been prepping. It’s approximately 30″ x 13.5″, so it’s a good size to hang at the top of a window and get some nice light. For the background, I’m using that same Spectrum iridized blue glass that I used in the mermaid’s tail. I’ve used this glass in many projects. It’s one of my favorite colors – especially for skies. I cut a sheet of this glass into strips, then into squares, then nipped the corners off to make rough circles.
The blank slate – I drew a rough ball for where the sun will go with a Sharpie pen on the back side..
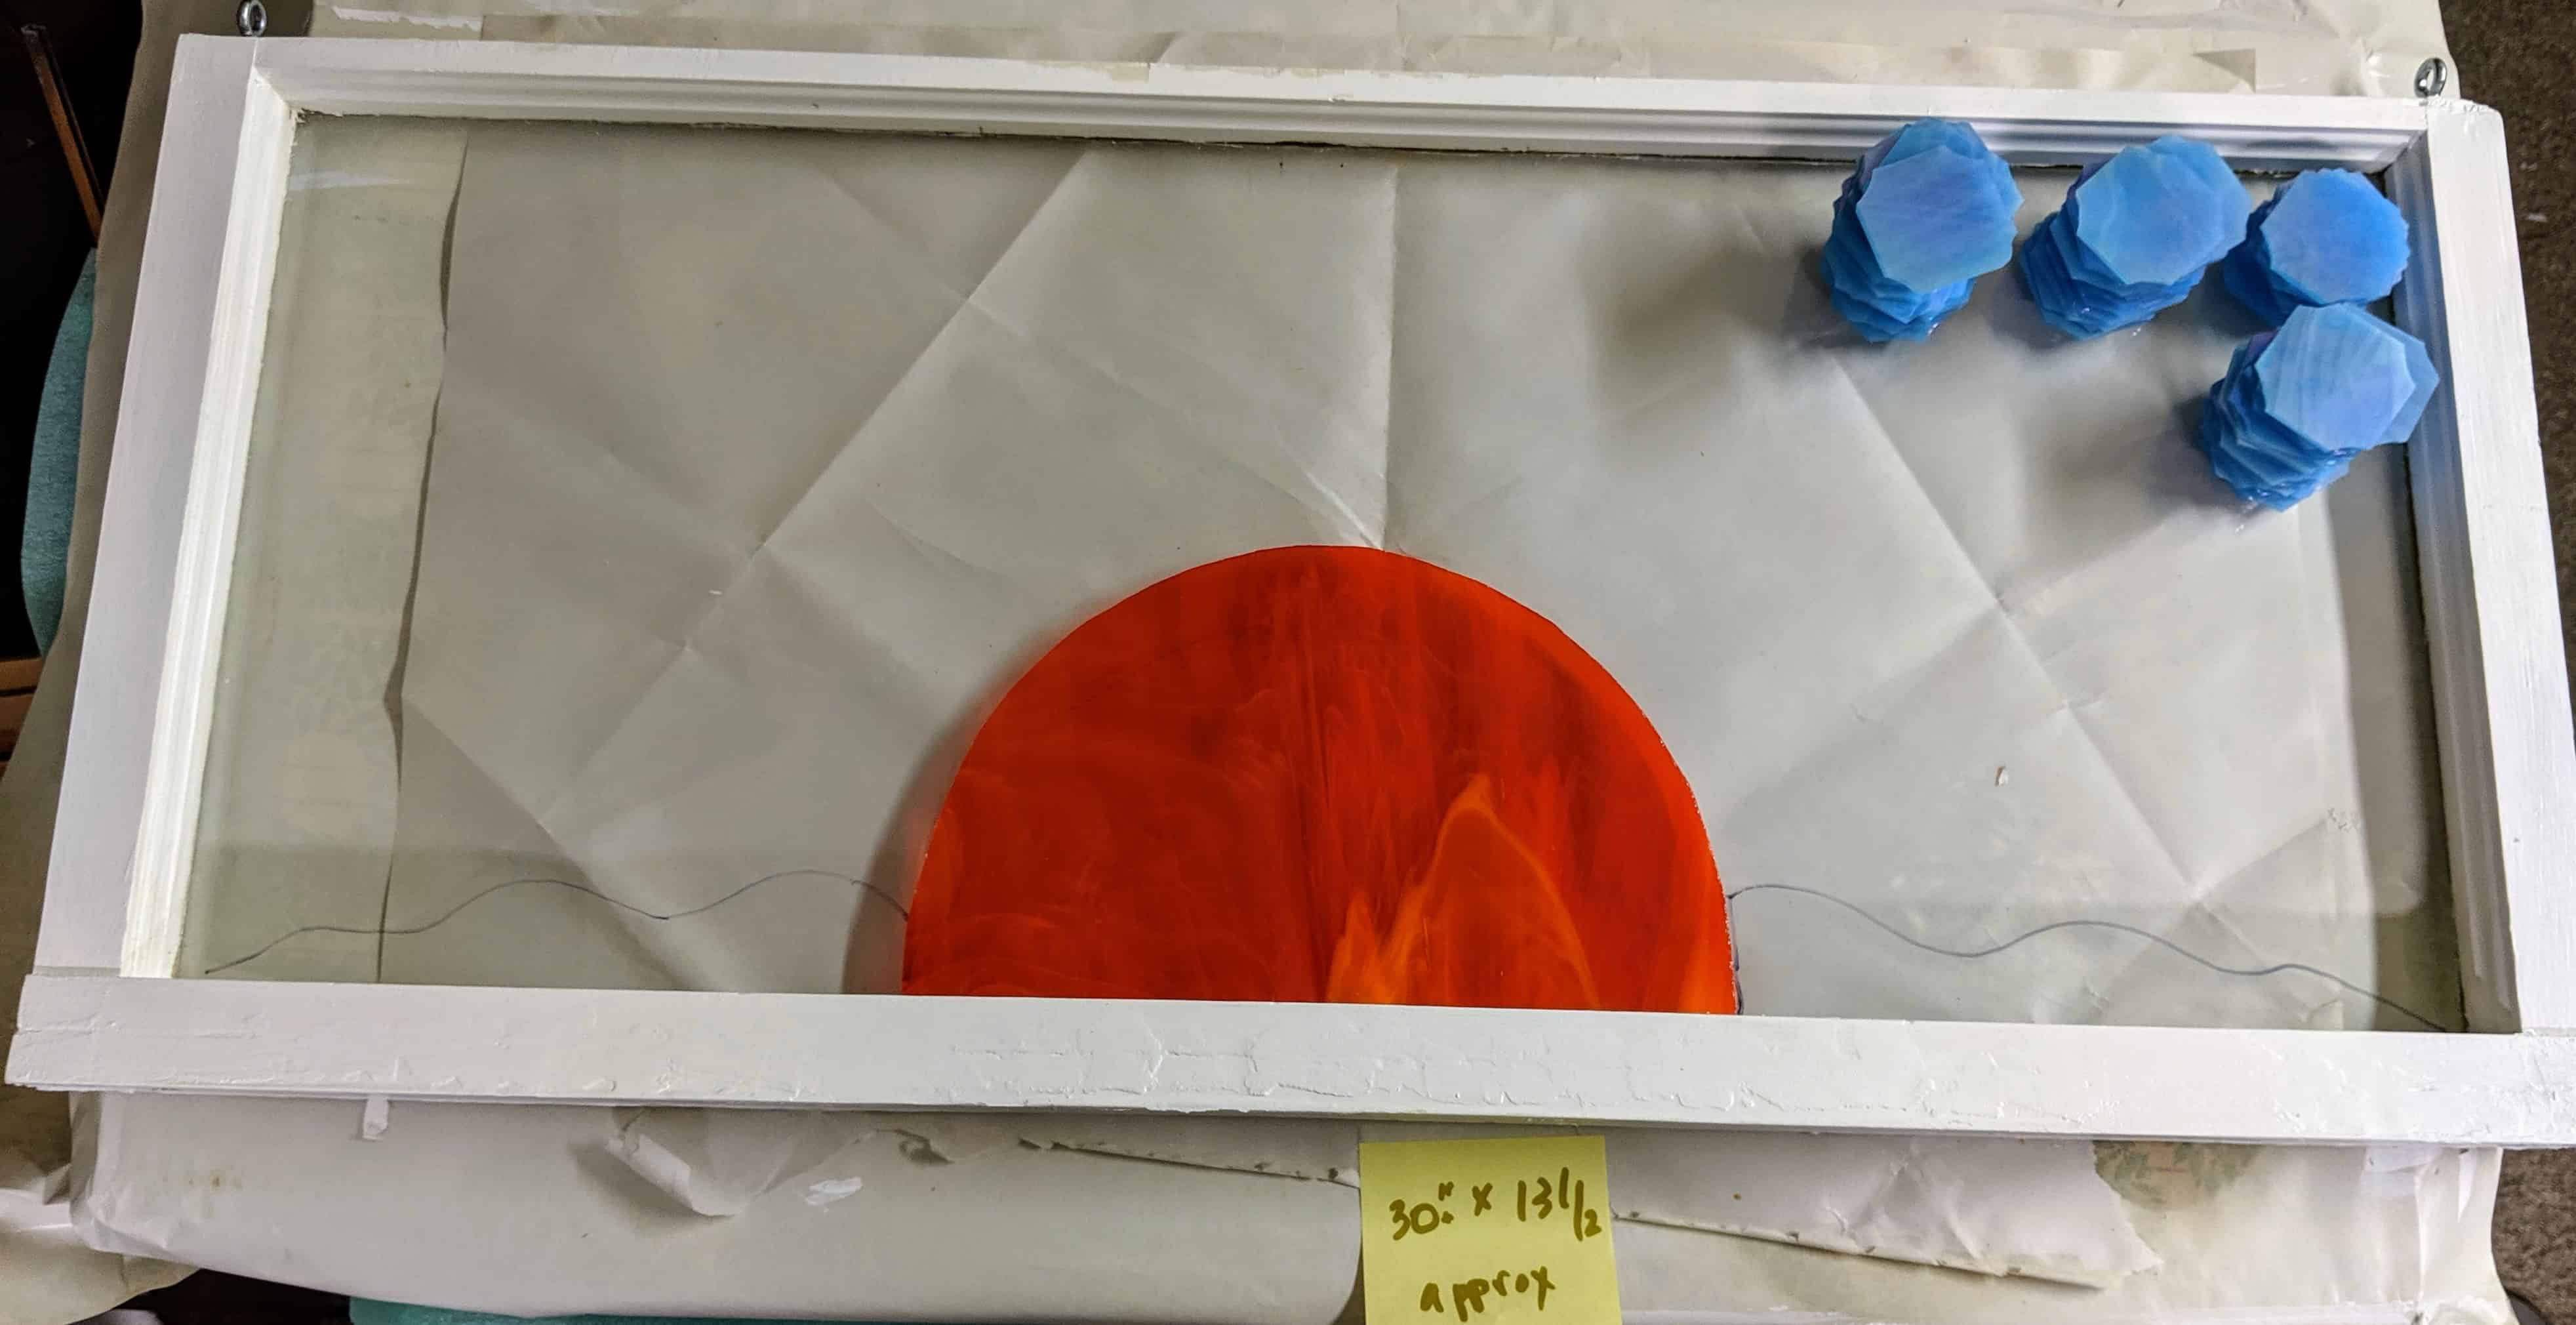
One thing about the sun is it’s not really something that just falls into a rectangular shape in my brain. I tend to want to have a nice square frame for the sun, but that’s obviously not going to happen with this mosaic. For the past few days, I have been trying to decide whether this sun will be to one side or in the middle, and how the rays will be distributed. I finally settled on this starting point for this big ball of fire. I used a circle from an old pattern I have used for the sun in the past to draw a guideline on the glass, then used a self-oiling handheld glass cutter to cut the shape. I finished off the rough edges with an electric water cooled glass grinder. Of course, I cut myself while handling the glass, but a tiny circular adhesive bandage came to the rescue so I could keep going.
Sun peeking out.
Next I had to start thinking about the rays for the sun. Since I’m not using a pattern for this piece in general, I will likely try a few options and move things around a lot before I start gluing anything in place. This way I can change my mind if I decide I want wavy rays instead of straight, or whatever. For now, I’m trying out some triangles with smaller pieces of glass in between. I have some more glass to cut before I will get an idea of how much I like where this is going. I also laid out some of the blue glass to see if I like the pairing with this design. So far I’m a bit apprehensive that the blue circles might be too large in contrast to the sun’s rays. I might want to make them smaller. Here I have them just sort of stacked / scattered around for an overall idea, they aren’t anywhere near where they will be when everything is ready for the resin. However, stacking them like this in layers might be a nice effect. I stacked the seaweed glass on top of itself (two layers of glass) in the mermaid mosaic and I really like that effect.
Laying out an option for the sun’s rays.
I liked where this direction was taking me, so I decided to fill it out a bit more to see how it would look. More band aids needed.
Filling in the sun’s rays a bit more.
Next I glued the outer bands of glass forming the rays down. They will keep the glass forming the sun in place when I eventually pour the resin. Then I started laying out the blue sky. After I filled in as much as I could with large circles, I cut some smaller ones and repeated the process. Then I started filling in the smaller gaps with triangles and even smaller pieces.
Filling in the gaps.
There will be a bit more filling to do tomorrow, but I have done as much I can in one day. Half of my fingertips are in pain from being stabbed with the sharp edges of the small pieces of glass. Now I need to sit back and look at it because it still needs some interest to bring it together. My eldest child says I should add some yellow to the sun – maybe some wavy rays. I can also make another layer to give it more depth, or maybe some designs with the tiny red glass pieces I have. Hopefully sleeping on it will give my brain time to formulate a plan.
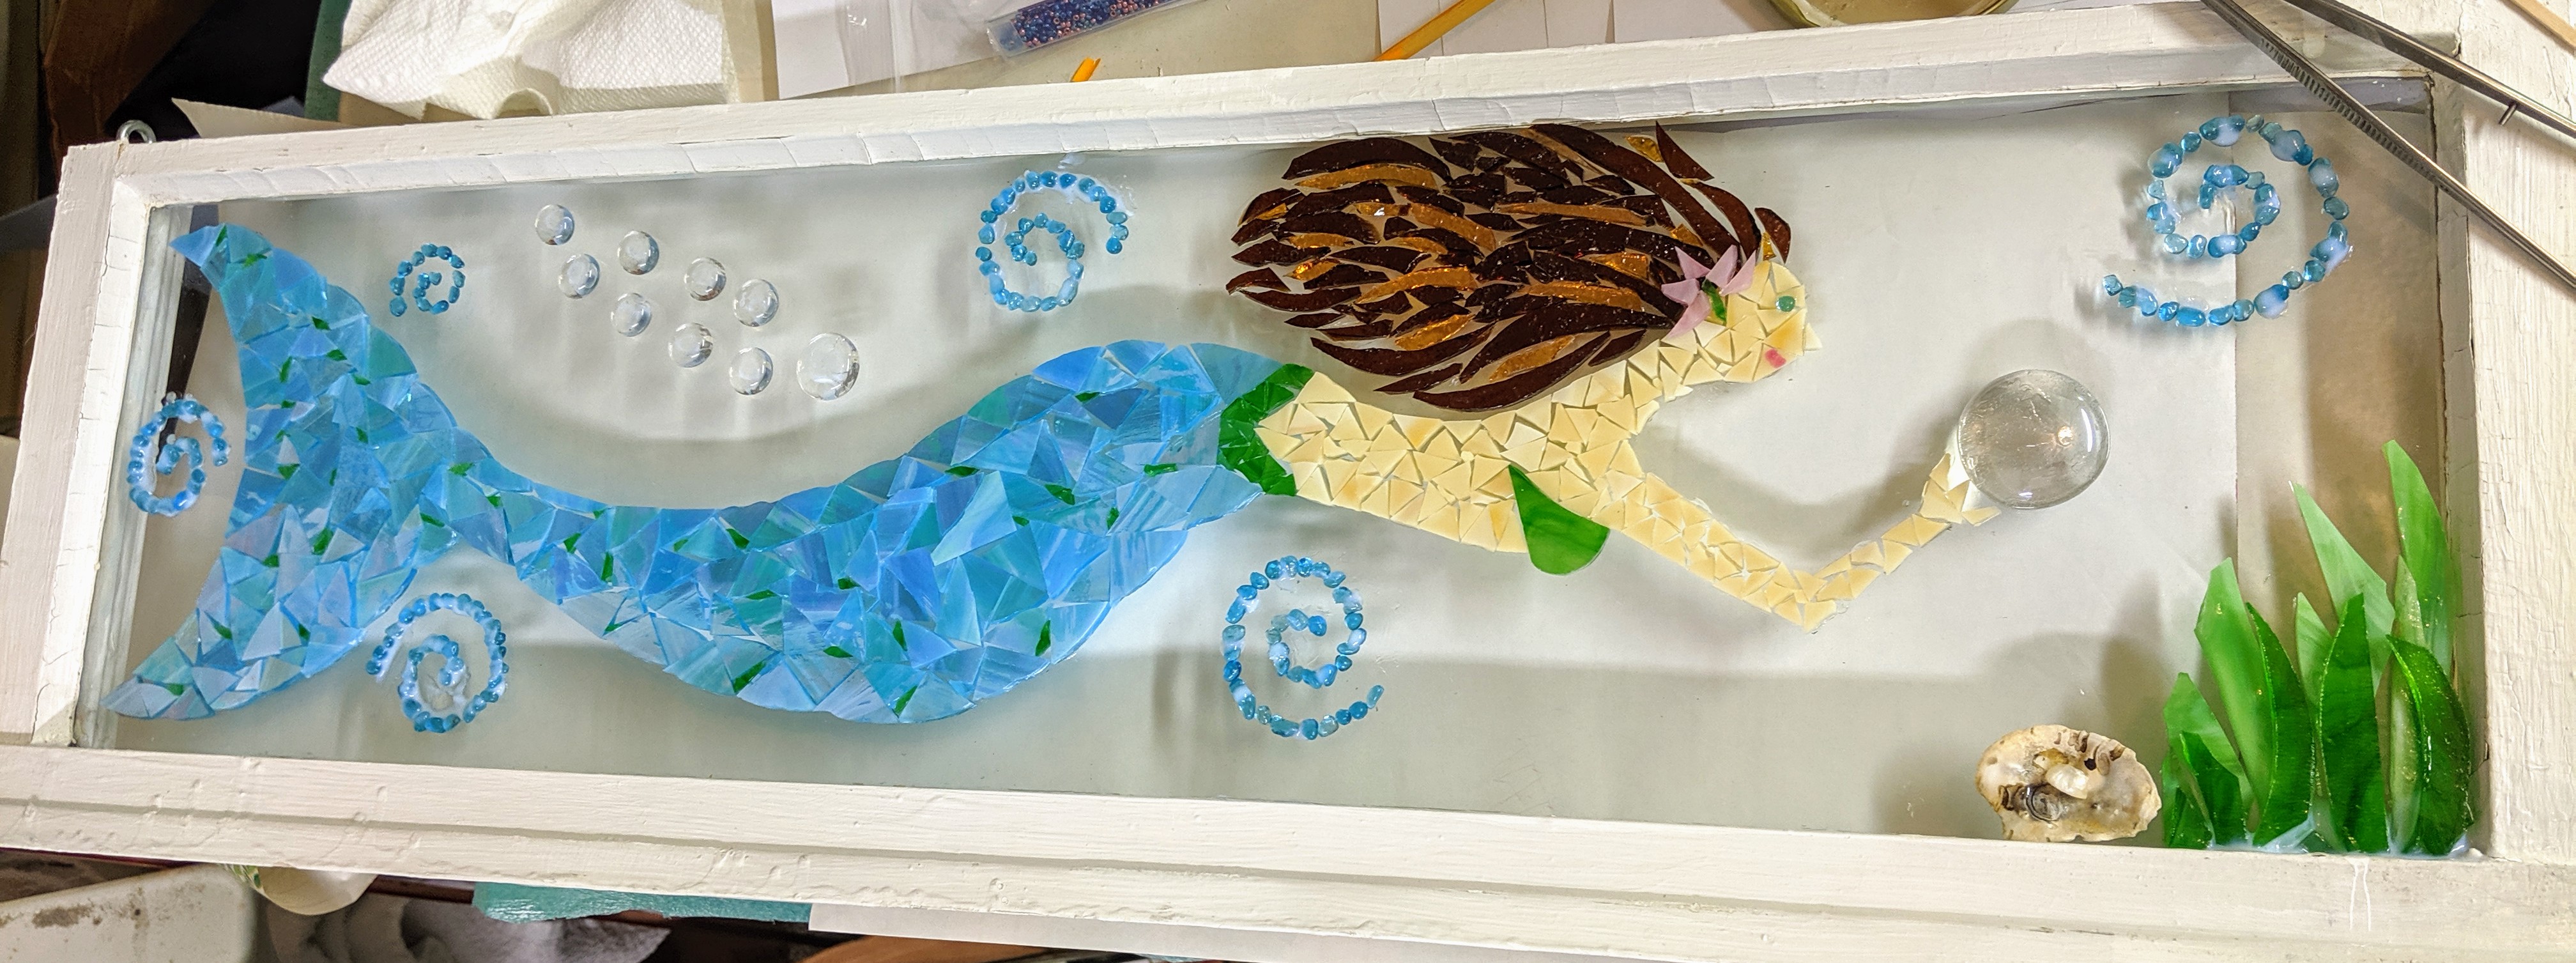
Today I went back and forth on, but finally committed to (read that, glued in place) some background decoration features for the mermaid. I glued them in place because they are small and the resin might push them out of place when I am pouring it. I don’t want to be trying to make the swirls look perfect when the resin is applied, so I used some Mac glue to secure them. I might add just *one* more little blue swirl. The next step is to let the glue dry overnight. Hopefully tomorrow everything will look great and I can pour and decorate the resin background to bring it all together!