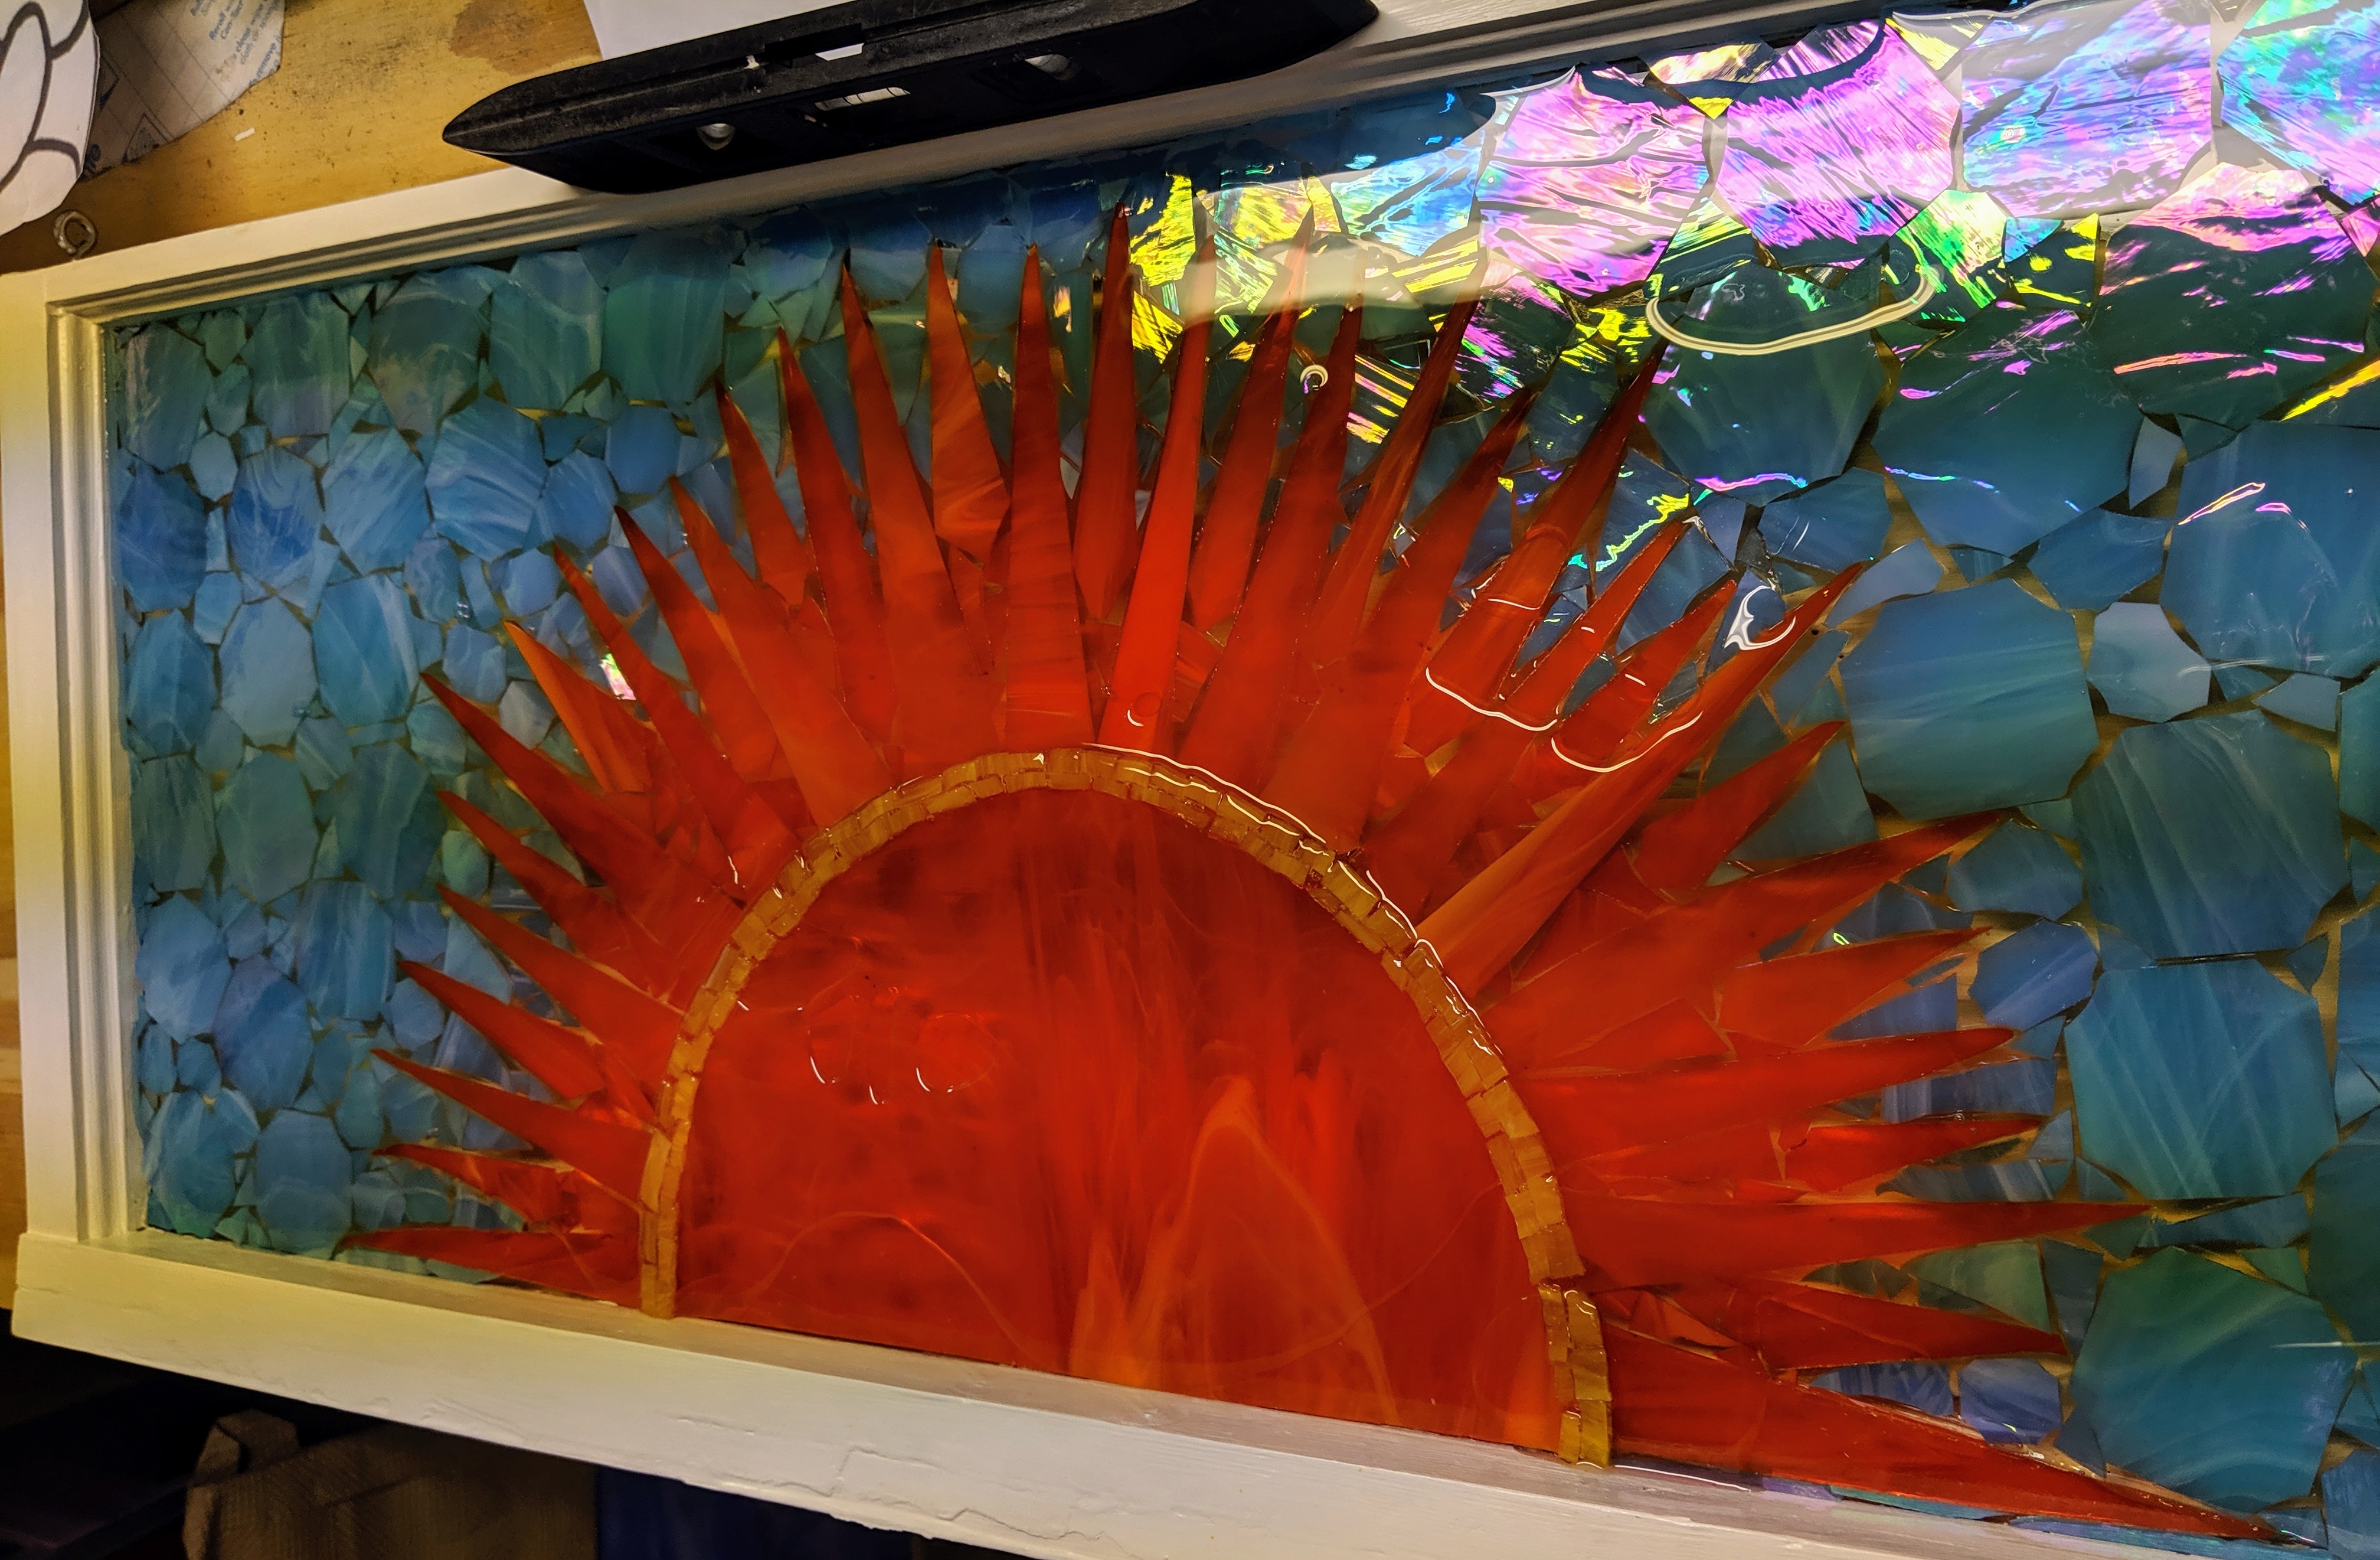
I haven’t been posting much, mostly because the dichroic window I’ve been working on has now been rethought as a sunset and it’s taking me some time to plan it. At the same time, I haven’t been doing much that is new and different, until this weekend. I decided to sign up for the Charleston Holiday Market at the N. Charleston Convention Center. It’s a big three day craft fair, held November 8-10. I usually do most of my holiday shopping at this event. This year, I’ll be a vendor!
Holiday Market Info
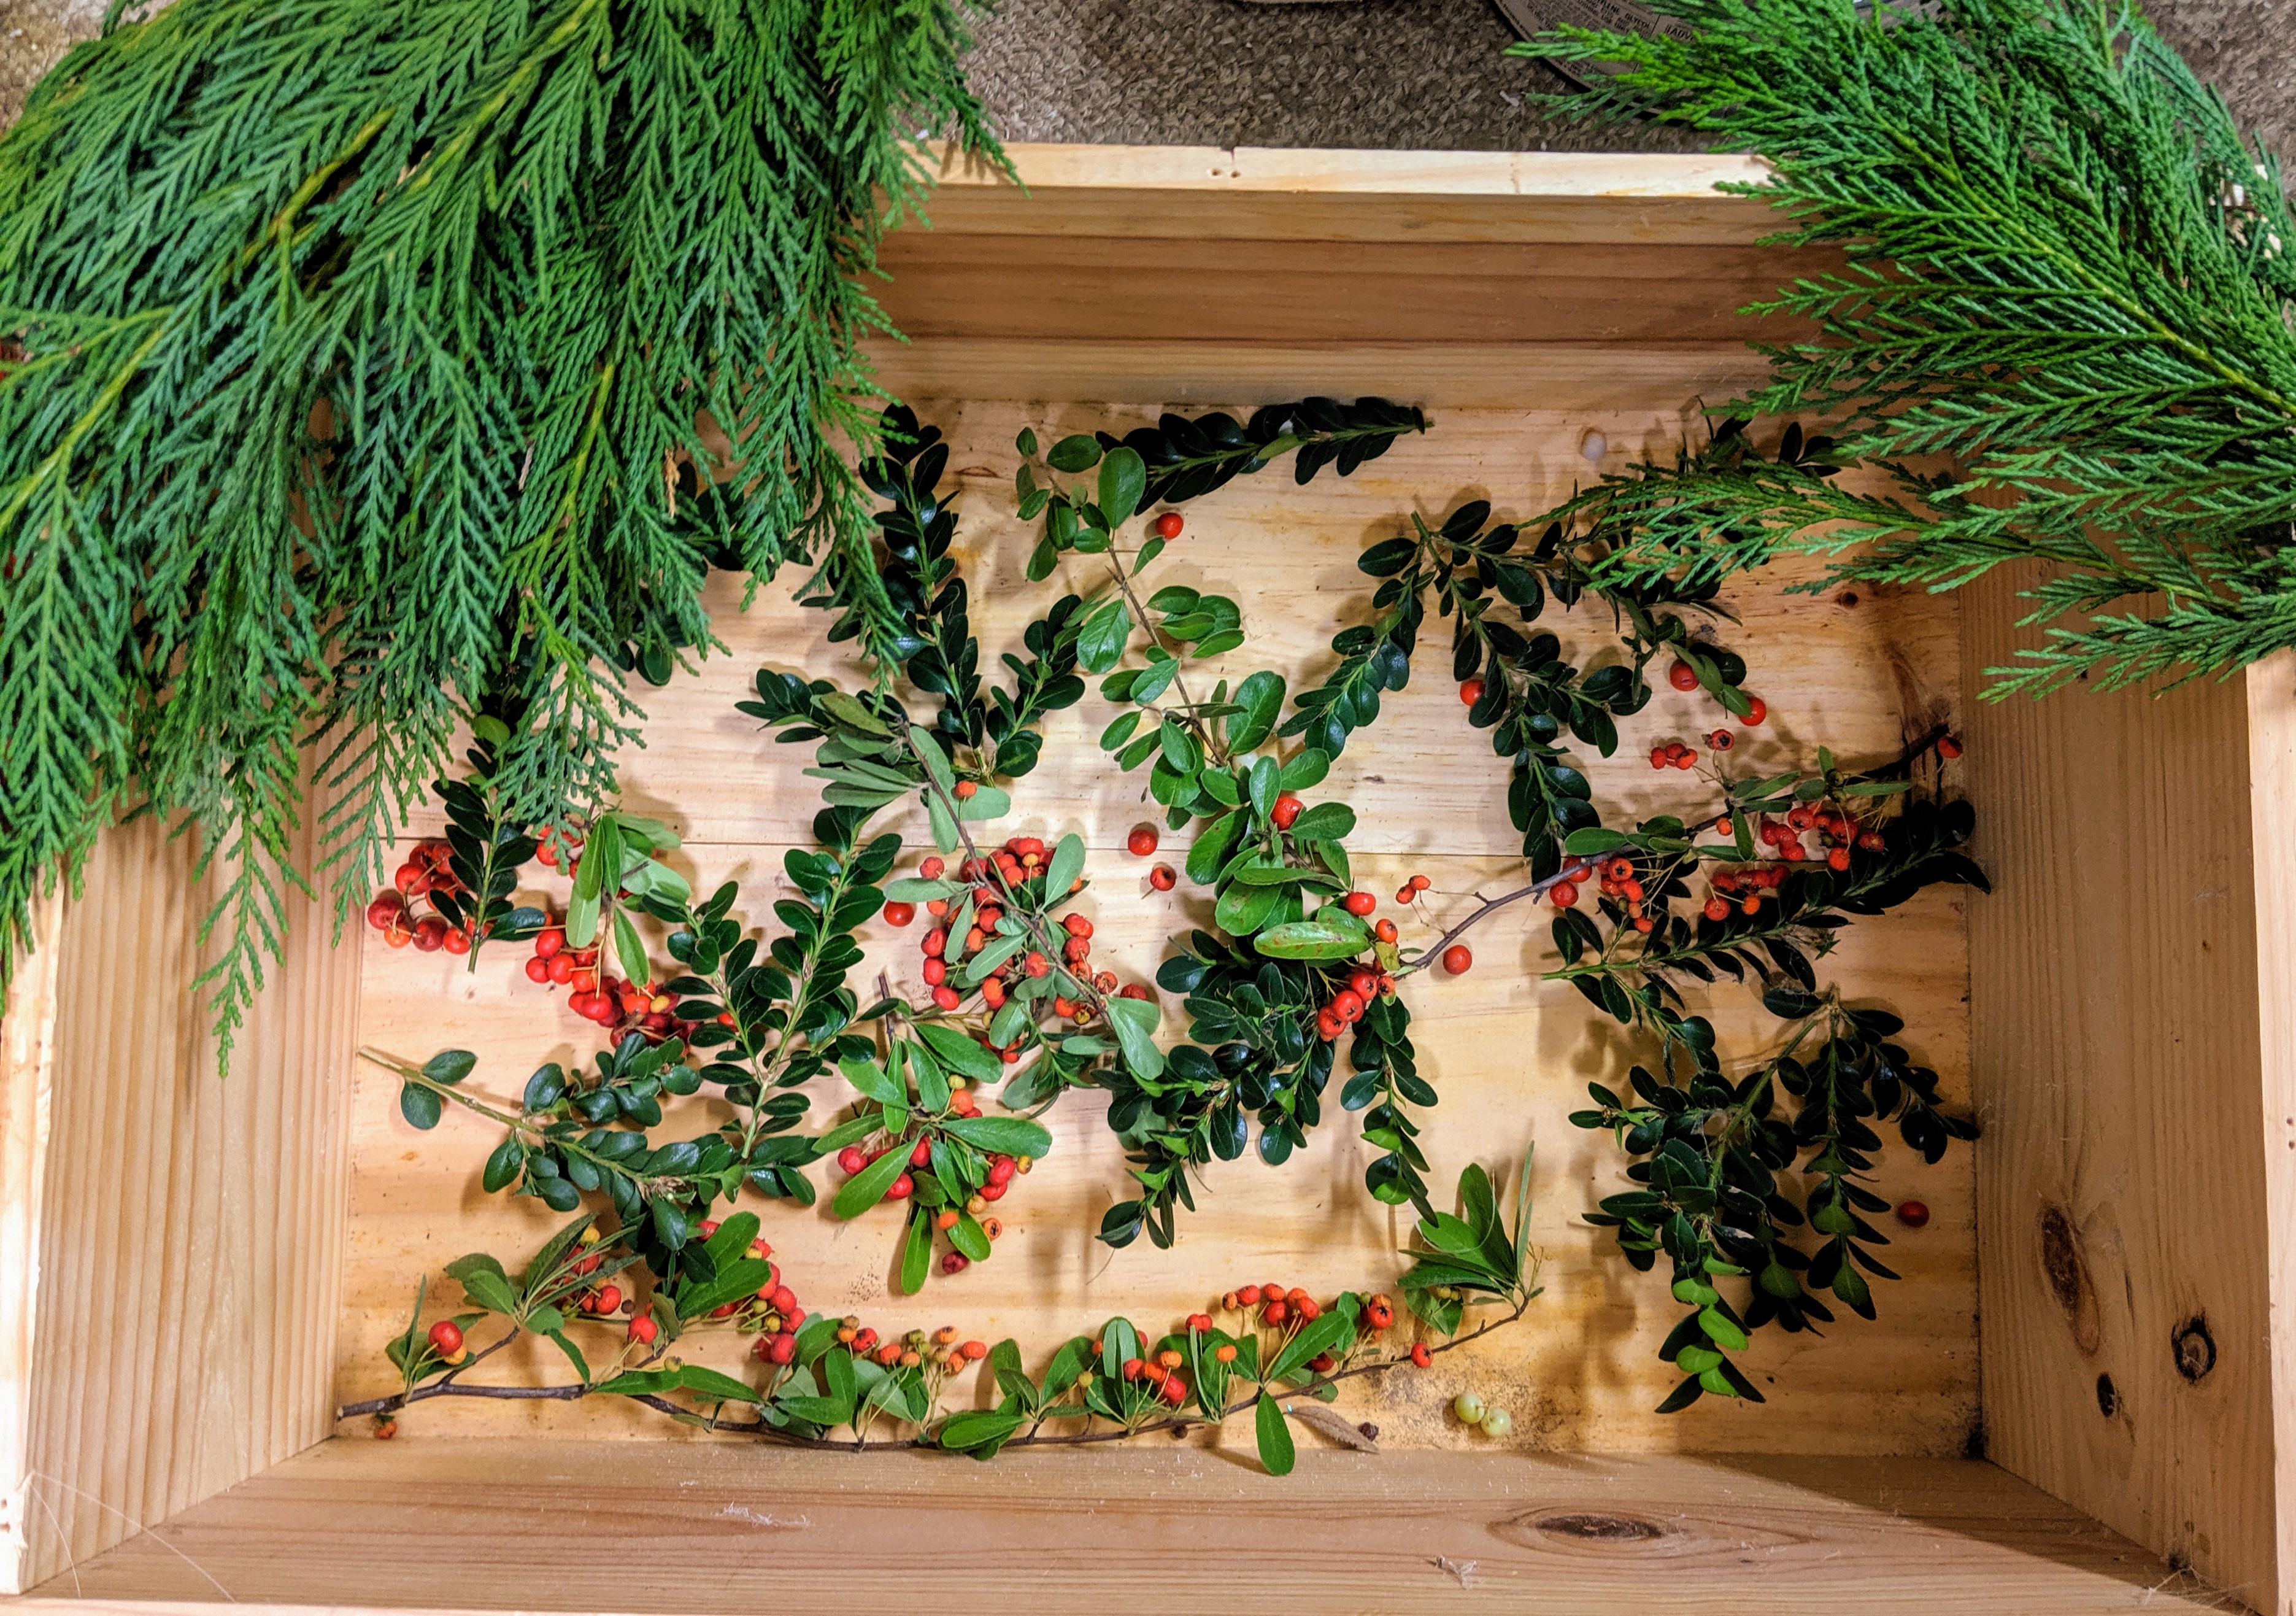
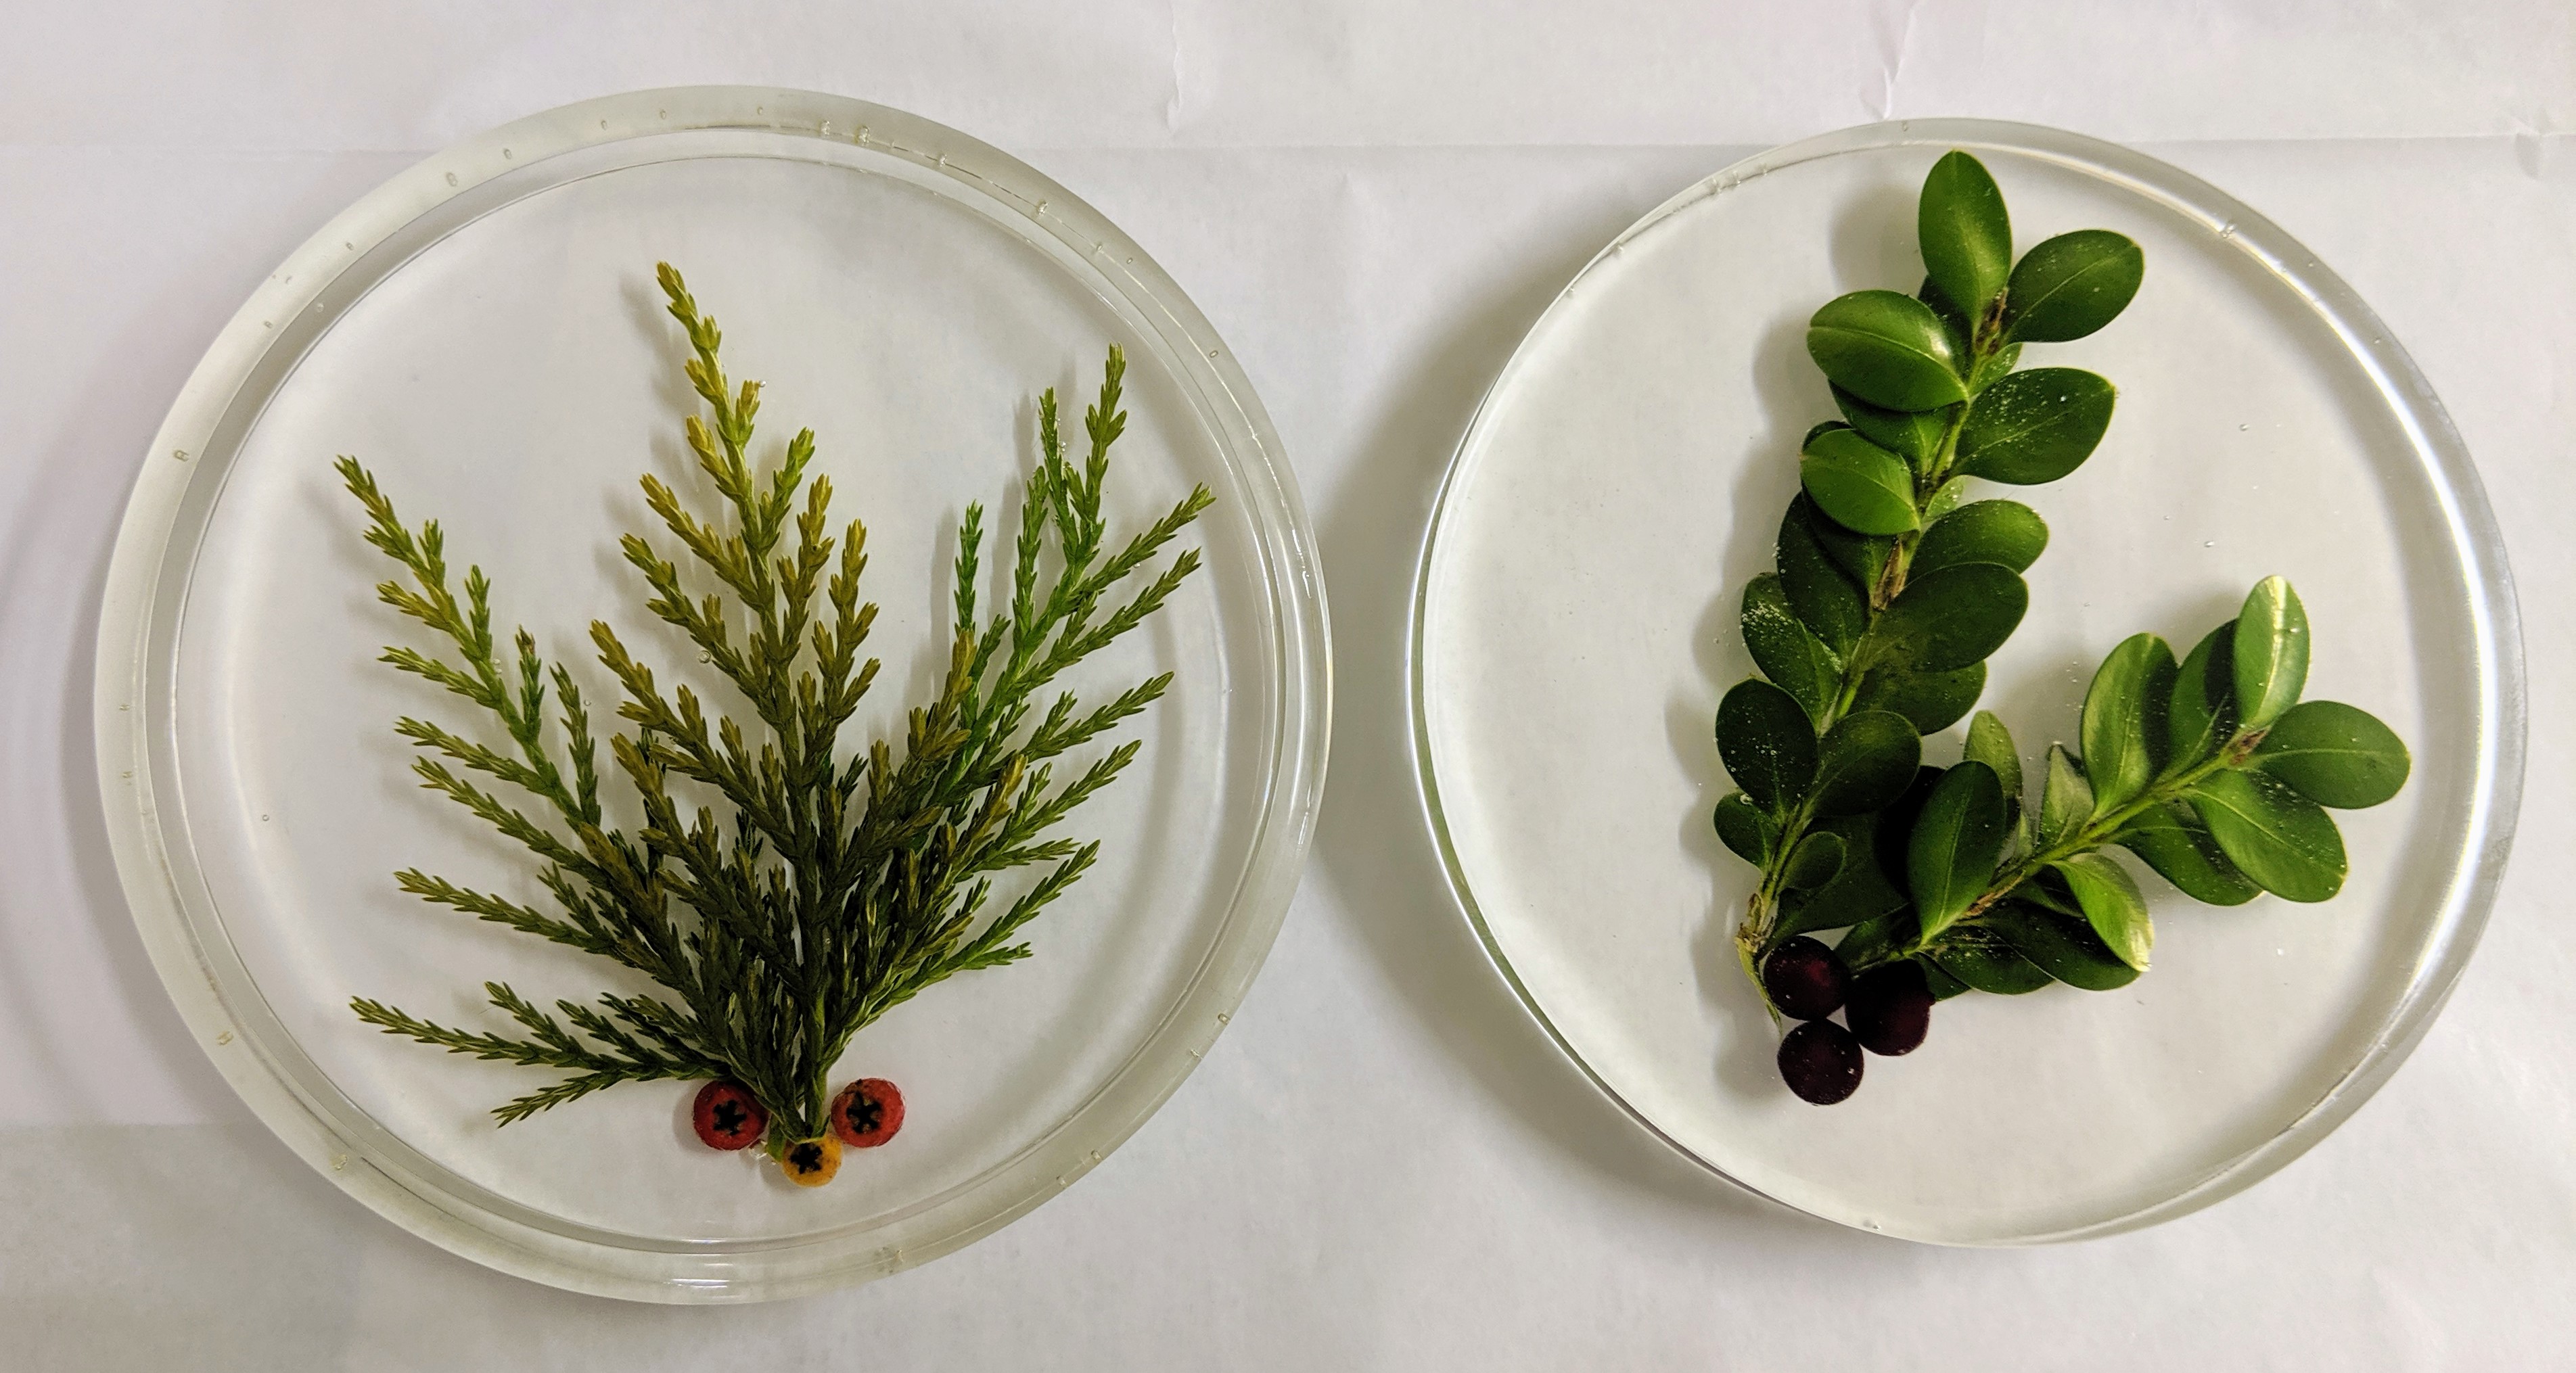
When I was talking with another vendor at the N. Charleston Farmers Market about it last week, she suggested that I make some seasonal coasters for the event. So I decided to see what I can do. I haven’t used any really perishable / organic materials other than shells and beachy things, so plants are an expansion of my repertoire. I headed out into my yard and snipped some cheerful berries and greenery from my plants, then coated them with resin spray.
Festive greenery and berries
I then set about inserting my harvest into some coaster molds with resin. Hopefully they will turn out well – I read a few stories online of others’ experiences with plant based embedding and there were a lot of woeful tales of things turning brown. Fingers crossed that the resin spray helps deter that from happening. I even read that some folks use plain old hair spray instead of resin spray, which I may try when my supply of resin spray is depleted. I have two types of berries on hand, one from I believe a Pyracantha and some others from some Asparagus Fern in my yard.
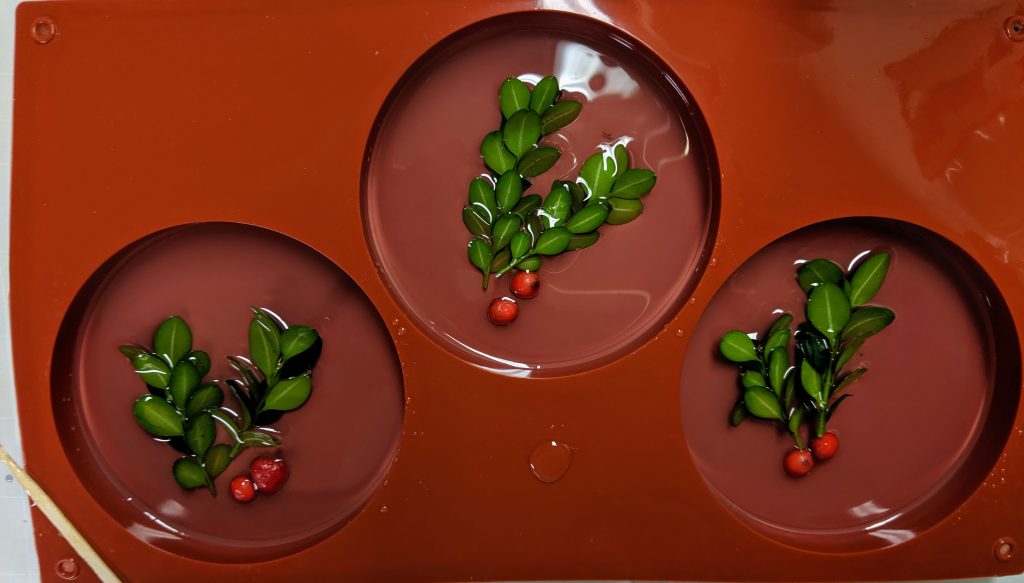
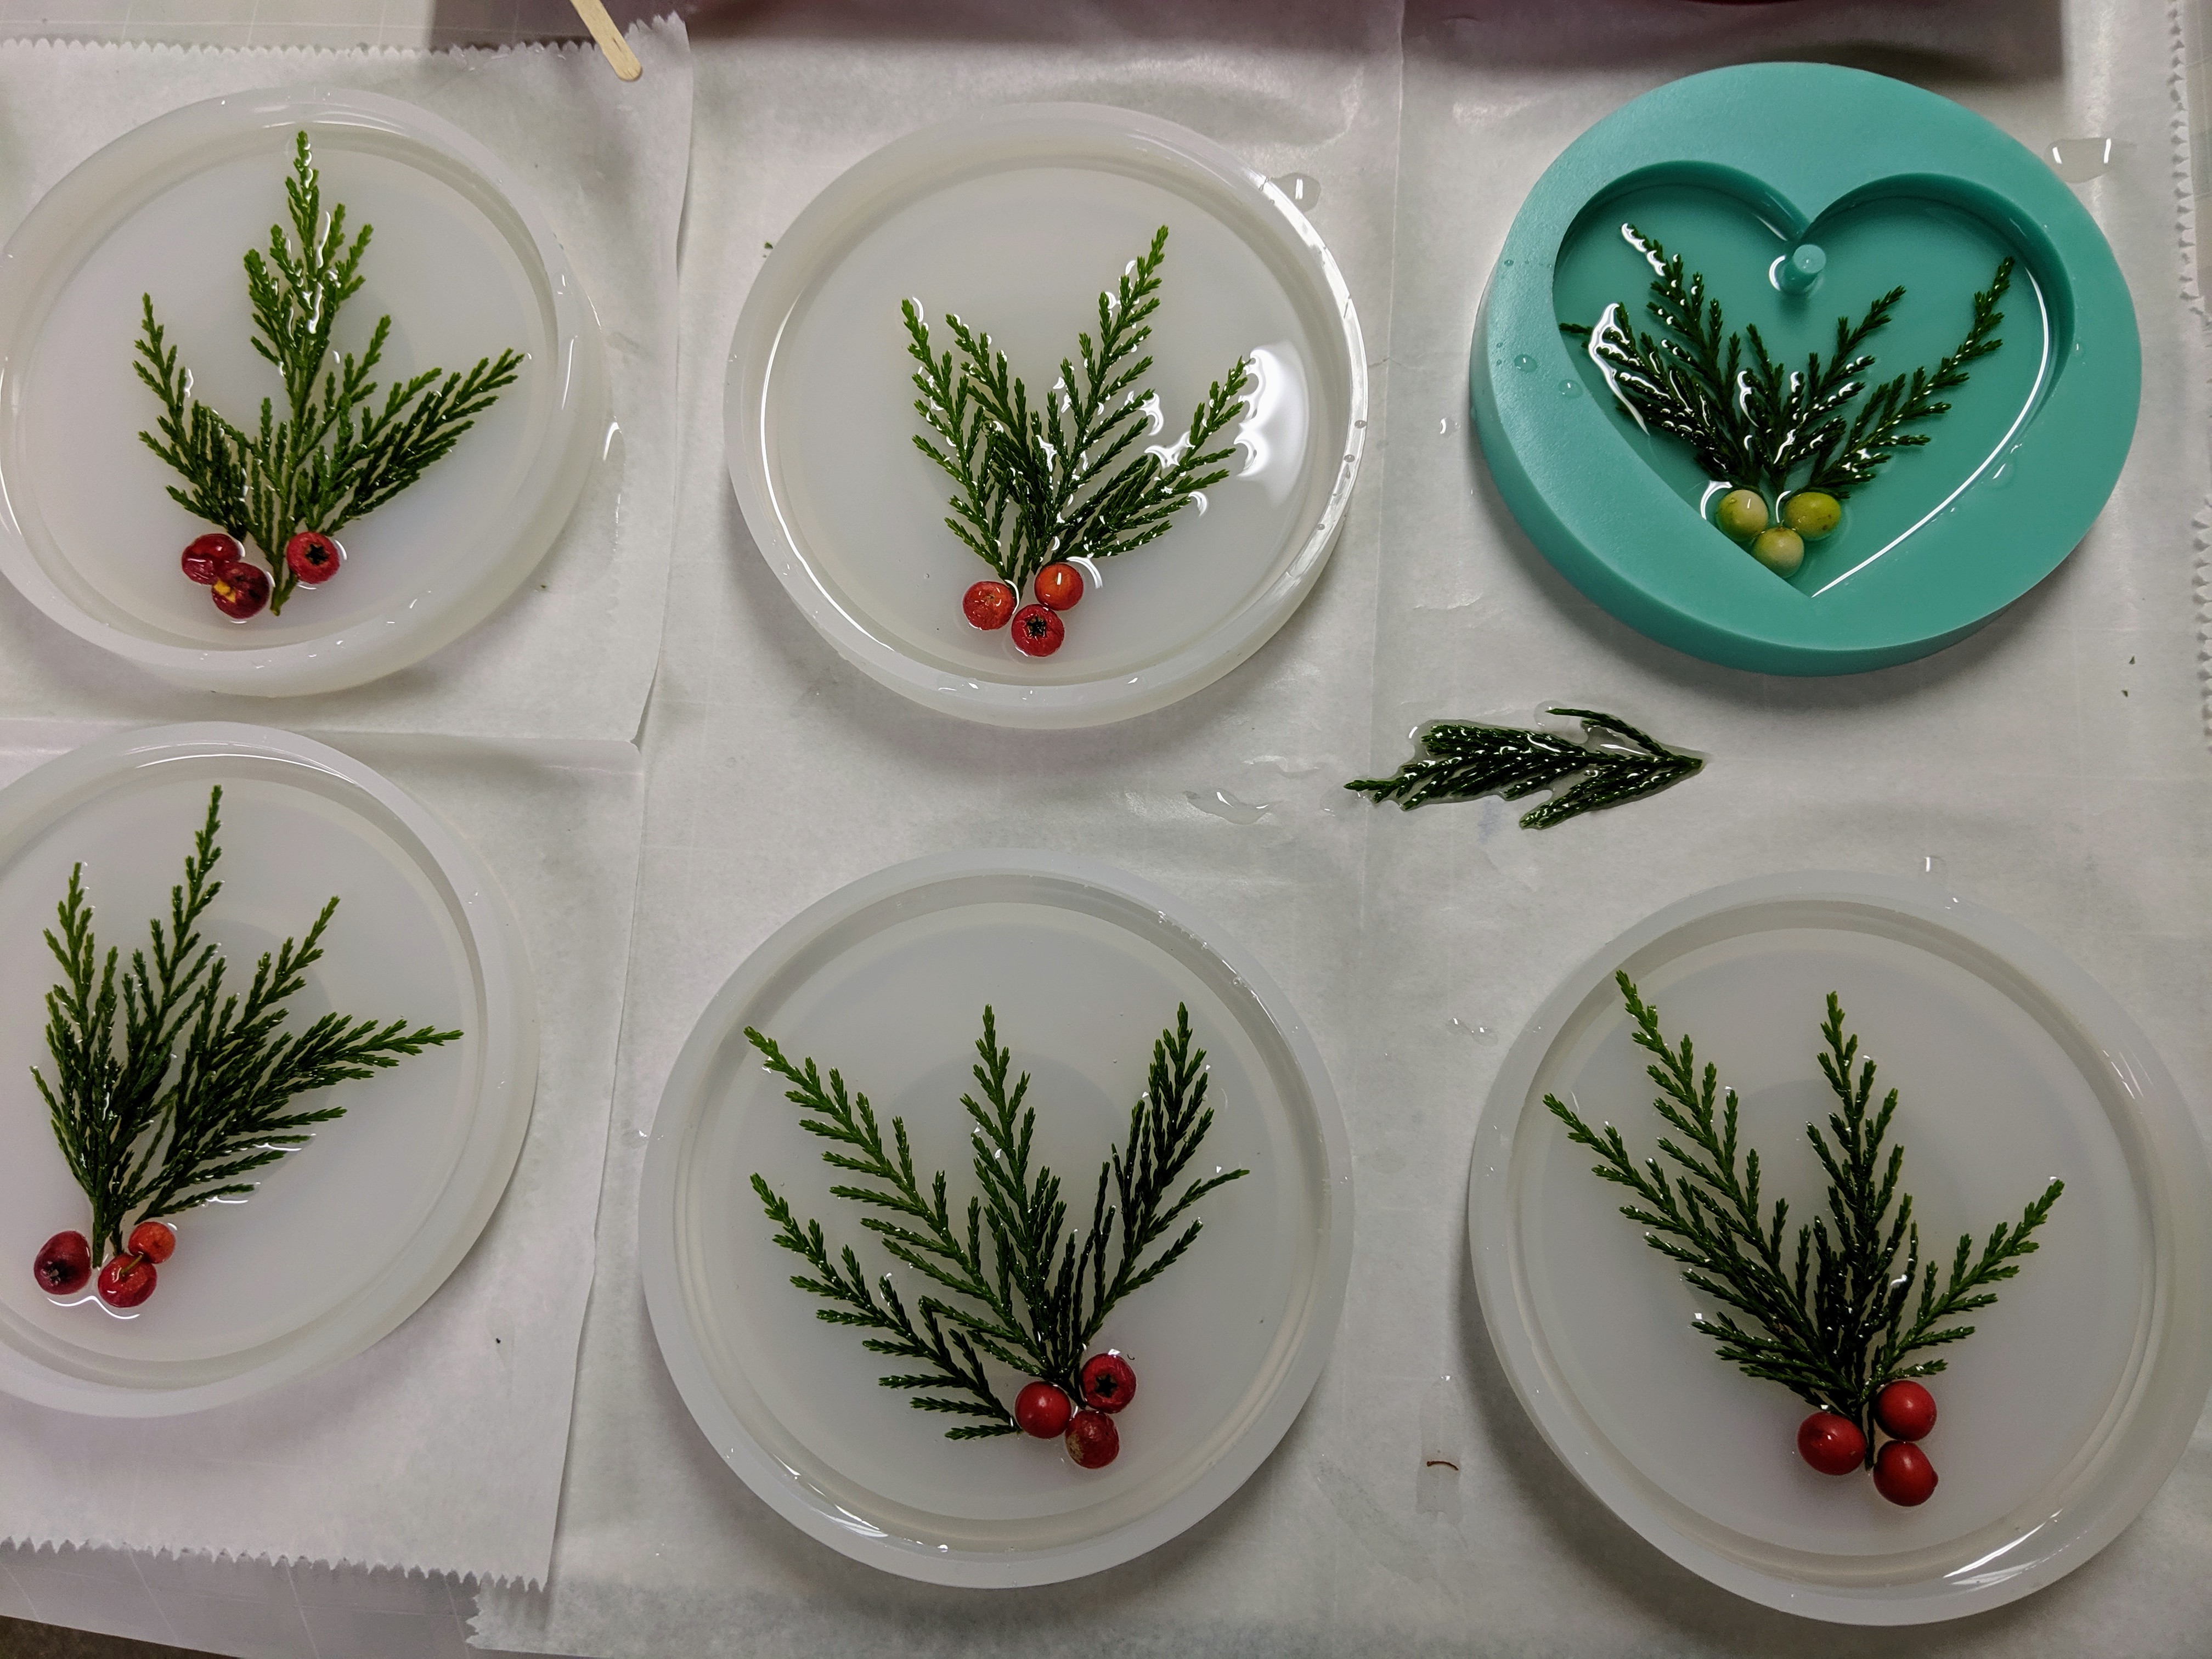
Boxwood and berriesLeyland cypress and berriesHere are a couple of the first batch I made yesterday.
I like how the Boxwood looks, but it is very thick and difficult to keep small enough for the mold. I used some extra resin spray on the cypress greenery in the batches I did today to see if they hold their color any better.
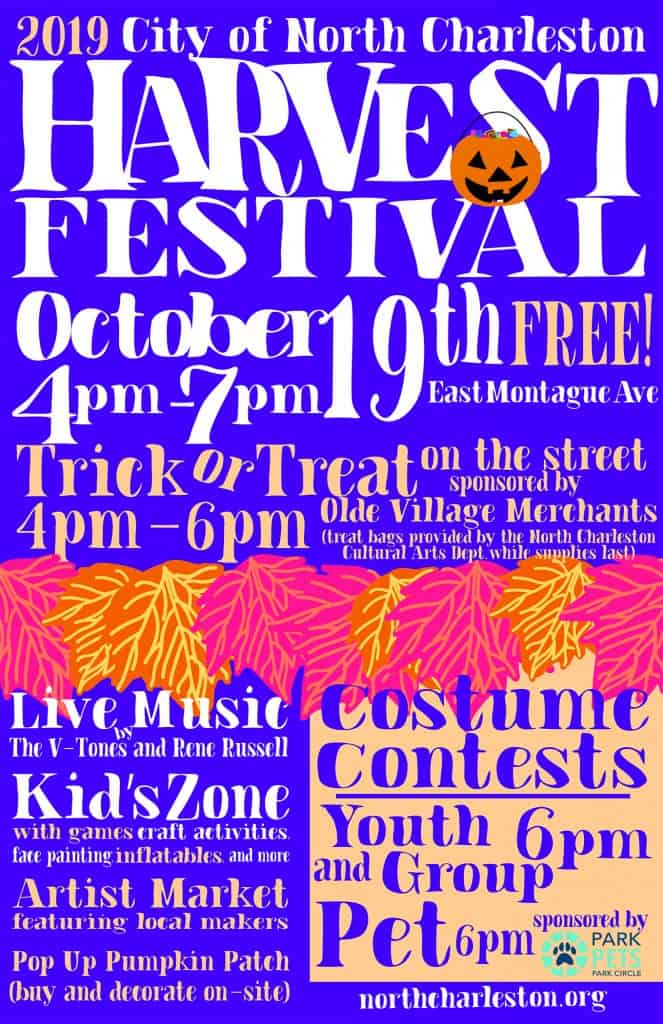
I will have a booth at the North Charleston Harvest Festival on Saturday, October 19th from 4-7pm. Come check it out!
The
City of North Charleston announces the 7th Annual Harvest Festival featuring
live musical performances, an artist market, costume contests, trick-or-treat
on the street, a pop-up pumpkin patch, children’s activities, and more.
The fall festivities will take place in the Olde Village of North Charleston,
located on East Montague Avenue near Park Circle, on Saturday, October 19, 2019,
from 4:00-7:00pm. Admission and parking are free. East Montague
Avenue will close to vehicular traffic from Jenkins Avenue to
Virginia Avenue at 2:00pm and remain closed
for the duration of the event.
The celebration includes live music by the
delightfully eclectic V-Tones of Charleston and singer-songwriter Rene Russell.
The Kid’s Zone offers a craft activity led by the City’s artist-in-residence Katherine
Hester, carnival games, face painting, drumming with RBM African Drum and Dance,
and a variety of inflatables. An artist market featuring local artists,
crafters, and makers will line two blocks of East Montague Avenue, along with a
few festive treat vendors. In addition, many of the restaurants in the Olde
Village will offer food and drink specials.
Other highlights include trick-or-treating on the
street with free treat bags for kids age 12 and under (4:00-6:00pm, while
supplies last); a pop-up pumpkin patch with on-site decorating stations (cash
only – prices of pumpkins vary); a mechanical bull, photo booths, and costume
contests with categories for youth, groups, and pets. The contests are free to
enter and prizes will be furnished by the City of North Charleston Recreation
Department, merchants of the North Charleston Olde Village, and Park Pets.
Participants for all contests should be prepared to line up for judging at 5:45pm
for the contests to begin at 6:00pm.
The annual Harvest Festival
is a rain or shine event produced by the City of North Charleston in
collaboration with the North Charleston Olde Village merchants. For information
on additional programs and events, visit the Arts & Culture section of the
City’s website at www.northcharleston.org.
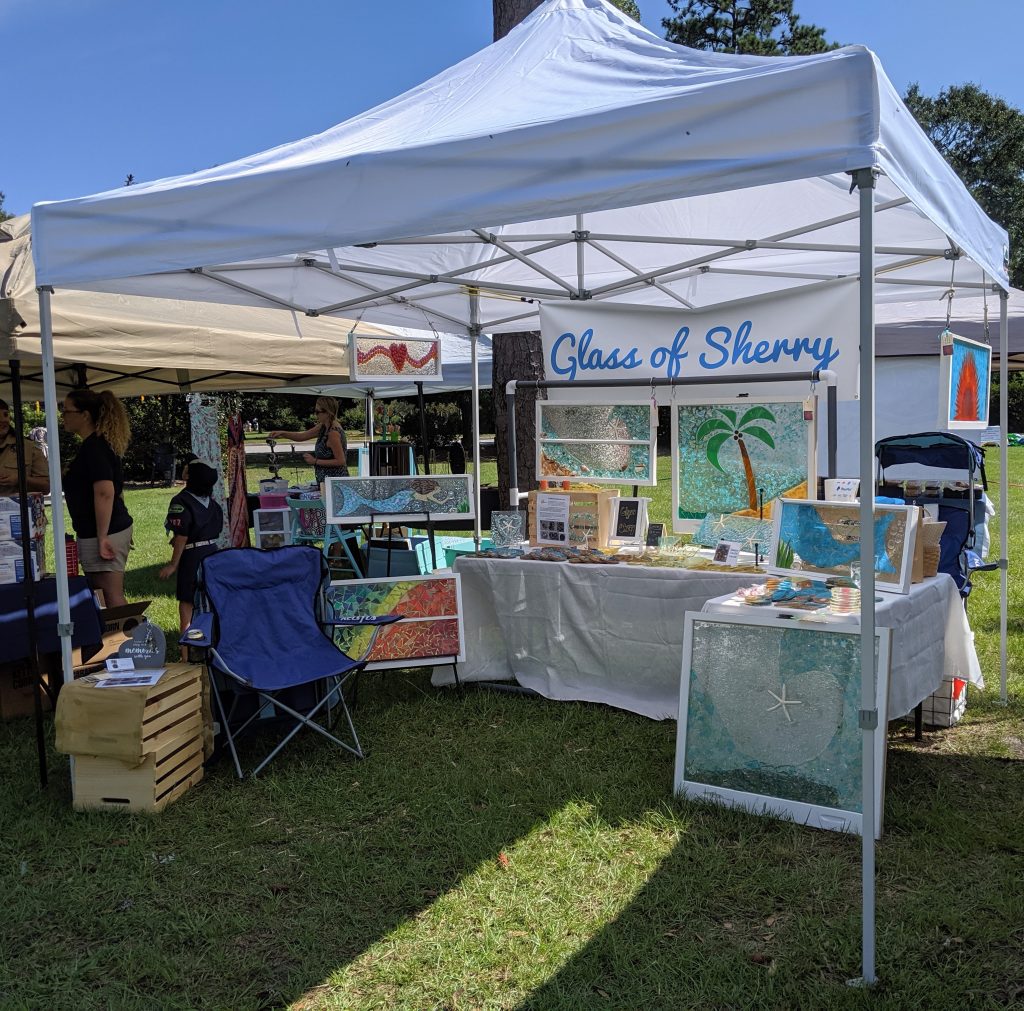
I’ll be at the Farmers Market in Park Circle again tomorrow, Thursday September 19th from 3-7 pm. Come by and visit me! Mention the code “VisitTen” to receive 10% off any in stock window!
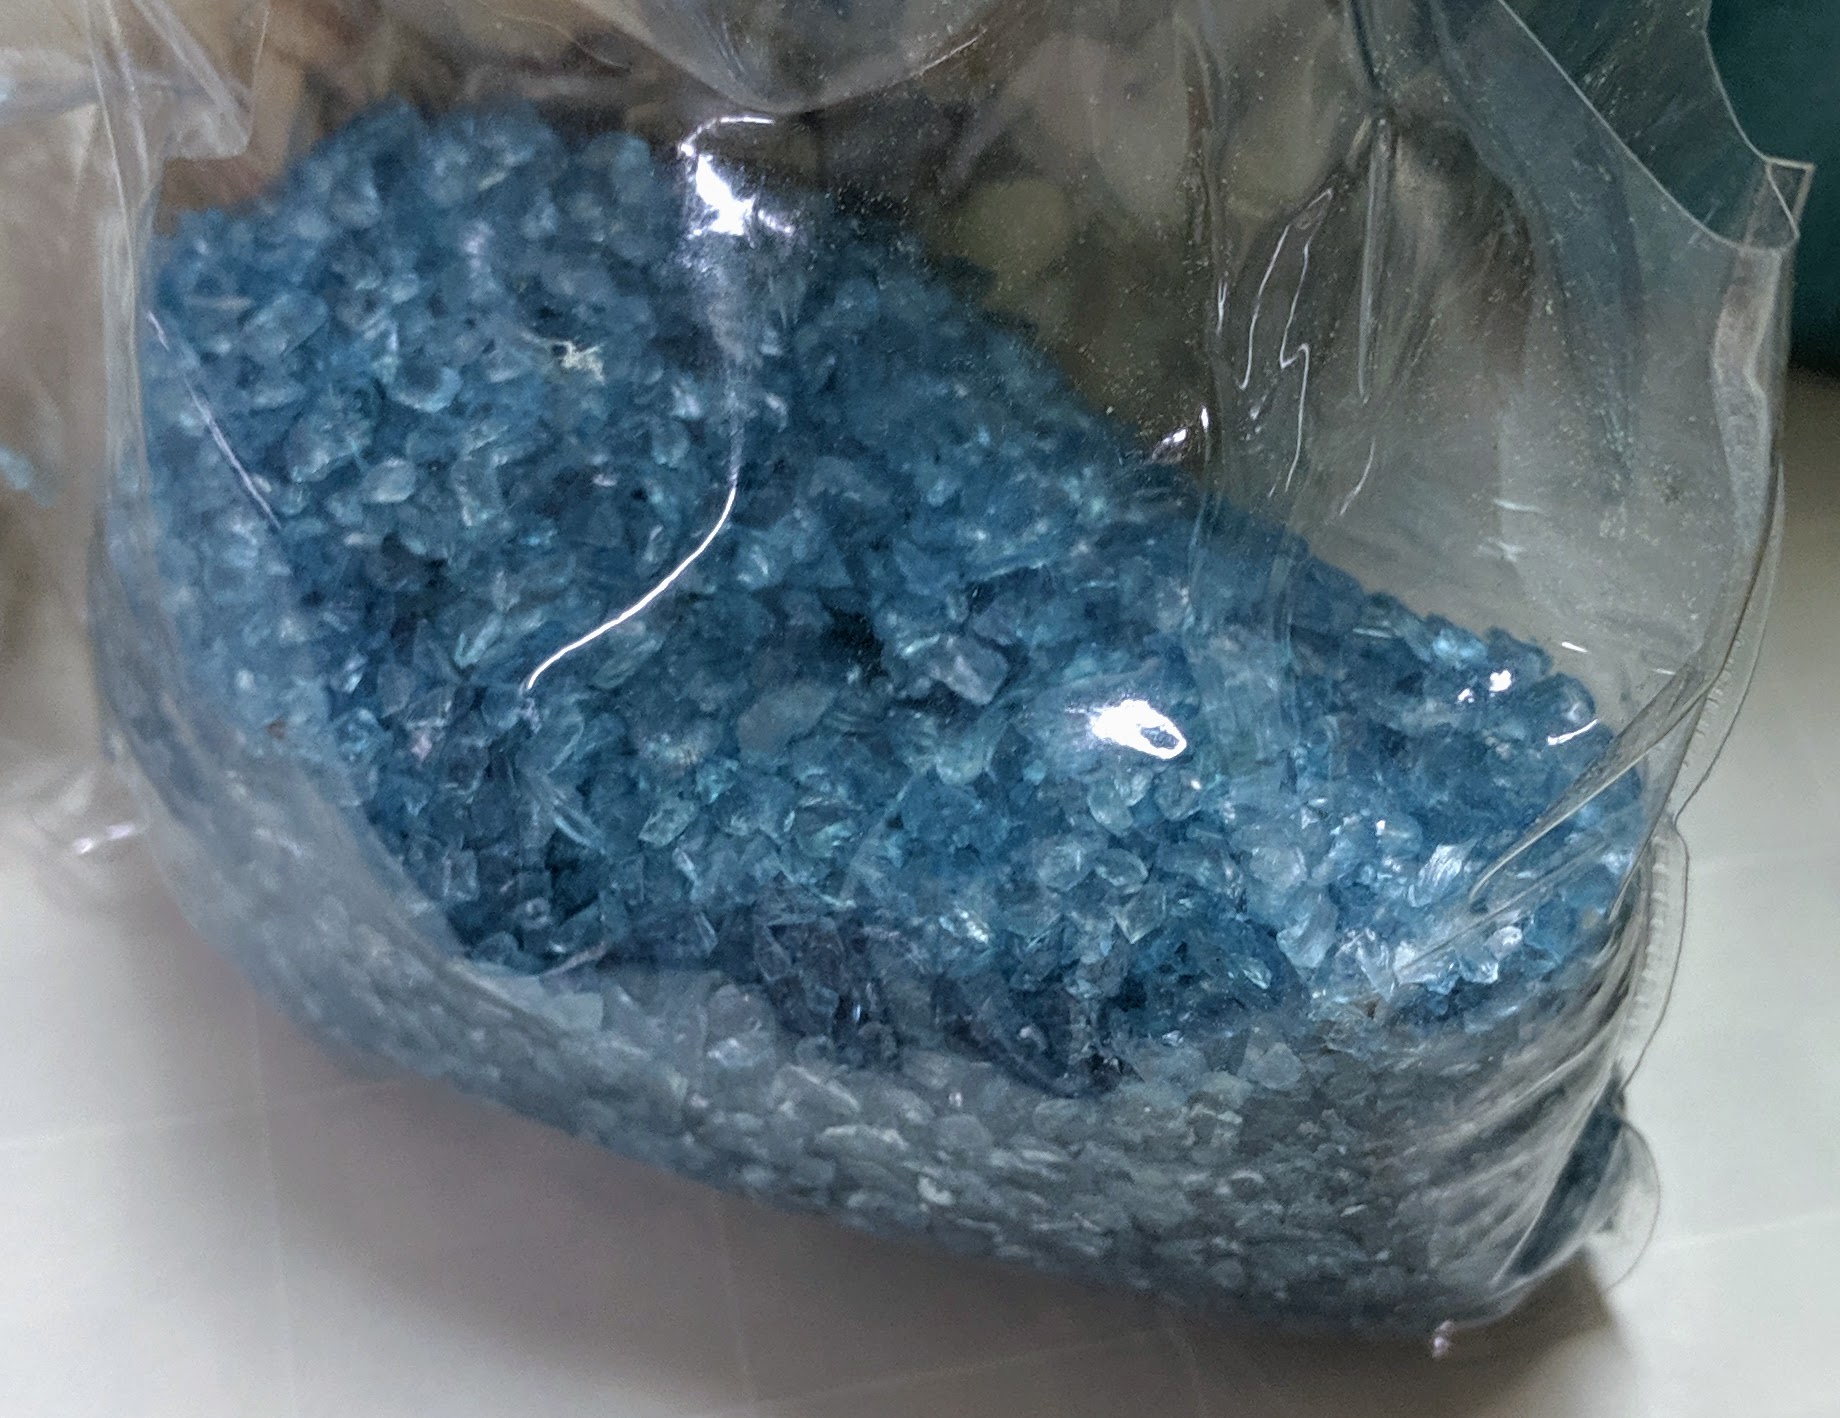
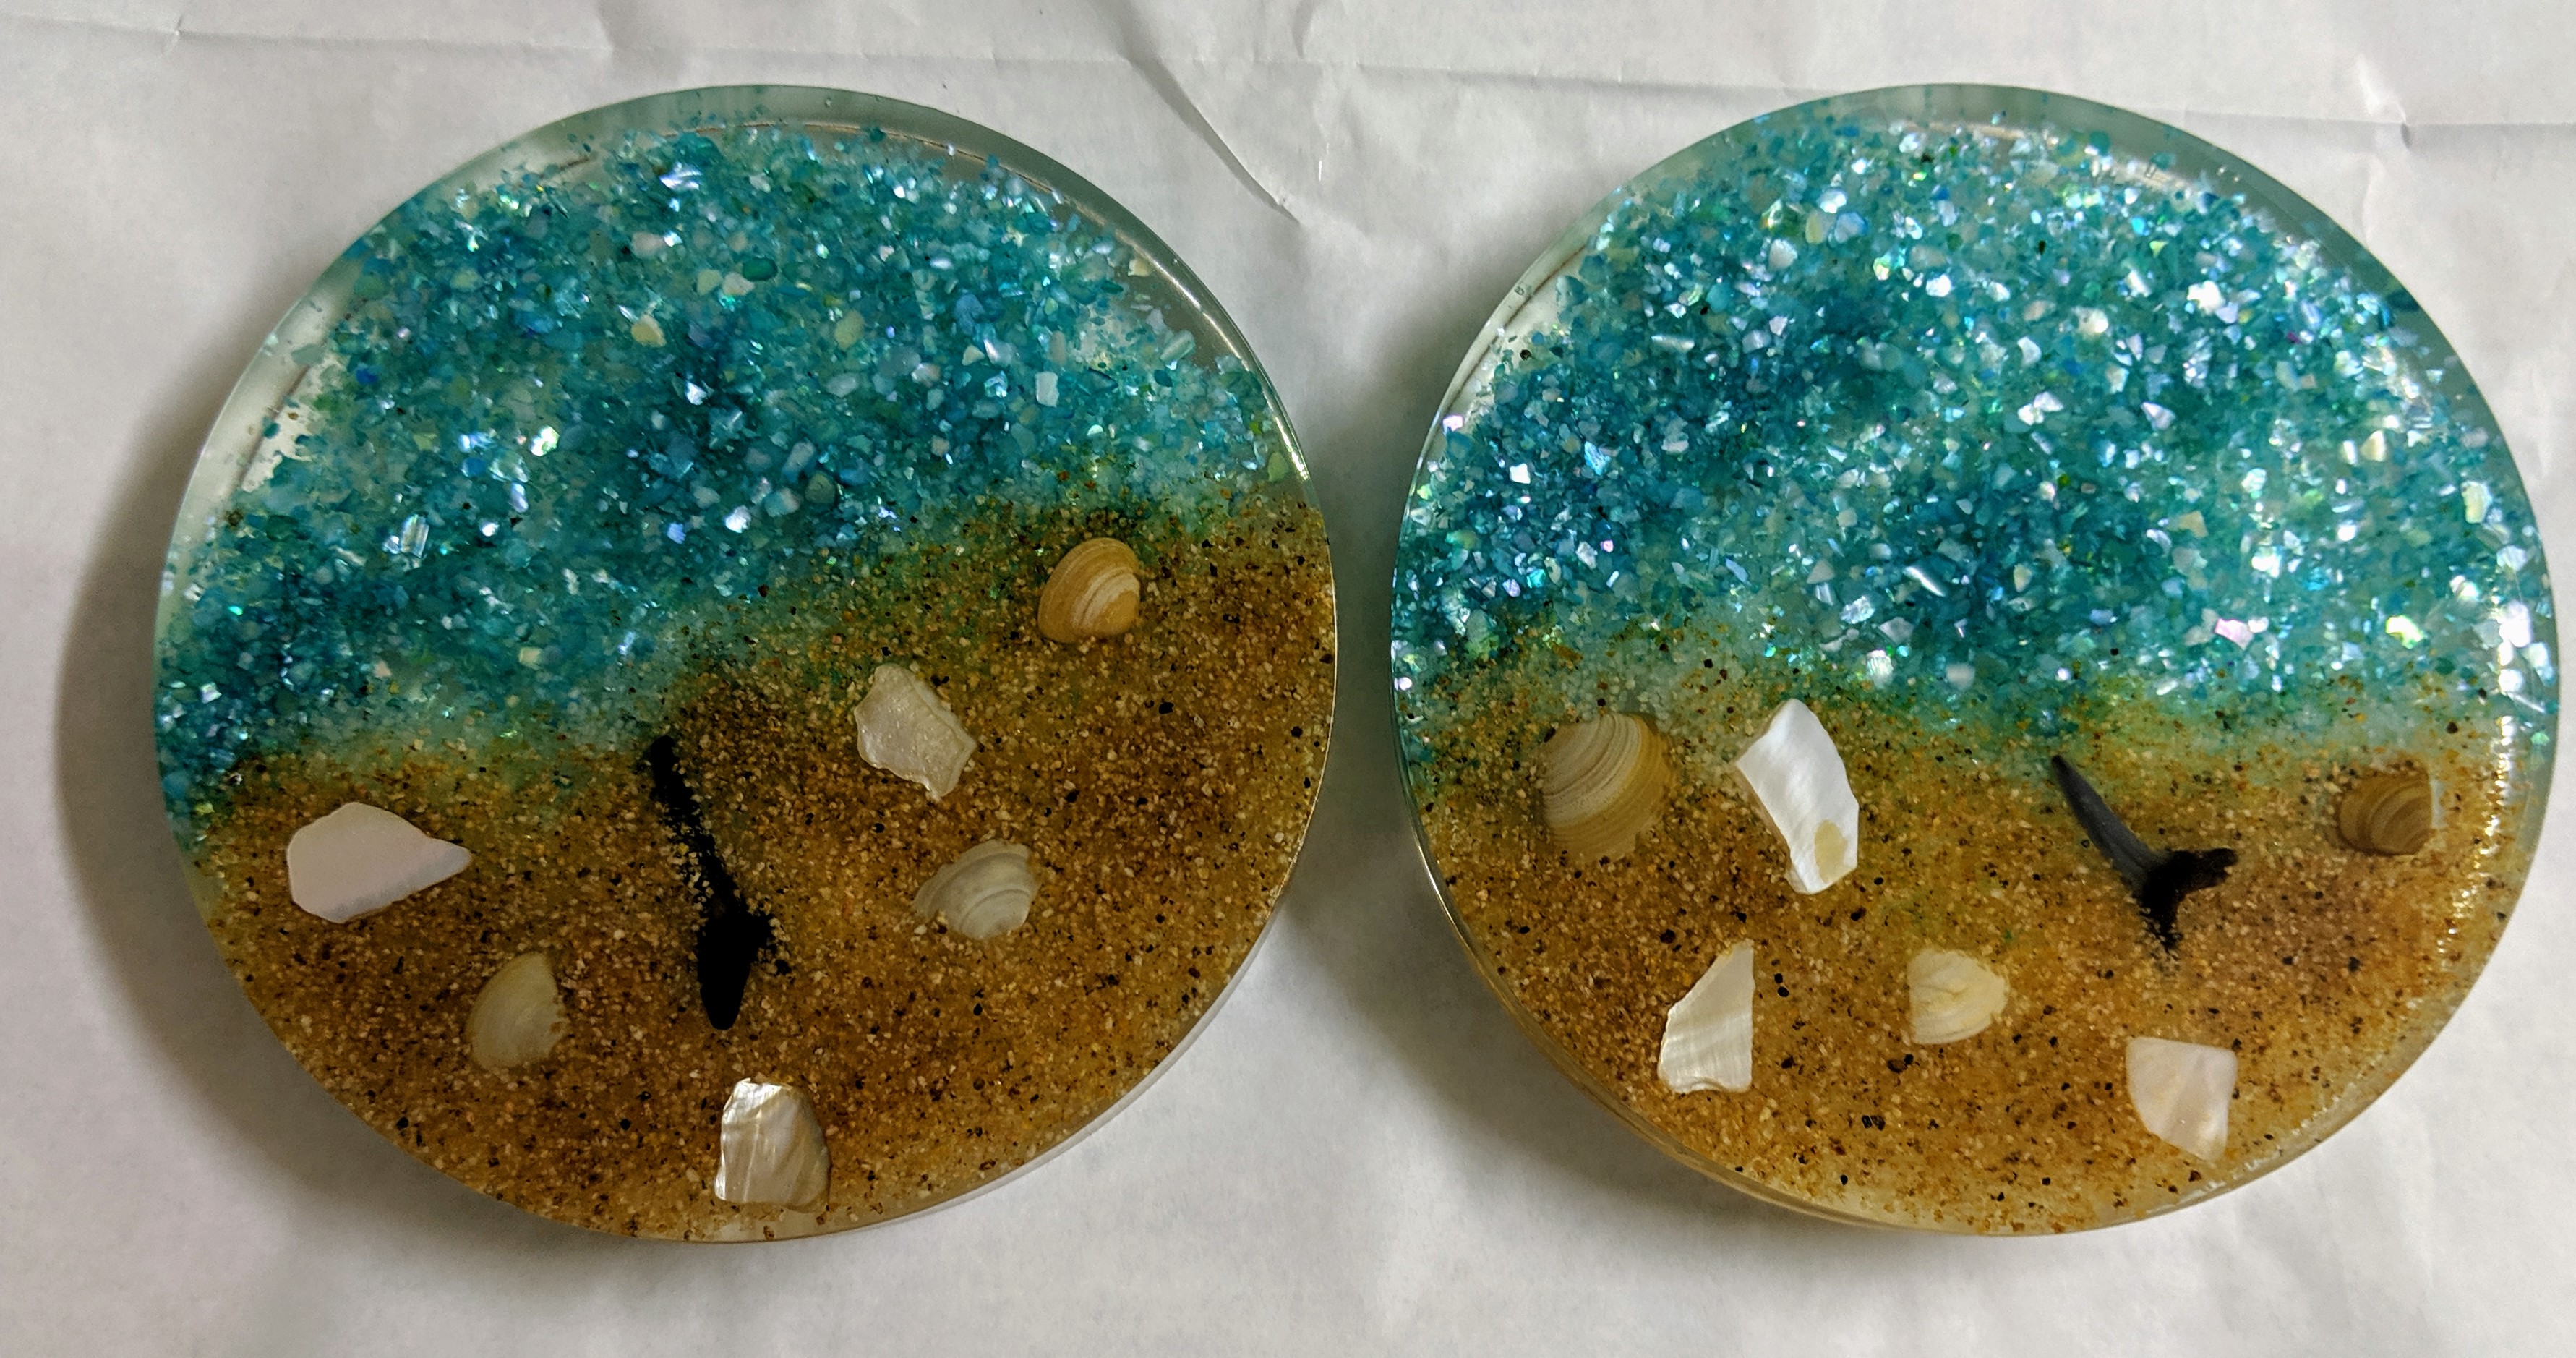
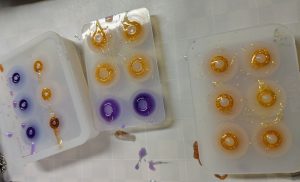
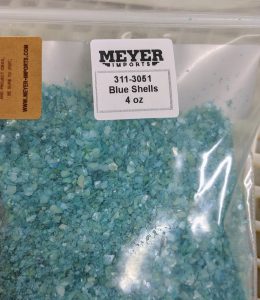
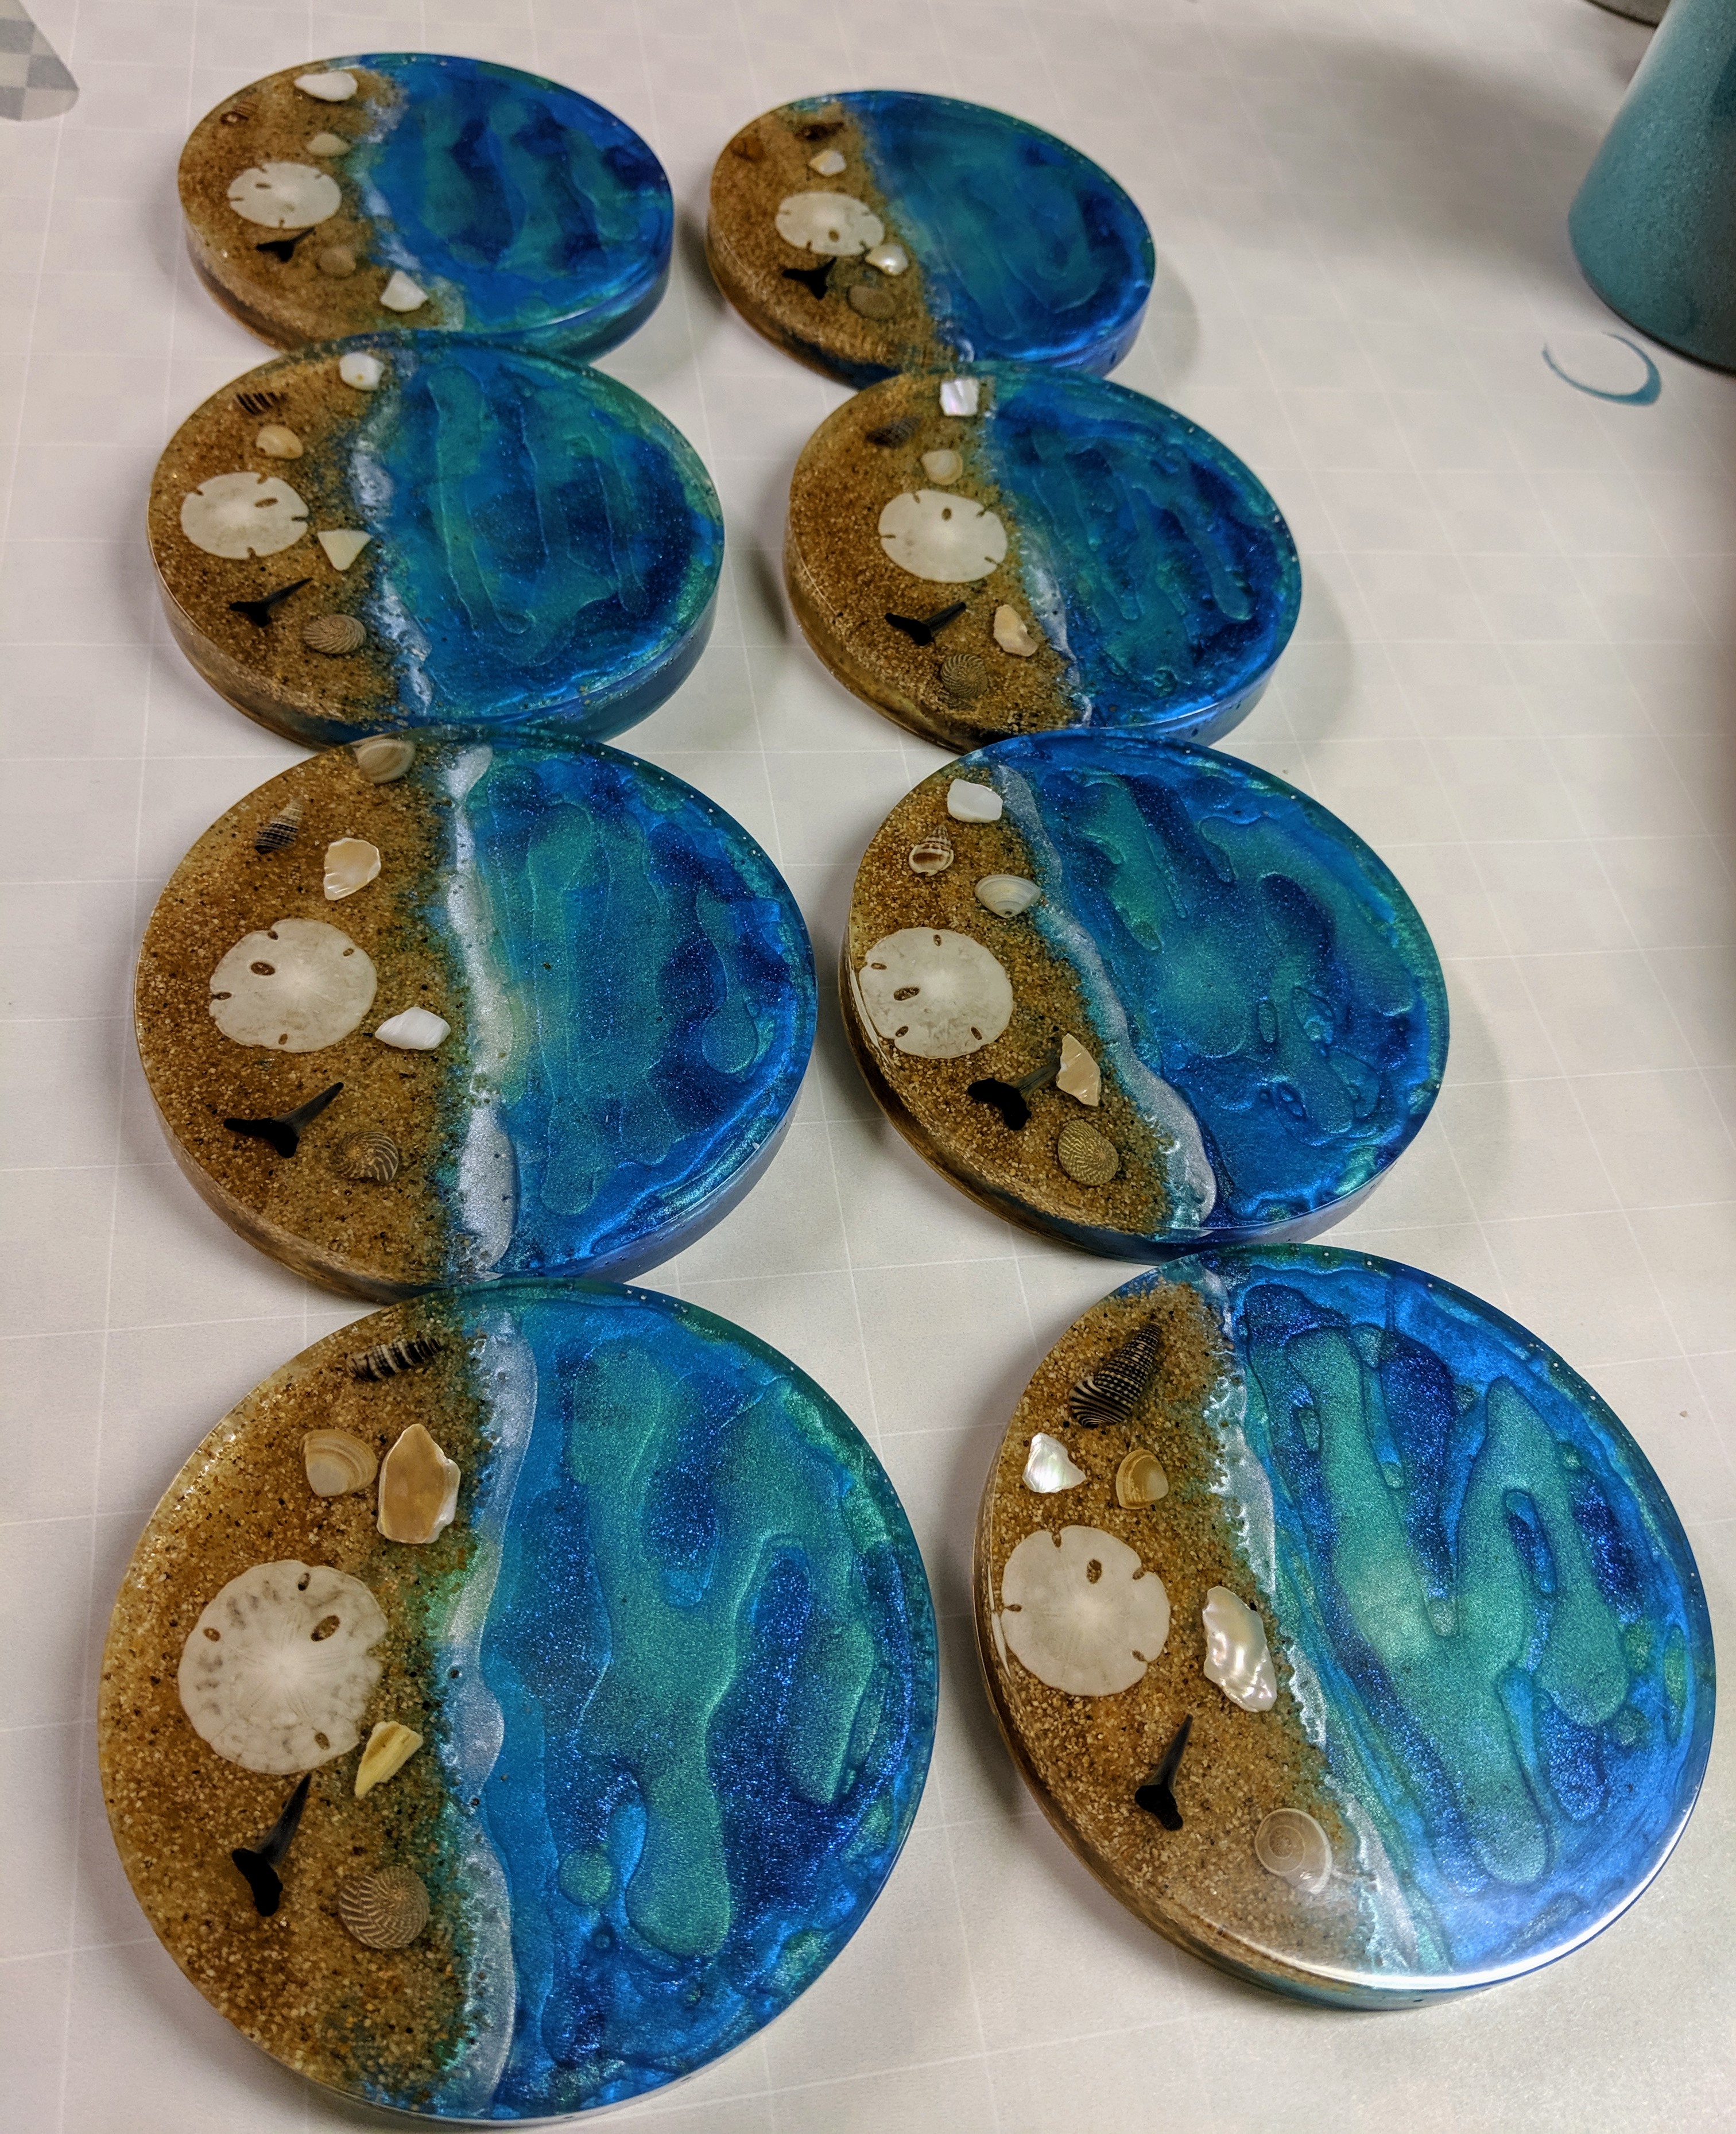
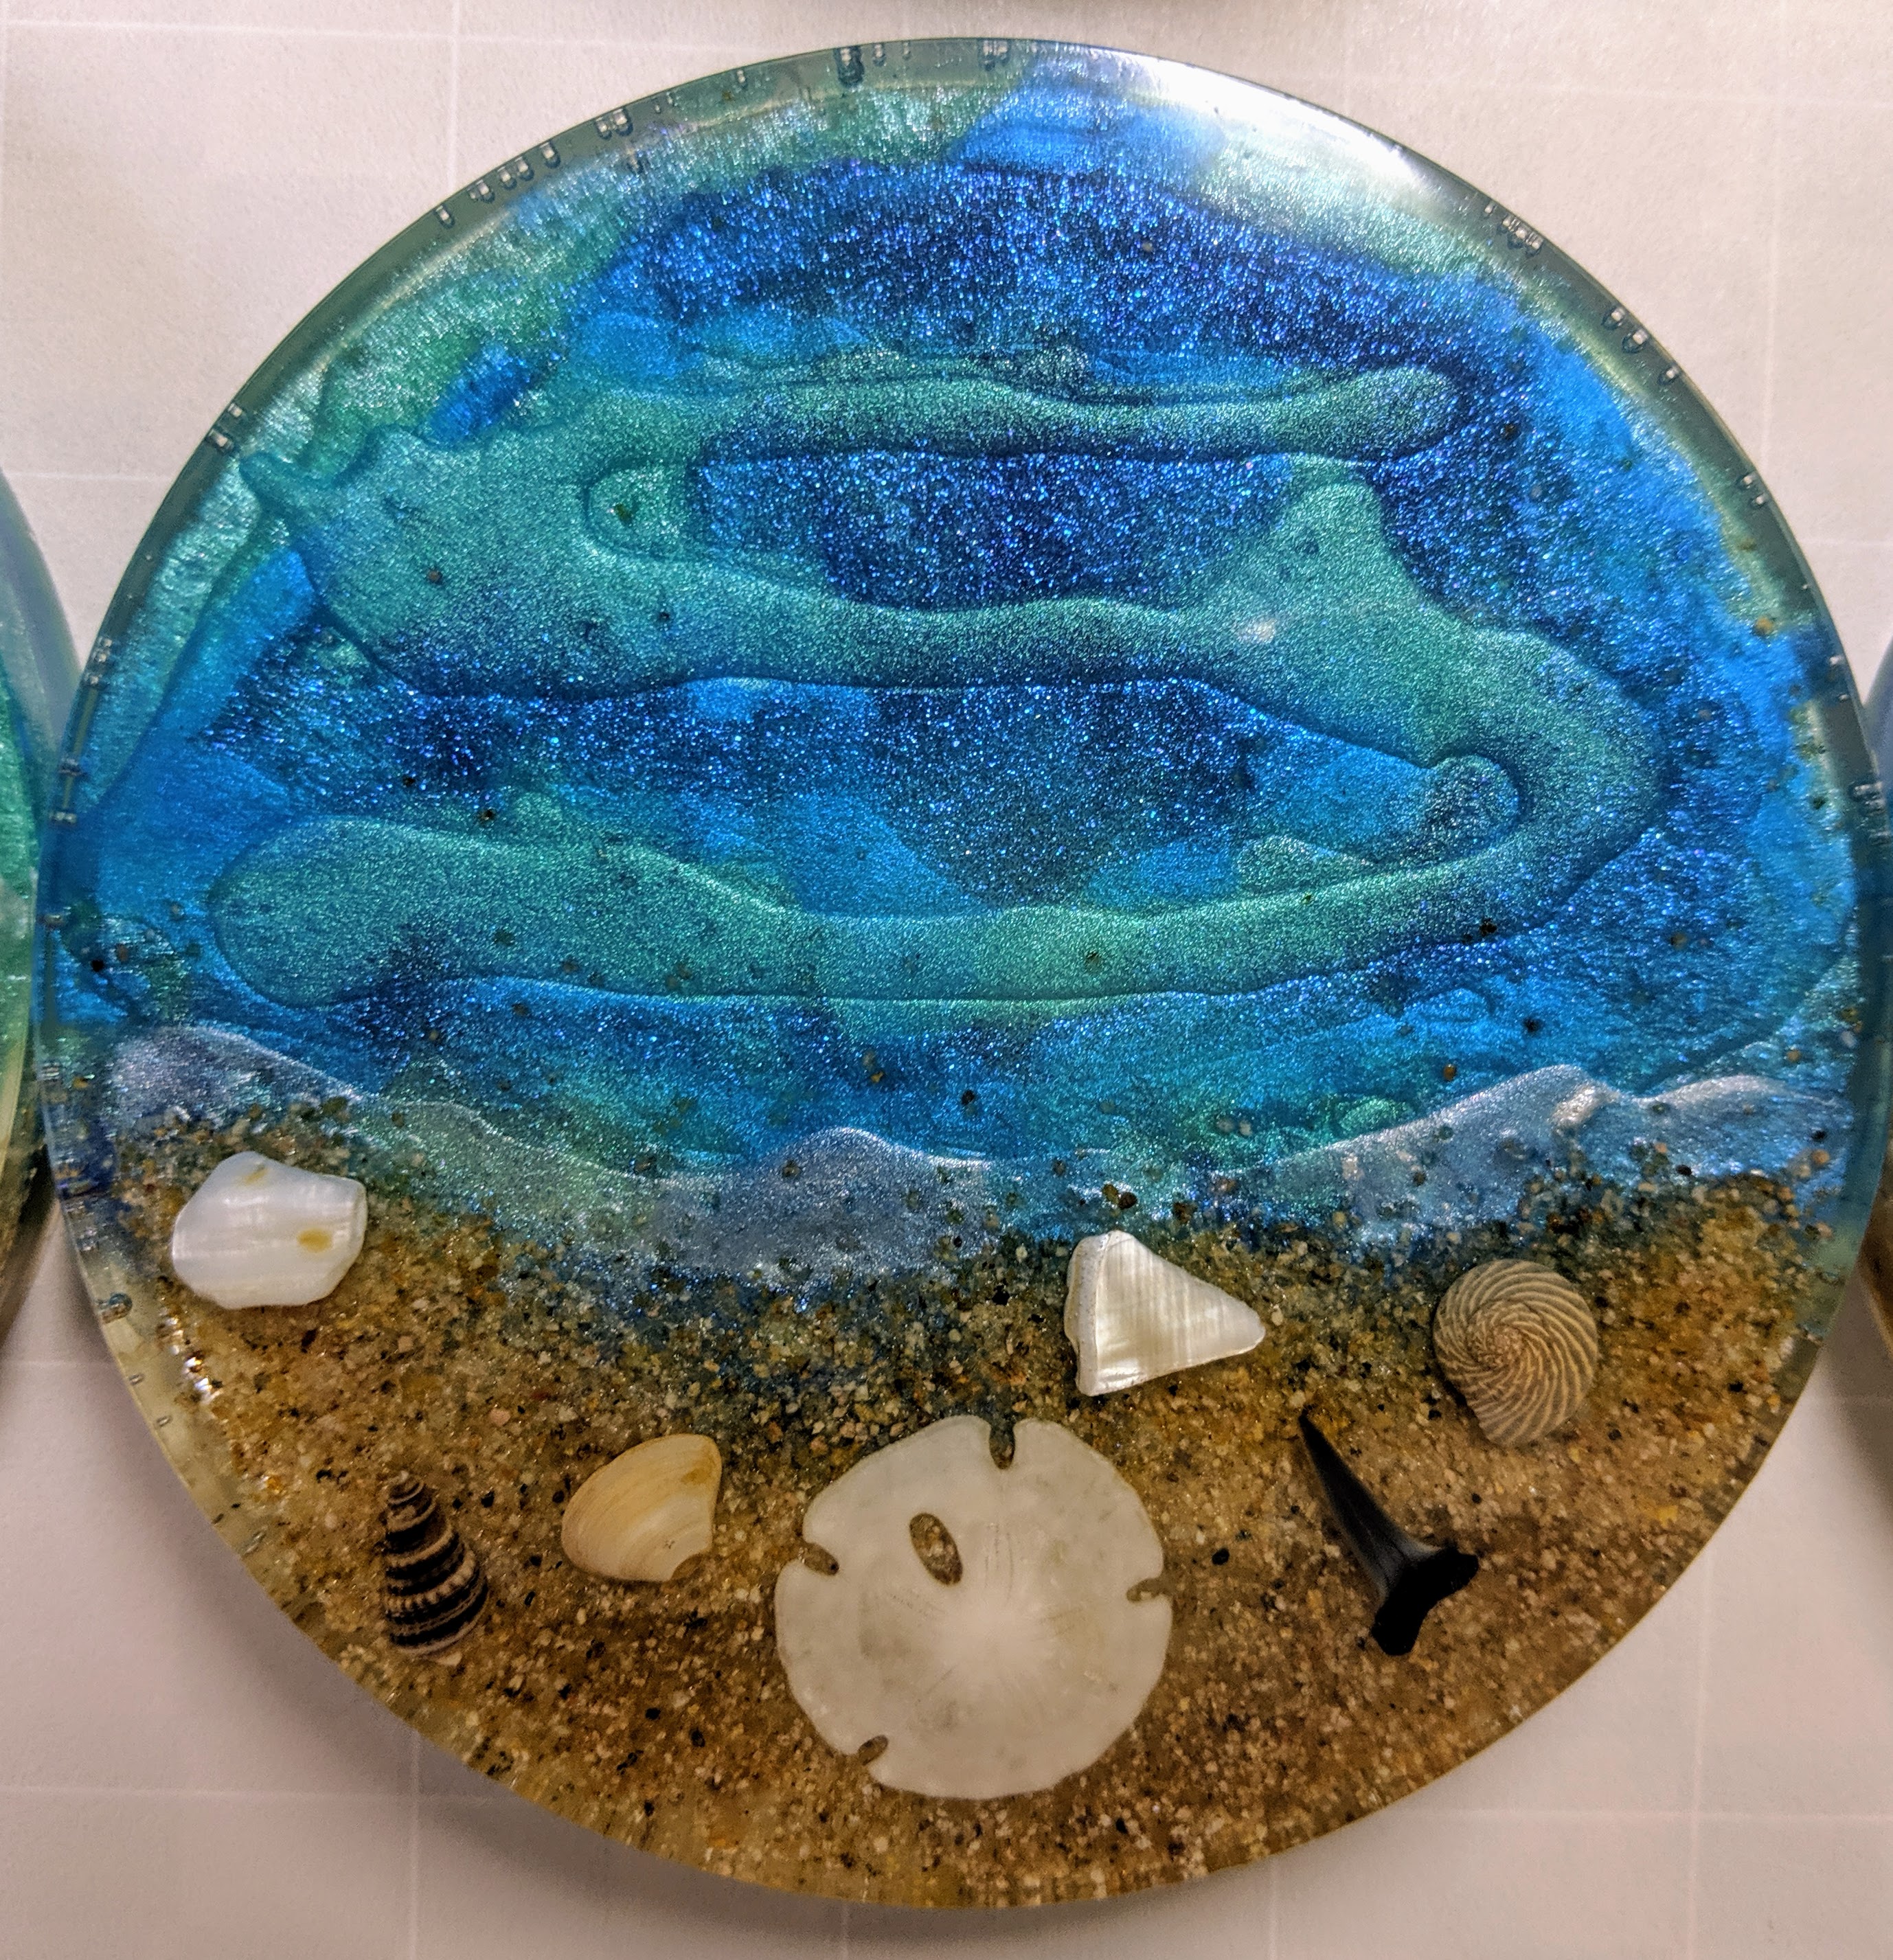
I signed up for a space at a local farmer’s market for the months of September and October, so I have been trying to build up an inventory of small things (smaller glass pieces and coasters) to sell in addition to my stained glass in recycled windows. I also bought some various blue glass materials to use for the water in the beach coasters. I decided to try three different types of glass for this round of coasters. I really love the look of the “Blue Shells” glass, so I used that for some. Additionally, I used some fairy garden glass chips and another shade of larger (but still tiny) fairy glass globs.
Fairy garden glass chips
Below is how the fairy glass globs looked when set in the resin.
Fairy glass globs set in the resin
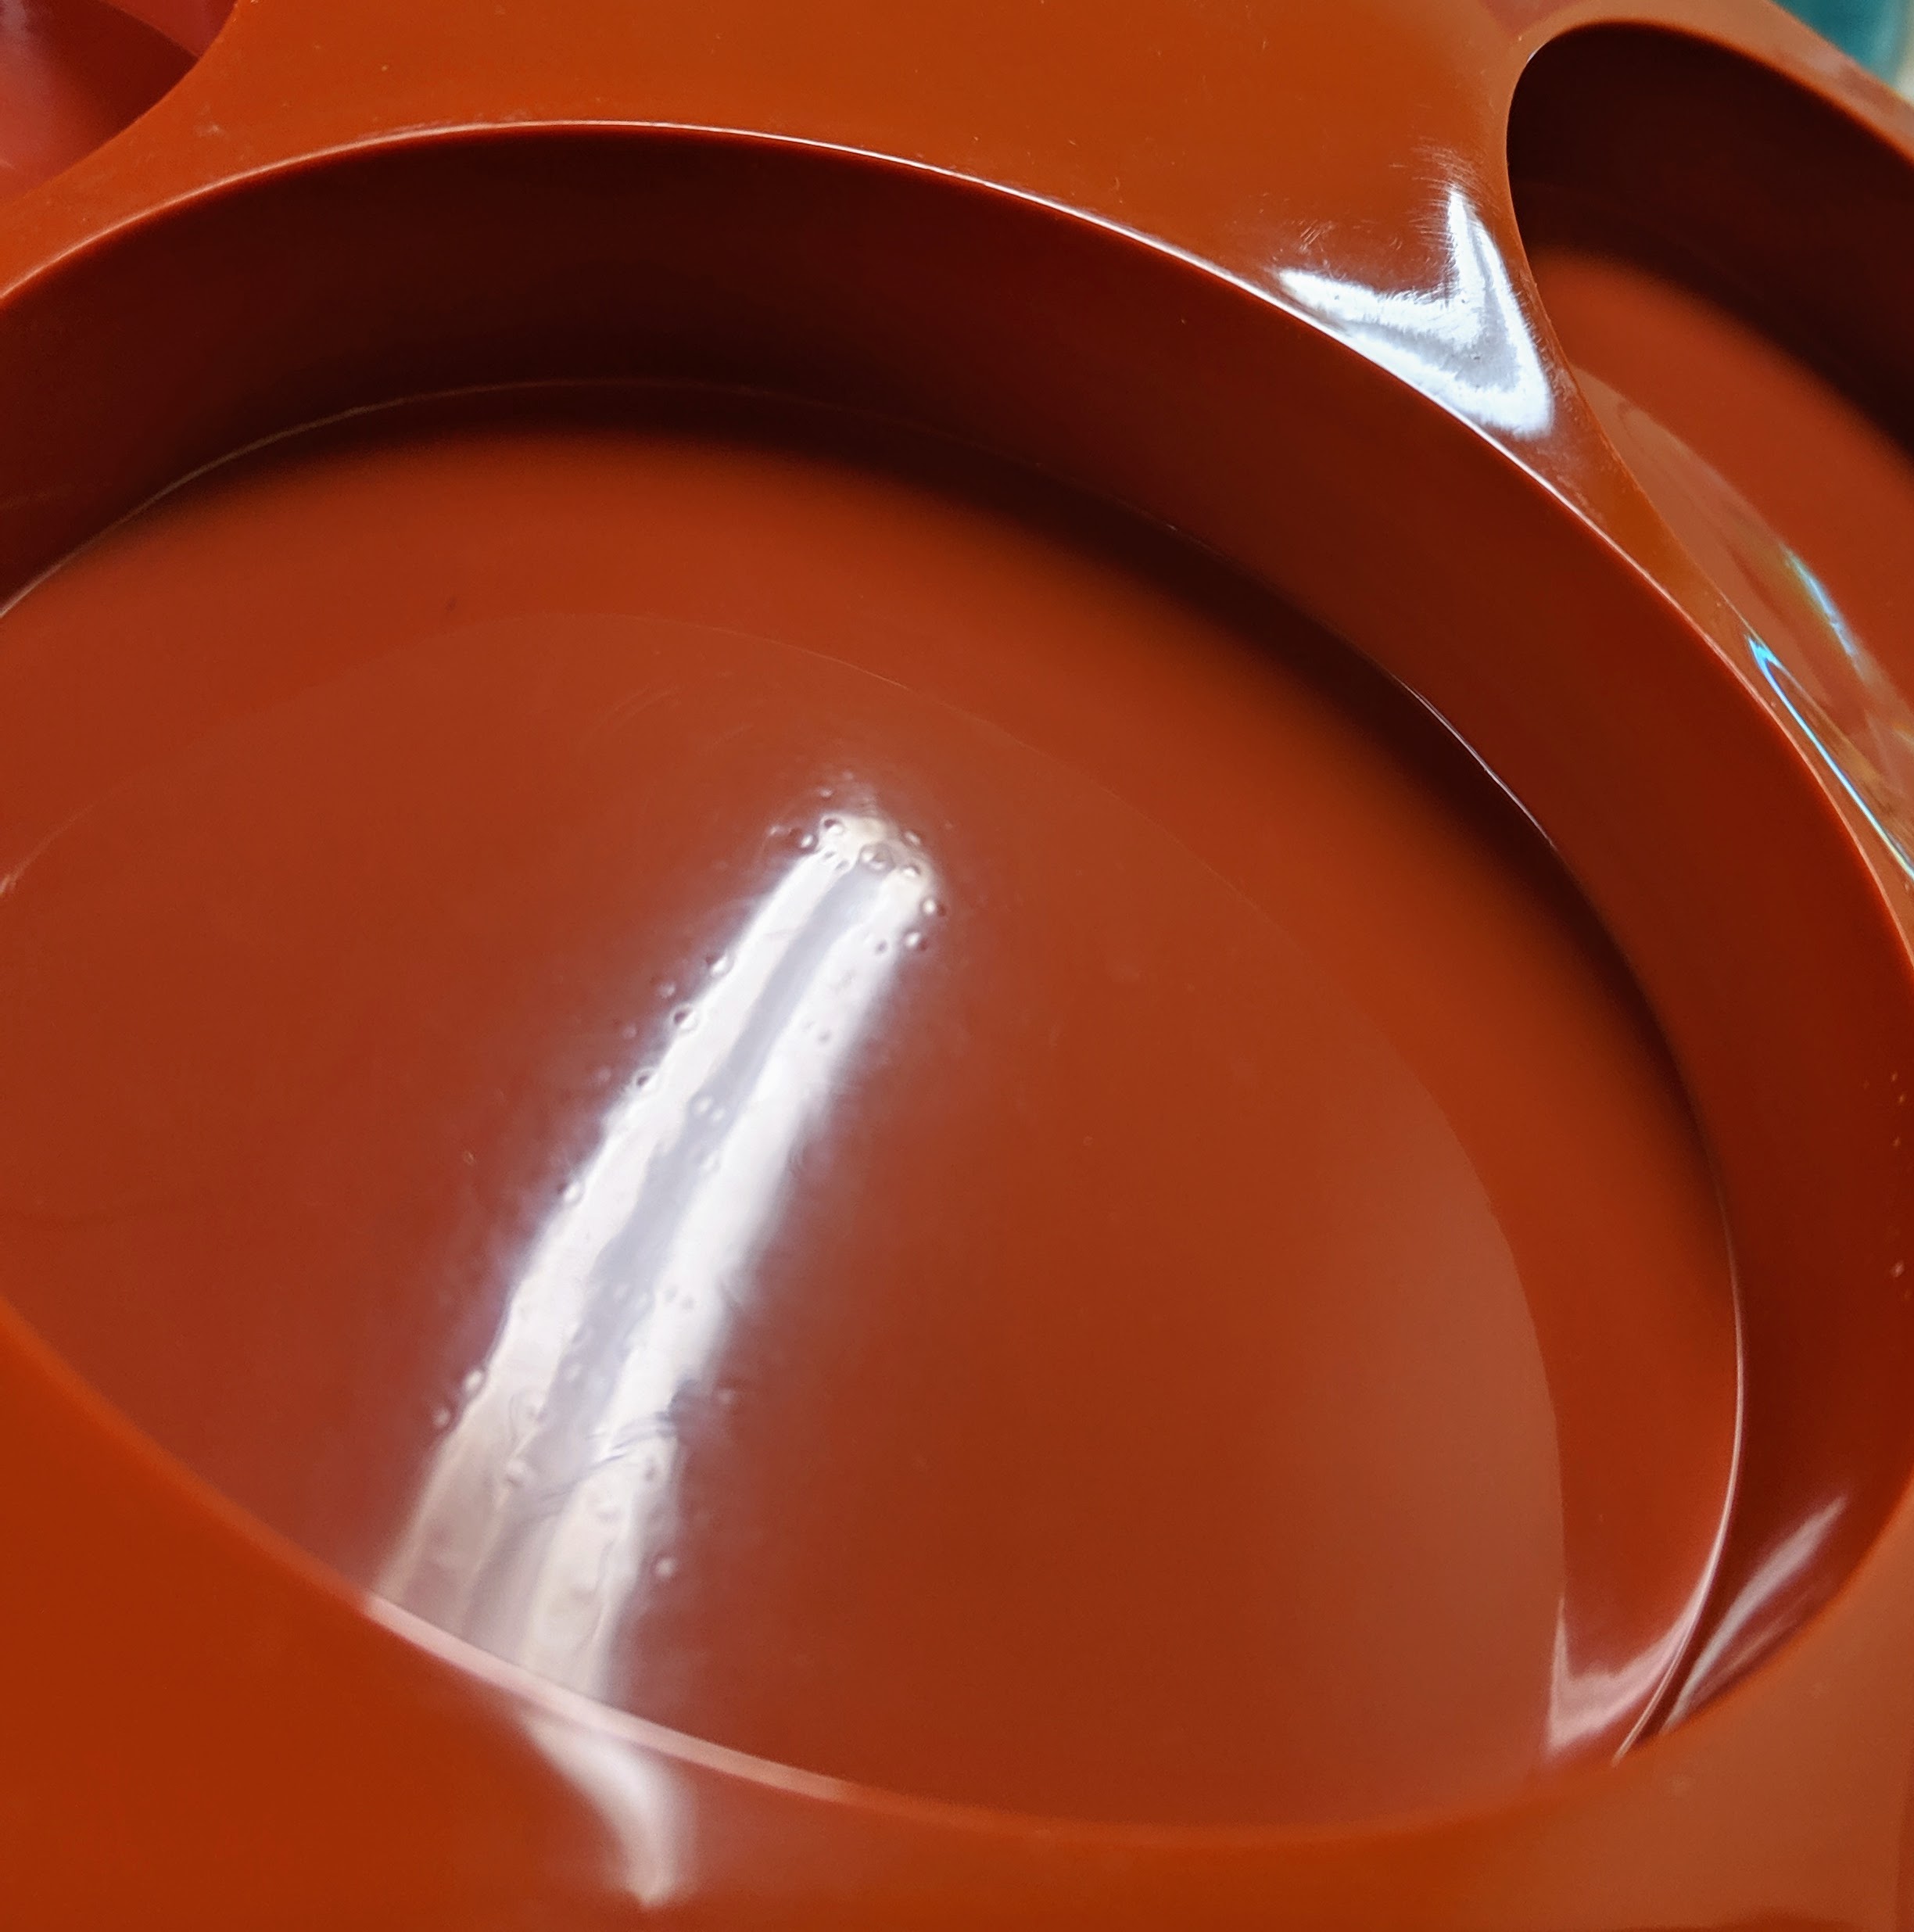
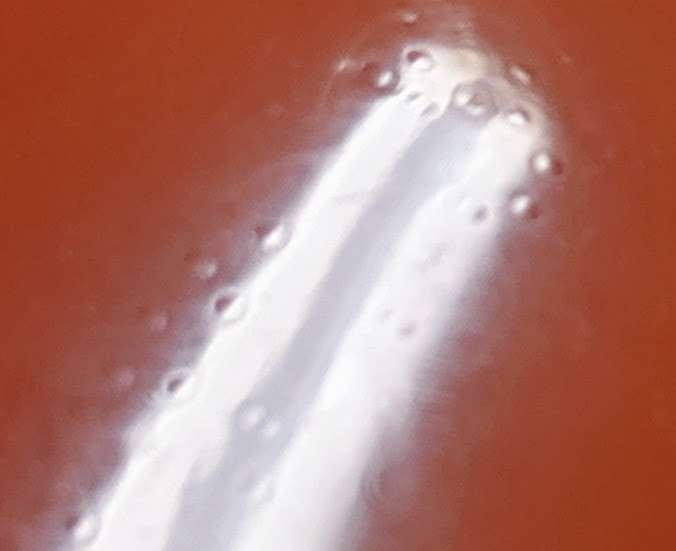
I poured all of these coasters in two layers, one day apart. Since I learned that the type of resin I’m using is meant for thin applications, I went back to my old layering method of pouring. The demolding revealed another anomaly in the resin, however. The coasters with the fairy glass chips warped when they cured, so the tops of all four of them were uneven.
Poured coasters, 2nd layer
All the other coasters turned out to be fine, only the ones using that particular glass warped. They will obviously not be particularly useful as coasters with the tops so warped. After further inspection, I realized that one of the new molds I just purchased for coasters is defective, causing the warping. Unfortunately I wasted a lot of materials before I realized why the warping was occurring.
Coasters with fairy glass chips – warped.Warping, close up viewCoasters with “blue shells” class chips
Another lesson learned. Luckily my new resins arrived today, so I can start using the proper resin for thicker molds going forward. The type I normally use is good for thin coatings only. I must just be fortunate that my previous coaster creations turned out fine using it!
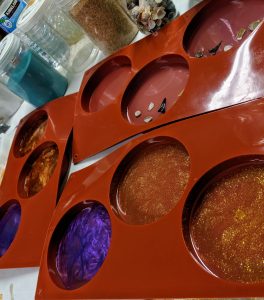
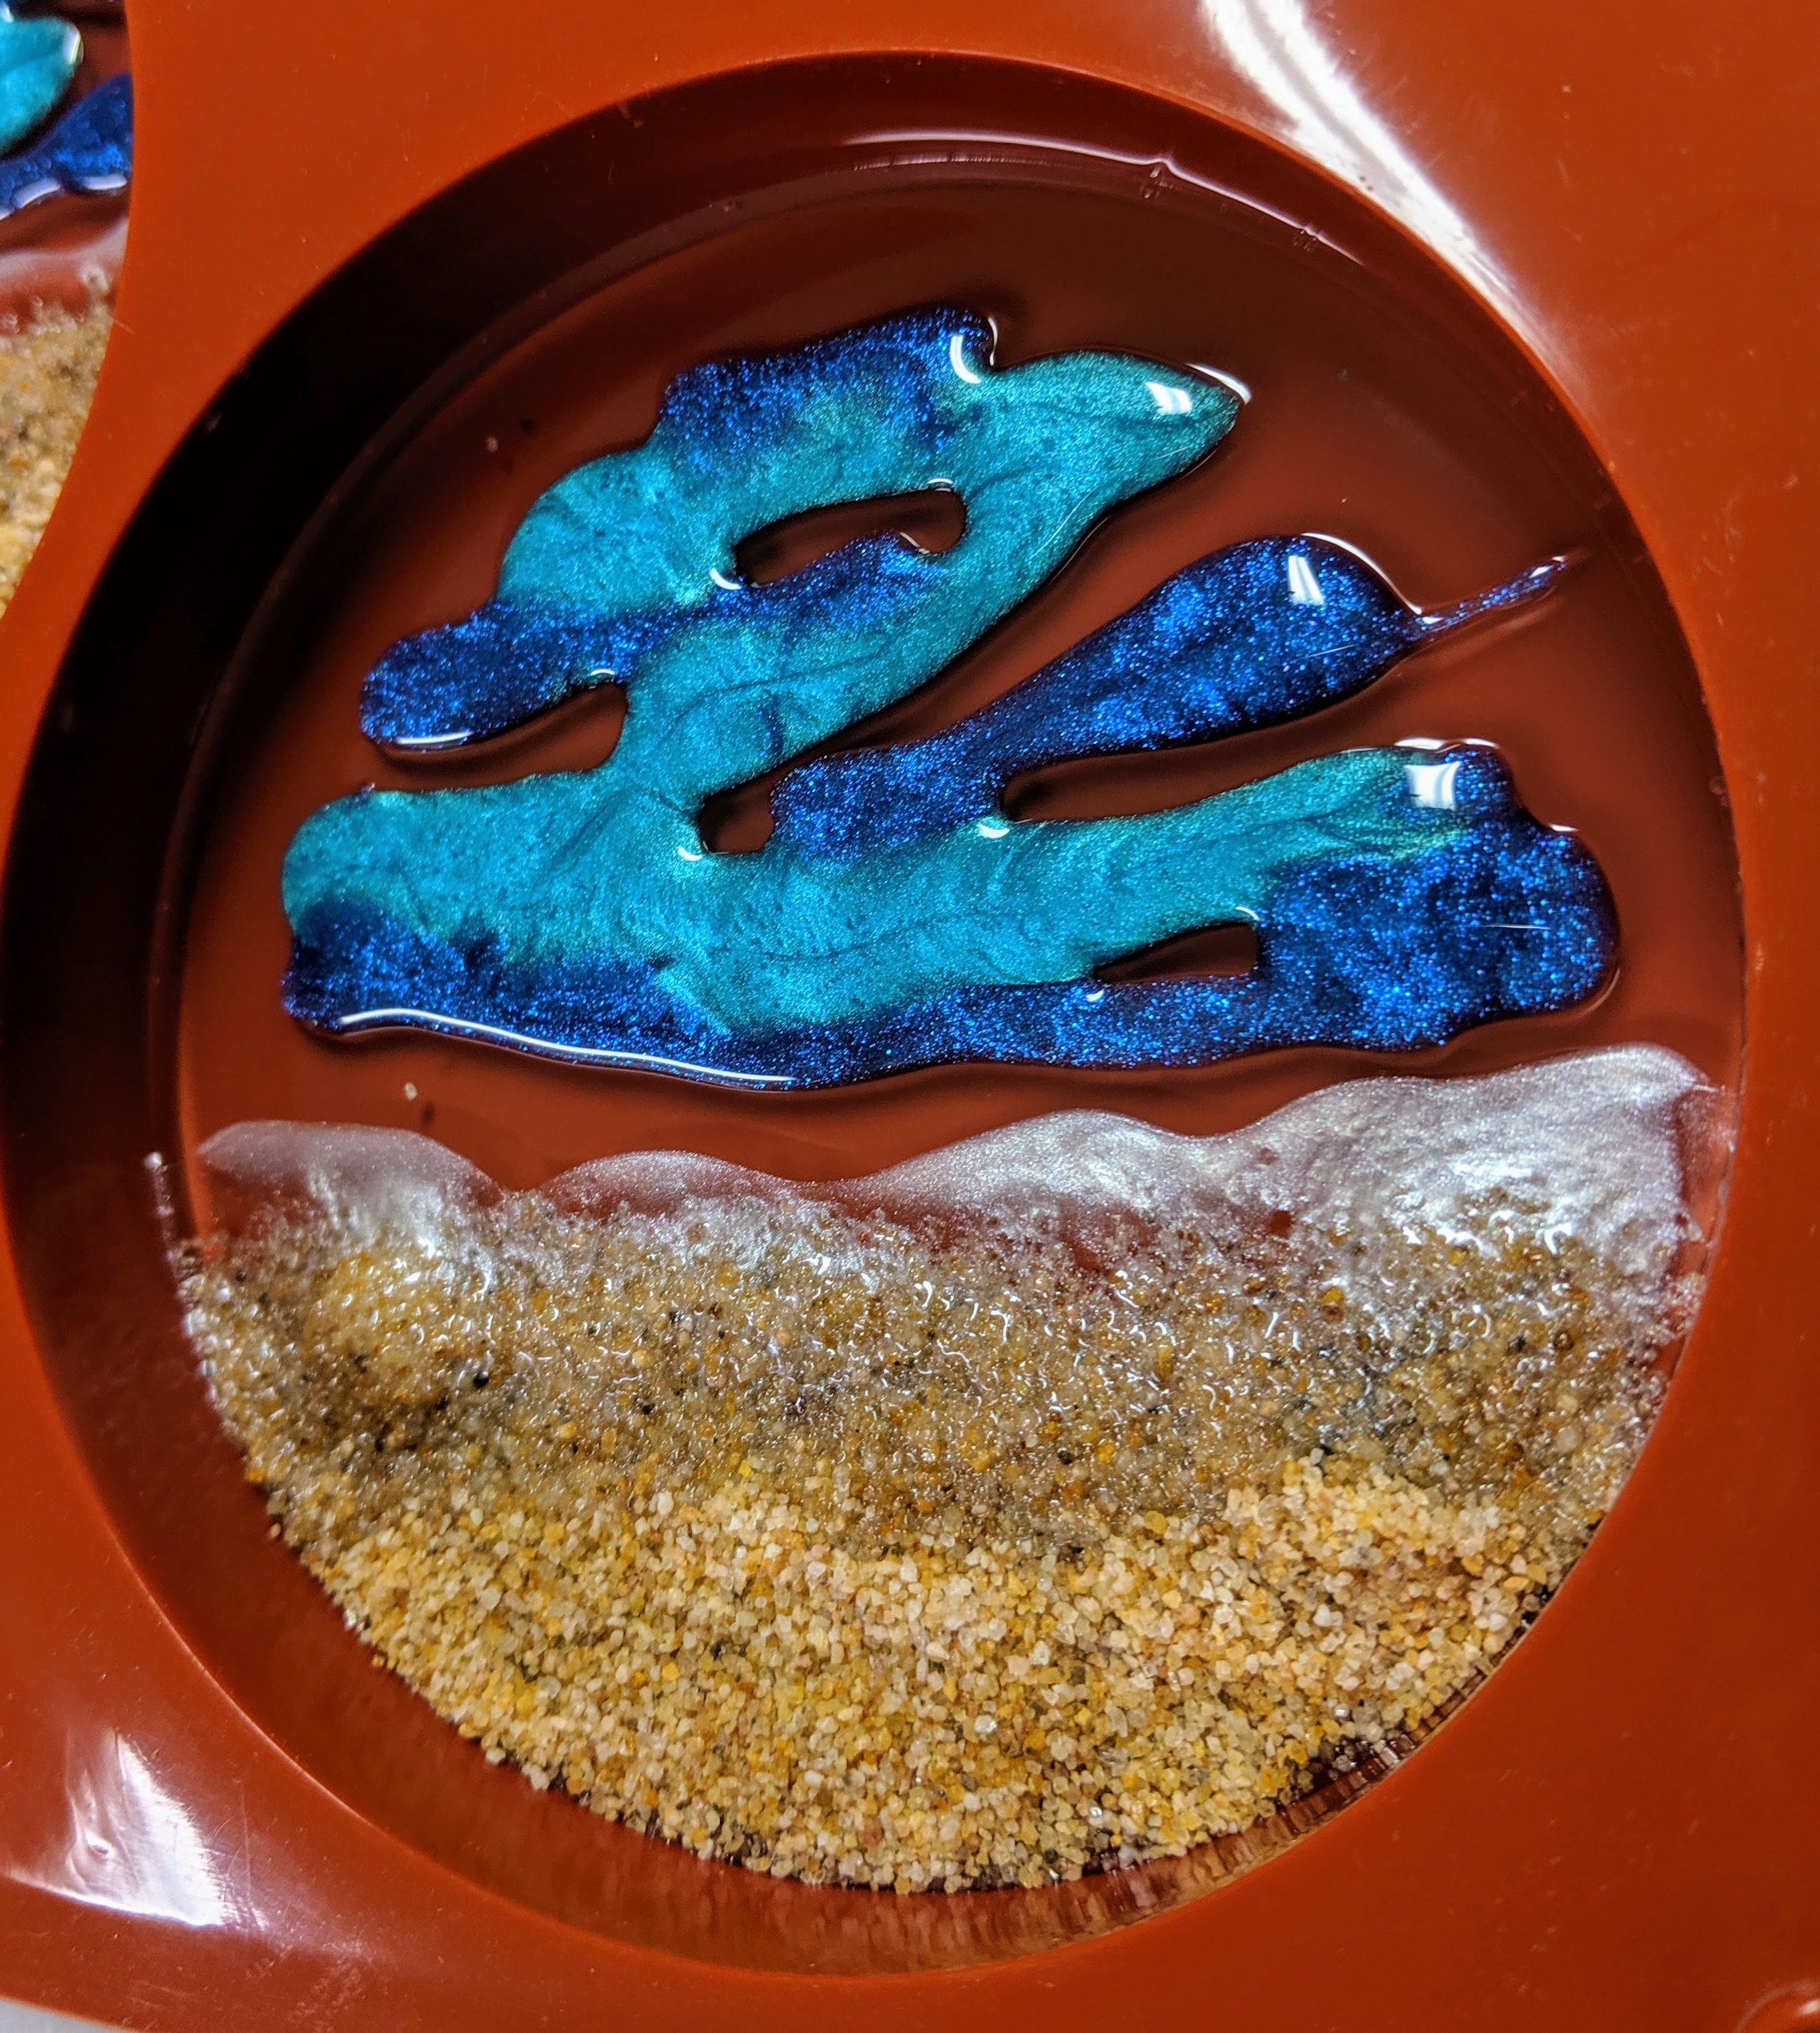
Here is how the latest batch of coasters came out. I was trying different colored pigments and also some new glass called “Blue Shells”. I *really* love this new glass. I bought it from Meyer Imports. By the way, I get no payment or promotion of any kind from any of the vendors whose products I use. I just share the info in case it helps someone.
Beach coasters using the Blue Shells glass chips for the water.
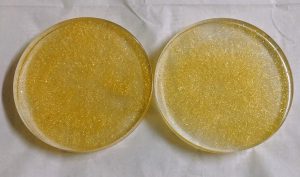
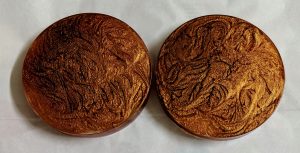
Gold nugget pigment.
I probably should have used more of the gold pigment in these, but I didn’t mix up enough. I can try this one again.
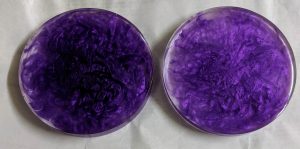
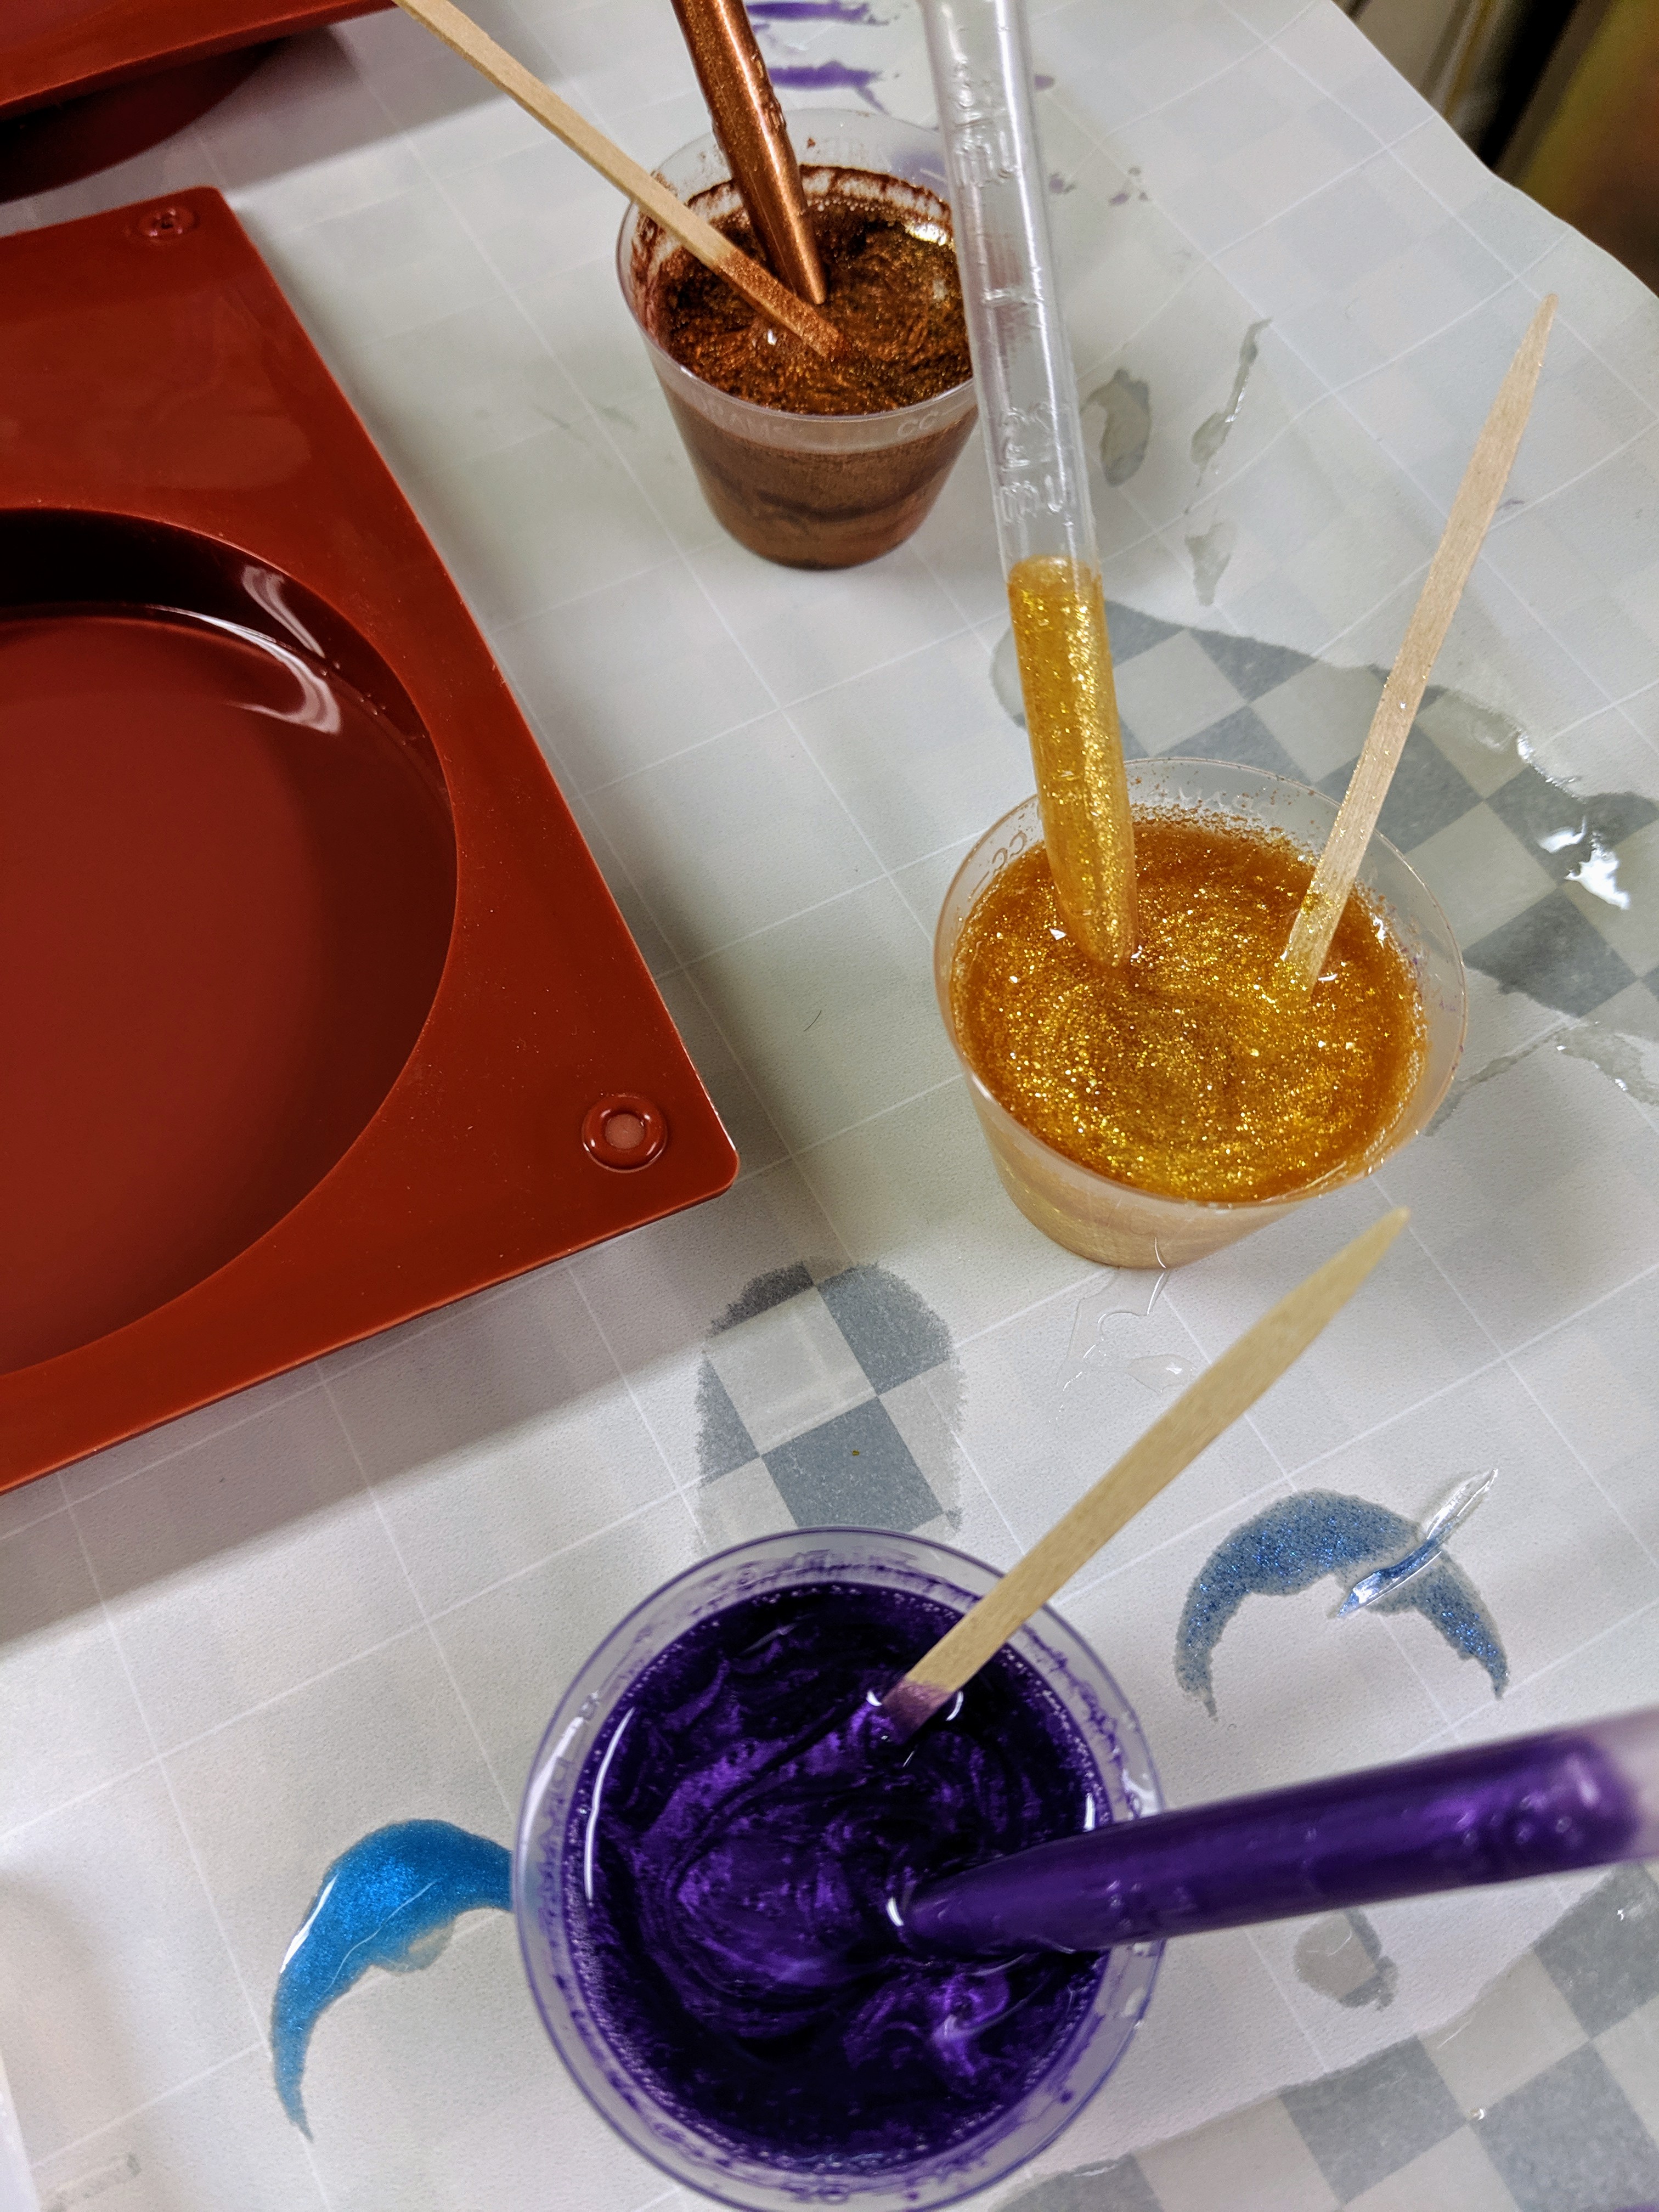
Since my coaster molds are a bit out of shape, I thought I would experiment with a couple of new colors of pigment I haven’t tried before while I wait for the new molds. I also wanted to make some other accent beads, so I thought this would be a good chance to try the colors in those molds as well.
Mixing Pigments
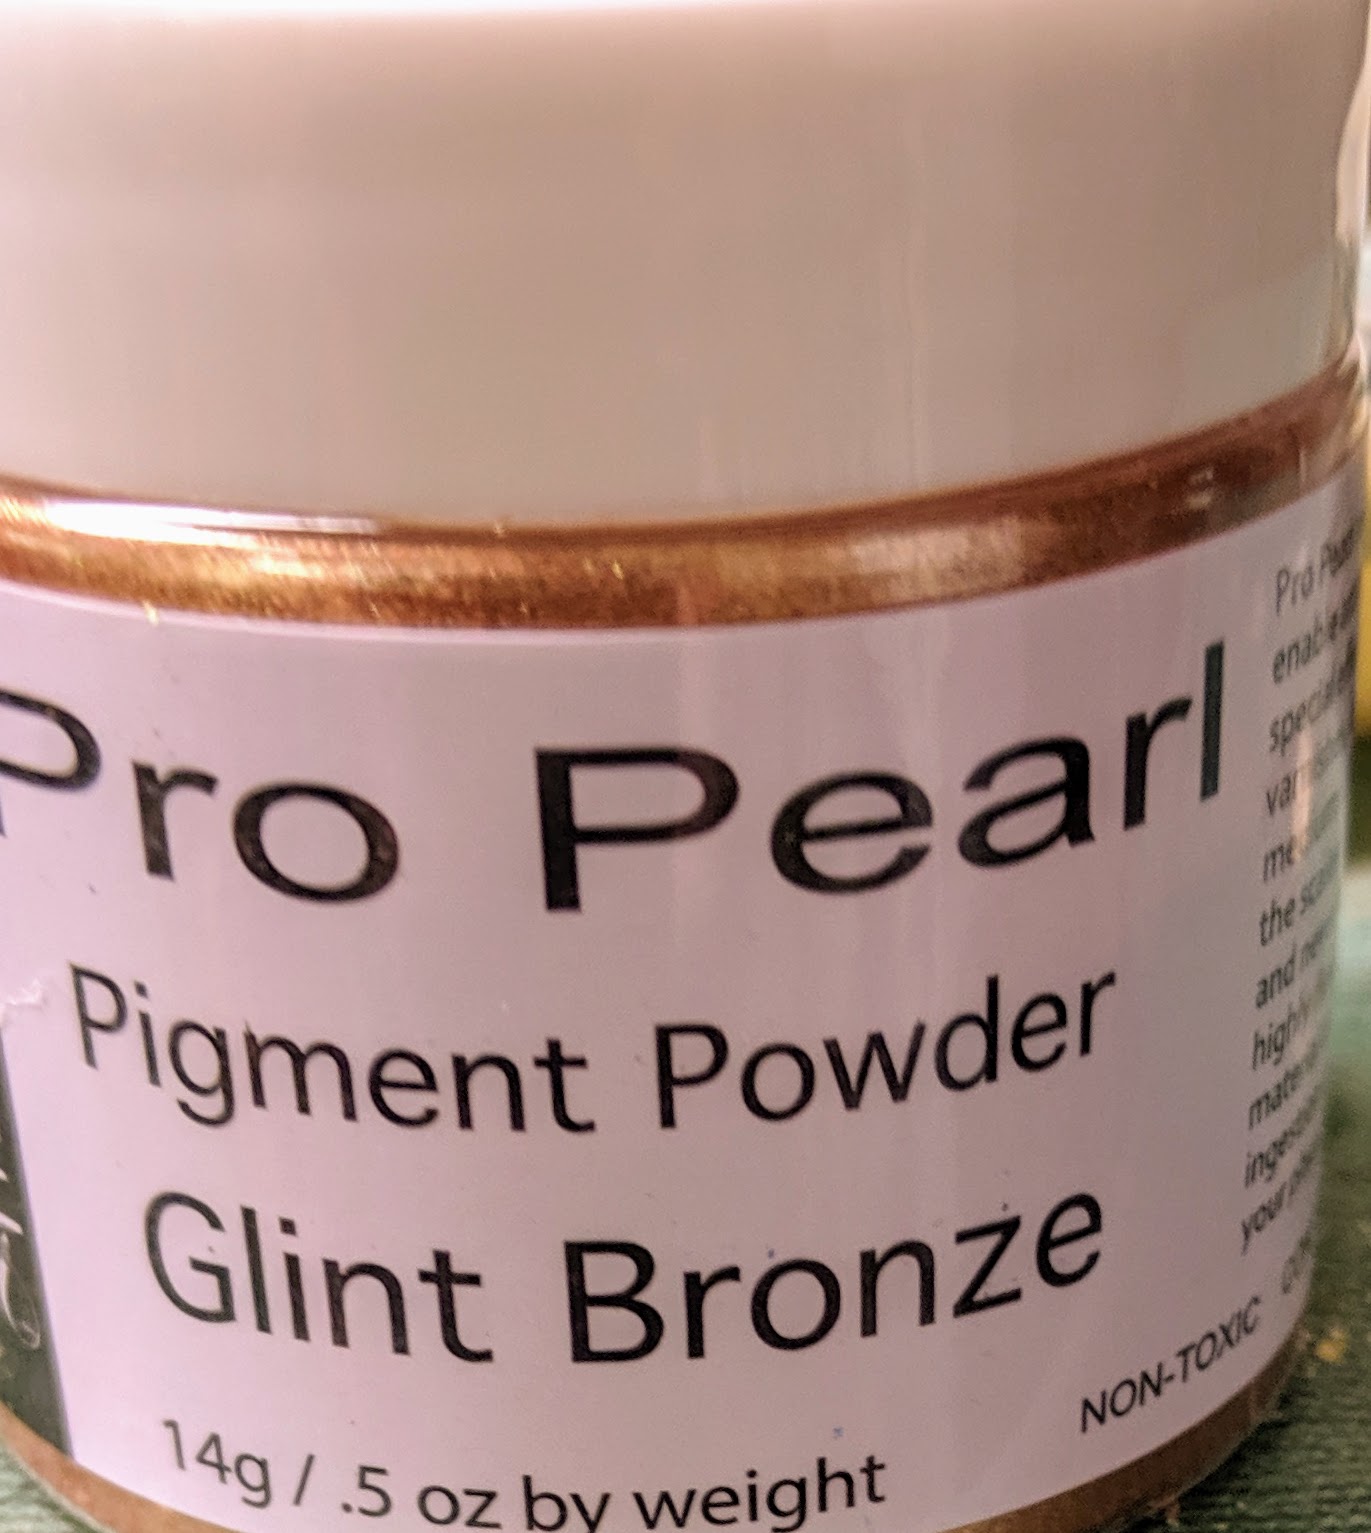
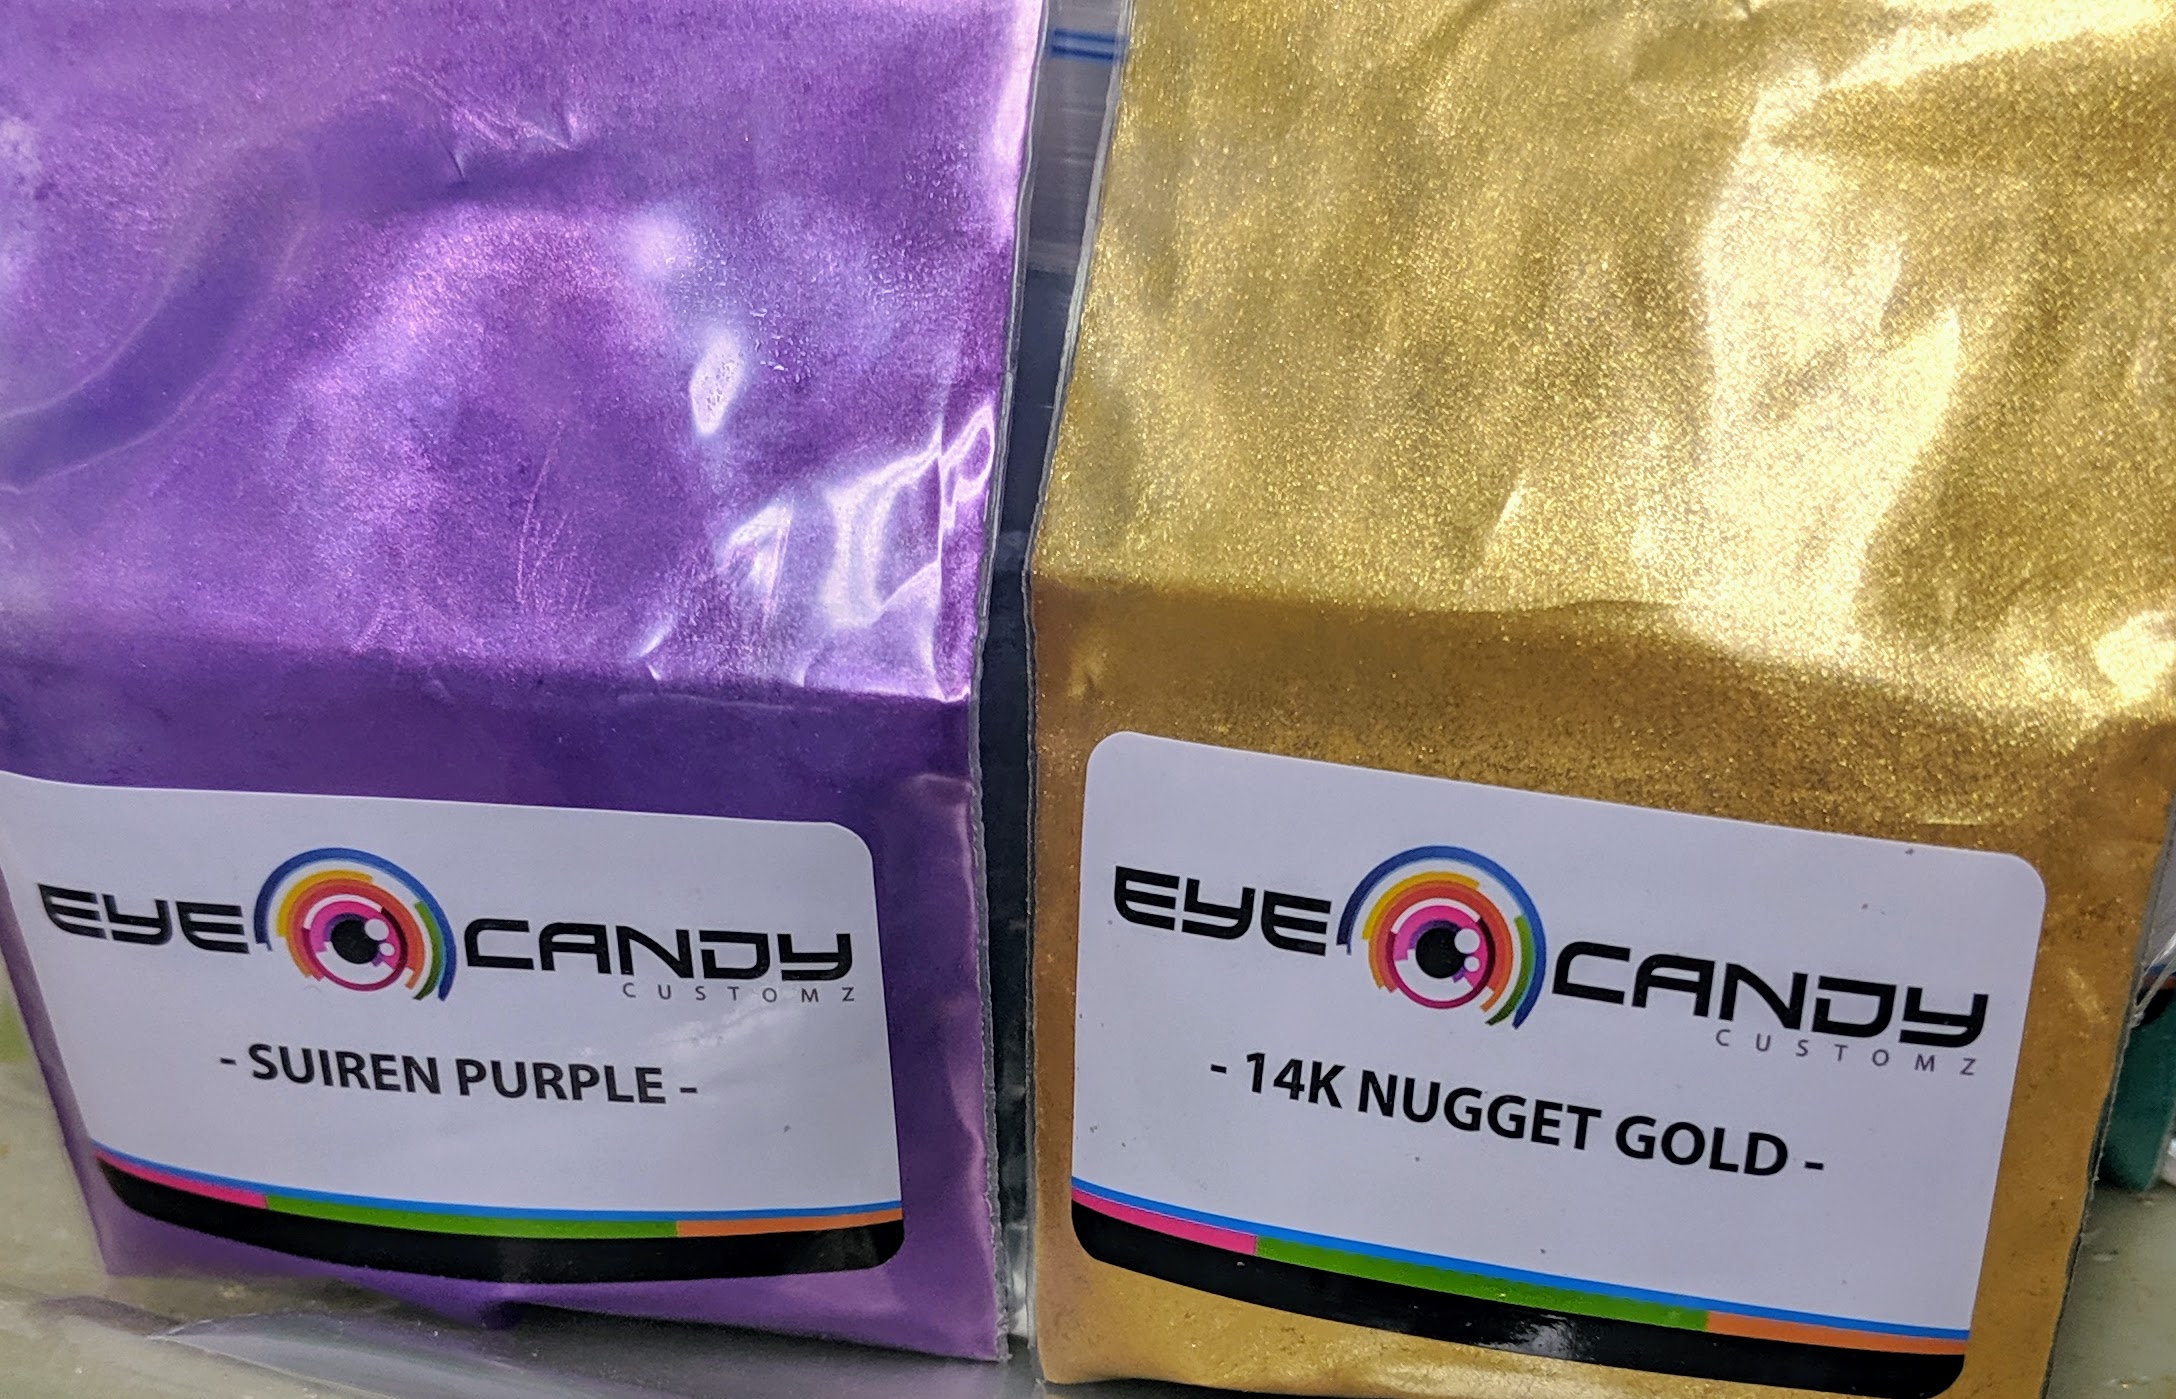
I used the purple pigment last week, and I wanted to make some additional beads using it. However, I hadn’t tried the Bronze or Gold pigments yet. The gold pigment is extremely light and flew all over the place when I was trying to mix it with the resin. I piped the colored resin into the bead molds right away. I wanted to do this quickly, since it is difficult to get the resin into them when it starts to thicken. I made several with the gold and purple and one with the bronze pigment.
Beads of each color
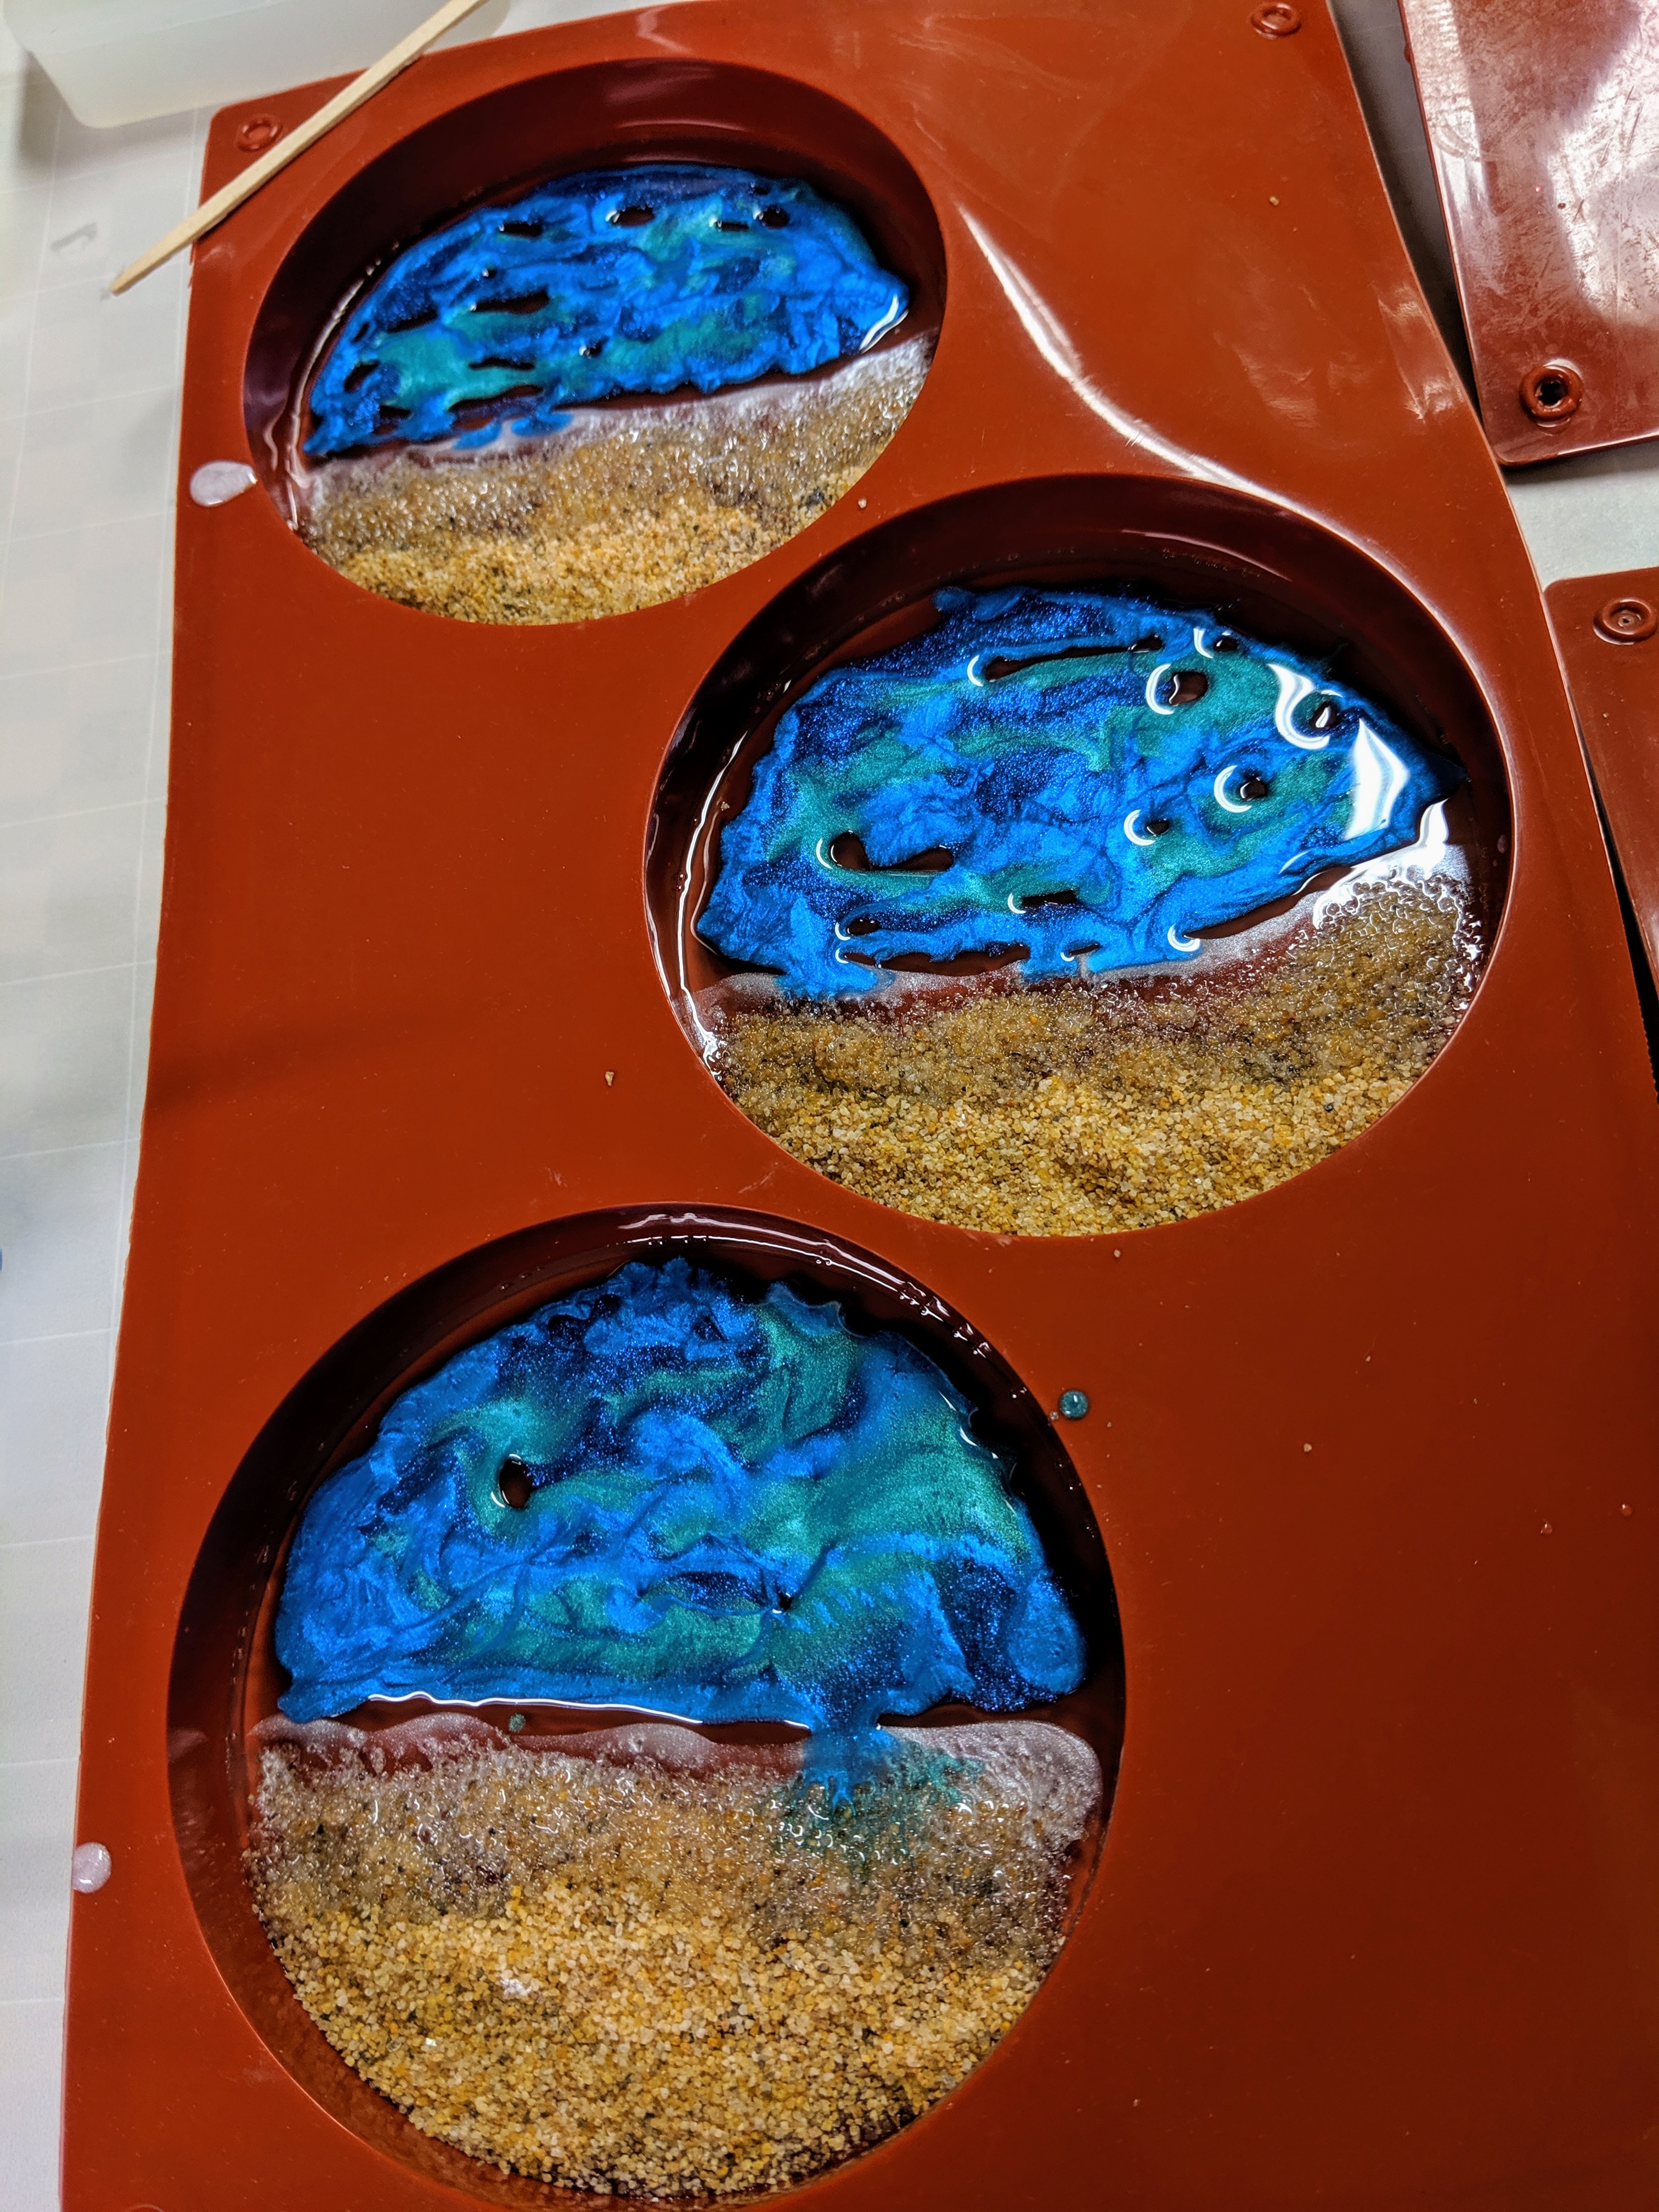
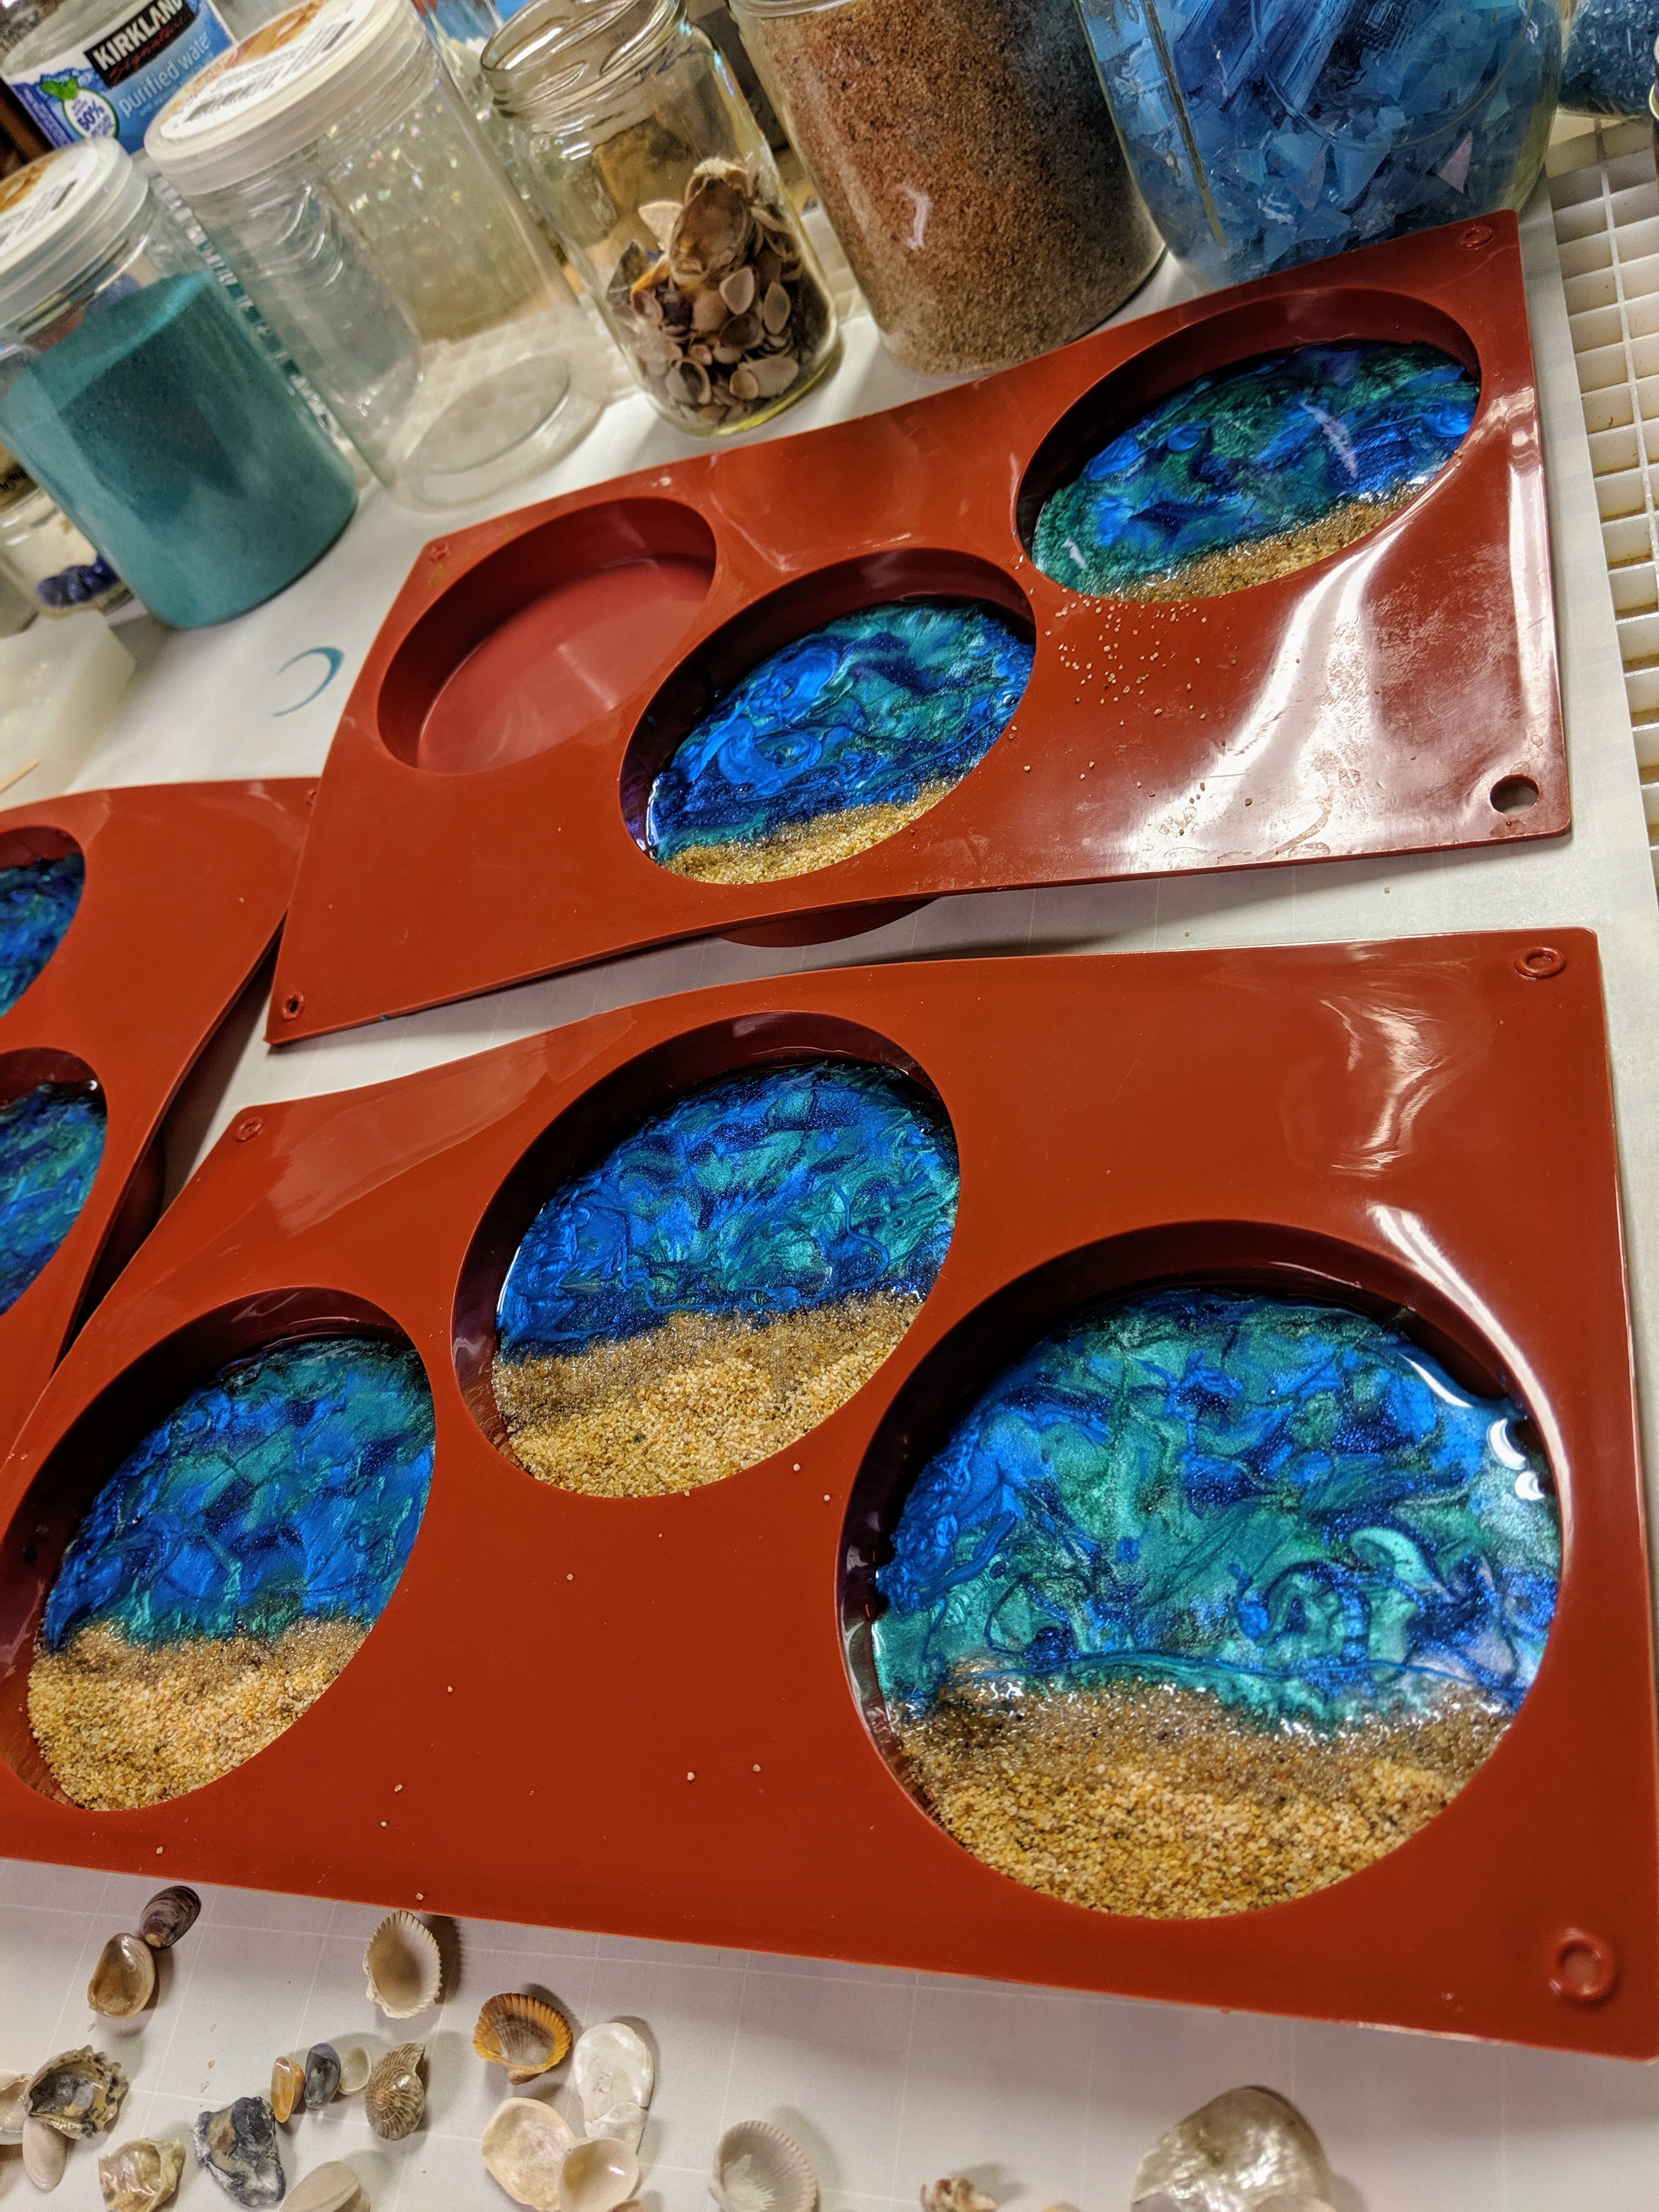
After pouring a thin layer of Envirotex Lite resin into eight of the coaster molds and removing bubbles with a heat gun, I added the pigmented resin on top. I then swirled them around a bit with my craft sticks. I also waited about 20 minutes before adding shells to two of the molds.
Adding decorative elements.
Glass called “Blue Shells”
I also have some new material to try using as the water element in the beachy coasters. It was very expensive, so I will likely limit using it to particularly special projects after today.
I waited until the resin was starting to thicken before adding the shells, and waited even longer (maybe 20 minutes) before adding the sand and the glass chips to the resin in the mold.
I decided there wasn’t enough of the gold pigment in the gold coaster molds, so I mixed up another medicine cup full using some that was left over from the initial batch of resin and added it to the molds. If all goes well overnight, I will add another clear layer of resin to the coasters tomorrow and demold the beads to see how they turned out. I am a bit leery of pouring another layer of resin today after the experience the other day with the resin turning yellow during curing. The manufacturer got back to me and recommended I use a different product, EasyCast, for molds / thicker applications. I can continue to use this type in 1/8″ layers, though. I can’t wait to see how they turn out!
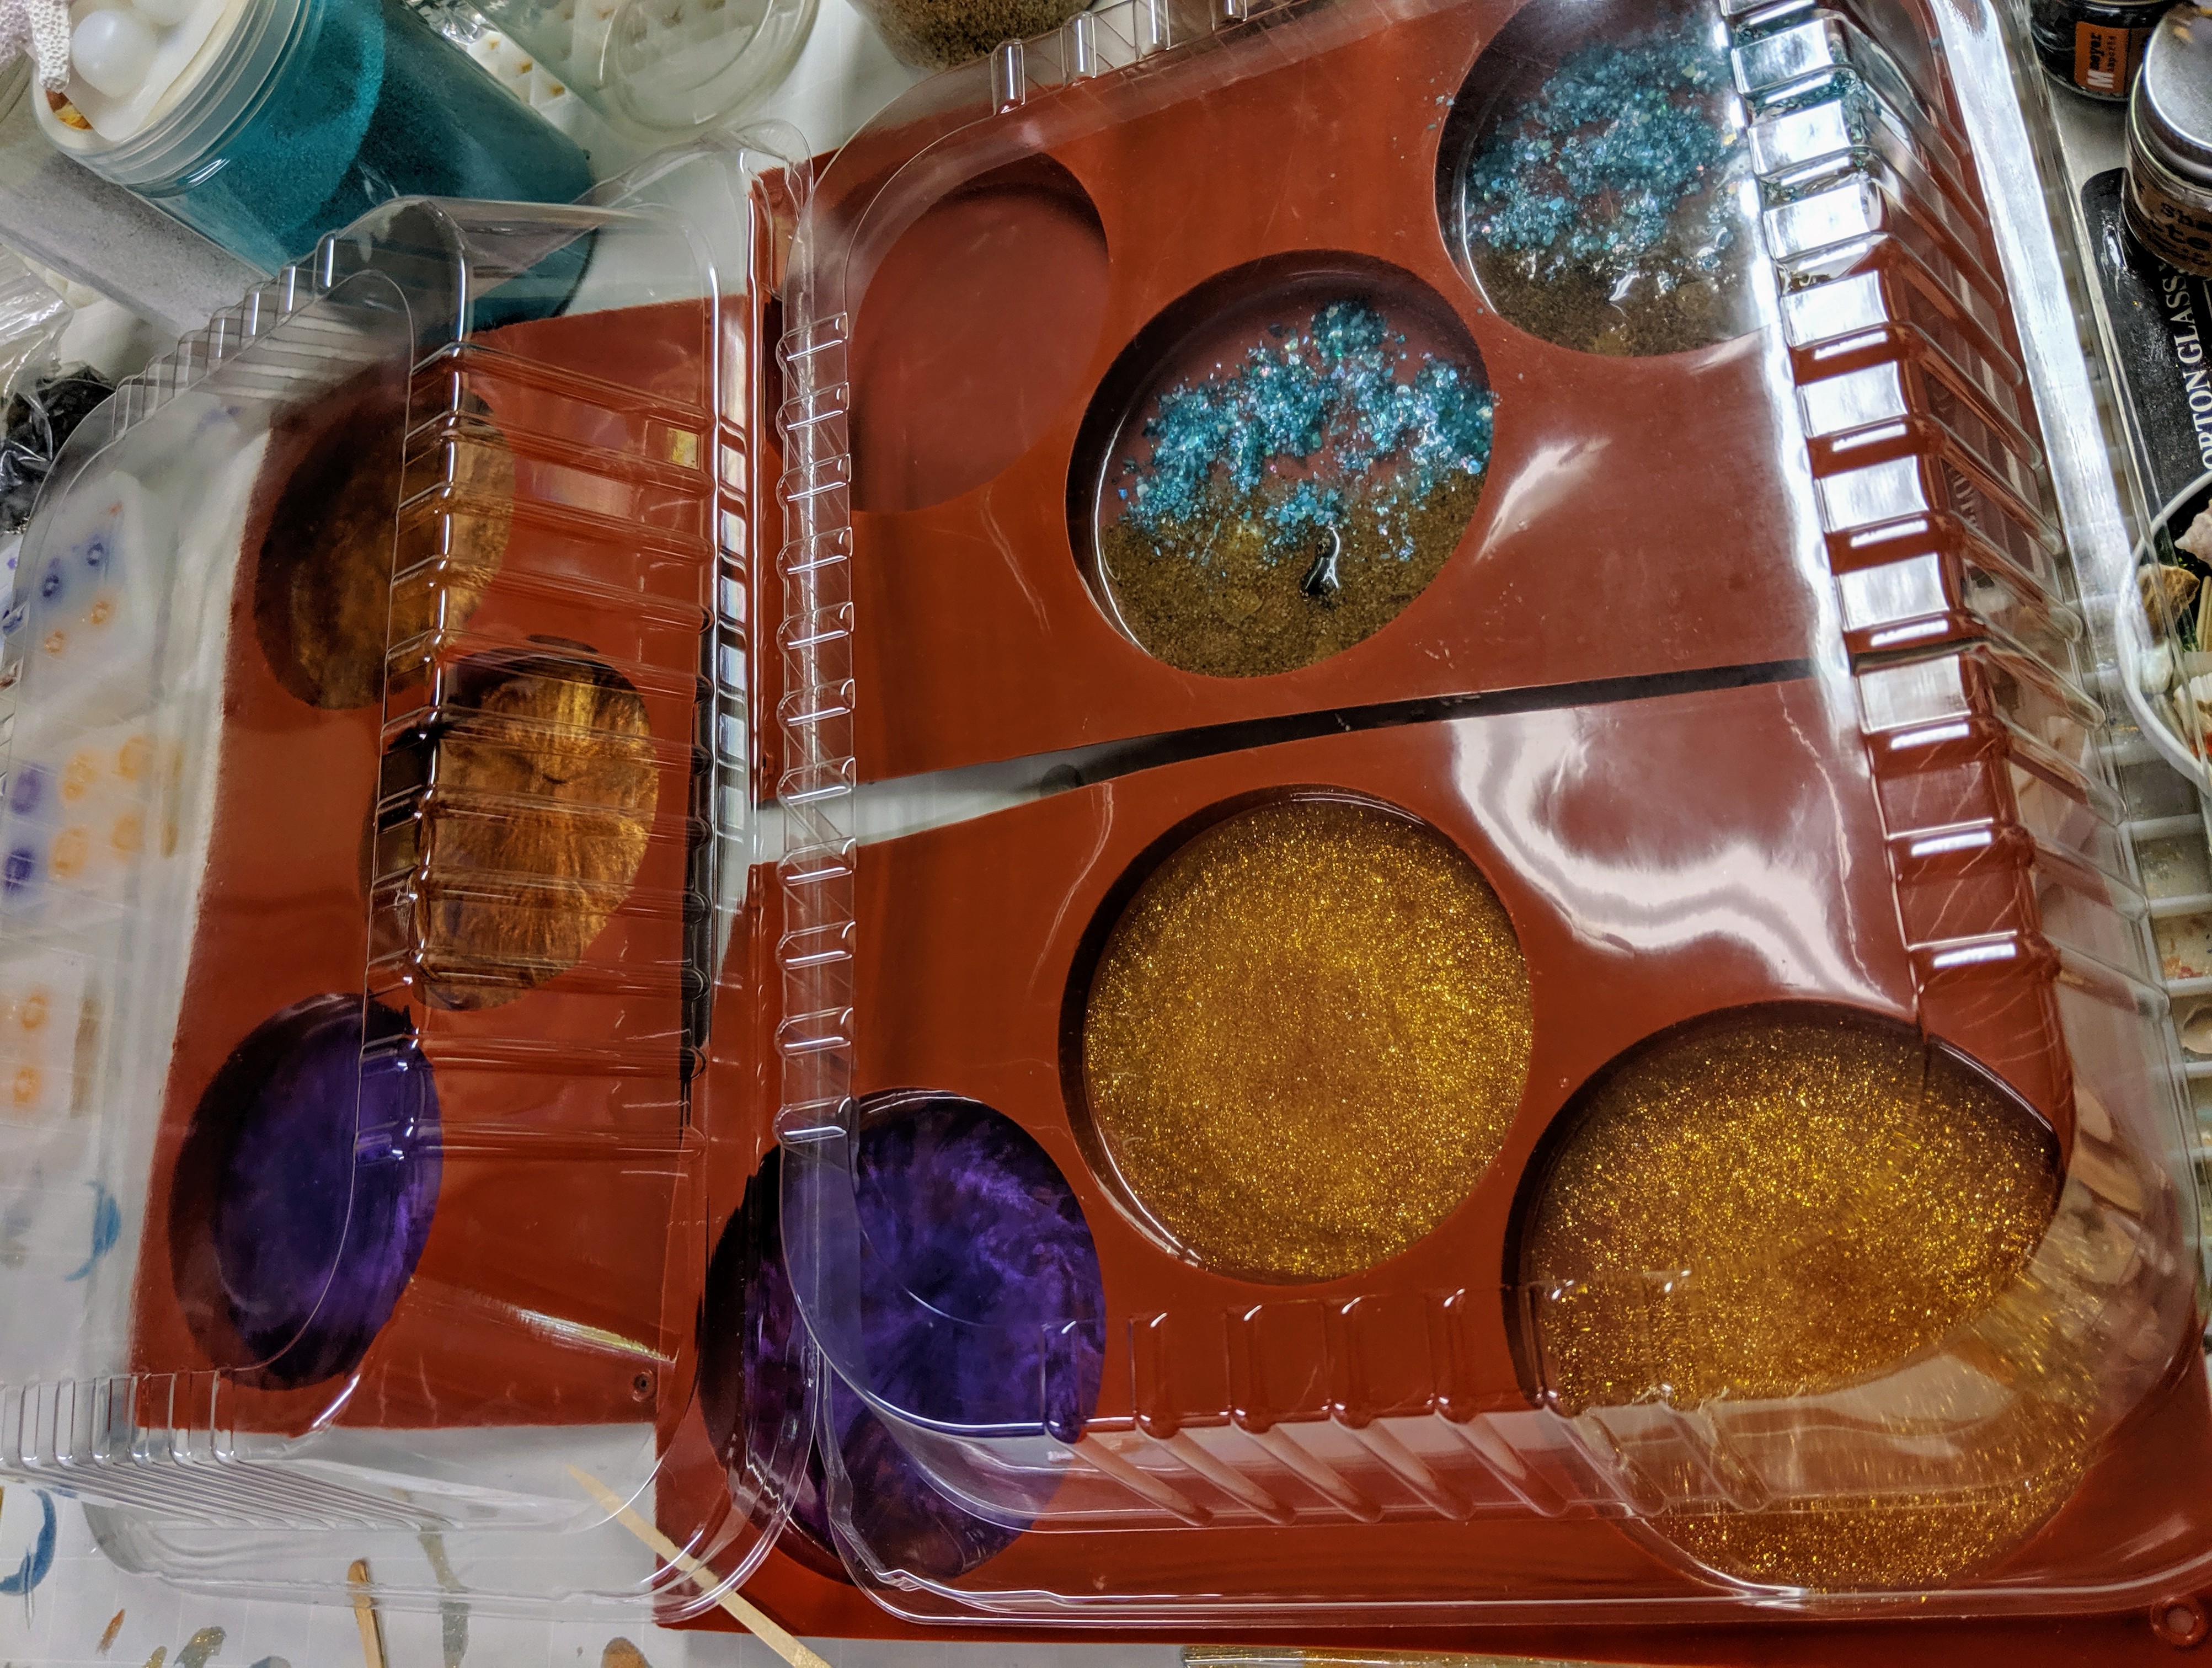
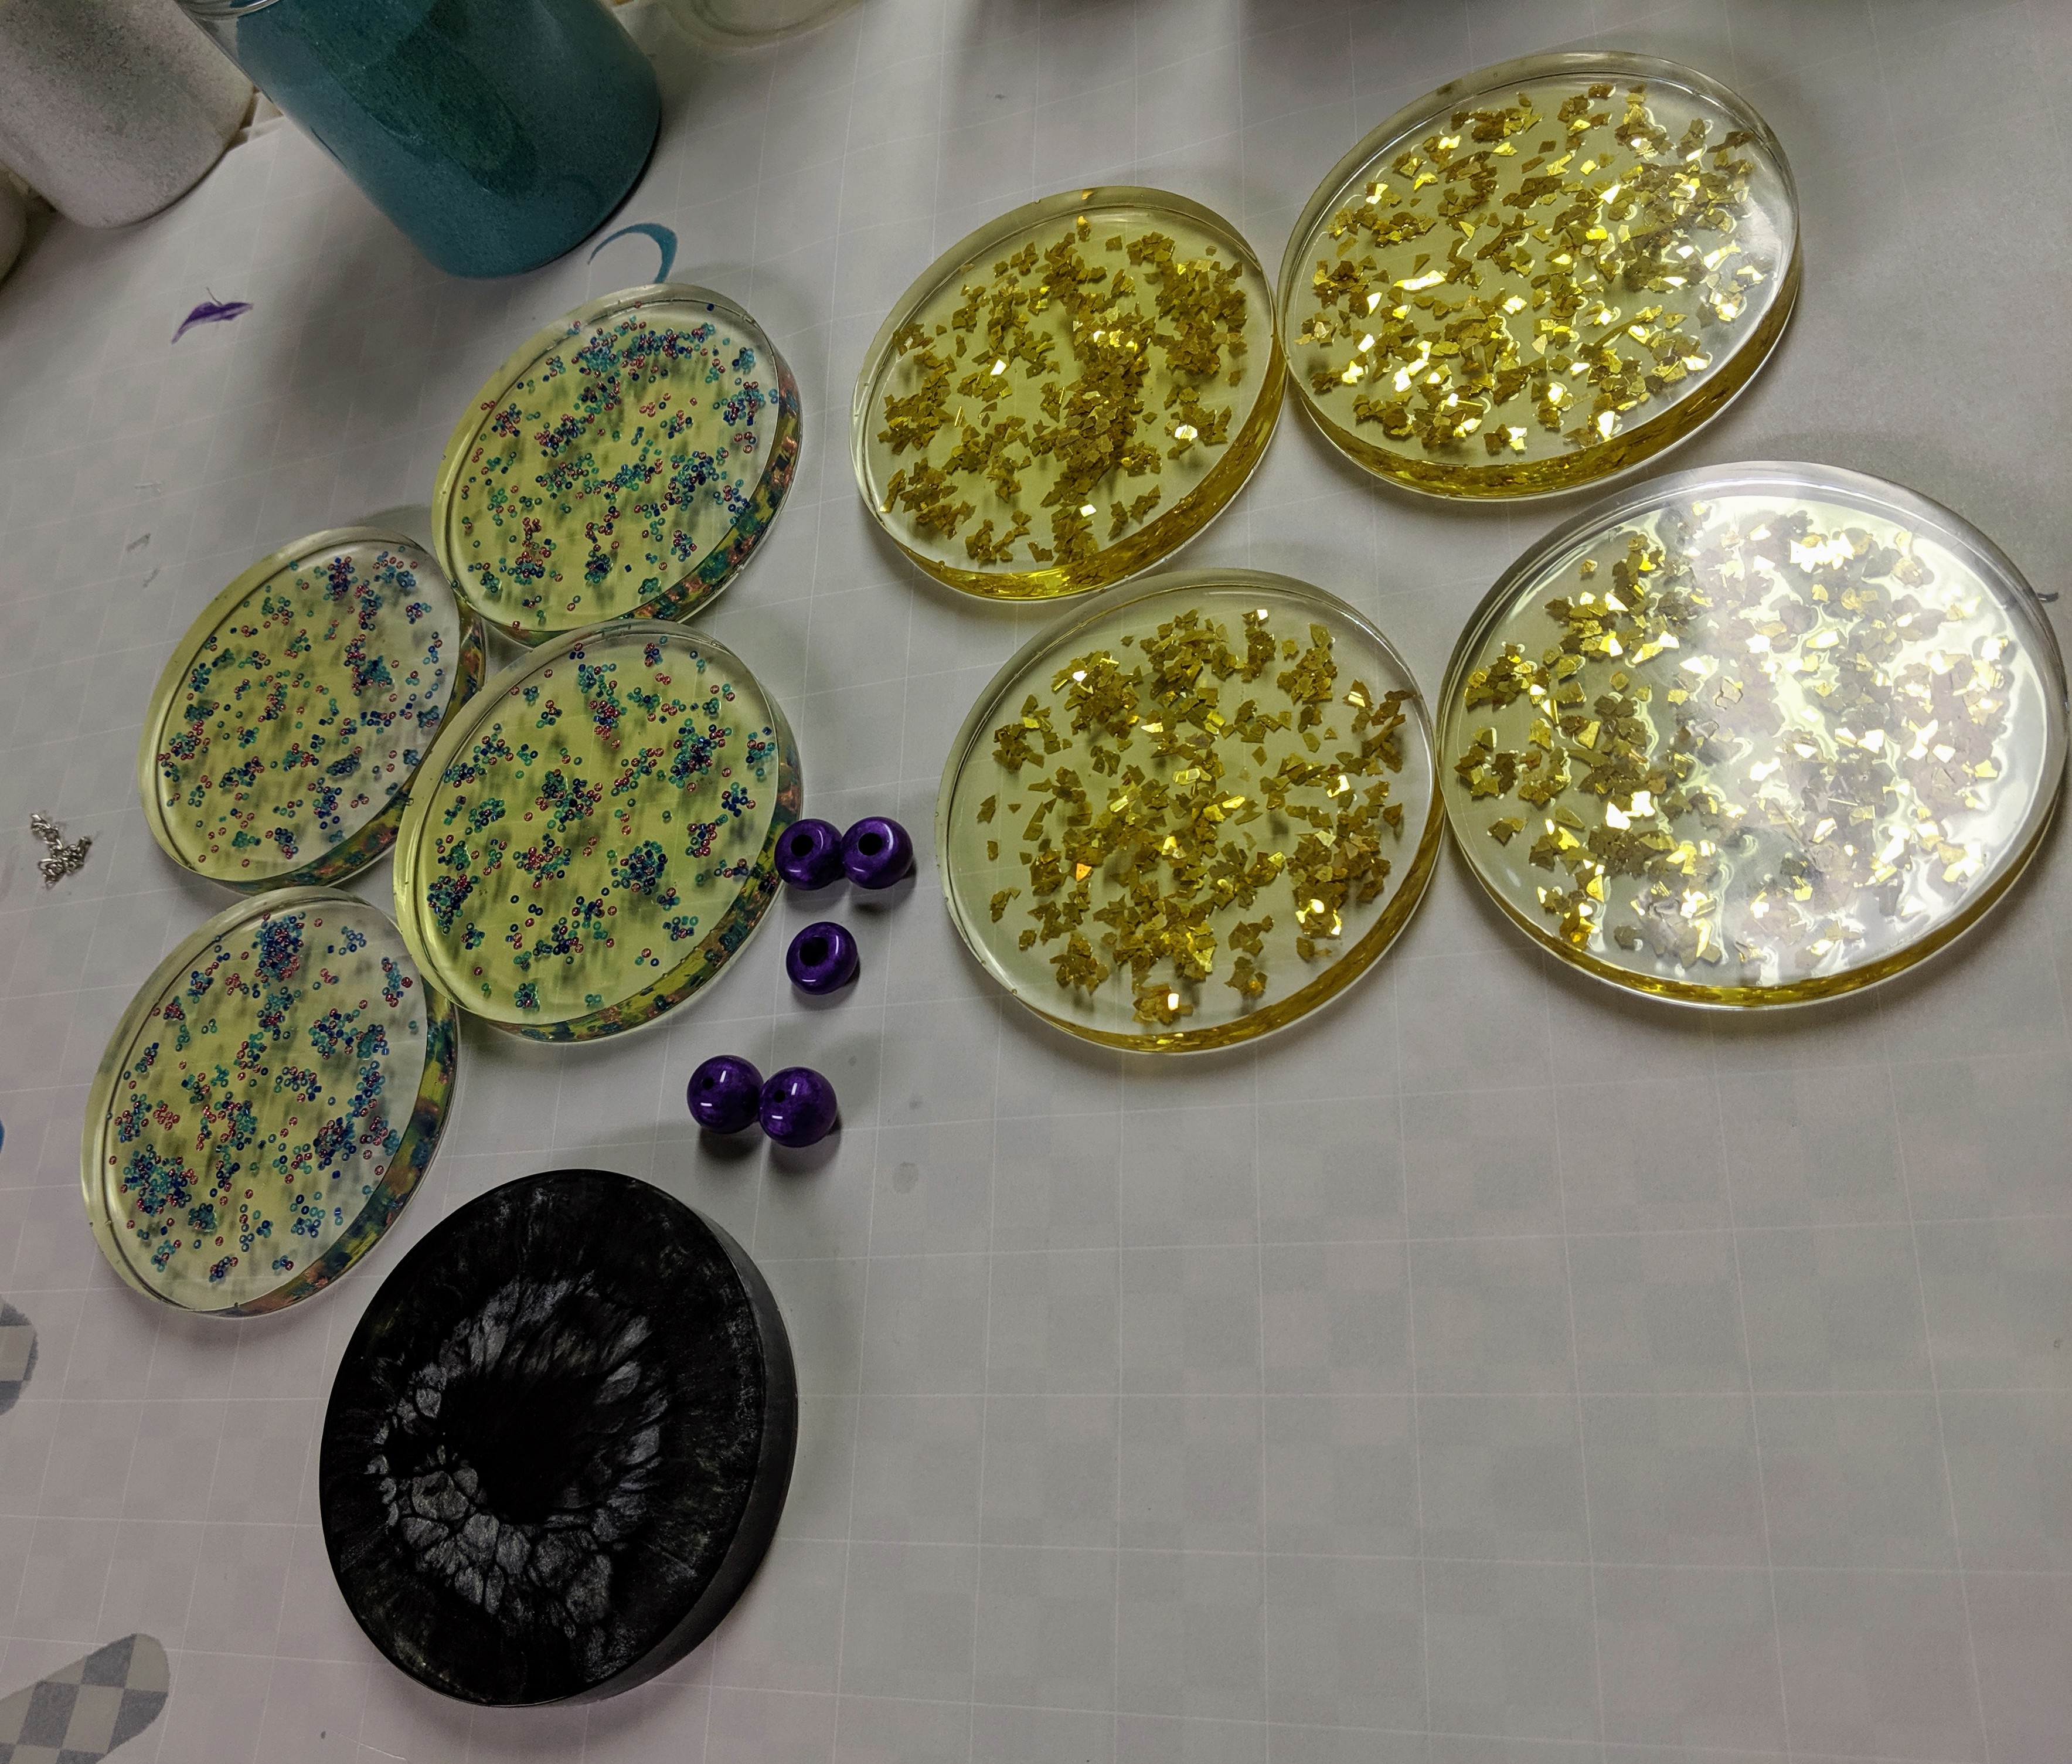
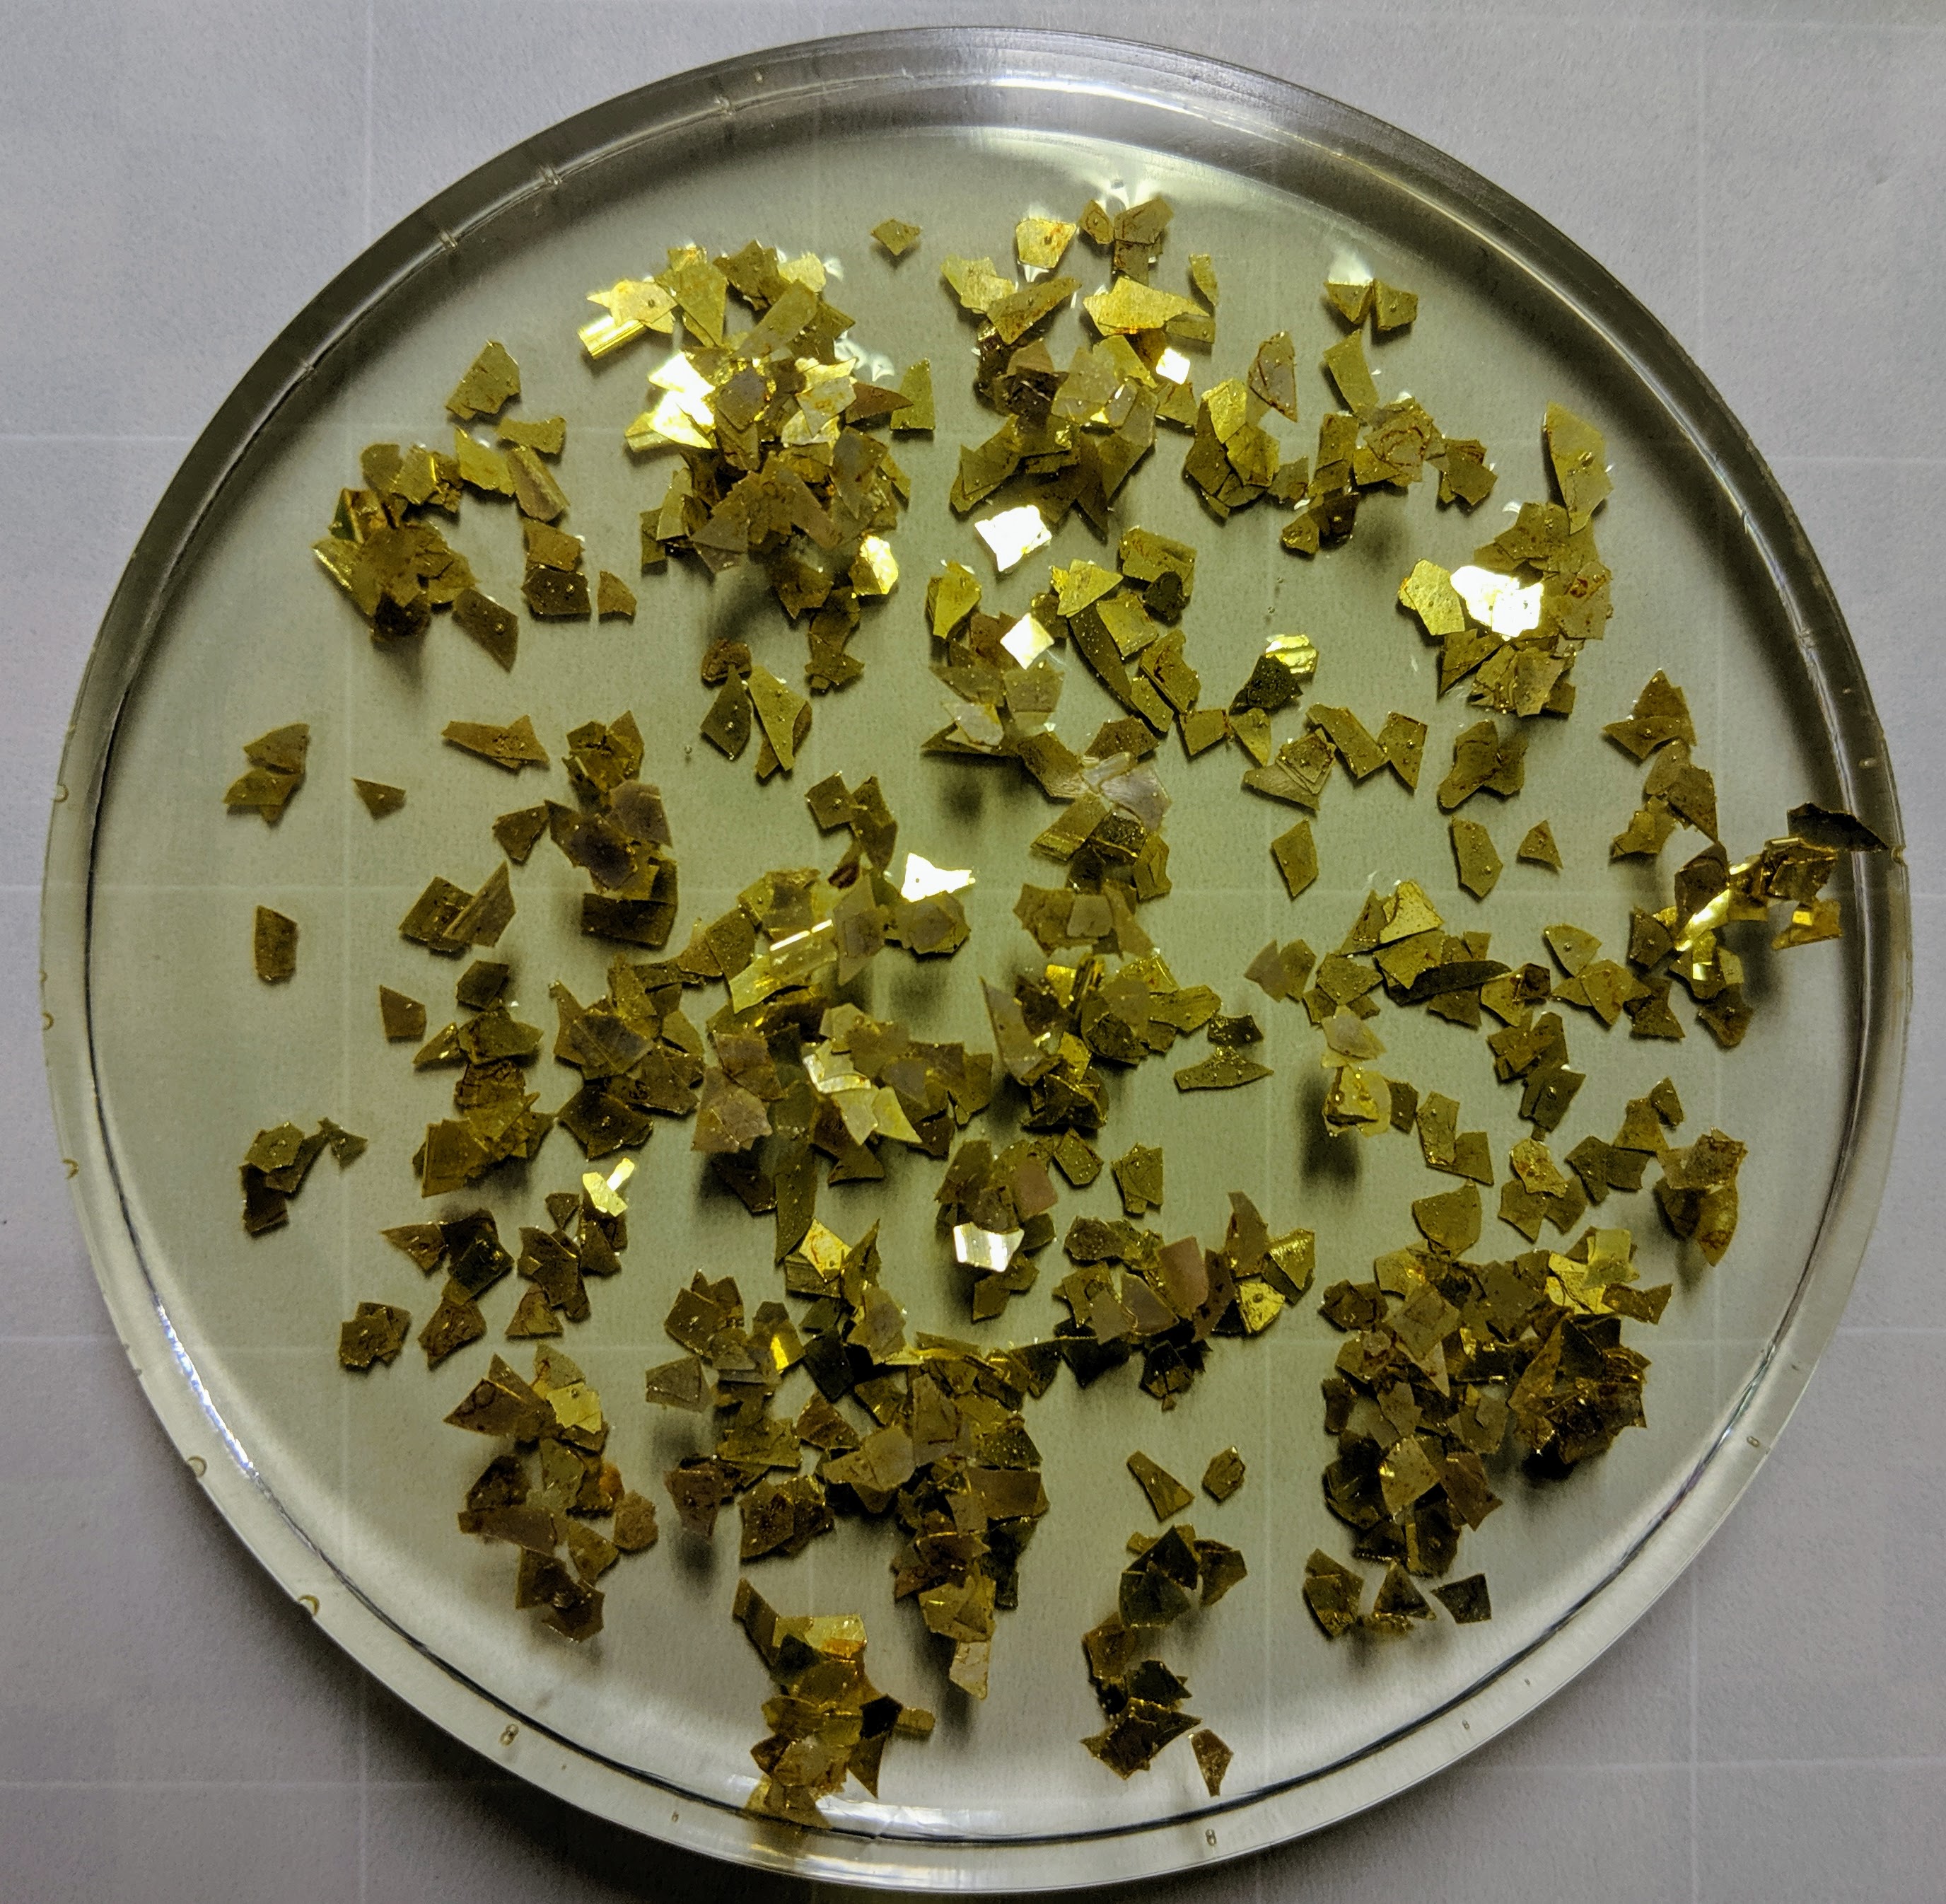
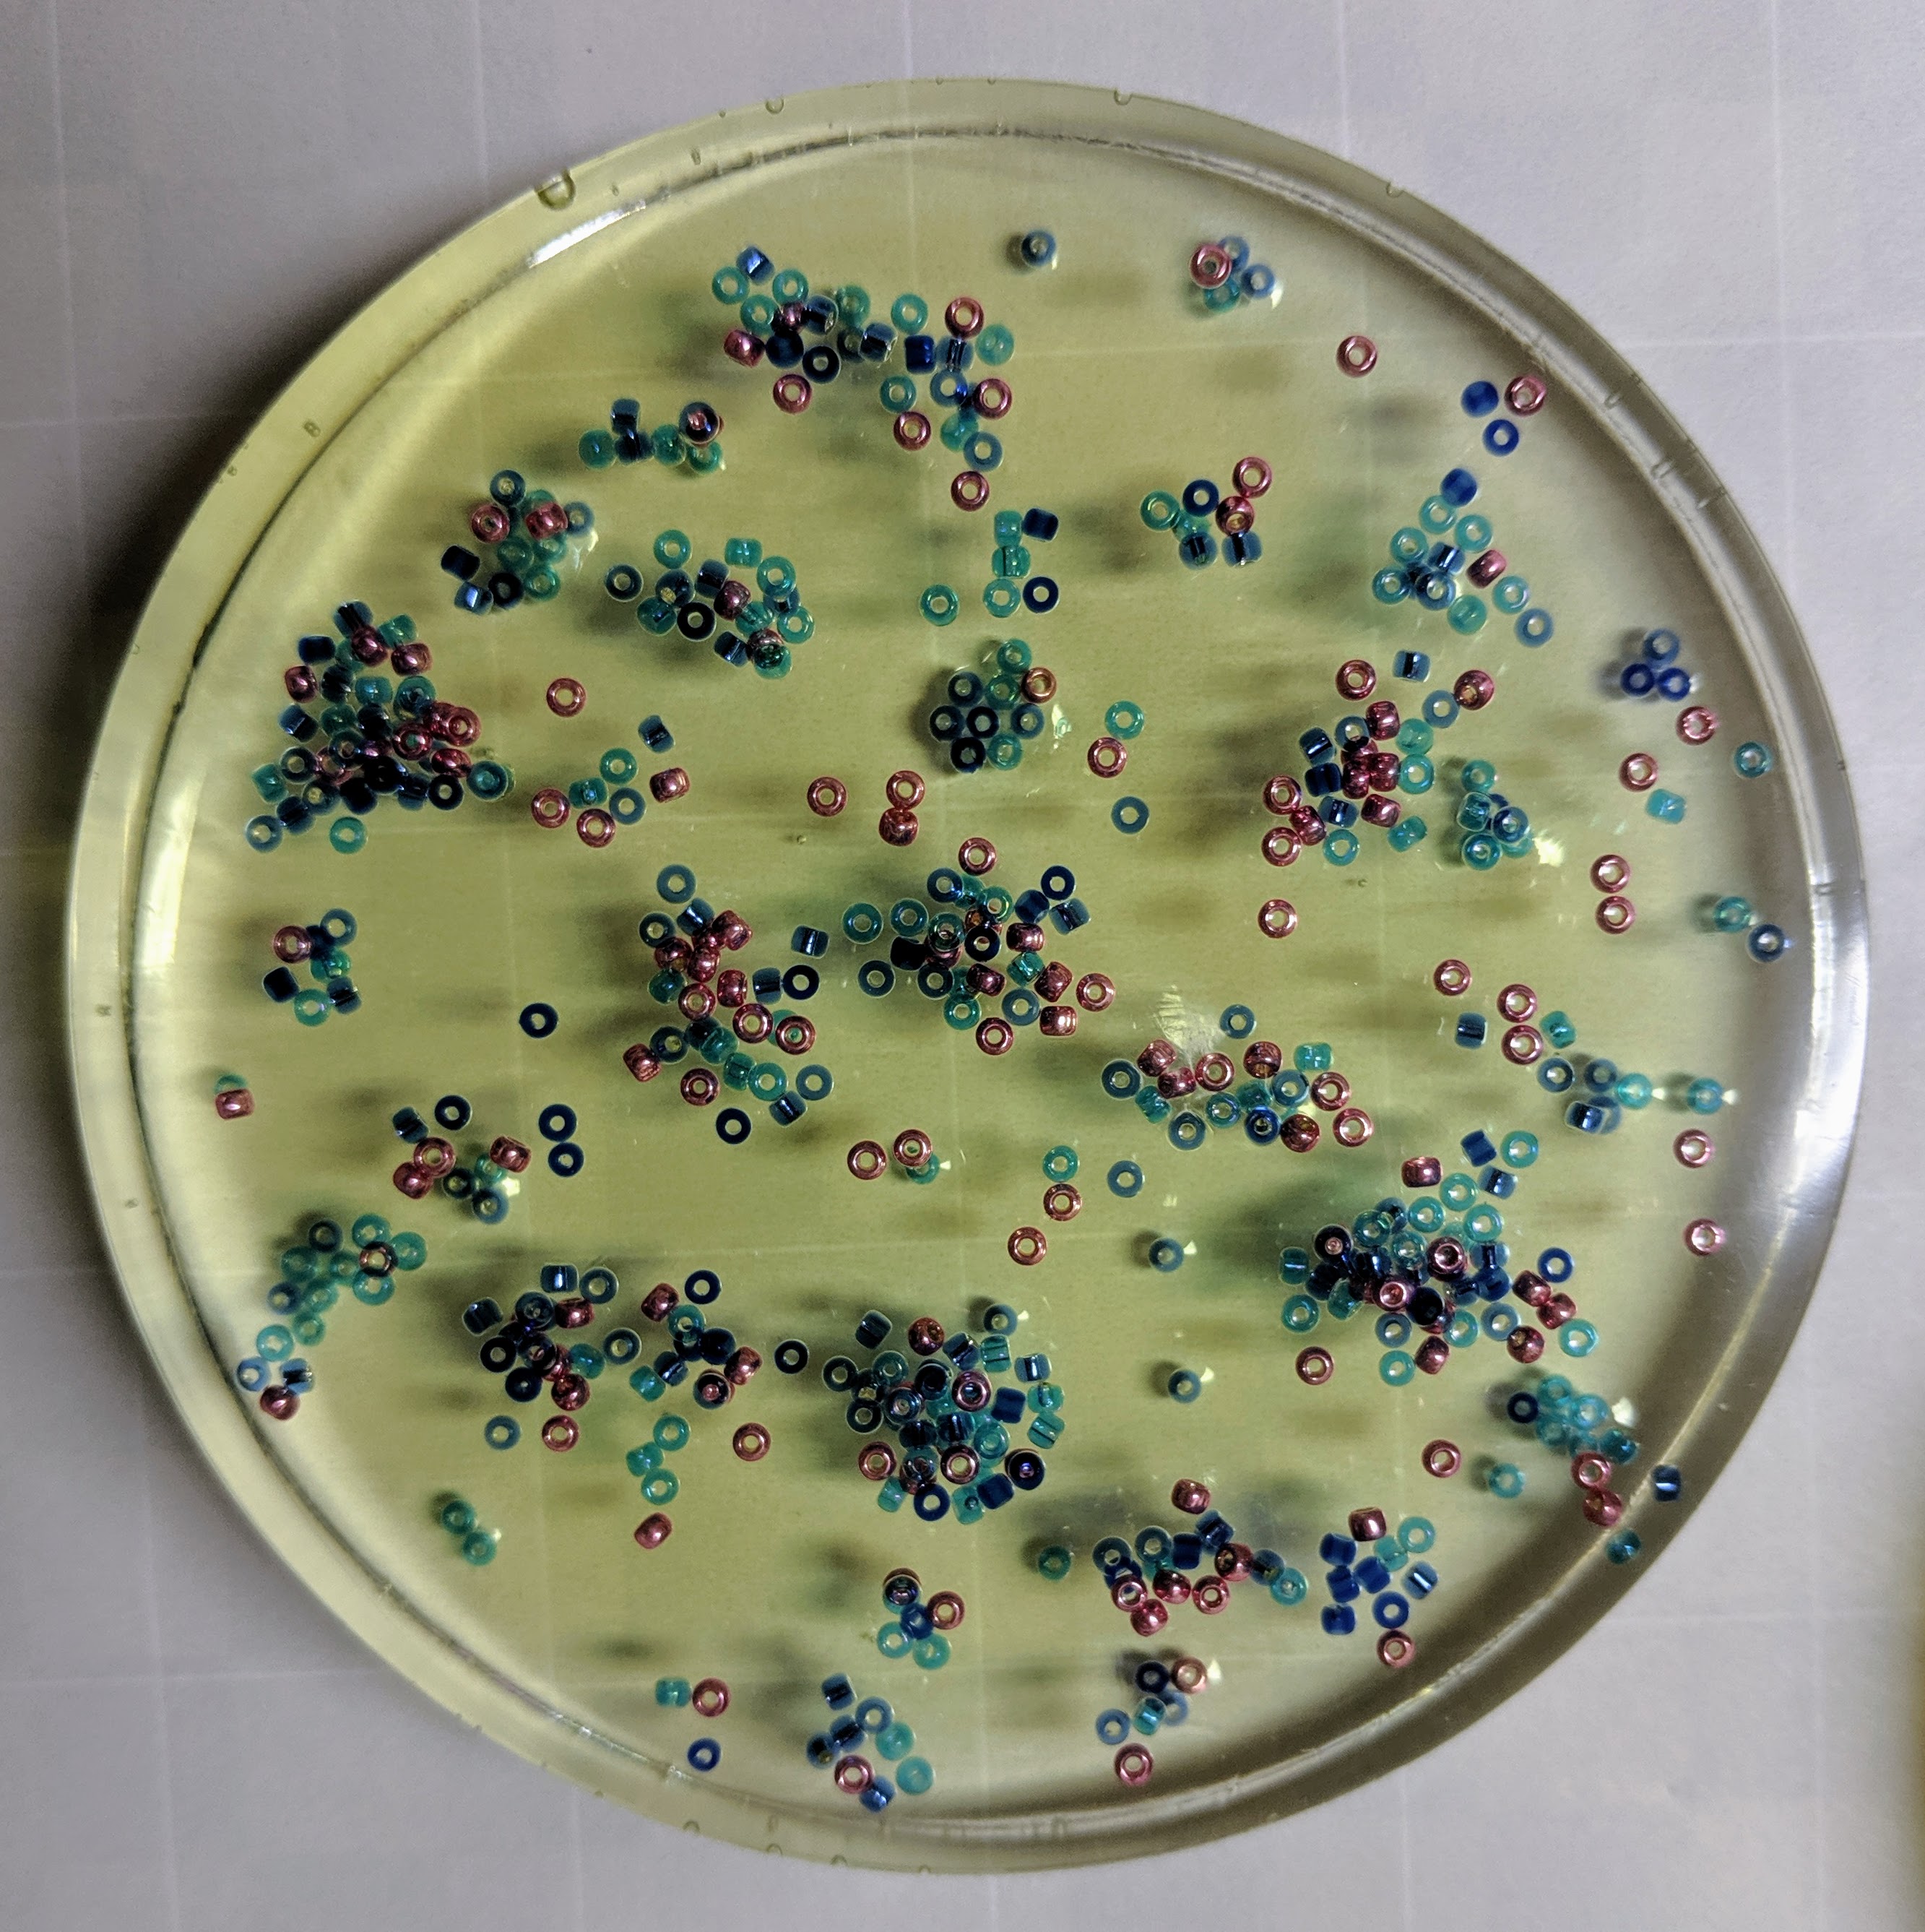
Over the past few days, I made a batch of coasters using a method I don’t usually try. I split 16 ounces of resin between 9 molds, then decorated four of them with glass chips and four of them with some seed beads. I also made an experimental one with white and black pigments for my eldest child in an attempt to create a “galaxy” look. I also made a few beads while I was at it. I normally wait longer before I decorate, but with this batch, I decorated within 20-30 minutes of pouring and then topped off all of the coasters with another batch of resin. Maybe that’s not a long enough waiting time.
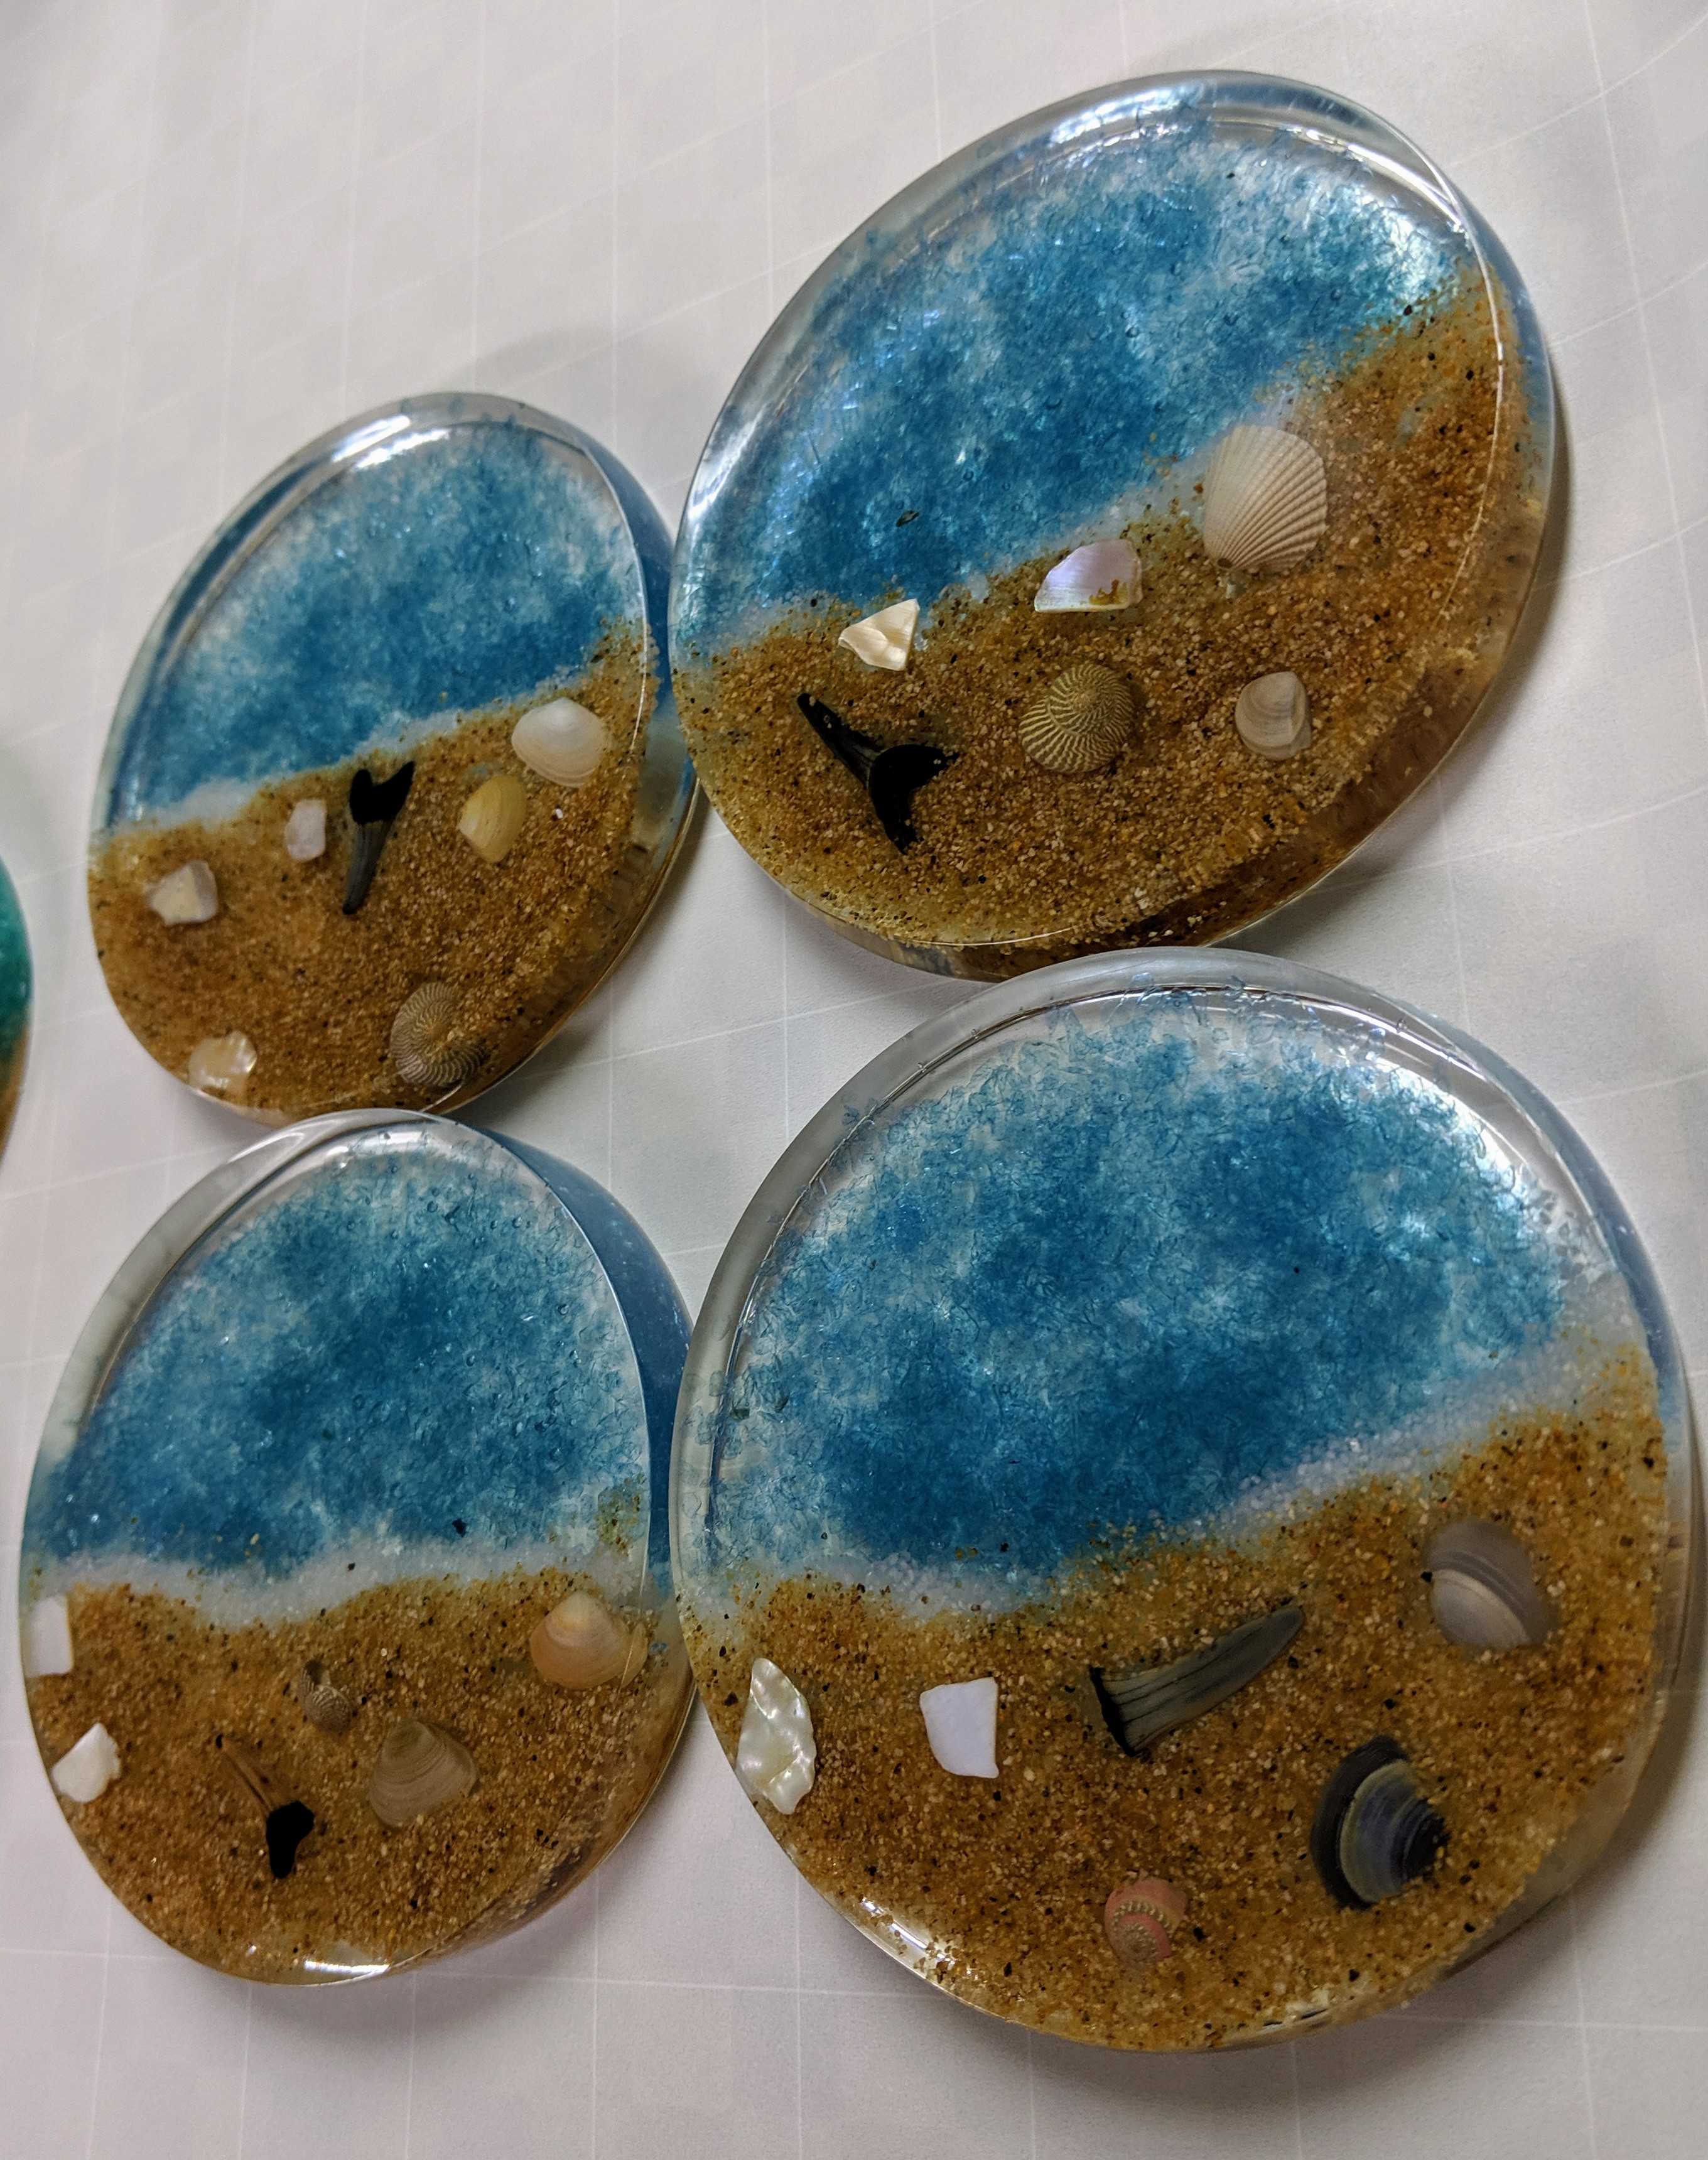
The finished products.
The resin yellowed as it cured. I’m not sure if this was because of the amount I poured (I normally use smaller layers) or the amount of time I waited (or didn’t wait) between layers of resin. I’ve only had this happen once or twice in the past.
Gold glass chips.Seed beads.
But that wasn’t the worst part. After demolding, I noticed that the molds where the seed bead coasters were now have little indentations anywhere the seed beads were. That pretty much ruins the mold, so I had to order some new ones.
Damaged silicone mold.Close up of damage to mold.
I’m guessing the resin got too hot when it was curing. The type I have been using (Envirotex Lite) thickens pretty quickly, which can make it difficult to get into the tiny bead molds if you’re slow. I sent an email to the resin makers to see if they can tell what I did wrong. Hopefully it’s something straightforward.
Note: I heard back from the manufacturer of the resin a couple days later. They recommend a different type of resin for molds/ thicker applications.
“Our Envirotex lite is intended for coating table tops, bars, chairs etc… We do not recommend for filling molds. Envirotex can be poured at a max depth of 1/8 inch, any more than that causes a heat reaction. We recommend waiting 6 to 8 hrs in between coats. We do have a two products that we recommend for molds, Easy Cast. Polyester casting resin. Both products can be found on Amazon, Michaels Craft store, Hobby Lobby and Joann Fabrics. I hope this information helps and if you have any further questions please feel free to ask.”
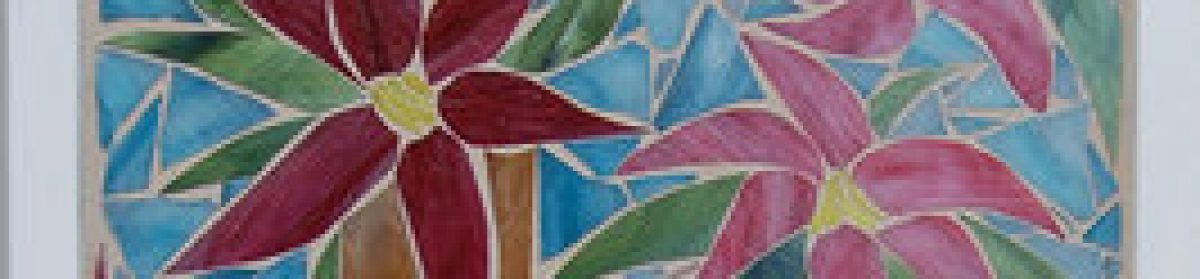
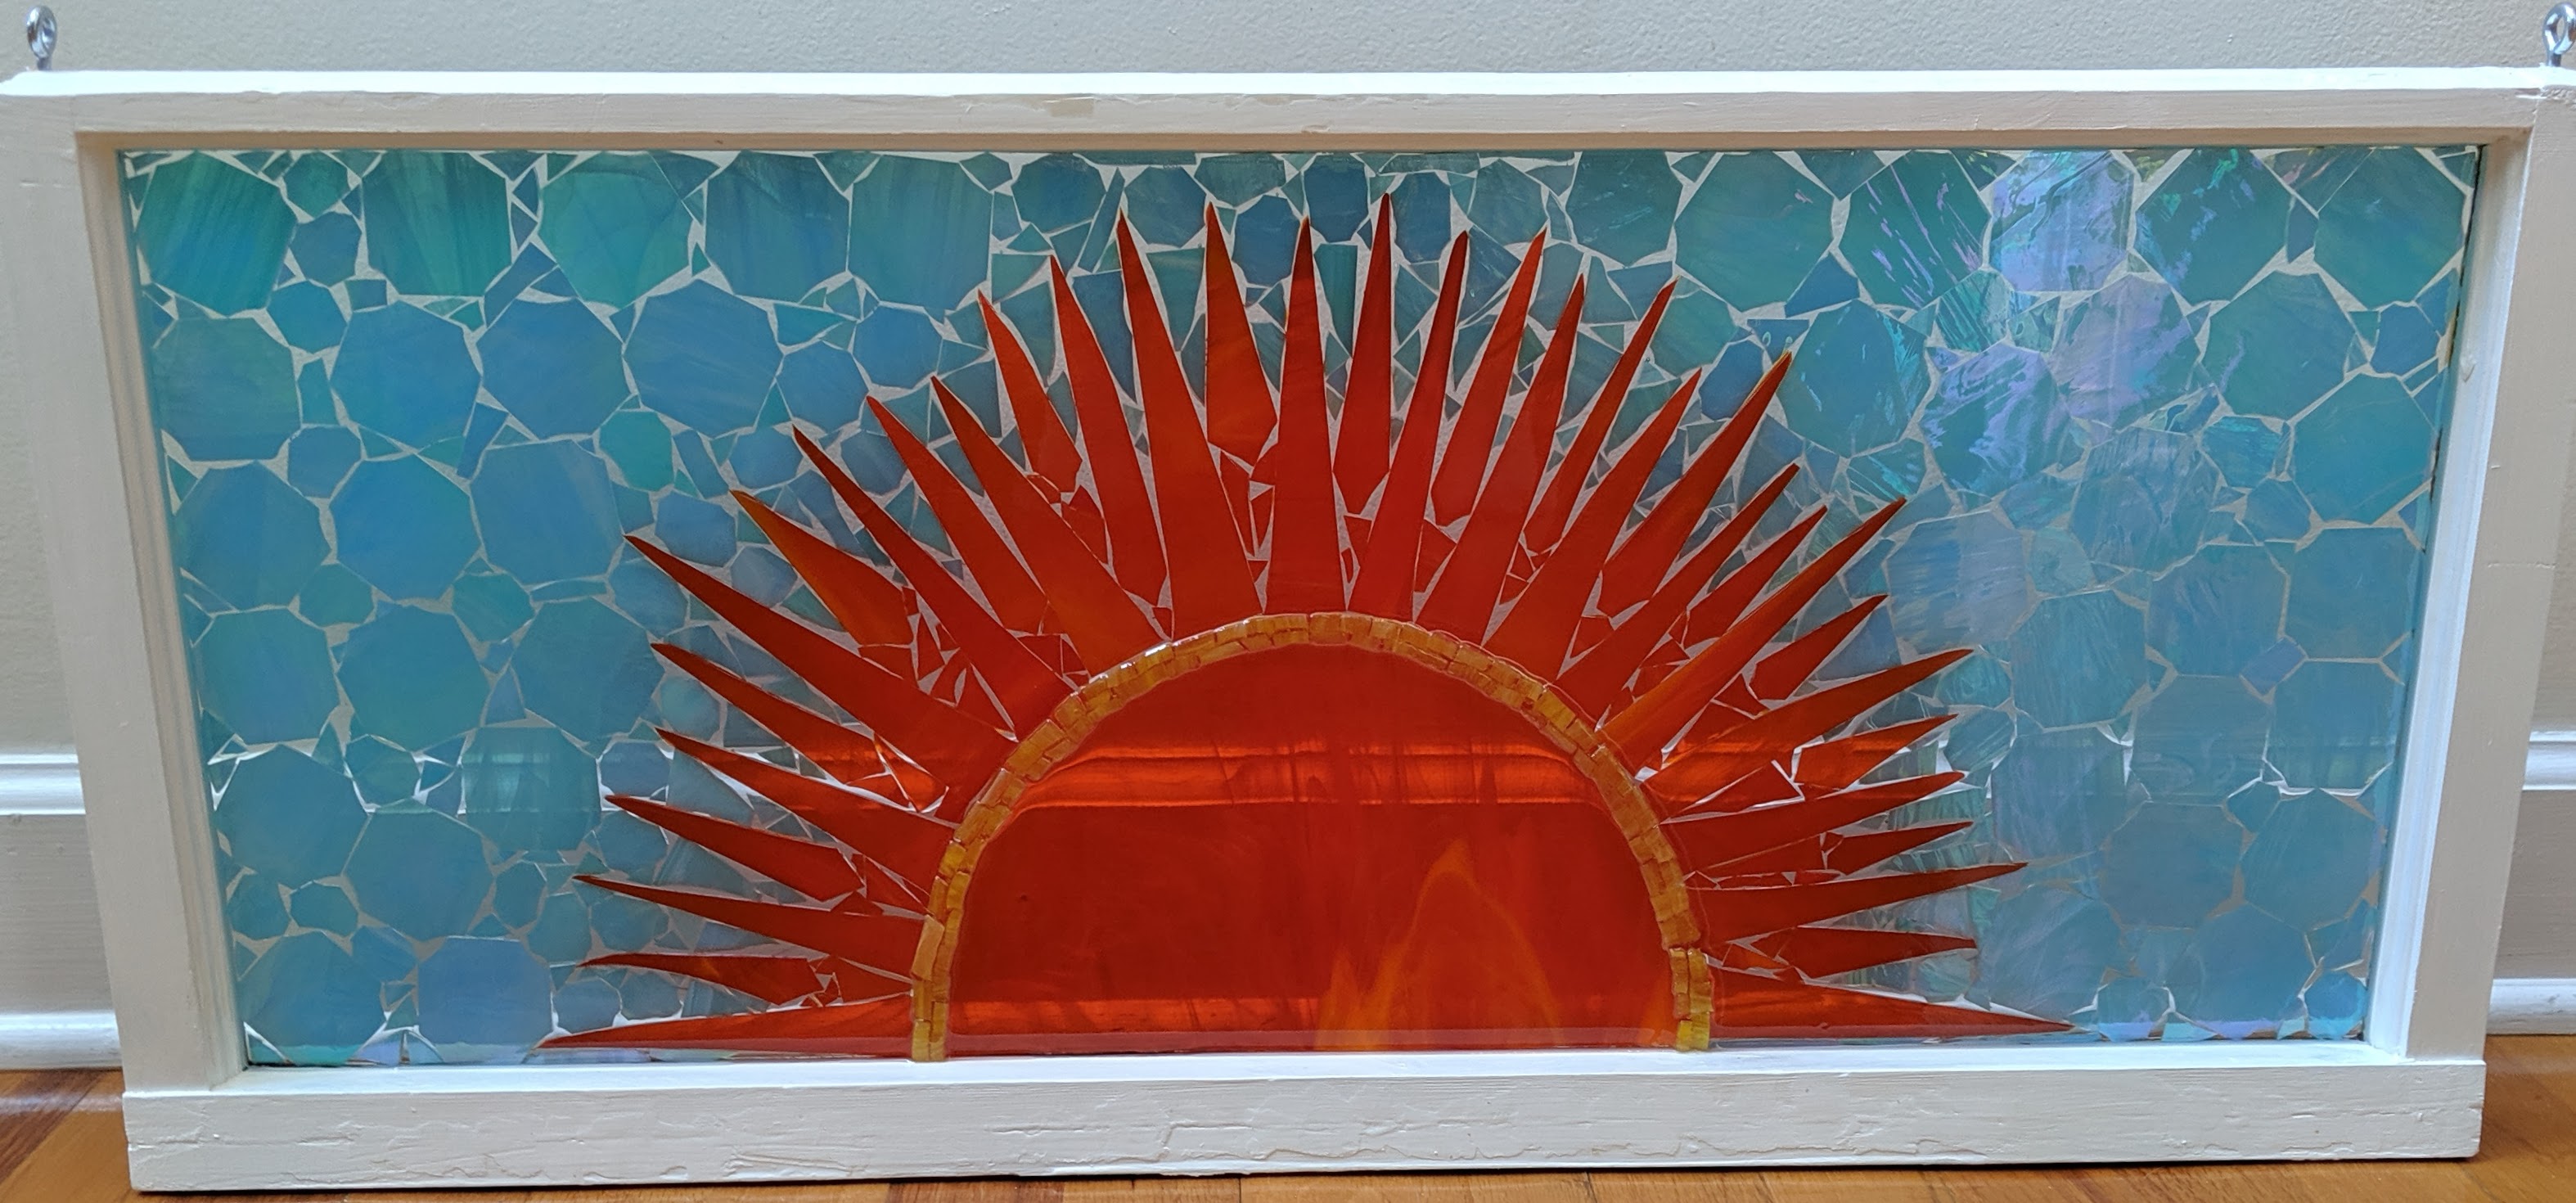
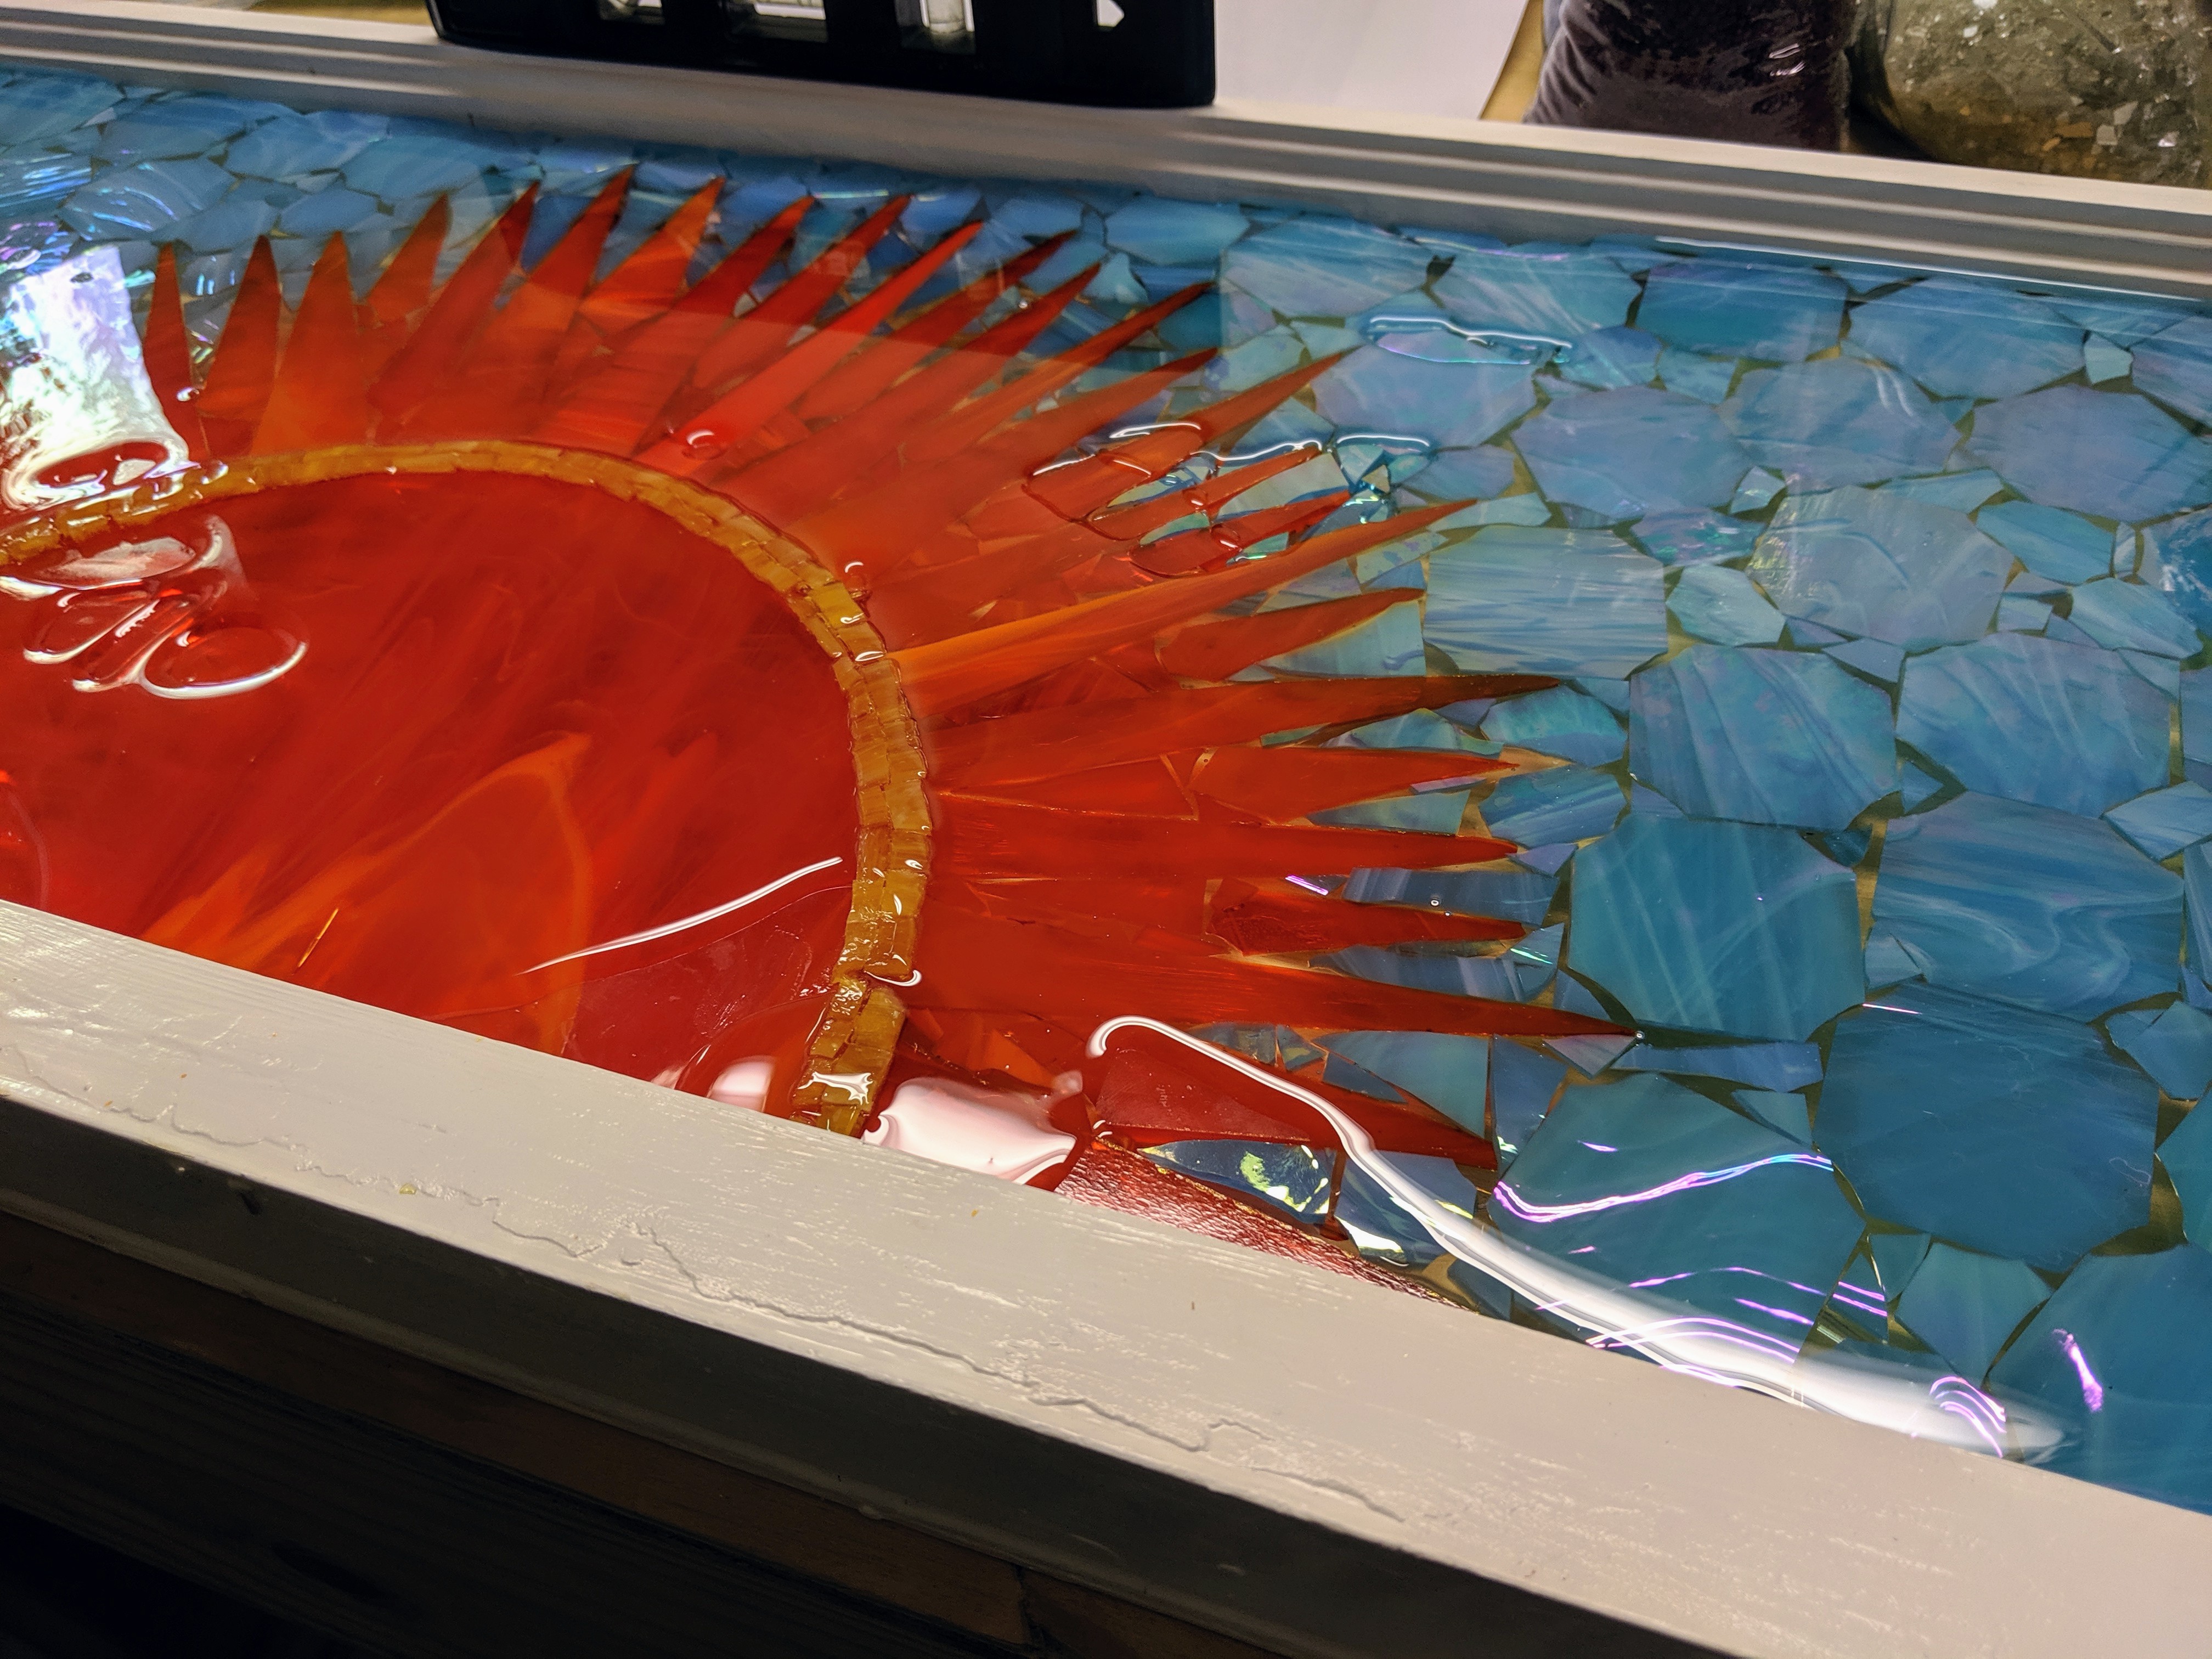
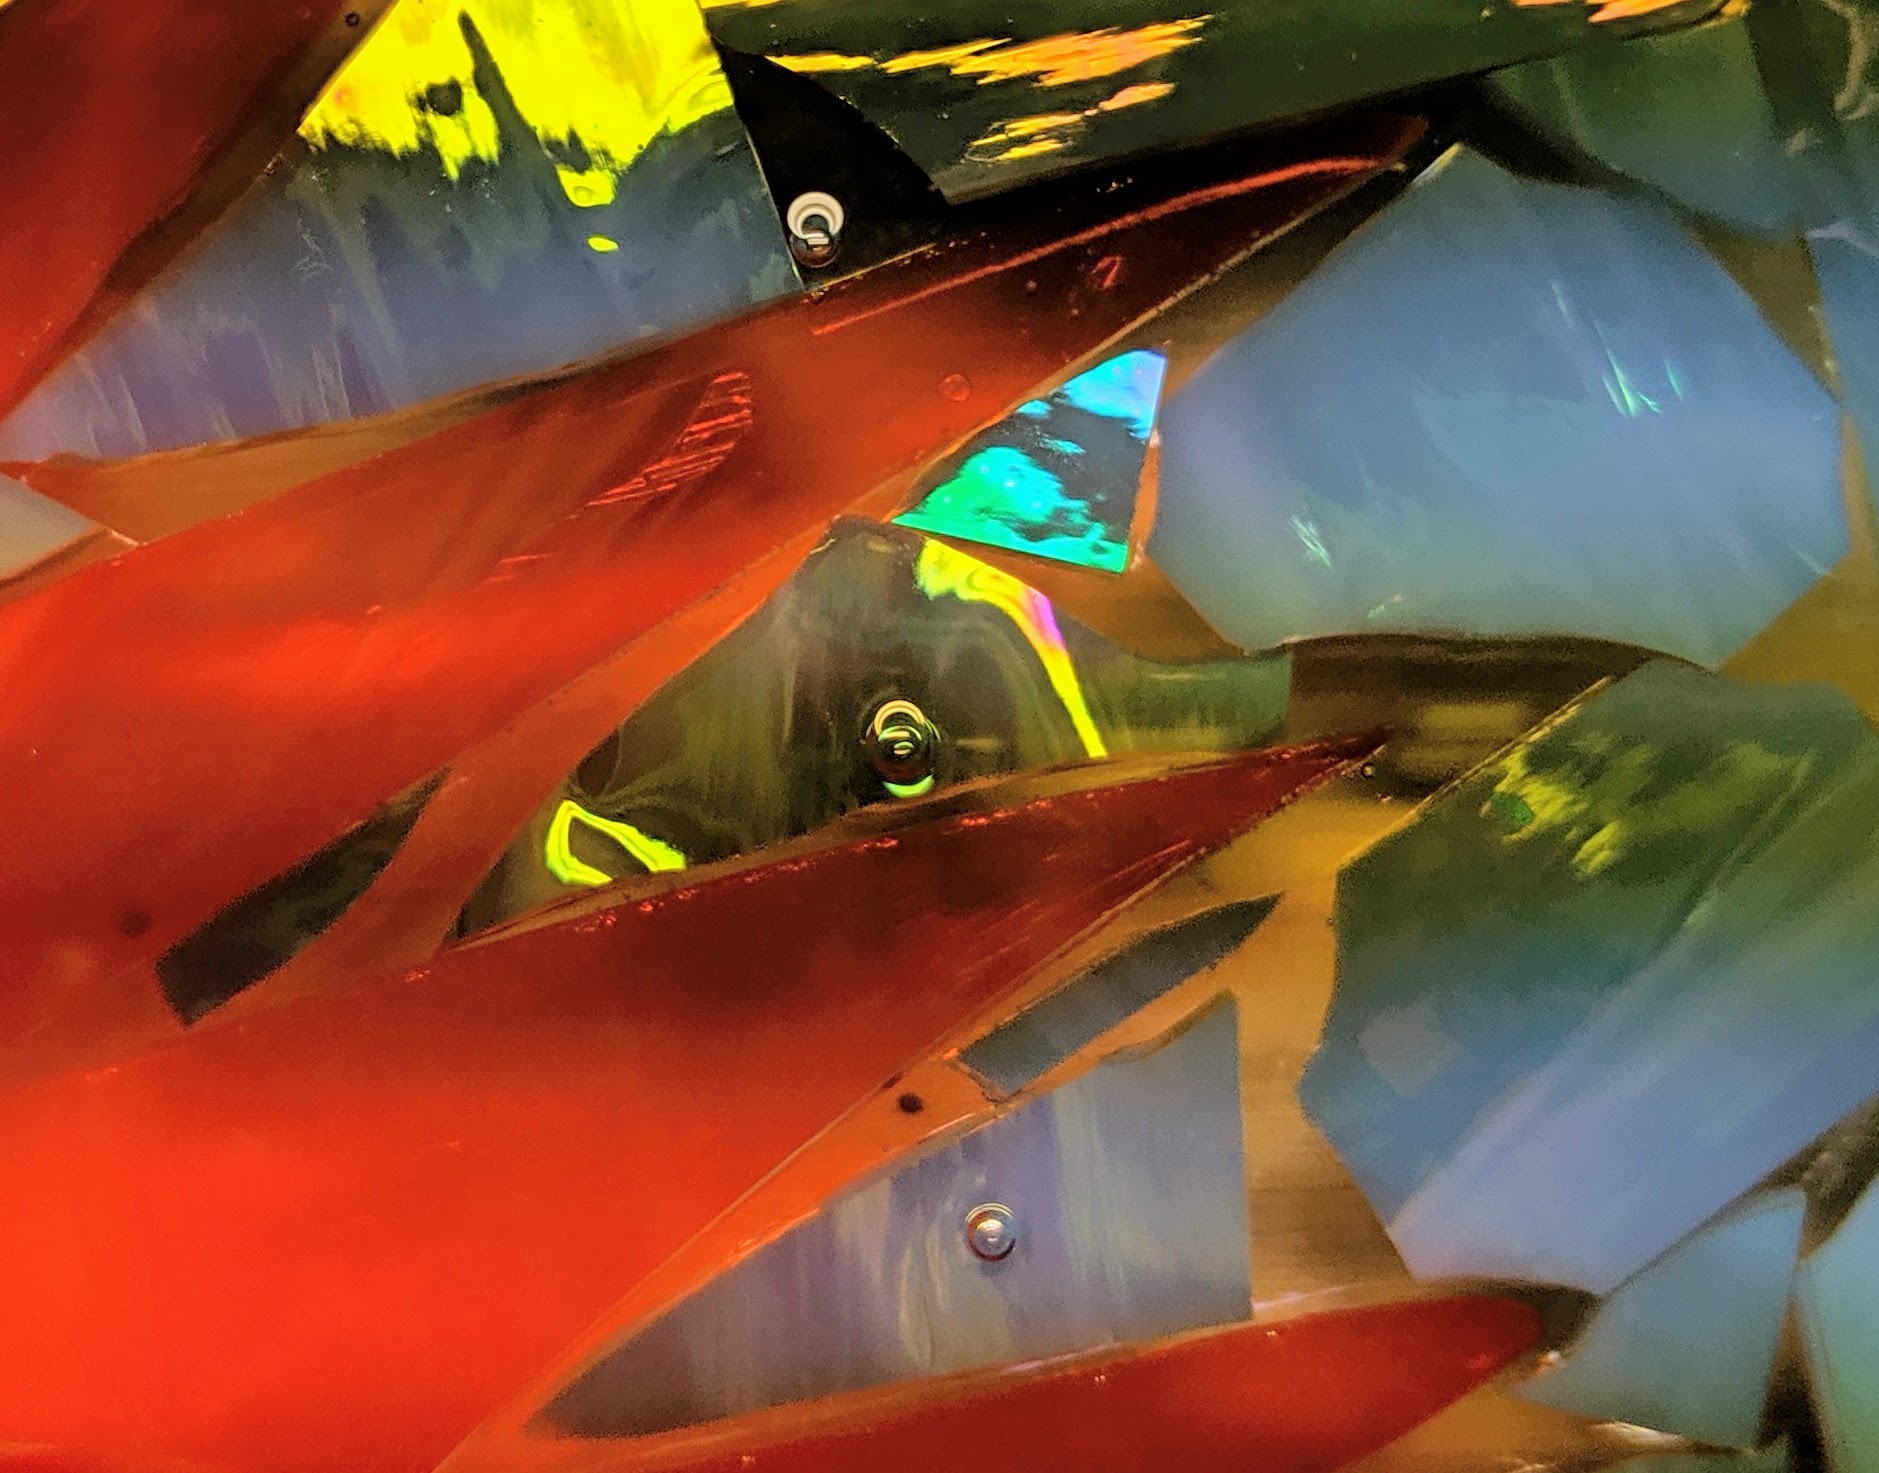
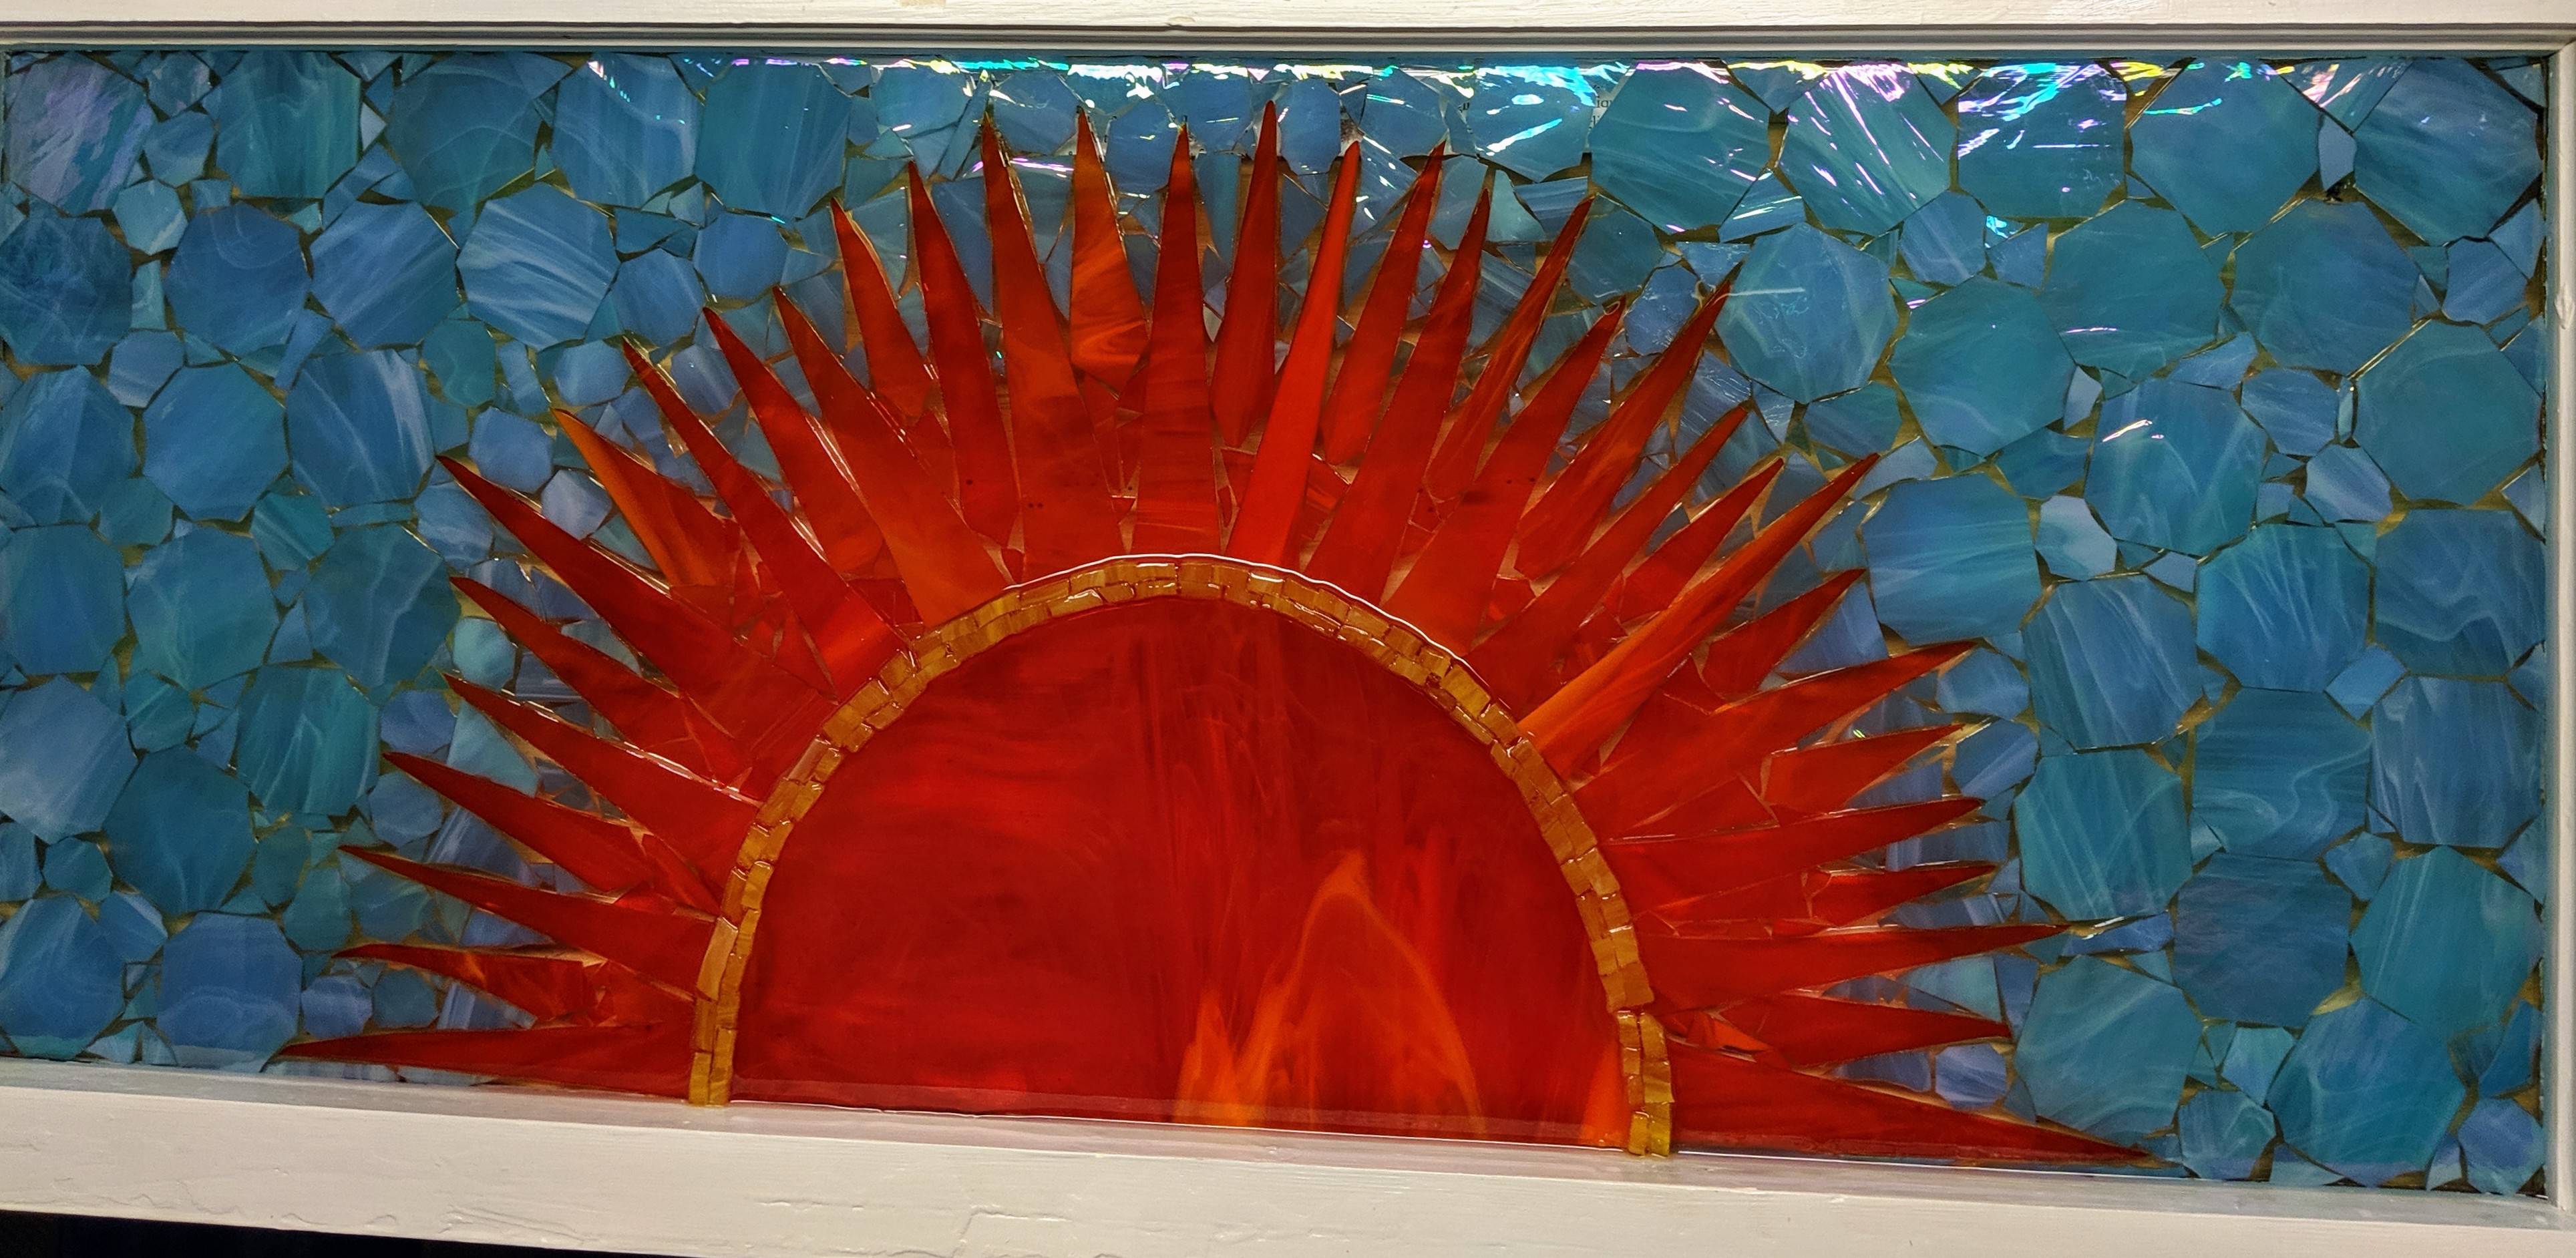
Here is some of the fruit of the labor of prior days. The sun mosaic is complete, and I have 8 coasters and some beads ready, as well.
Here comes the sun!
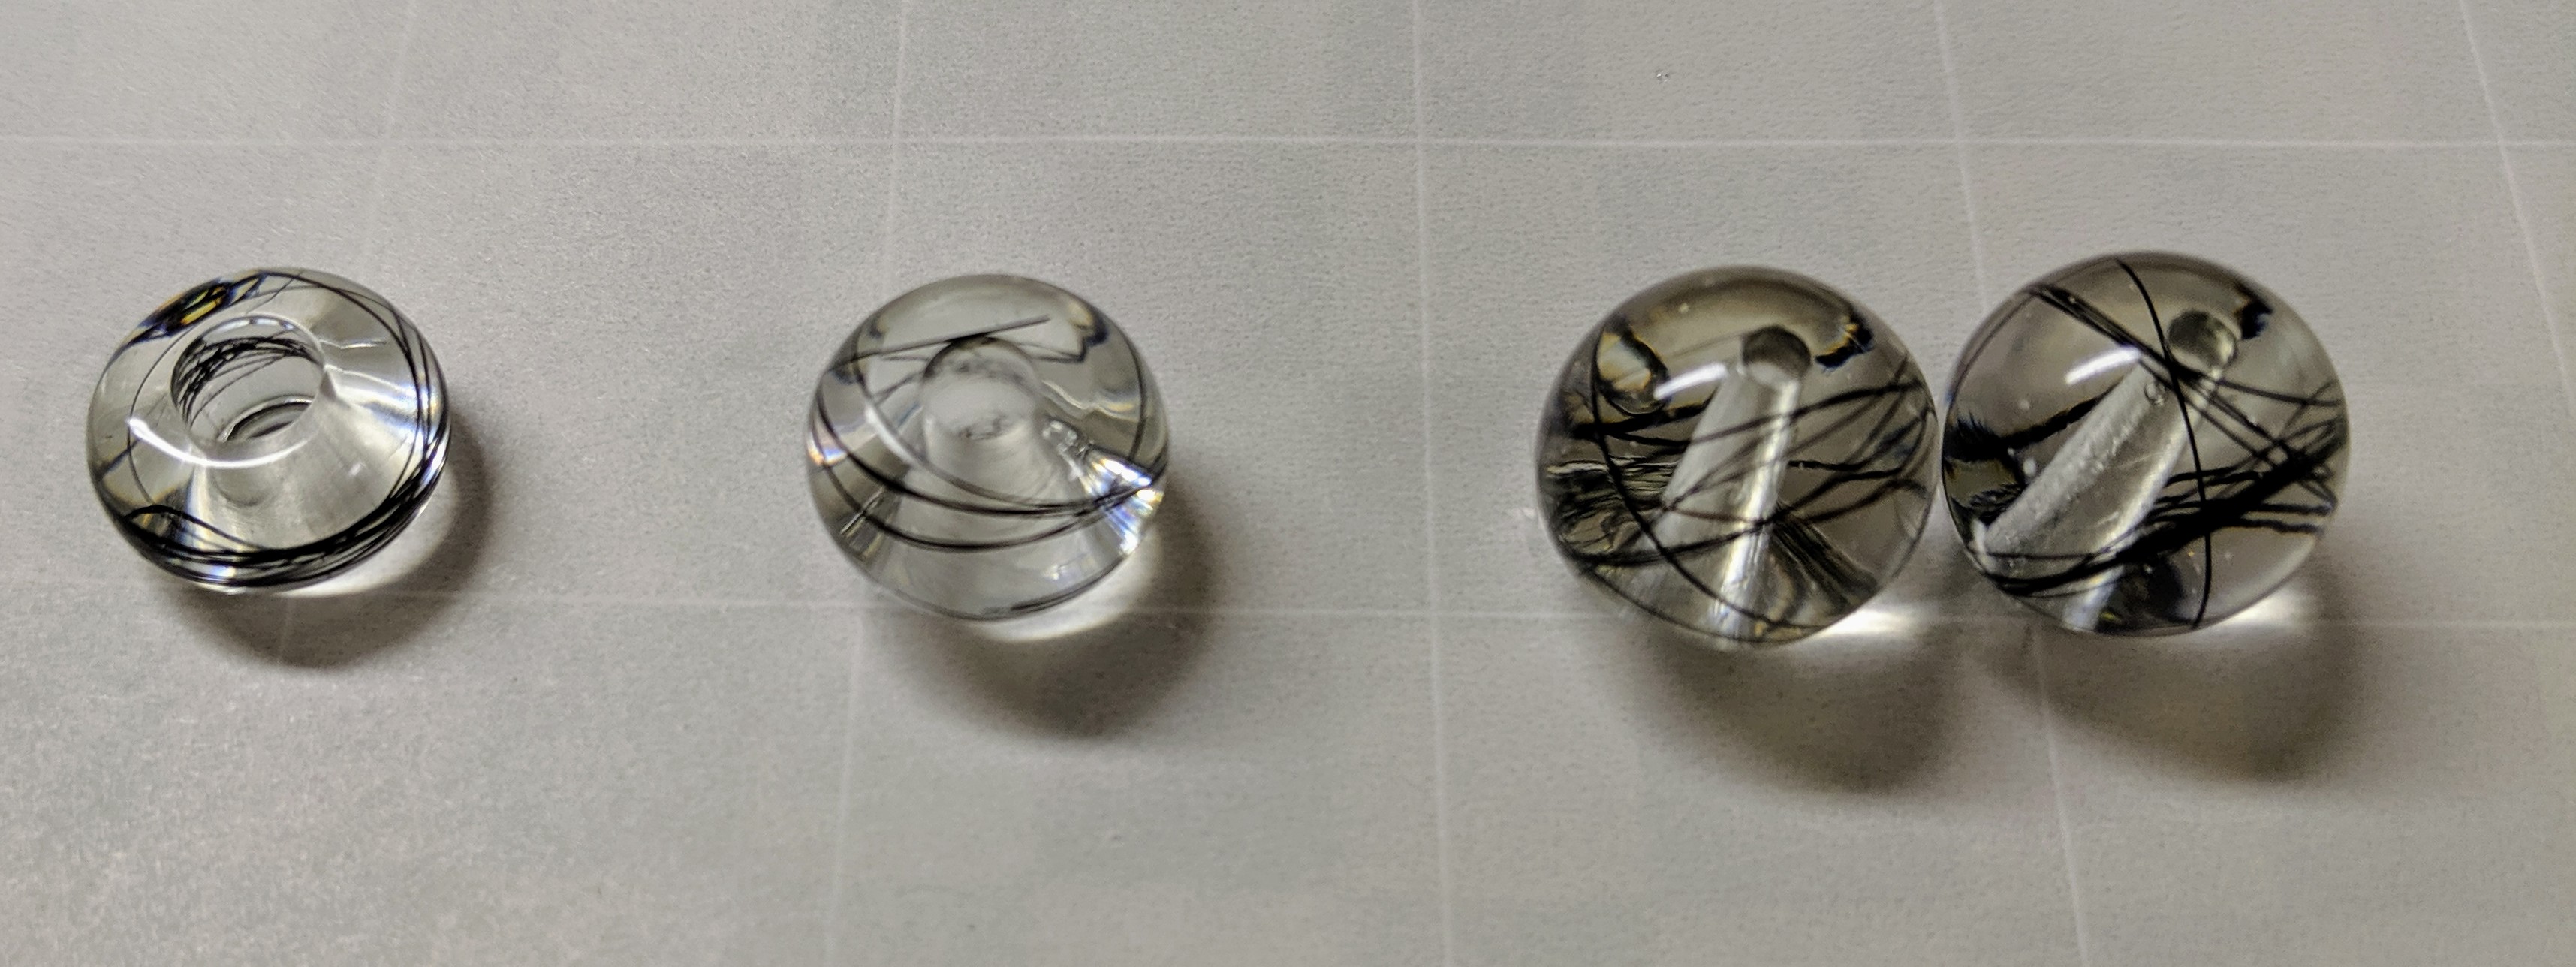
I had a new request for some memory beads, but I’m not yet sure what type she will want. Since I had some resin handy, I just made a selection of beads. They turned out pretty well!
Rondelle (6 mm hole), rondelle (5 mm hole), ball beads.
The coasters I made with the quick layering technique turned out OK. I think next time I will swirl the water pigmented layers a bit. I was hesitant to do that because the layer underneath wasn’t cured, but I think the pigments need to be moved around a bit more. I also think the look of the bubbles at the edge of the water are improved with this technique.
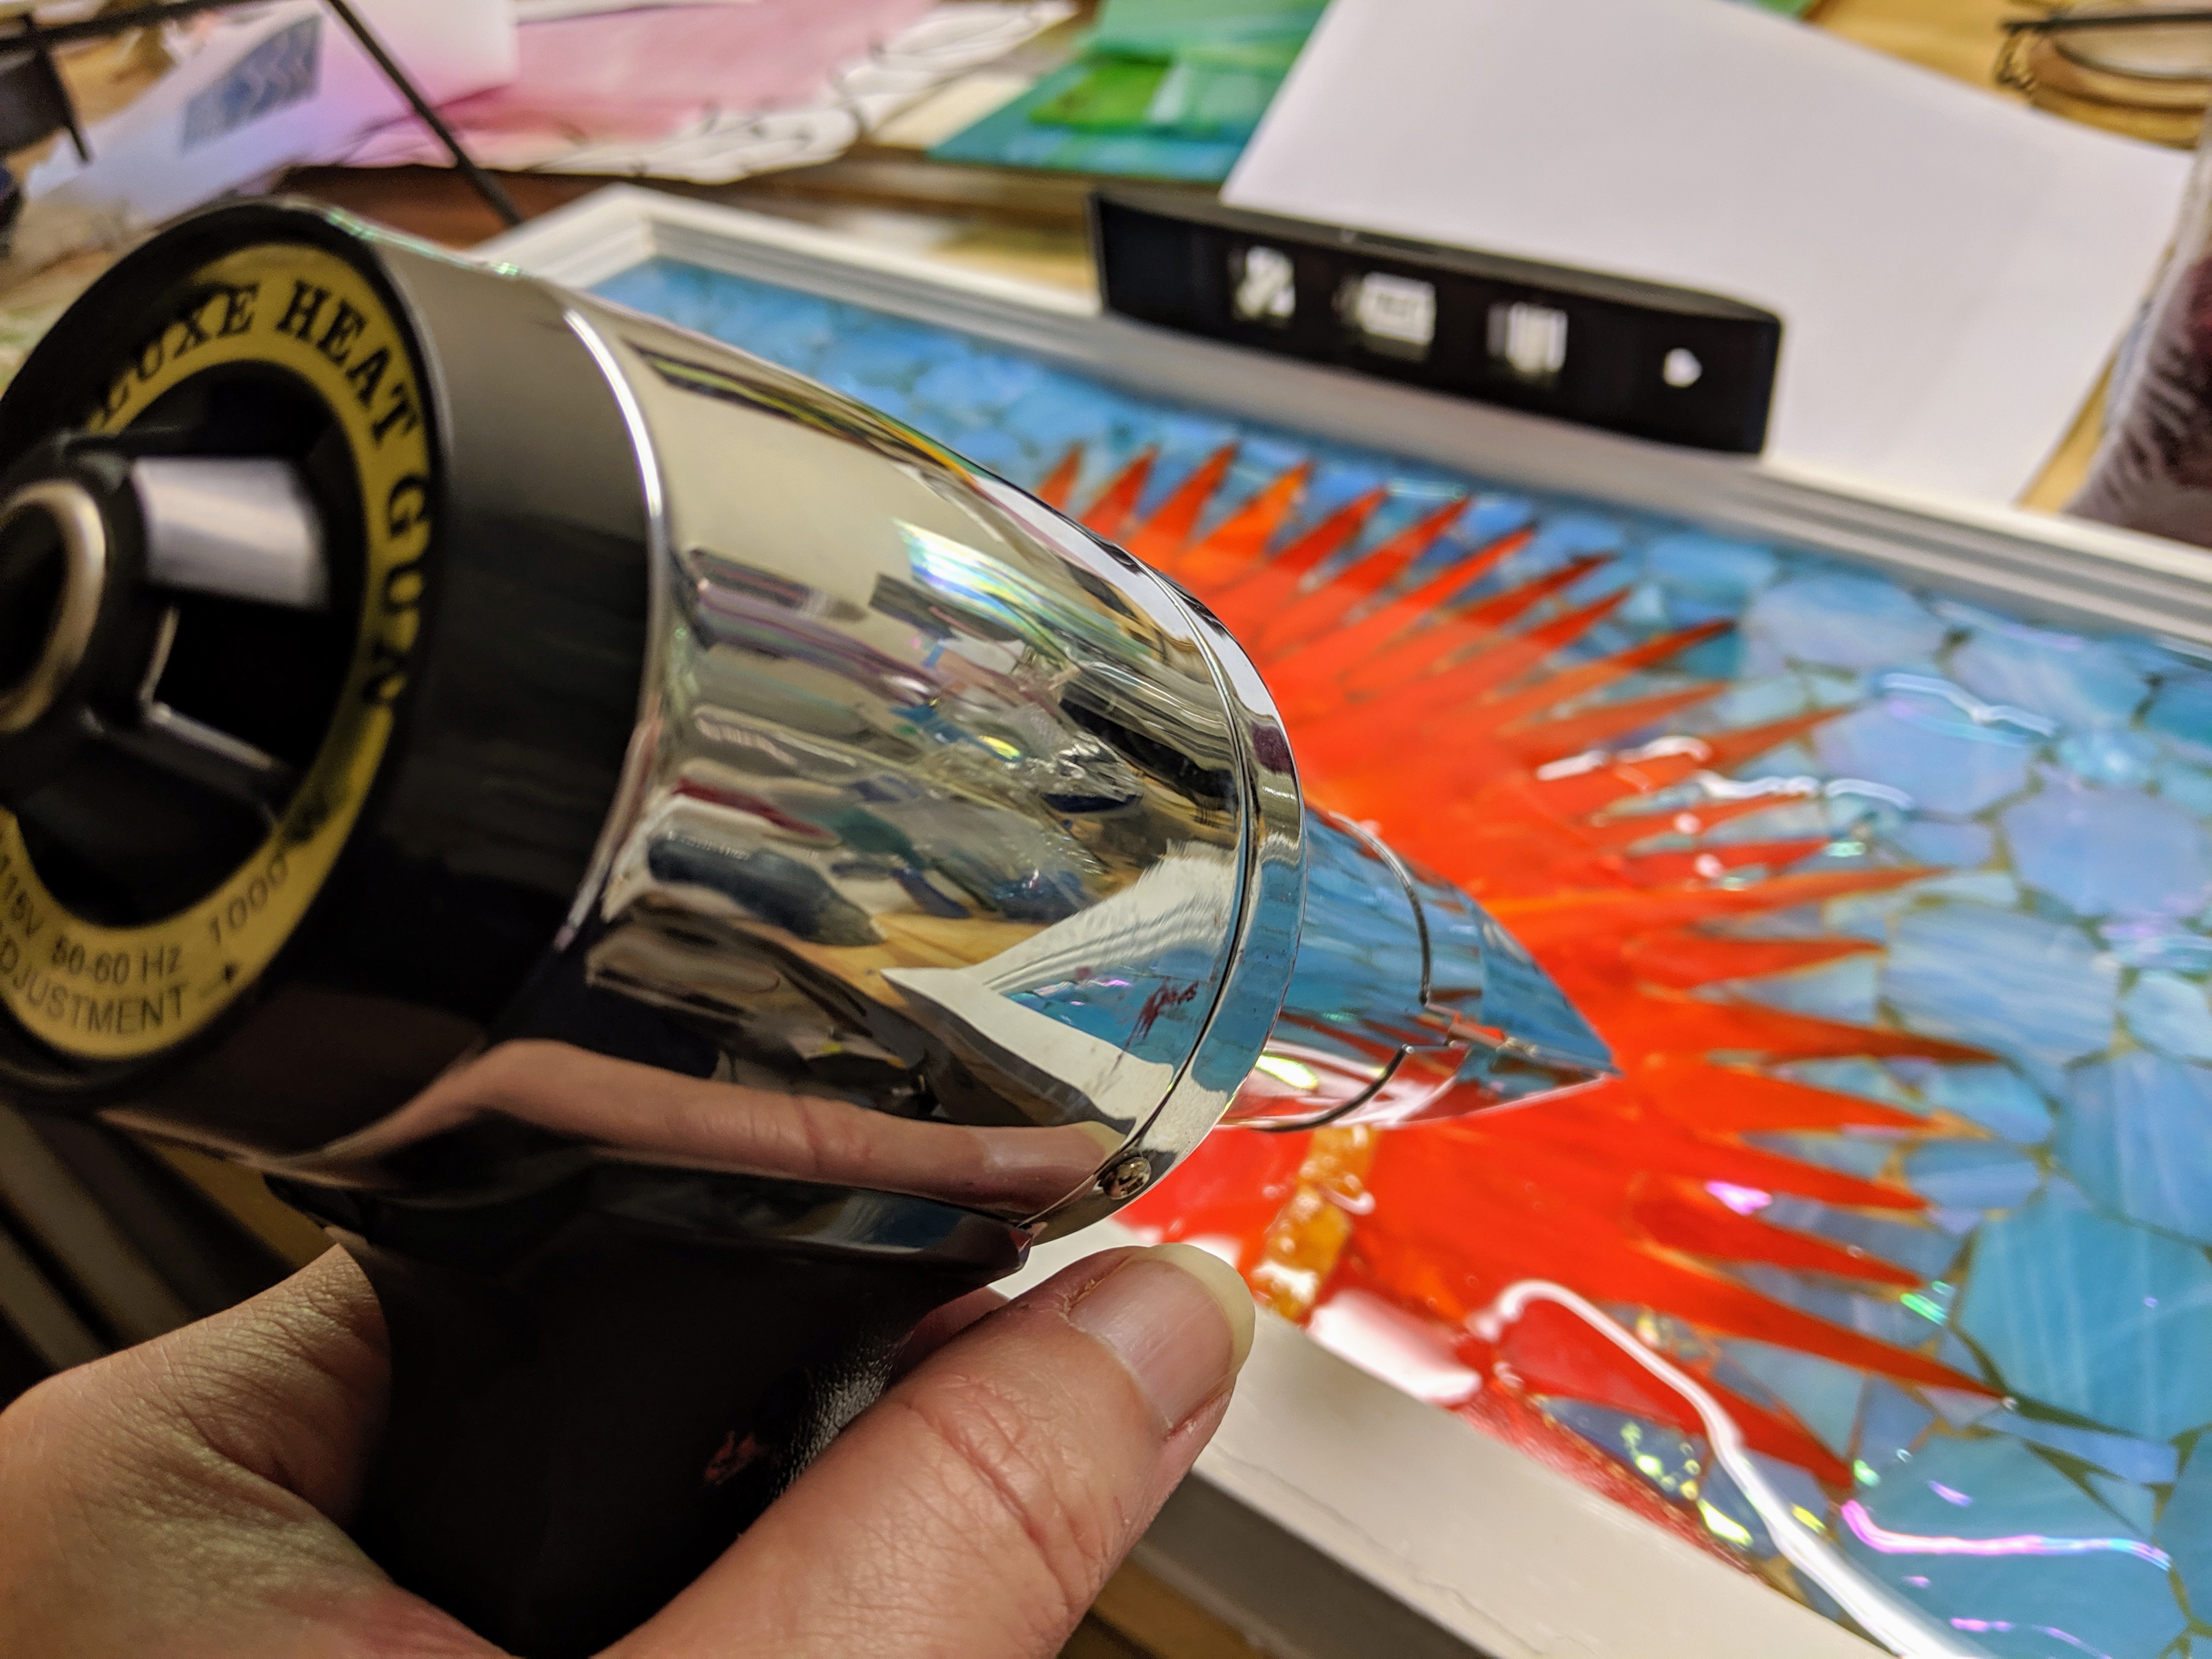
Today was a very busy, but productive, day. I finished the sun panel by pouring the resin over it, set a few memory beads in their molds, and made 8 coasters using the layer method where you don’t cure the resin overnight between layers. At times I felt like the proverbial one-armed paper hanger! It was a challenge doing all this in one day, but hopefully it was a success. I will find out tomorrow when I can take the beads and coasters out of their molds. Here is the basic rundown of the methodology and things to note.
Pouring the resin.
Pouring the resin on the sun mosaic was pretty straightforward, since everything was pretty much secured in place one way or another. I mixed up 16 ounces of resin and used almost all of it to cover the glass. After pouring, I immediately used my heat gun to help distribute the resin evenly across the window as well as to remove bubbles that form as the resin settles under the individual pieces of glass.
Pouring the resin.
I thought about adding some glass chips to the resin, like I had planned to do, but I just wasn’t sure how that would look in the end, so I decided to save that to try on a smaller project that won’t be such a big deal if I don’t like the way it ends up looking. I normally use the glass chips in a clear background, but this whole window has glass in it, so I chickened out.
Using the heat gun.
The difficult part comes after the resin is poured and bubbles start to emerge. For the next 45 minutes to an hour, I had to repeatedly use the heat gun to remove bubbles as they emerged in the resin.
Bubbles forming in the resin.
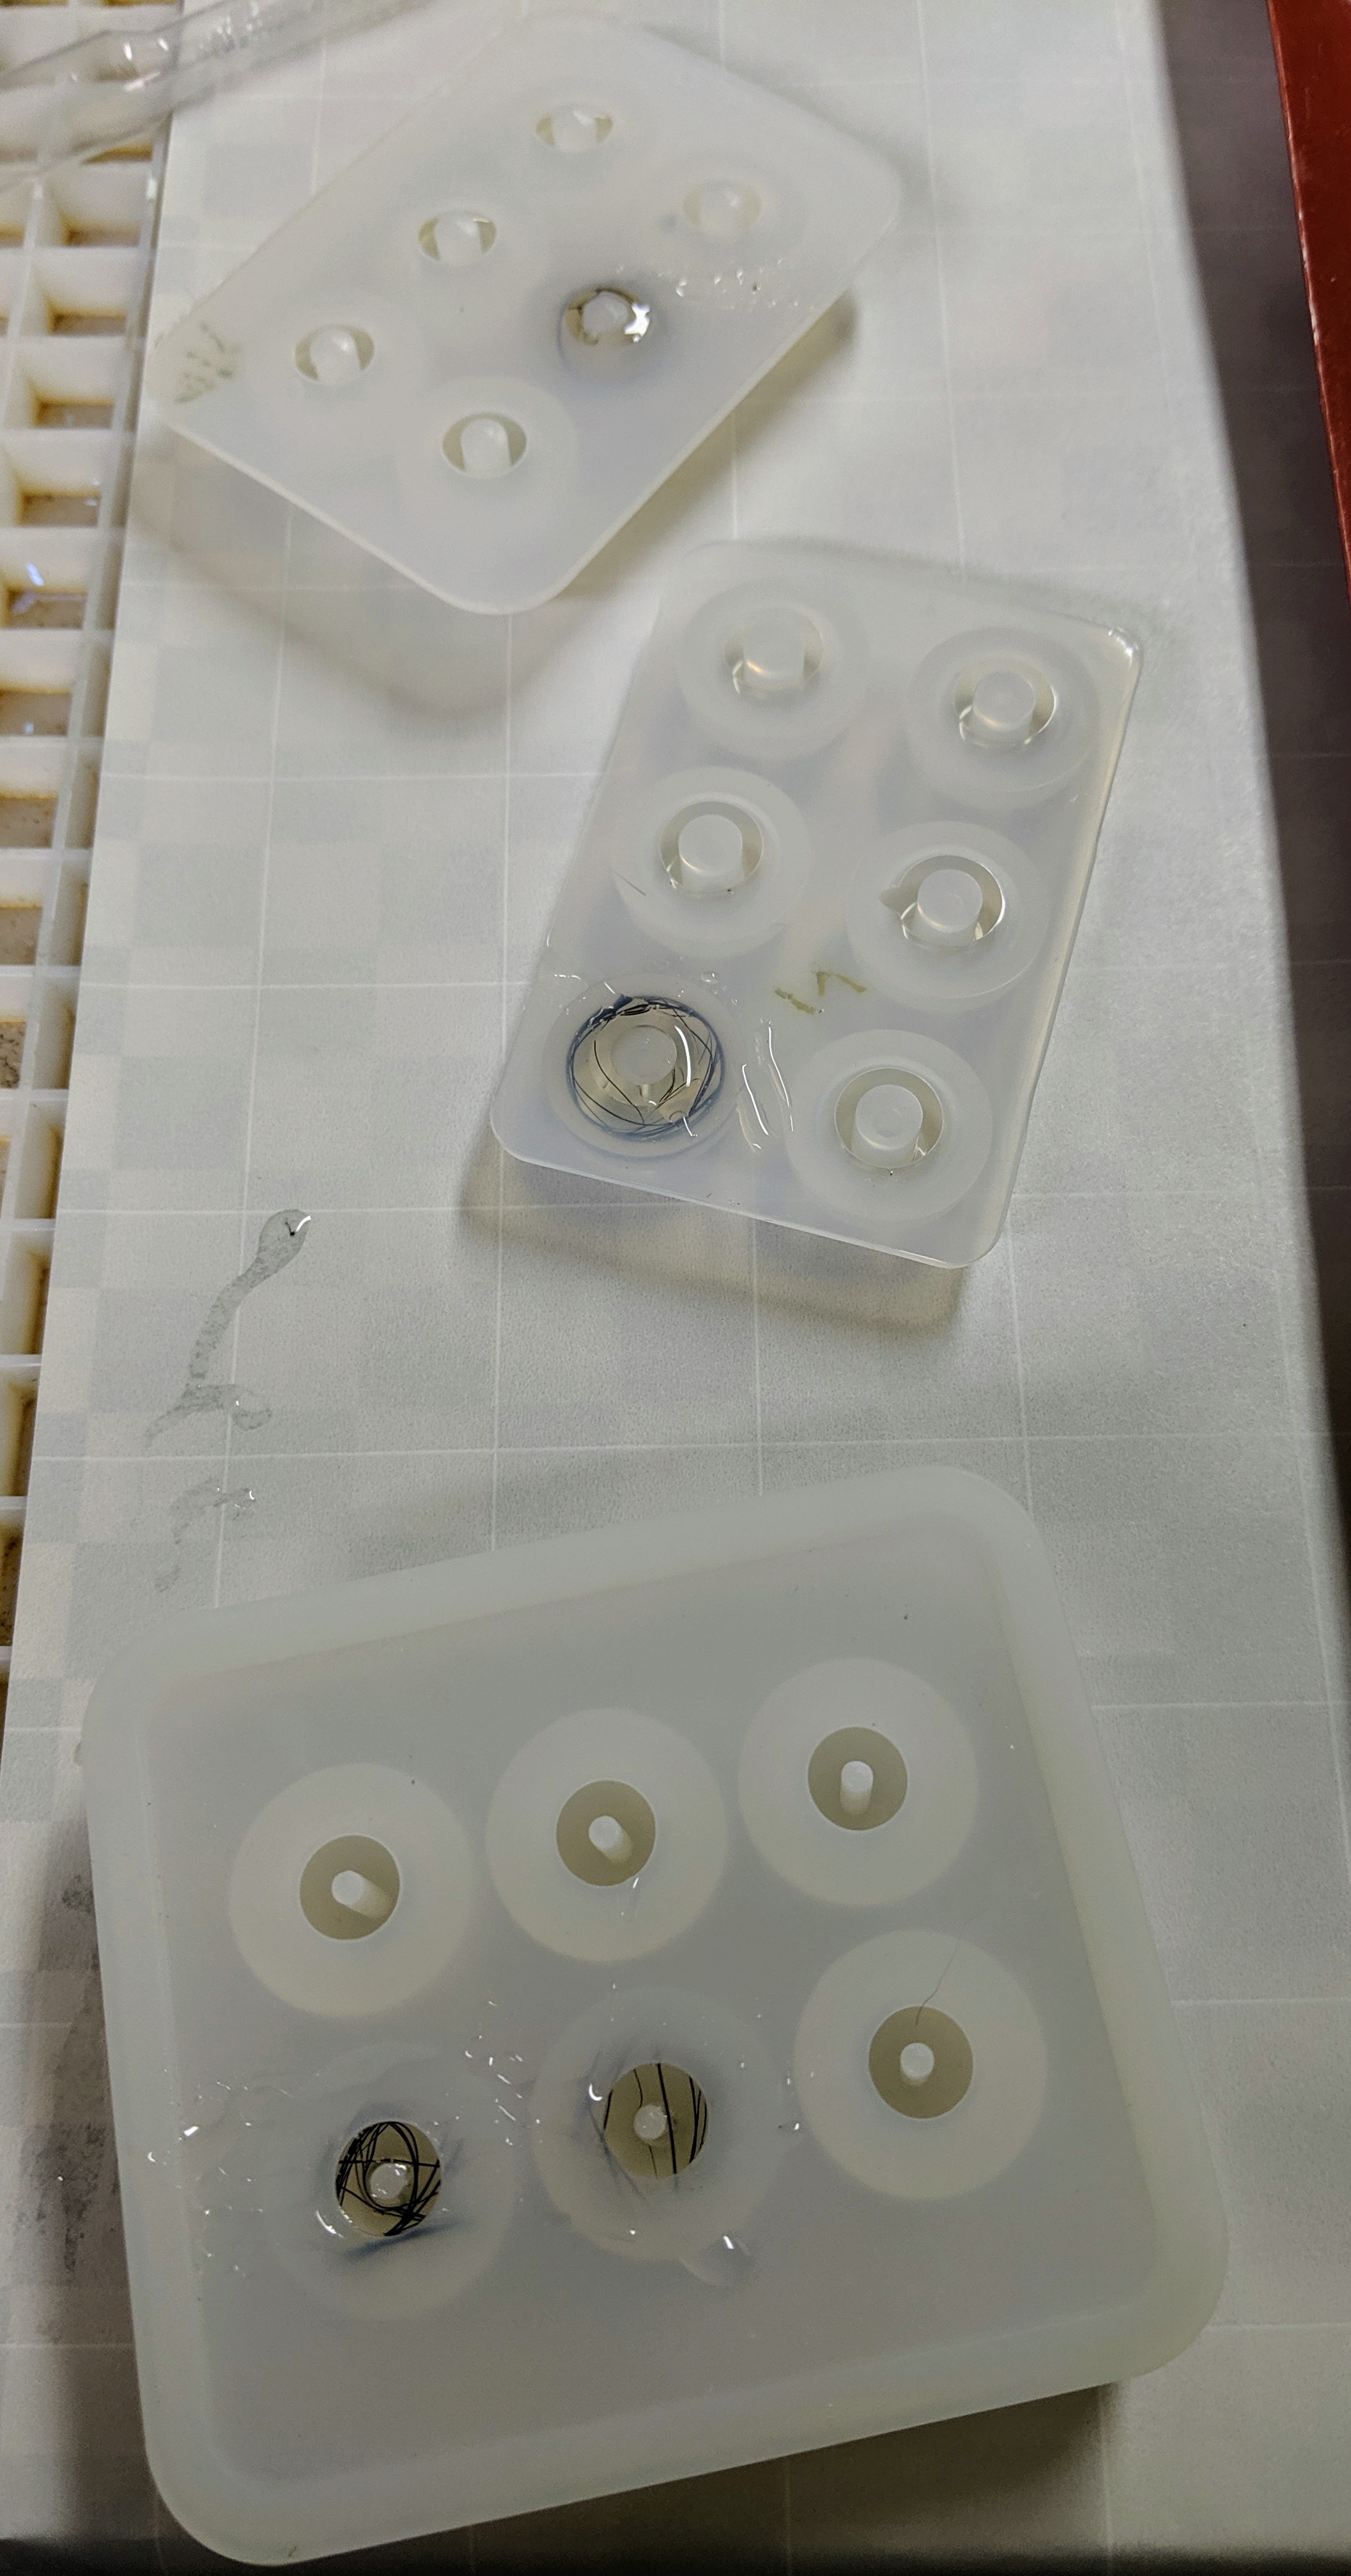
While I monitored the bubbles on the sun mosaic, I used a bit of the resin to make a few memory beads. The beads take very little resin, and I had enough left to make about four of them.
Using extra resin for some beads.
Since the bubbles in the mosaic weren’t slowing down, I decided to make another batch of resin and try to do the coasters in layers without curing in between. I read that this results in a stronger end product, though I haven’t had any “strength” issues with my previous creations.
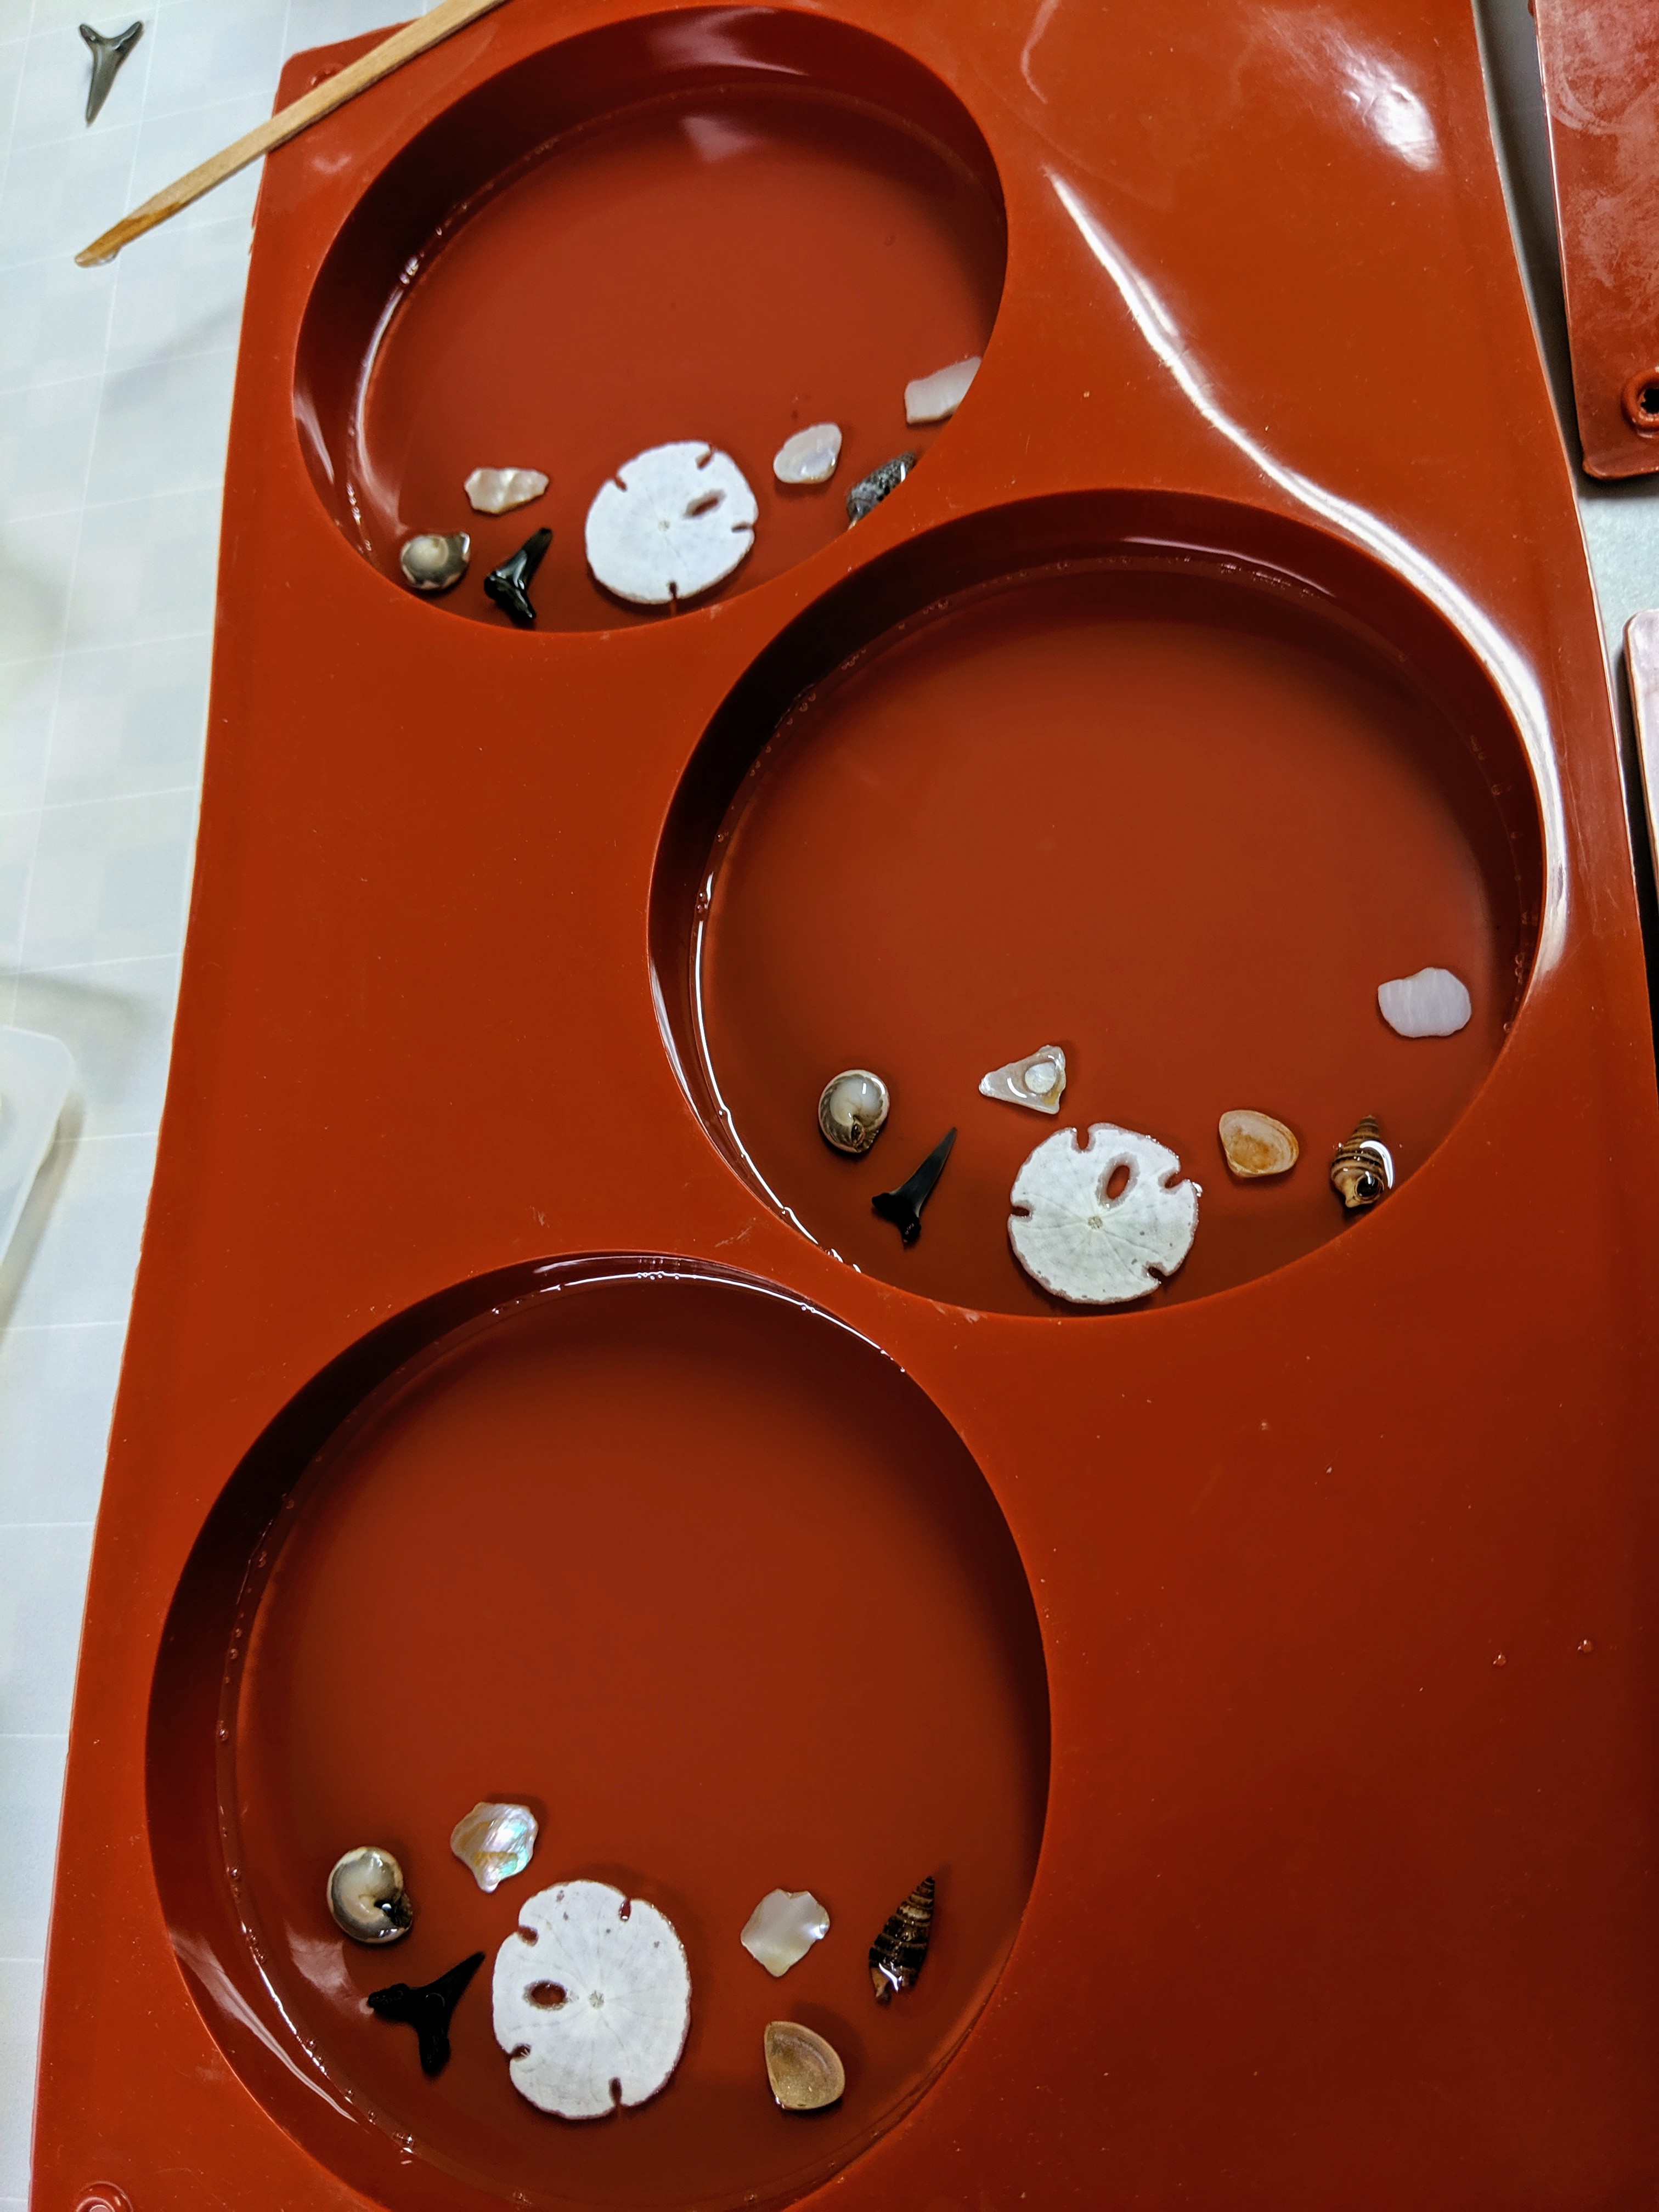
First layer poured and decorated.
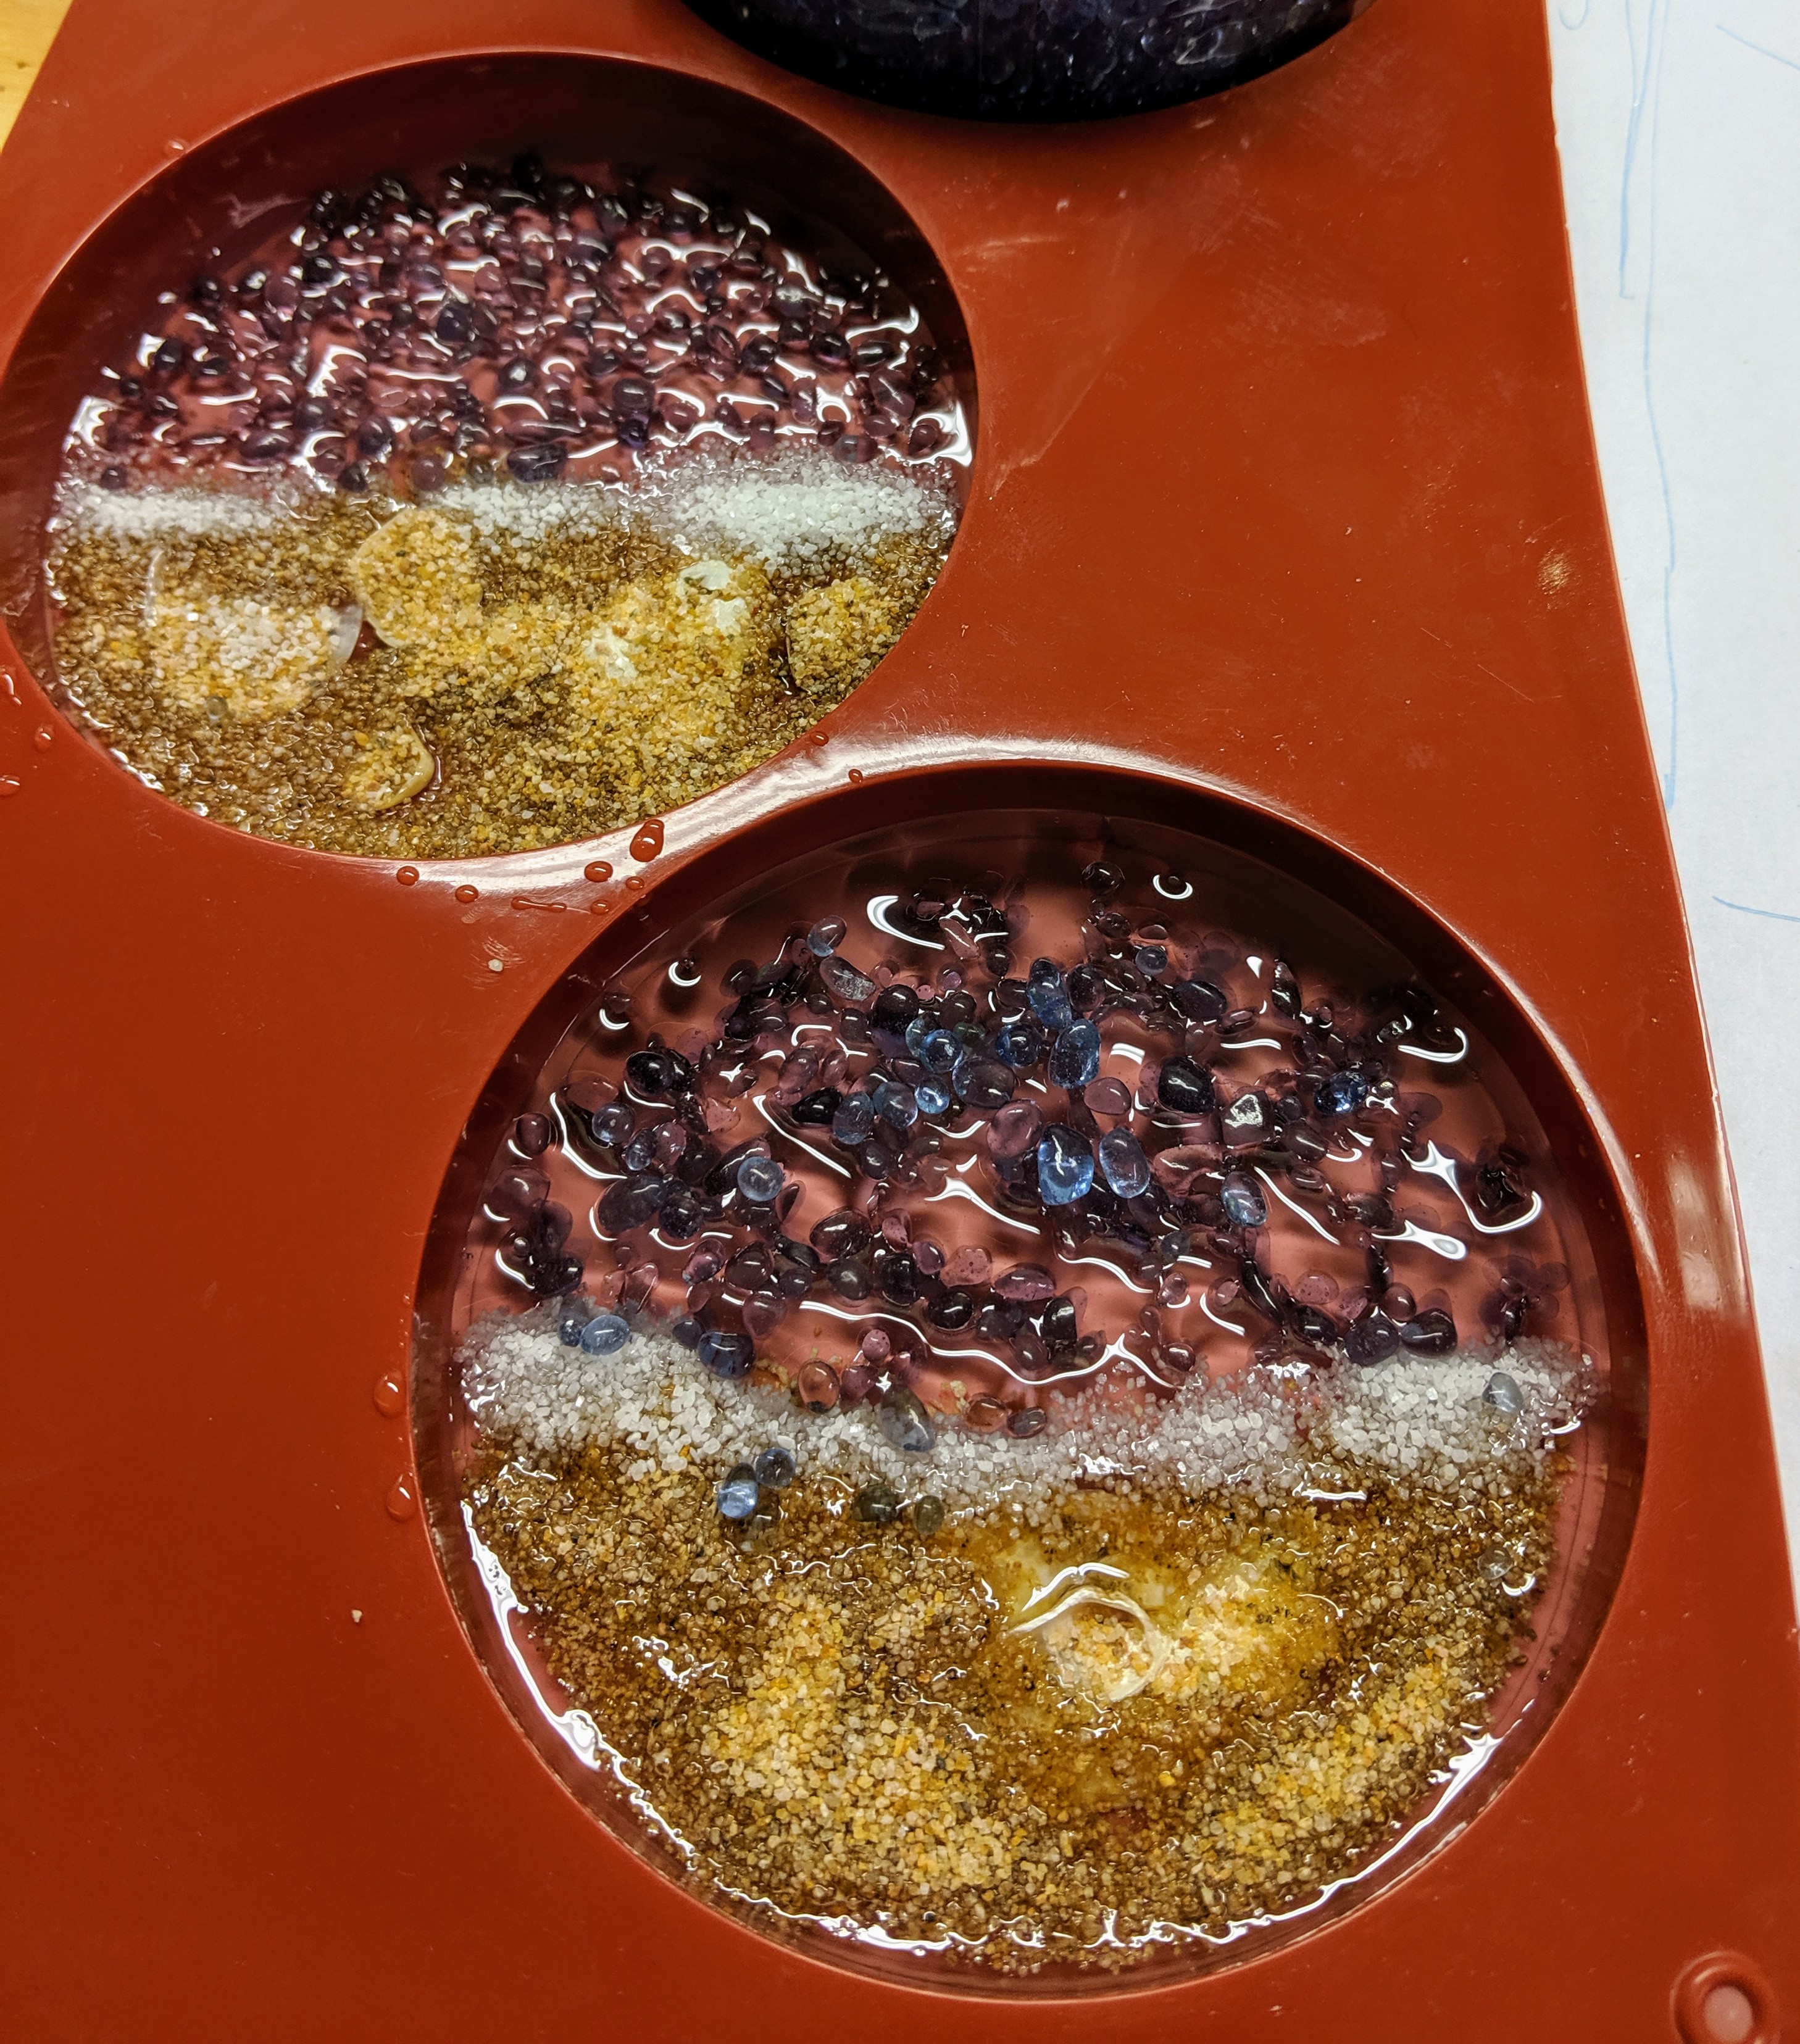
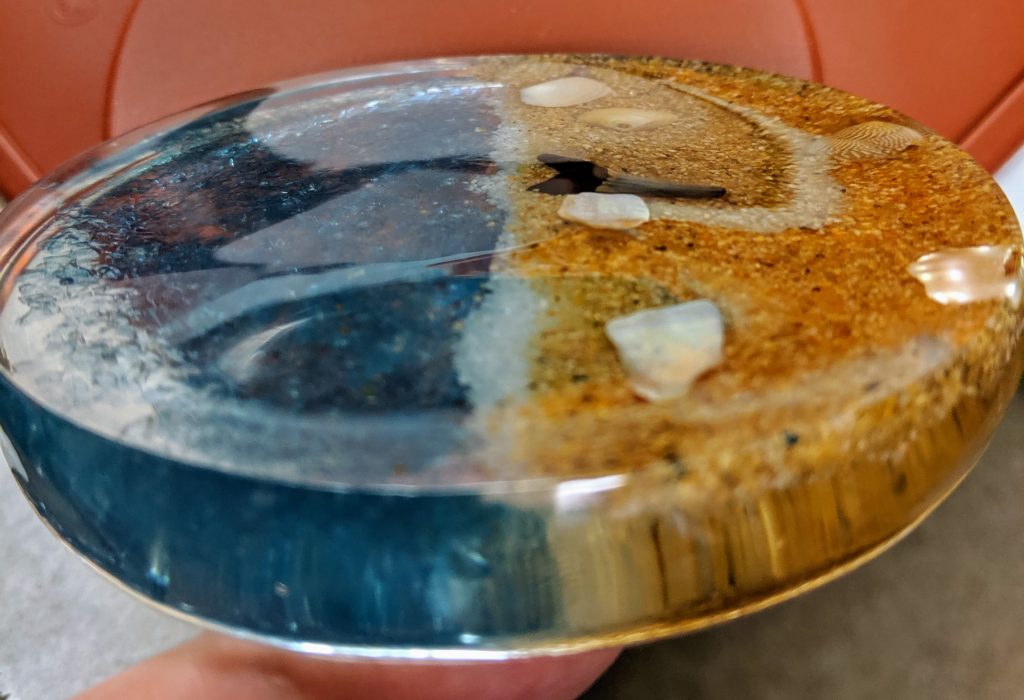
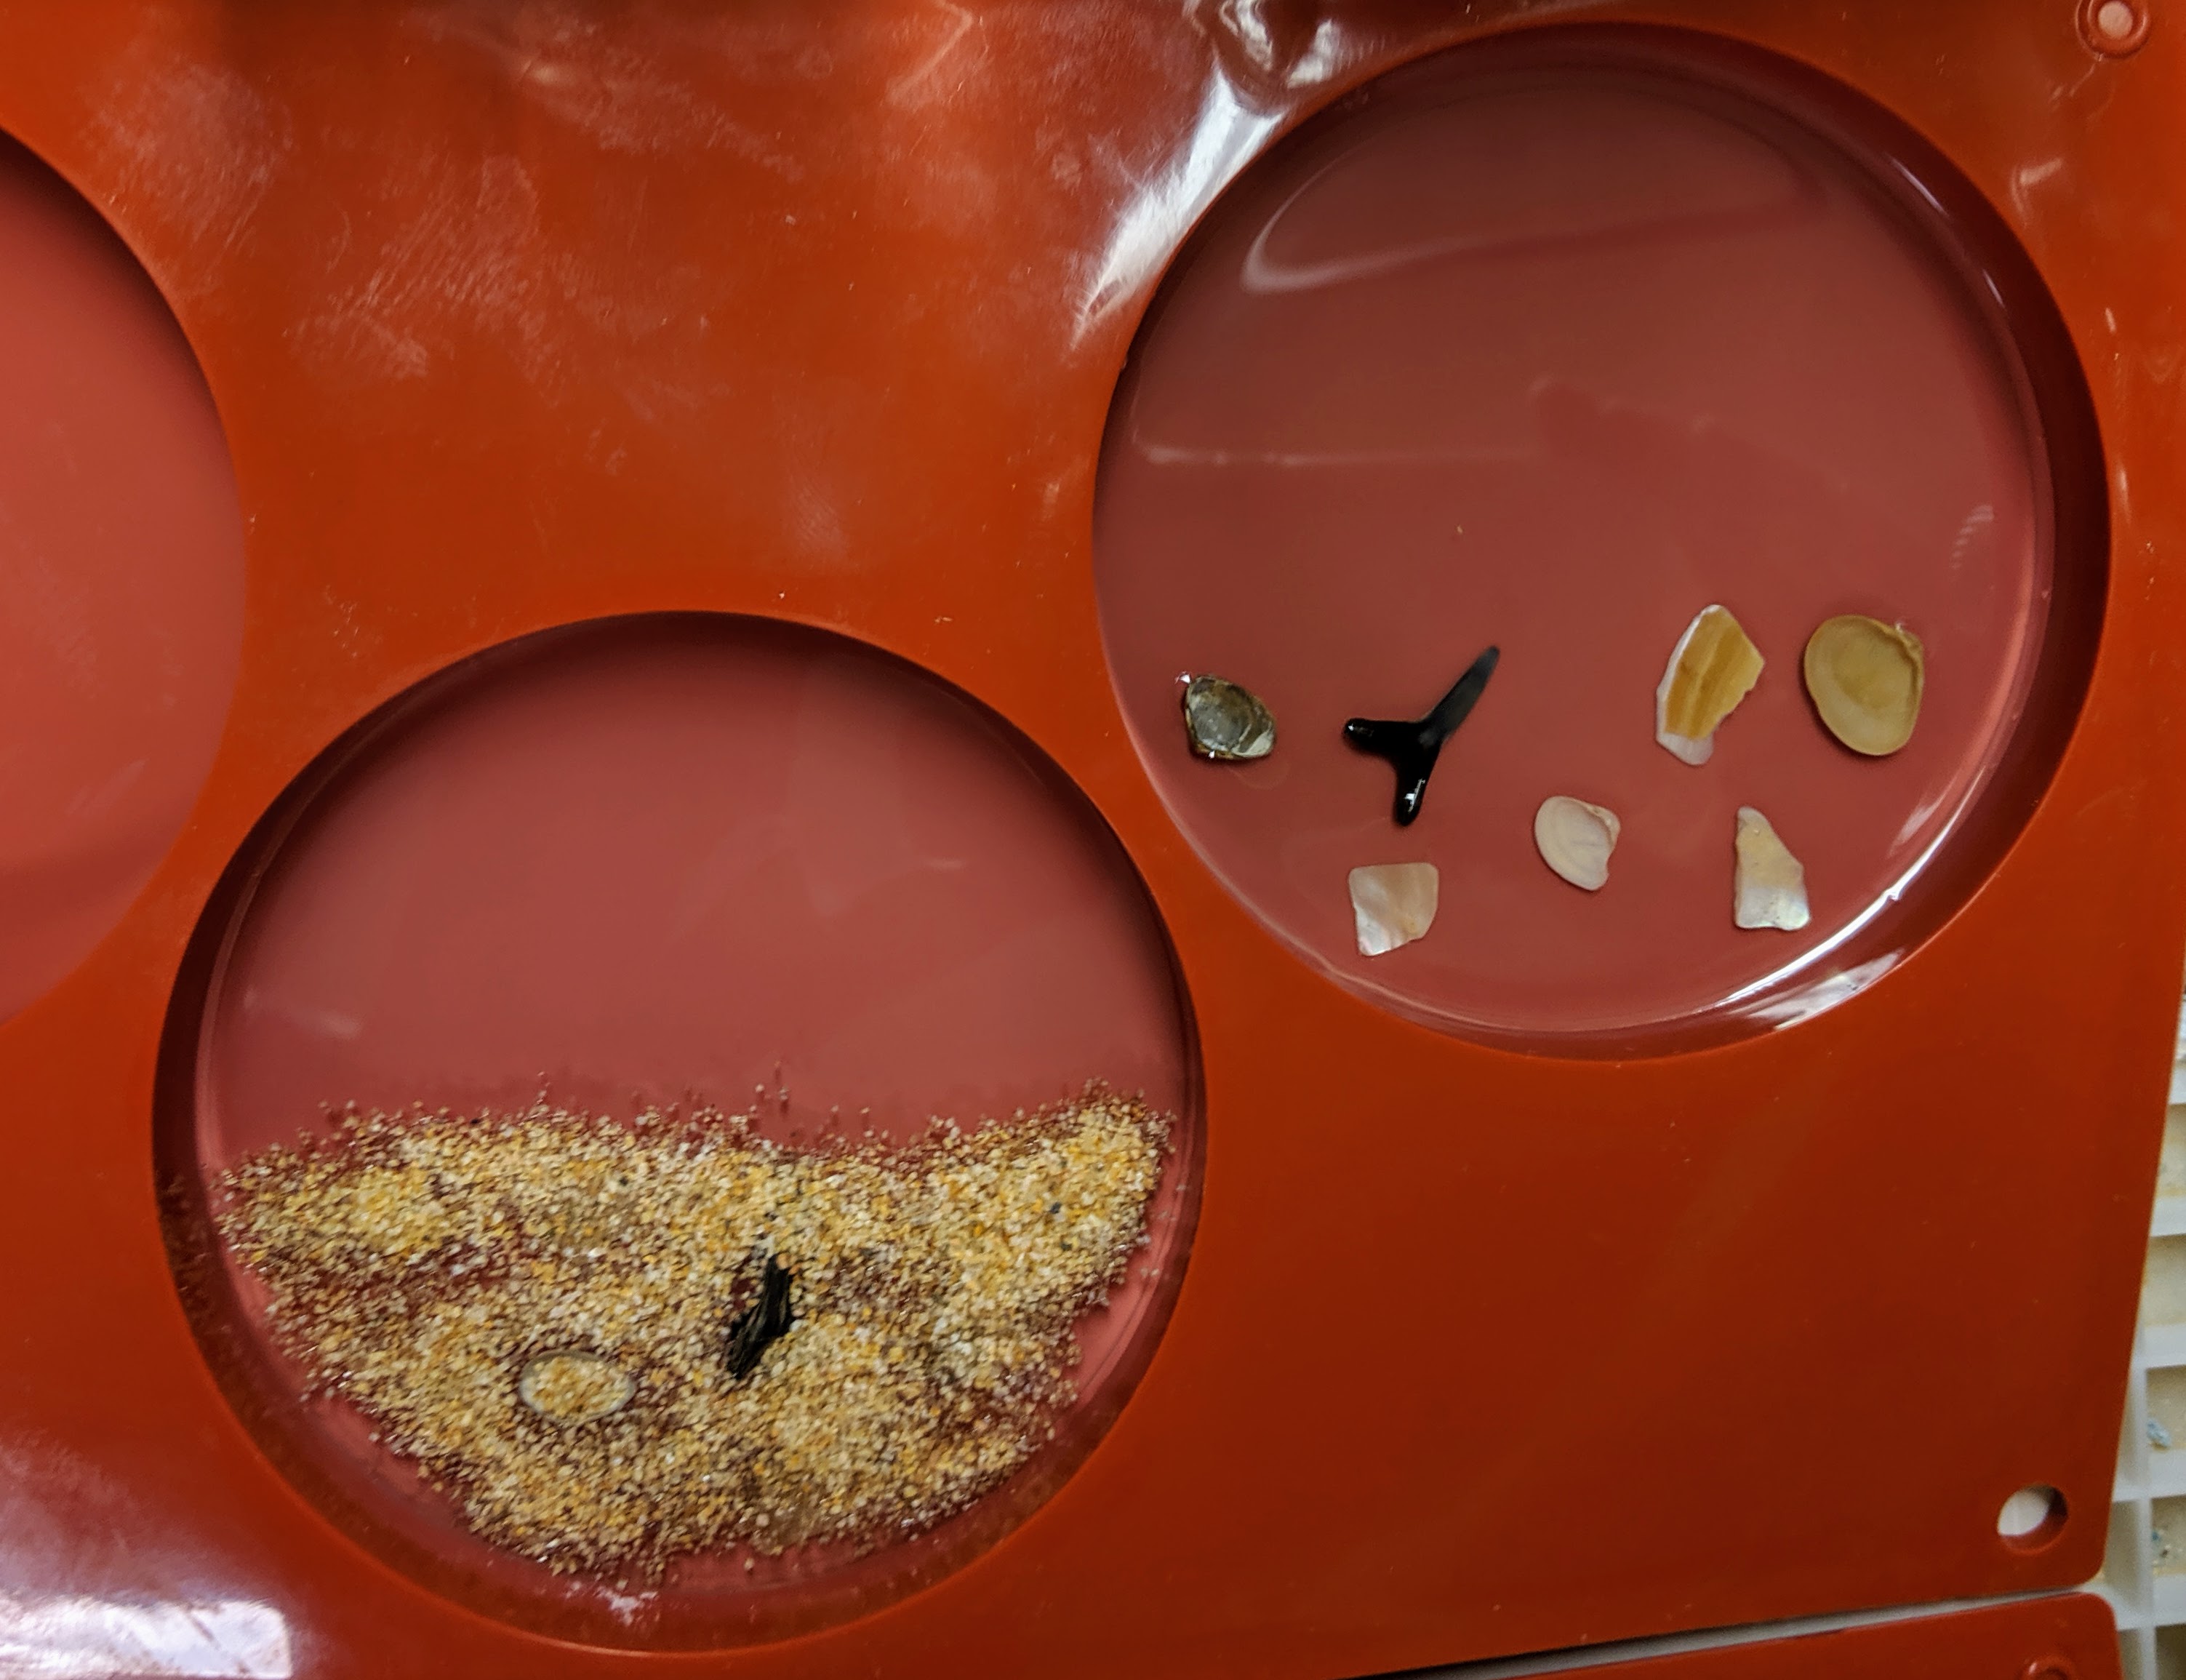
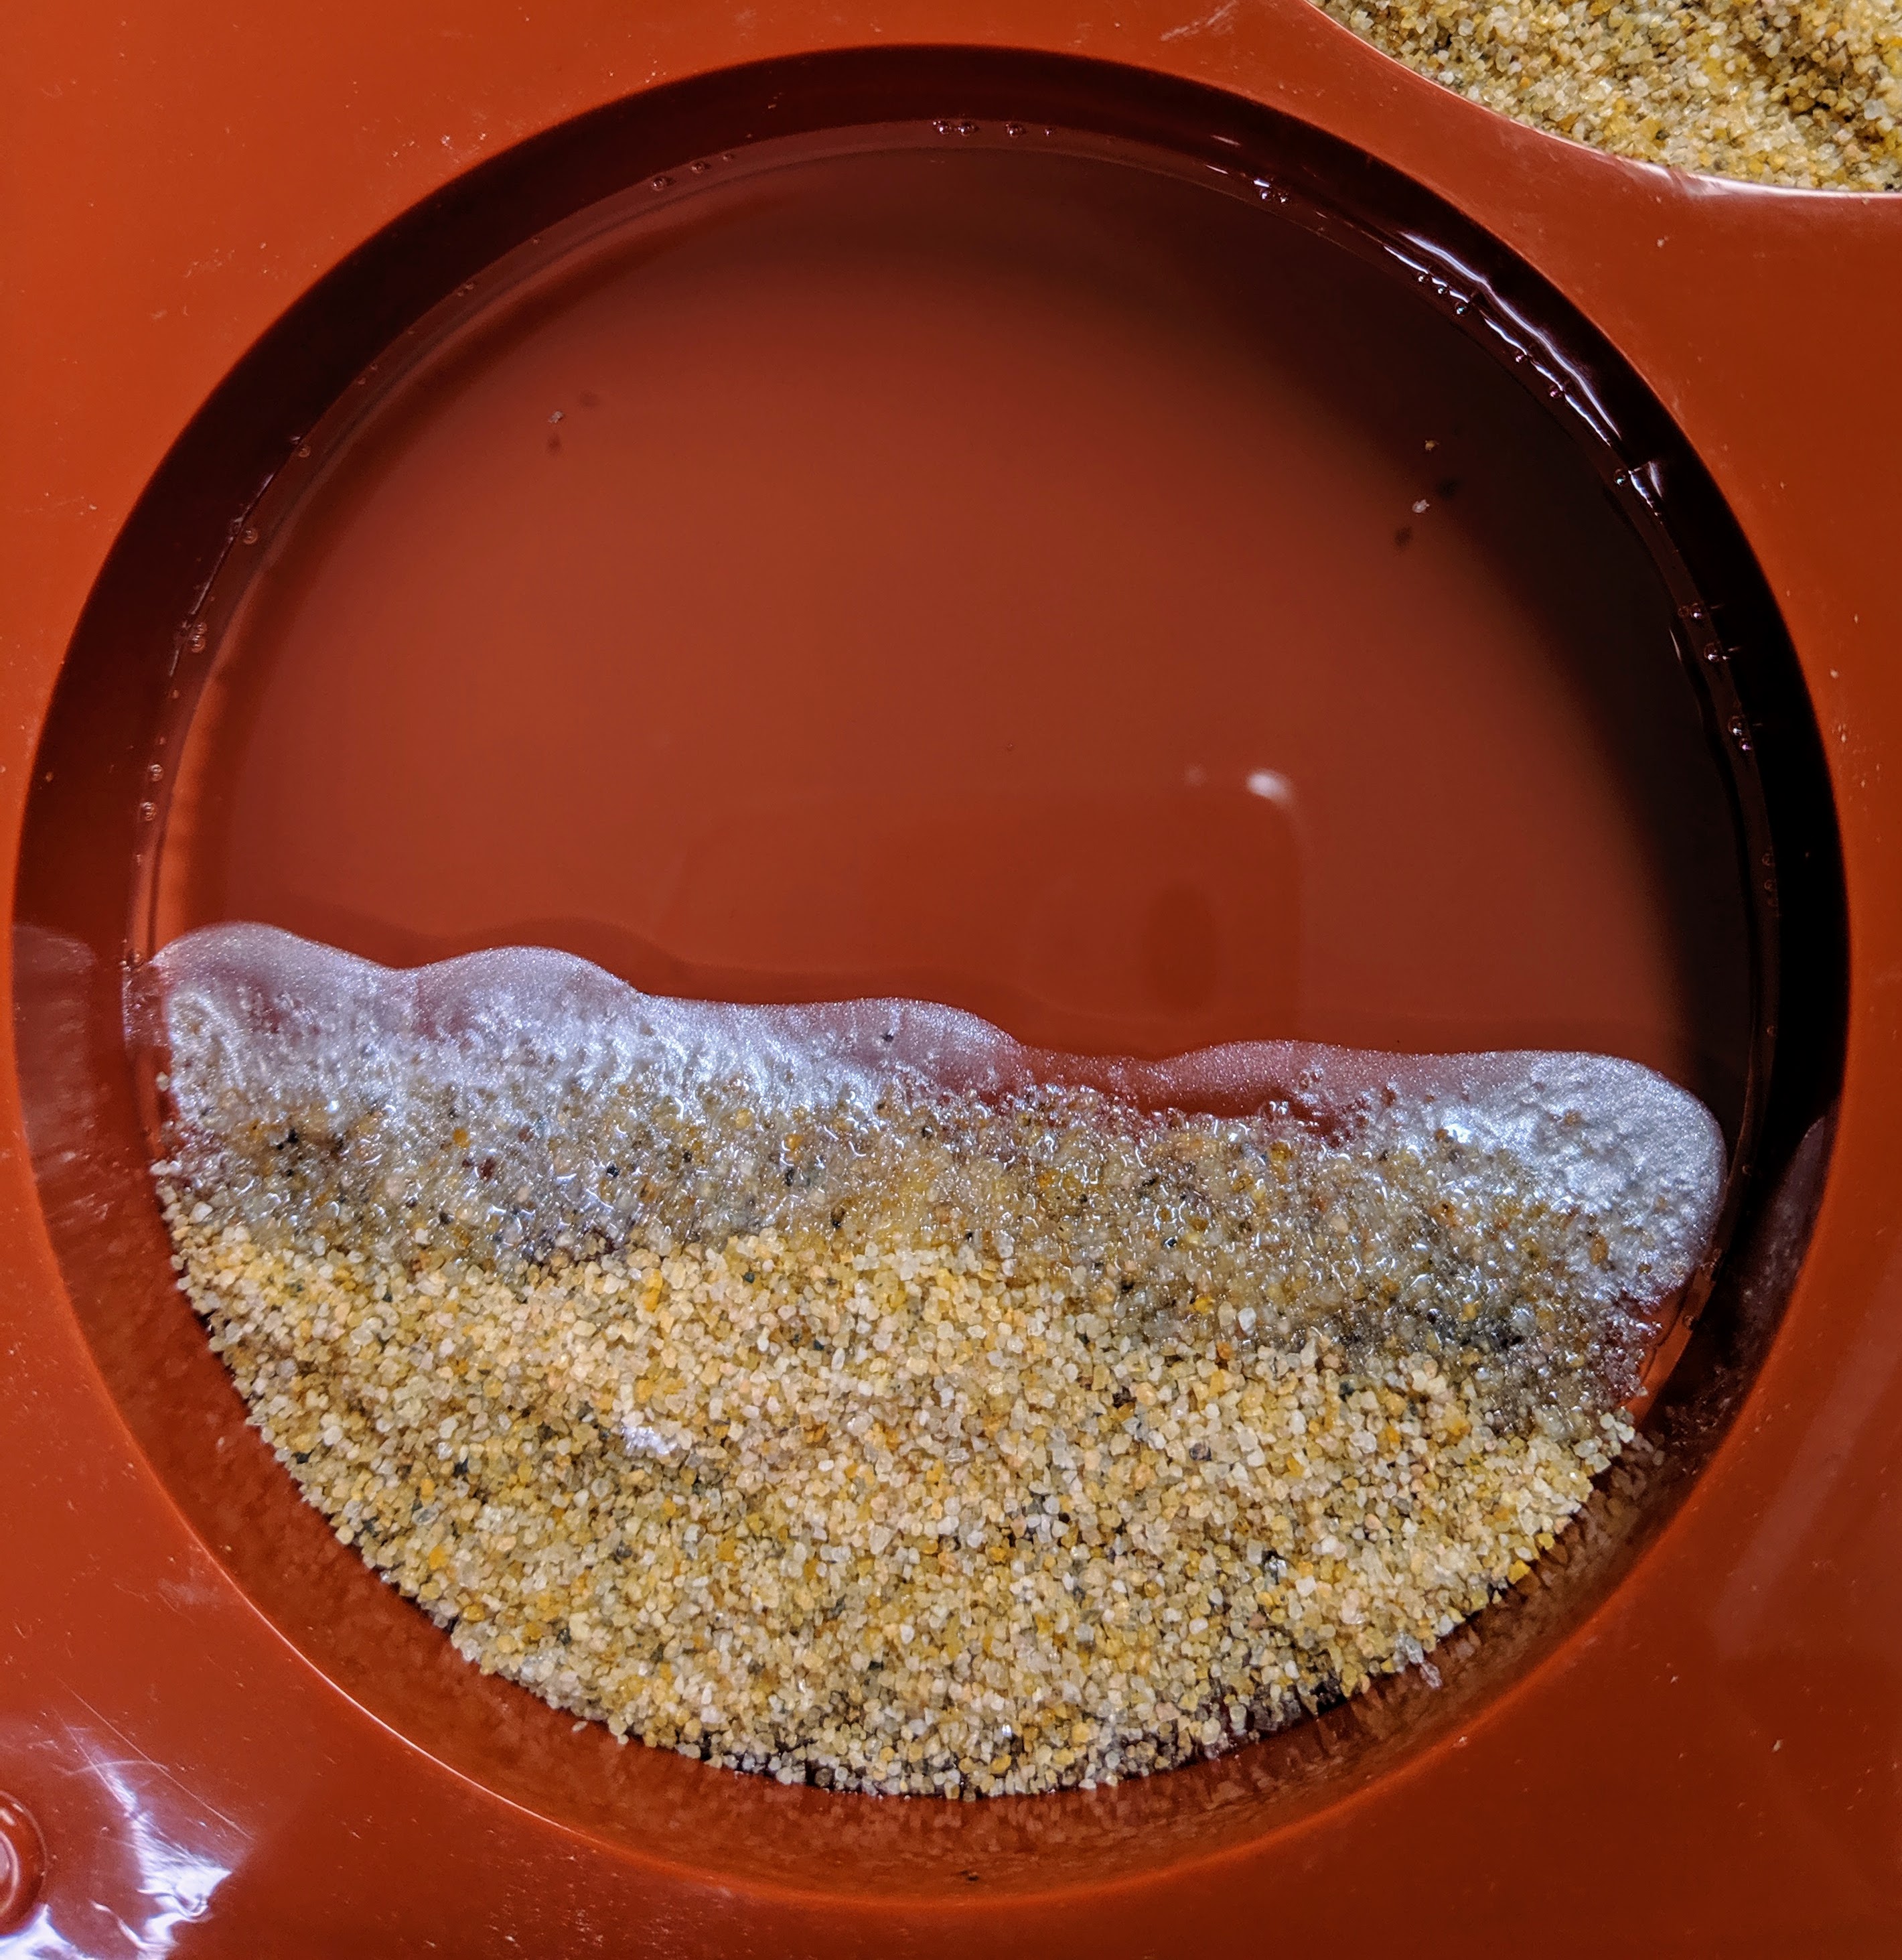
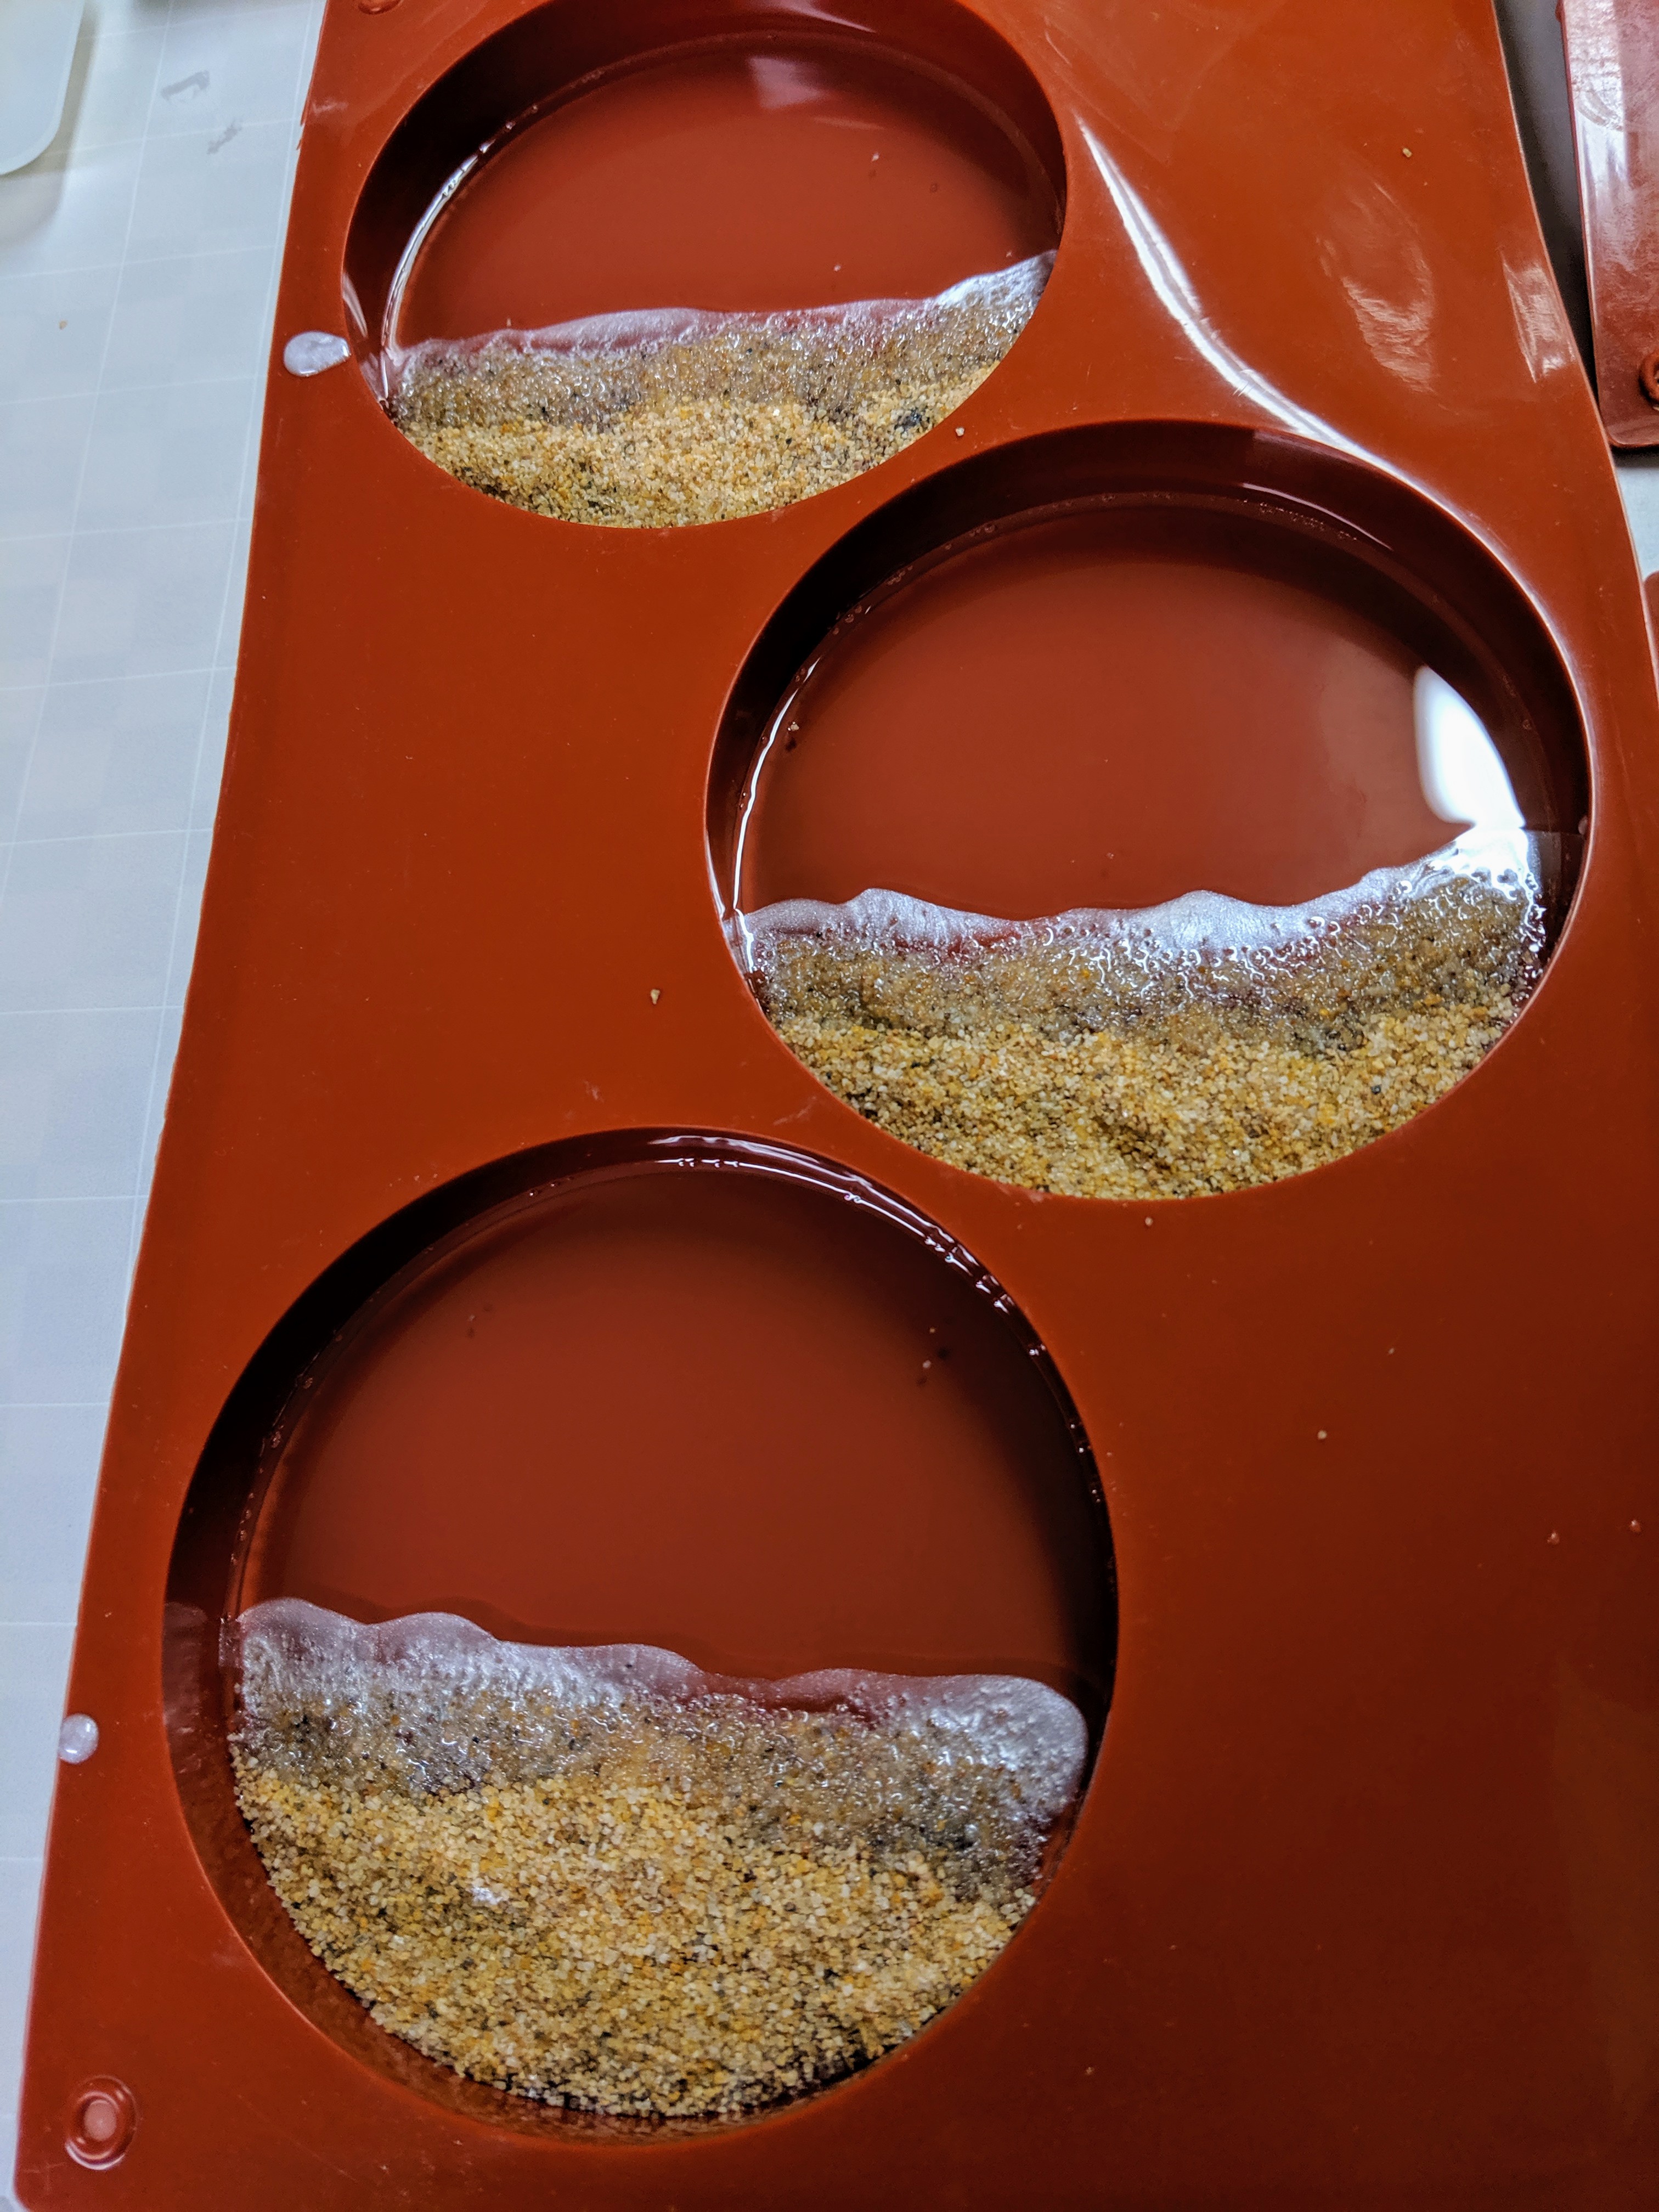
I poured about an ounce of resin in each mold, waited about half an hour, then started placing the shells, shark teeth, etc in the resin. I then waited about 2 hours before the next step.
Added the sand for the beach and the white bubbles.
First I added the sand for the beach, which I made smaller than usual in this batch. I mixed up just about 3 CCs of resin and added the white pigment, then drizzled it in a line along the edge of the “beach” using a small craft stick. I went back and added a bit more after it dissipated a little. I also had enough white resin left over to make a couple of experimental beads. The white resin still spread out a bit more than I anticipated. I just drizzled a thin line and by the time I took photos, it had spread into the sand.
Bubbles added.
I wanted to let this layer cure enough that it would be more gel-like than liquid, as I believe that causes the white pigment to spread out more than I want it to (I really want it to be a thin layer at the edge of the sand and water to look like bubbles when the waves are crashing at the beach). Since it was just a small amount of resin, that didn’t take very long, and I started mixing up the various colors of pigment for the water.
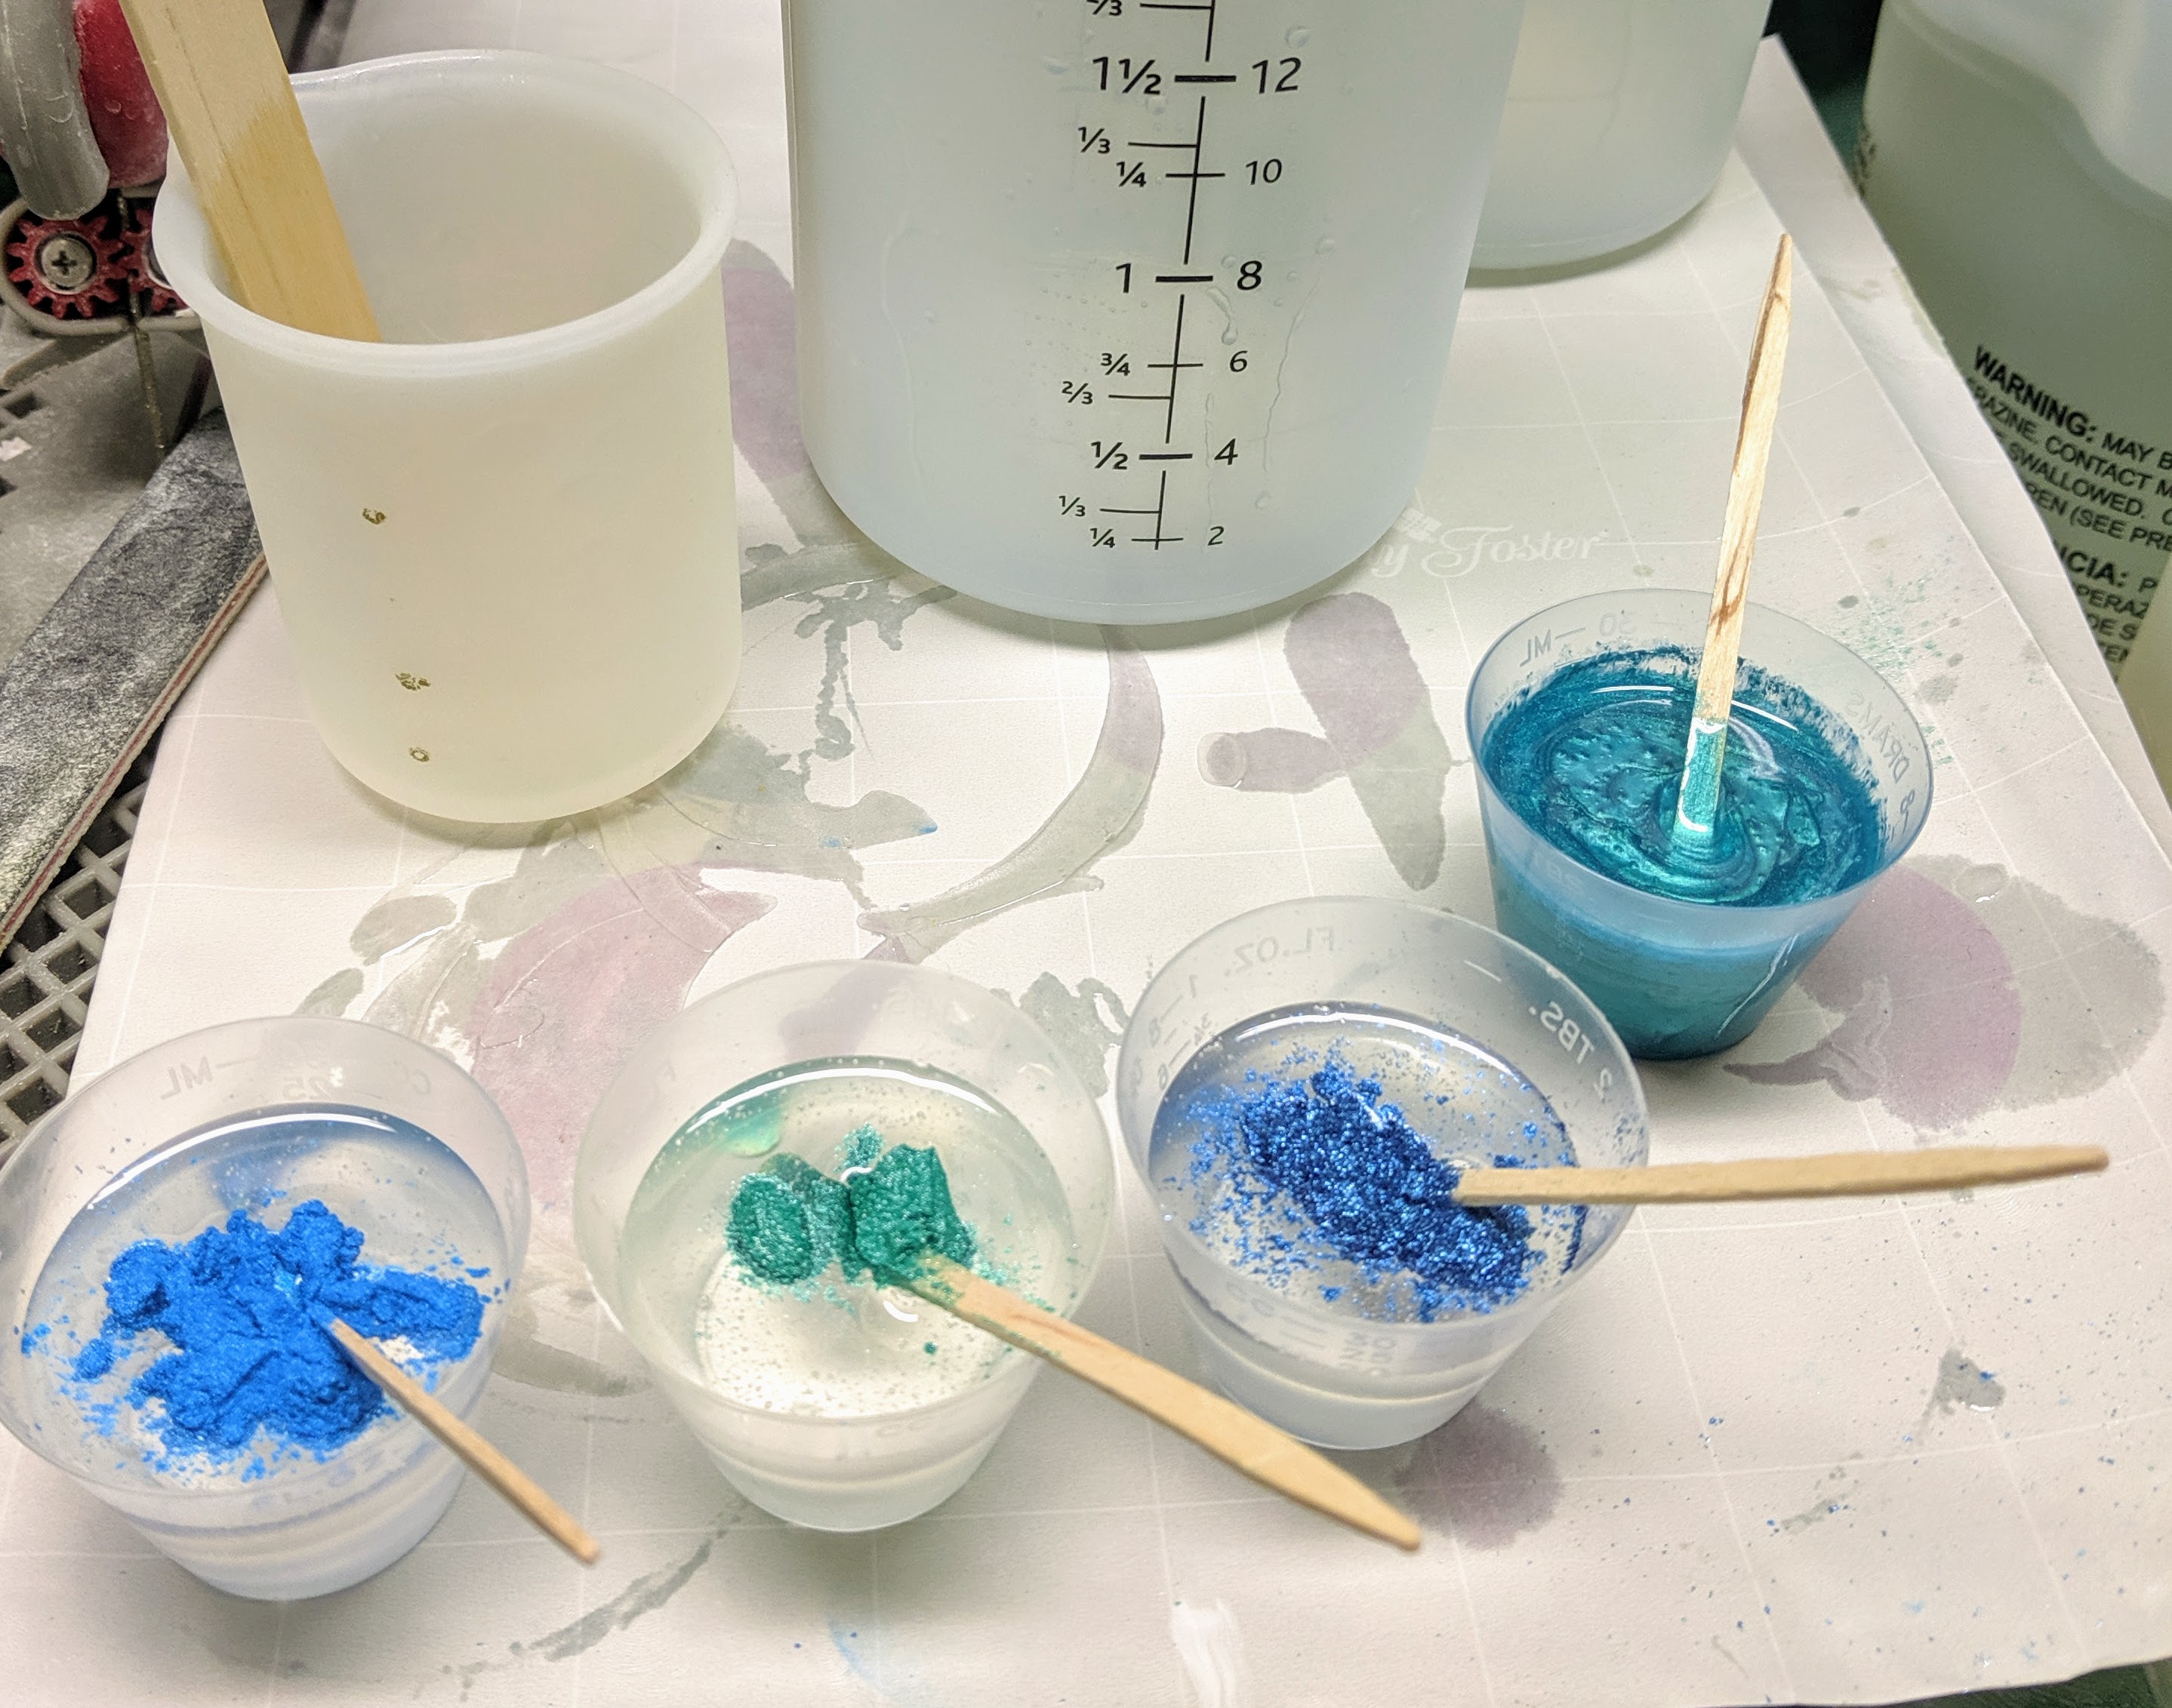
80 ccs of resin for pigment.
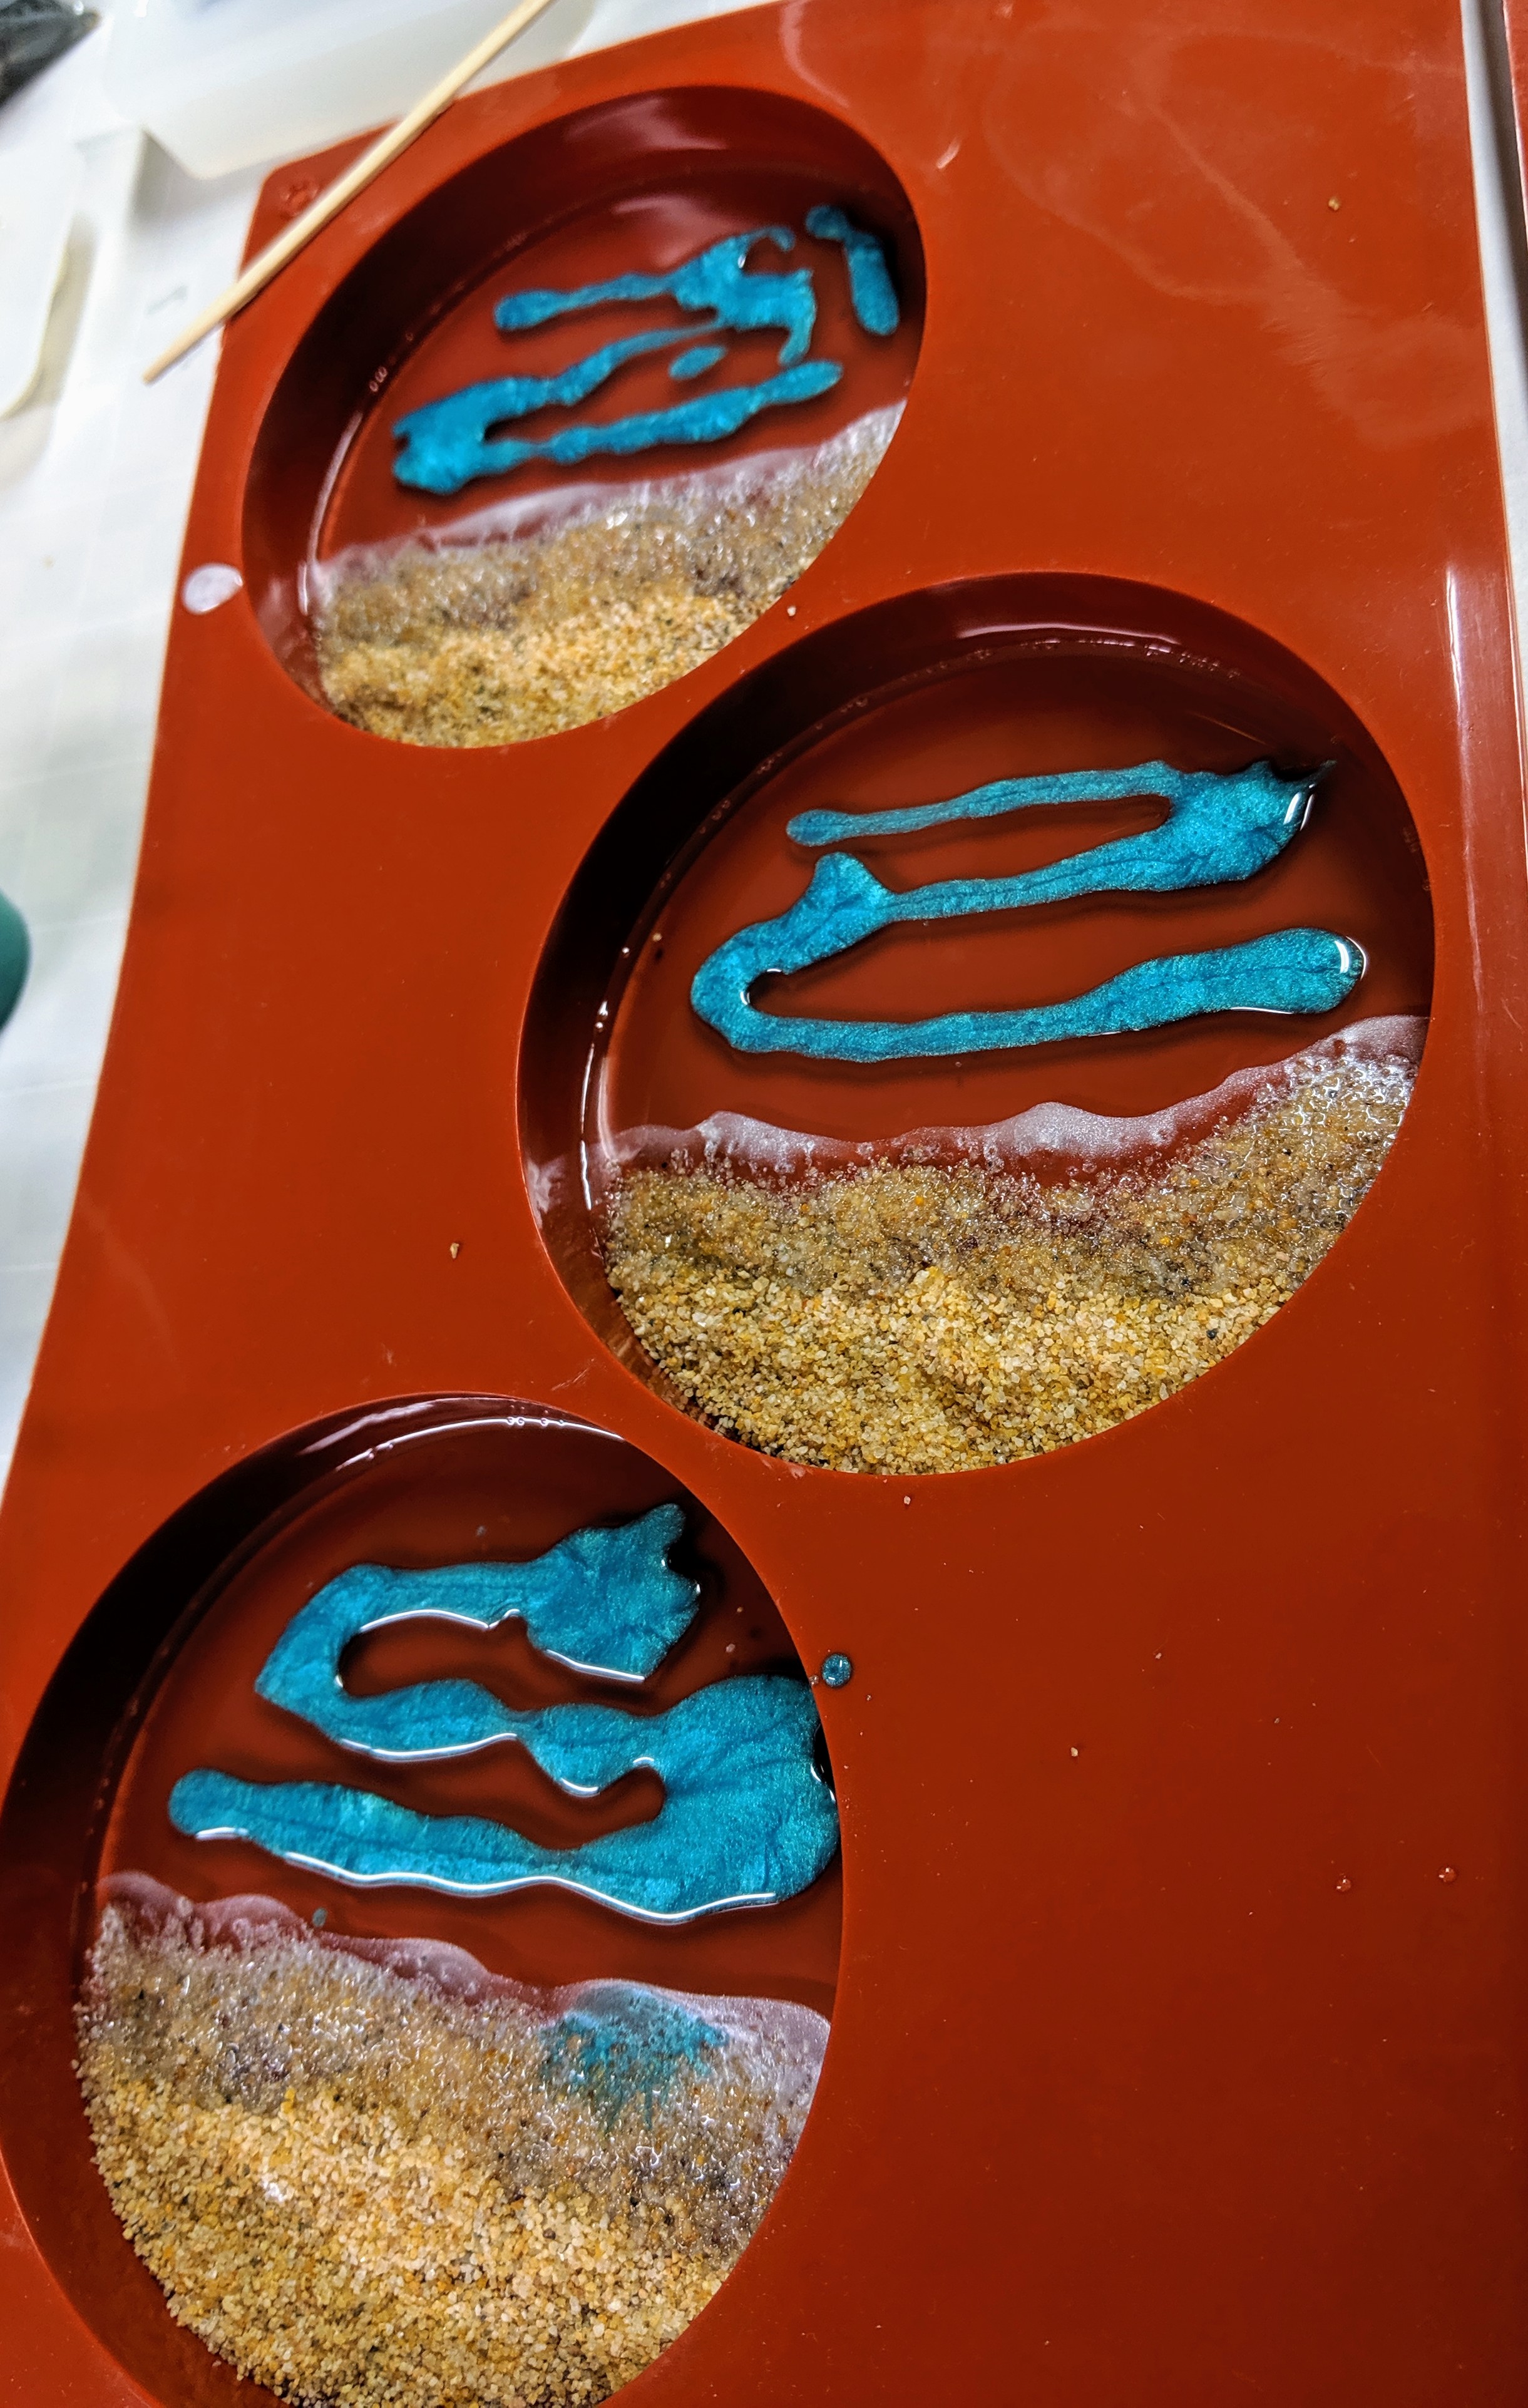
I mixed up 80 ccs of resin using a small silicone measuring cup, then split it evenly between the four medicine cups. I then scooped a bit of pigment powder into each cup and mixed it together. After all the colors were ready, I drizzled some of the Caribbean Blue (far right in the above photo) in a few lines into the mold. It will be interesting to see if making lines with the pigmented resin results in a different look for the water in the coasters.
Adding the first color for the water.
After that, I repeated the steps for each of the other three colors. I tried to fill in empty areas with each color. I didn’t add any of the water-pigmented resin to the sand, but I knew it would drift over it a bit after the last step.
Two colors added.Adding colors.
I used up every last usable drop of the pigmented resin I mixed for the water. I really wanted to fill in all the gaps.
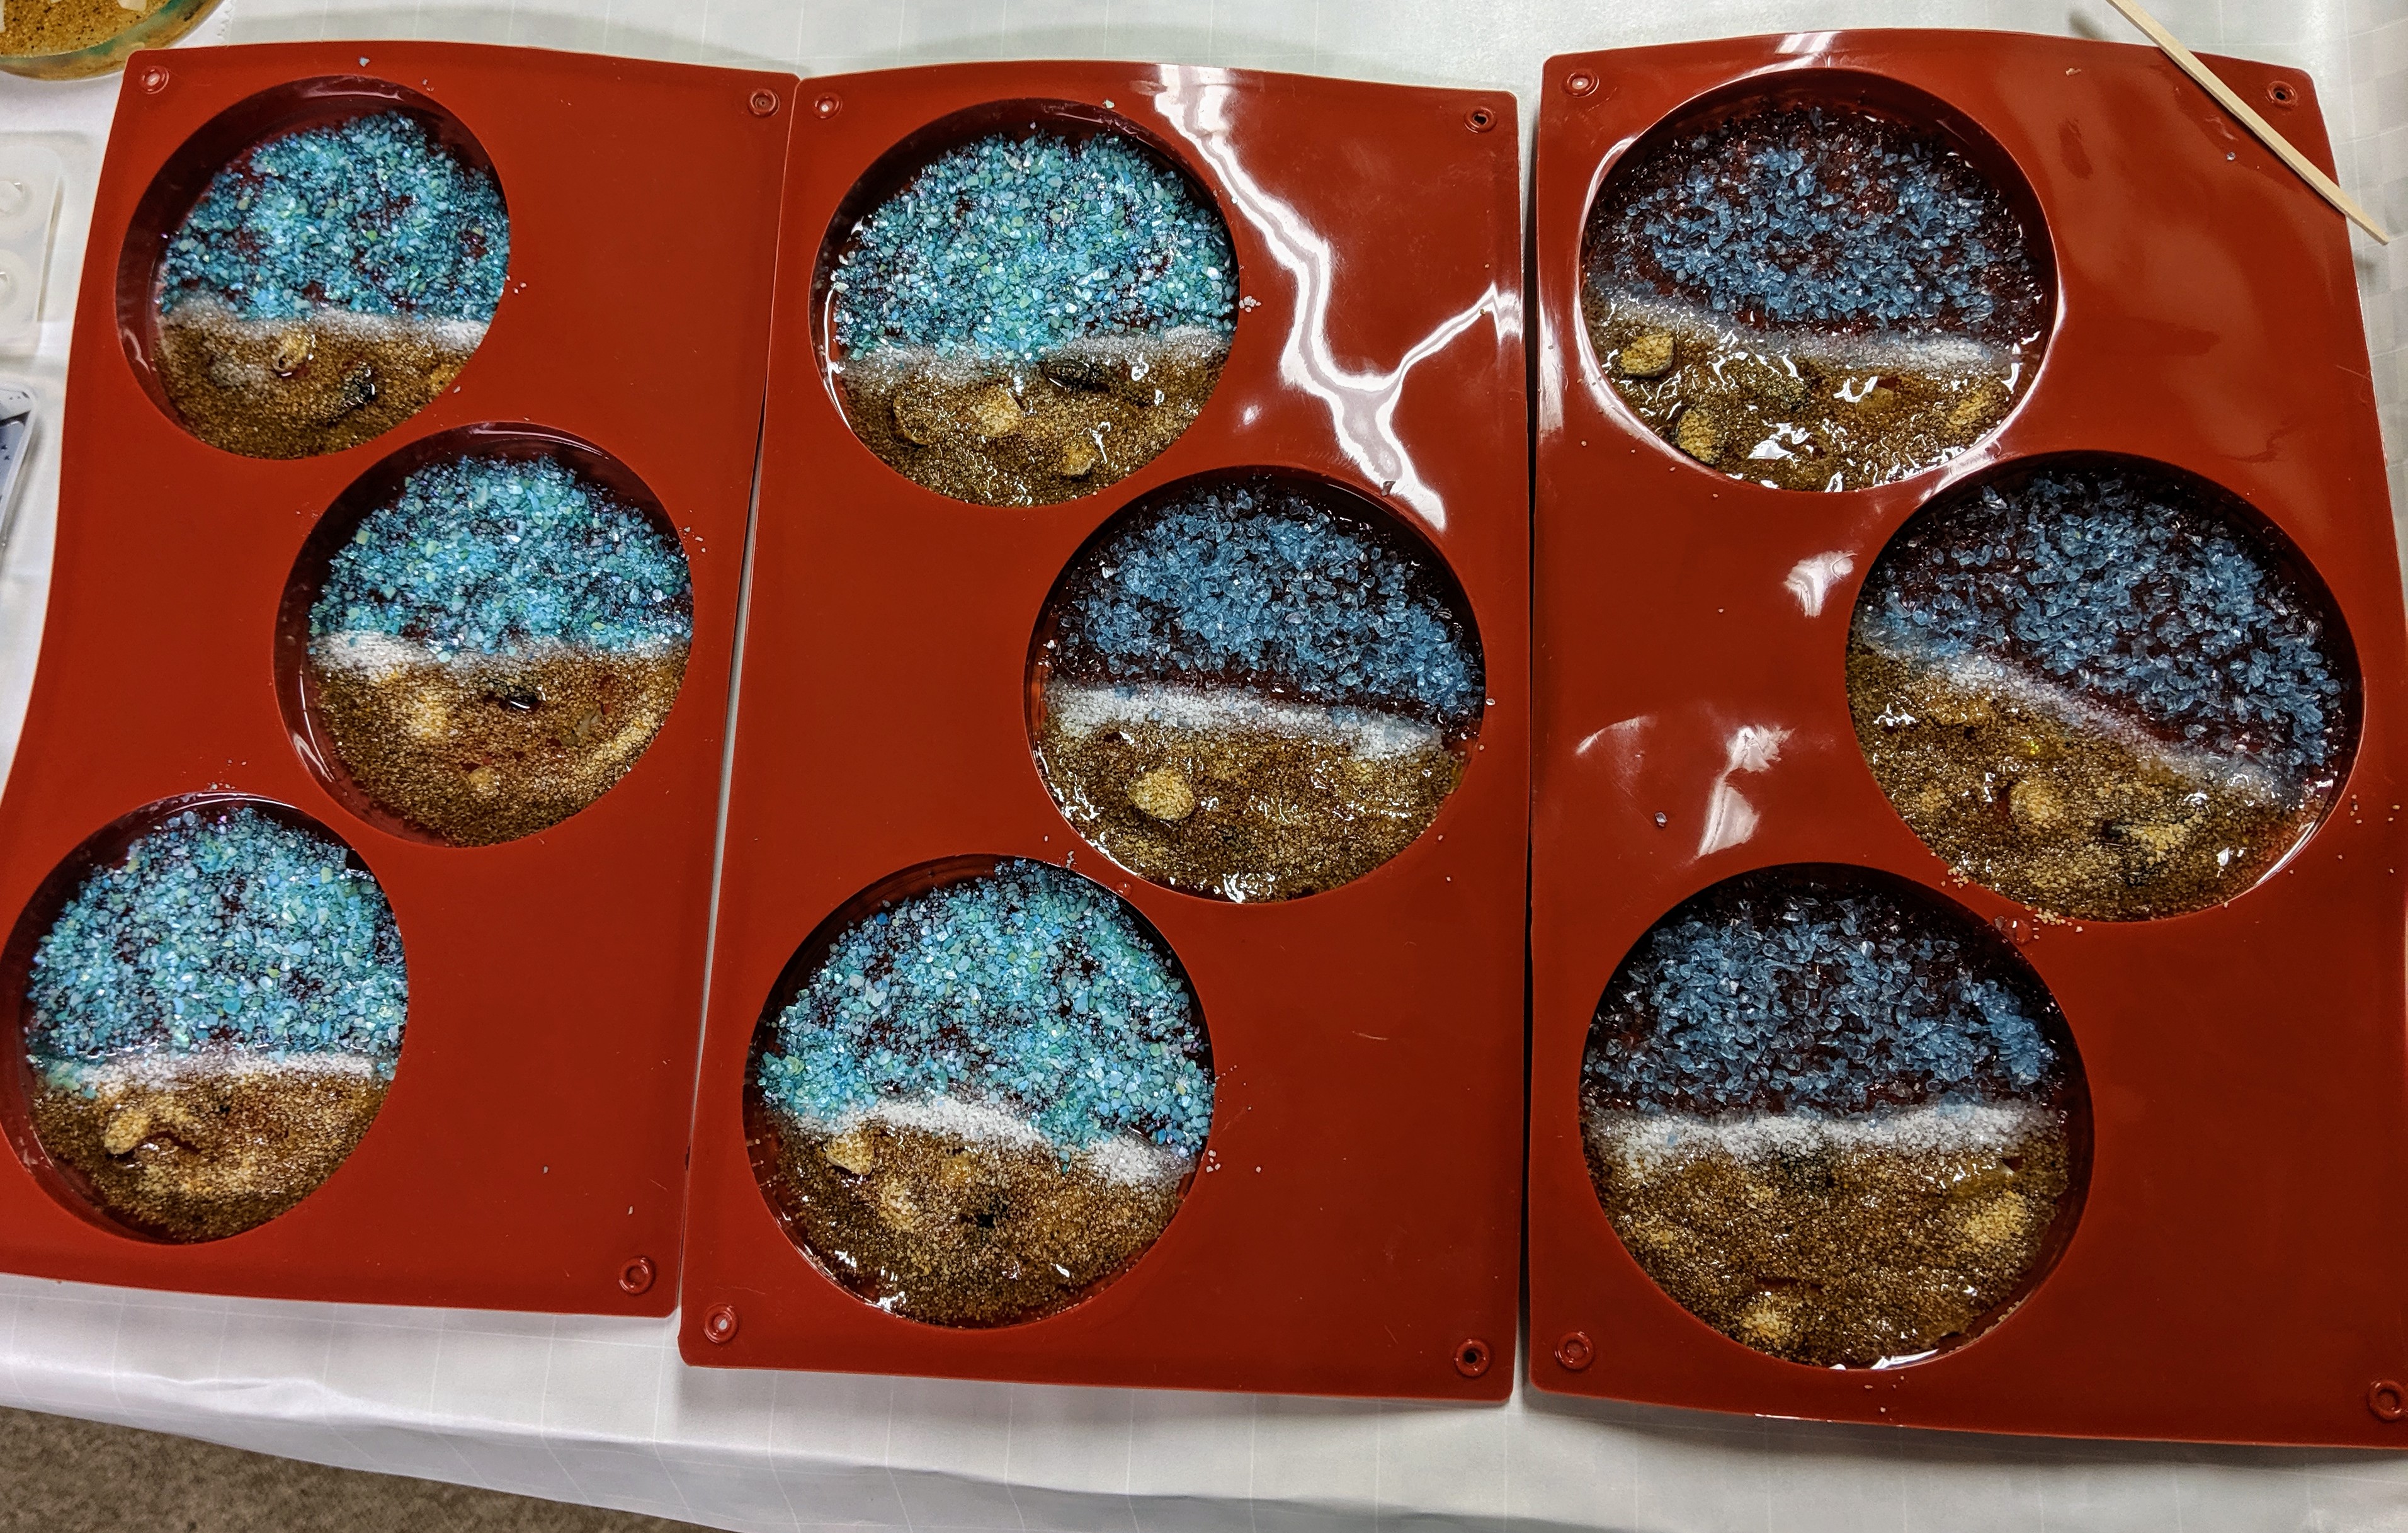
All four colors added.
The final step was to add the last layer of clear resin, so I mixed up my last batch of the day, 14 ounces of resin. The reason I go back and forth between ccs and ounces is because my measuring cups have different measurements which I use for different purposes, just for convenience and ease of reading. For some reason, these really had a lot of late-emerging bubbles – much more persistent than I usually see with coasters. That could be a side effect of not letting the layers cure fully between pours. Having to use the heat gun so much moved the pigment / water around quite a bit (at least on the bottom of the coasters). I might need to get a blow torch, as I think they might be more precise in removing bubbles without moving the resin around so much. I’m a bit impatient to see how these turn out, but I have no other choice but to wait until they fully cure to find out how they look. Unlike the sun mosaic, which I can look at while it cures. The only problem with that is keeping curious fingers out of the resin while it is still soft (yes, my children have been known to poke at things during this stage). Hopefully tomorrow I can bring it upstairs to photograph.
Resin curing.
Just a side note – I’m normally a day behind posting these, but I try to write the post the same day as I do the project so all the details are fresh in my memory. That means when I reference “today”, it’s not usually the same day as the post went live. I’ll actually be pulling these out of their molds on the 30th, but I will also schedule this to post on the 30th at a somewhat random time.